The Conversation (0)
Sign Up
Building your own minimalist desk can be pretty simple and cheap (compared to other sturdy wooden desks) the project will cost around $190.
Tools required are a drill with a 3/16ths bit, an electric saw and a screw driver.
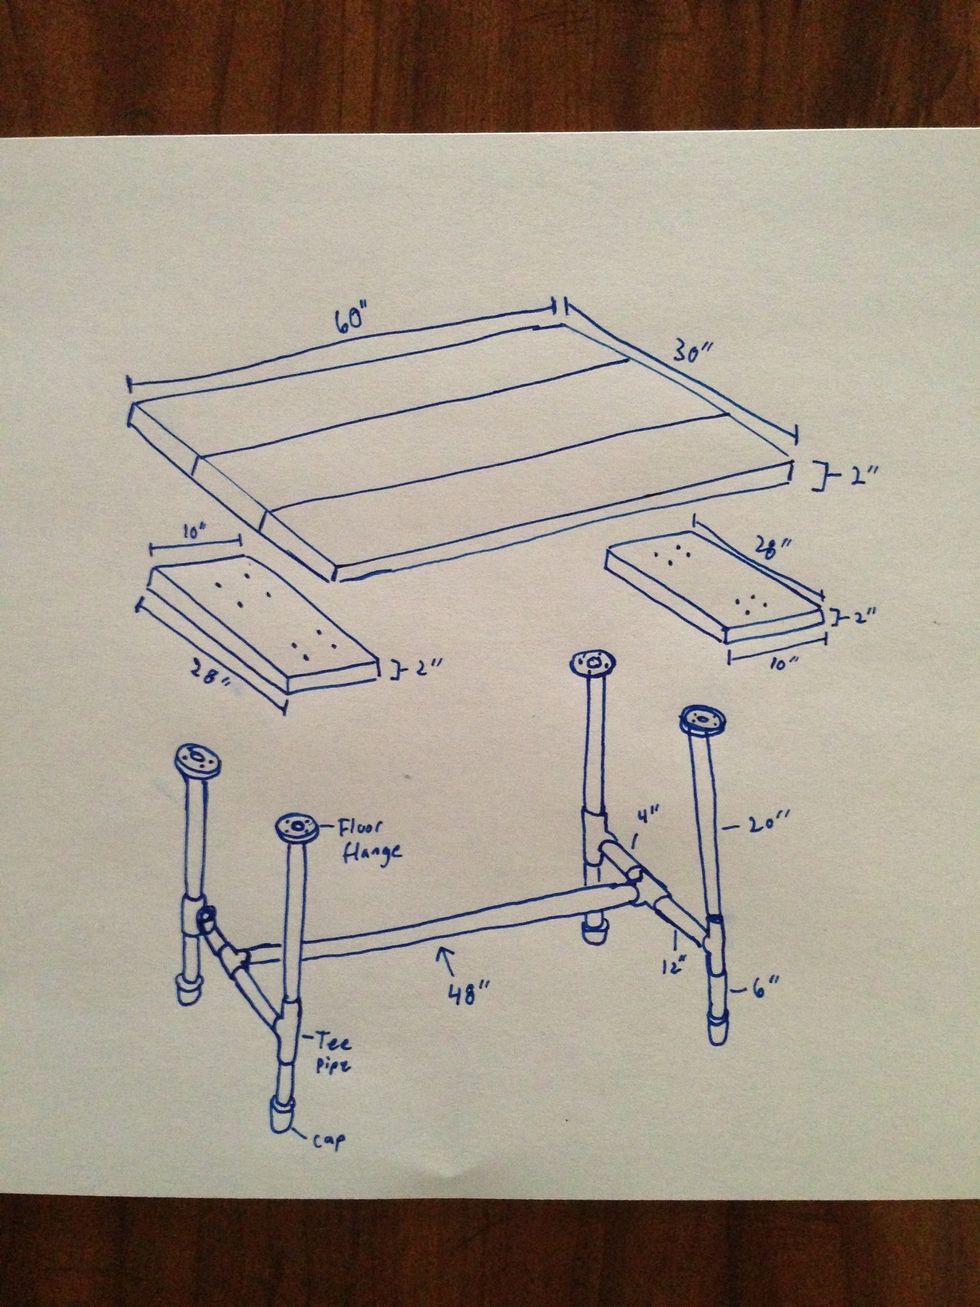
My initial desk layout. Yours doesn't have to be a wide or deep as mine but measure everything before you go to the hardware store. You don't want to build a base larger than the top!
My drawing said to use 6" pipes at the bottom of the legs but I found that none of the pipes screw all the way into each other so it was far too tall. I swapped them for 3" making my final height 29"
First go to the plumbing section to get your pipes for the legs. I went to Home Depot, they will cut and thread the custom sized pipes for you. They will also cut any wood to length for you.
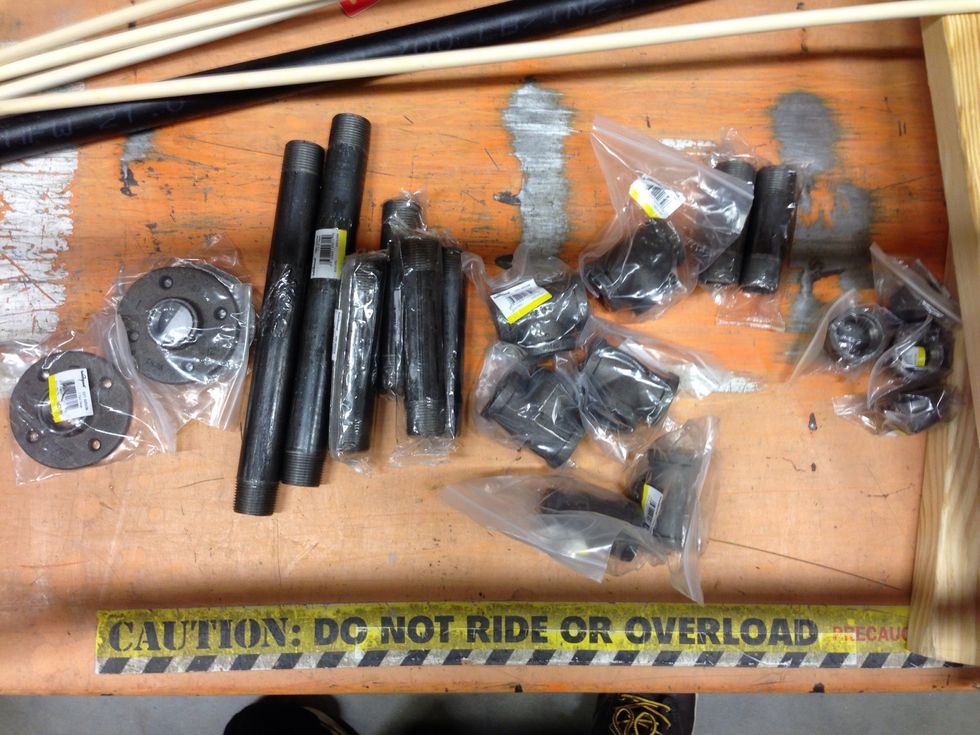
Make sure you have all the pipes required to make the base. I like black steel pipes, you can use any 1" pipe you find at home depot (custom sized pipes like the 20" I required, can be cut for you)

Home Depot employee cutting and threading the 20" black pipes for me.
Go to the lumber section, pick out 3 nice looking boards of 2"x10"x8' lumber. Lay them next to each other to see if they're warped. You wanna find 3 that fit together nicely to create a flat surface.
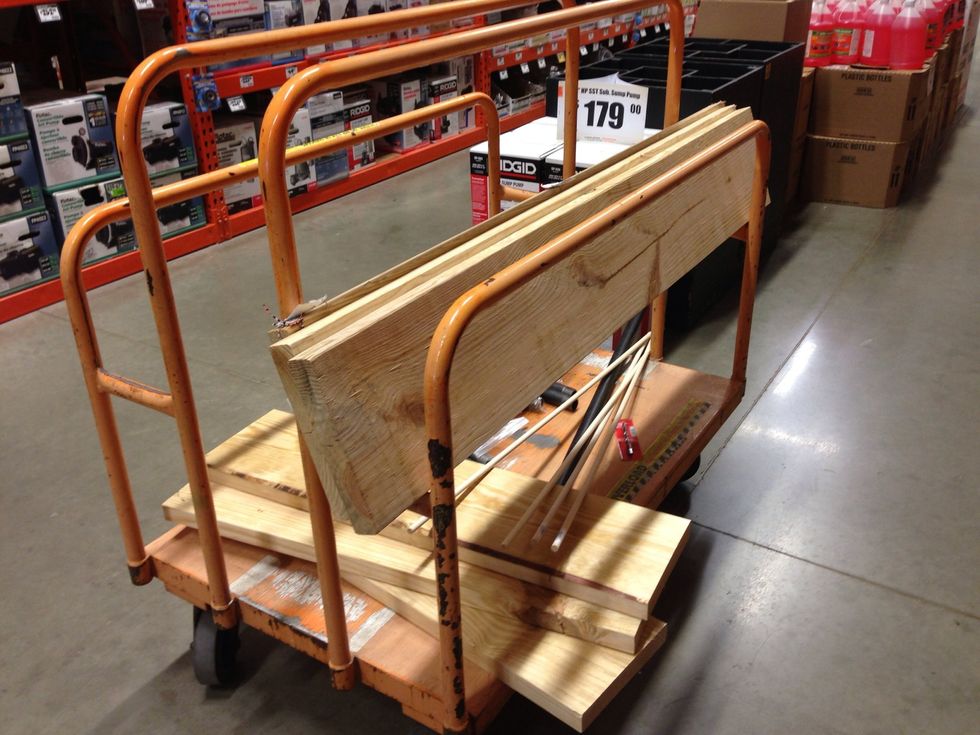
The three 2"x10"x8 foot cut down to (3) 5' planks by a Home Depot employee. (The planks laying flat are scrap that we can use later)
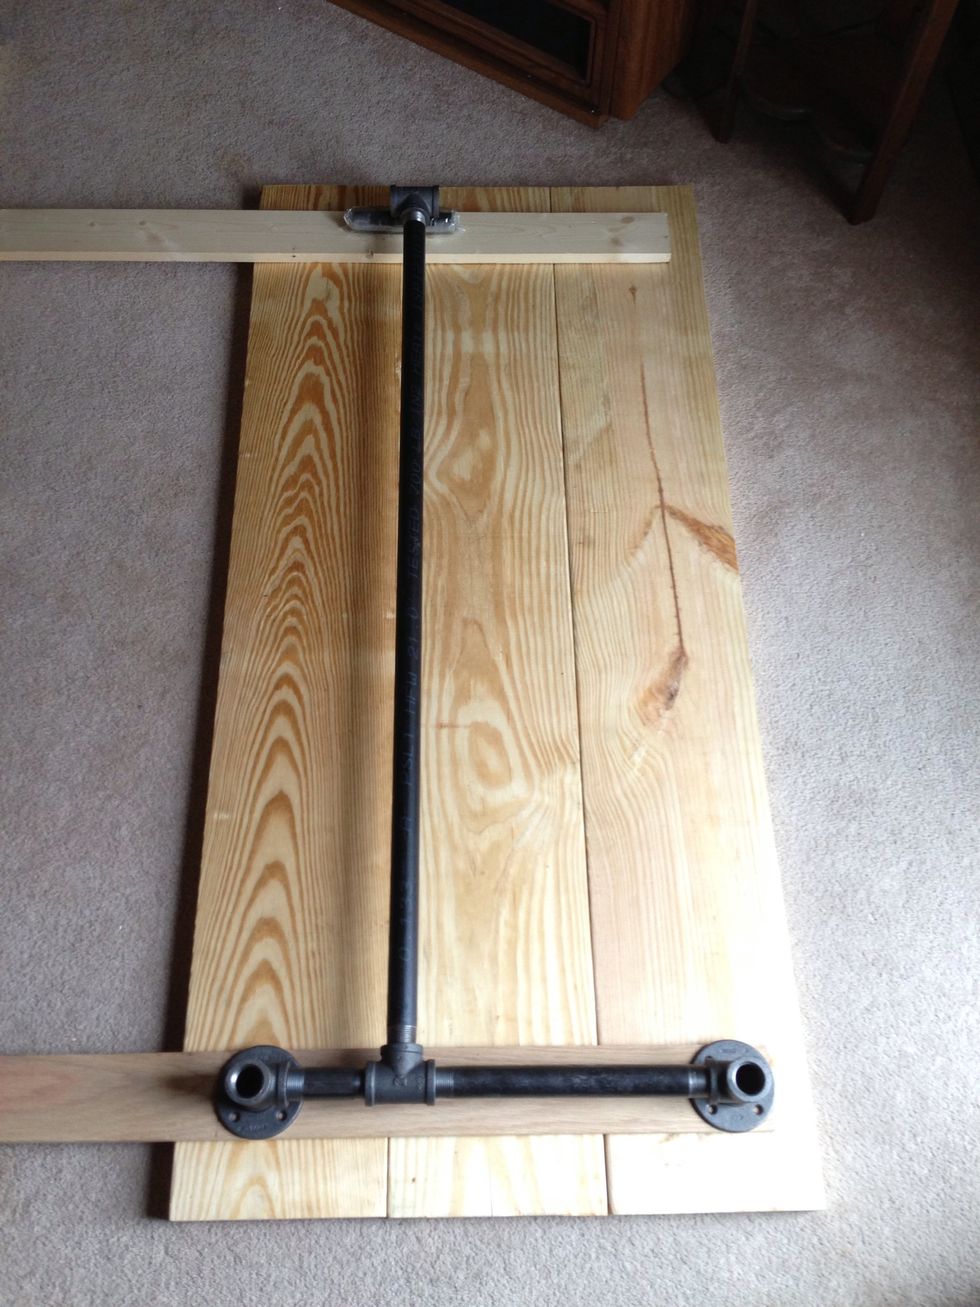
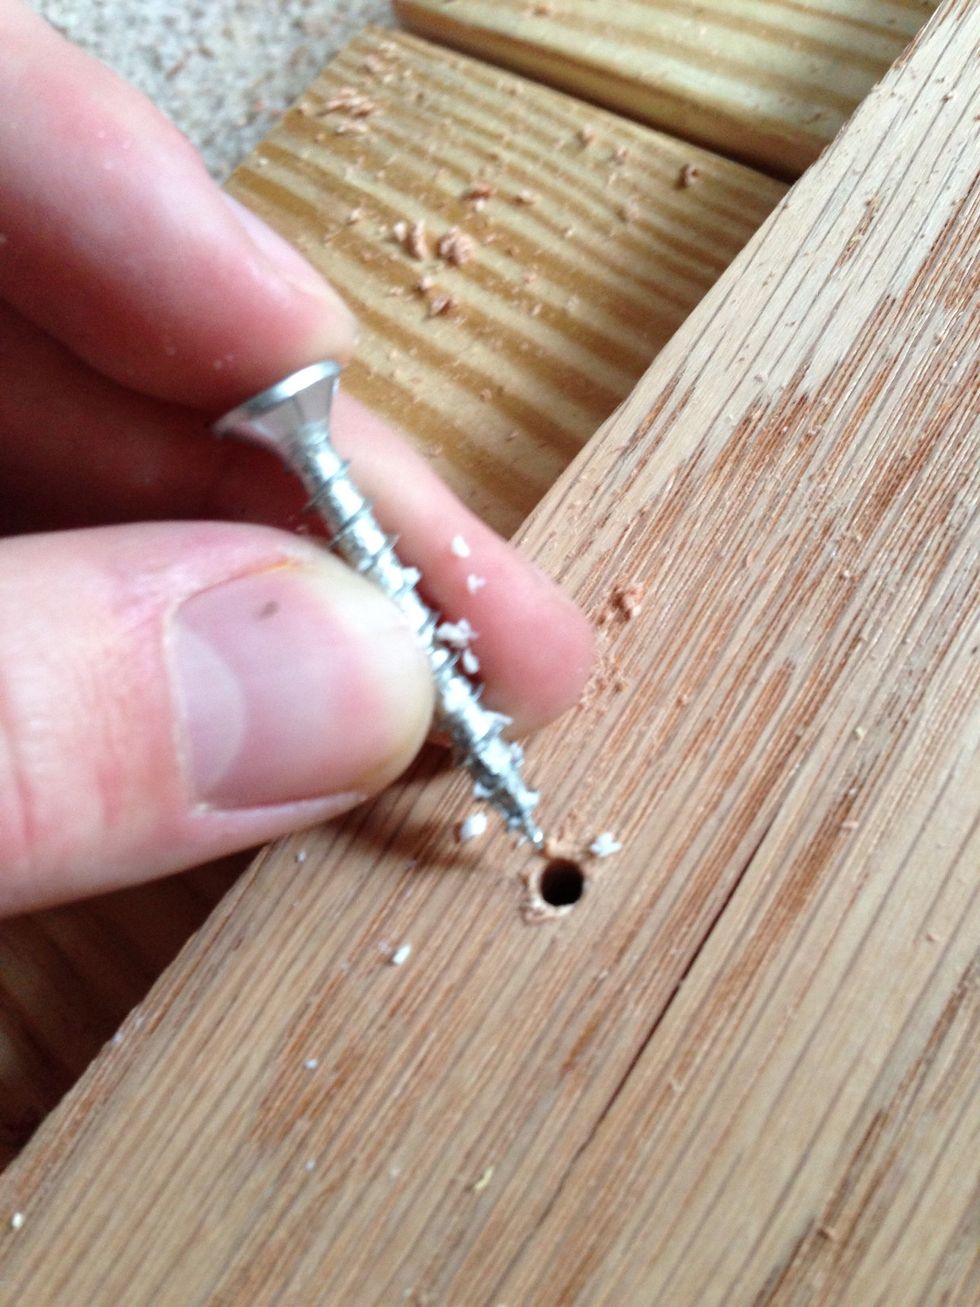
Lay out your pipes to determine where you need to drill your holes for the support boards. I drilled 3 holes through the support board (horizontal) into each desk top board totaling 9 holes.
When drilling the holes to connect the support boards to the desk top boards, make sure you have someone help you hold the desk top boards tightly together.
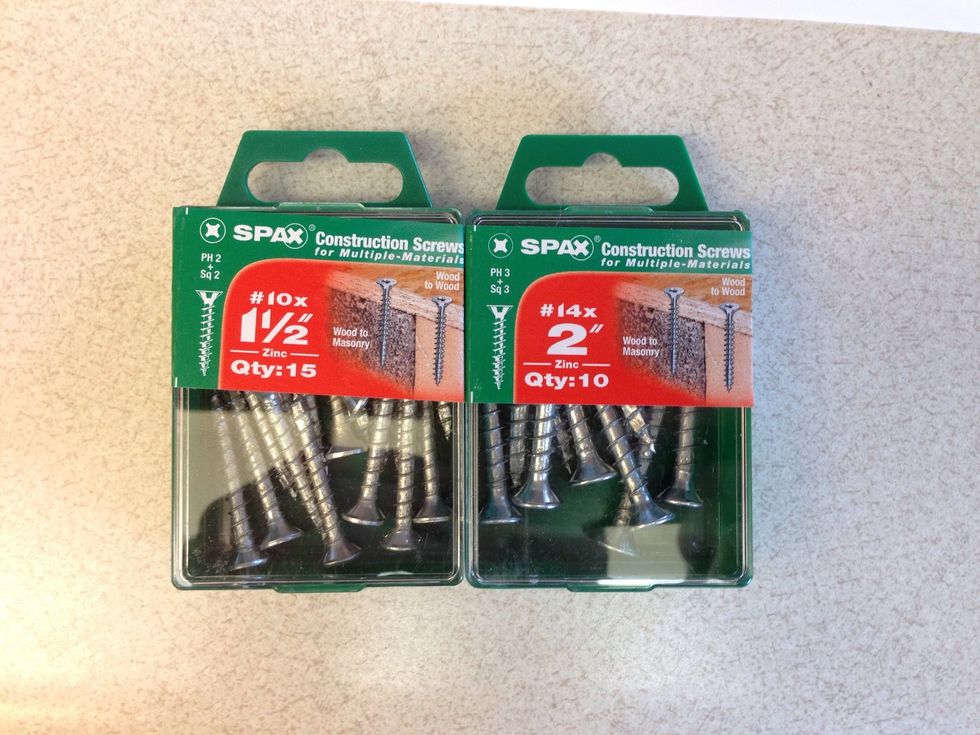
For the thickness of my support board and the desk top I bought 3 packs of 1 1/2 inch wood screws and two packs of 2 inch wood screws. The 1 1/2 inch is what we use to secure the support to the top.
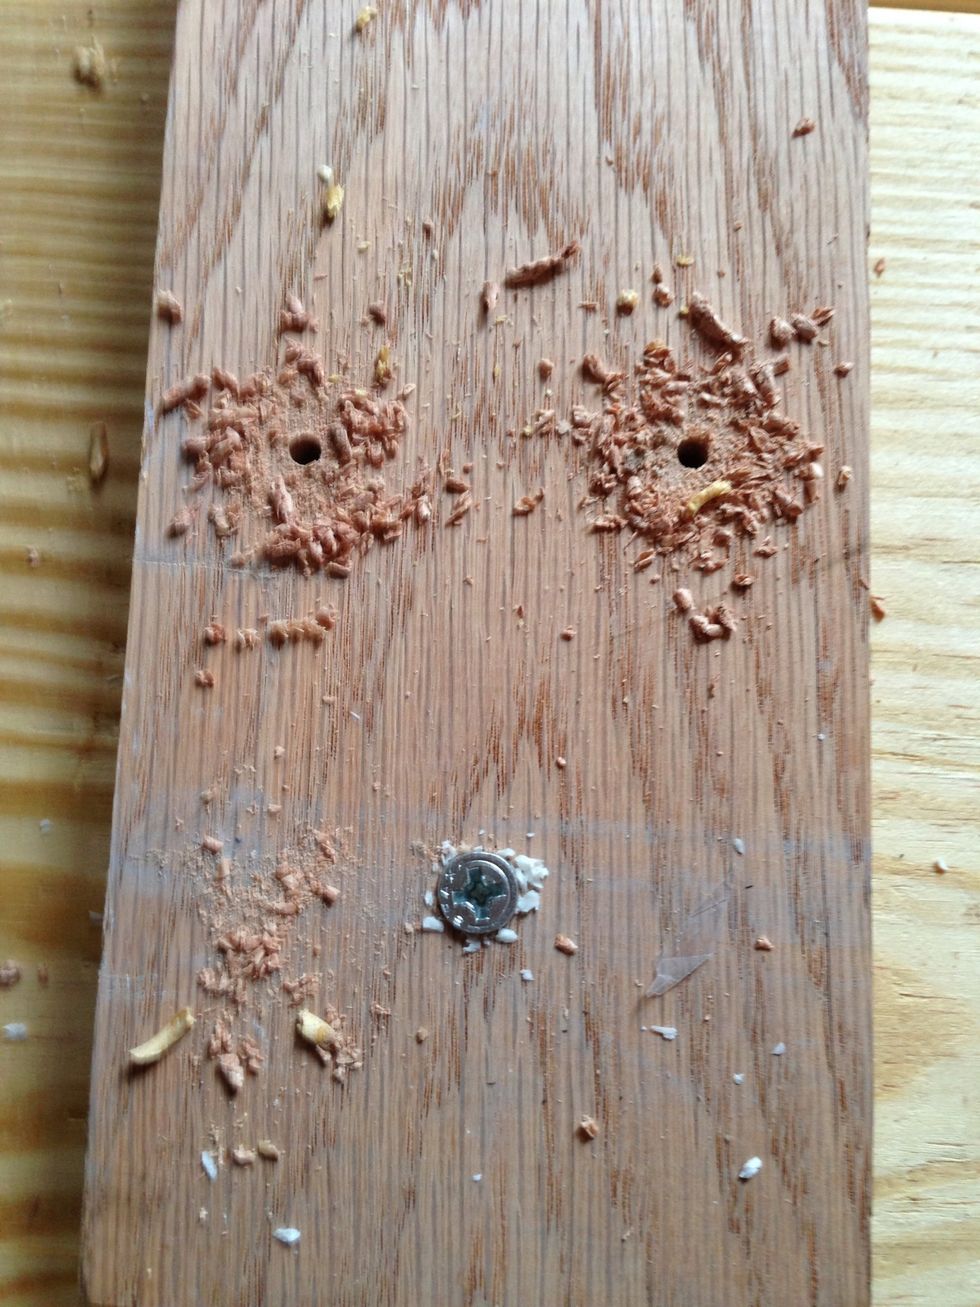
Once the holes are drilled you can screw in the screws.
Pro tip: if you scrape the screw against a bar of soap it makes tightening the screws easier if you are doing them by hand.
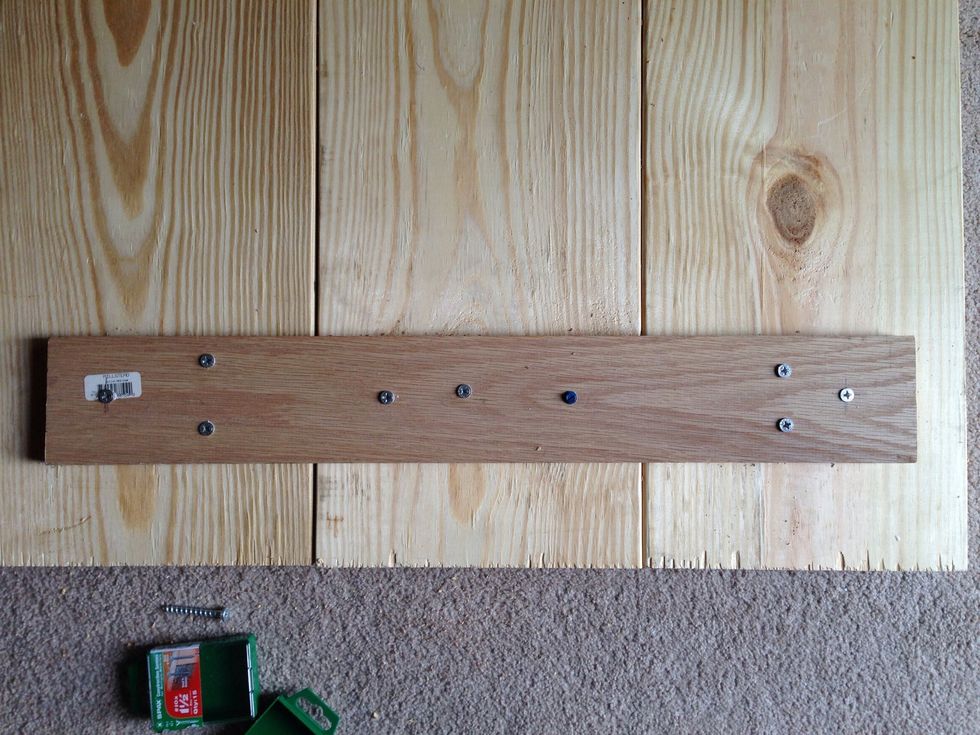
Screw the center board in last and make sure the edges are square to each other.
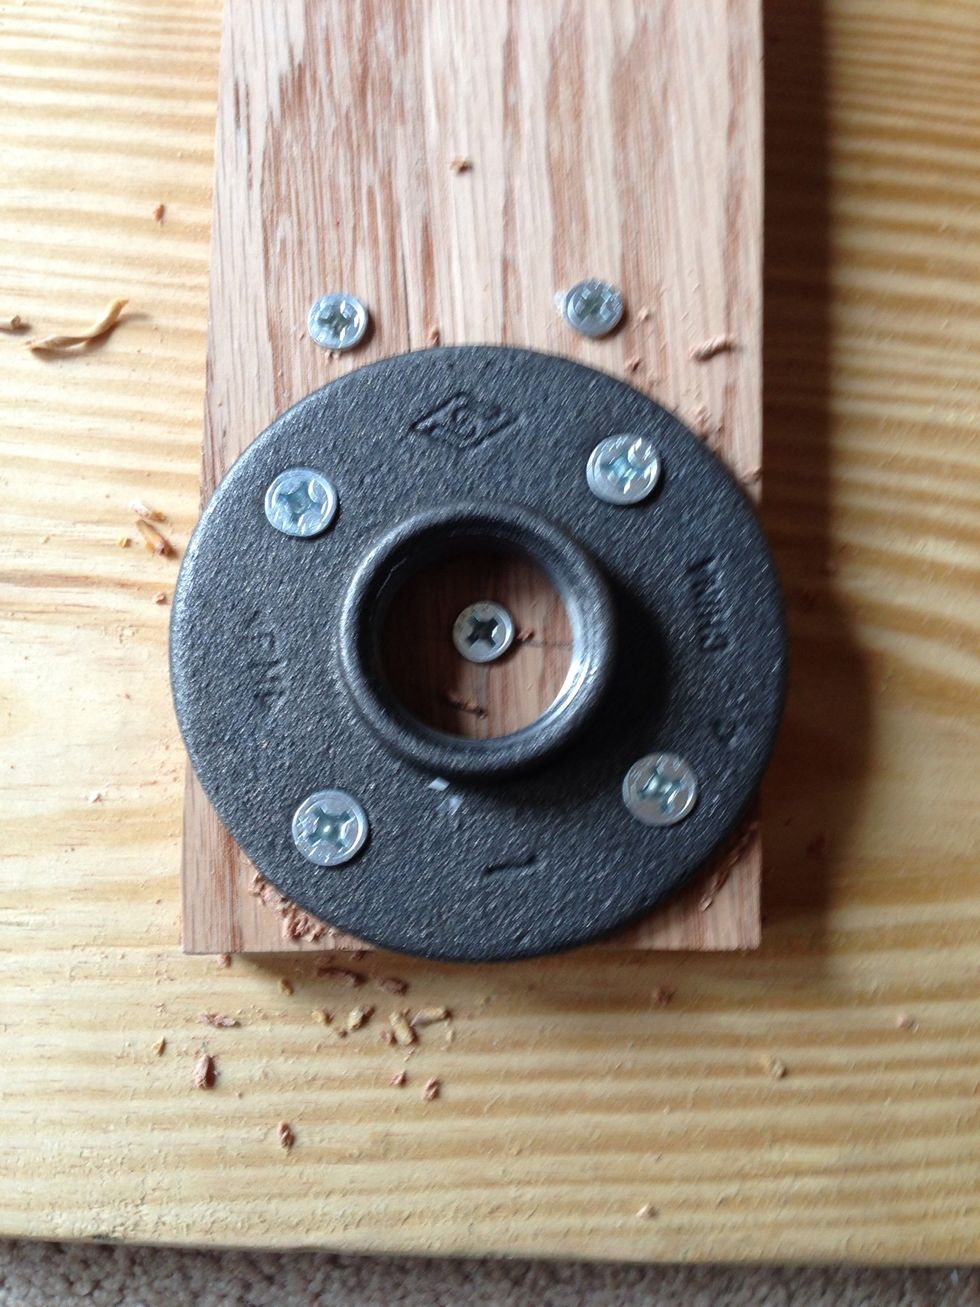
Place the floor flanges on the end support boards and make sure the pipes will line up to each other. This is when you will drill 16 holes for the 4 floor flanges.
Watch out, they grease up the ends of these pipes!
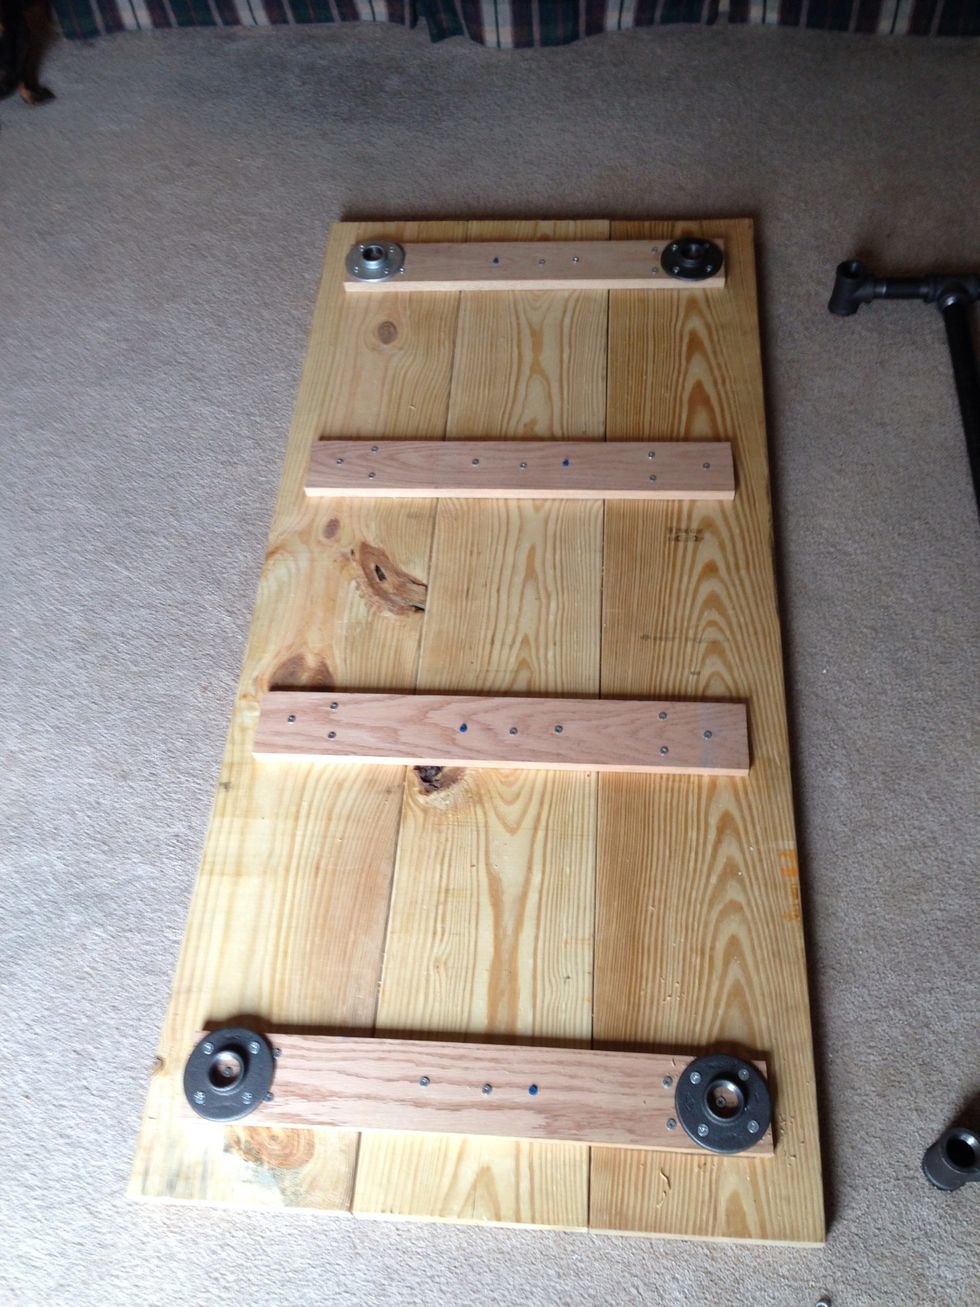
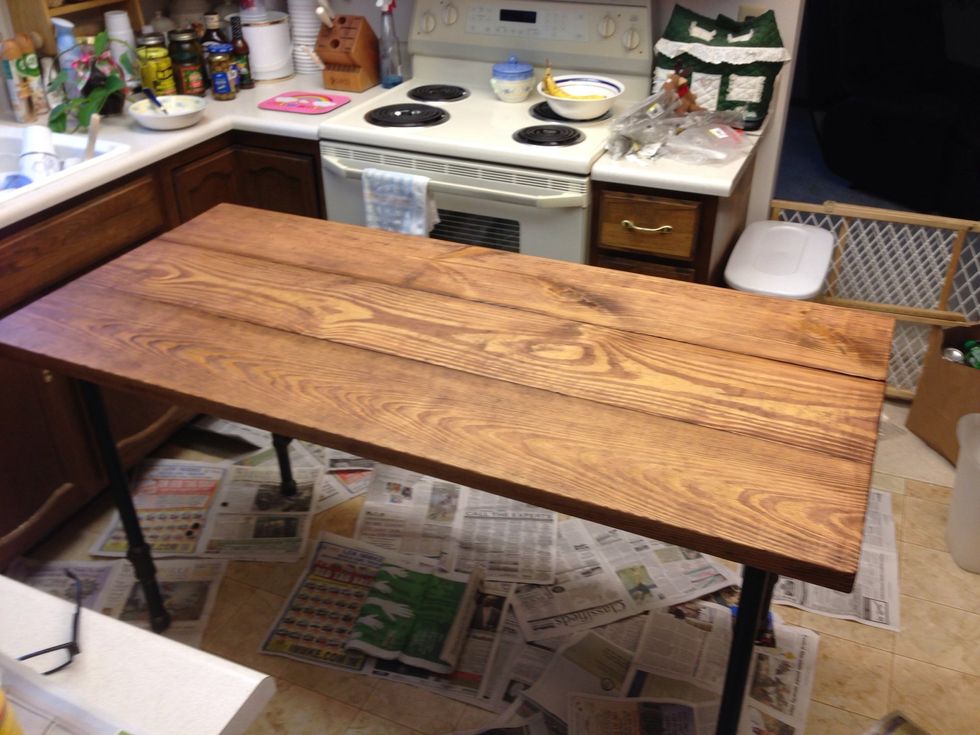
Here is what it will look like with all 4 flanges attached. We will remove these later to attach the base pipes. We are only attaching them now so we can stand it up for staining.
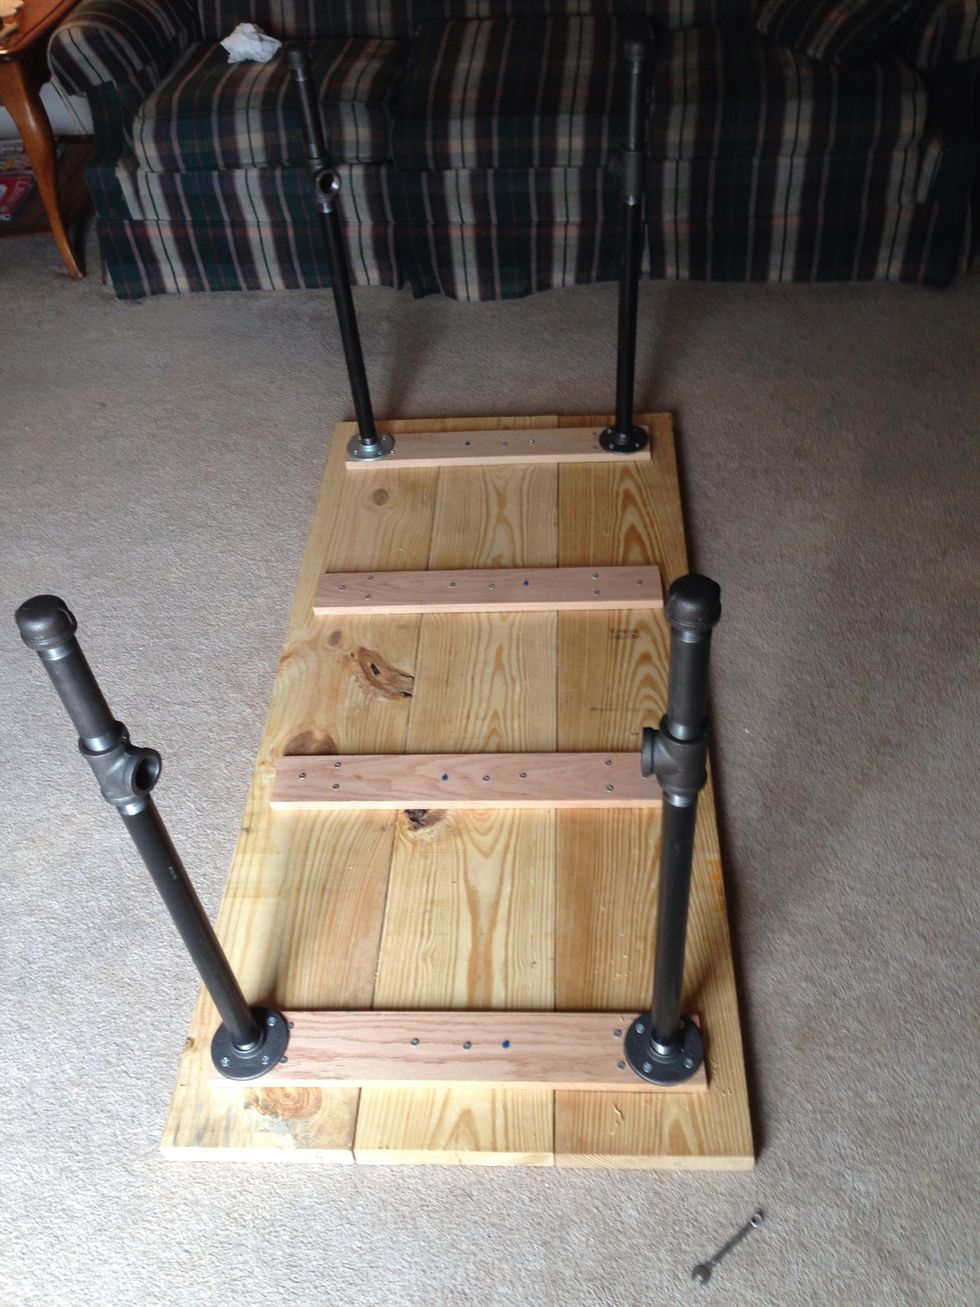
Once the legs are on you can stand it up and start sanding.
I used a medium and fine grit sand paper that I had laying around. This is the time to sand off all the edges and smooth the top with the medium grit paper. Then use fine grit to make it real smooth.
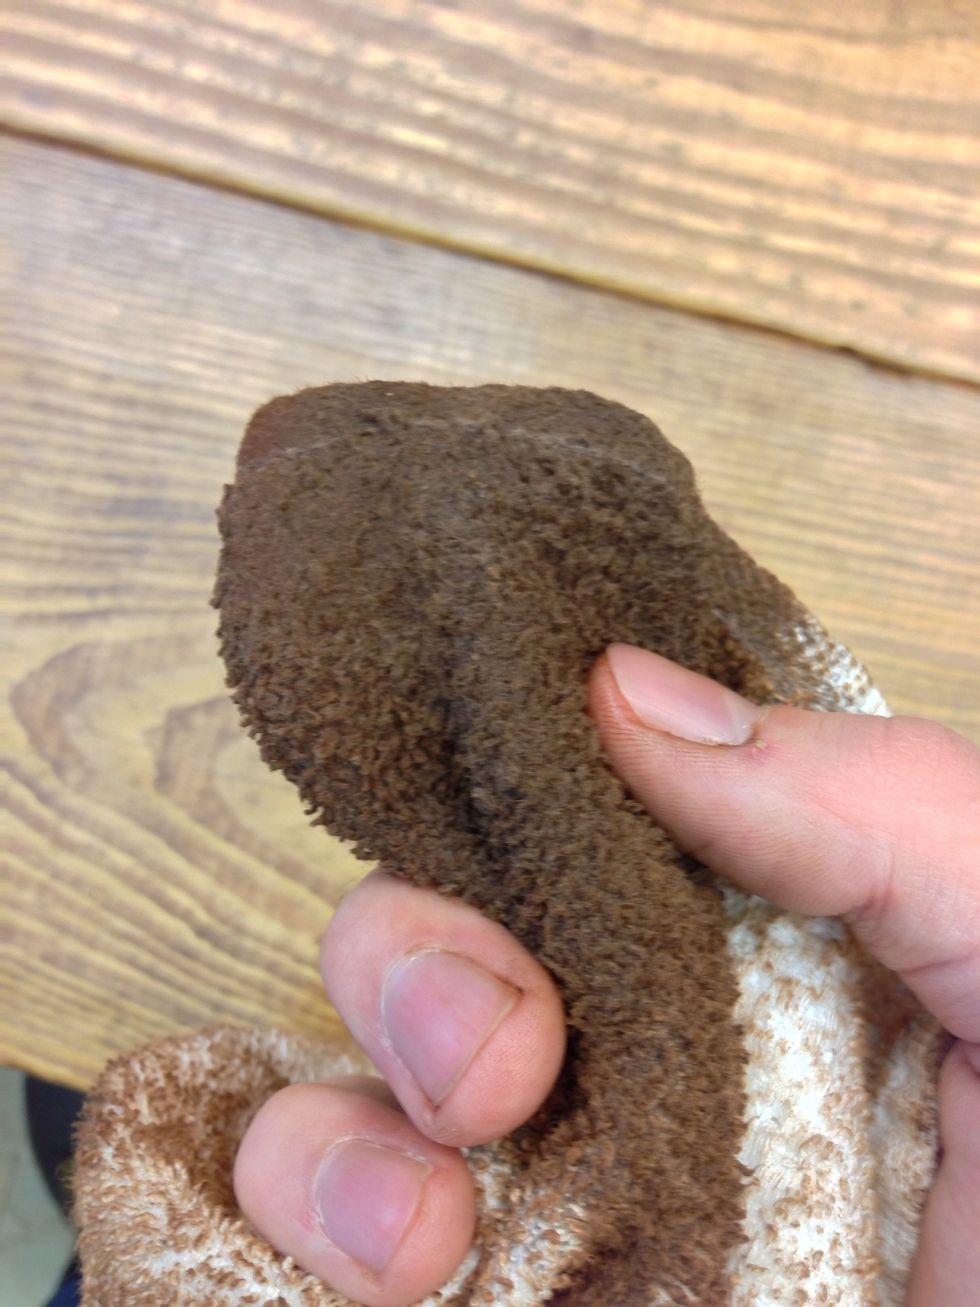
Once the top, sides and bottom edge are sanded and wiped off. You can start staining. I am using a stain called English Chestnut by Min-Wax. It's easily applied with an old rag.
The wood will I soak up the stain really quickly. I only used one coat because I liked the way the scratches in the wood held the stain.
WARNING: every time you go over an area with wood stain it gets darker so be very cautious!

Let the stain sit for 15 mins then you can apply your first coat of Polycrylic

I am using semi gloss but you can use gloss.
The first coat of ploycrylic will take about 8 hours to dry. You will be putting 3 to 4 coats on. Use your fine grit sand paper to lightly sand in between poly coats.
After it all dries you can detach the floor flanges and build the base (you can not put all the pipes together while the flanges are attached to the desk top)
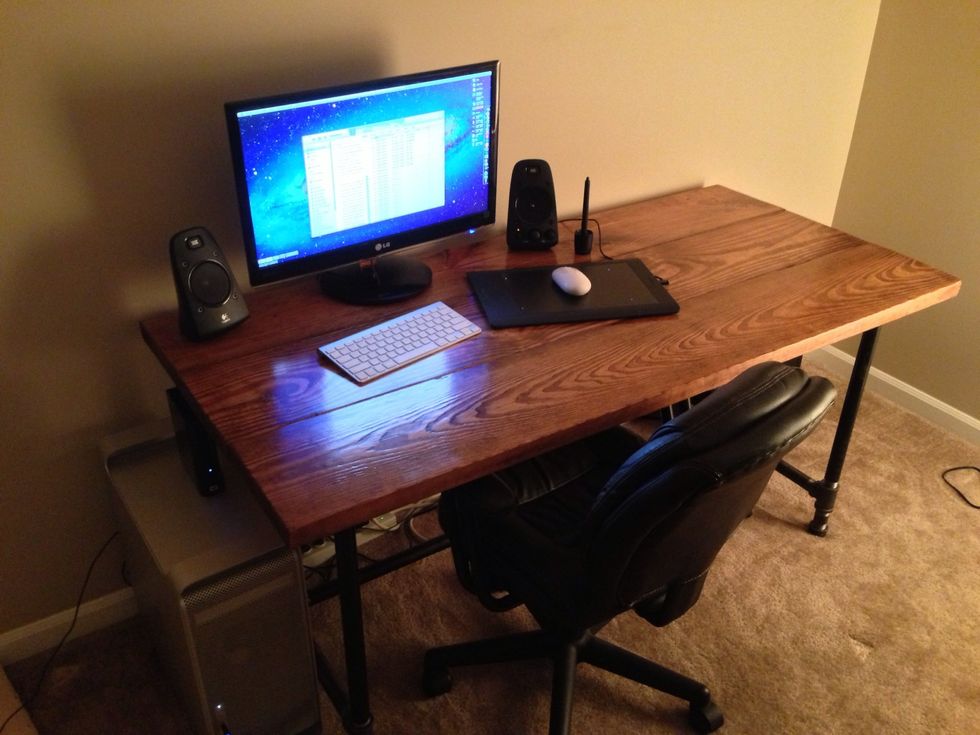
There you have it, a very sturdy minimalist desk that you can build for under $200! I'm also planning on building a junction box for all of my wires to store neatly in, but that will be another guide.