The Conversation (0)
Sign Up
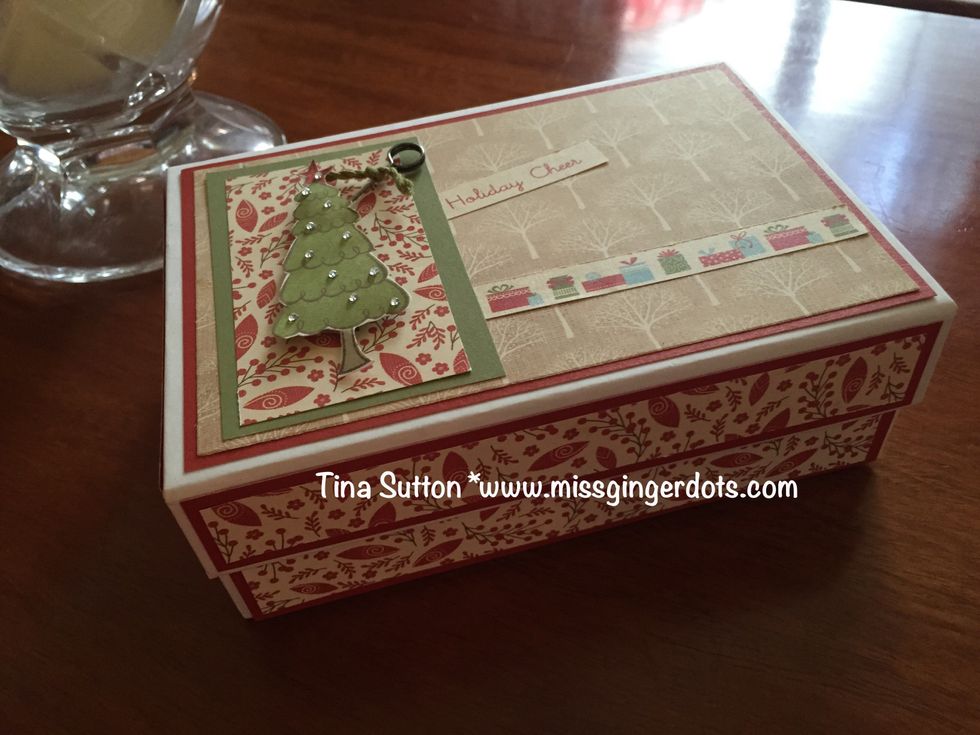
Follow the directions that came with the kit for your cards. This will be what your card box looks like when you are finished with your project!
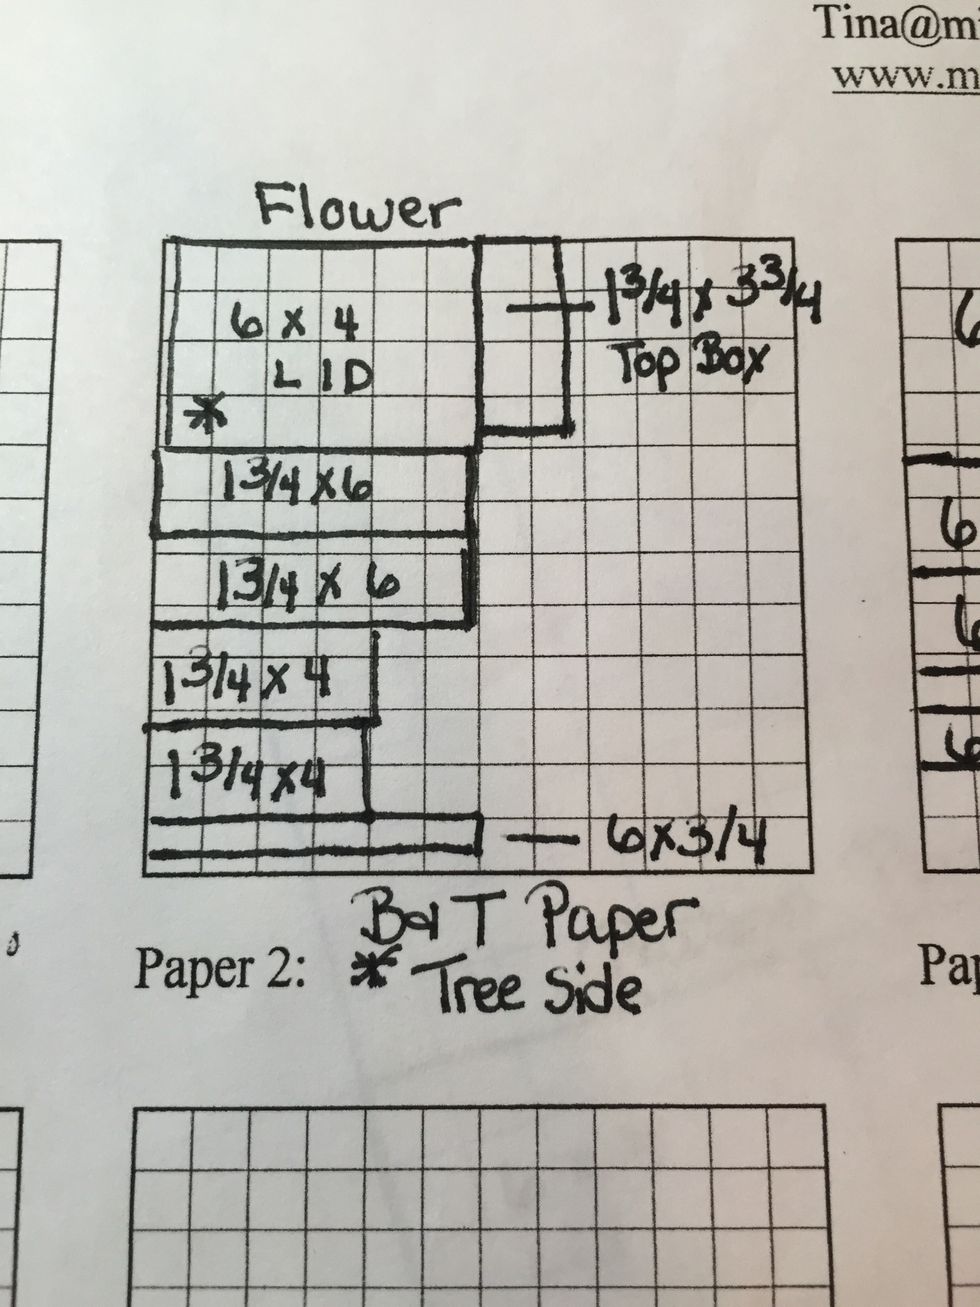
Cut your flower paper using this diagram!
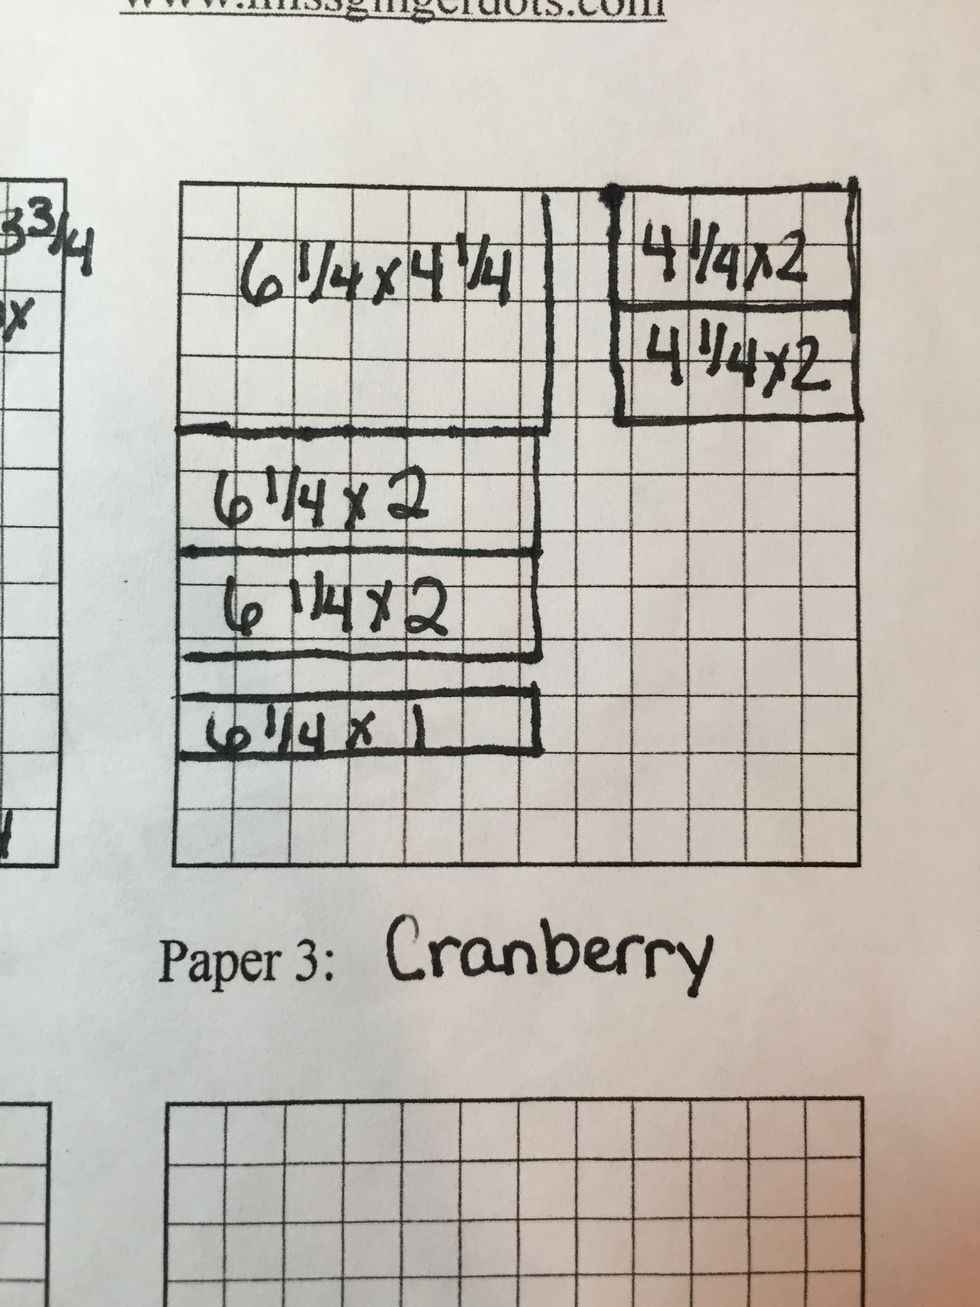
Cut your cranberry Cardstock this size!
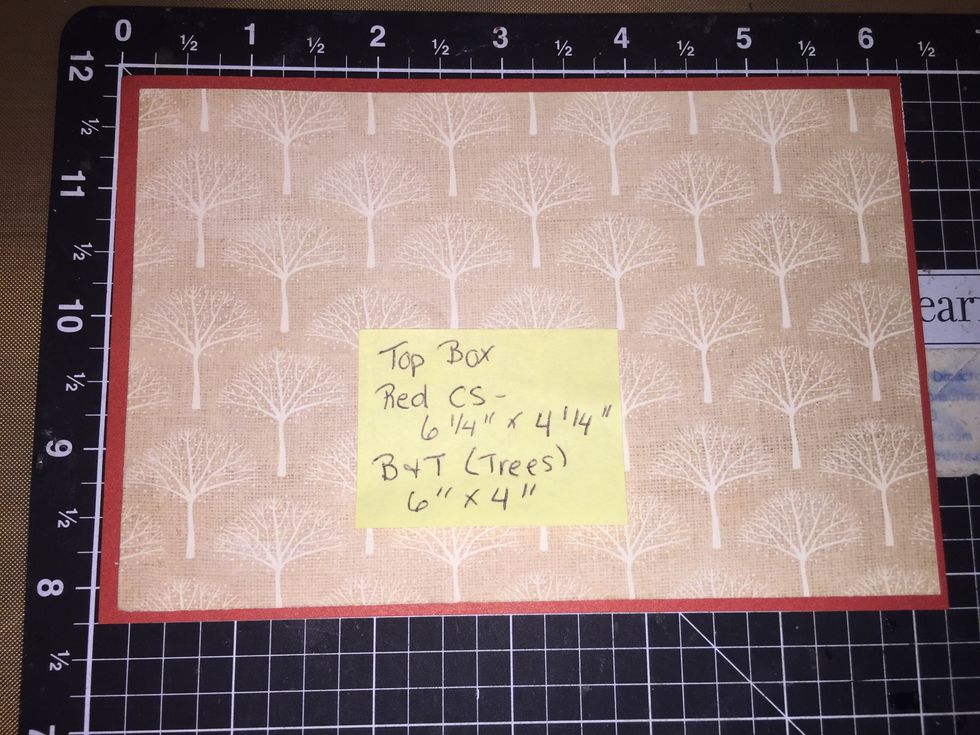
Cut your box top these sizes.
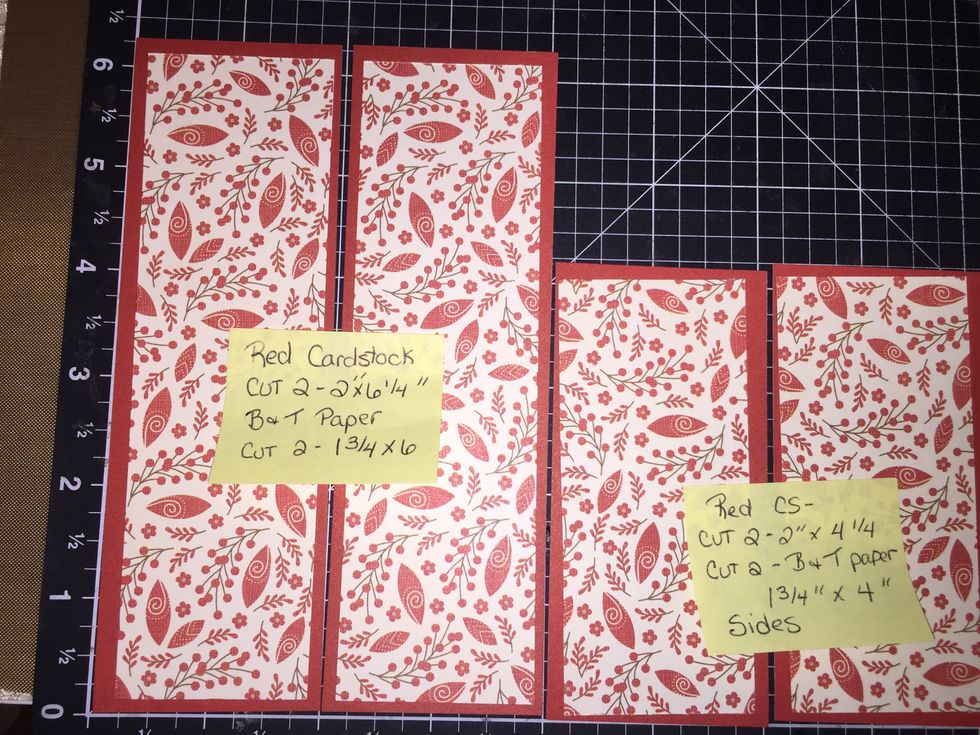
Here are the sizes for your sides of the boxes.
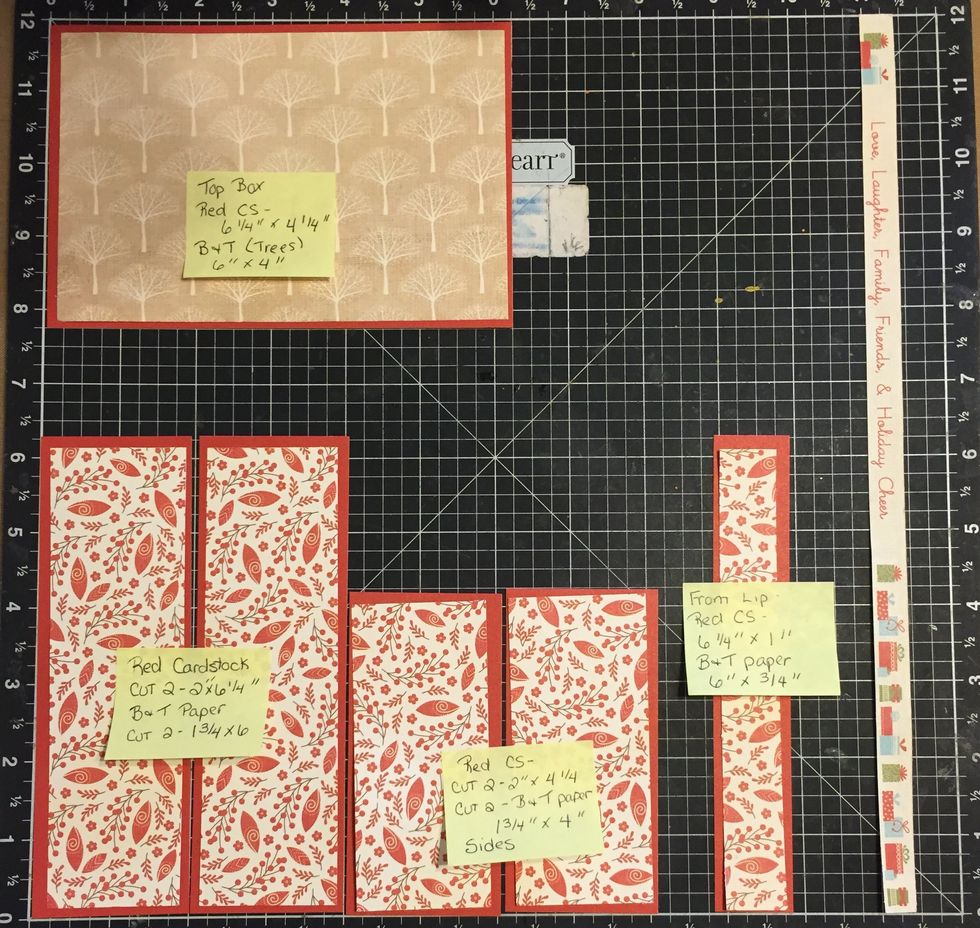
Cut the lip piece. Glue all the pieces together and then glue them to the box.

The Matt for the tree is (flower) 1 3/4 x 3 3/4". The fern Matt is 2 x 4!
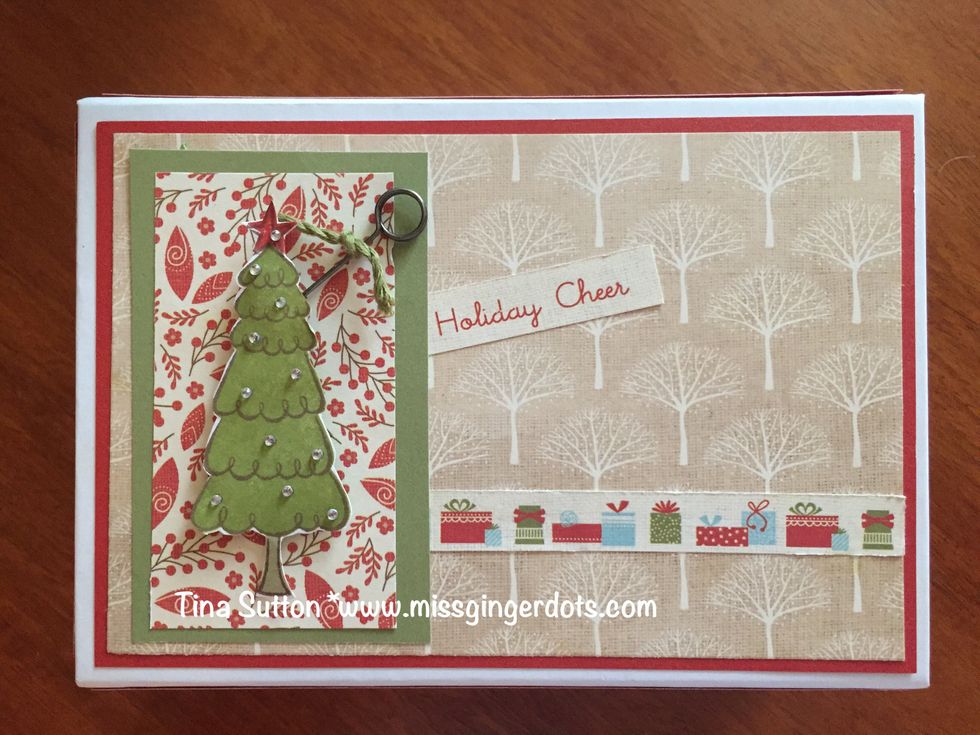
A look at the top. You can ink distress if you wish. I left my edges clean. The tree is popped up with dimensional tape. The pin is inserted in the tape behind the tree!

Decorate the top of your box as shown. The tree is stamped in Fern and Desert Sand! Then it is cut out and glued on!
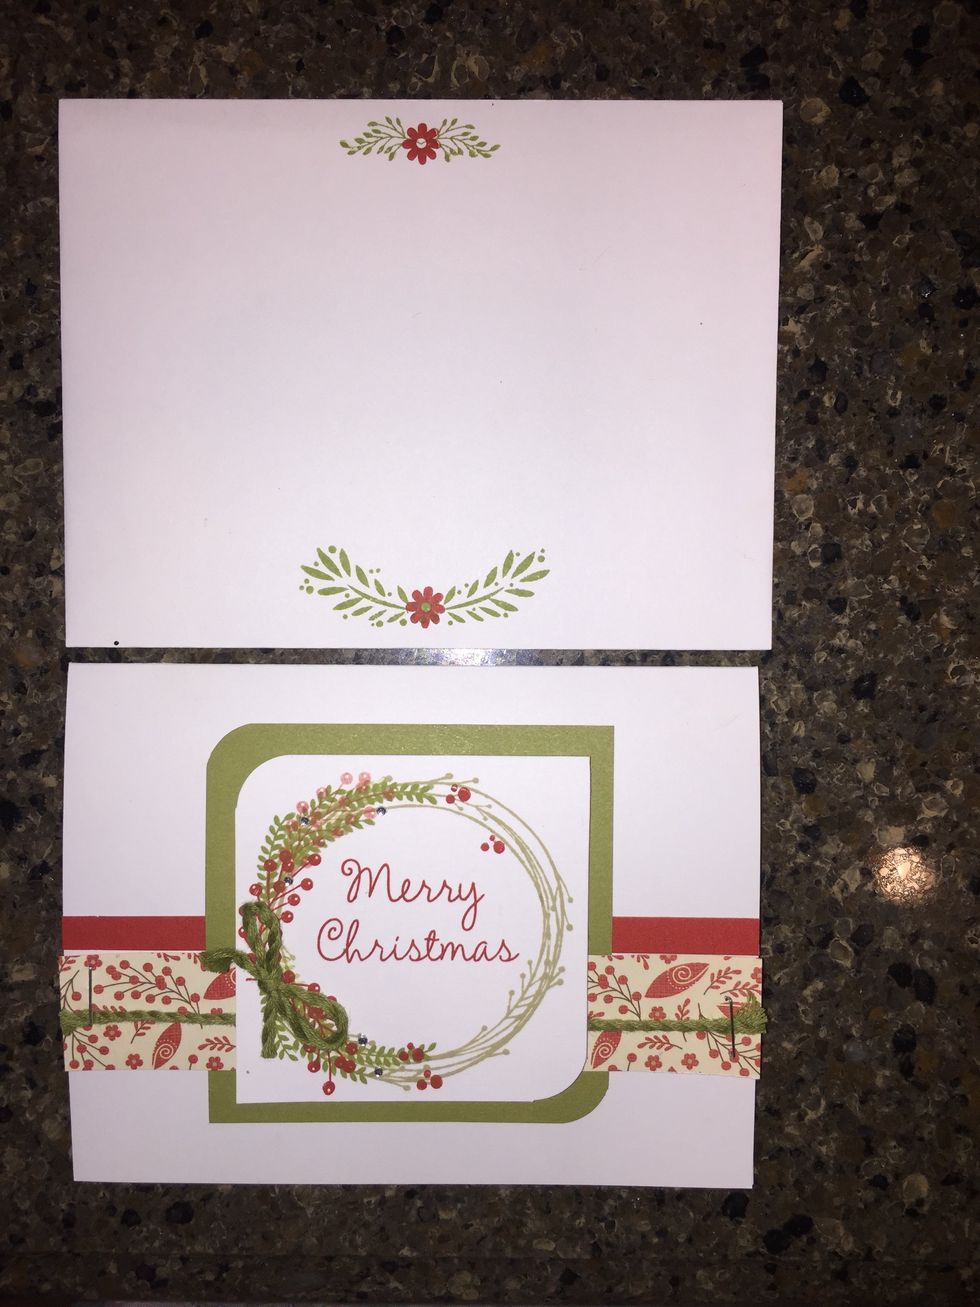
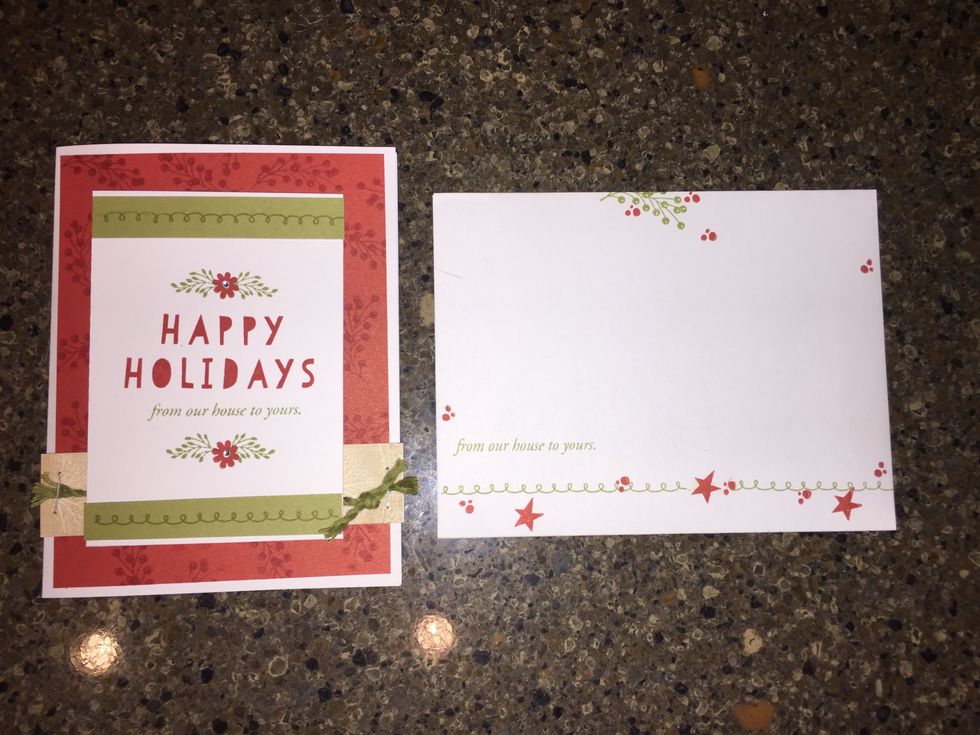
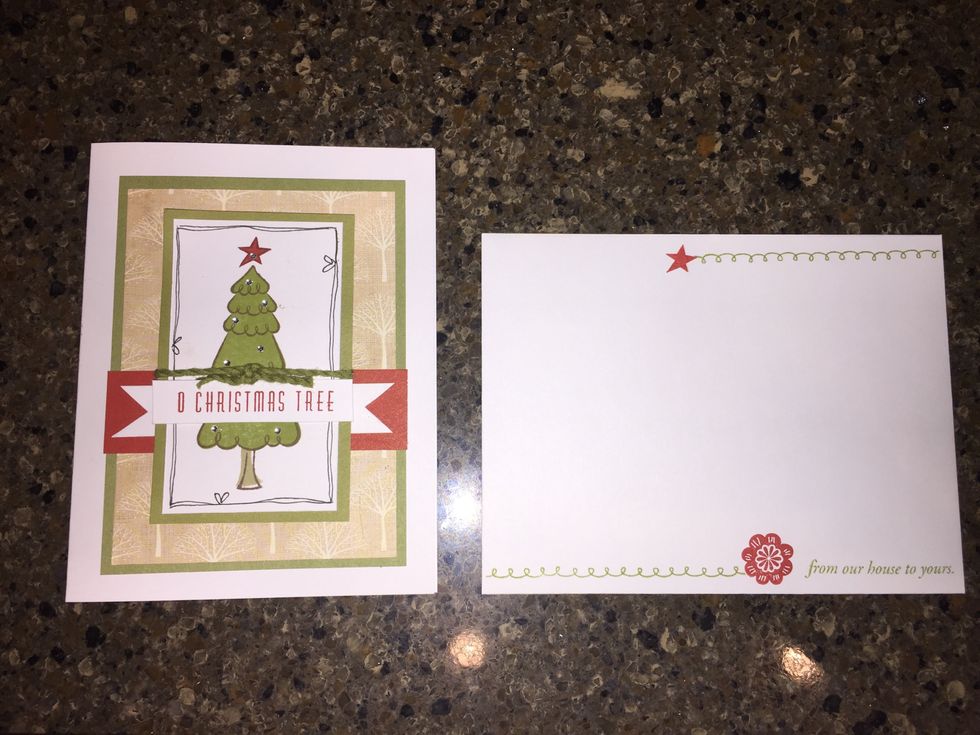
I stamped all my envelopes. Here are some examples of how I stamped them! This is an extra stamp that I added- not required but fun!