The Conversation (0)
Sign Up
Lengths are approximated (personal choice). Binder clips shown are for weight purpose only to control curling for guidance photos. Ribbons are very curly so consider using scotch tape for 1st try.
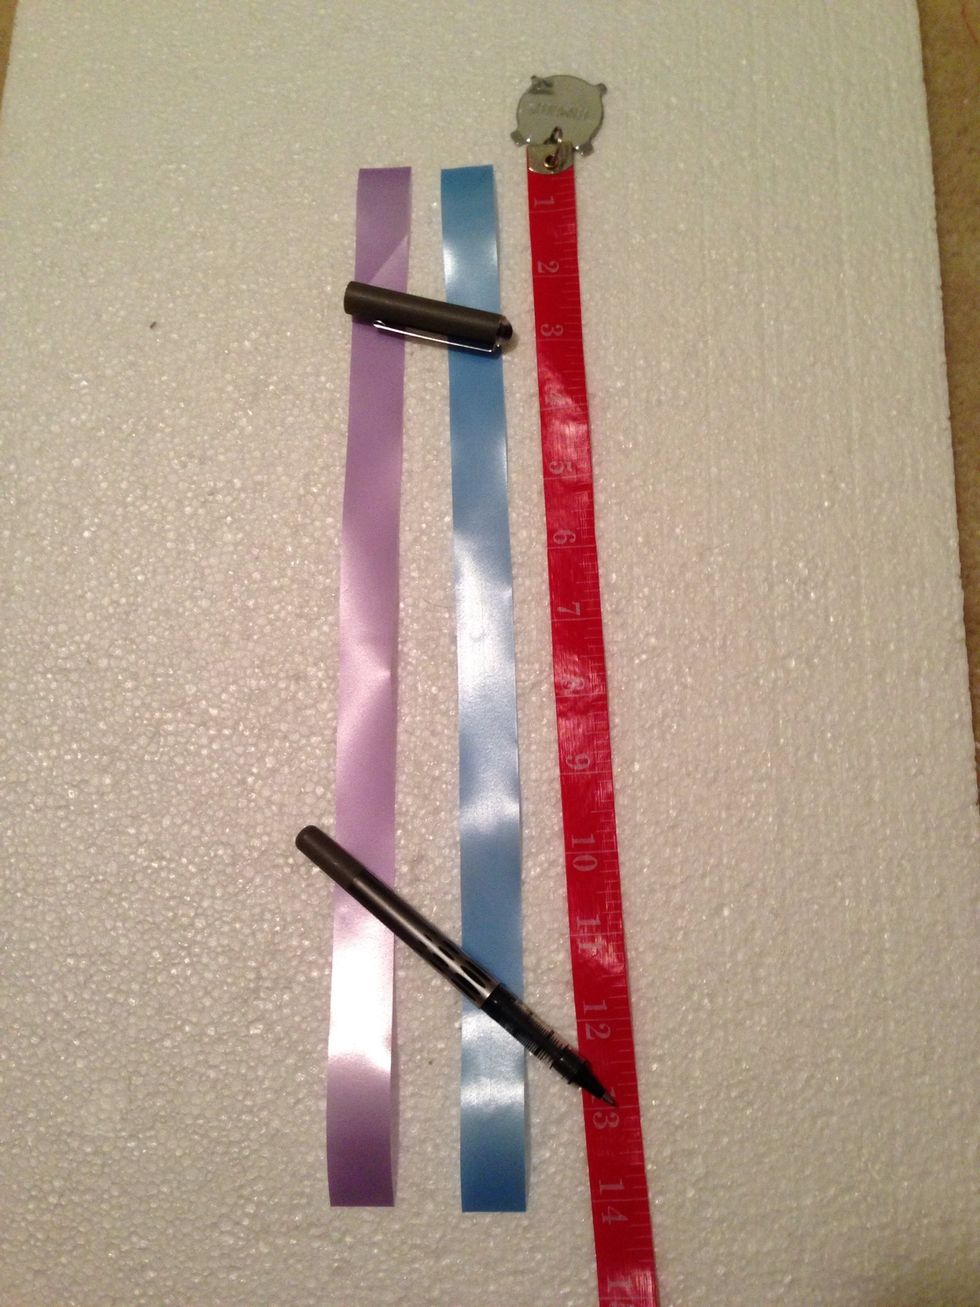
2 strips of 14" standard ribbon. I used 2 colors for easier guidance.
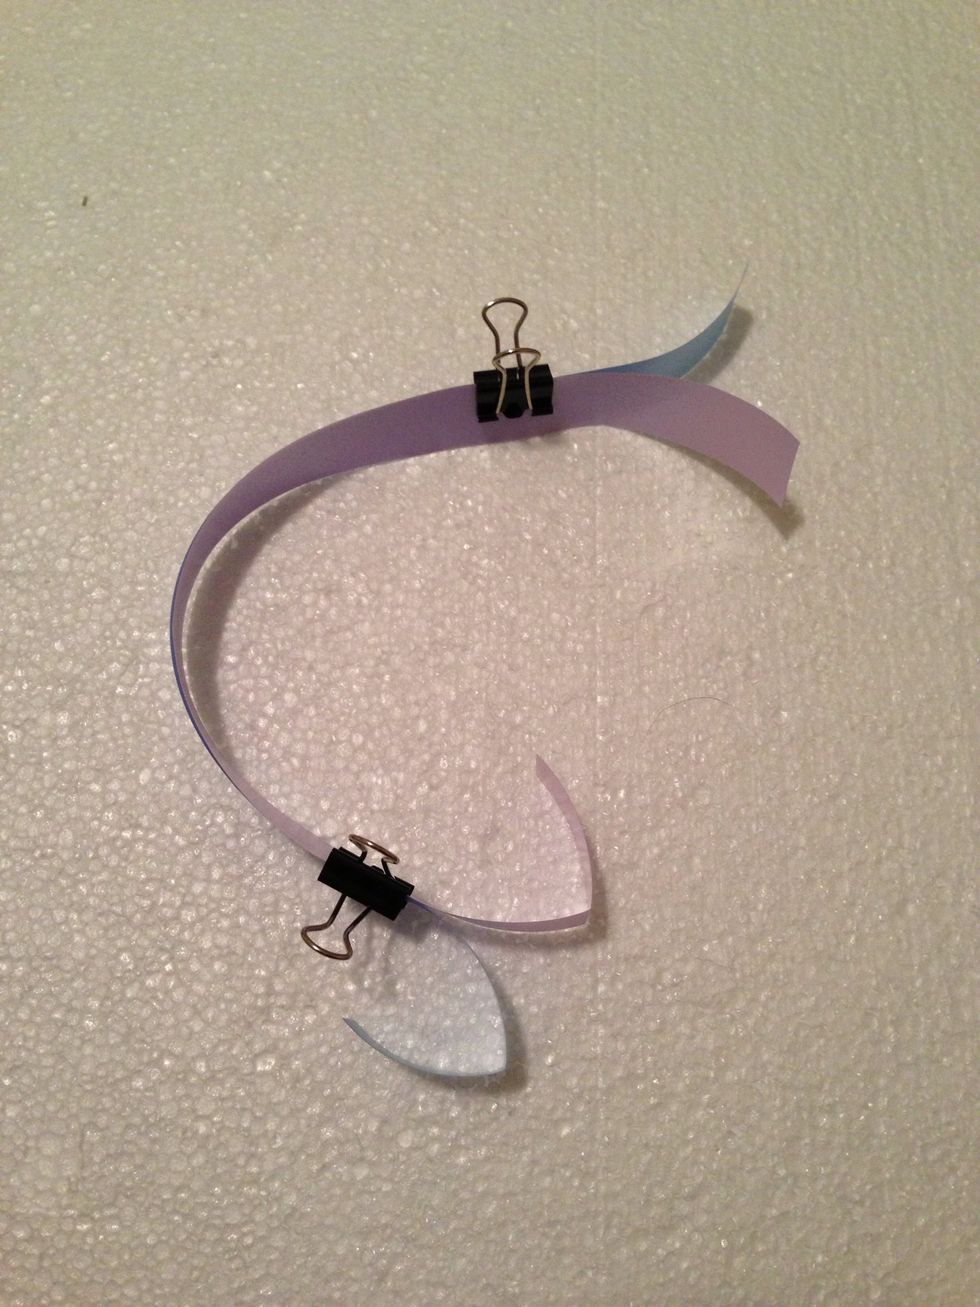
Fold one end 1.5", which becomes the wings.
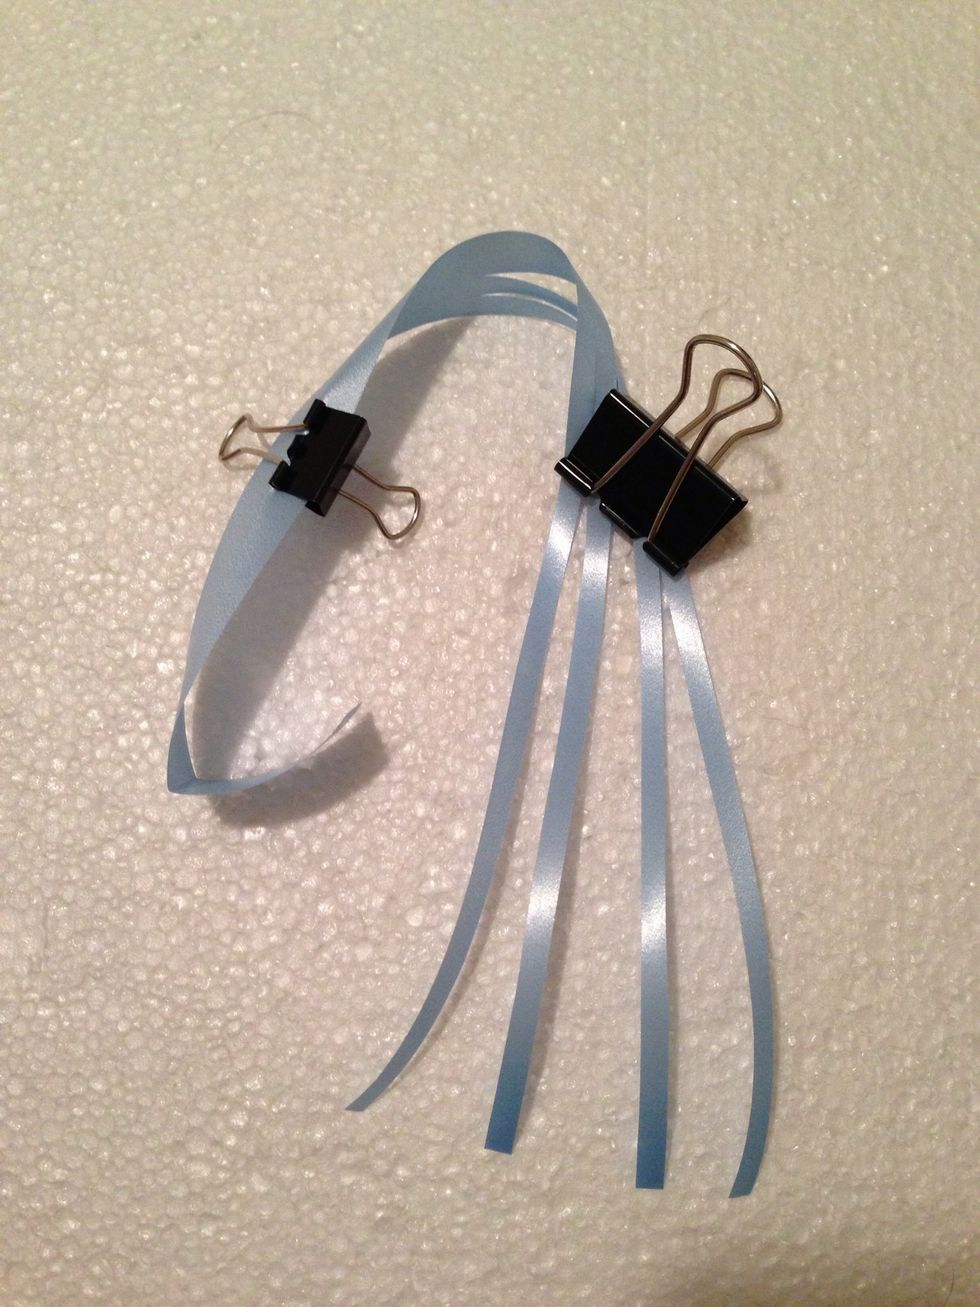
Cut lengthwise into 4 equal strips but stop at wing fold.
Should look like this.
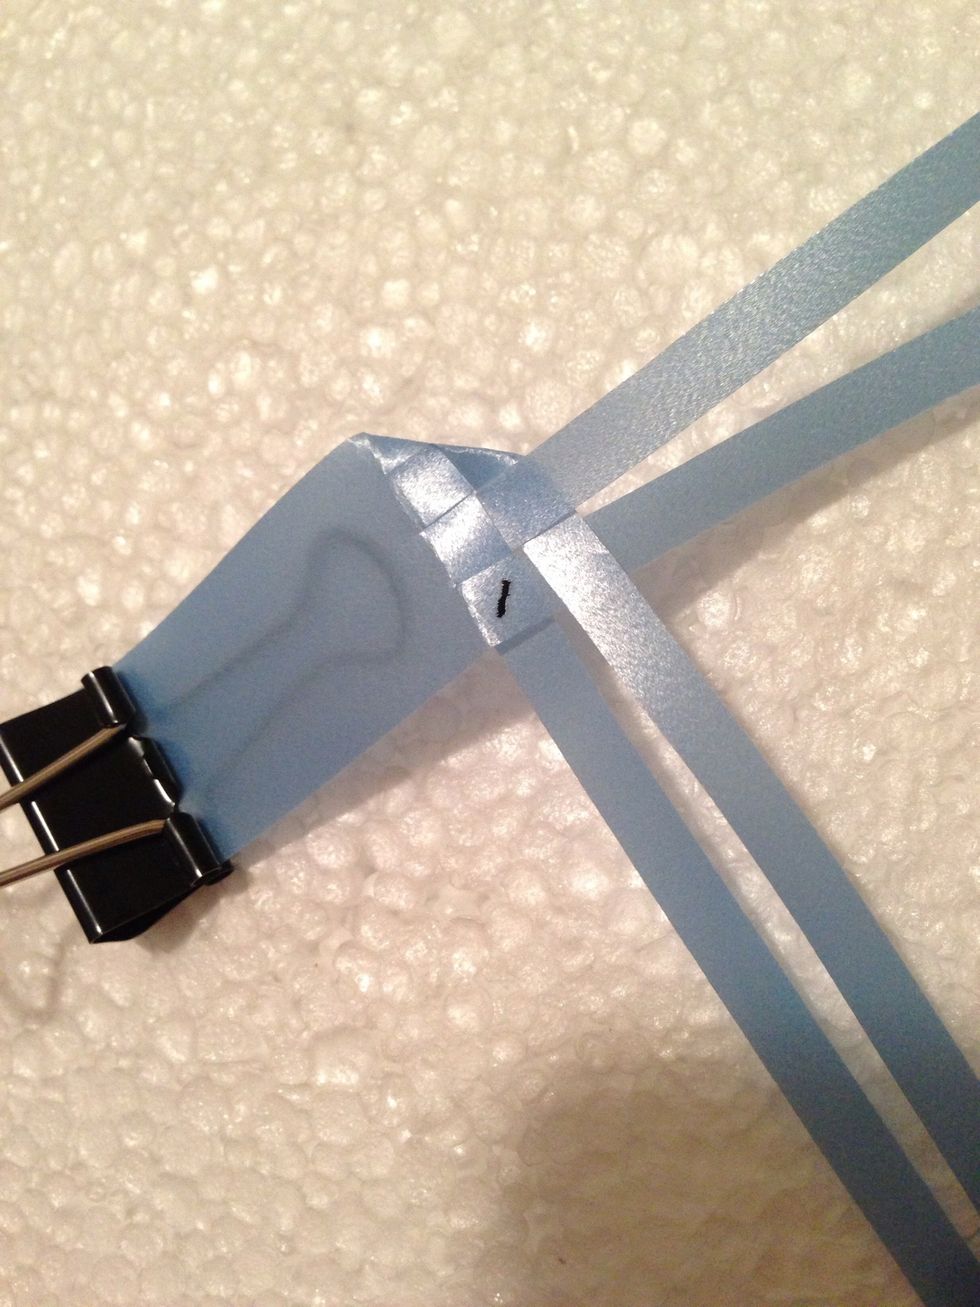
This is TOP of bird & the LEFT wing. Fold left 2 strips diagonally & interlace as shown. Notice label 1 (non-folded strip is on top of folded strip).
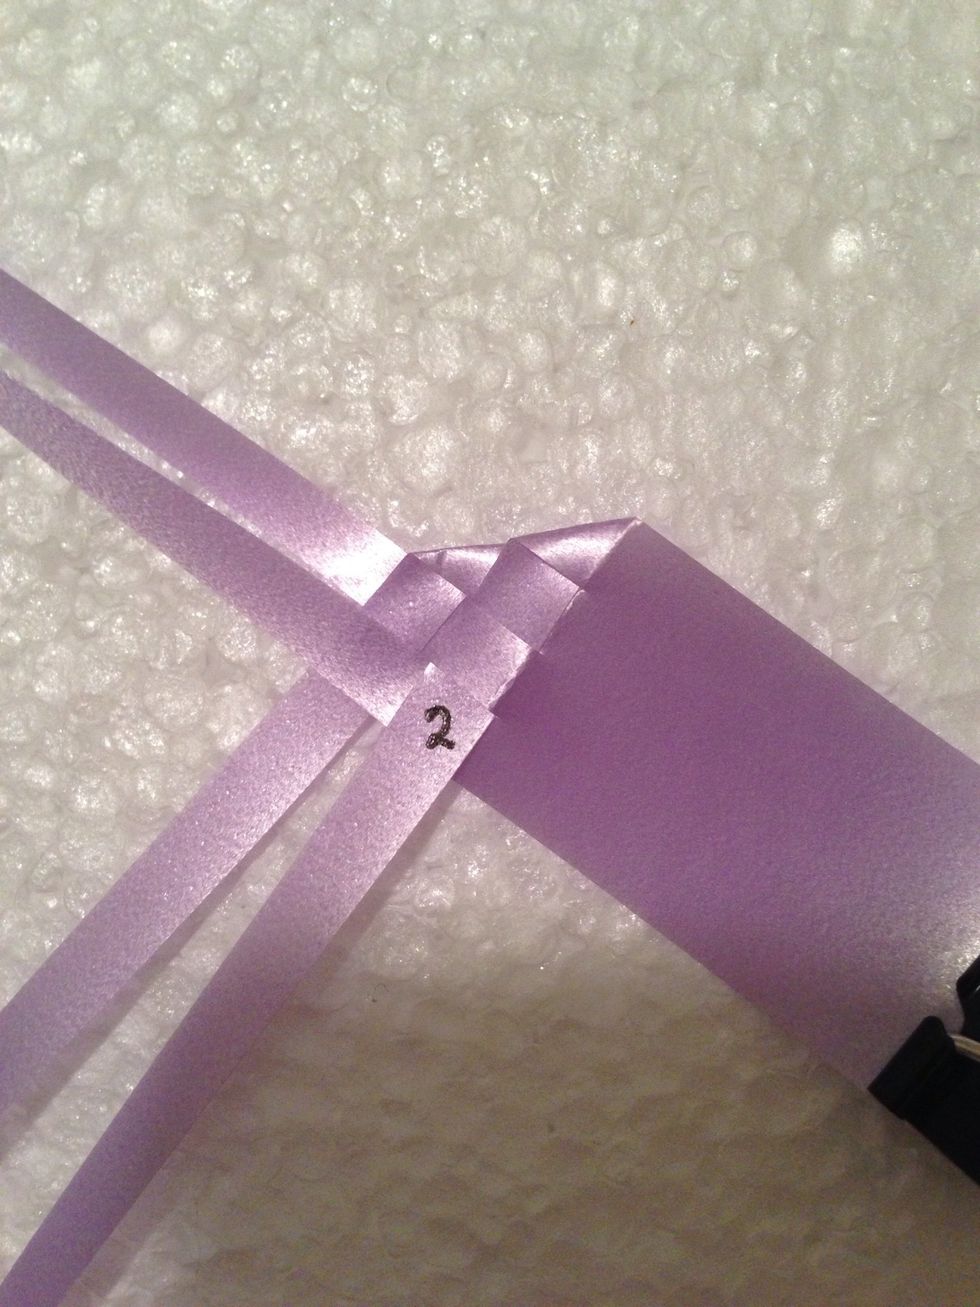
This will be the RIGHT wing. Fold right 2 strips diagonally & interlace as shown. Label 2 MUST interlace opposite of label 1 (folded strip is on top of non-folded strip).
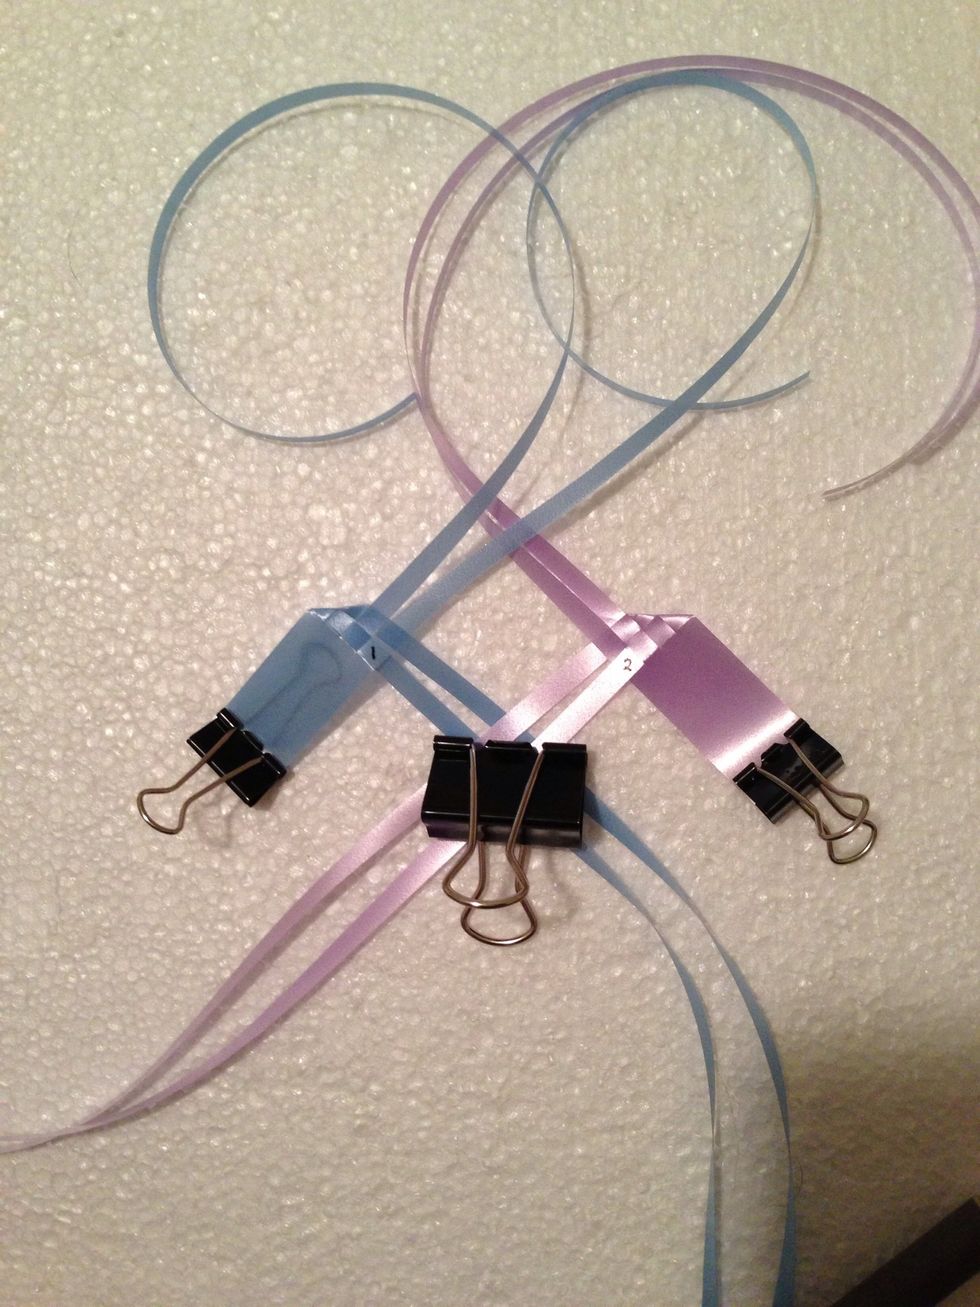
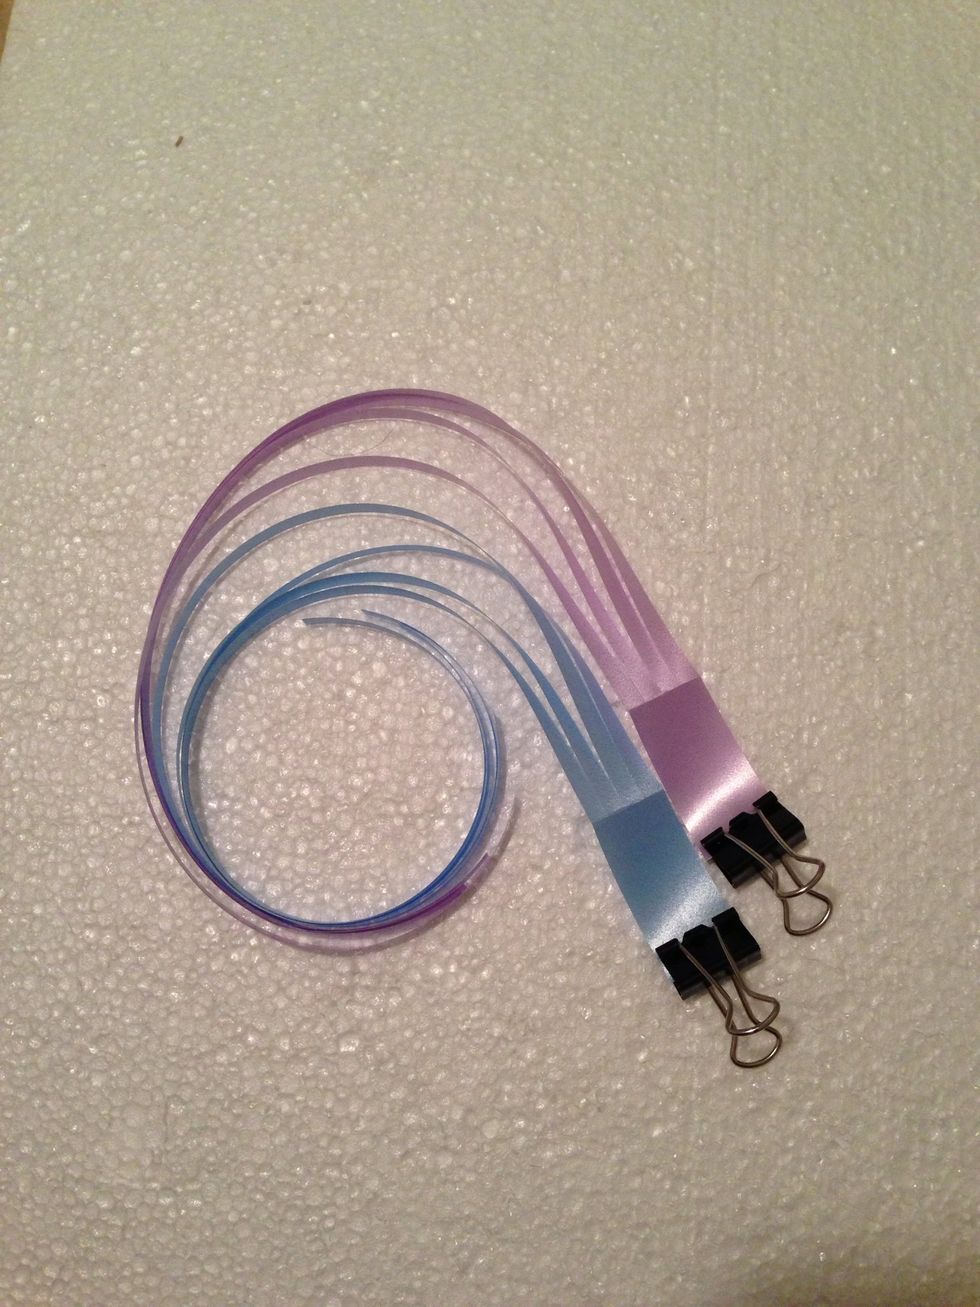
What you should have so far for side-by-side comparison.
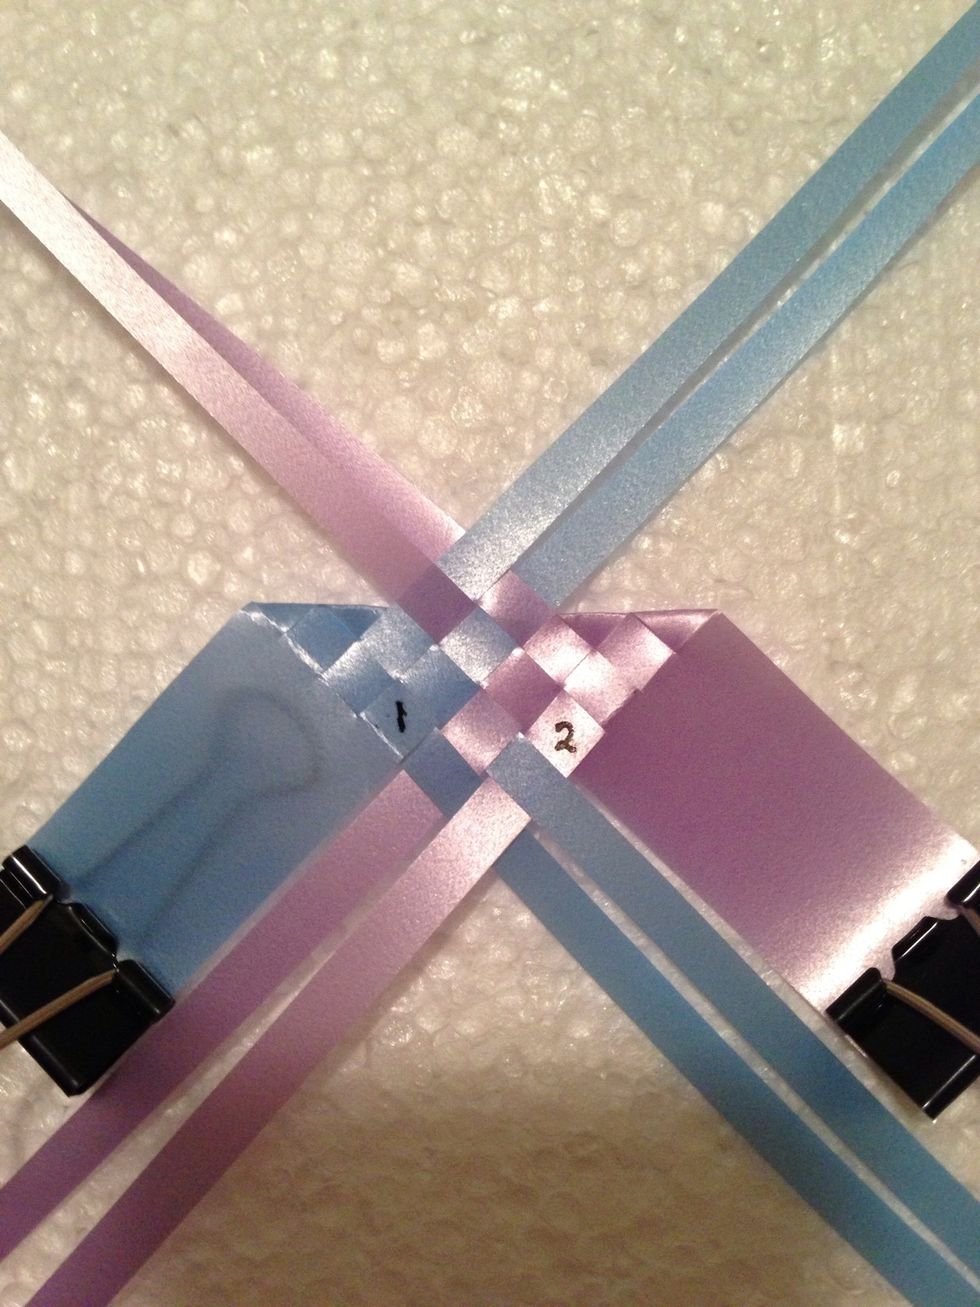
Now interlace the 4 strips on top & bottom. Won't interlace if 1&2 are not interlaced in opposite.
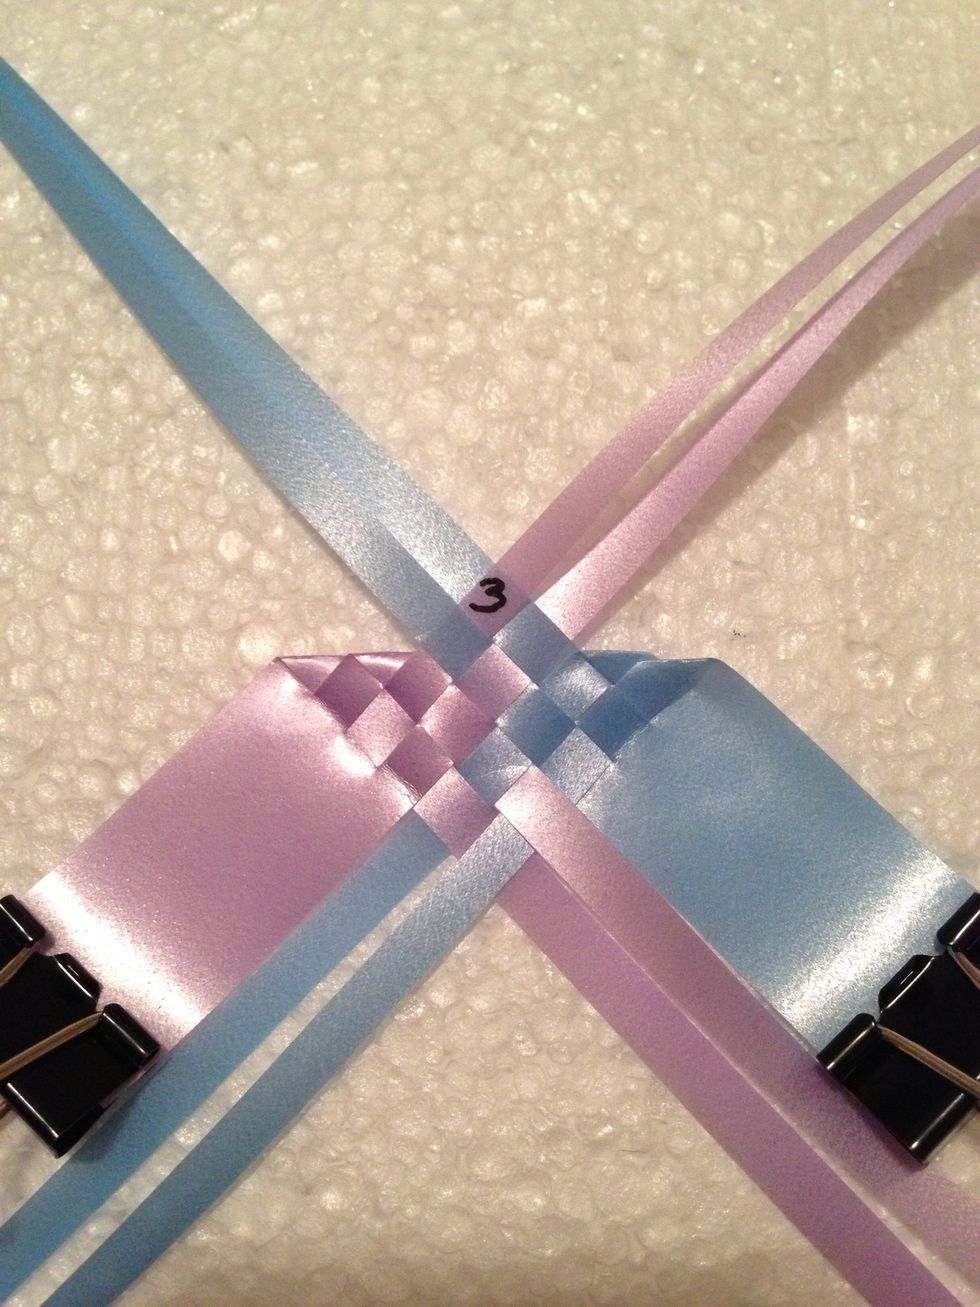
Flip to the BACK. Note label 3 is pink on top of blue.
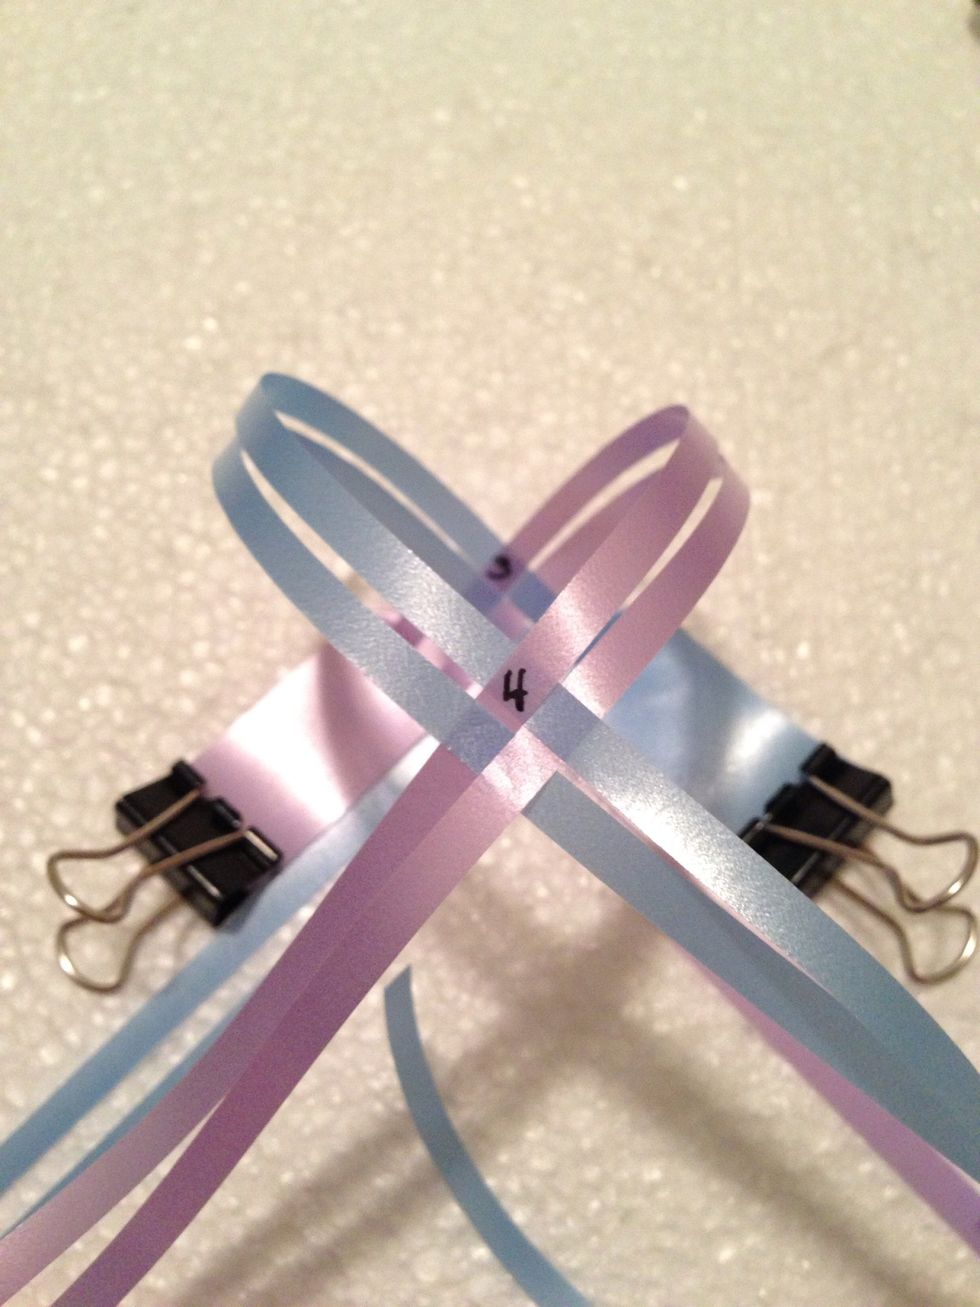
Interlace top 4 strips (label 4 MUST be same as 3, pink still on top of blue).
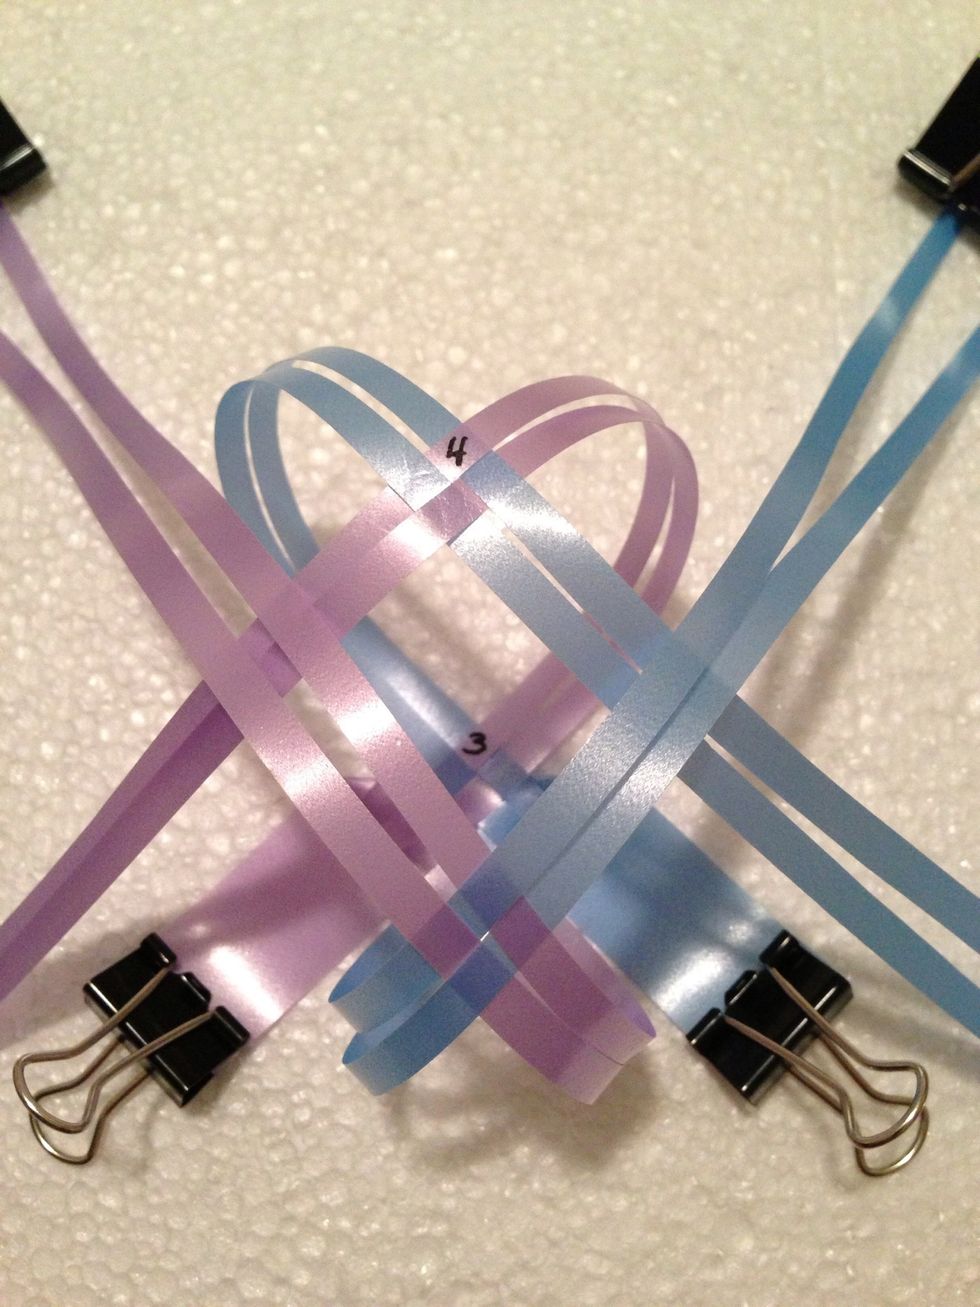
Repeat same rule for bottom 4 strips.
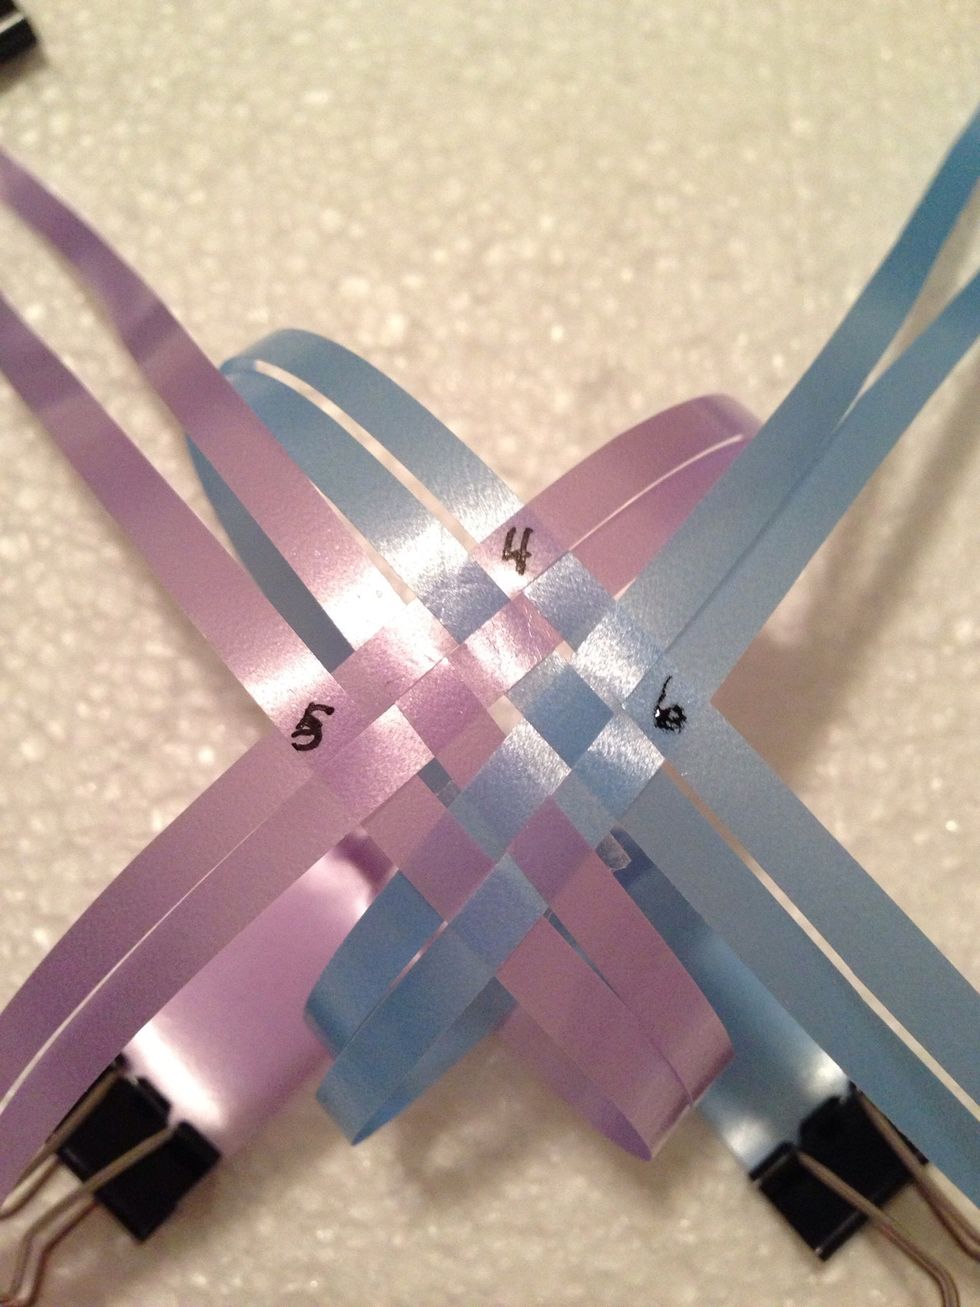
Then interlace the 4 strips on both sides shown in 5&6.
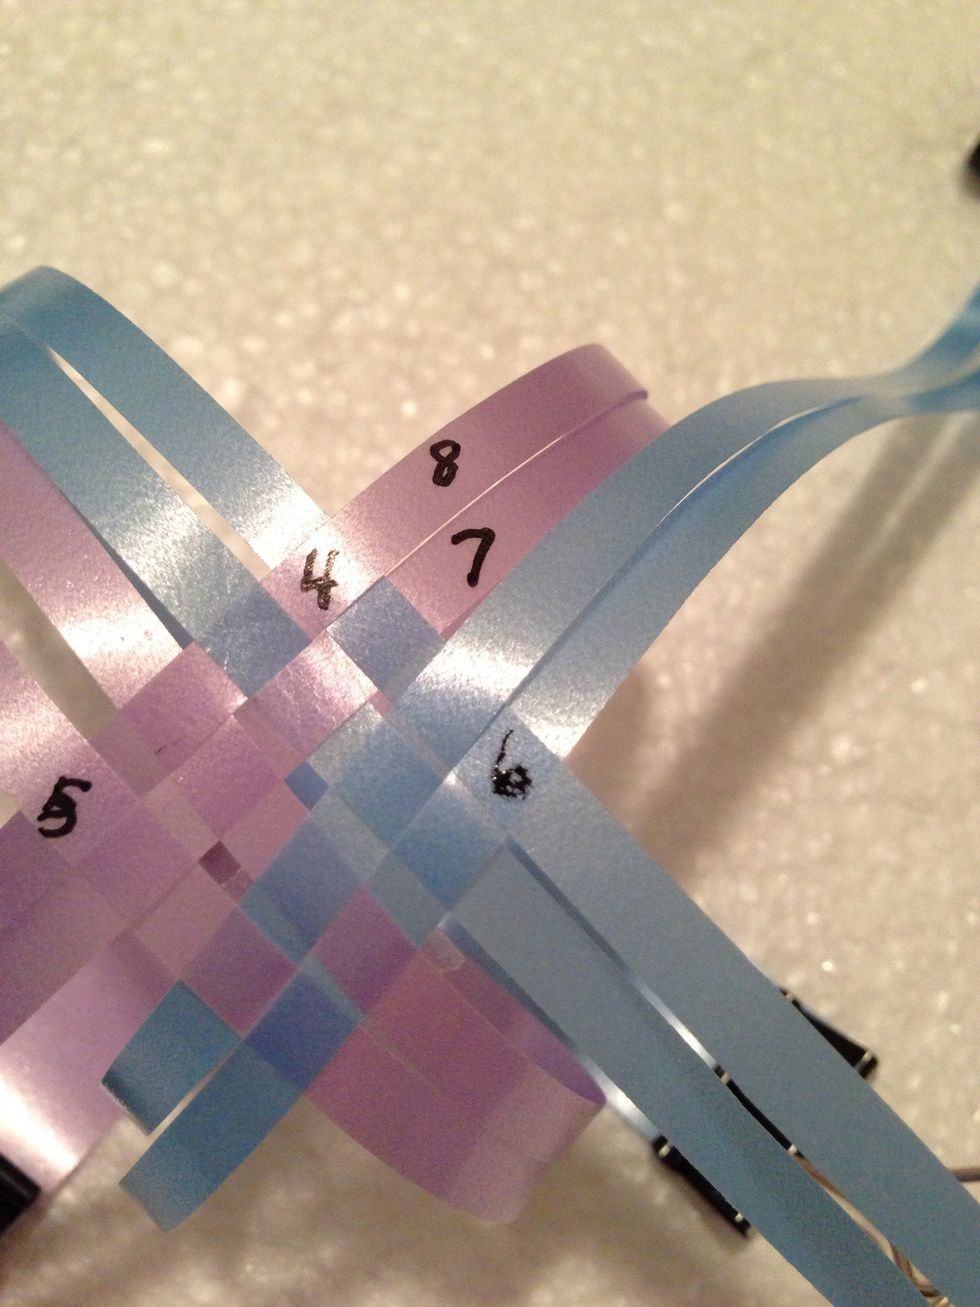
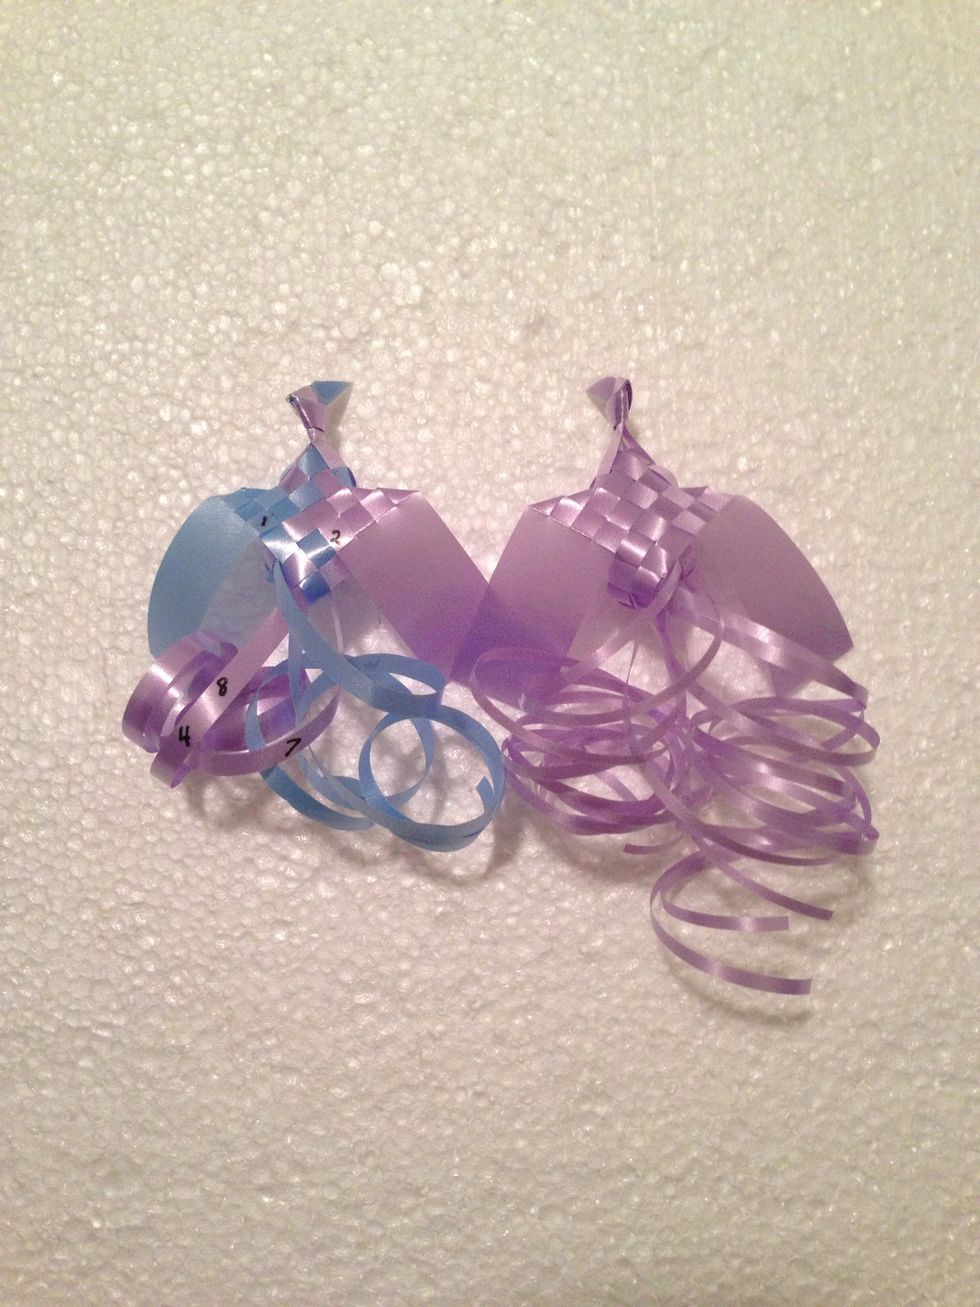
Note the top 2 blue strips and label 7&8.
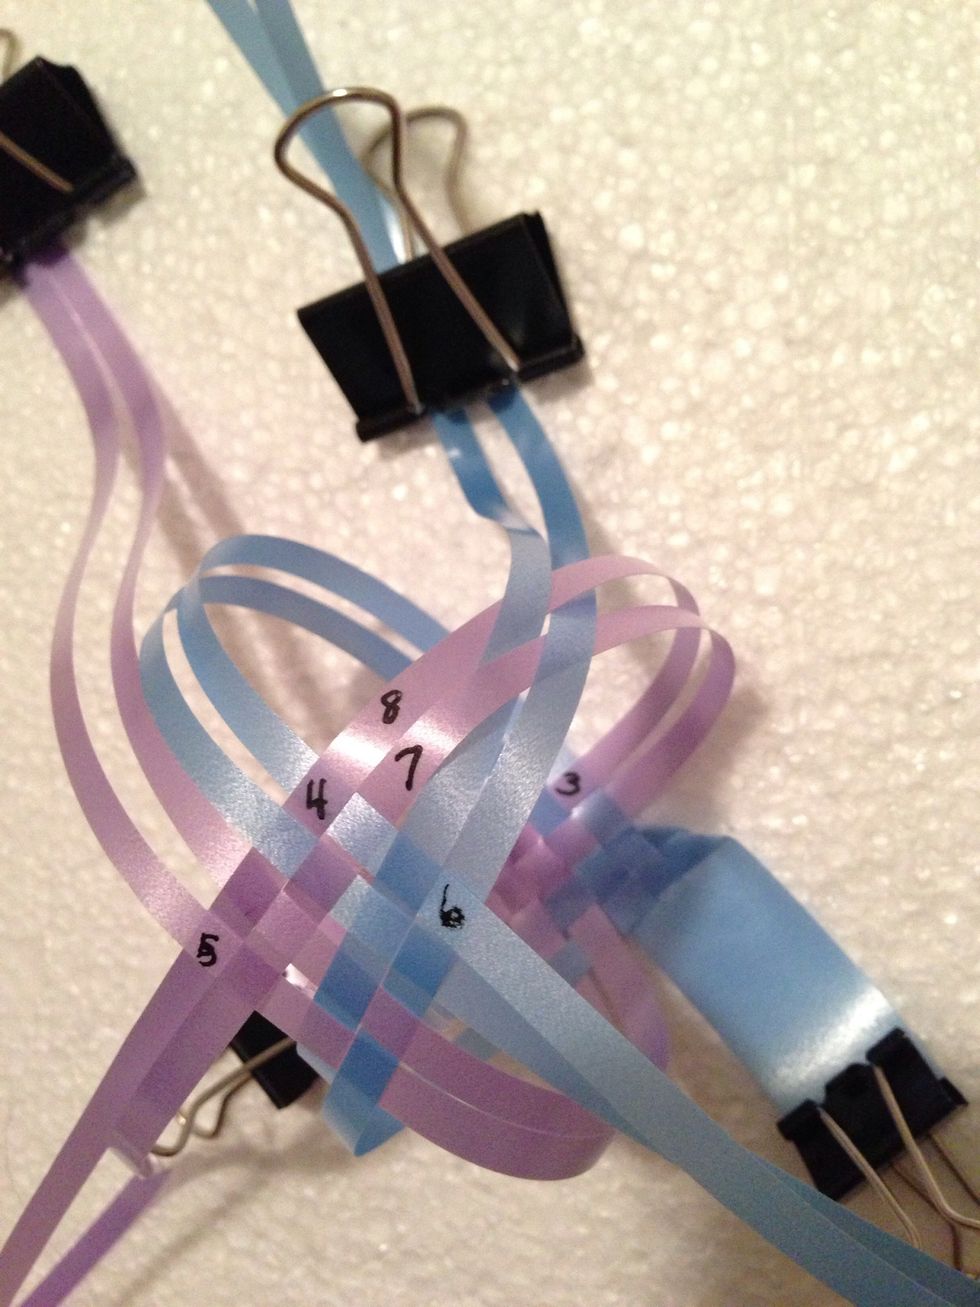
Interlace the 2 strips through 7&8. This brings the strips toward the center. Repeat same rule for remaining 6 strips.
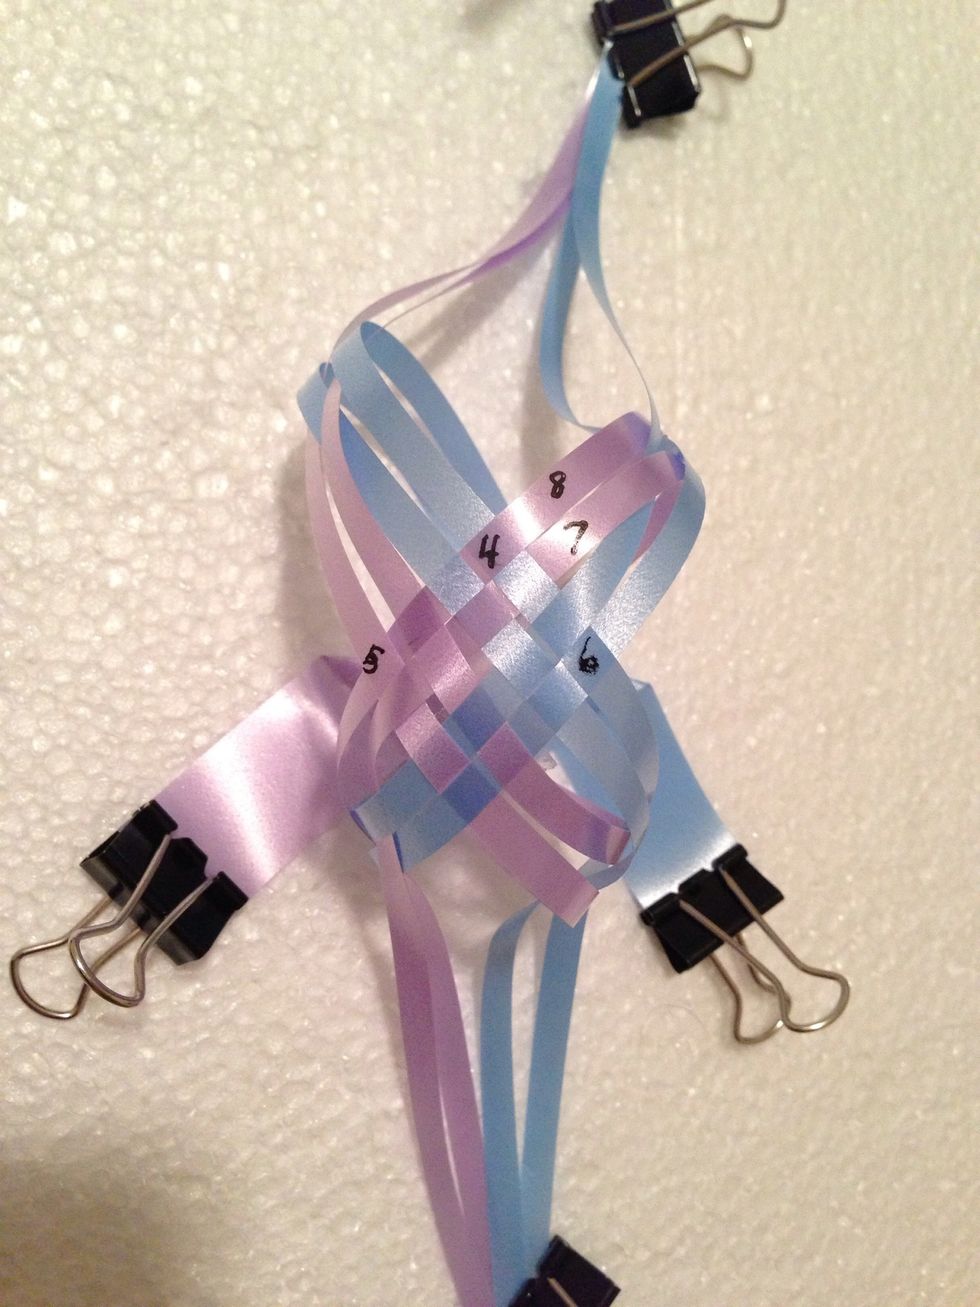
What it looks like so far.

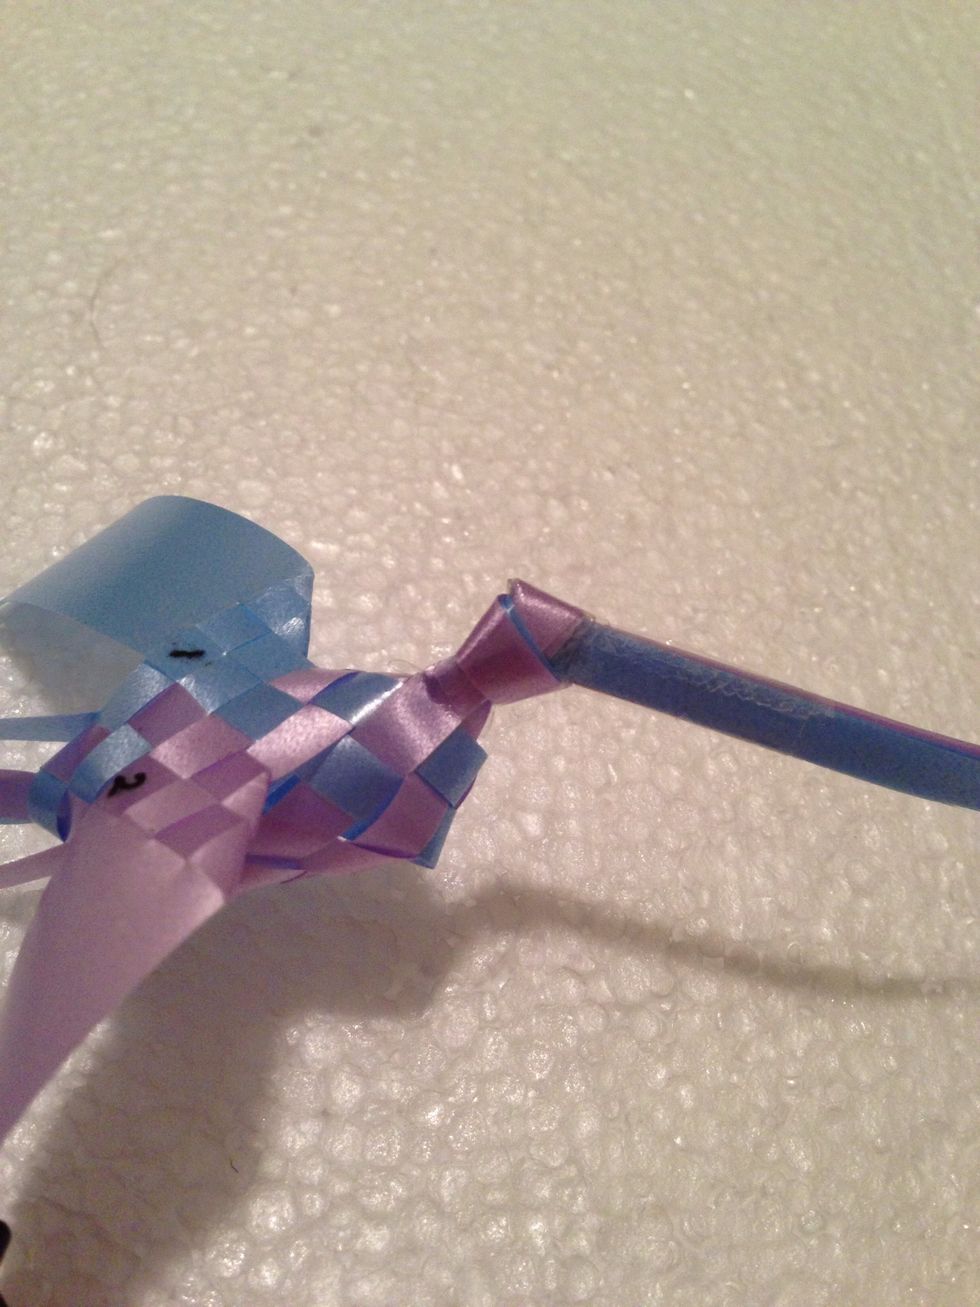
Remove any tape & pull excess lengths gently to form the body.
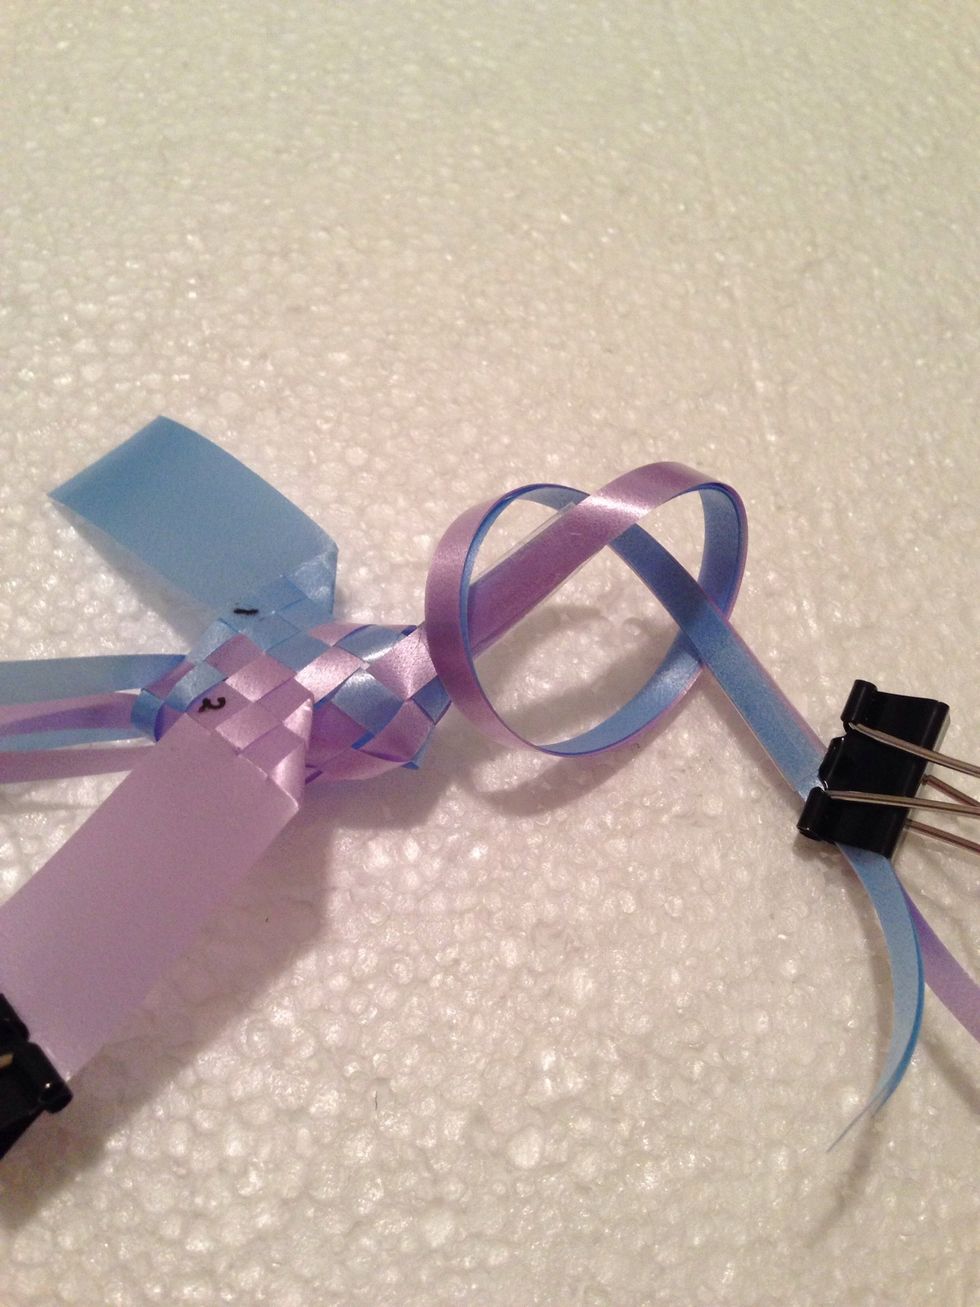
Forming the HEAD, gather all strips & knot. Ends need to point downward, NOT up.
Should look like this. Scotch tape strips together after knot.
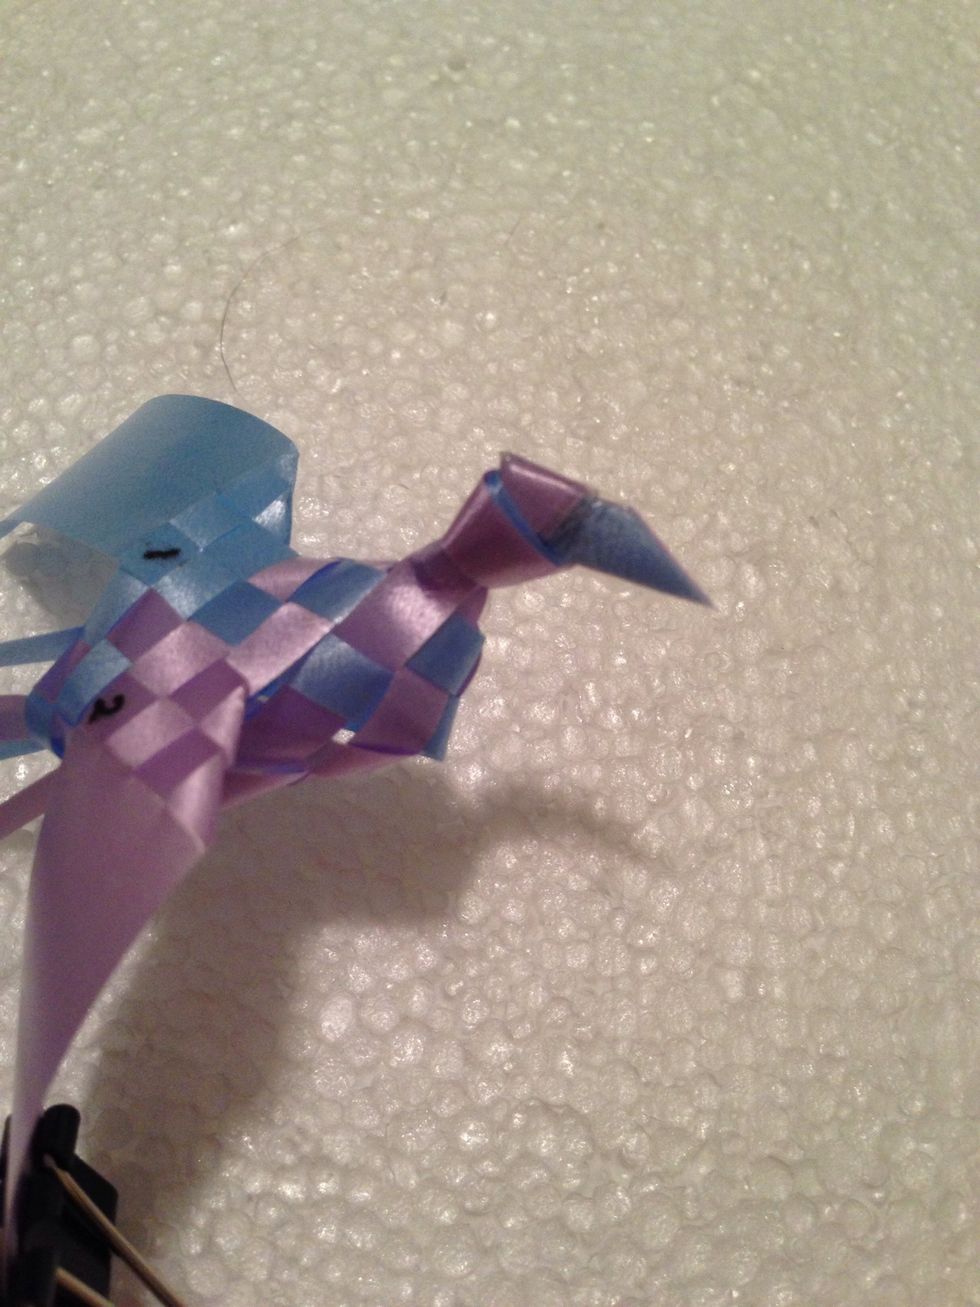
Angle cut creates beak.
Should look like this.
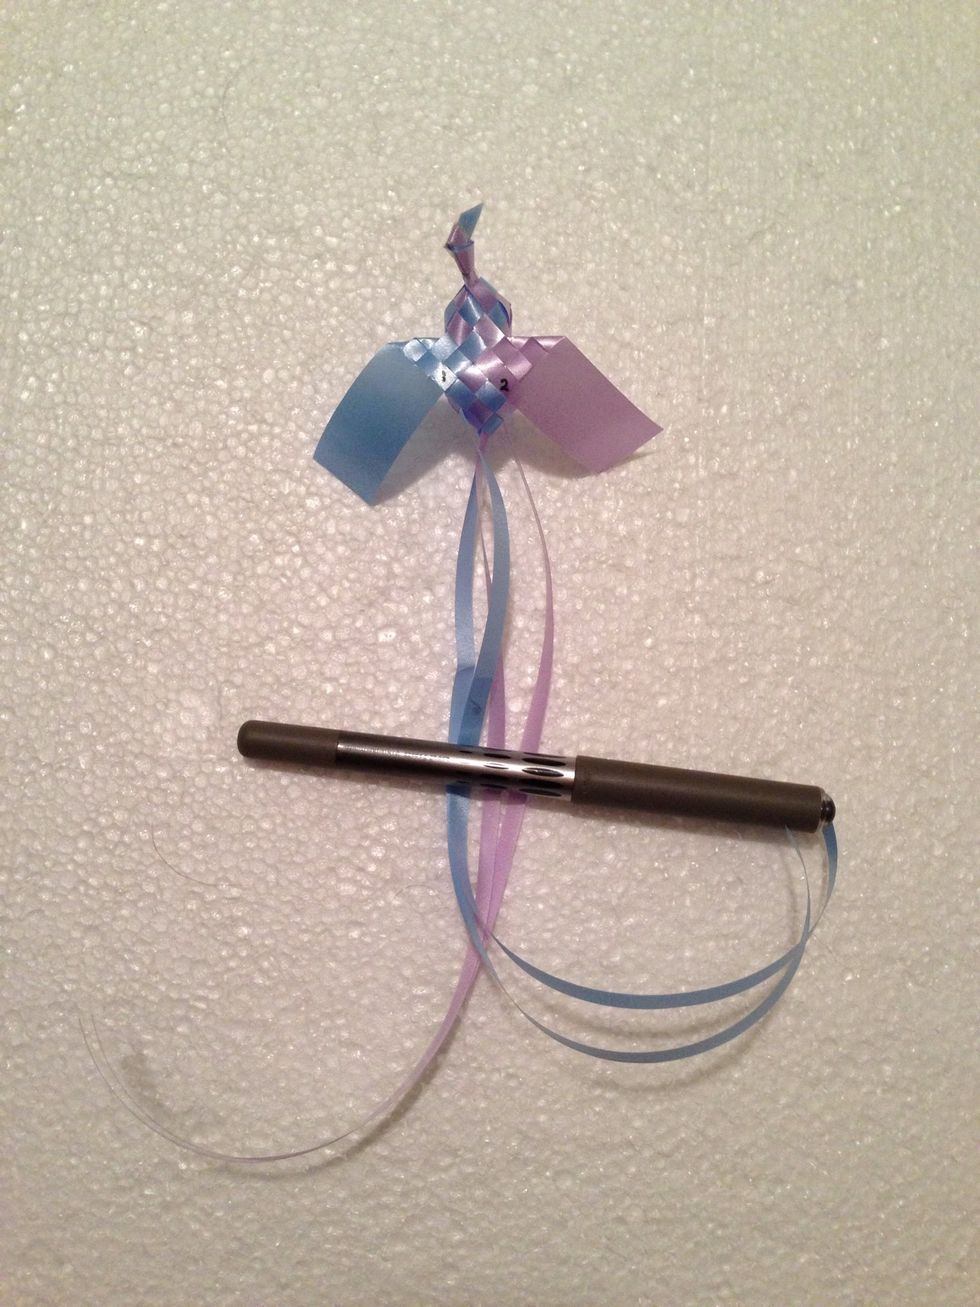
Completed BACK. Options: Run tail strips along edge of scissors to increase curls. Cut 4 strips in 1/2 lengthwise to create 8 for fuller coverage.
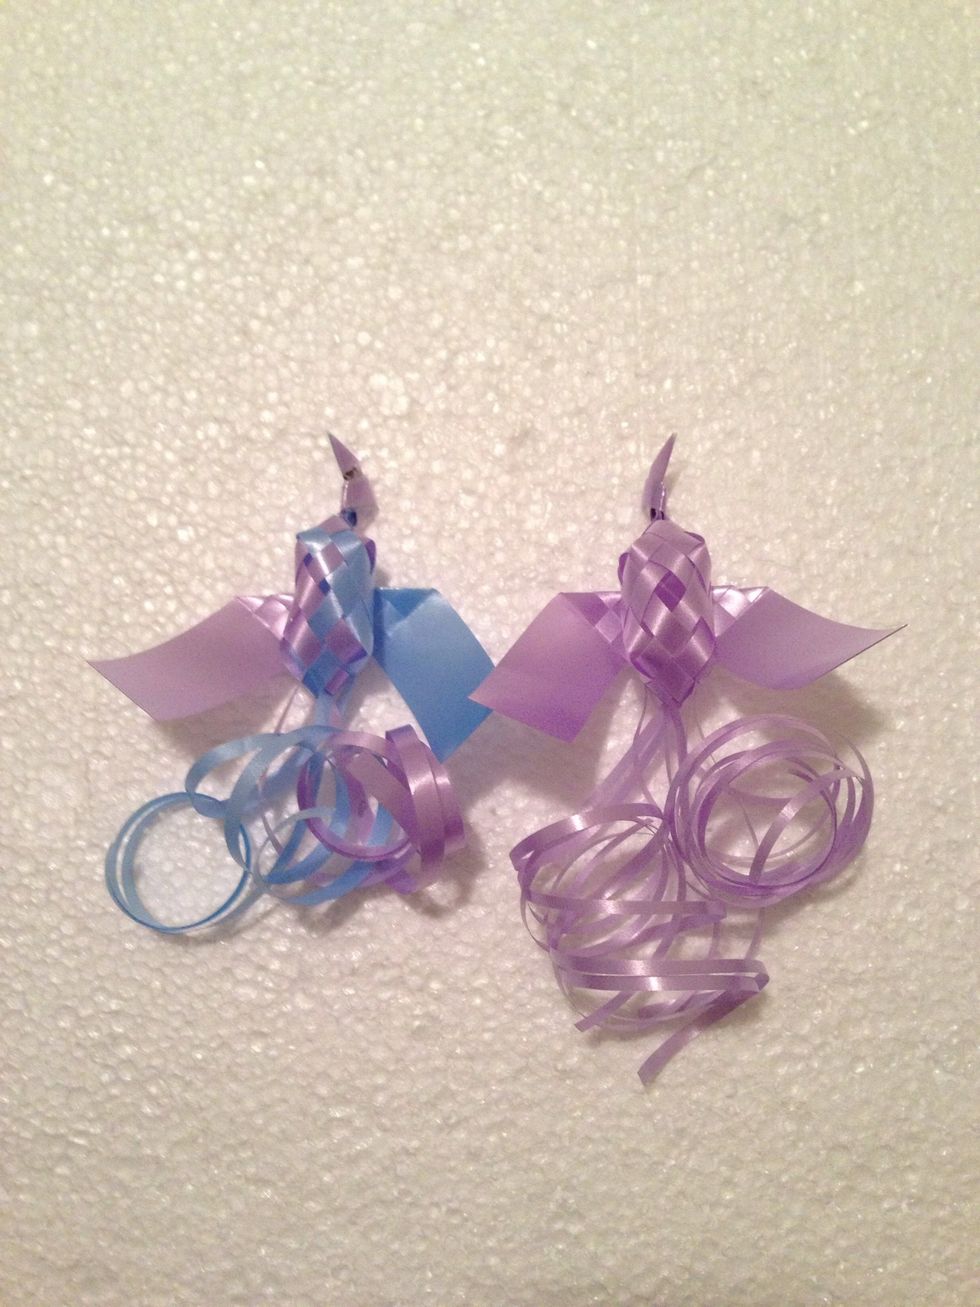
Completed TOP. Enjoy!