The Conversation (0)
Sign Up
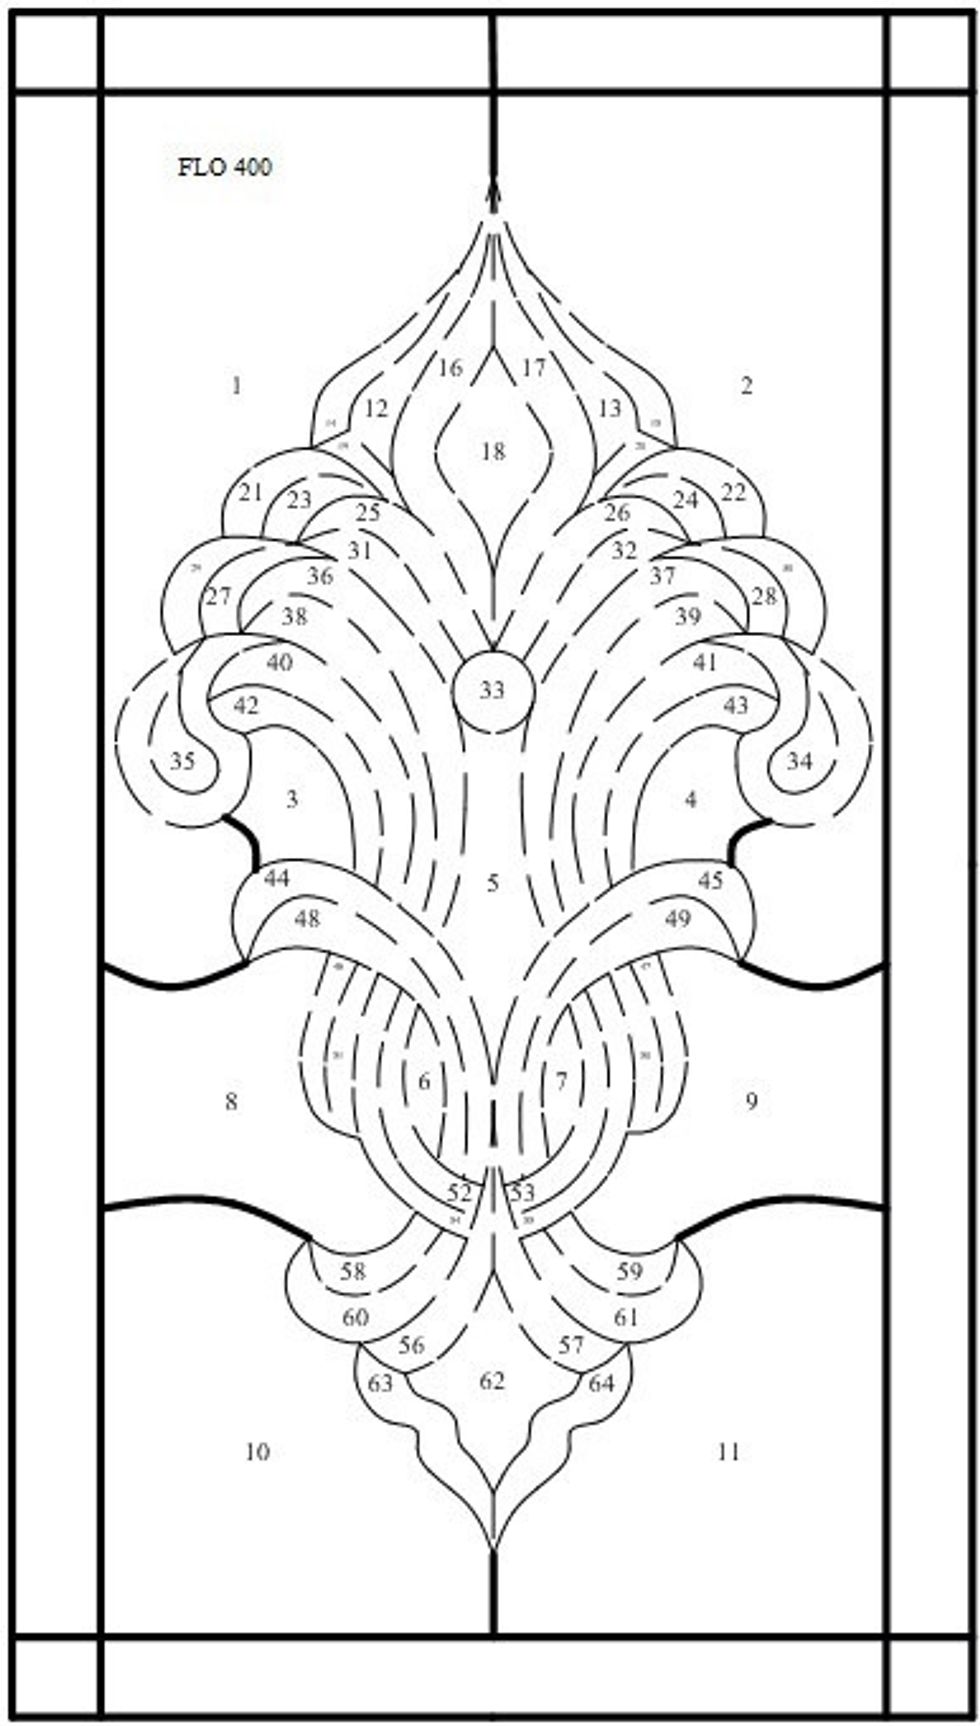
First make a rough pattern of your chosen design. We design all our patterns on the computer and have all the bevel cluster designs pre drawn ready to drop into any given size rectangle or oval etc.

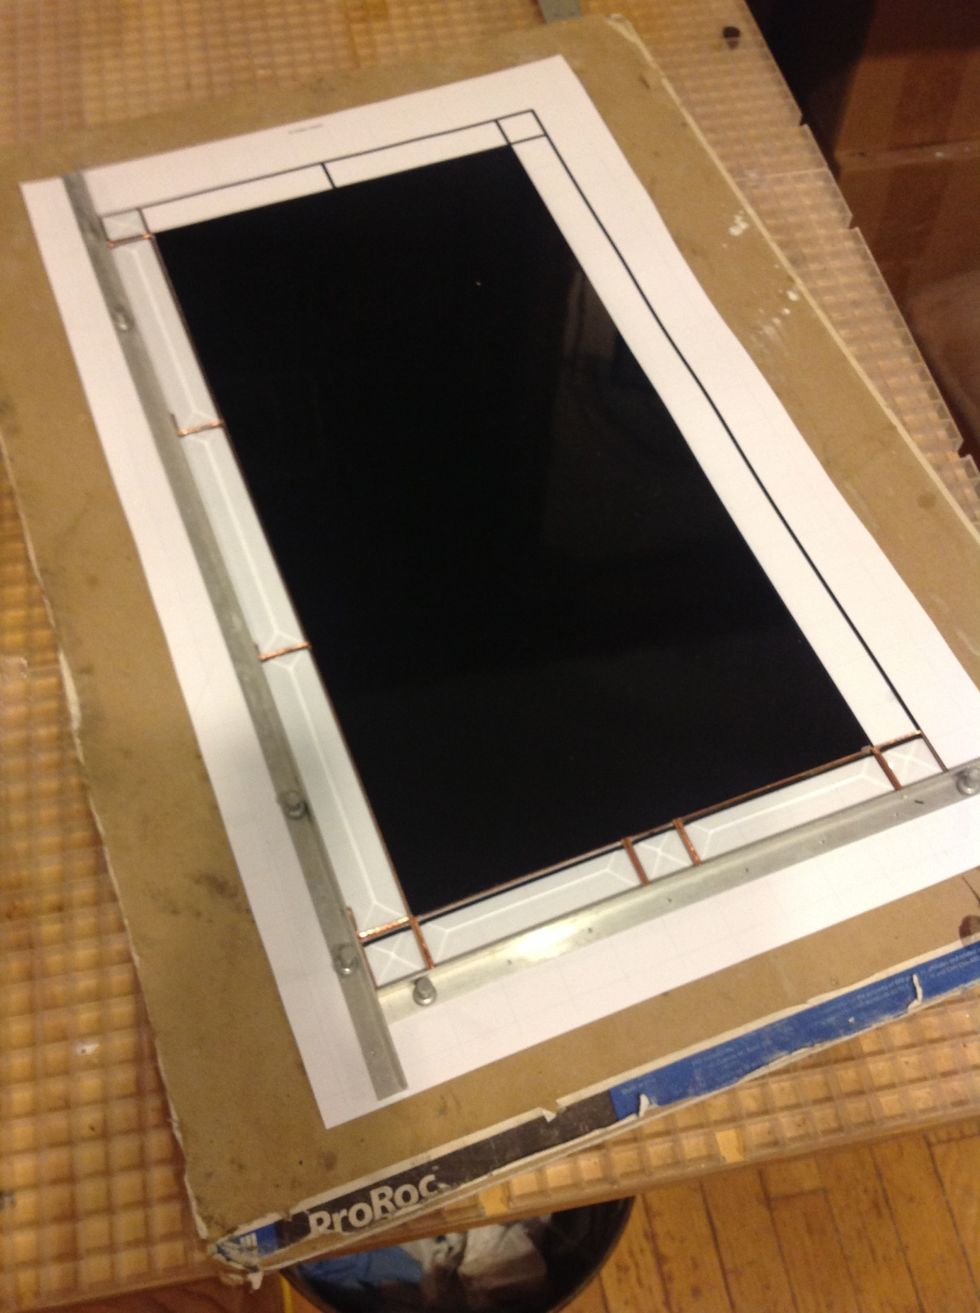
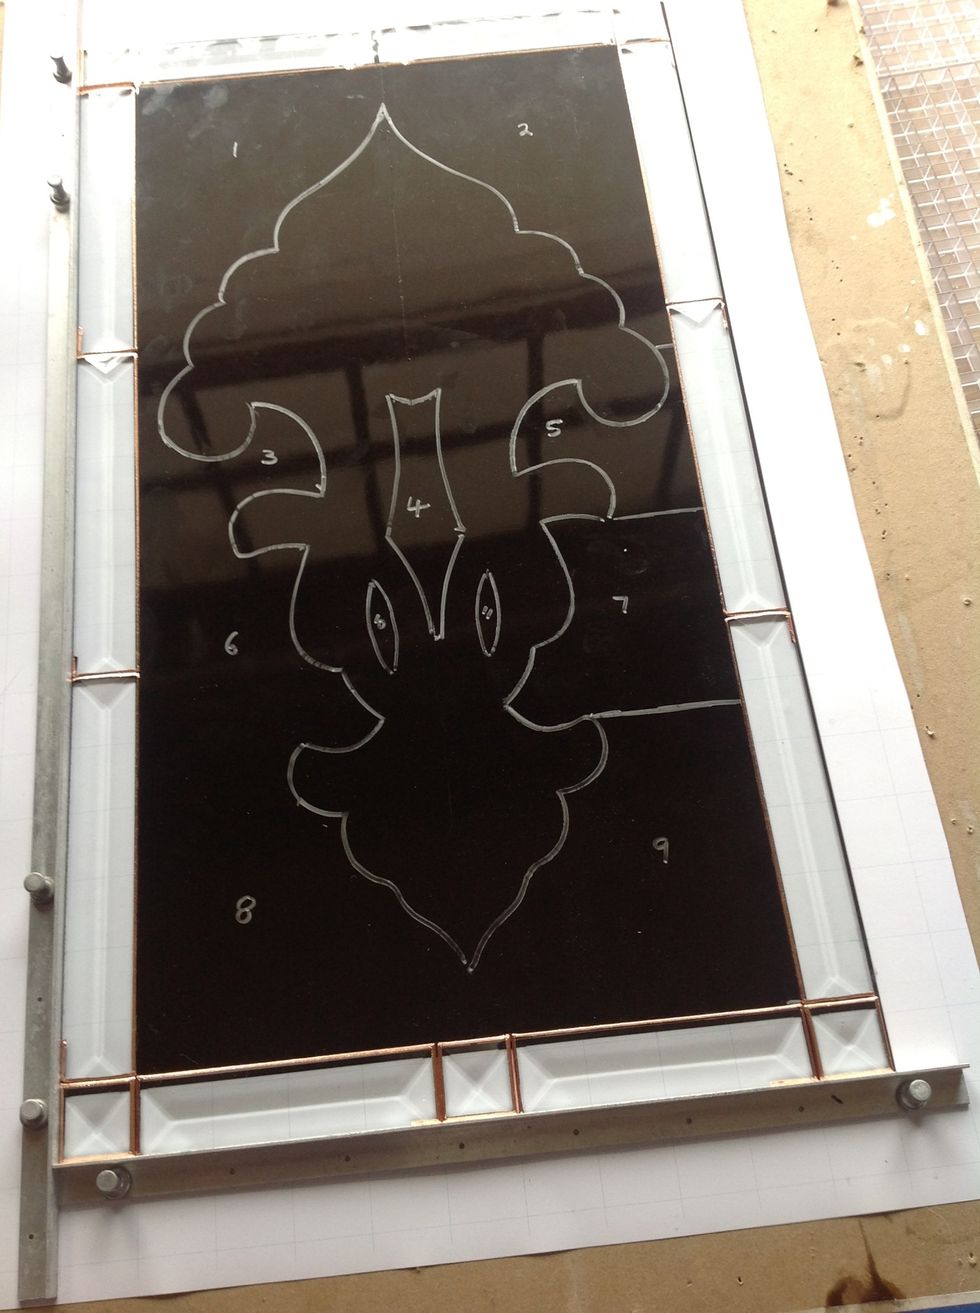
Next use a Morton layout block system to provide a true right angle edge.
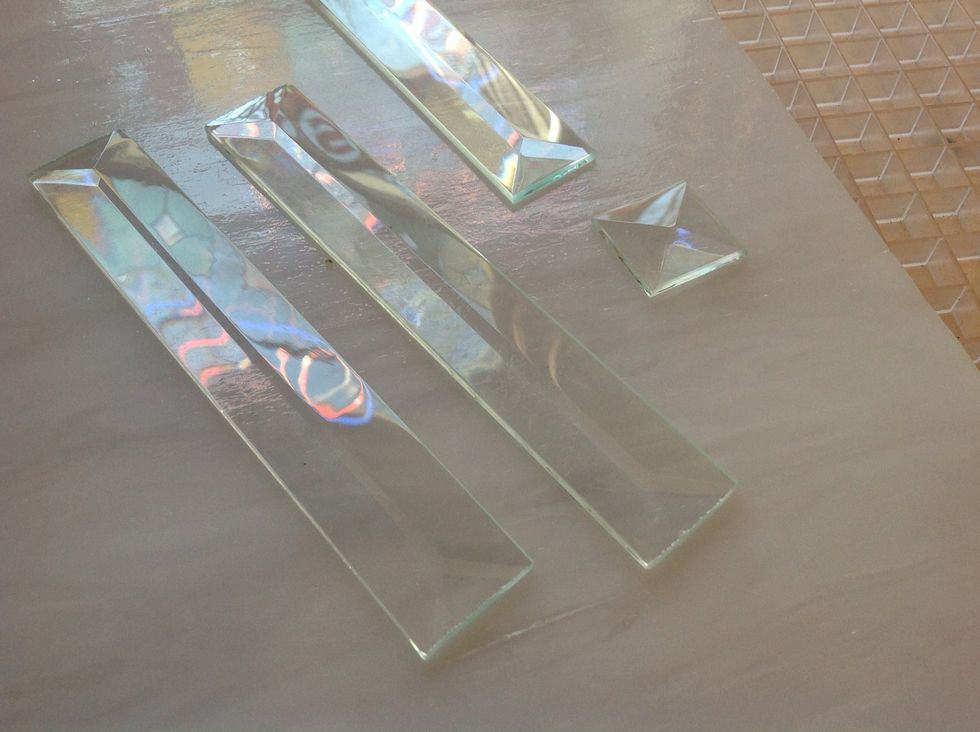
We chose to add a beveled edge to our design.

Foil bevels with 3/16 copper foil. It makes for a much nicer finer line. We use a table foiler because its faster, pre crimps the foil and keeps the foil perfectly even.
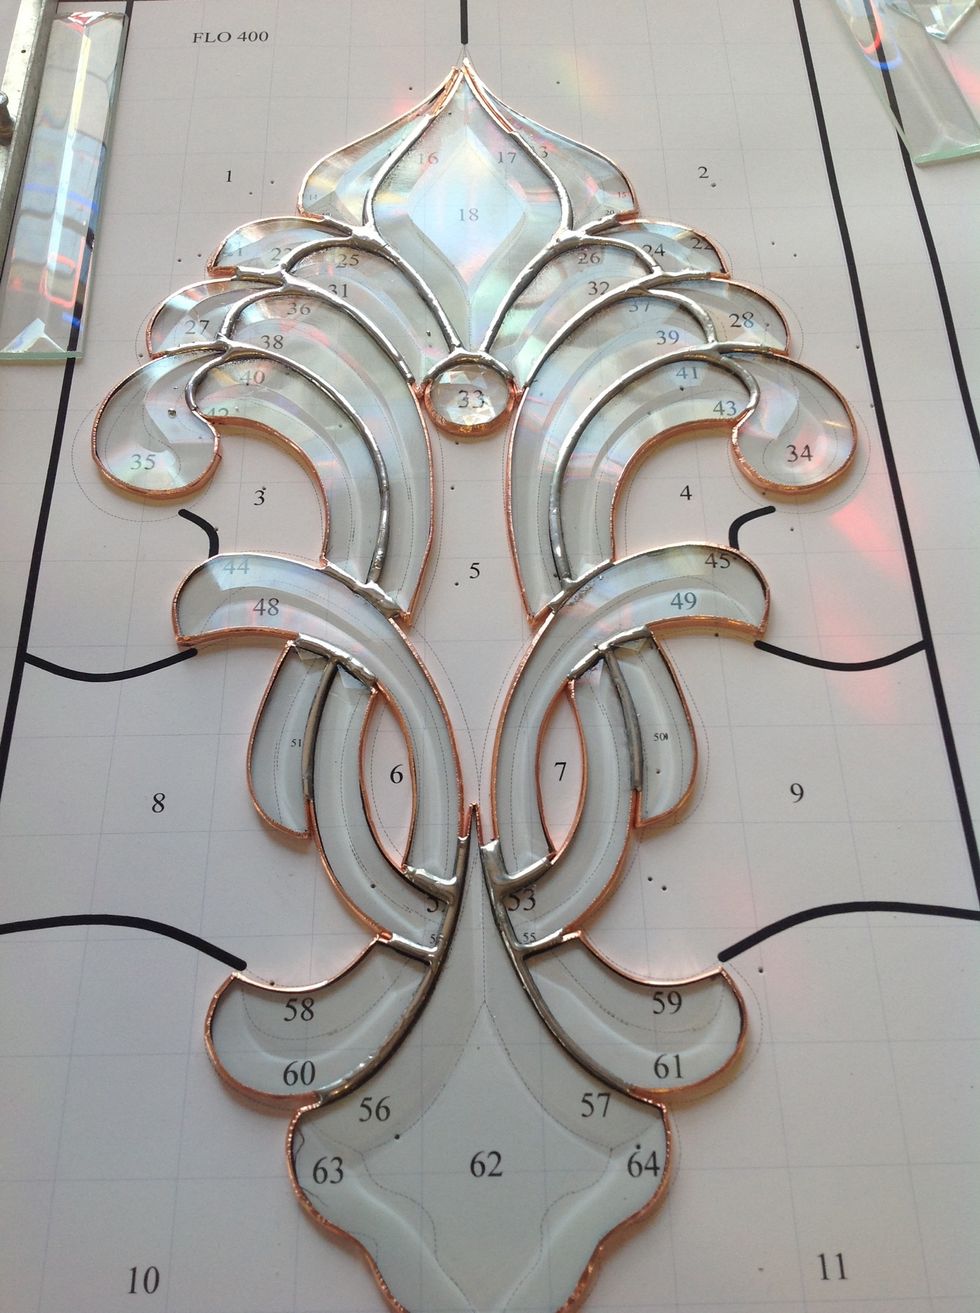
Foil and solder the bevel cluster together but be sure and leave edges clean of solder and flux. (For a comprehensive guide to soldering see our Complete Guide To Soldering).
Lay a full sheet of glass in place up against the border bevels and mark or measure where to cut. (For comprehensive instruction on cutting glass see our Beginner Guide to Cutting Glass.)

You can measure where you need to cut the glass but marking with a Sharpie pen is easier and equally accurate for this purpose.

Strip glass to marked or measured line. (Professionally we use the Cutter's Mate Strip Pro Cutter for anything under 24" and a monorail system for everything over 24")
The glass should now fit the given area inside the bevel border.
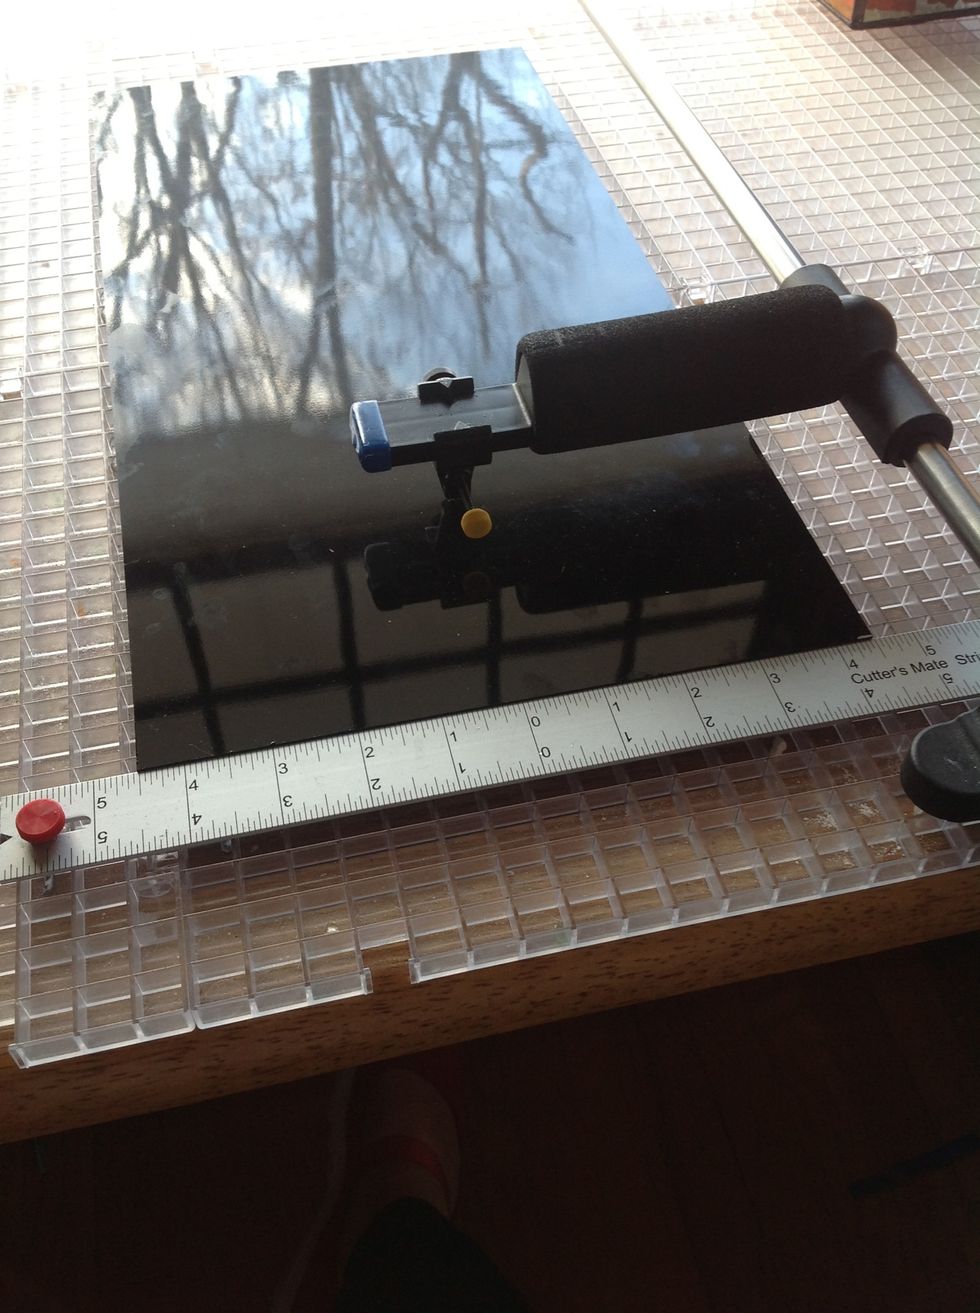
Now score the glass down the center and break into two halves.
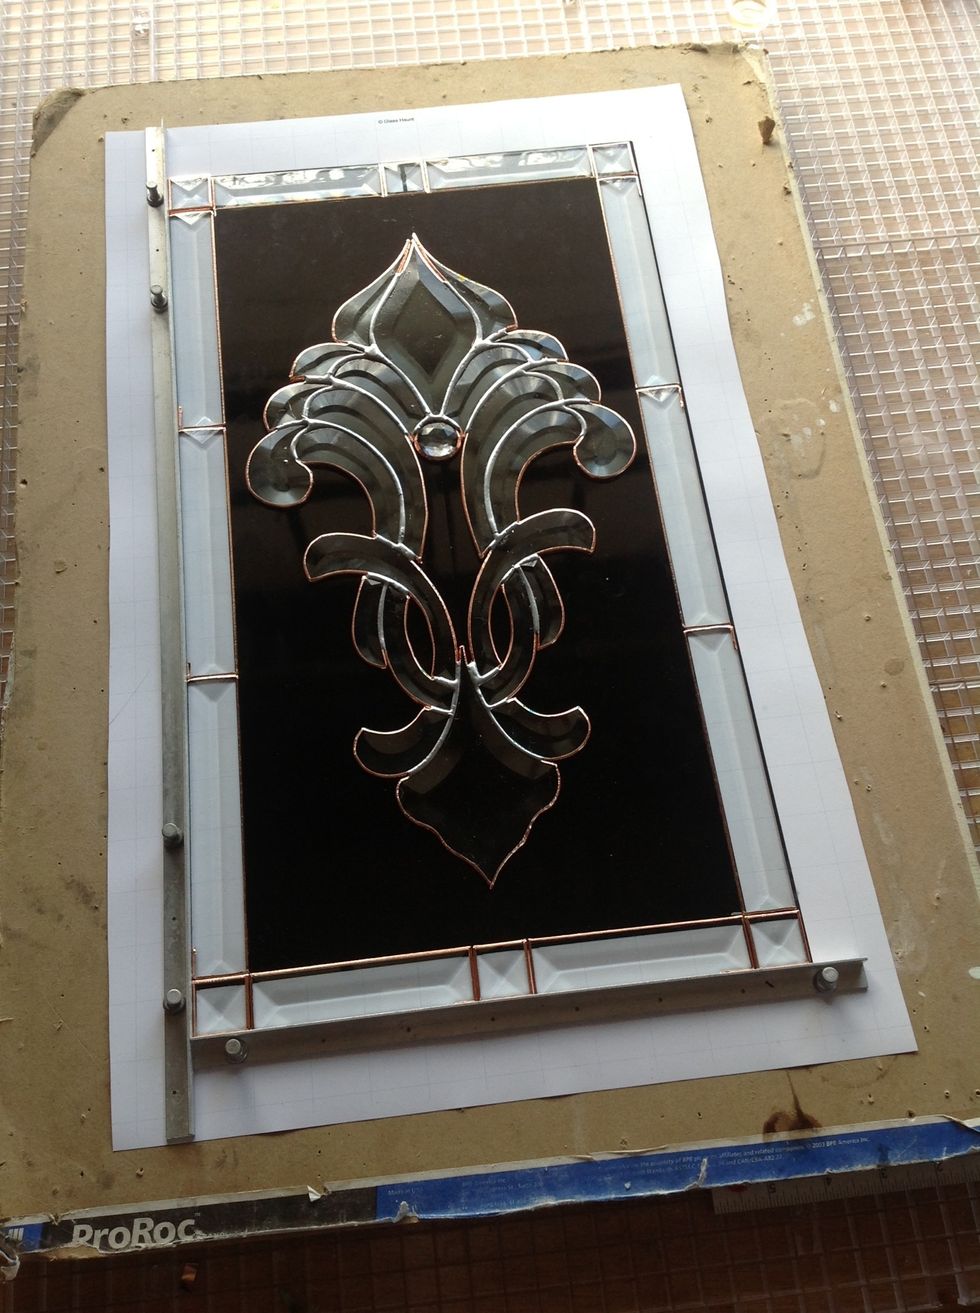
Place pre soldered bevel cluster on the glass using top and bottom points of bevels to center it on your score line.
Draw around bevel cluster with a Sharpie pen. We dislike glass marking pens because they flood. Add extra break lines to edges as necessary to make the cuts.
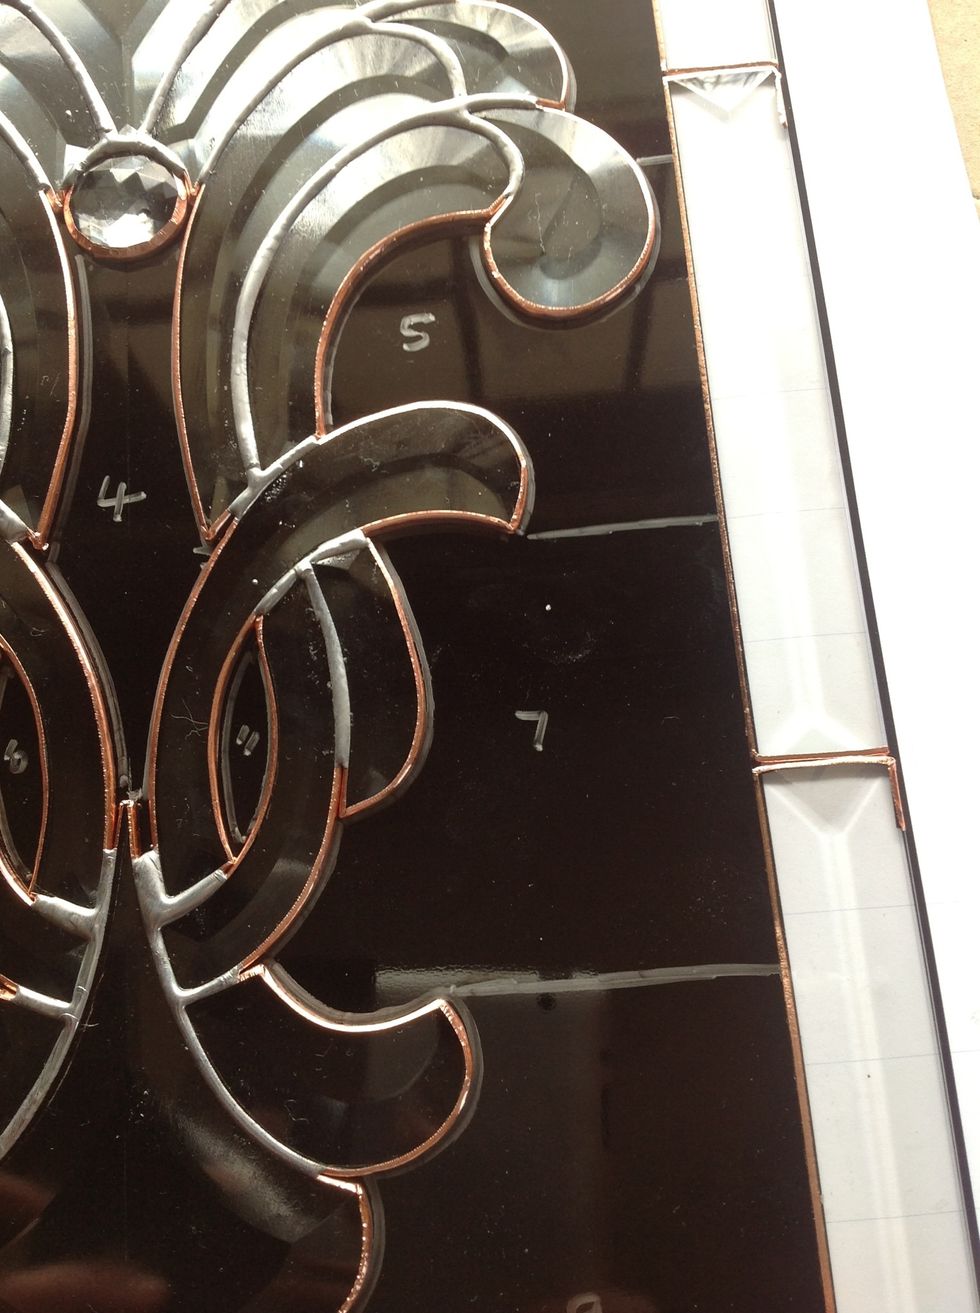
It is not necessary to mark break lines all the way across because we are simply going to strip across those lines. However it is handy to number your pieces.
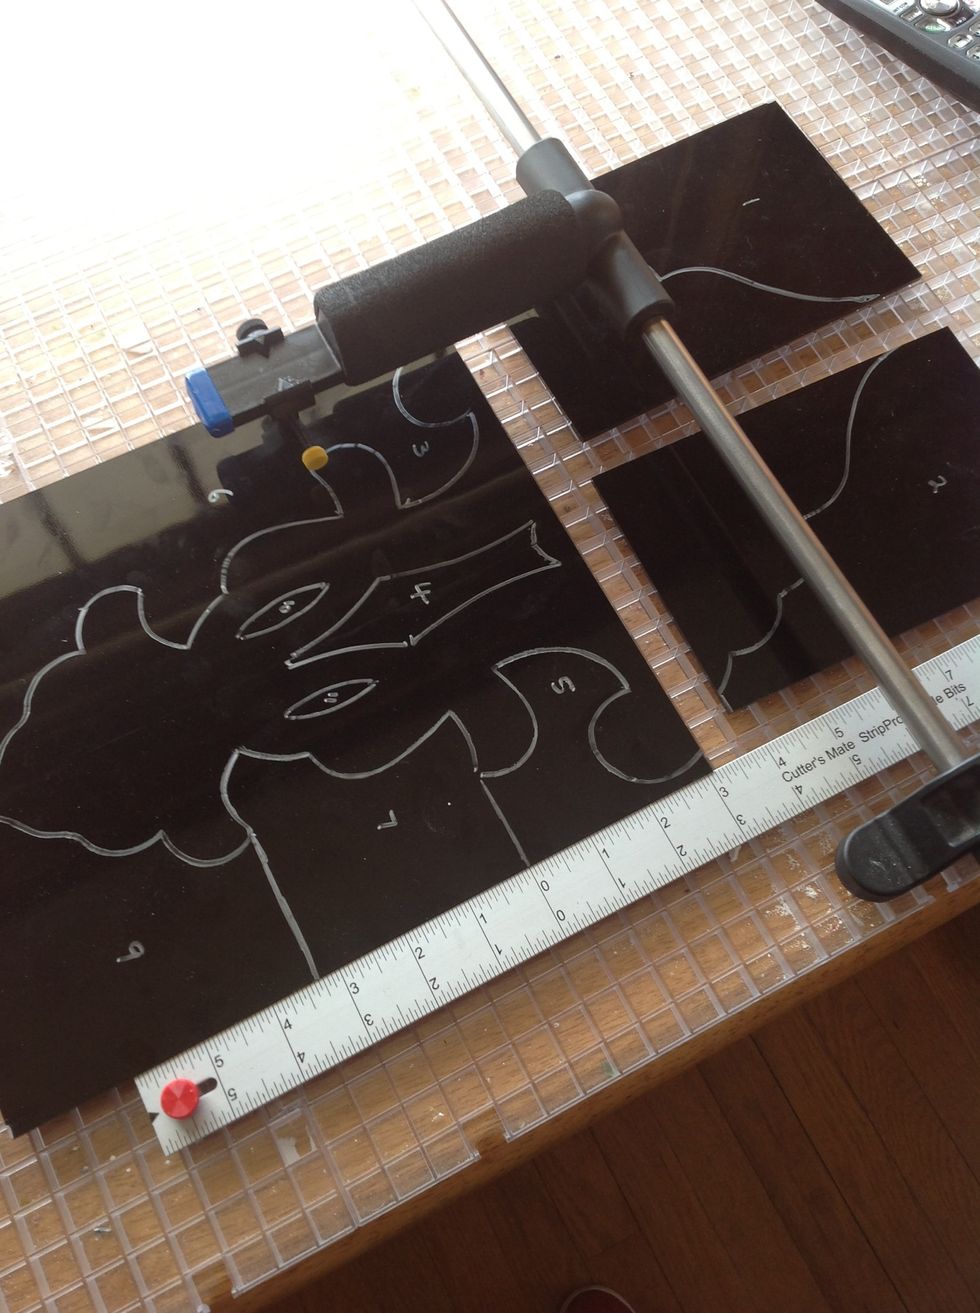
Strip across break lines to separate pieces ready to make the finer cuts.
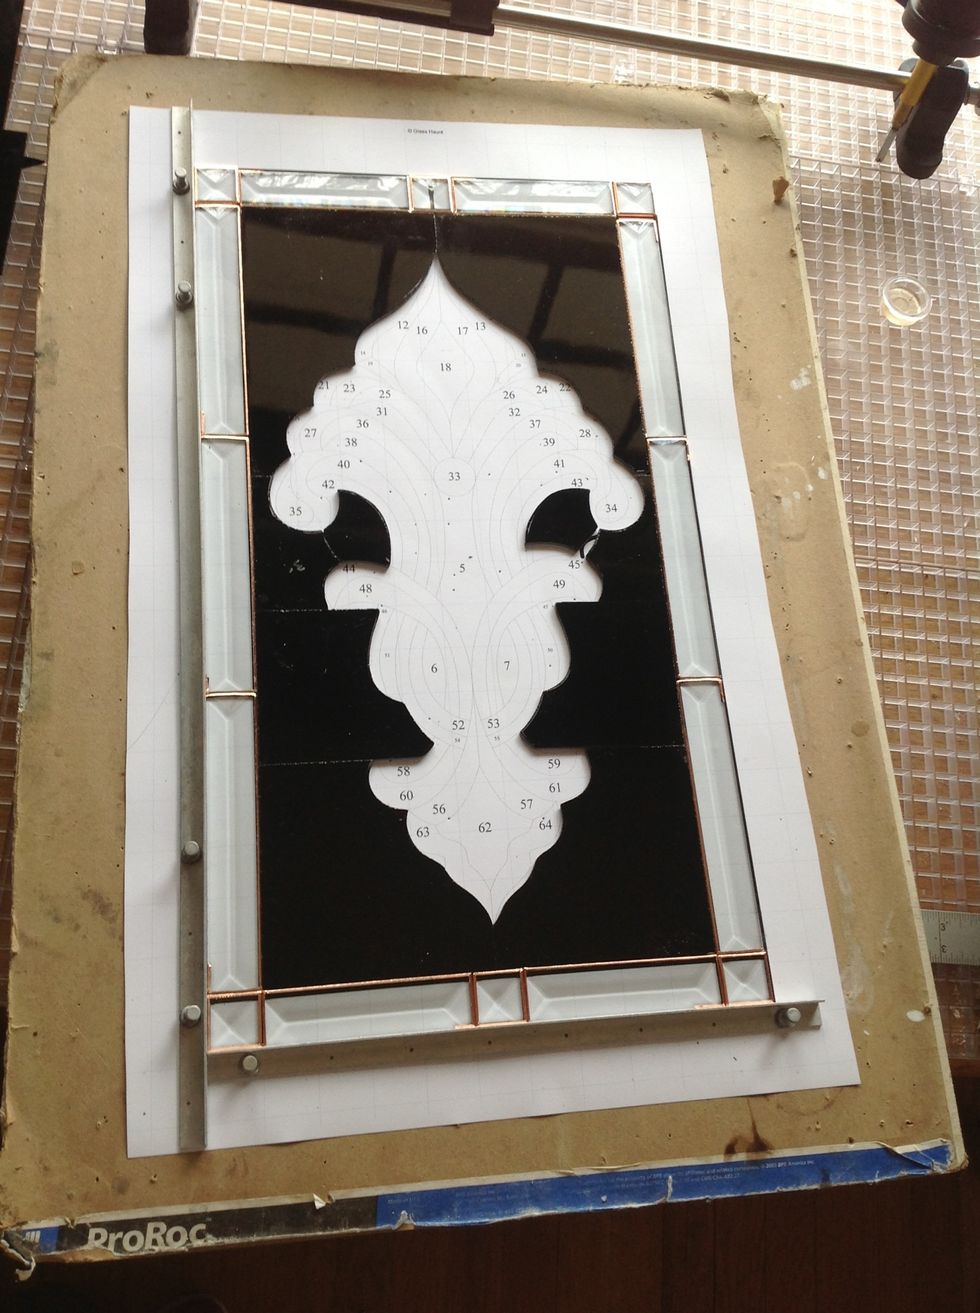
Cut pieces, grind if necessary and lay back on pattern.
Lay bevel cluster in the void to check for fit. Grind as necessary.

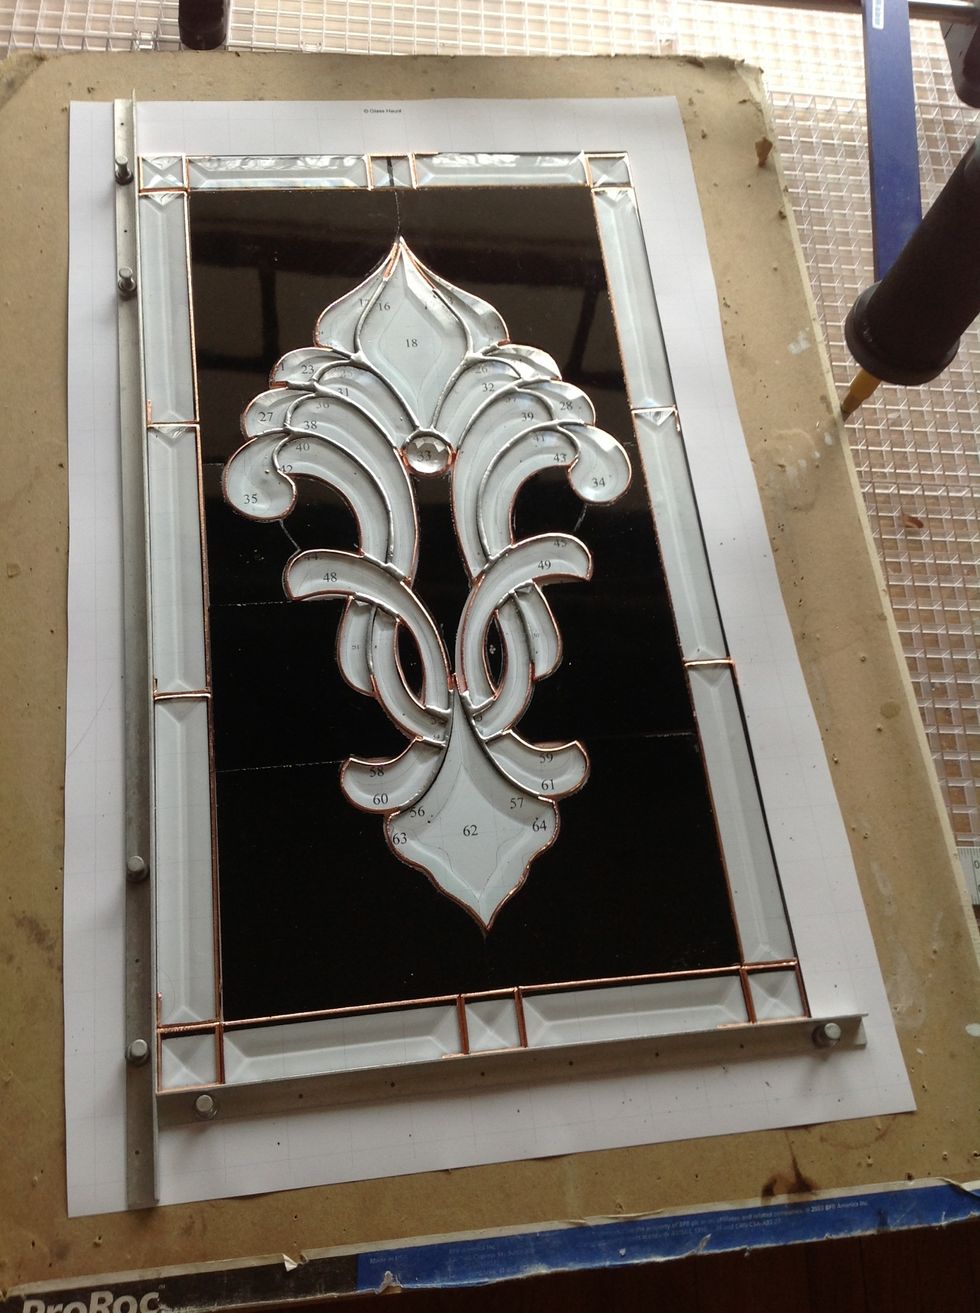
Foil background glass with 7/32 copper foil. Never opt for cheap foil. Use a decent brand.
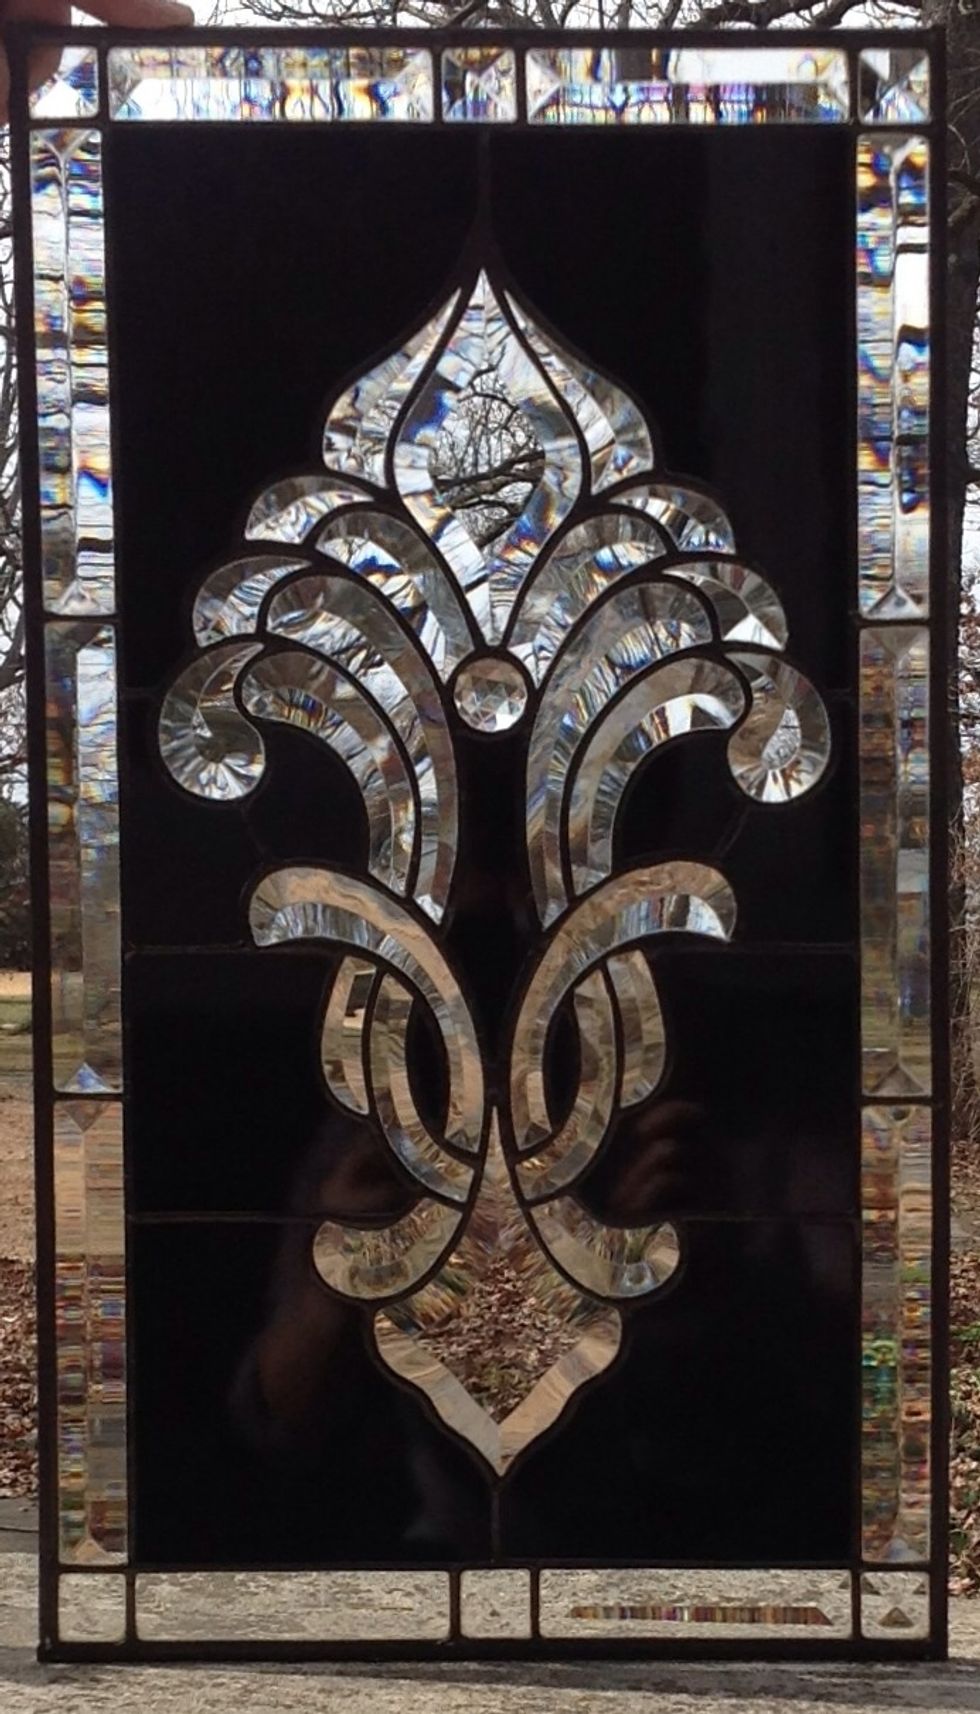
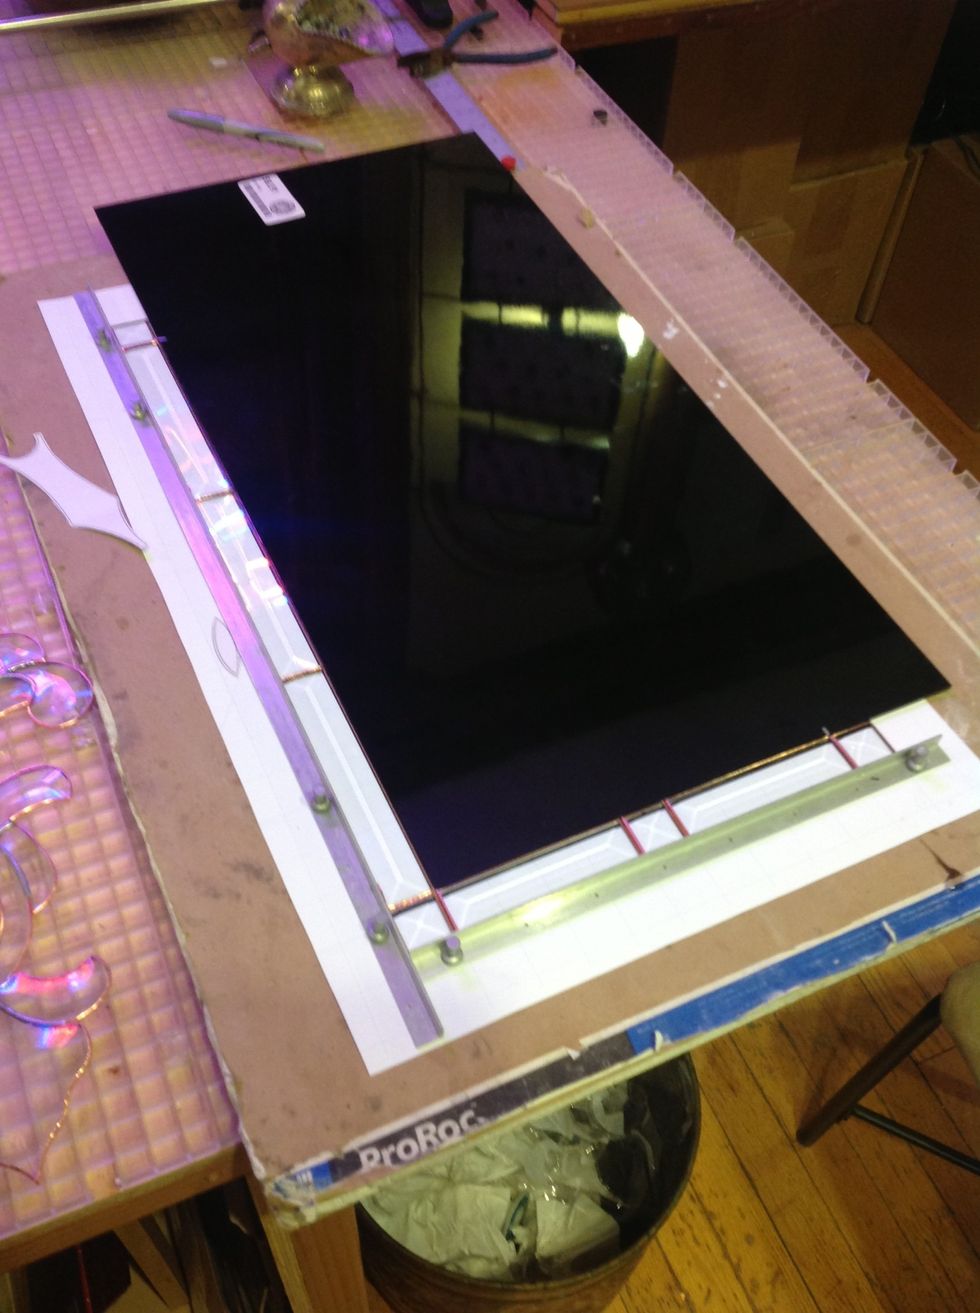
Solder, clean and patina the panel.

Adding a finishing compound will really makes things sparkle.
See our other guides for both beginner and advanced stained glass techniques. Learn to do stained glass the professional way with the Glass Haunt. www.glasshaunt.com