The Conversation (0)
Sign Up
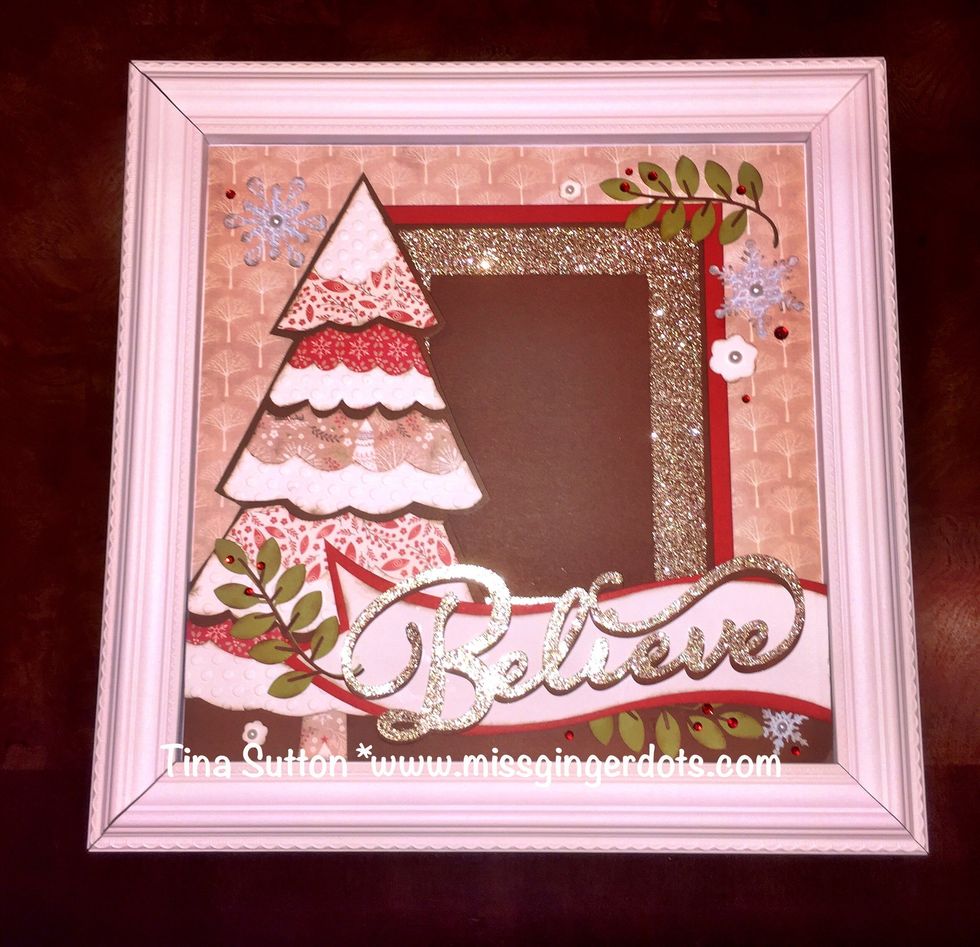
Here is another look at the project.
Cut the photo mat pieces-Cranberry- 7 1/4" x 9 1/4". Chocolate- 6 1/2" x 8 1/2". Gold - 6 1/4" x 8 1/4" Cut a section out of middle creating a 1 inch frame.
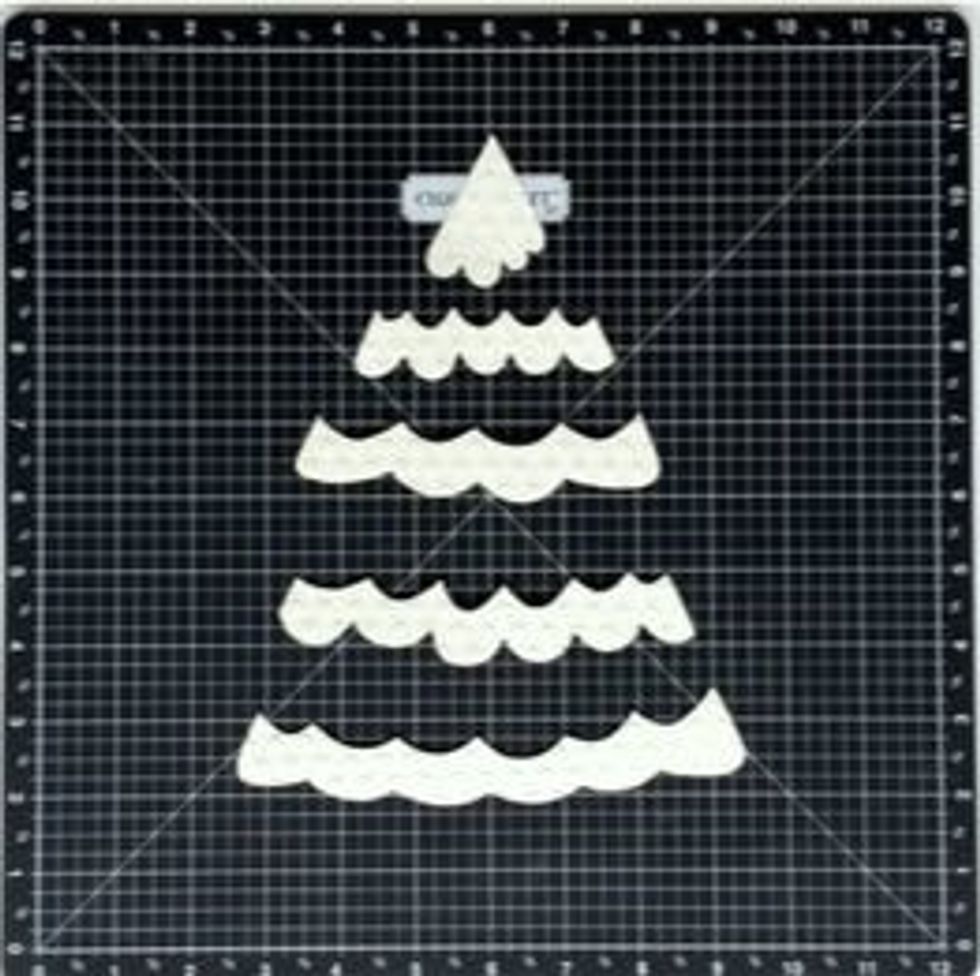
Sizes to Cut Shapes- Art Philosophy- Christmas Tree - p. 52, (Oval 4, Shift)Choose 3 B&T Papers and cut 1 tree out of each paper, make sure papers are going the right direction. Size 10 1/2”.
• Flowers - p. 57, (Shape 9, Shift) Colonial White Cardstock. Cut at 1/2” (qty. 2), 3/4” (qty. 1), 1” (qty. 1). • Leaves - p. 43, (Square 3, Shift) Fern Cardstock. Cut at 2 1/2” (qty. 3).
• Stems - p. 43, (Layer, Shift) Chocolate Cardstock. Cut at 2 1/2” (qty. 3).
Artiste Cartridge- • Banner - p. 58, (Accent 3, Shift) Colonial White Cardstock. Cut at 3”.
• (Icon) (Real Dial Size) Cut one at 1 1/4” and one at 3”. • (Icon, Shift) (Real Dial Size) Cut one at 2”. • (Boarder, Shift ) (Real Dial Size) Cut one at 2”.
Artbooking Cartridge• “Believe” - p. 74, (Title, Shift) (Real Dial Size) Cut one Chocolate Cardstock and one Gold Glitter Paper. Cut at 3”. • Snowflakes - p. 76, Glacier B&T Paper.
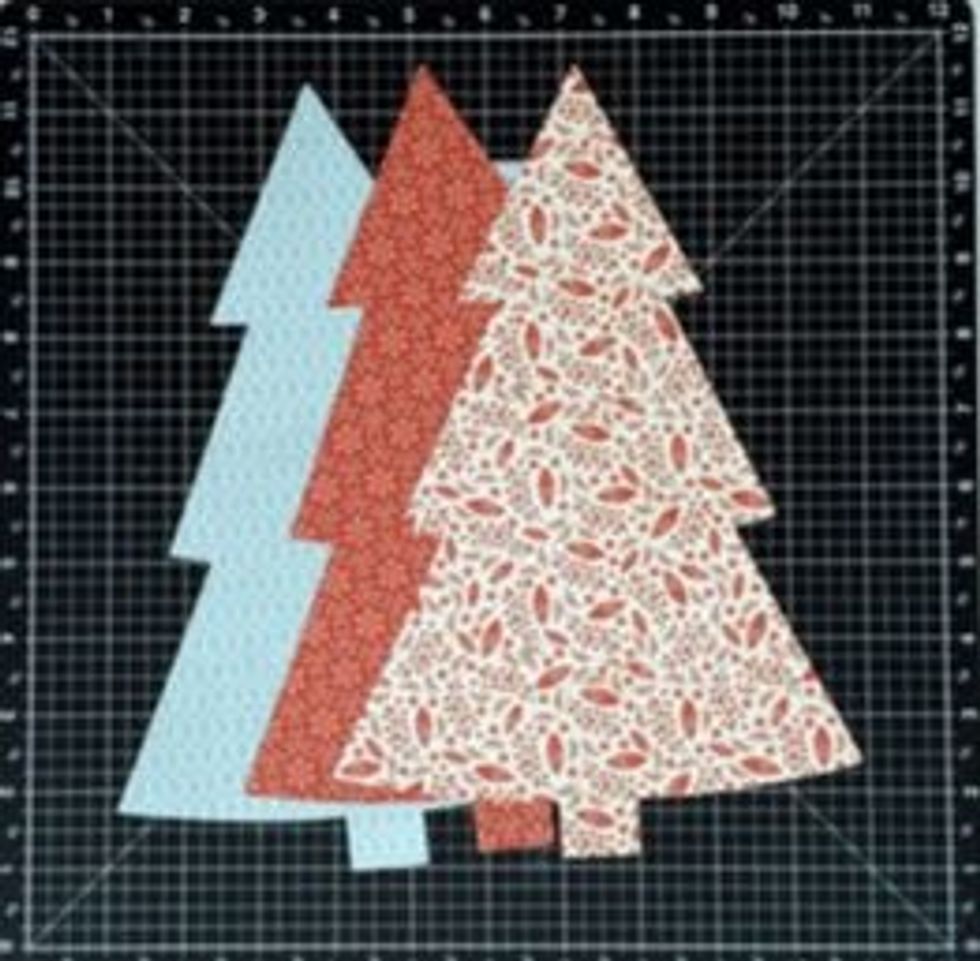
Cut all 3 tree trees into sections at the same time. It will make it easier to piece the trees back together because the cuts will all line up the same between the sections. You can mix and match.
Use the pattern provided to cut apart the tree if you want to use scallops!
You can cut the tree sections straight or scalloped. The scallops do not need to be evenly spaced out. It is supposed to be whimsical. You can use the pattern to trace the tree sections if you wish!
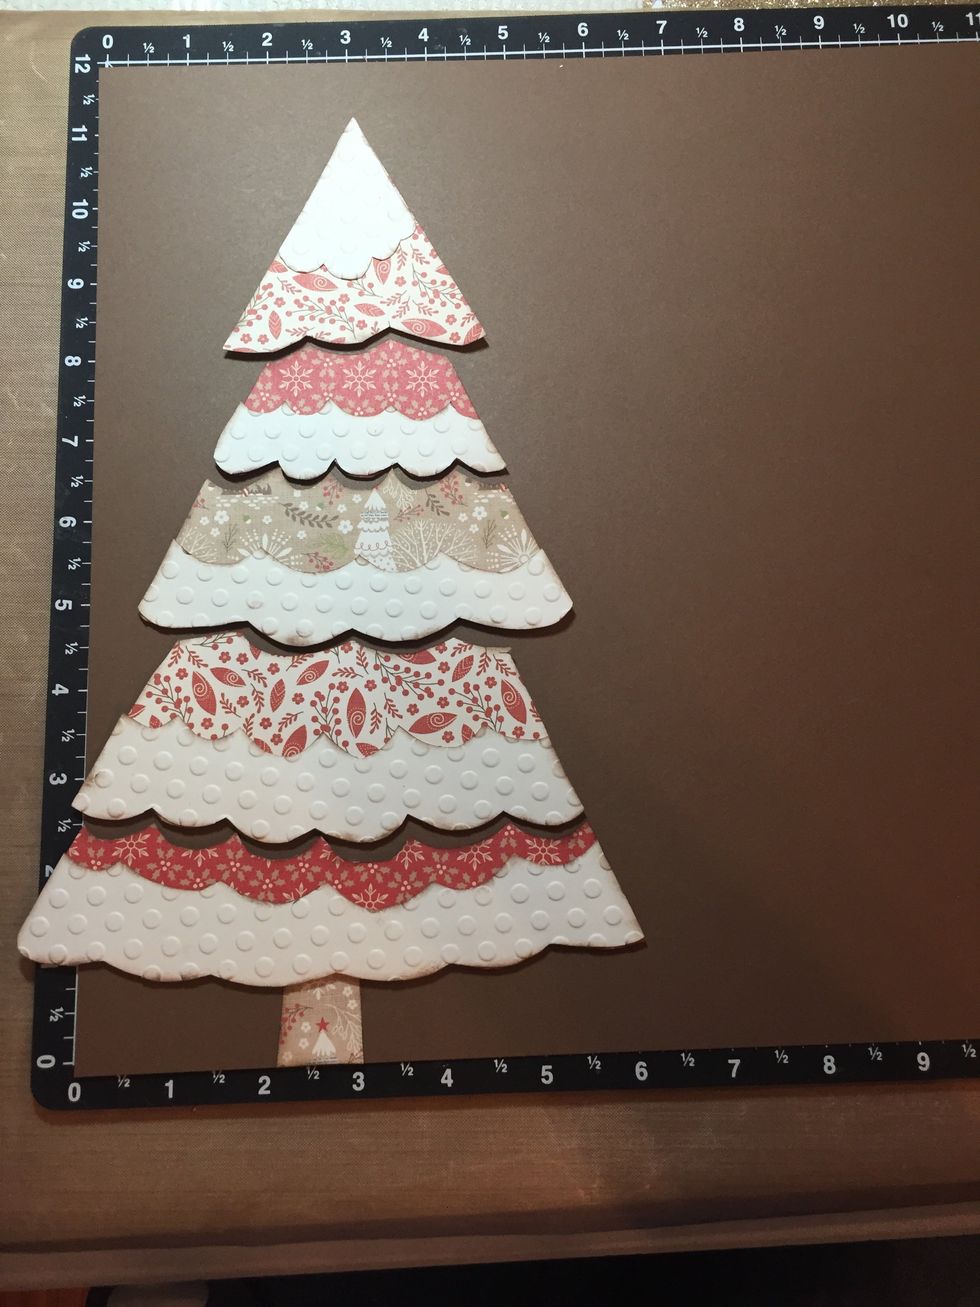
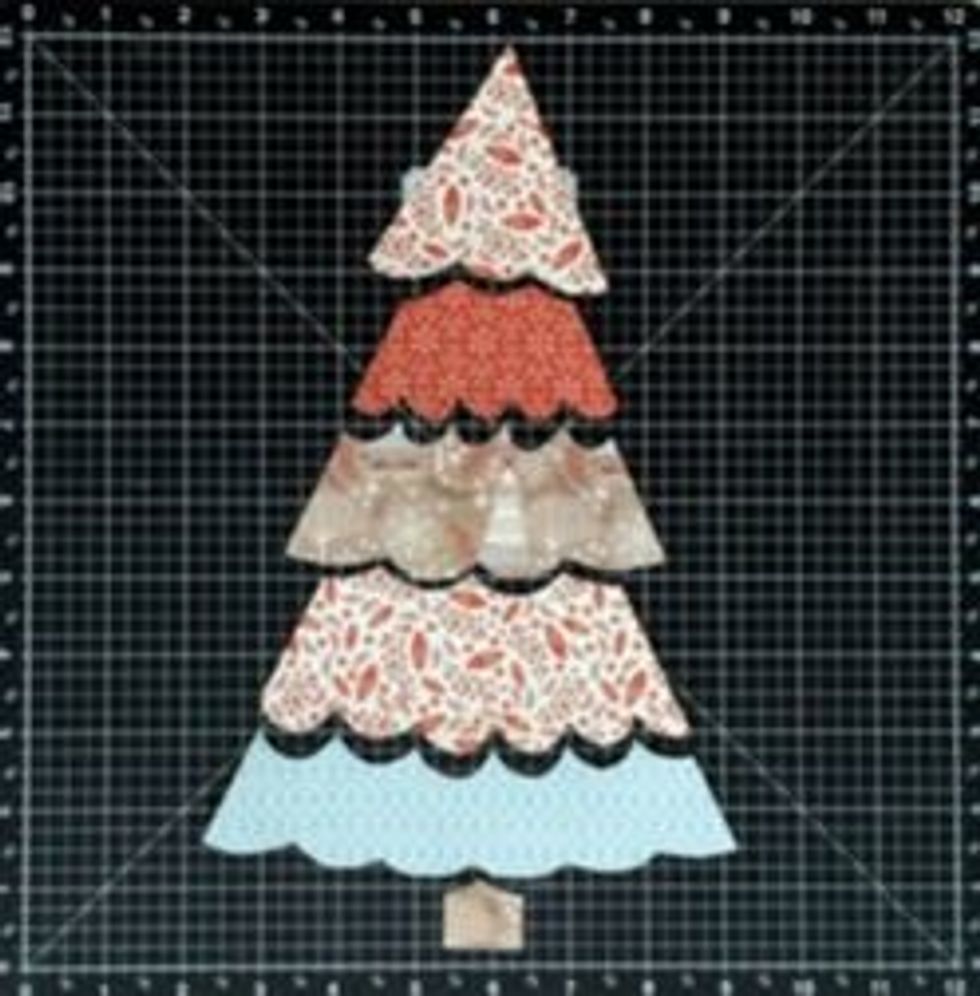
Glue the snow pieces onto each of the Christmas tree sections. Set the Christmas Tree on a 12 x 12 Chocolate Cardstock to get spacing before you attach to base. Leave 1/8" spacing.
Cut the snow sections out of Colonial White Paper using the template. Use the Dot Embossing folder to create texture on these pieces to make them pop. Ink distress.
Once the pieces are arranged, attach pieces to the cardstock with thin 3'd foam tape. The bottom section of the Christmas tree will go to the left side. Trim to make flush.
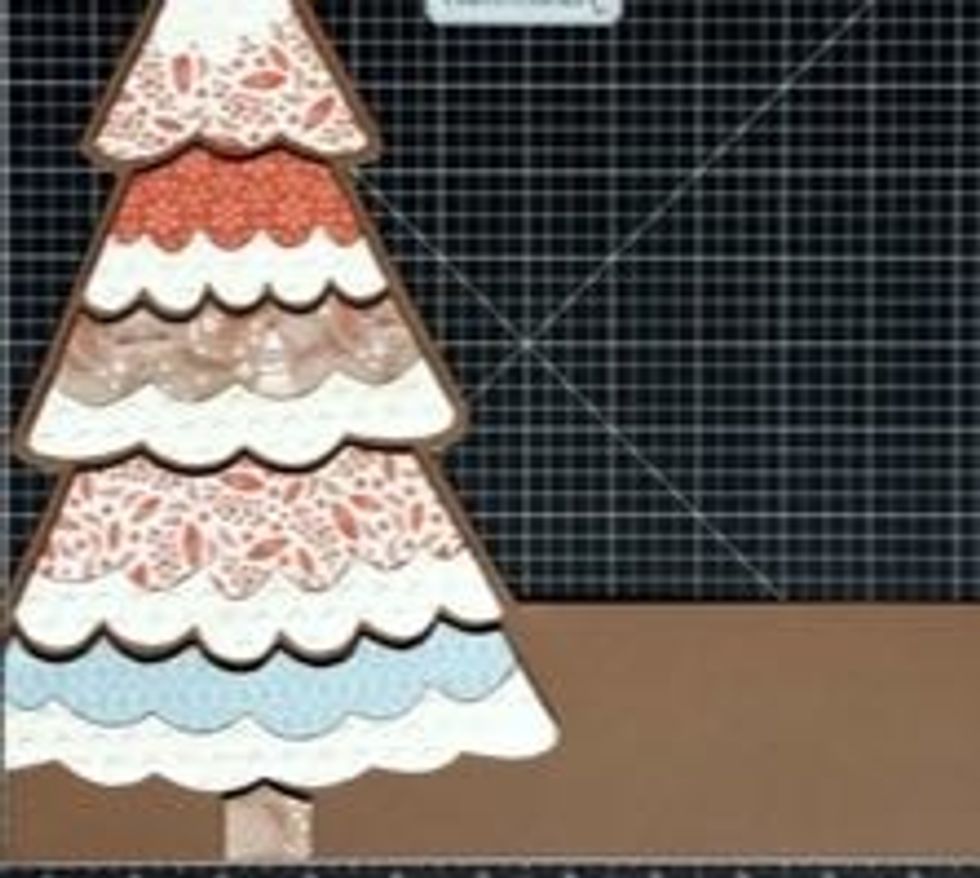
Cut the chocolate cardstock leaving about an 1/8 " border around the tree AND leaving a 3" strip all the way across the bottom of the chocolate cardstock. (see photo)
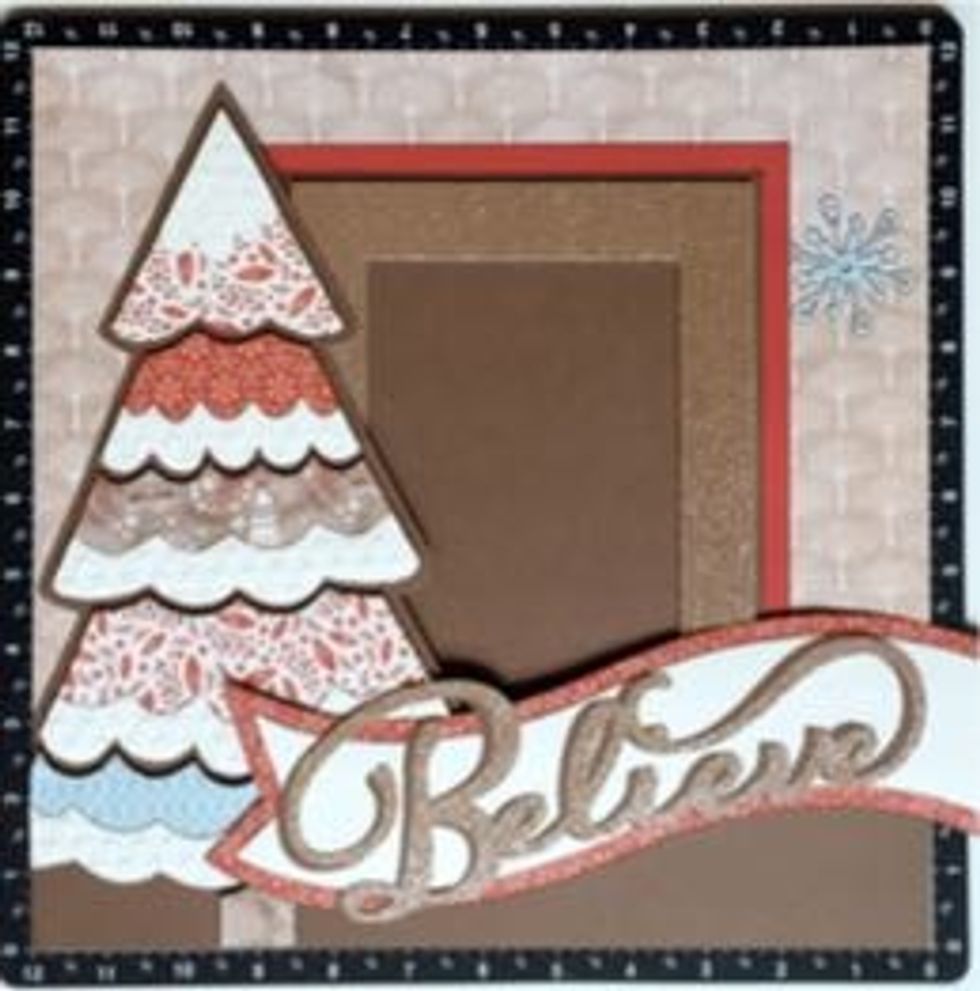
Assemble Banner- Glue the Colonial White Banner onto a 4 x 12 piece of Cranberry B&T Paper. Cut around the banner leaving 1/4 inch around all sides.
Layer the Gold glitter Believe and the Chocolate Cardstock Believe so that they are offset and the chocolate cardstock makes a sort of shadow. Glue piece together. Attach to banner.
Center the Chocolate Cardstock on the Cranberry and glue flat. Attach the Gold Glitter Paper frame with Thin 3-D Foam Tape, so that it is centered on the Chocolate Cardstock.
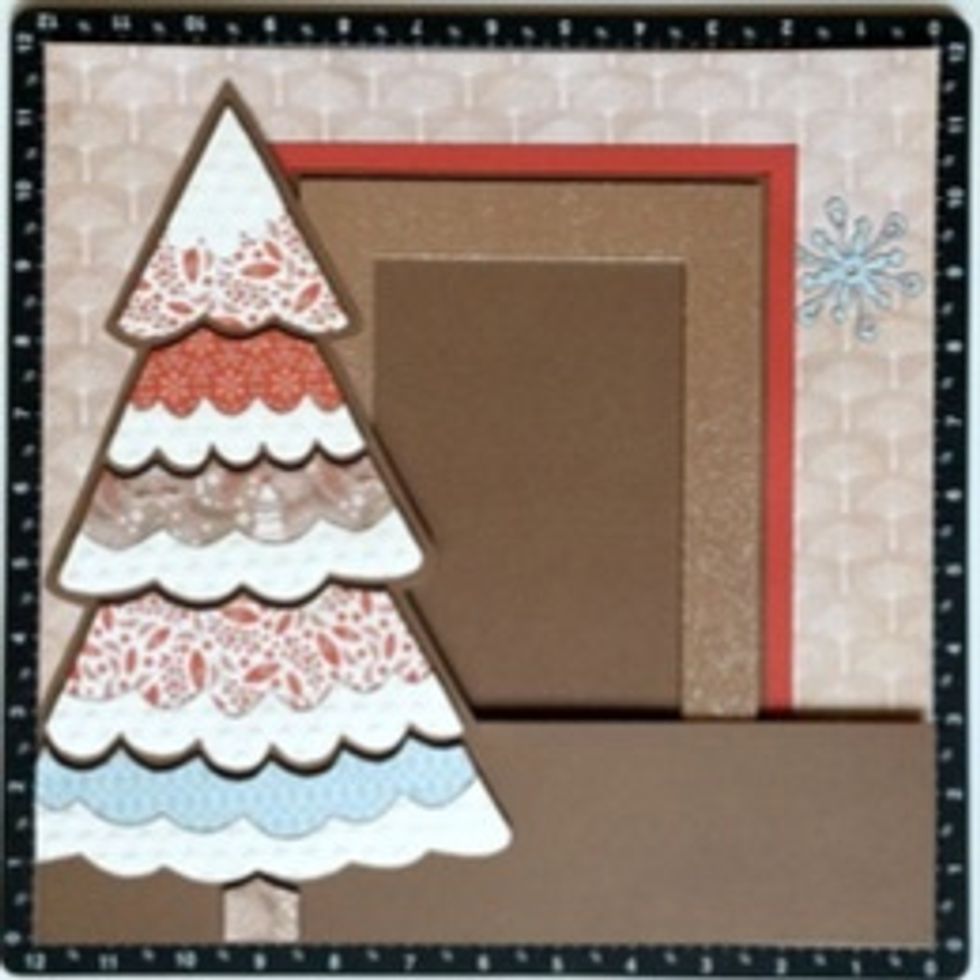
Add the Christmas Tree layer with 3-D Foam Tape, leaving the backing on areas that overlap where they photo will be placed. This will make it easy to slide the picture behind the different layers.

Attach the banner so that it overlaps the Christmas Tree and runs off the right side of the page. Trim off the extra on the right so that it is flush!
Add the additional Cricut die-cuts (branches of leaves, snowflakes, & flowers). Glue the Chocolate Cardstock stem die-cuts on top of the Fern Cardstock leaf die-cuts before adding to the project base.
• Elements can be glued flat or popped with 3-D Foam Tape to add depth to the project. • Add Red Enamel Gems as desired.