The Conversation (0)
Sign Up
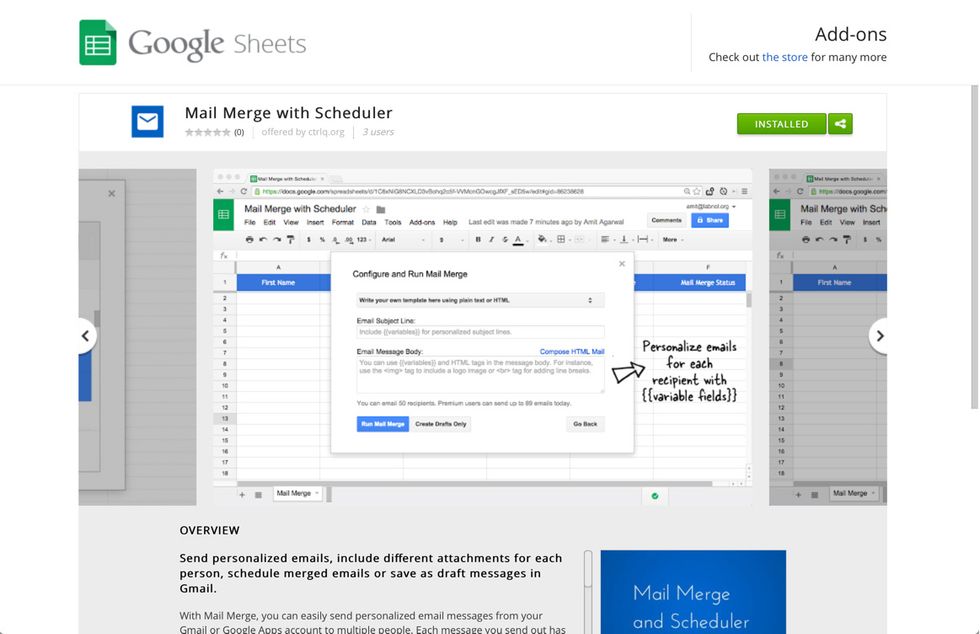
Go to https://goo.gl/AnQhdK and install the Mail Merge add-on for Google Docs.
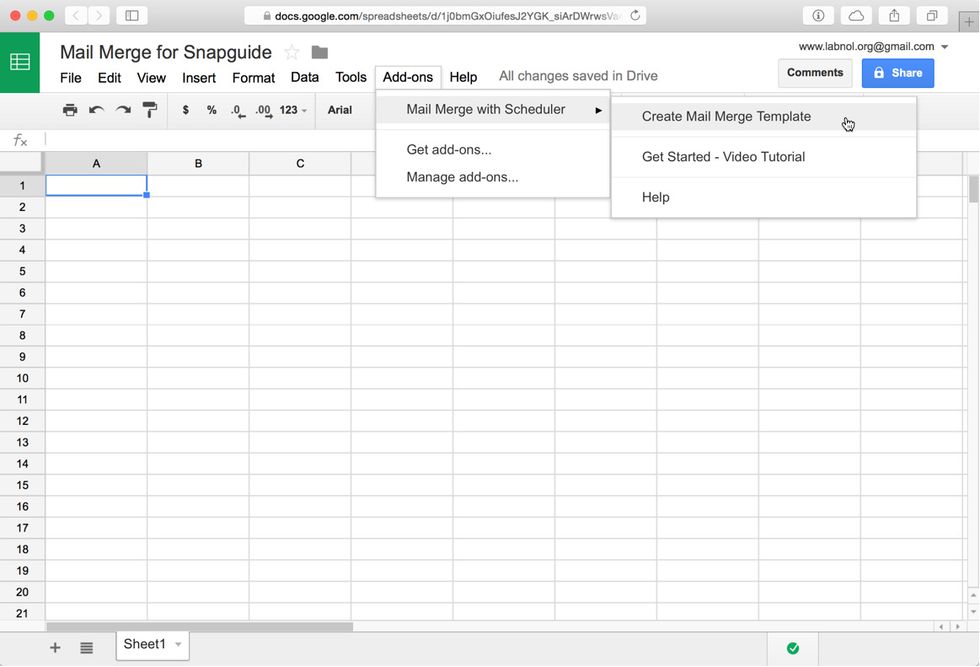
From the Add-ons menu, choose Mail Merge with Scheduler > Create Mail Merge Template.
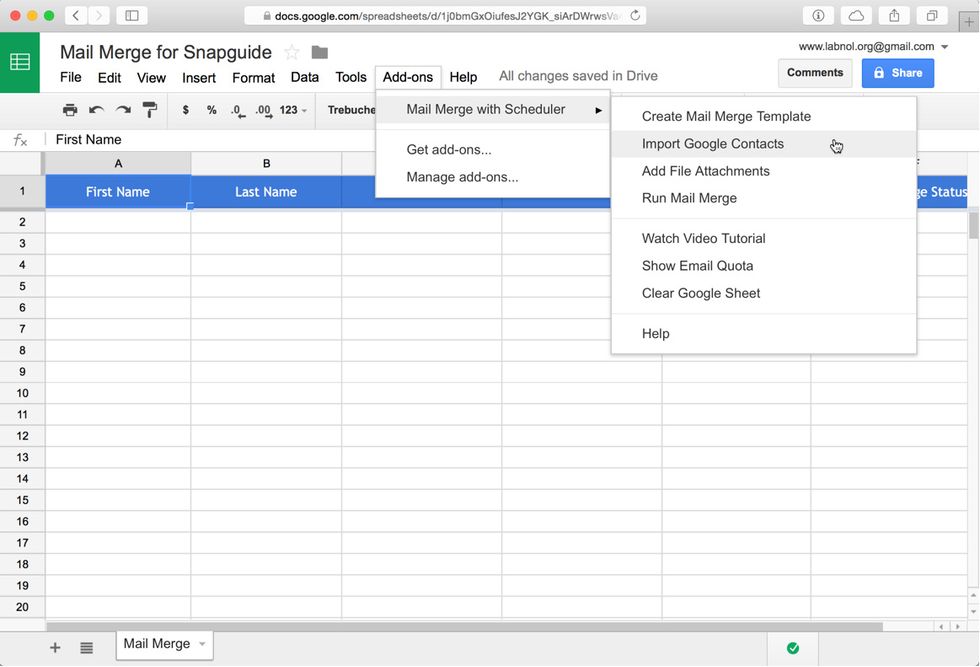
After the Mail Merge template is created, go to the Mail Merge menu again and choose Import Google Contacts.
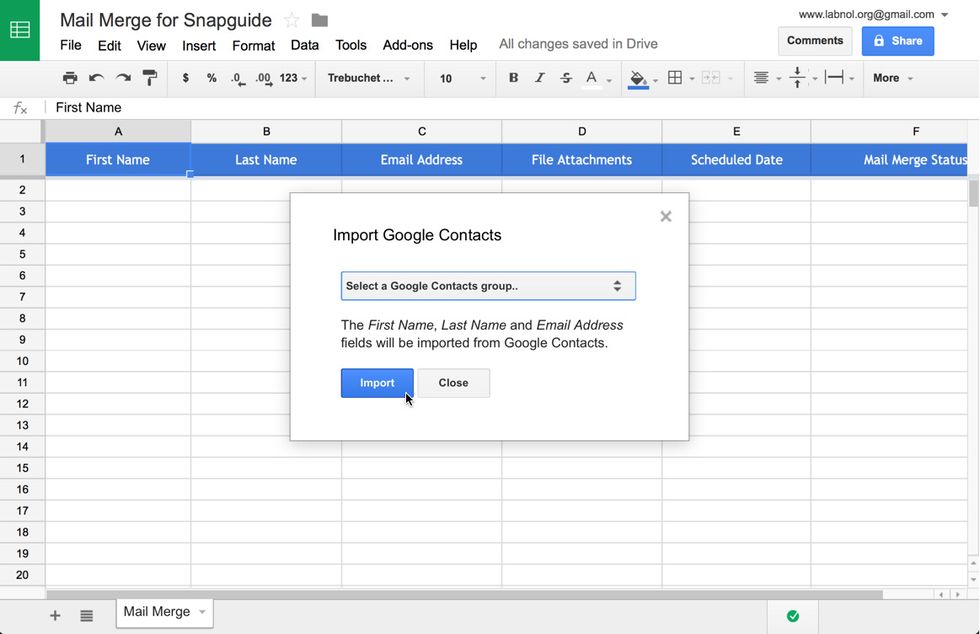
Choose a Google Contacts group from the dropdown to import contacts of that group into your current Mail merge sheet.
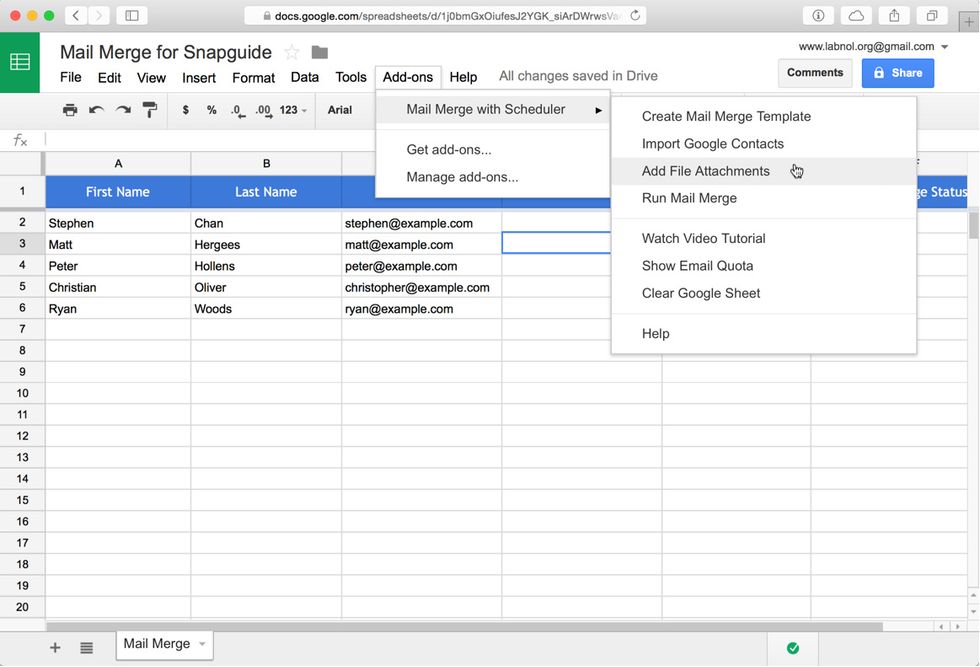
You can attach unique file attachments from Google Drive for each email recipient. Select the File Attachments column of any row and click the Add File Attachments menu.
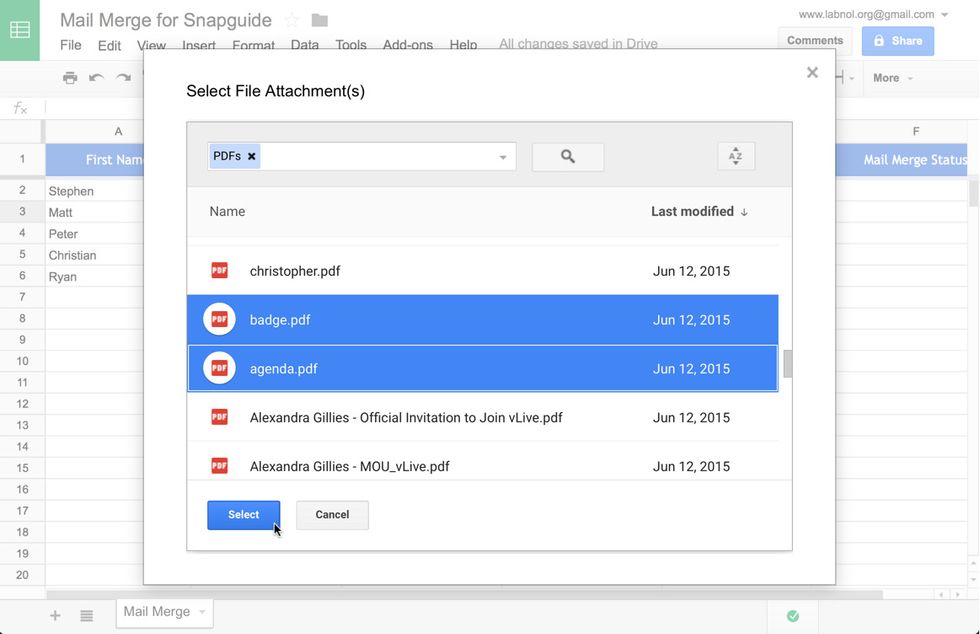
The File picker opens and you can select one or more files from your Google Drive to attach them to your merged emails.
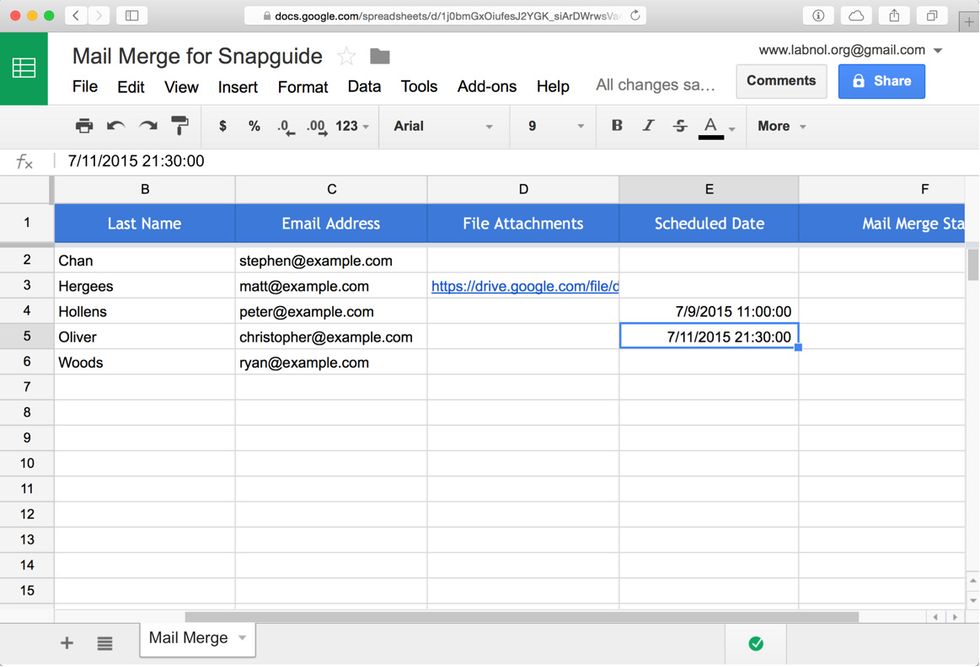
You can send your emails immediately or schedule them for sending later. Put the date and time in the Scheduled Date column and the app will send emails to the corresponding recipient at that time.
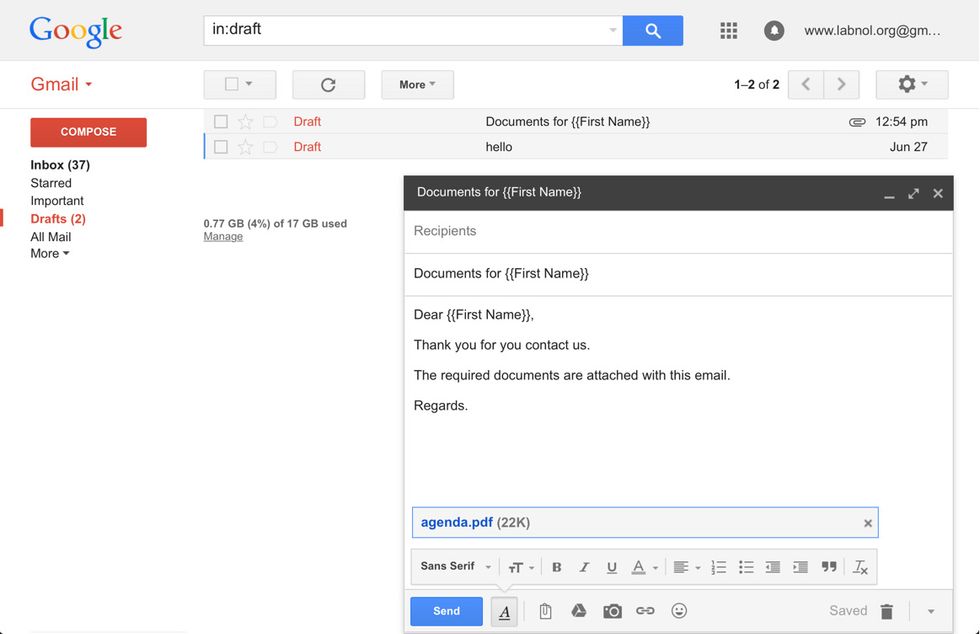
Go to your Gmail and compose a draft. For personalized emails, you an includes fields using the {{column name}} notation and they'll be substituted with the actual column value from the spreadsheet.
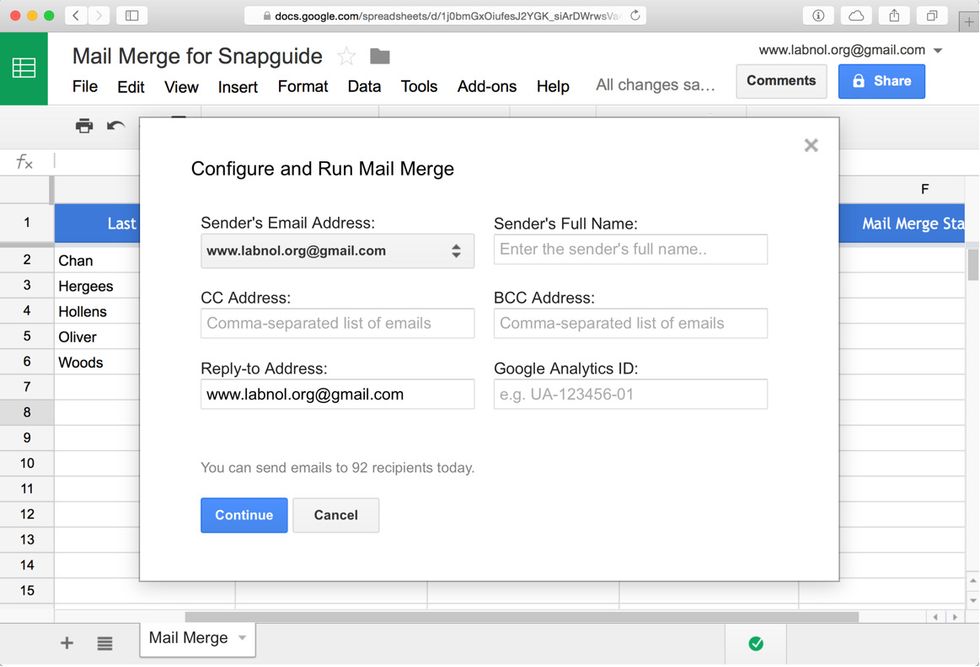
Choose the Run Mail Merge menu to open the wizard. Select the Gmail alias and emails will be sent on behalf of this address. Enter your name while the other fields are optional. Click Continue.
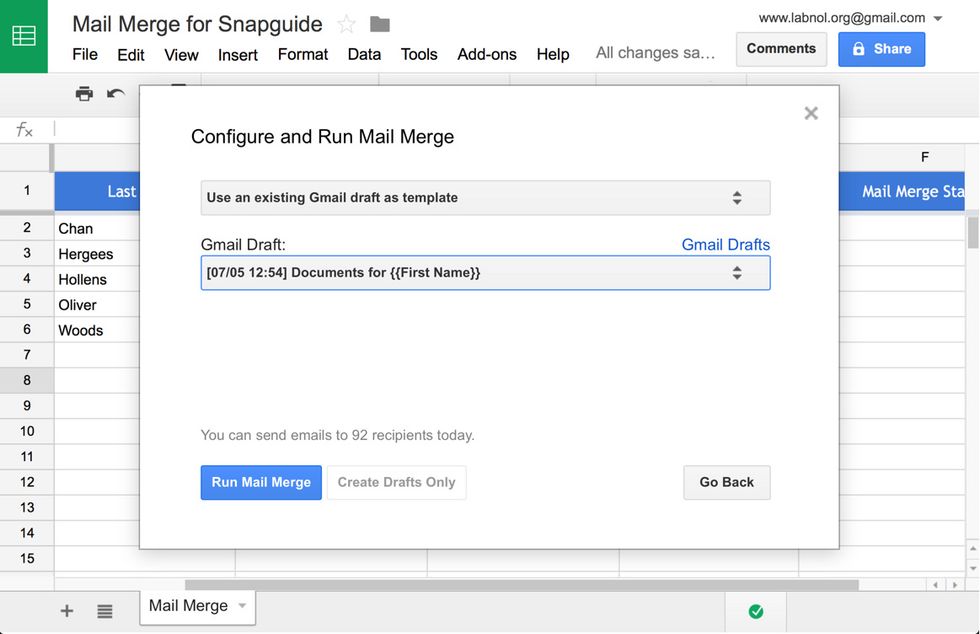
Select Gmail as the template type, choose the Gmail draft you just created and then click the Run Mail merge button to send your emails.
You can get the Mail Merge Add-on from https://goo.gl/AnQhdK (Chrome store). Watch the YouTube video demo at http://youtu.be/F07Py7sraDg to learn more about Mail Merge. For help, email amit@labnol.org