The Conversation (0)
Sign Up
Create necessary accounts. First create a free account on IFTTT, than create a free account on Dropbox.
Prepare your Mac. First install Dropbox on your Mac, and enable automatic sync in Dropbox on your Mac.
If you haven't already, you're going to want to make sure your Screen saver is set to require a password when deactivated.
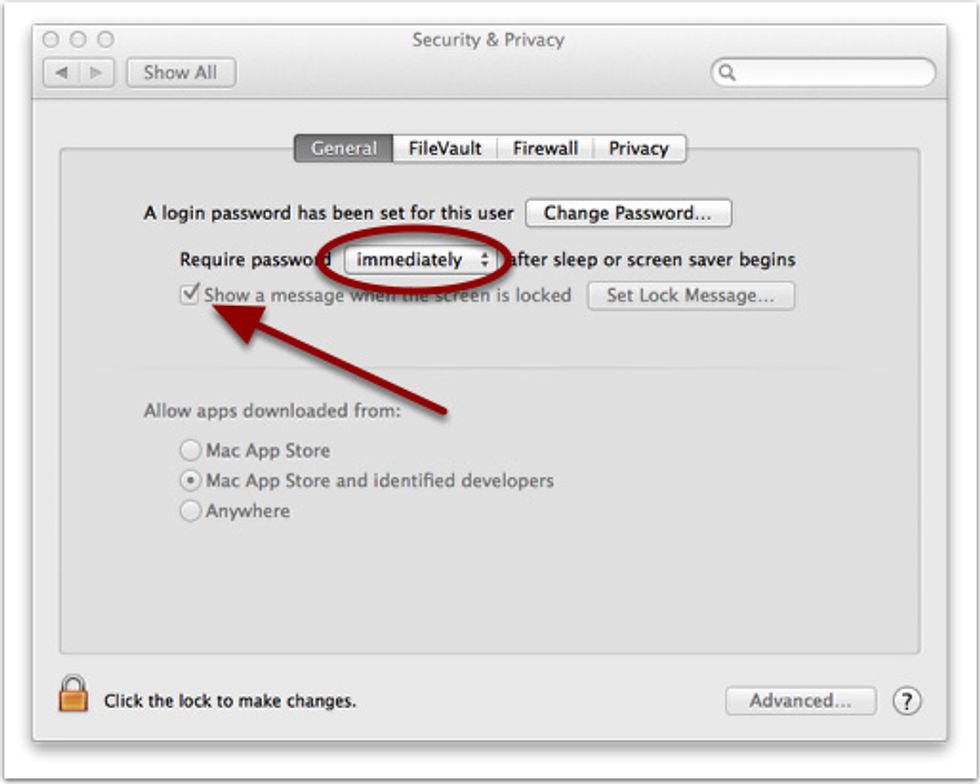
Configure Screen Saver to Require a Password on your Mac.
You find this setting in under the General Tab of the Security & Privacy System Preference. You'll probably also want to set the password to be required immediately after sleep or screen saver.
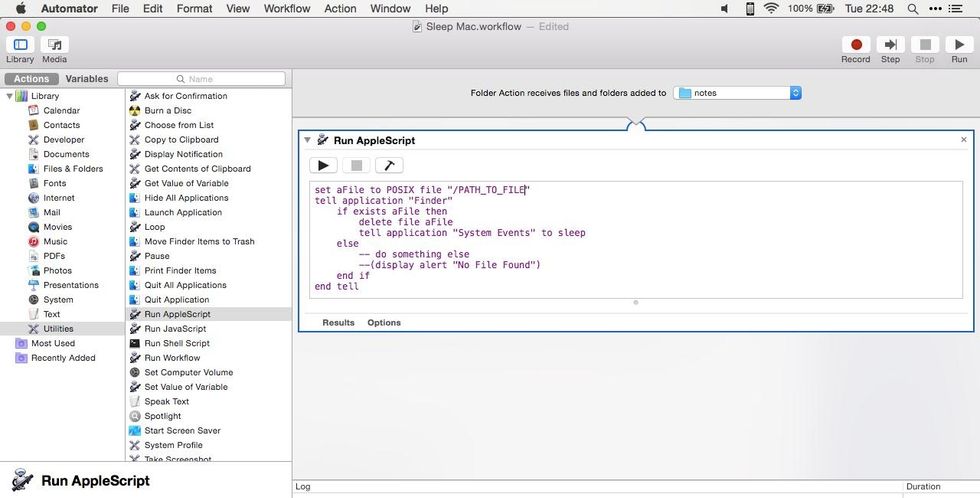
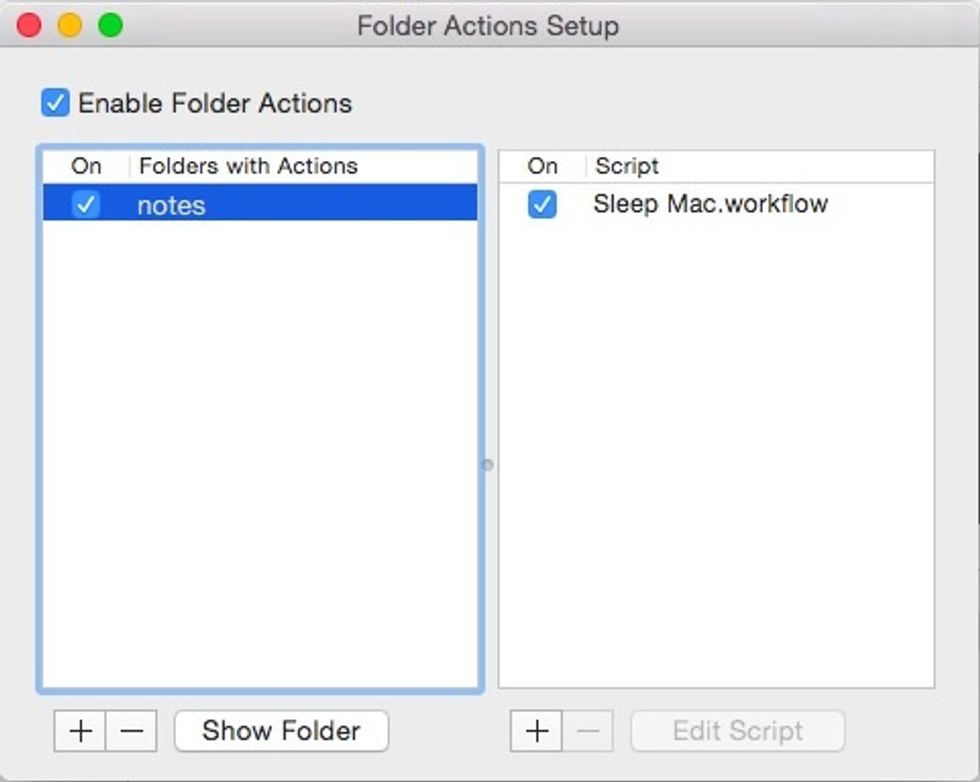
Create a folder action with Automator, using AppleScript.
To begin, launch Automator (located in your Applications folder). When the application launches, select “Folder Action” from the list of available Automator workflow types.
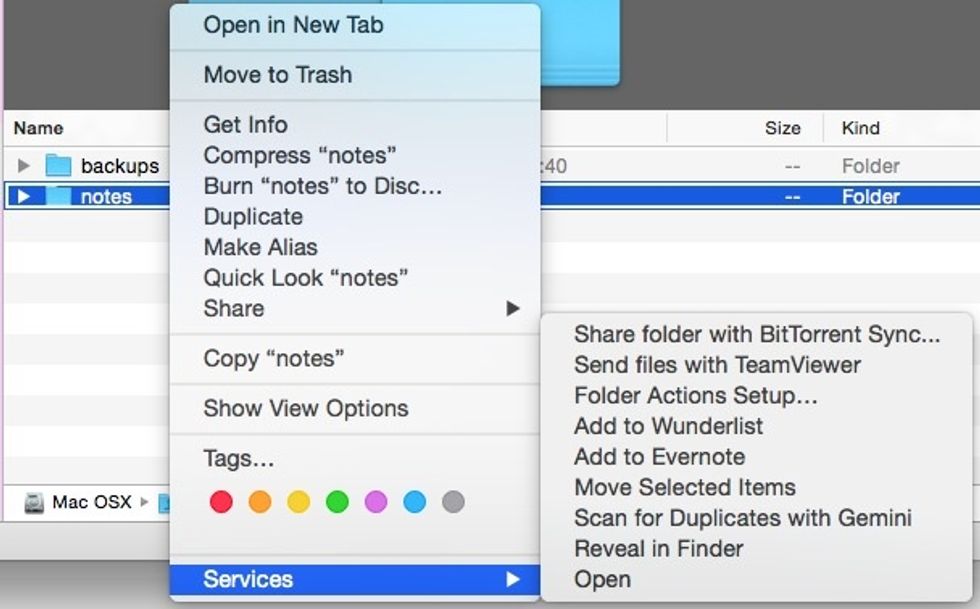
Associate folder action to folder.
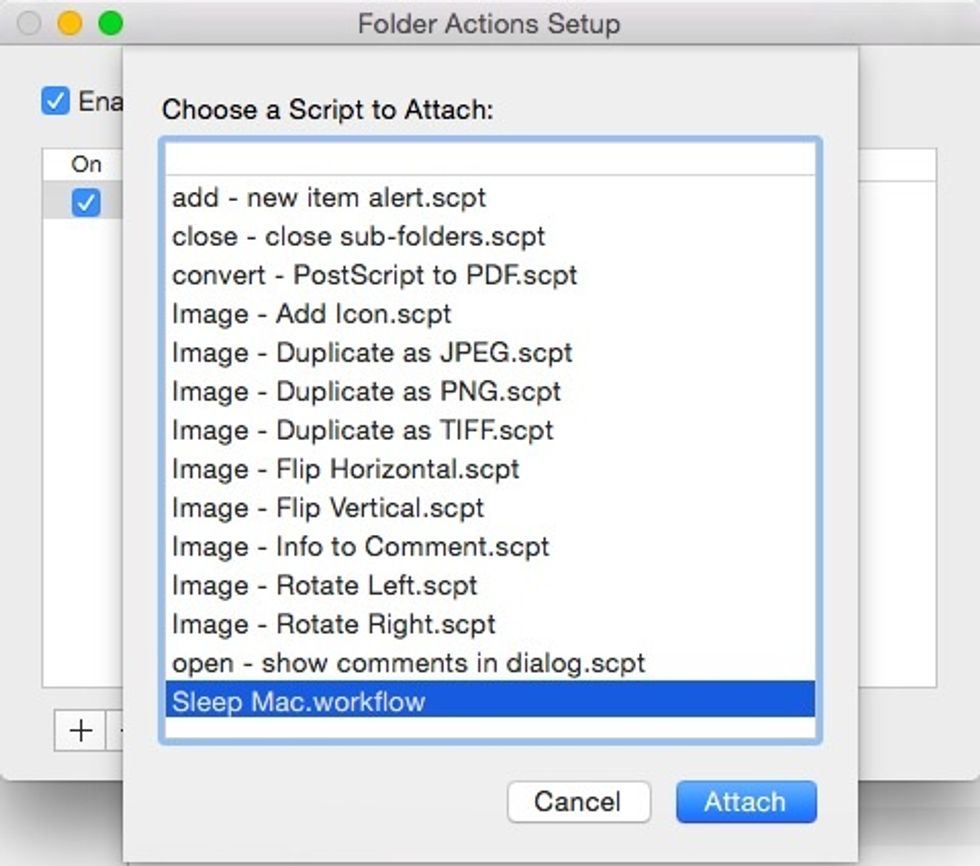
Choose action to associate with the folder.
Configute IFTTT. If you haven't already, head over to IFTTT.com and setup an account. You should also download the accompanying app for your iPhone.
For this particular recipe, you'l want to connect IFTTT to your Dropbox account and the iOS App.
Setup a Trigger Location Select the option a new recipe based on an iOS Location. Select the "you exit an area" as a trigger for the recipe and specify the address you wish to use as a trigger point.
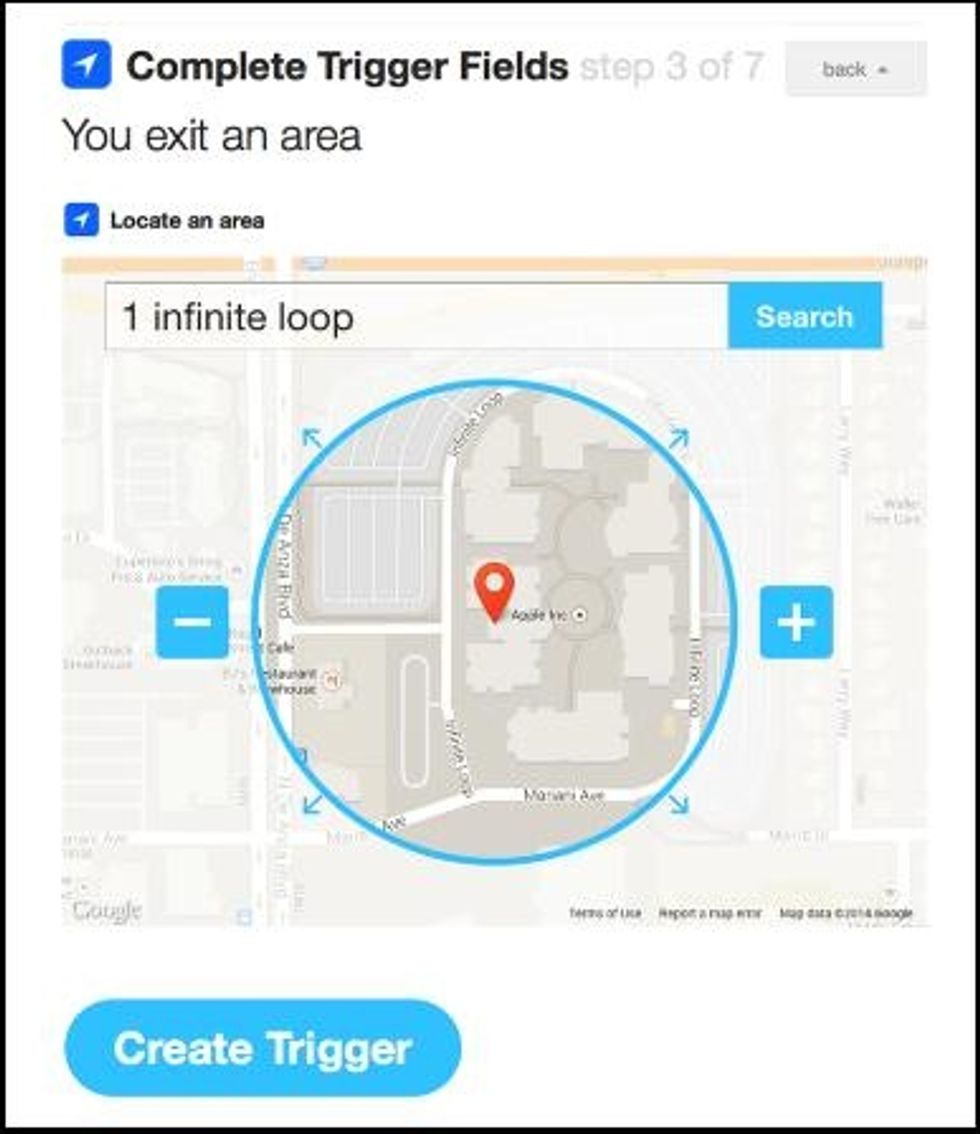
If you want to lock a computer at your home, then set your home address, at the office, use your office address. Anytime you leave this area, your action will fire.
You can optionally choose to have the action fire when you arrive at a specific location, or when you enter or exit a location. It's up to you.
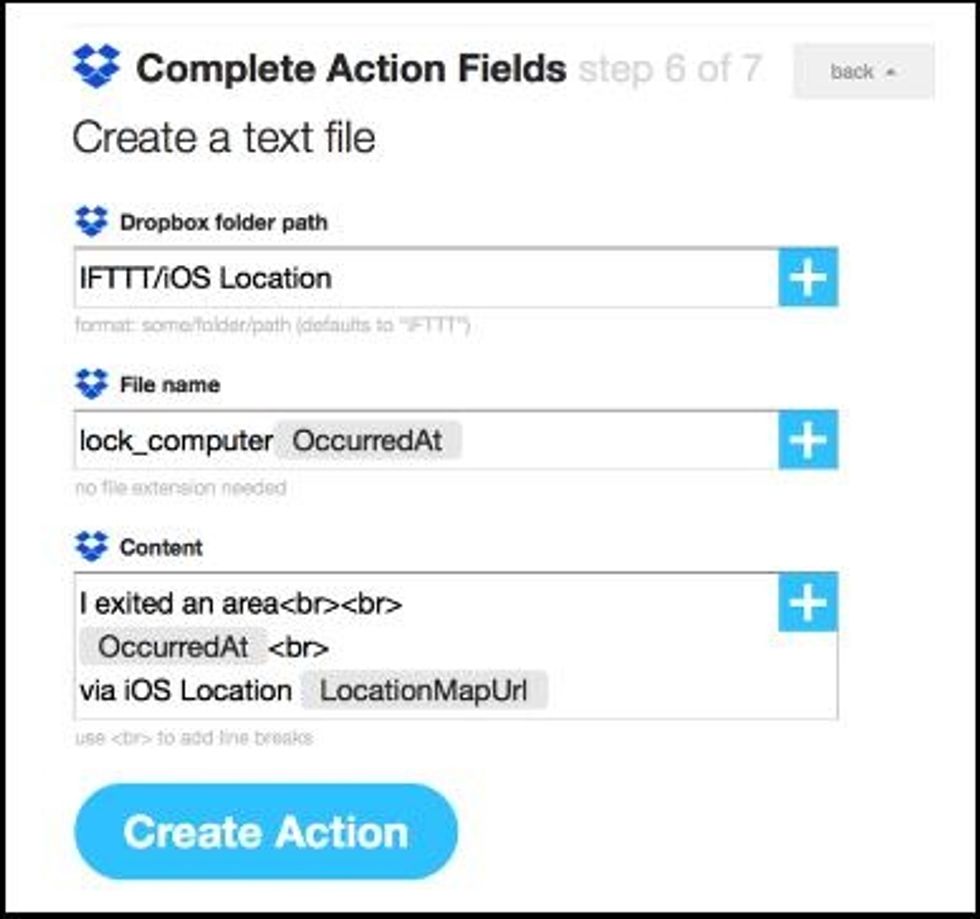
Setup an Action For the "That" portion of our rule, we're going to have IFTTT create a text file and save it to Dropbox.
You'll want to make sure that you have Dropbox running on the computer you want to control.
The title and the contents of the text file aren't necessary important, but you do want it to have a uniform name.
For this example, I choose "lock_computer" and left the default {{OccurredAt}} provided by IFTTT which will add a date and time but this is optional and just provides some additional information.
Also make sure you note the location of where the file is stored in your Dropbox.
So far, we've setup IFTTT to create a file in your Dropbox whenever you leave a location. But we still need your Mac to act whenever it sees the presence of that file.
The path of the Folder you selected on your mac must be the same selected in “Dropbox folder path”.
Now i show you how to do the same with paid application.
Instead of using the Automator, you can use Hazel to configure a folder action.
Now we're going to hand off to Hazel to activate the screen saver whenever it detects the presence of the newly created file in your Dropbox.
Create a new Hazel rule that monitors the folder you specified above (mine is in /Dropbox/ifttt/ios location) with the following criteria:
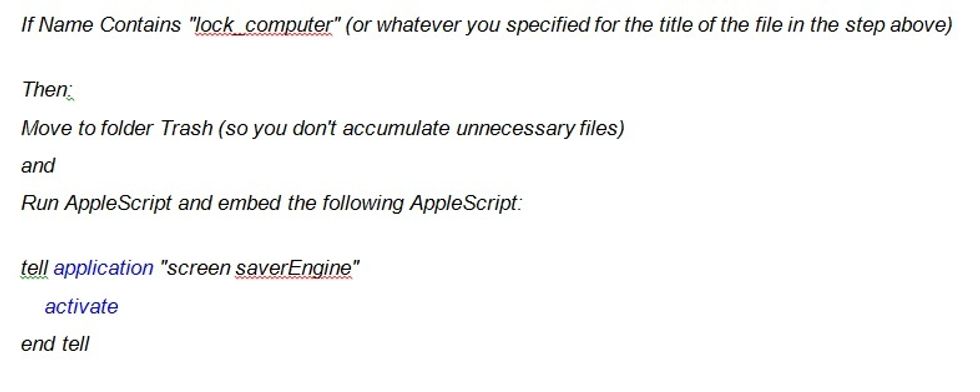
Make sure you compile the script (click the little hammer in the Hazel window)
If you prefer the computer go to sleep rather than start the screen saver, you can use the AppleScript: "tell application "Finder" sleep end tell"
Instead of IFTTT you can use Launch Center Pro, and create an action based on location.
1. Create a new action, and name it something like Sleep Mac. Using the Action Composer, head here: System Actions > In-App Dropbox > New File
2. Name: Sleep Mac; Text: whatever; Path: [same Dropbox path from above]; Name: Sleep Mac
3. Tap Done, cute it up with a lovely icon, and tap Done again