The Conversation (0)
Sign Up
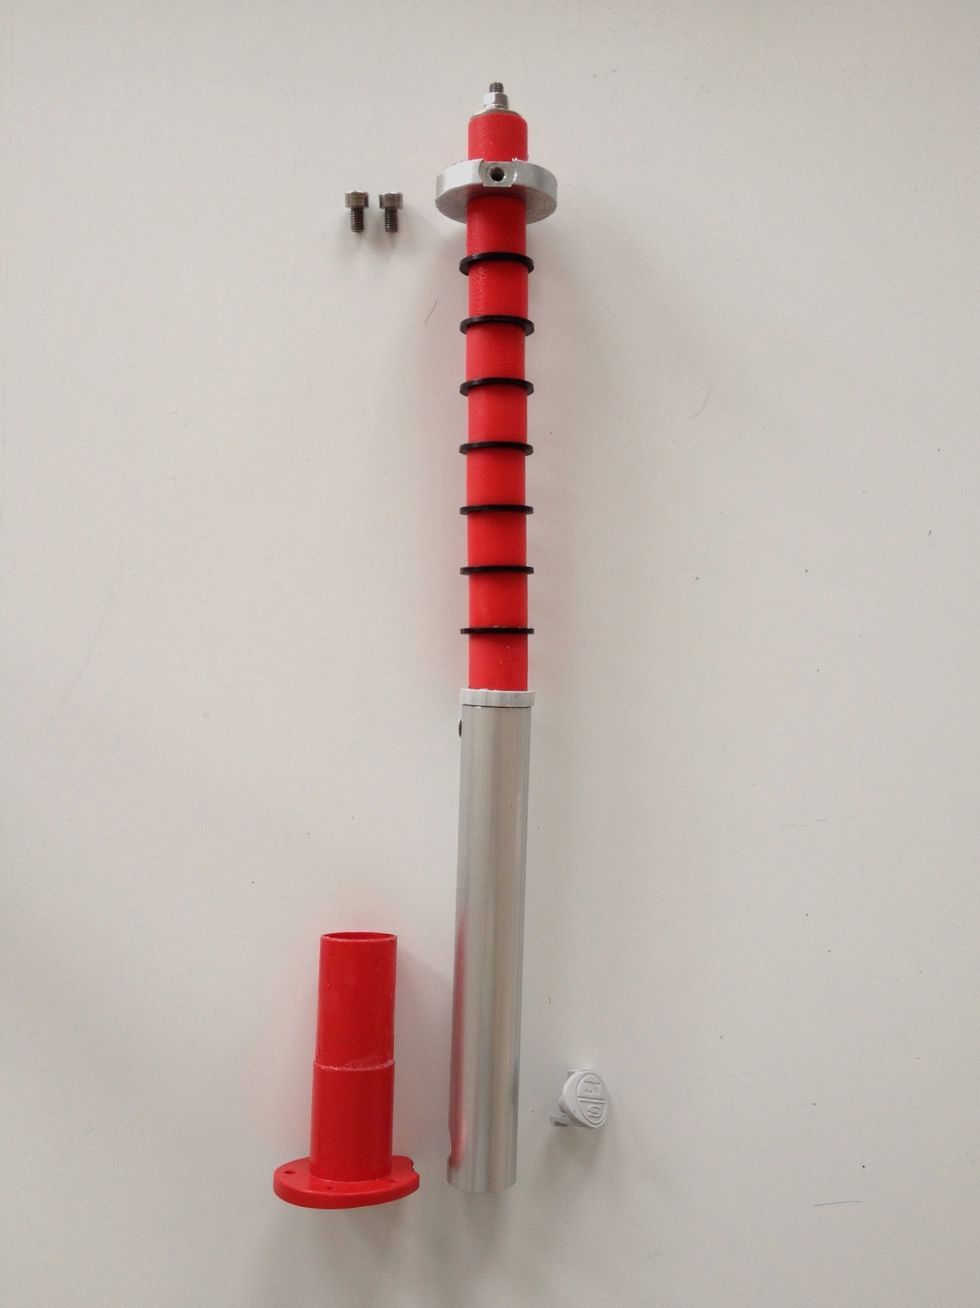
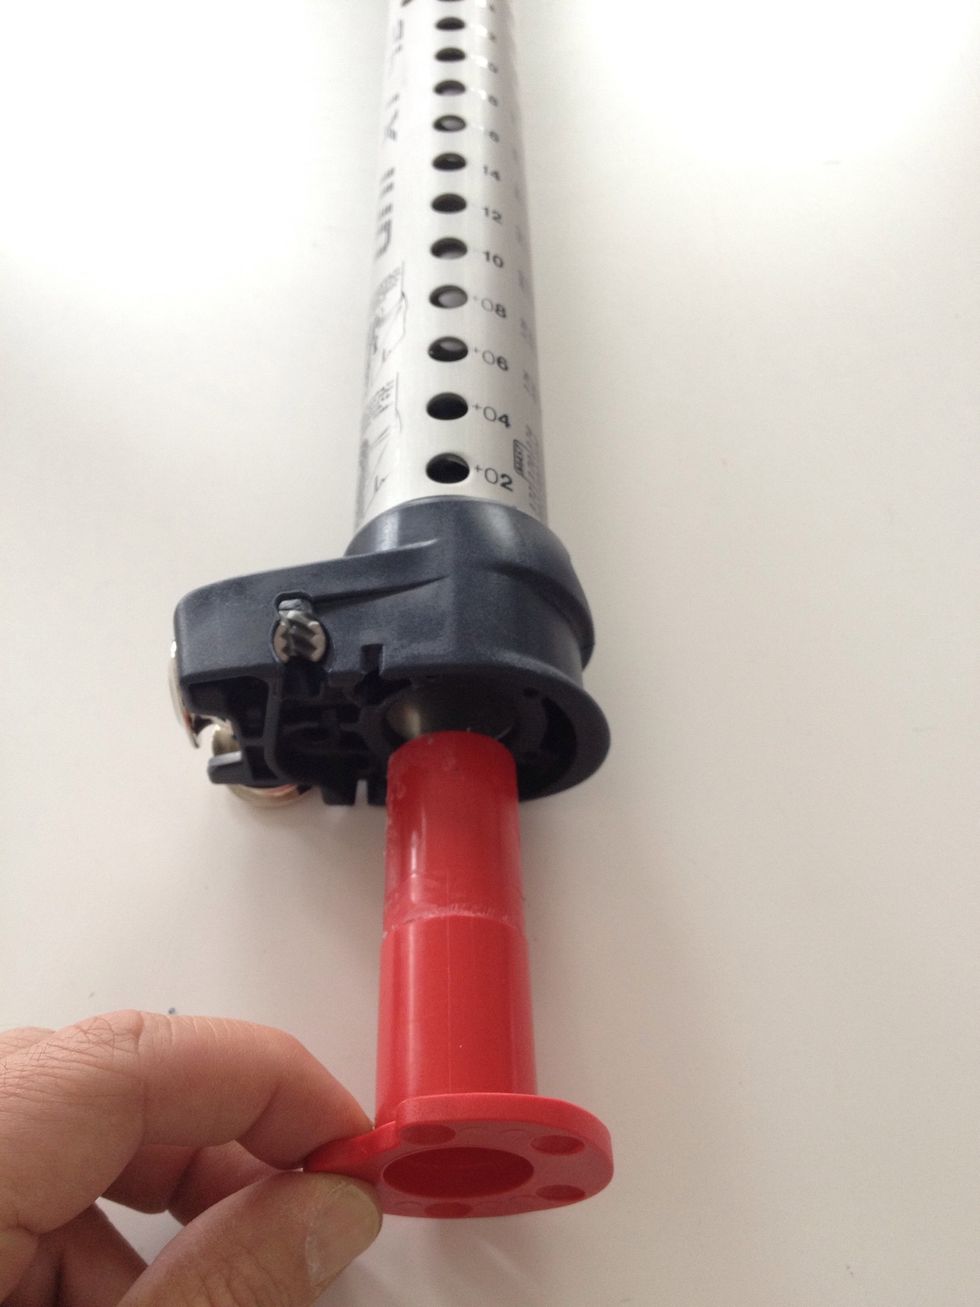
The SHOX.UPGRADE.KIT consists of the following parts: 1 x Shox dampener element / 2 x attachment allen-screw / 1 x Shox cup-insert / 1 x blind button
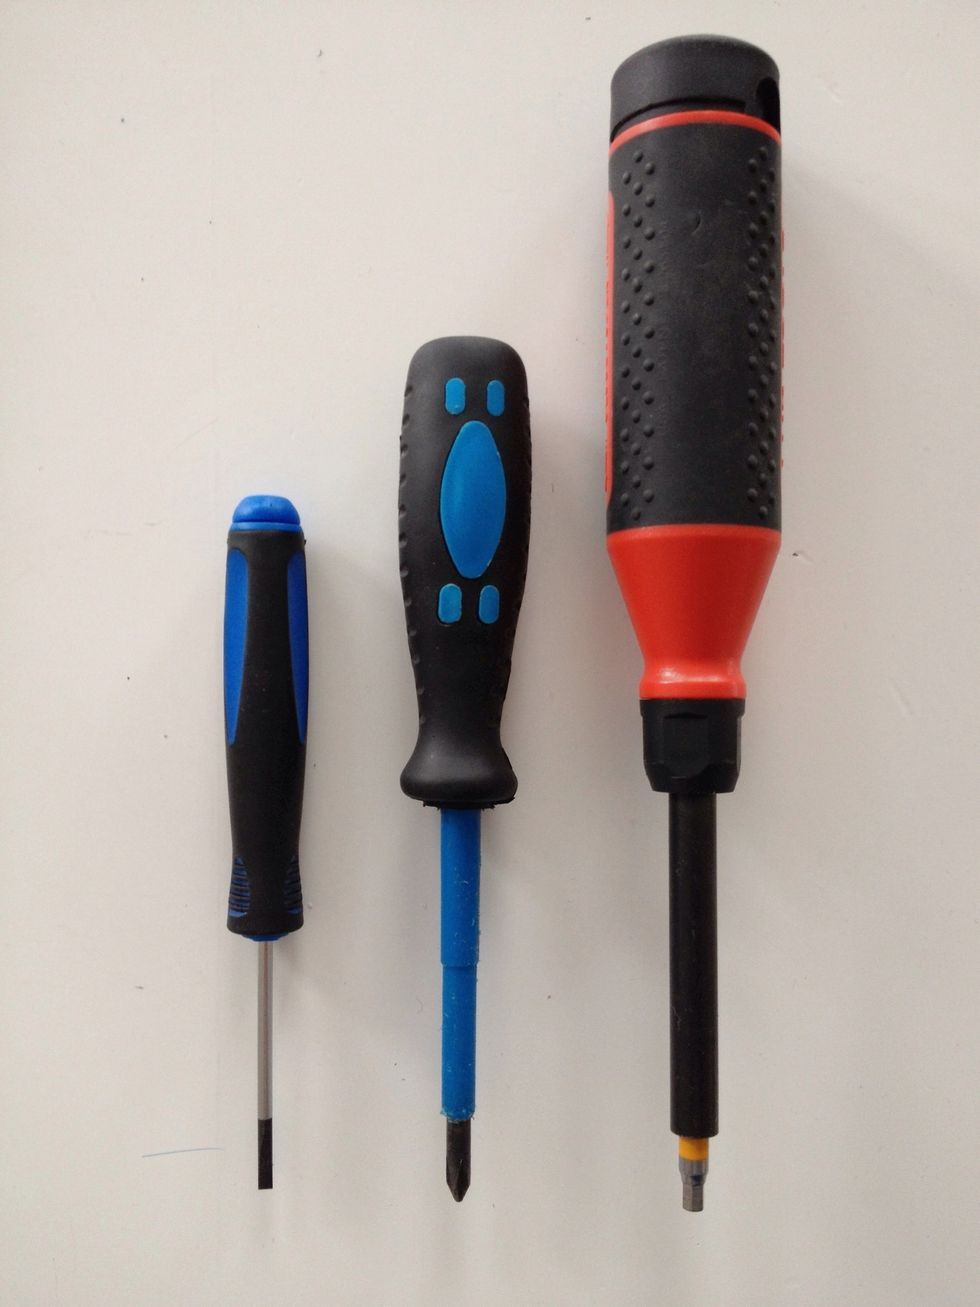
Necessary tools: Thin regular screw-driver / Phillips-head screw-driver / Allen key #5
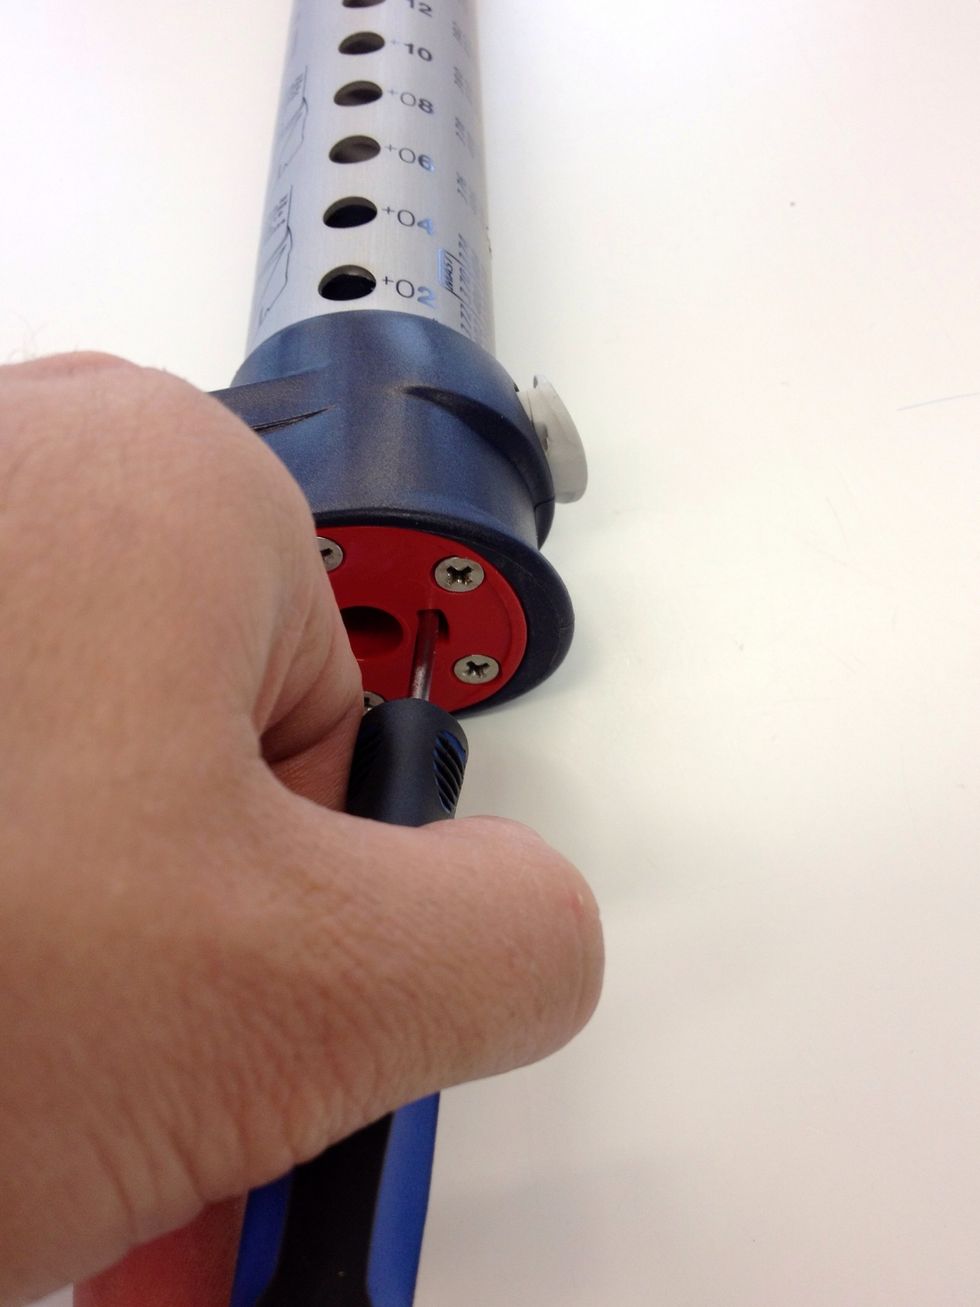
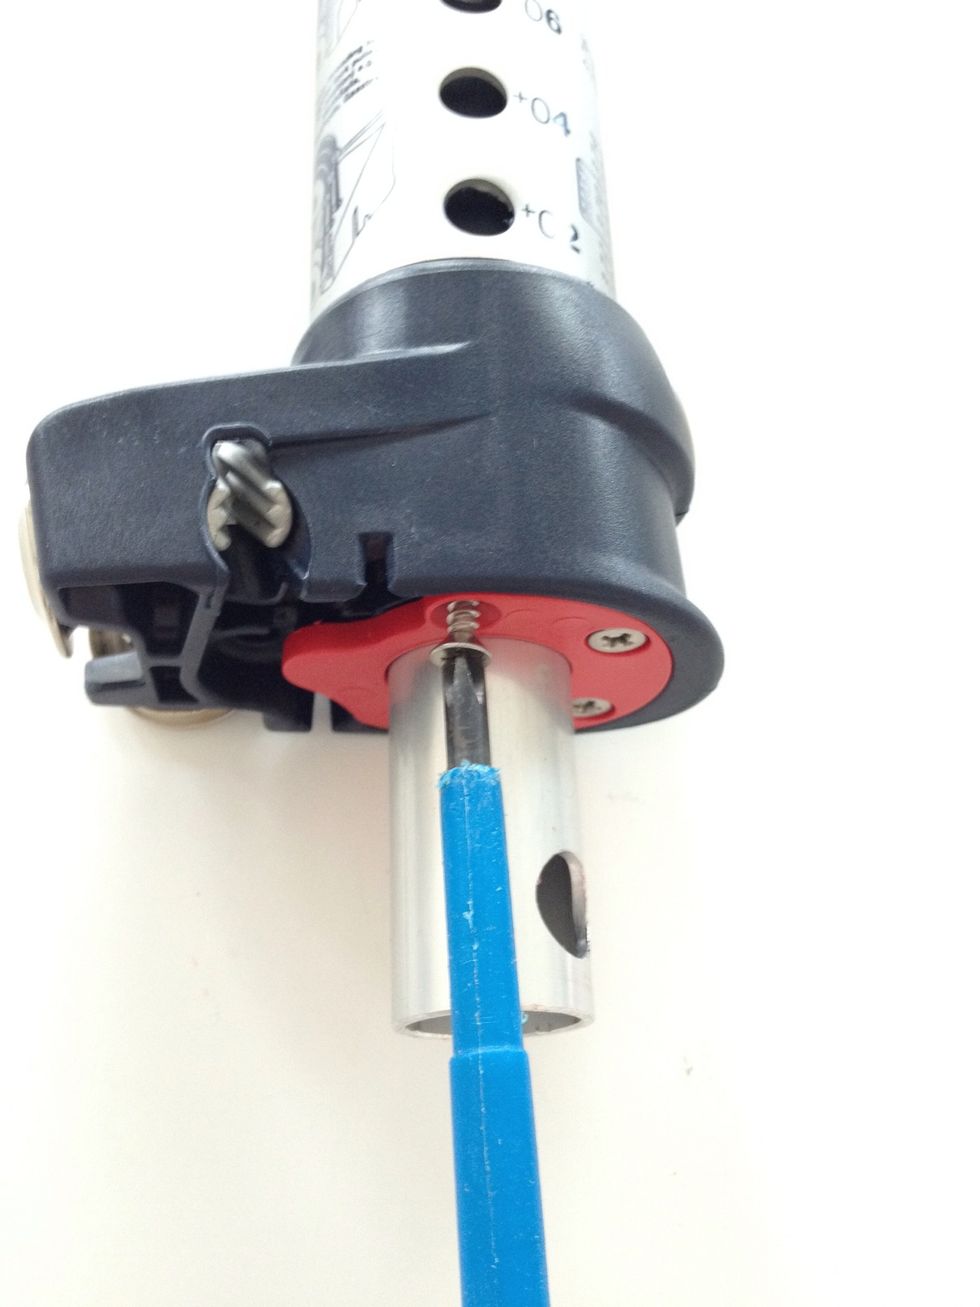
Put the thin regular screw-driver into the hole at the red cup insert and push until the release-button falls out
Use the Phillips-head screw-driver to remove the 4 screws fixing the red cup-insert
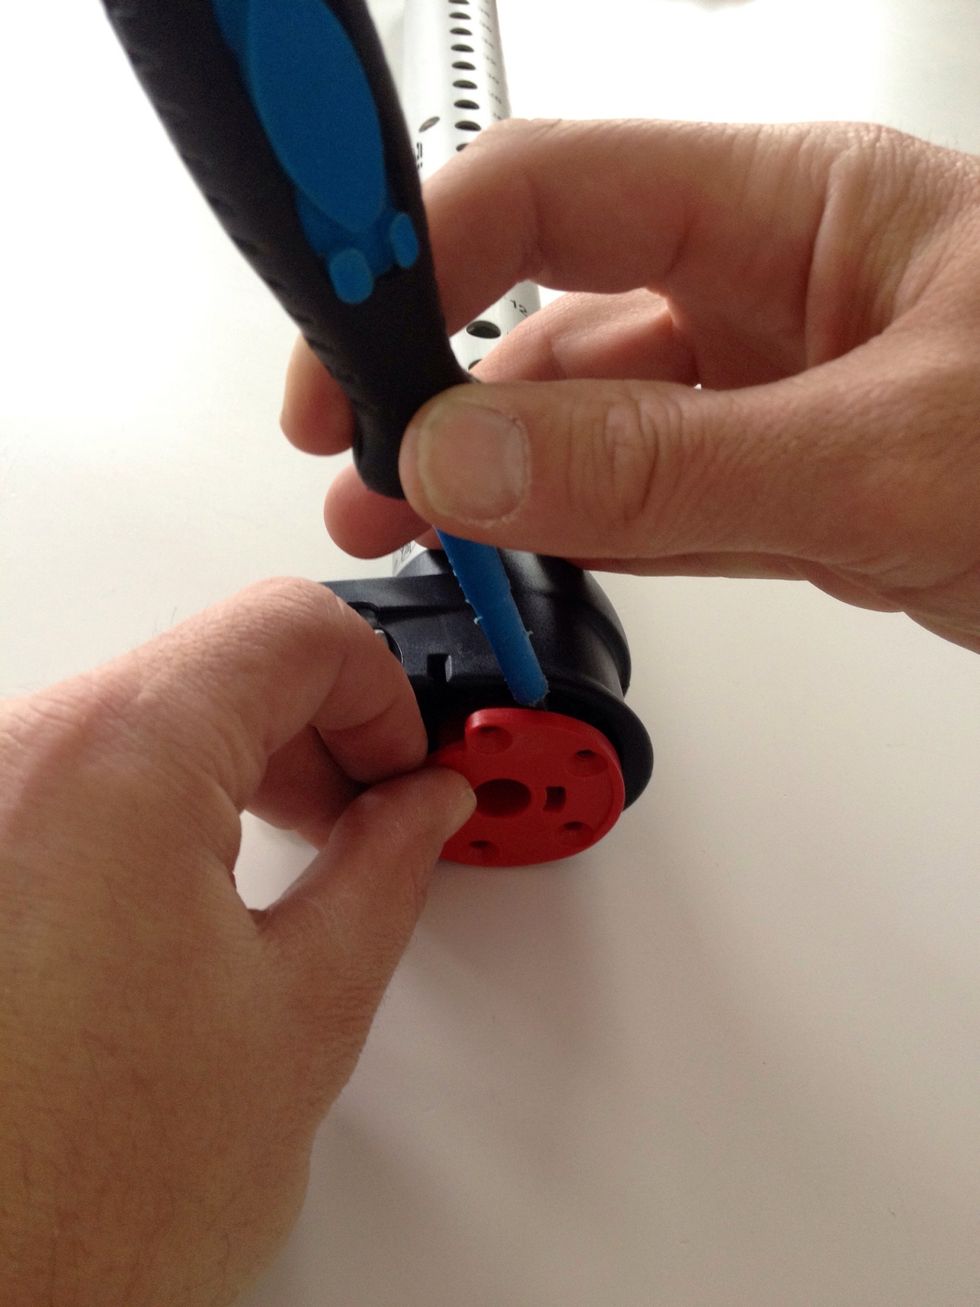
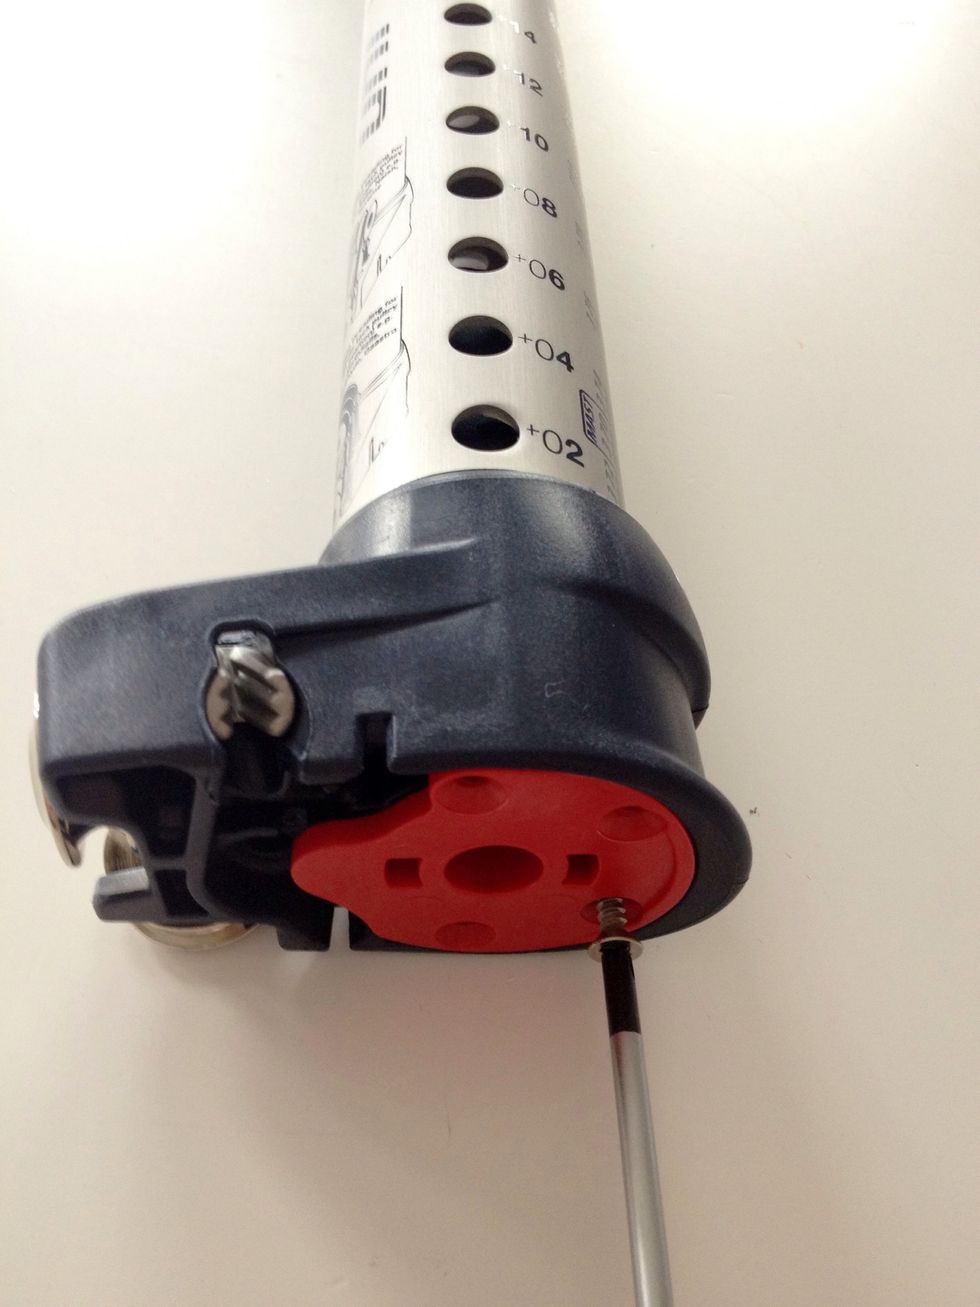
Remove the cup-insert (I) Attention: never try to do this prior to removing the release-button (step #3) as this will destroy the cup-insert!
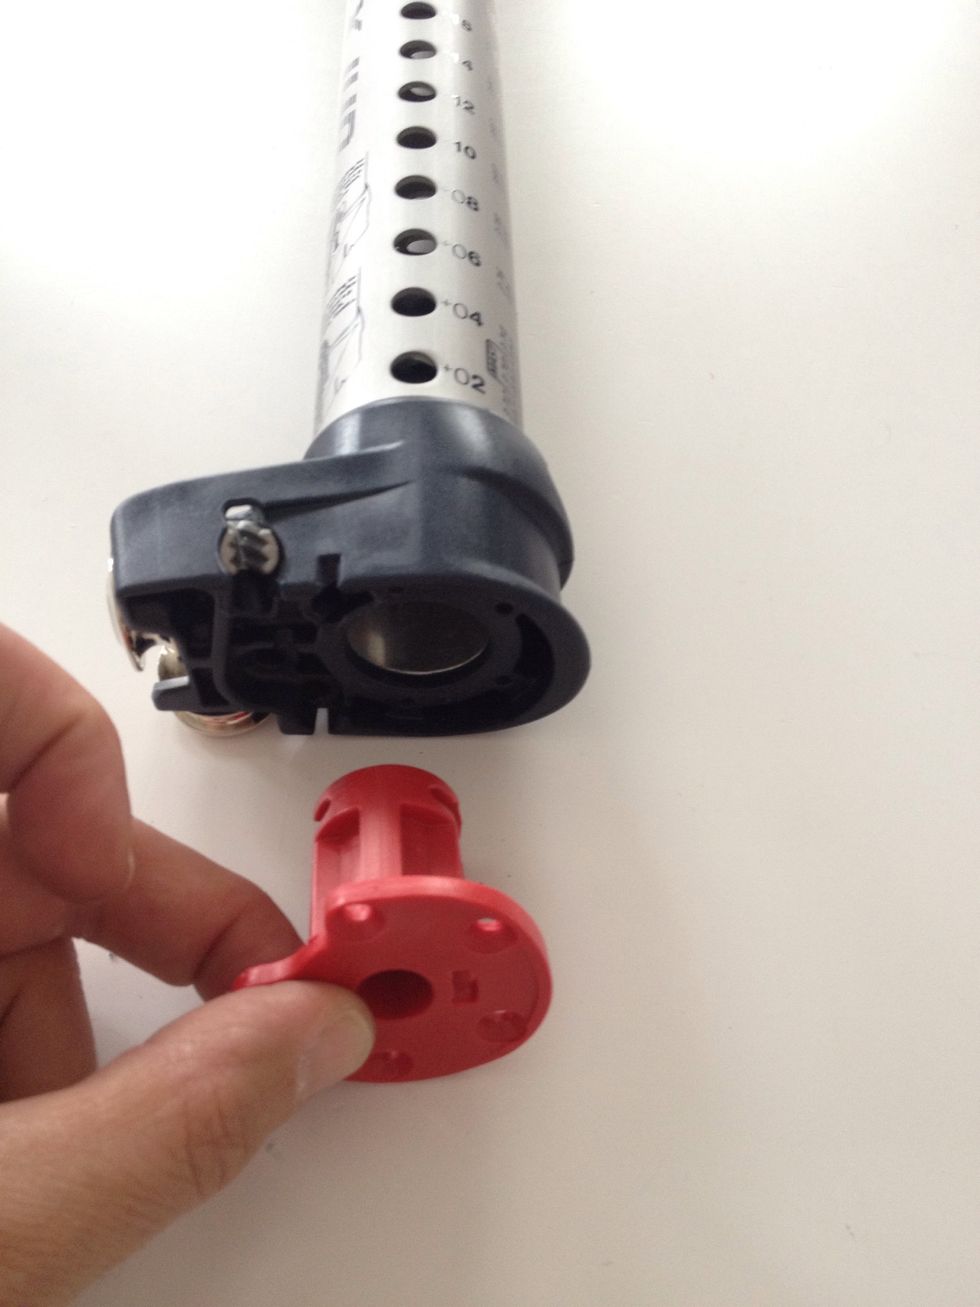
Remove the cup-insert (II)

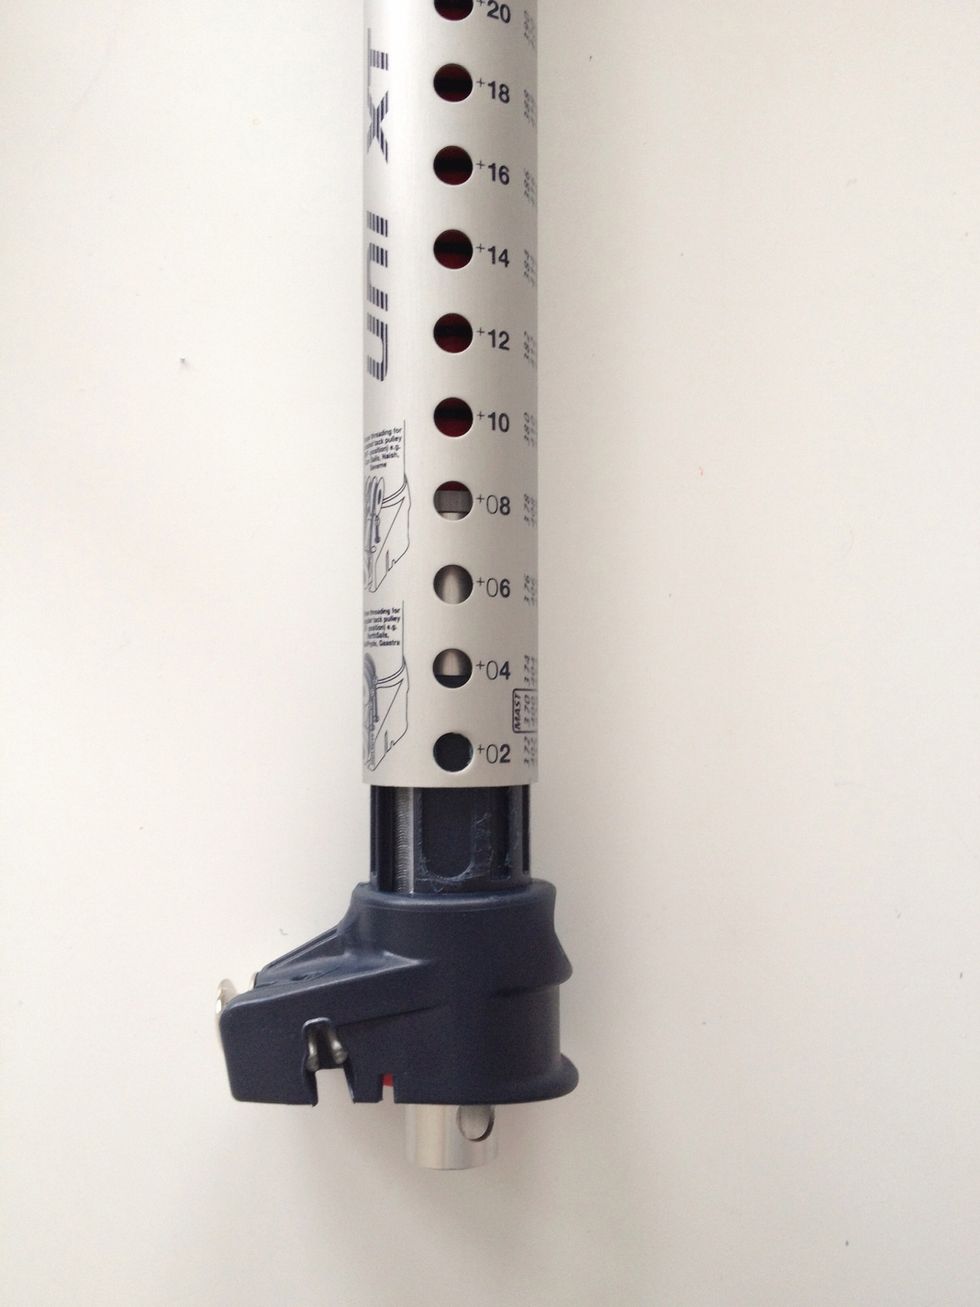
SDM-version only (RDM-version: please continue with step #9): open the screw connecting the extension-tube with the cup
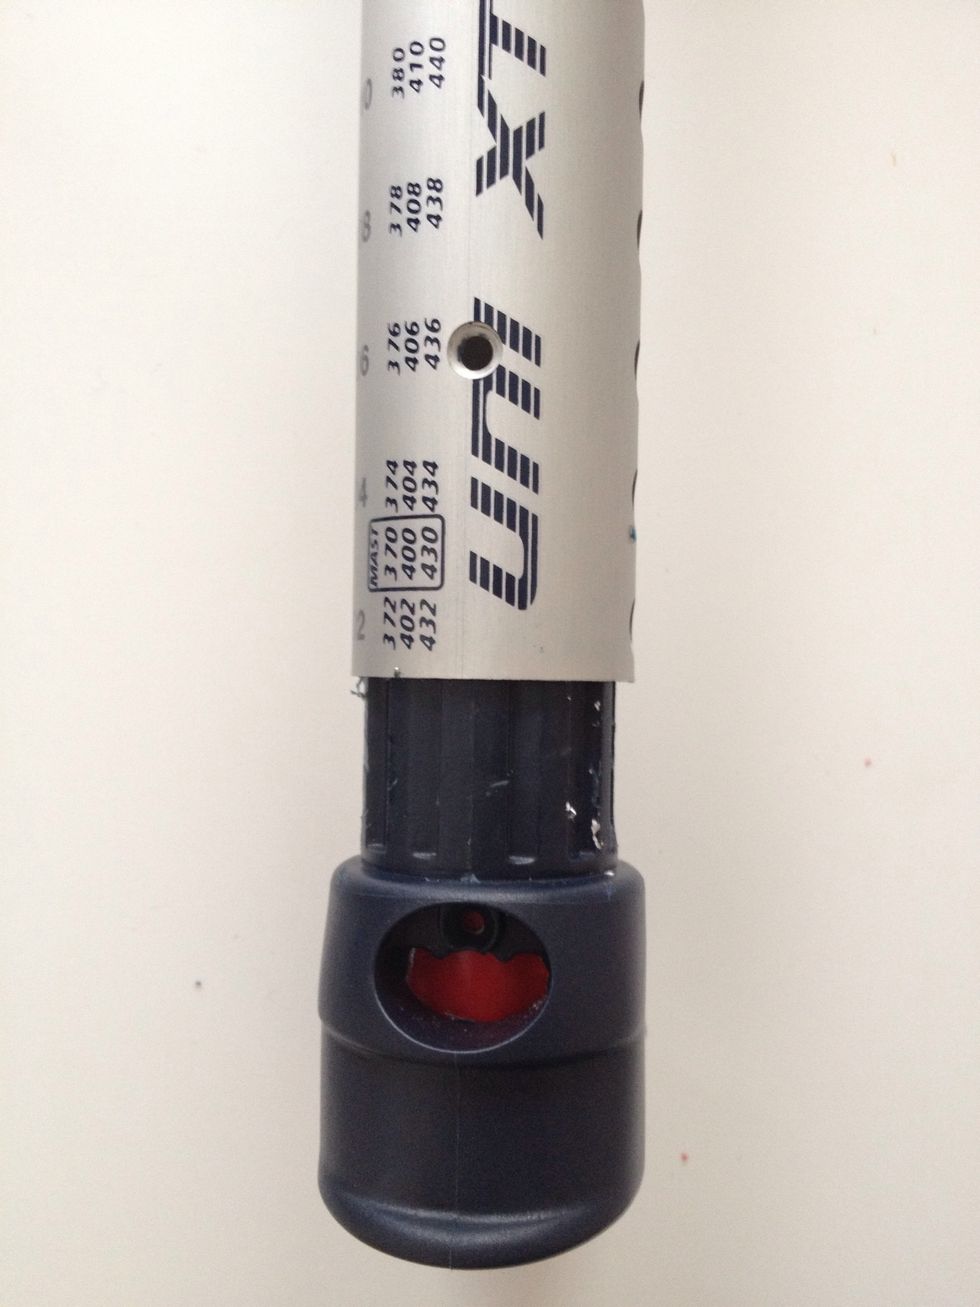
SDM-version only: remove the cup from the extension-tube
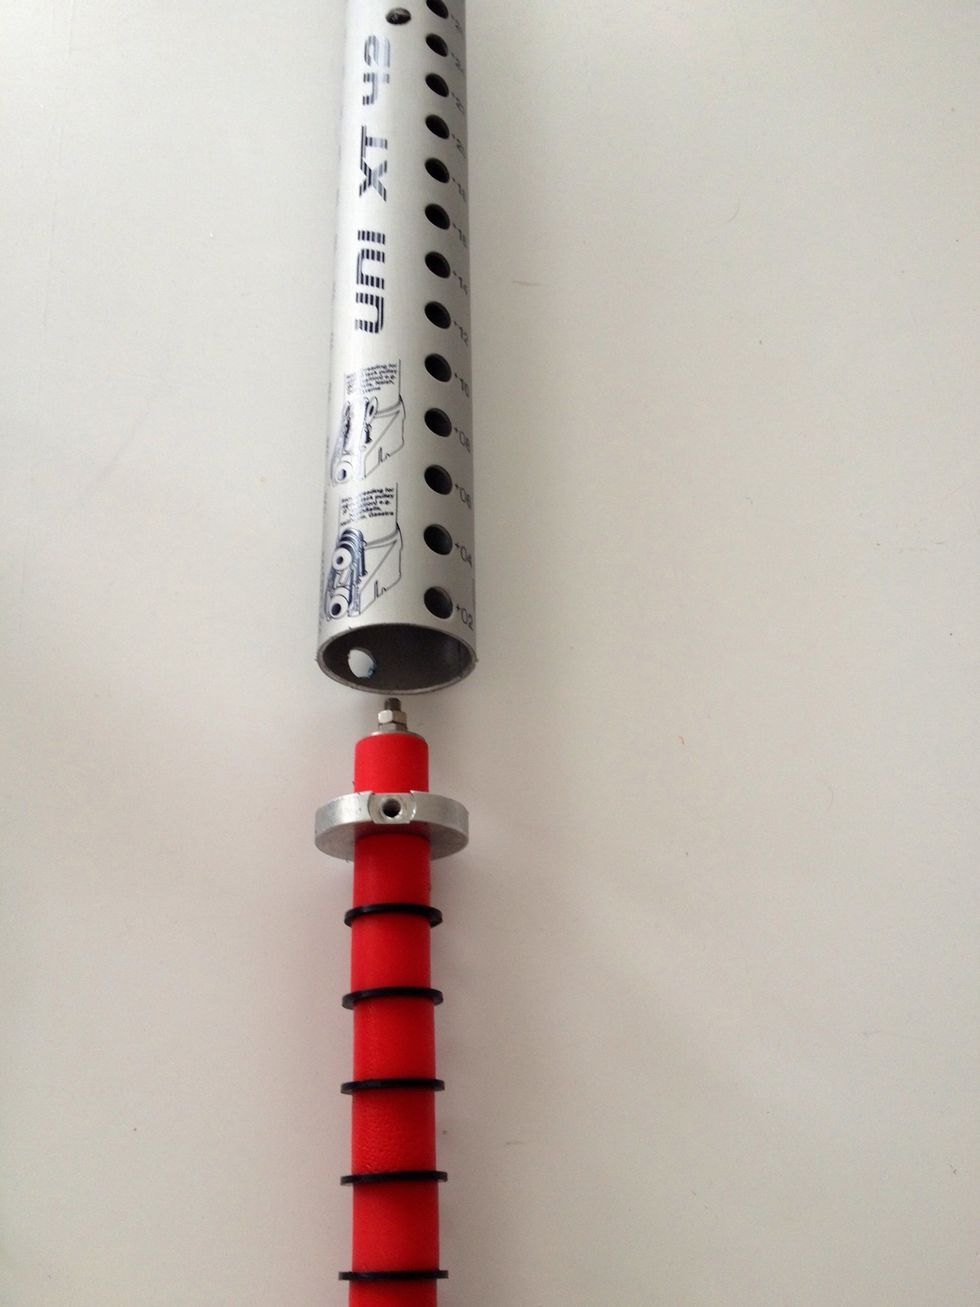
Slide the Shox dampener element into the tube
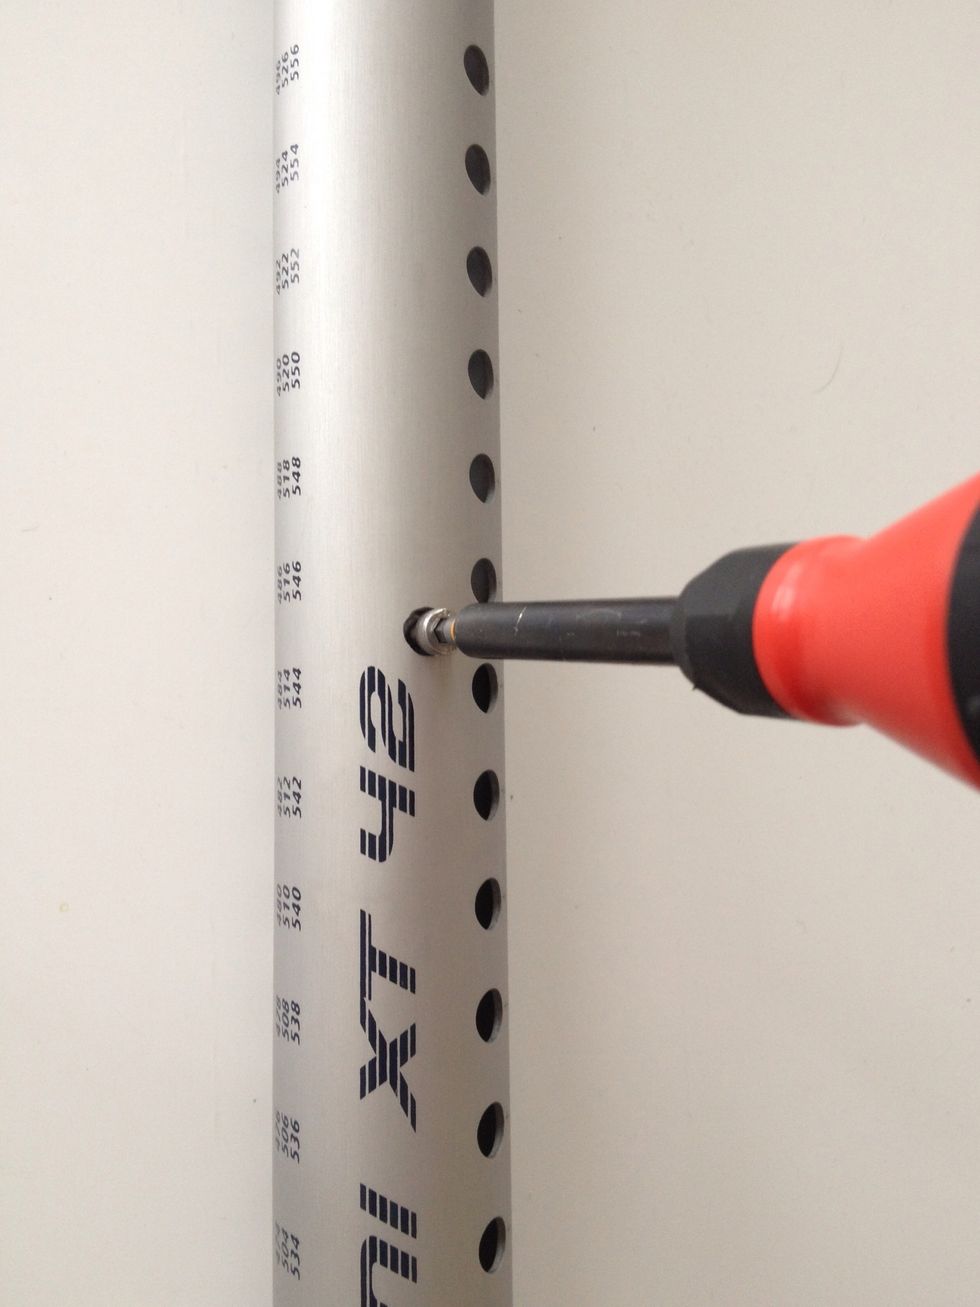
Fix the Shox dampener element with the 2 allen-screws
SDM-version only (RDM-version: please continue with step #13): push the cup back into the extension tube - Attention: please check for correct alignment
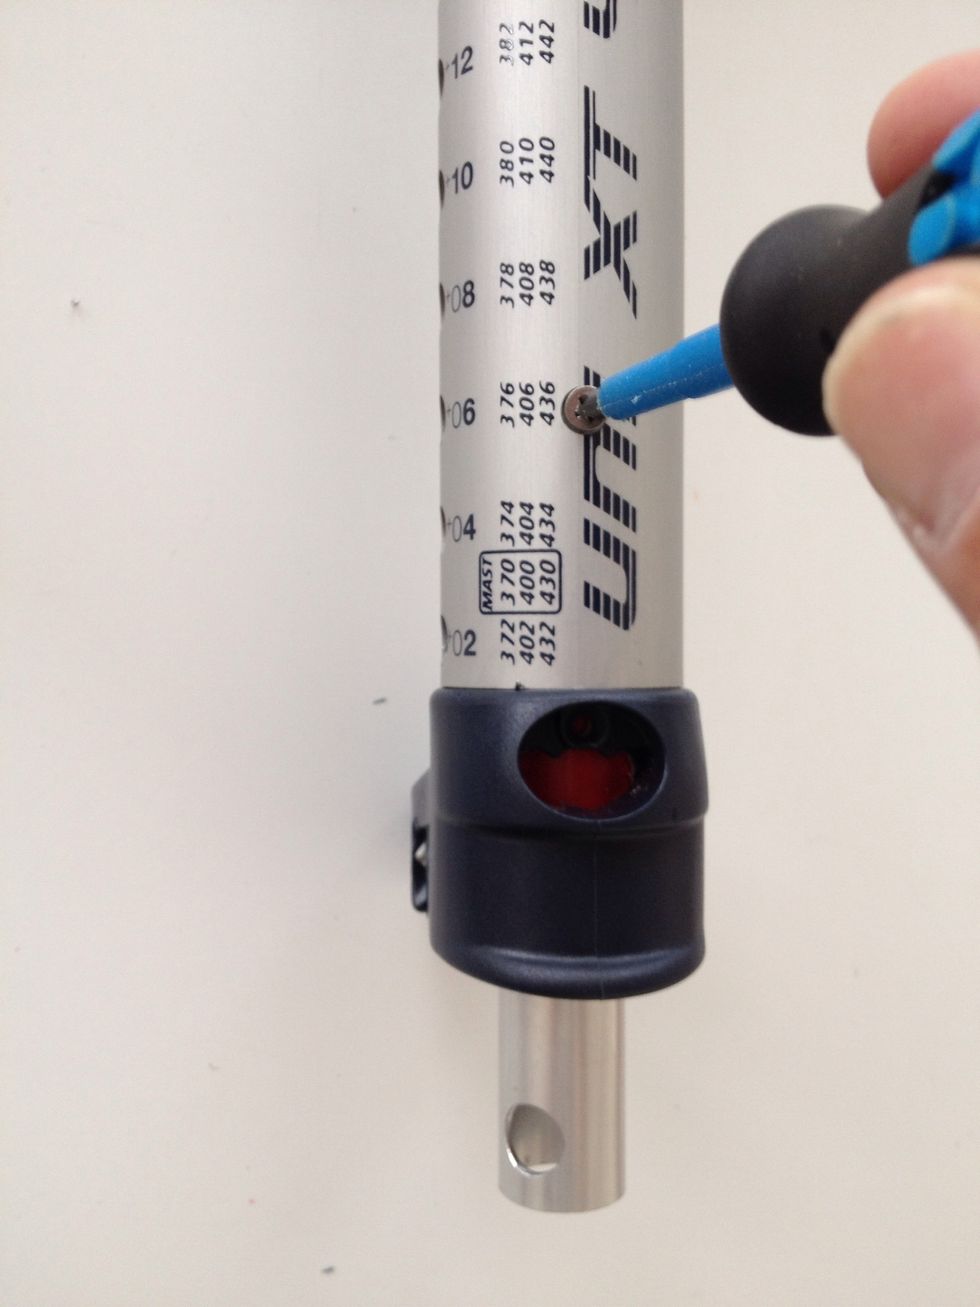
SDM-version only: tighten the screw connecting the extension tube with the cup
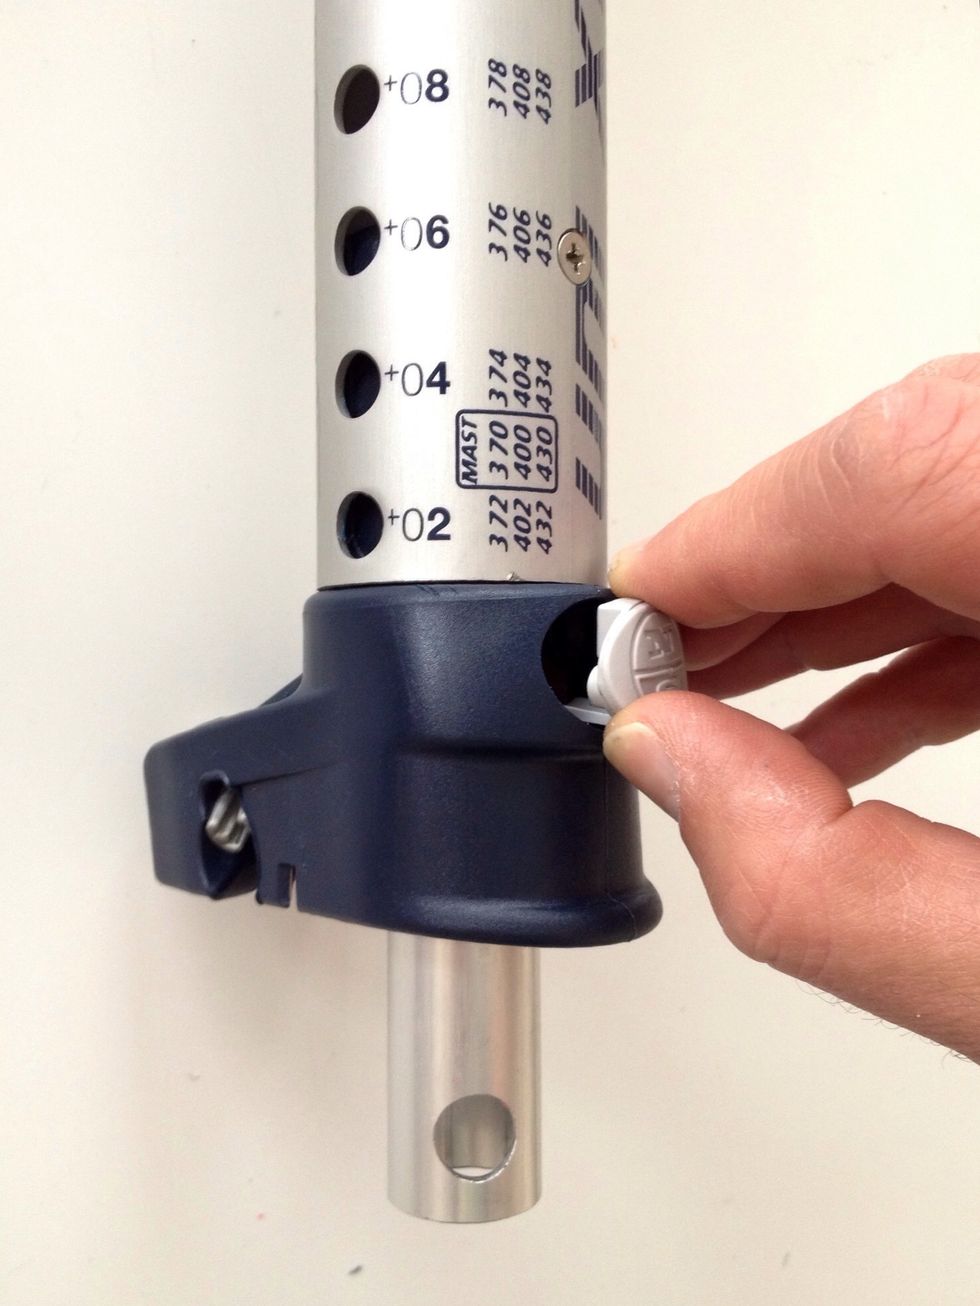
Push the blind-button into the cup until it snaps in
Push the red Shox cup-insert into the cup - Attention: please check for correct alignment
Fix the insert with the 4 Phillips-head-screws - FINISHED and ready to go!