The Conversation (0)
Sign Up
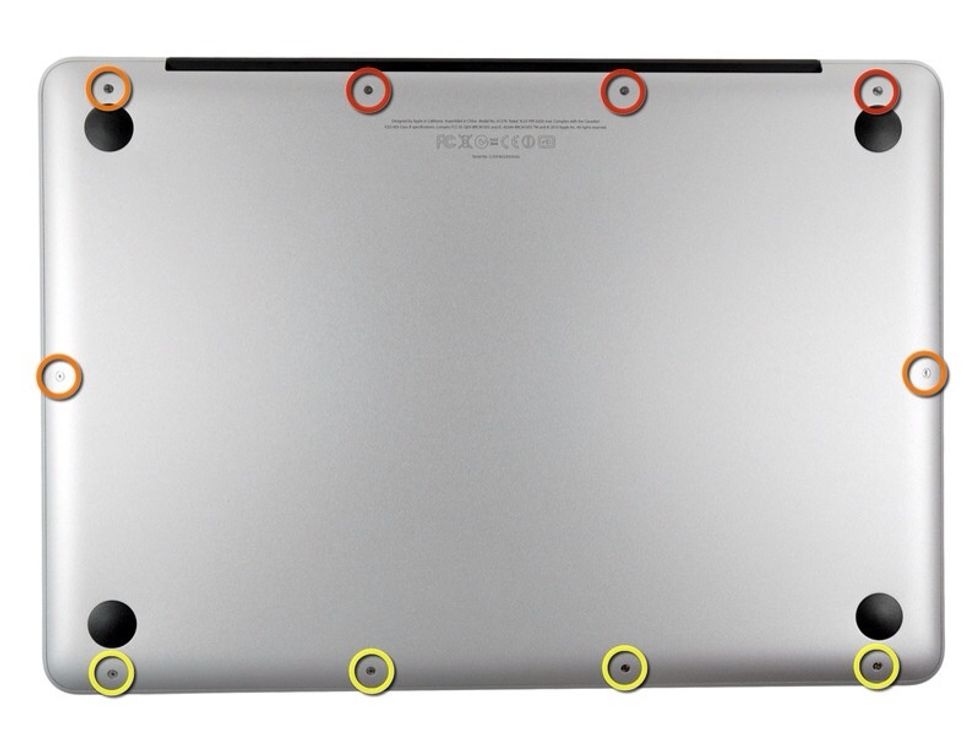
Remove the following 10 screws: Three 14.4 mm Phillips screws (Red) Three 3.5 mm Phillips screws (Orange) Four 3.5 mm shouldered Phillips screws (Yellow)

Use your fingers to pry the lowercase away from the body of the MacBook near the vent. Remove lower case.
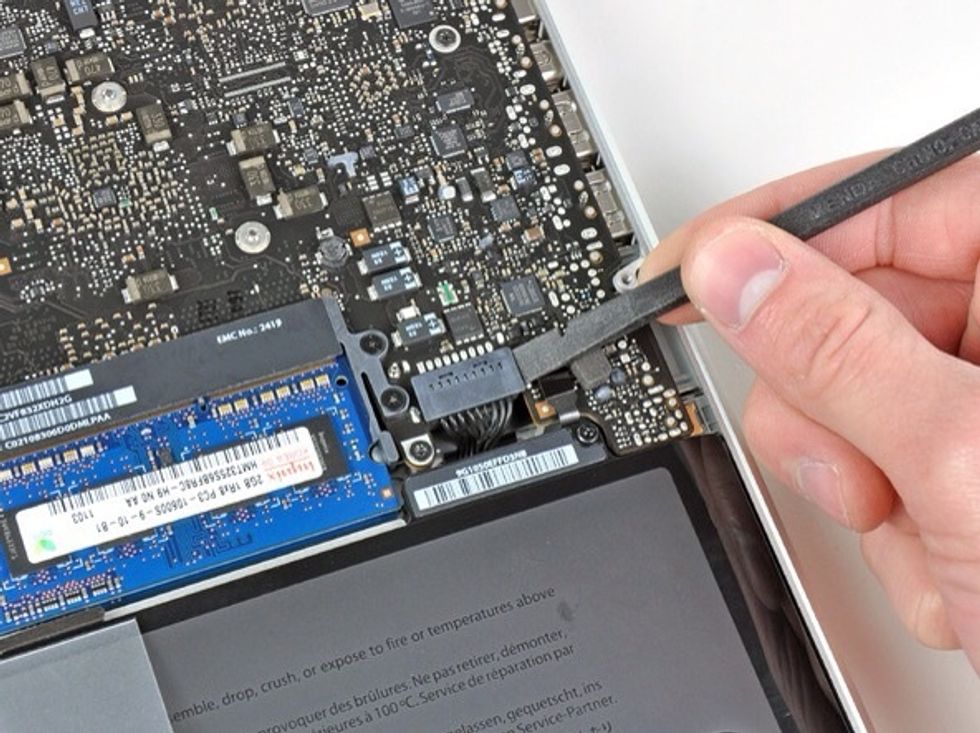
Use the edge of a spudger to pry the battery connector upwards from its socket on the logic board. It's useful to pry upward on both short sides of the connector to "walk" it out of its socket.
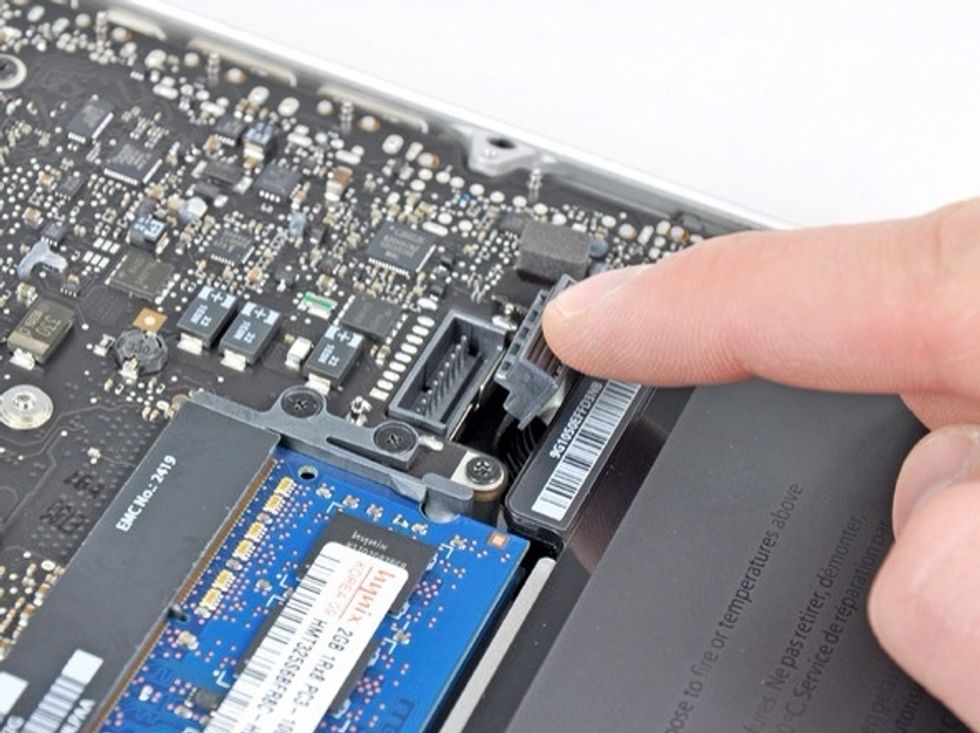
Bend the battery cable slightly away from its socket on the logic board so it does not accidentally connect itself when you work.

Pull the two RAM retaining arms away from the center of the RAM chip. The RAM. chip should "pop" up slightly from its socket.
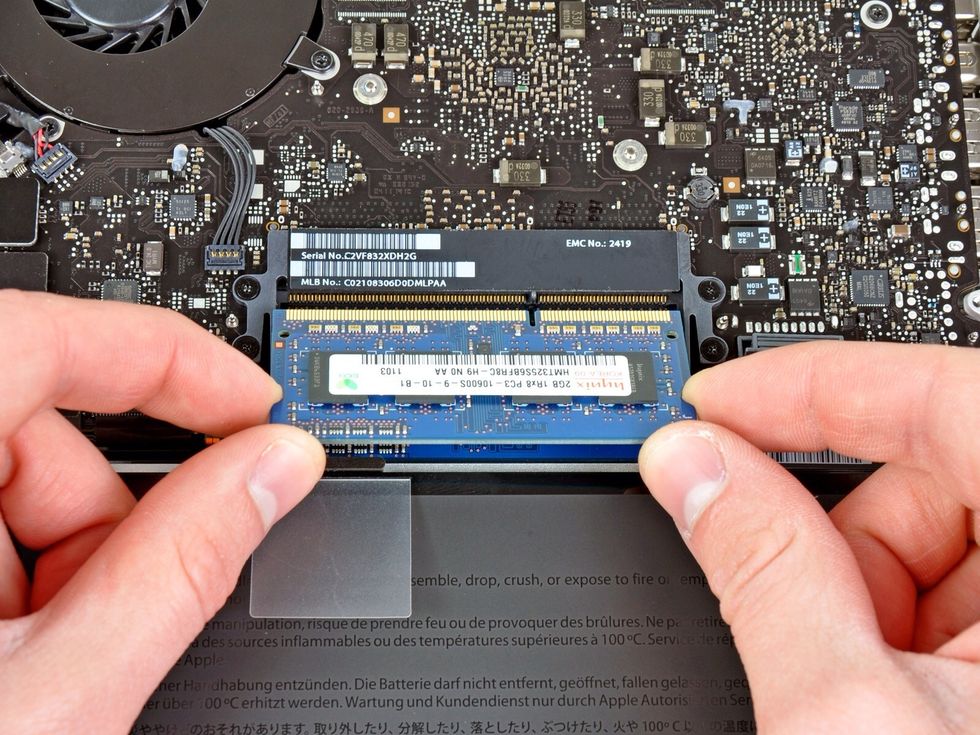
Pull the RAM stick out of its socket. Repeat this process to remove the second RAM chip. To reassembly your device, follow these instructions in reverse order.