The Conversation (0)
Sign Up
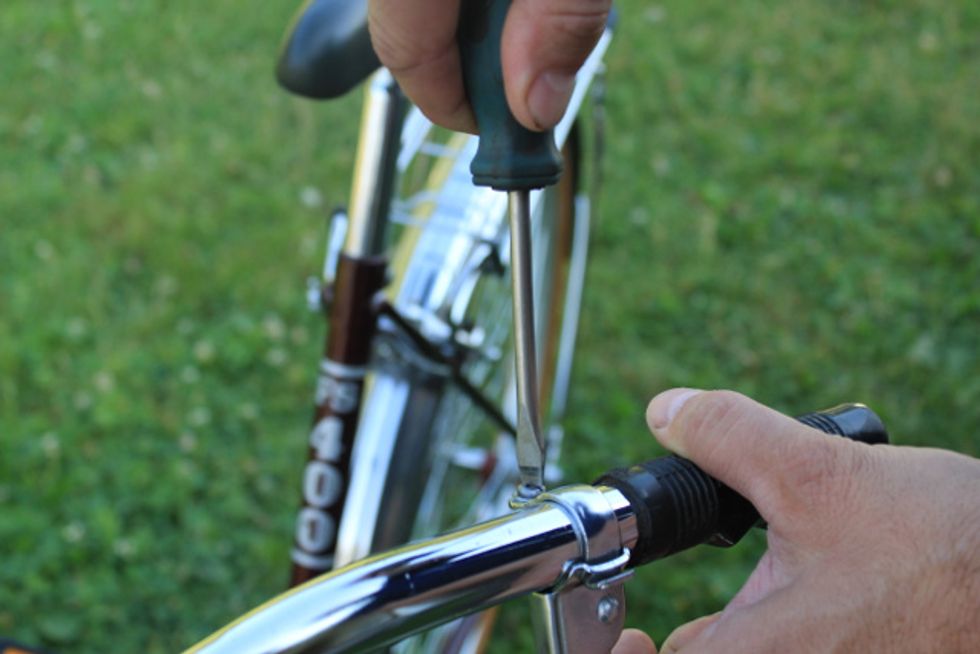
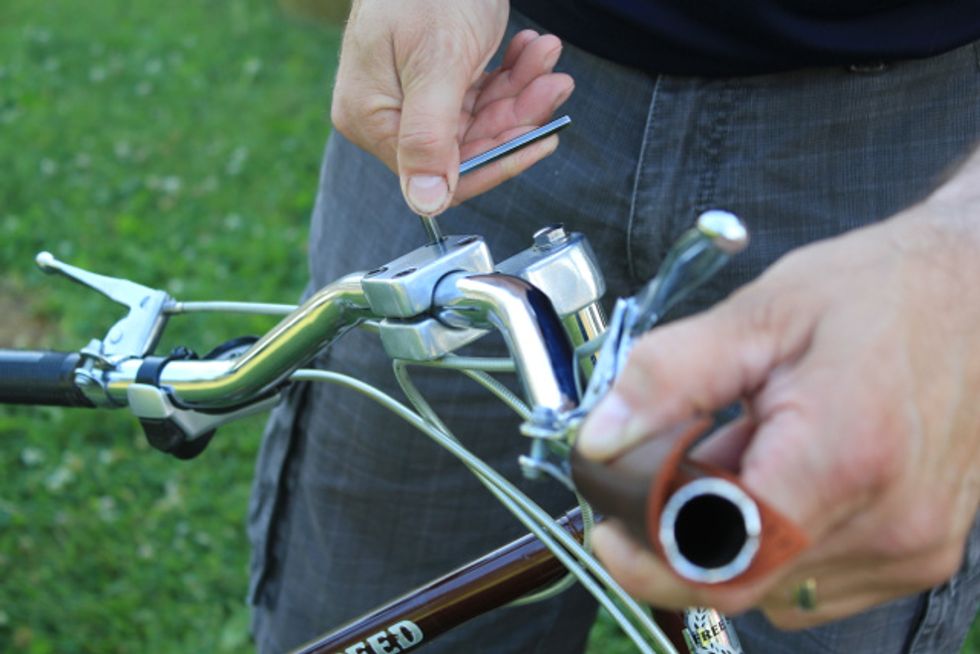
Loosen brake lever and shifter (if necessary) and slide towards stem.
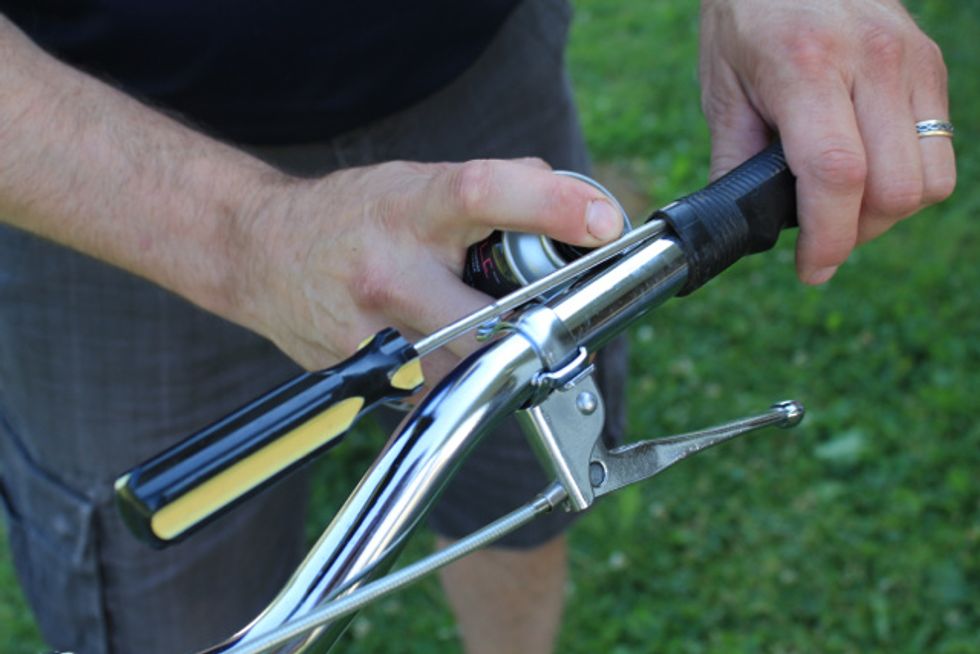
Remove the current bar grips by applying hairspray or soapy water beneath the grip. Begin twisting at the stem-end until the grip comes loose and can be removed. Repeat if necessary.
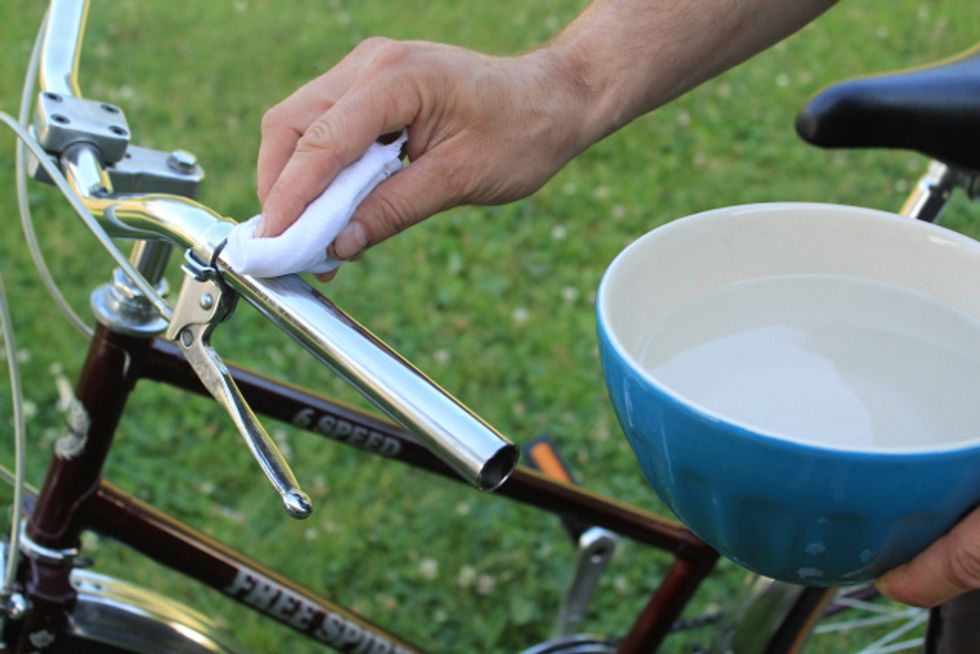
Clean the handle bar with soapy water or alcohol. Use a fine abrasive material if much residue is present.
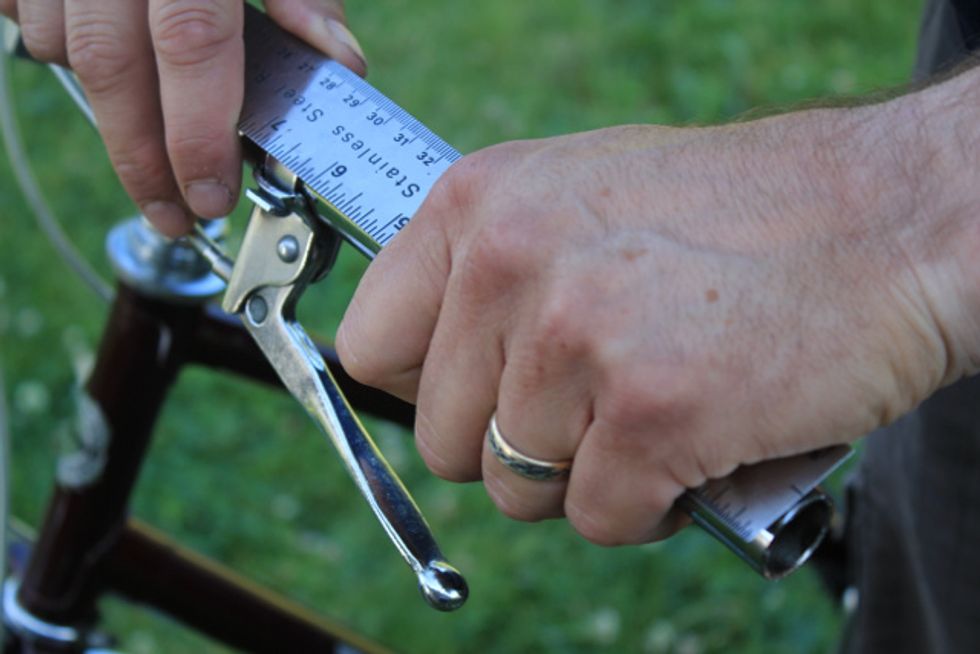
Measure the section of the handle bar you want your grip to cover. Hold a ruler under your hand and against the bar for accurate measurement. Be sure the measurement will apply to both sides.
Note that the two grips are different. The logo on each is to be placed near the end of the bar.
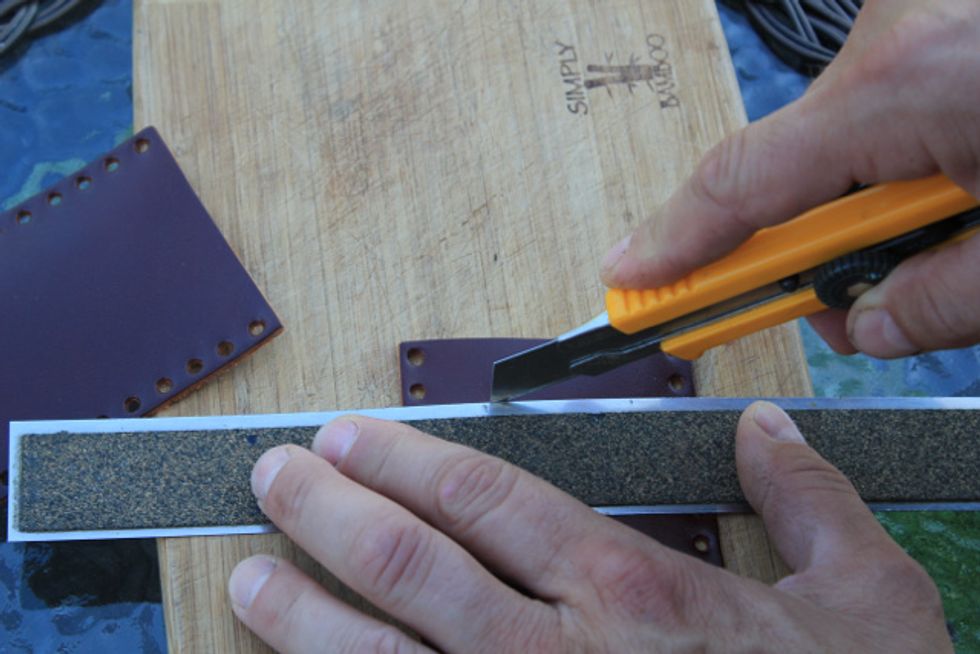
Cut grip to size: Lay the grip flat on a cutting surface and measure the desired length. Make a mark on both sides, closest to the measurement that places the cut line... (next slide)
equal distance between neighbouring holes. (It's best if you can leave an even number of holes on each side). Hold the ruler firmly and cut to the desired length using a sharp utility knife.
Test fit the grip to the bar ensuring the logo is closest the bar end and facing upward toward the rider.
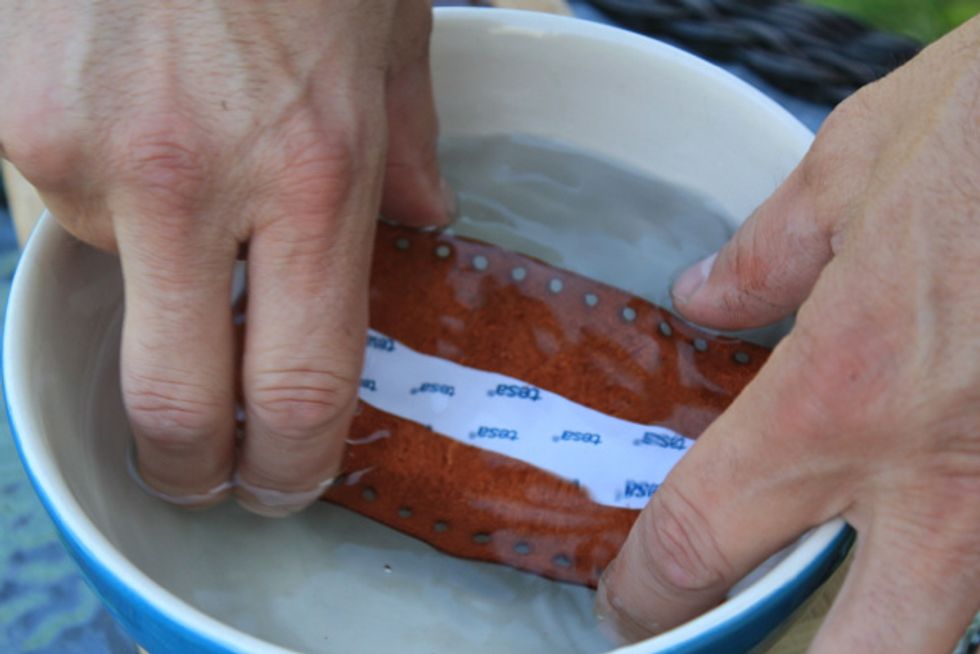
Soak the grip in warm water for 2-3 minutes, remove and dry off. Peel the backing off the tape and apply the grip to the bar as in the test fit. Smooth the grip around and along the bar for a good fit
For easy lacing loosen the handle bar and rotate until the bottom of the grip is facing upward.
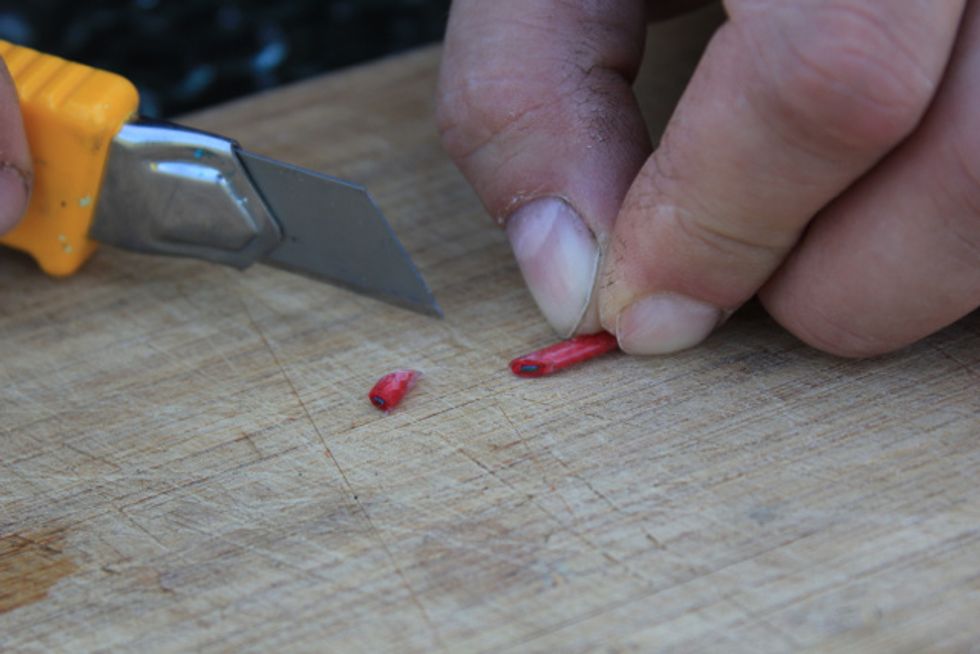
Cut the end of the laces at 45 degrees for easier lacing.
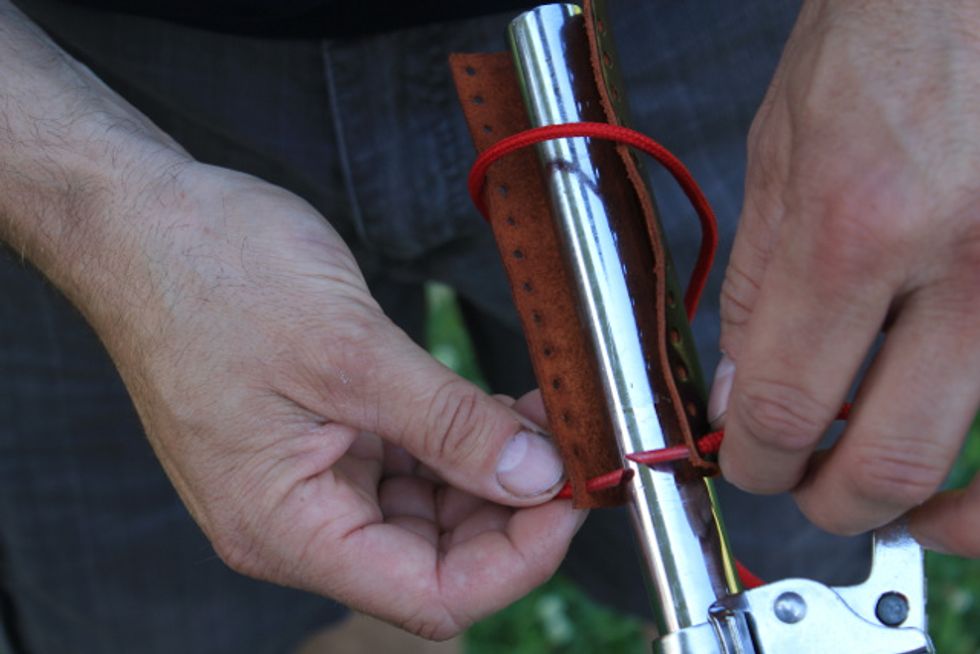
Lacing: Start at the end closest to the stem. Insert the ends of the lace through the first pair of holes from the outside to inside. Pull the lace ends through until the lace ends are even.
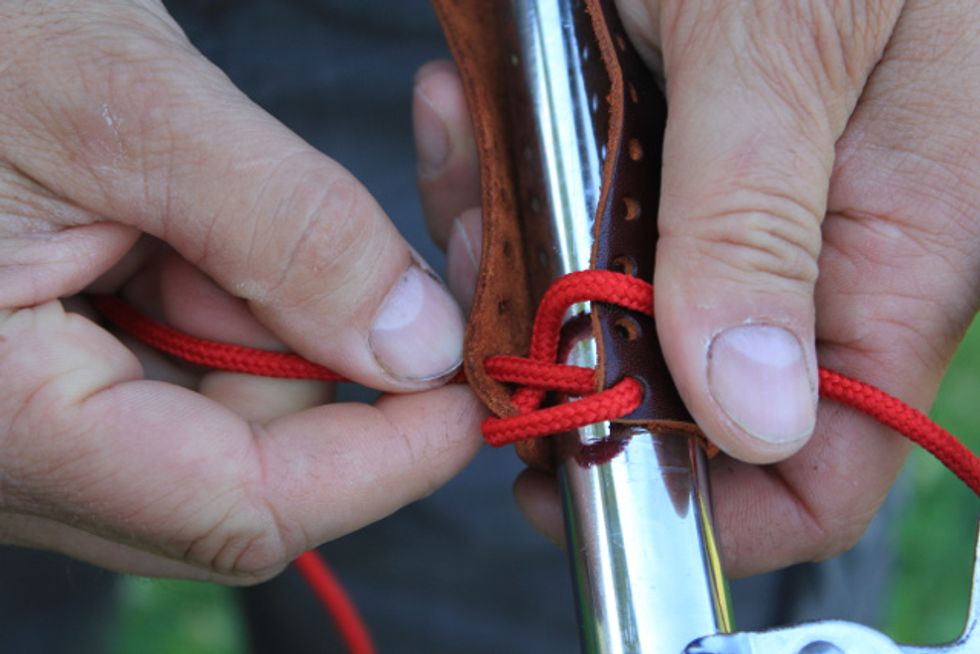
Lacing: Take one lace and thread it through the next hole on the opposite side from inside to outside.
Lacing: Take the other lace and thread it through the next hole on the opposite side from inside to outside. Continue with the same lace to the next (third) hole on the opposite side (in- to outside)
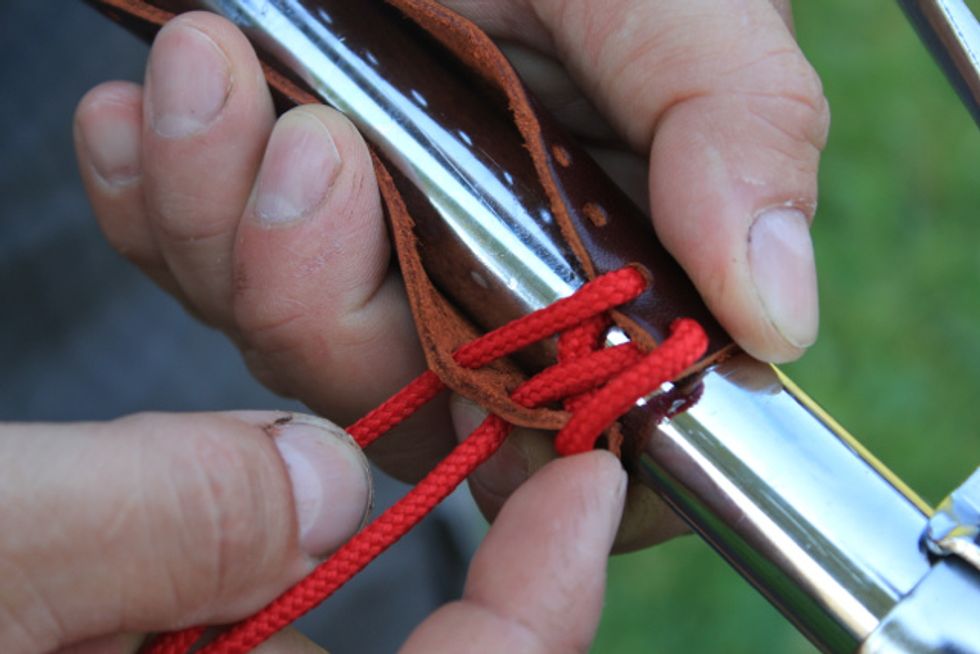
Laceing: Repeat the previous step until half to 2/3 of the grip is laced.
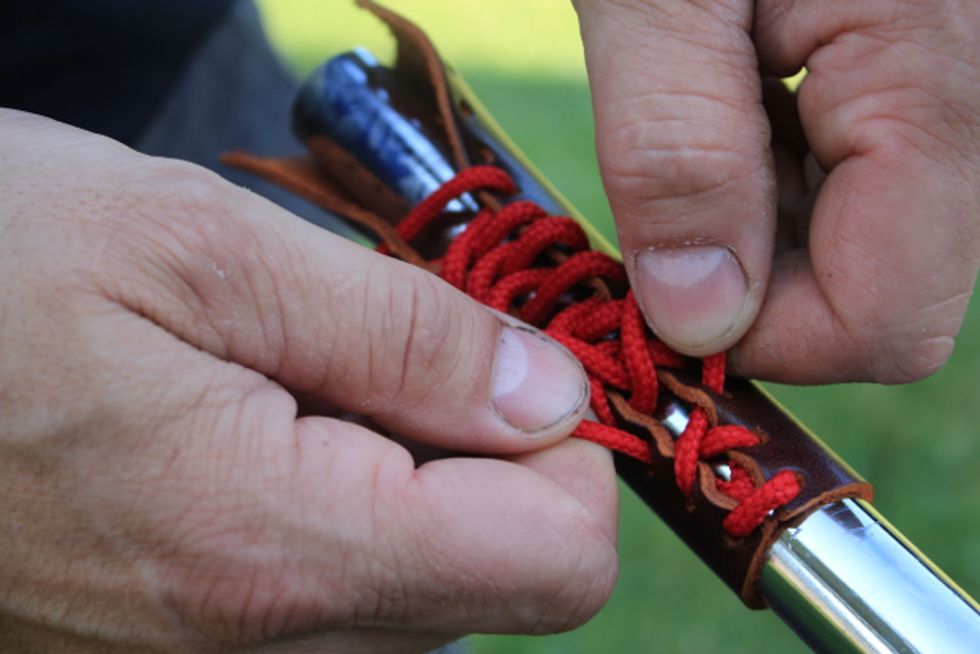
Laceing: Return to the beginning and tighten the laces by pulling on the lace emerging from the second set of holes. Using your fingers and thumbs work the lace until it is snug across the first holes

Continue tightening the laces until 2/3 of the grip's lace is tight.
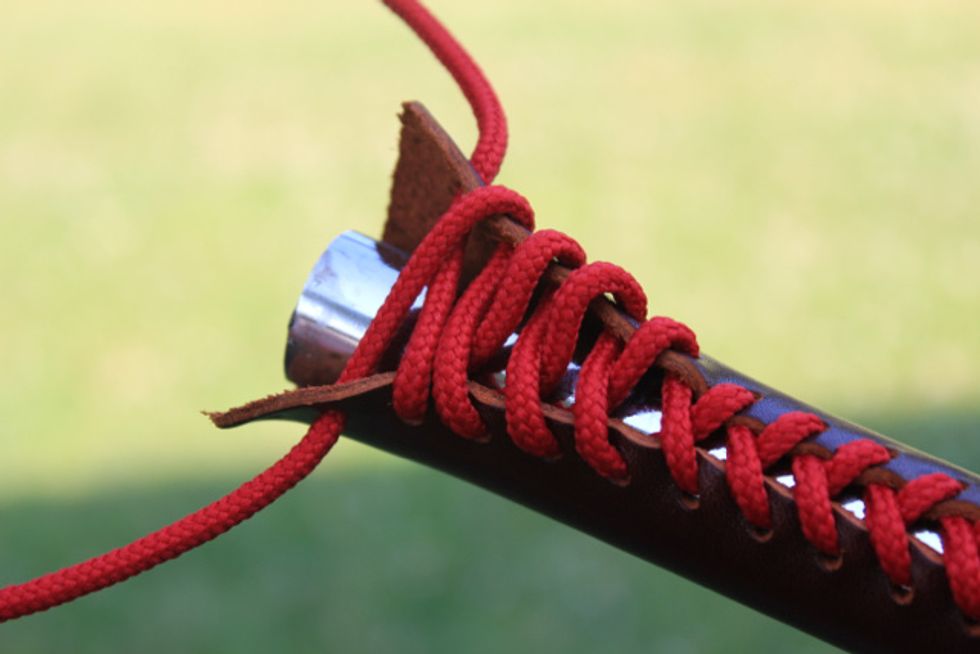
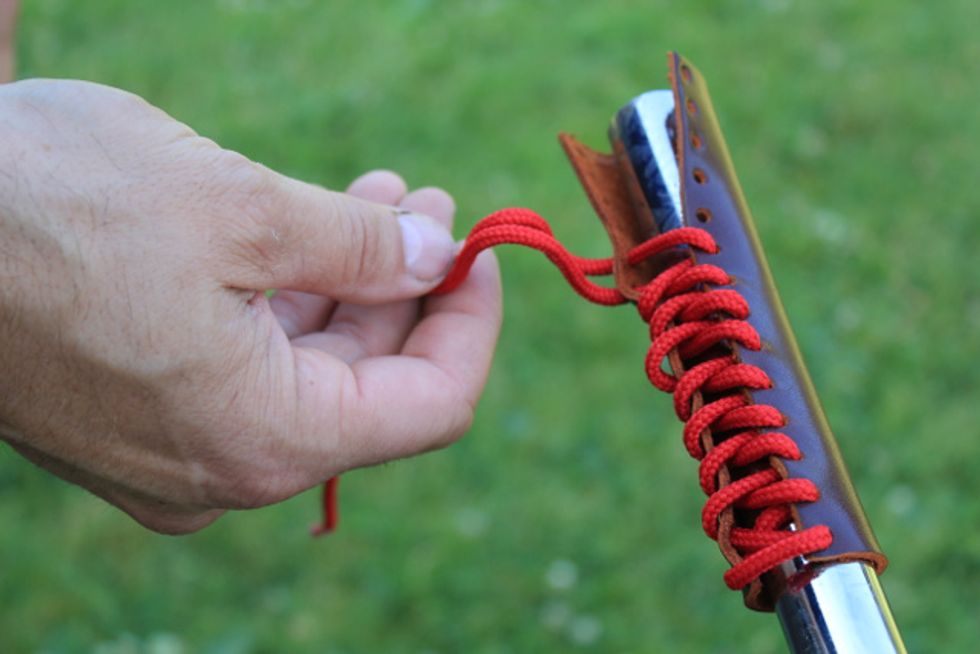
Complete the lacing (as in step 14).
Tighten the laces in the final 1/3 of the grip.
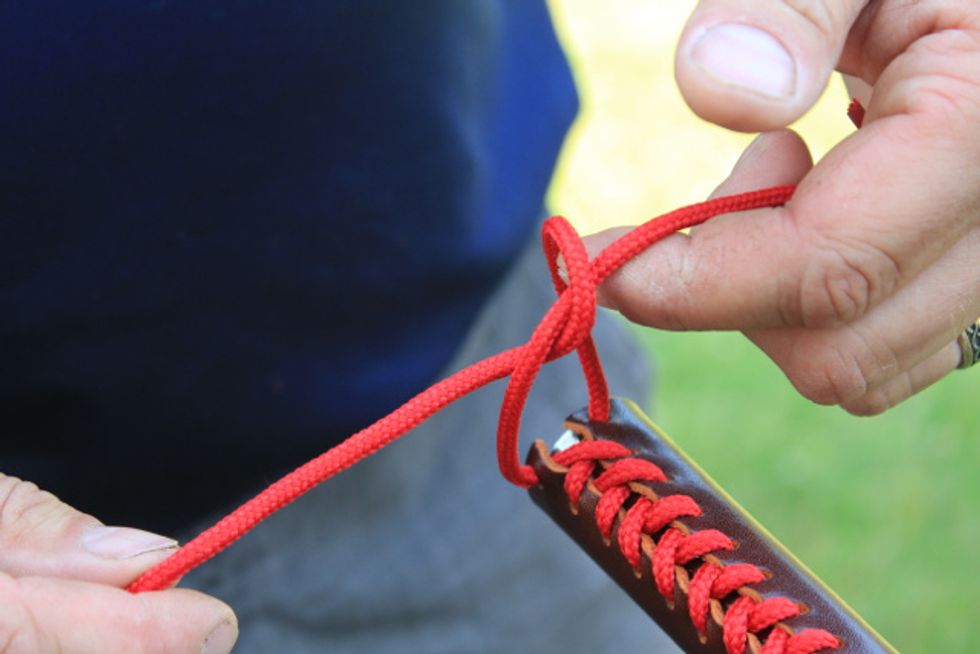
Tie an overhand knot and pull tight.
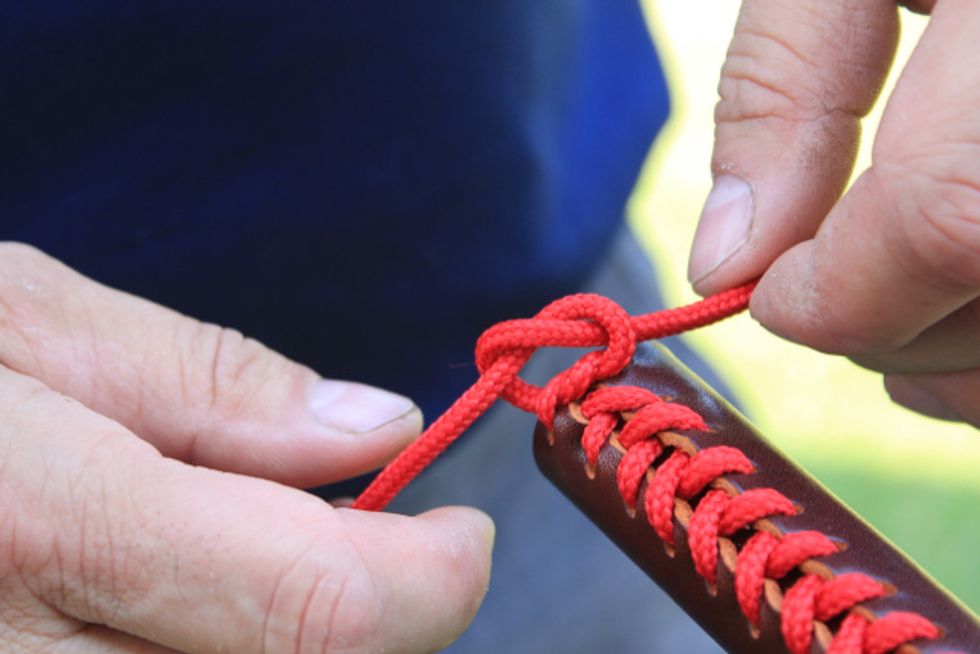
Create a reef (square) knot by tying a second overhand knot as in figure 16.
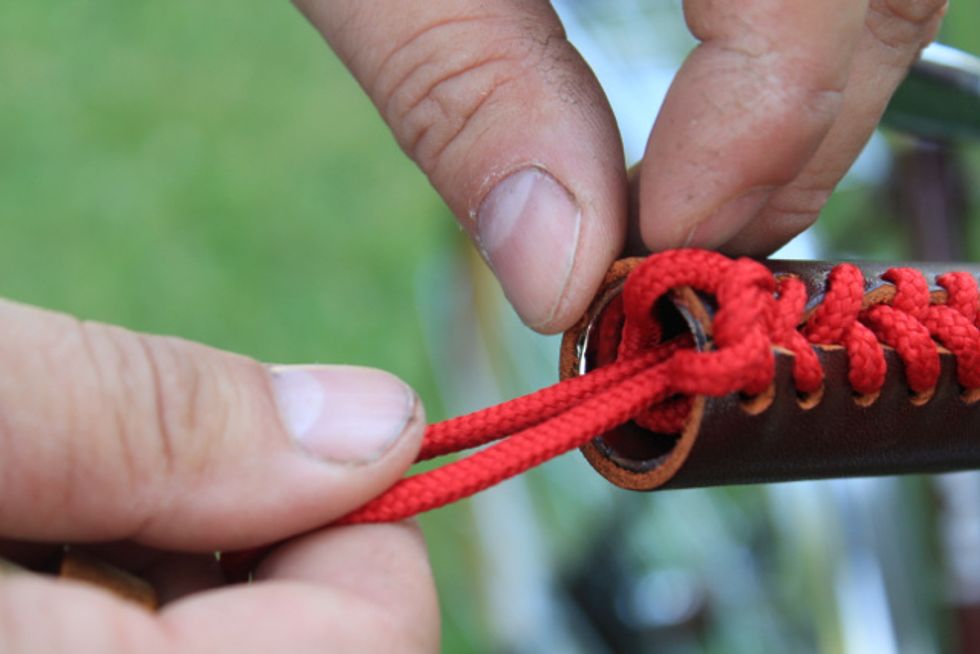
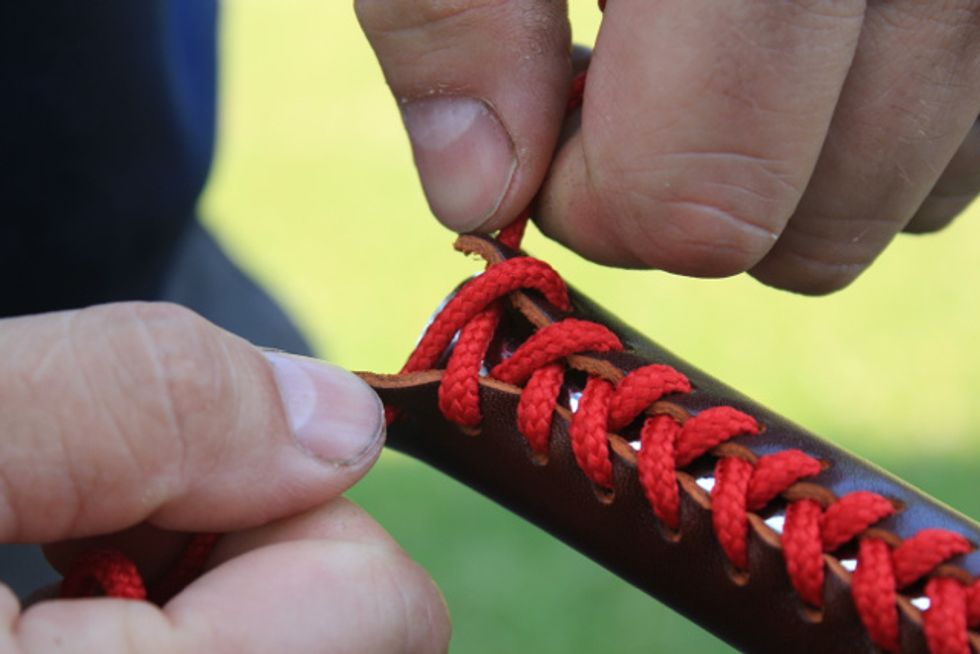
Tuck the excess lace in the bar end and ...
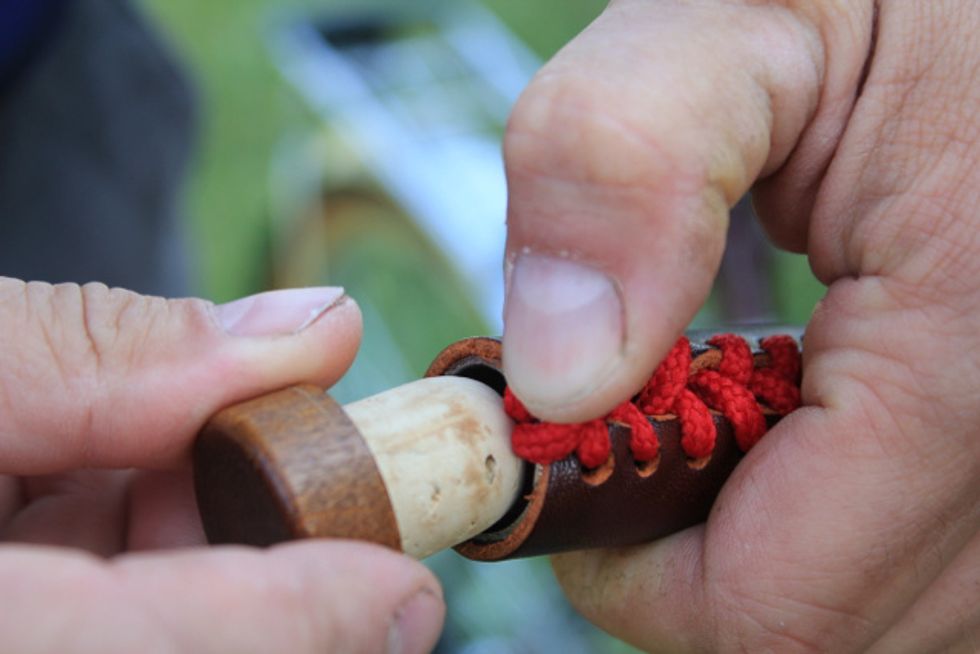
insert bar end plug and return brake lever, shifter and handle bar to their desired position and...

you're done!!