The Conversation (0)
Sign Up
Start by protecting yourself! Turn off your heater to be safe: depending on the type of heating/cooling system you have this could involve turning off both the electricity and gas running to it.
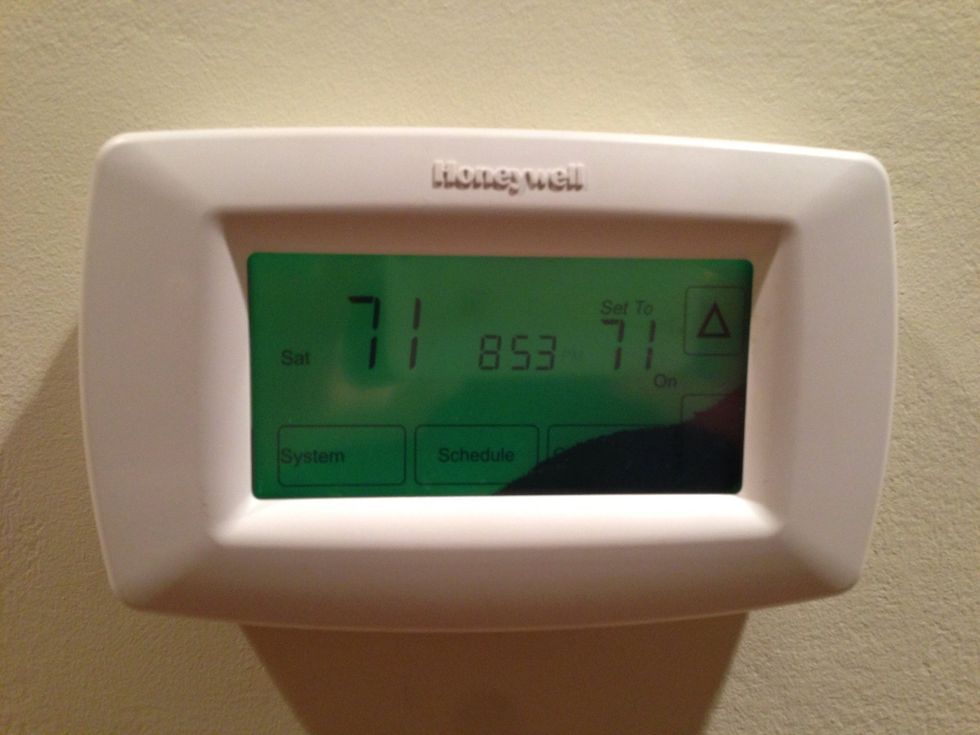
I damaged my thermostat awhile back and decided that it was time to upgrade. Fortunately, the Nest Thermostat was available. The fact that I can control it from my iPhone sold me on it.
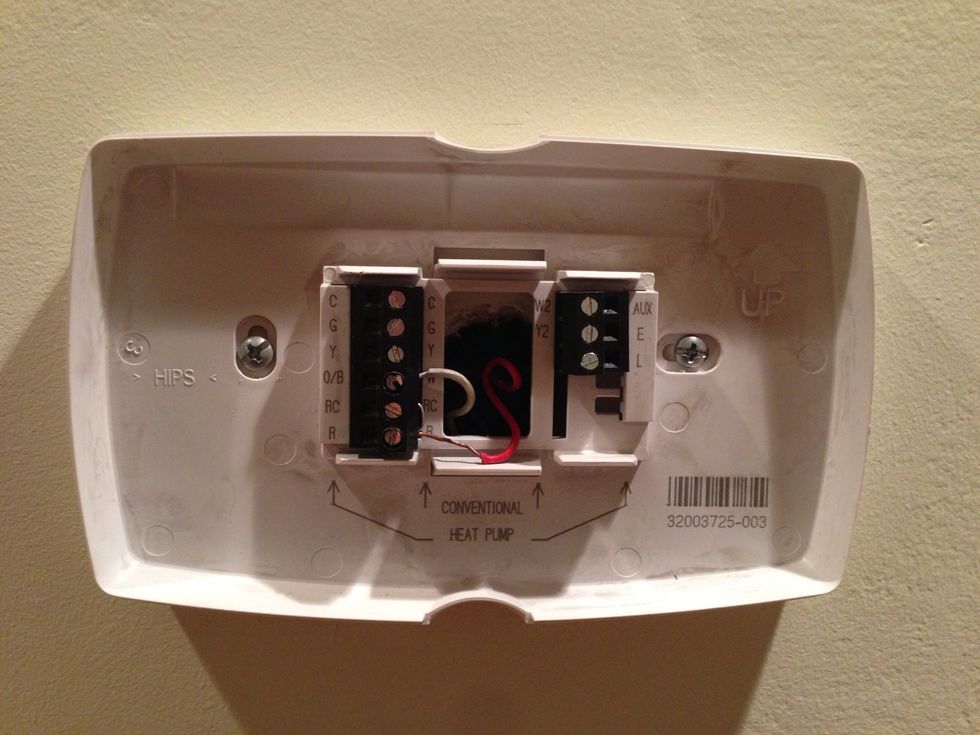
With the damaged Honeywell thermostat faceplate removed I began by documenting where there original wires were connected, this is very useful later!
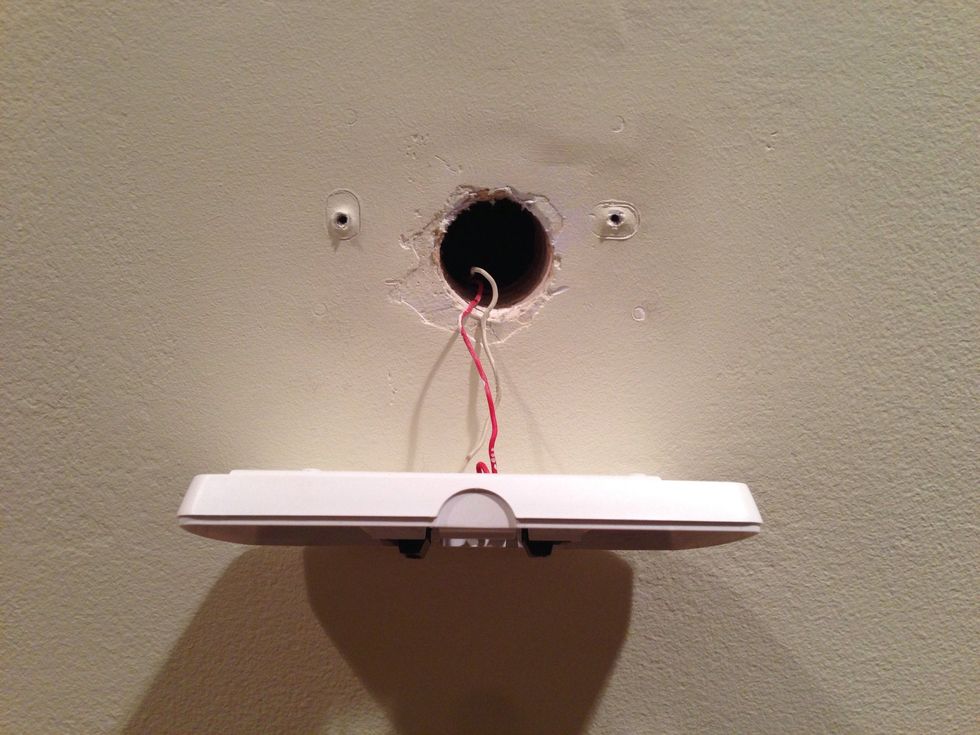
I then removed the thermostat from the wall. Dang, I have a few holes I don't feel like patching and painting, guess this means I'll be using the included trim plate (which is optional to install.)
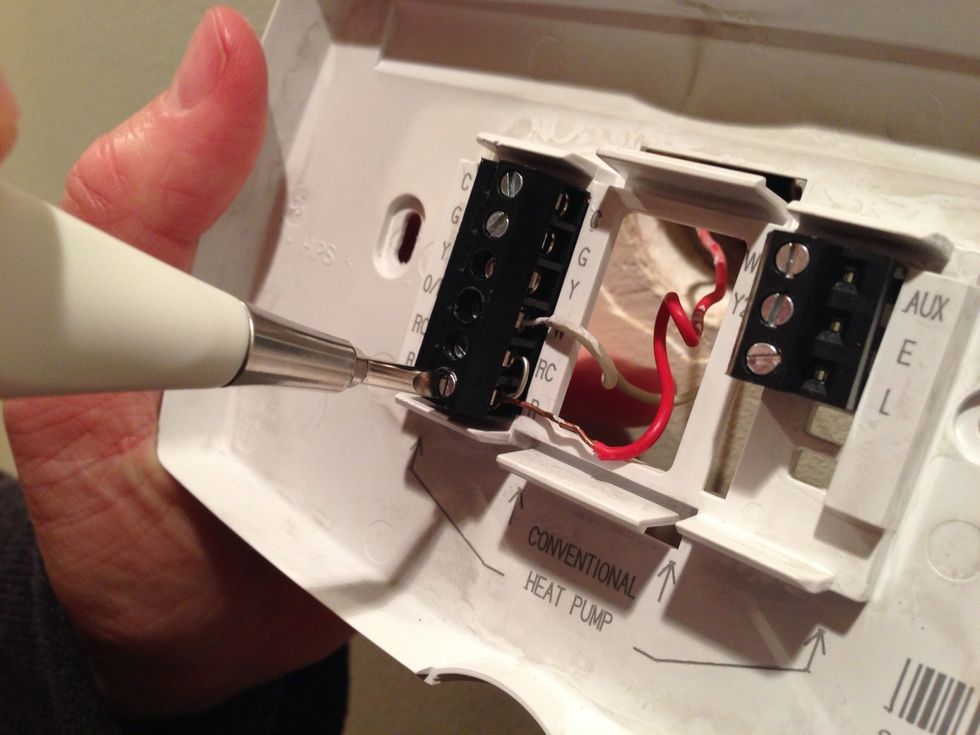
The Nest came with a handy, tiny screwdriver to remove these wires. You can label the wires with stickers included with your Nest but since I just have 2 wires I decided they were easy to remember.
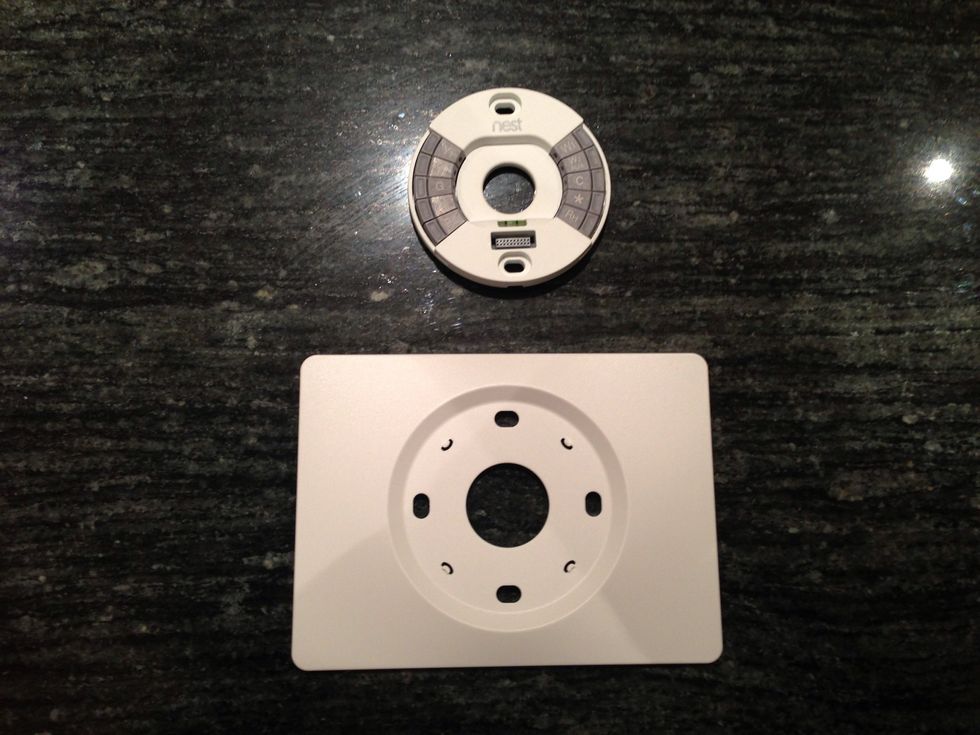
The Nest comes with a base (top in pic) and an optional trim plate (bottom in pic). The trim plate is useful to cover up holes or marks left by your old thermostat.
If you use the trim plate, place the base on top of the trim plate so that they snap together.
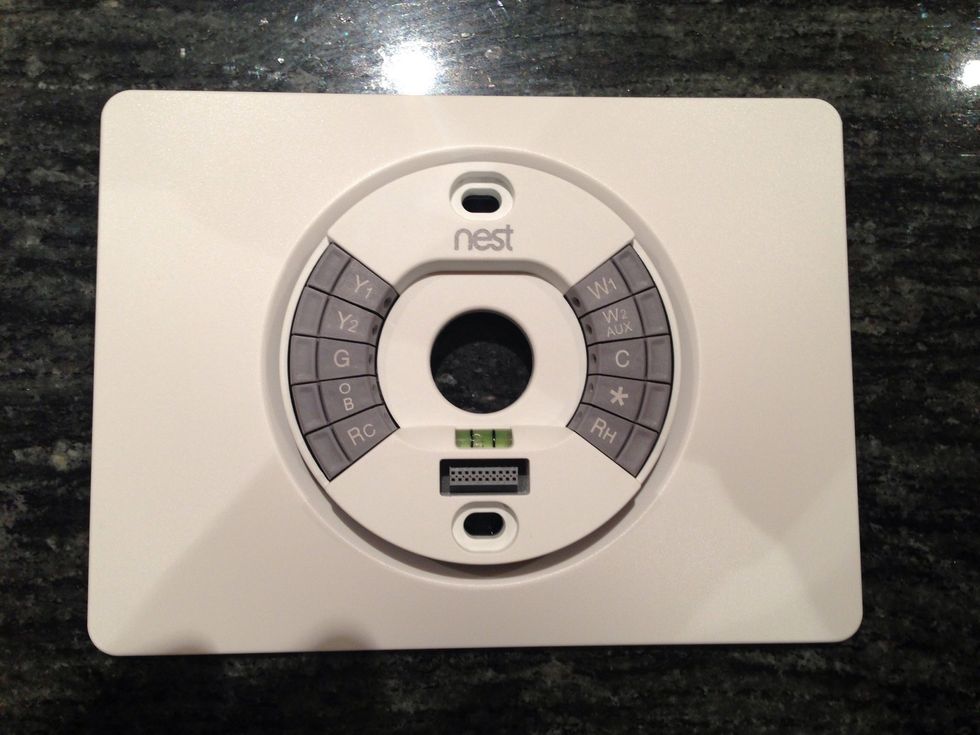
Place the trim plate and base on the wall and thread the wires through the center of them.
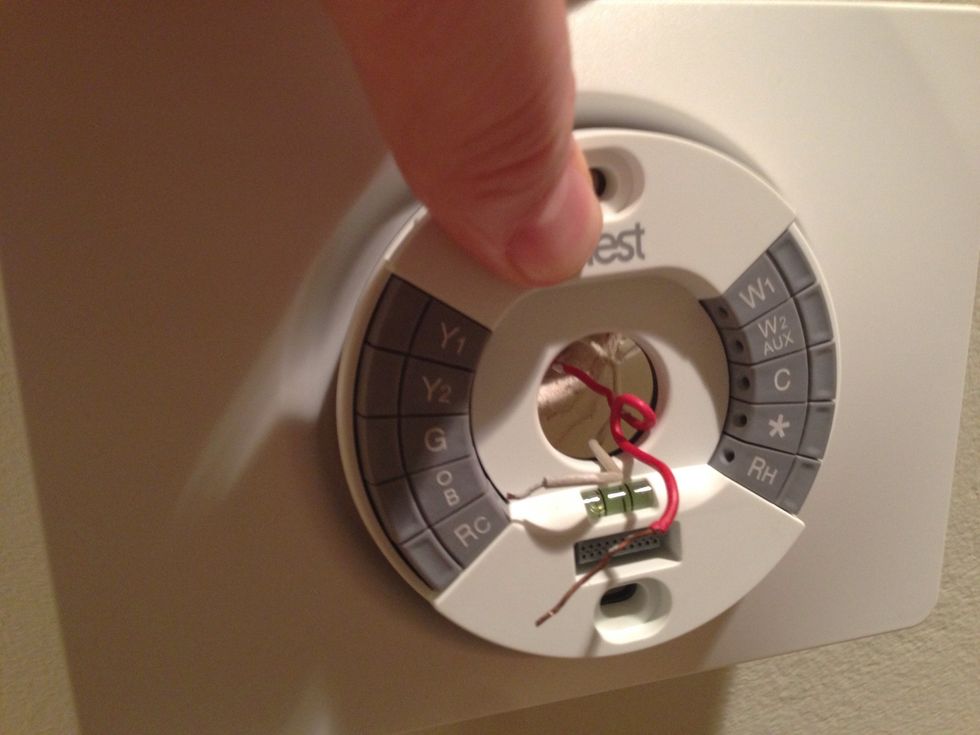
Refer to the wiring from your original thermostat and reconnect the wires to the Nest just as they were on the thermostat you removed. Note: on the Nest an R wire can connect to either an Rc or Rh.
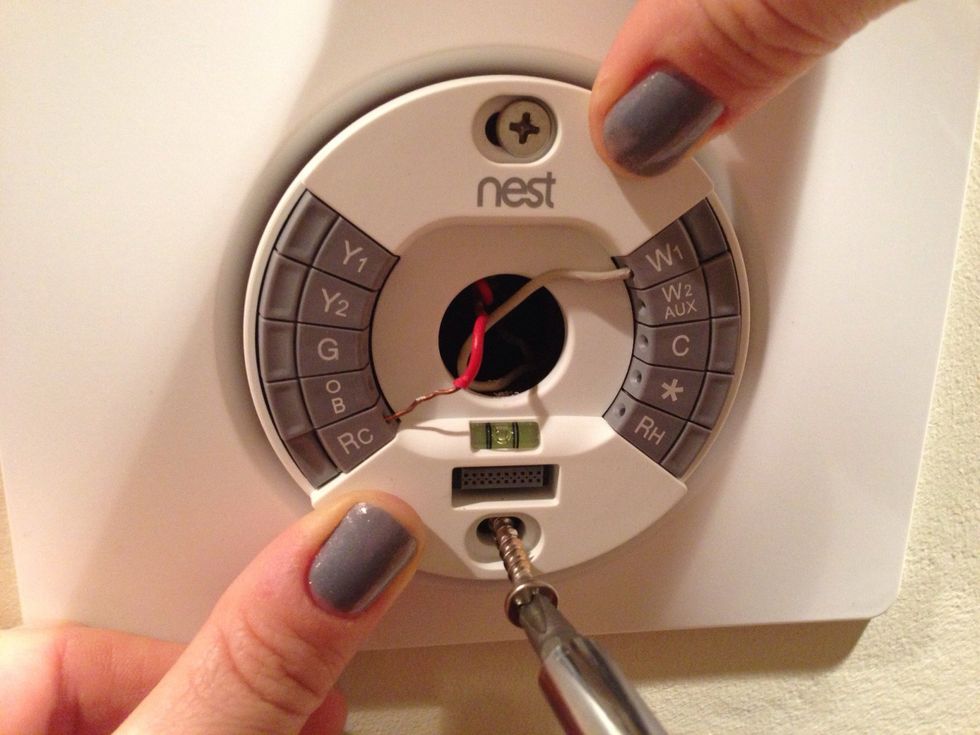
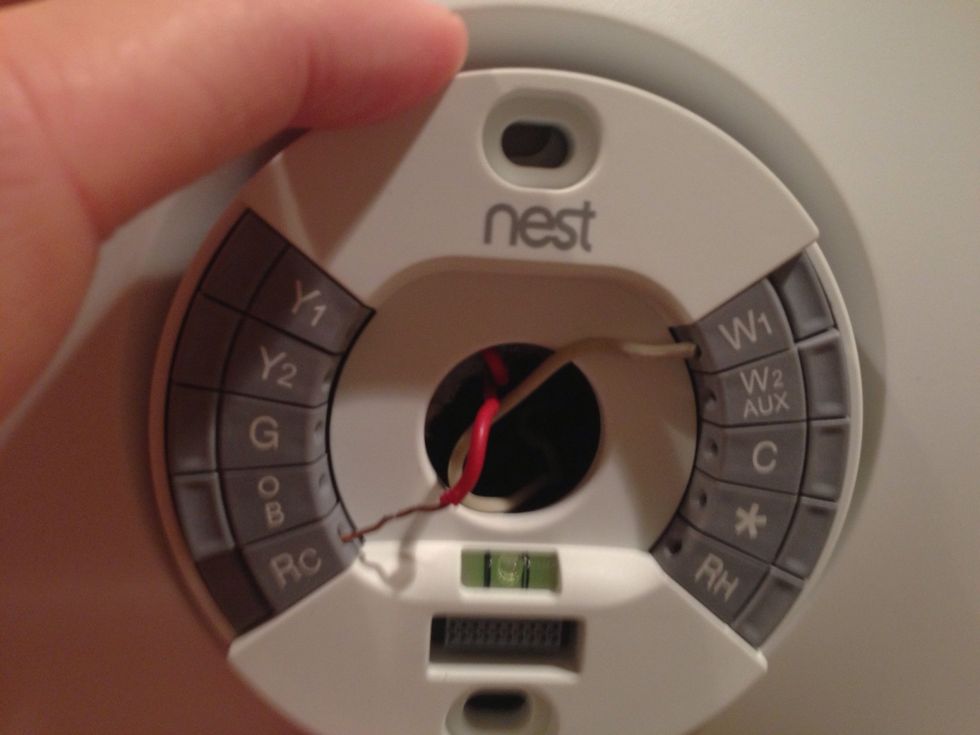
With the wires re-connected use the built in level to make sure the faceplate is aligned on the wall. Then screw it into place. Make sure to push the wires into the center hole as much as possible.
With all the wiring complete it's time to turn back on your heater: depending on the type of heating/cooling system you have this could involve turning on both the electricity and gas running to it.
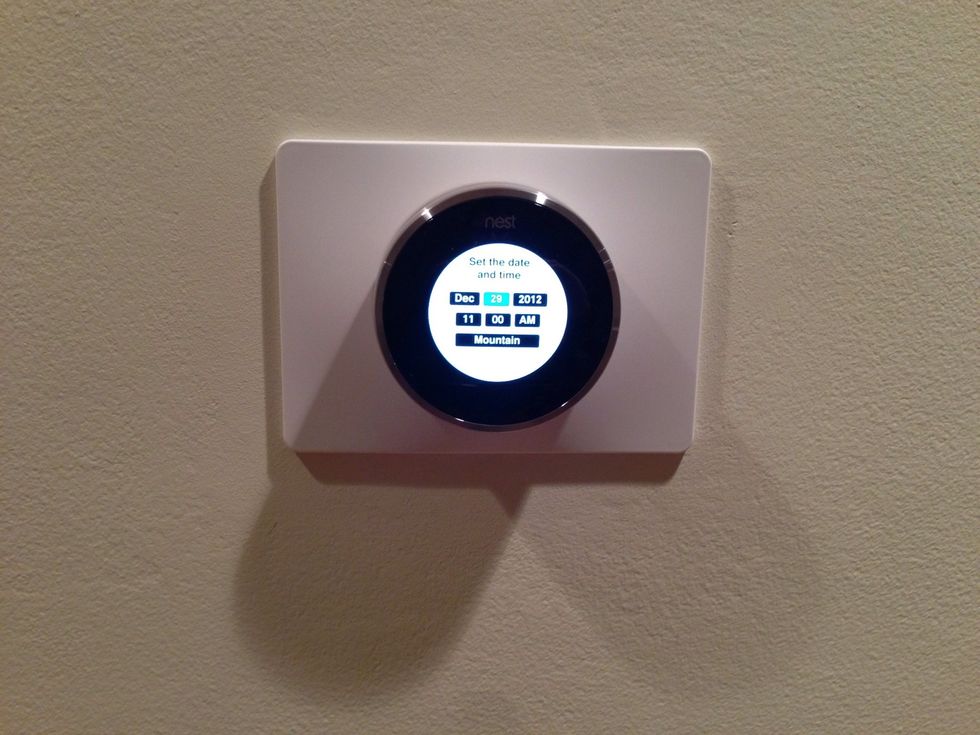
Attach the Nest faceplate and if all went smoothly you'll be ready to start configuring the software!
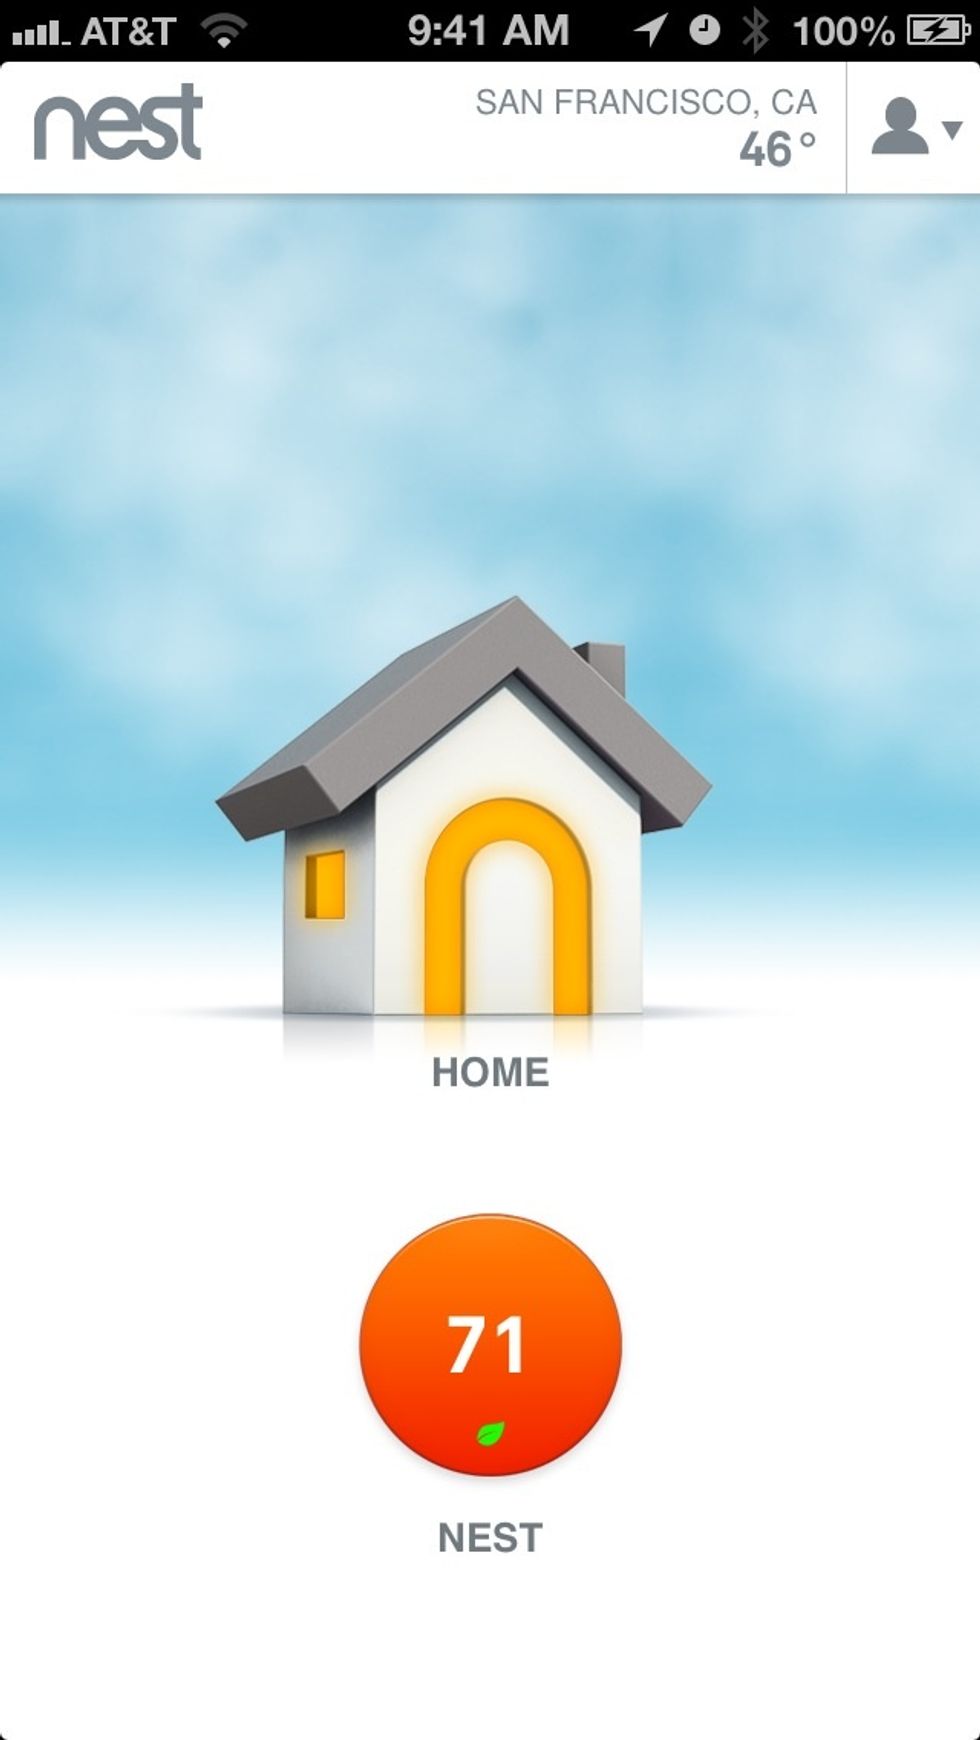
Once you've configured the Nest thermostat to get access to your wifi network you'll be ready to download their mobile app and pair it with your Nest account and control your thermostat remotely!