The Conversation (0)
Sign Up
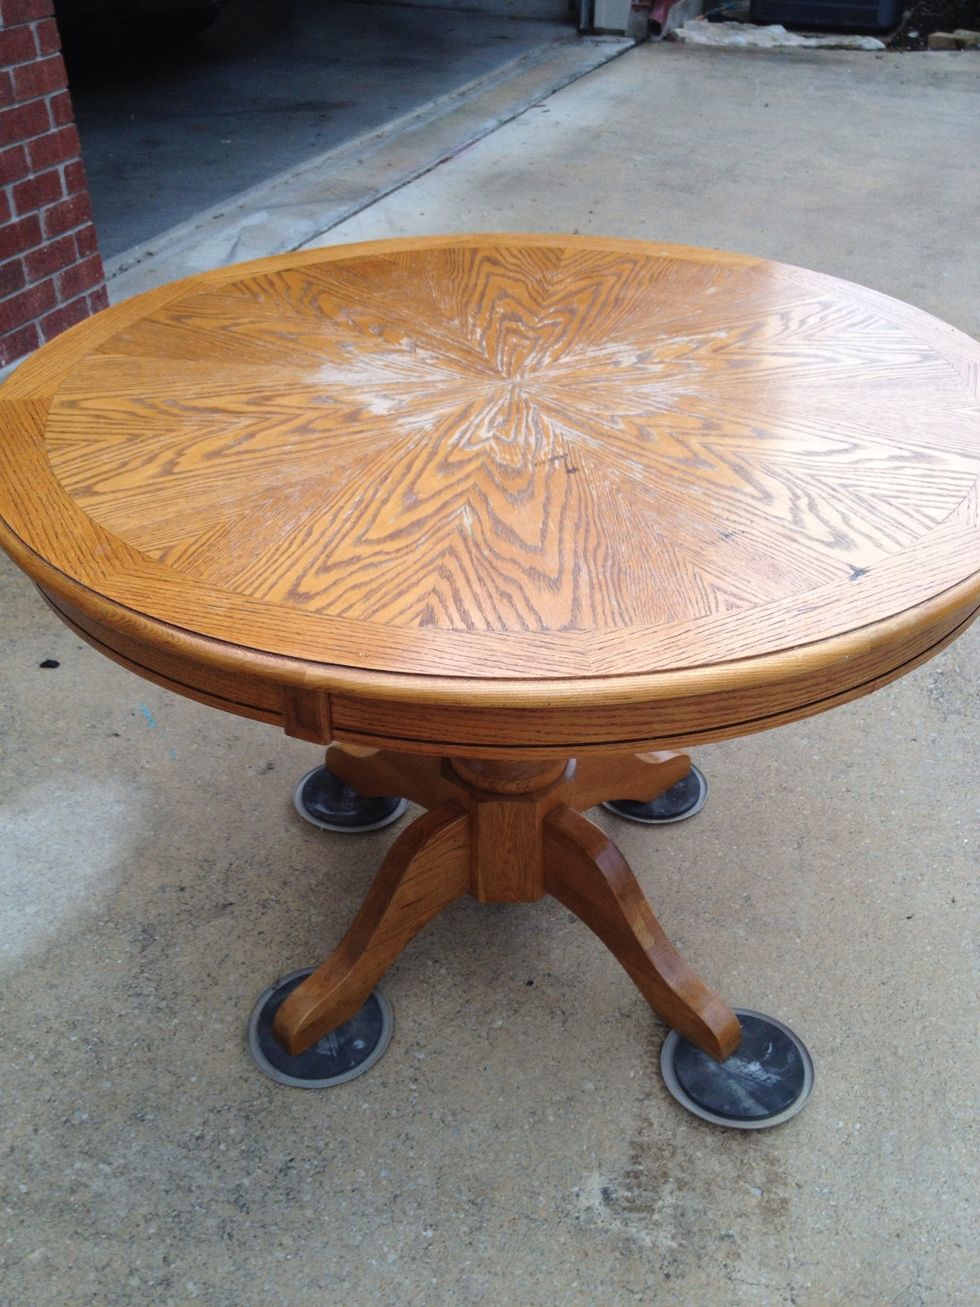
My friend wanted a new look for her table. She was tired of the pine look, but wanted to salvage this one instead of buying new.
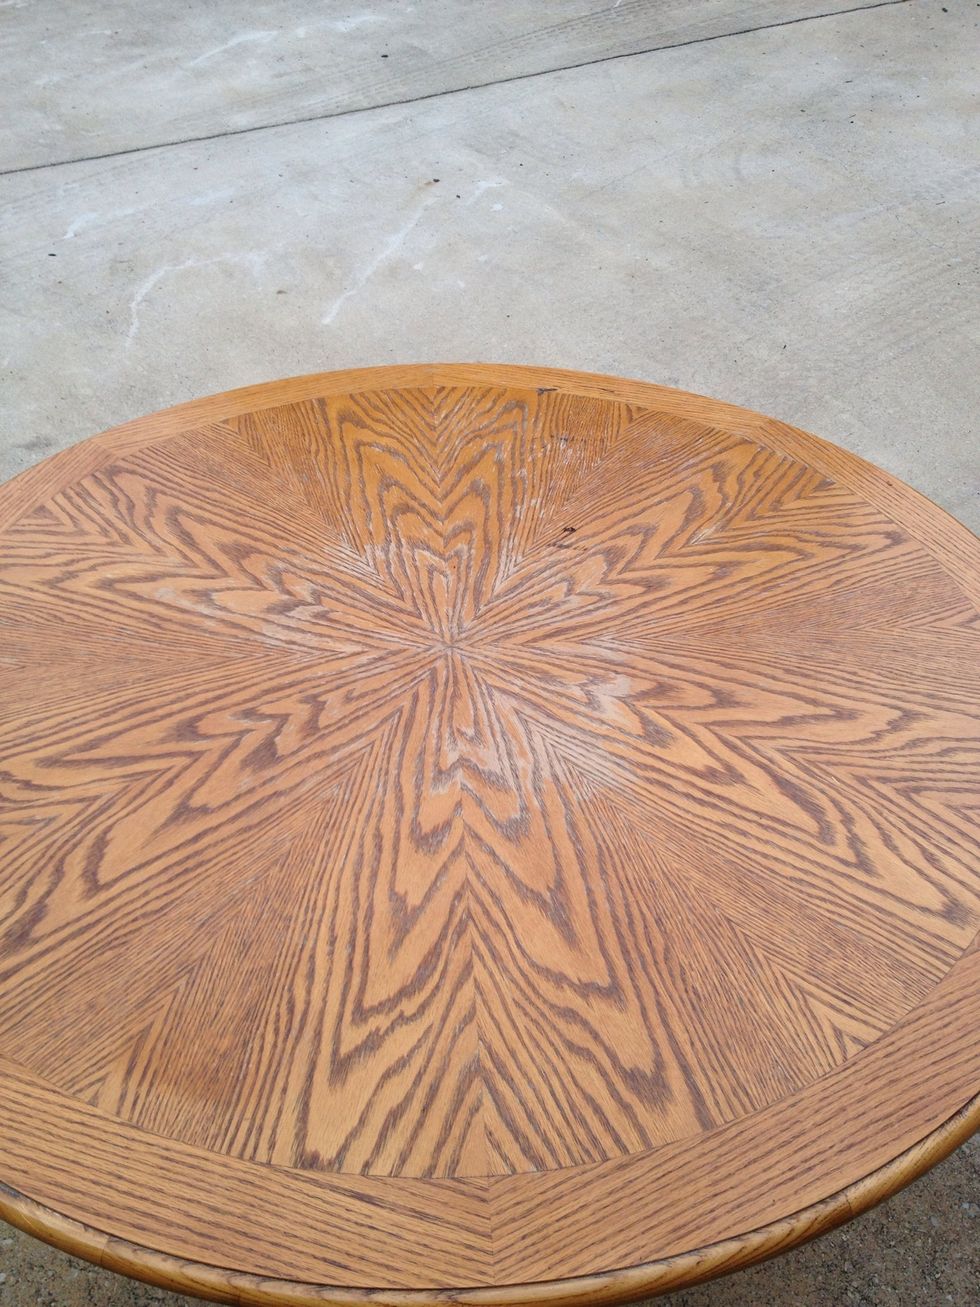
Sanded lightly to smooth out top and areas with signs of wear.
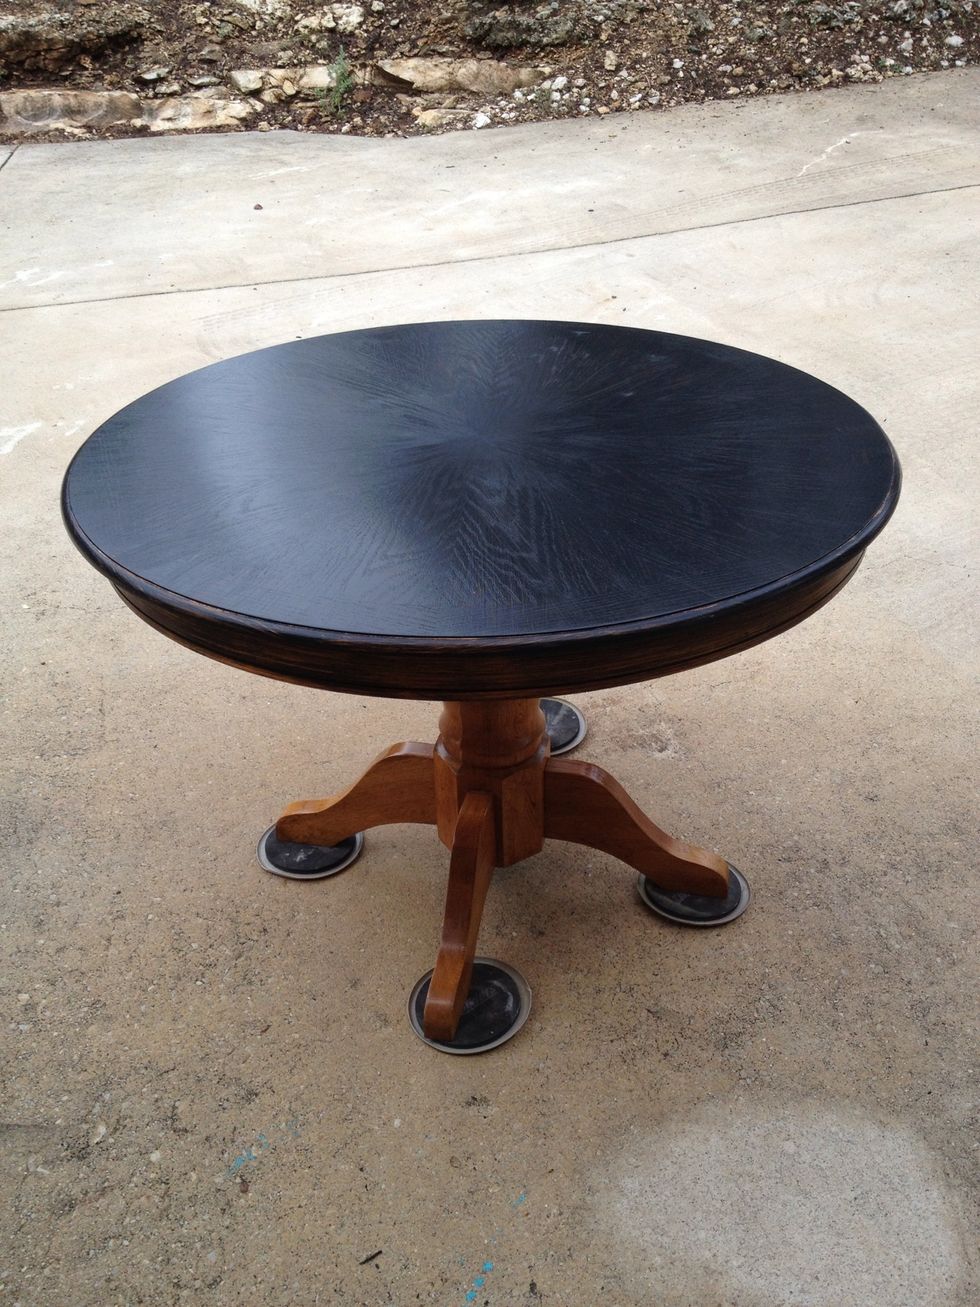
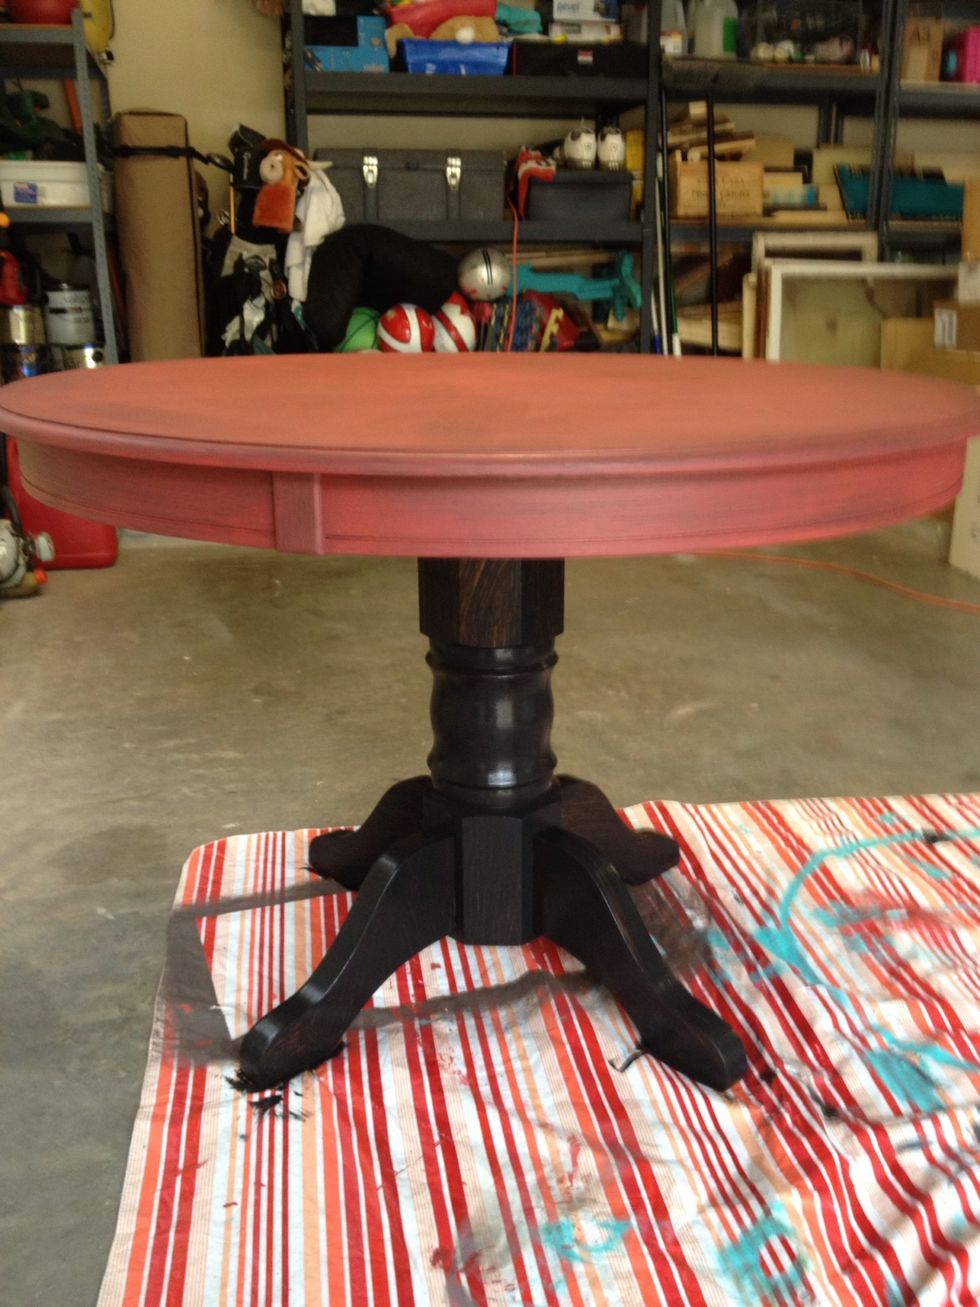
Next I painted the top with black chalk paint (not chalkboard). I did this to give dimension to the paint. I would have just dark waxed over red, but this table will be used daily.
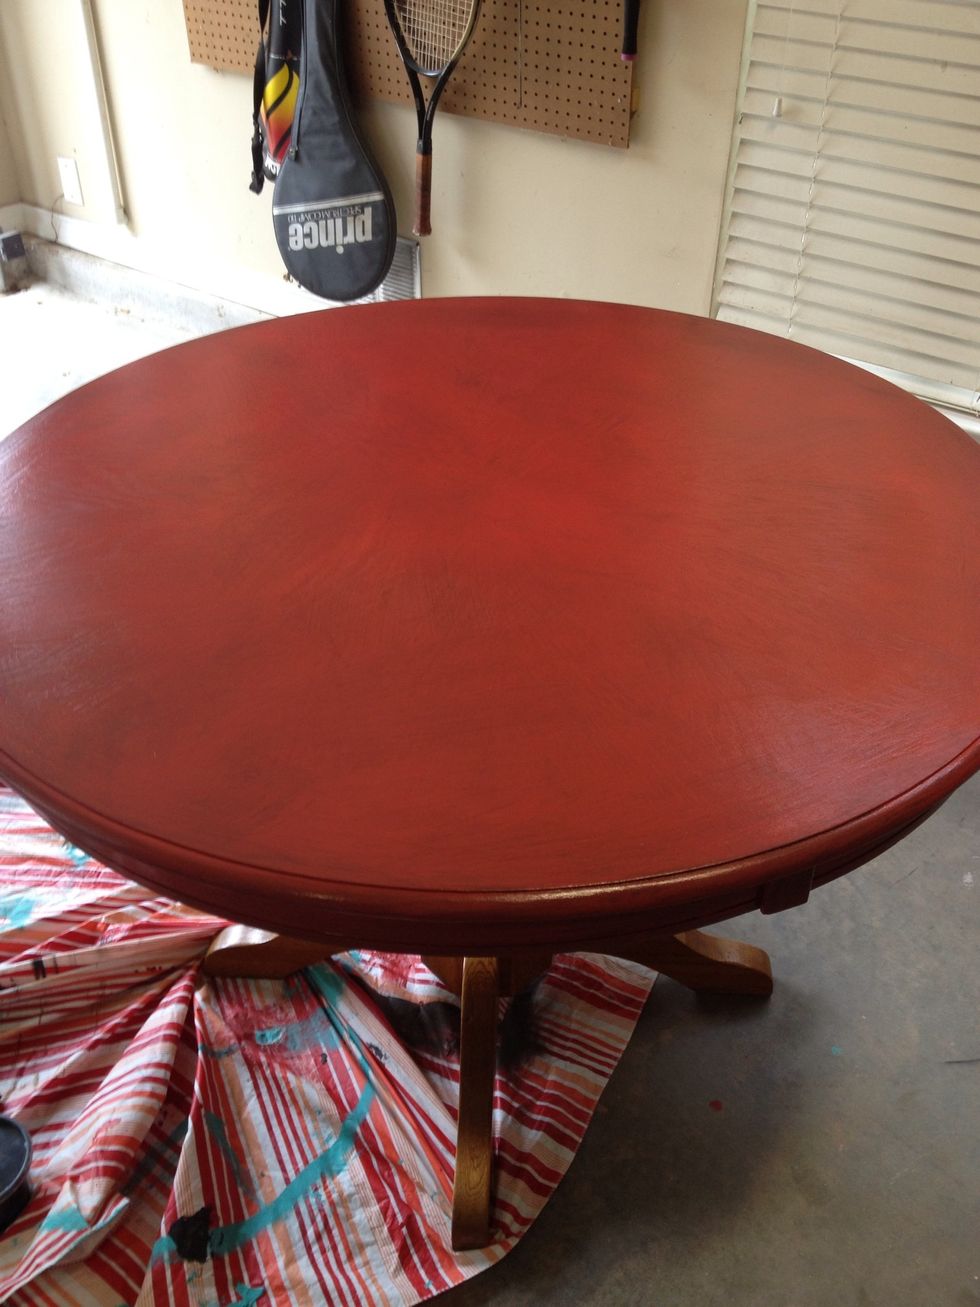
I applied red chalk paint and brushed in all directions. I purposely left some black showing. Gives a 'washed' look.
I now attacked the base. Surprise!!! I loved it black-but she wanted all red.
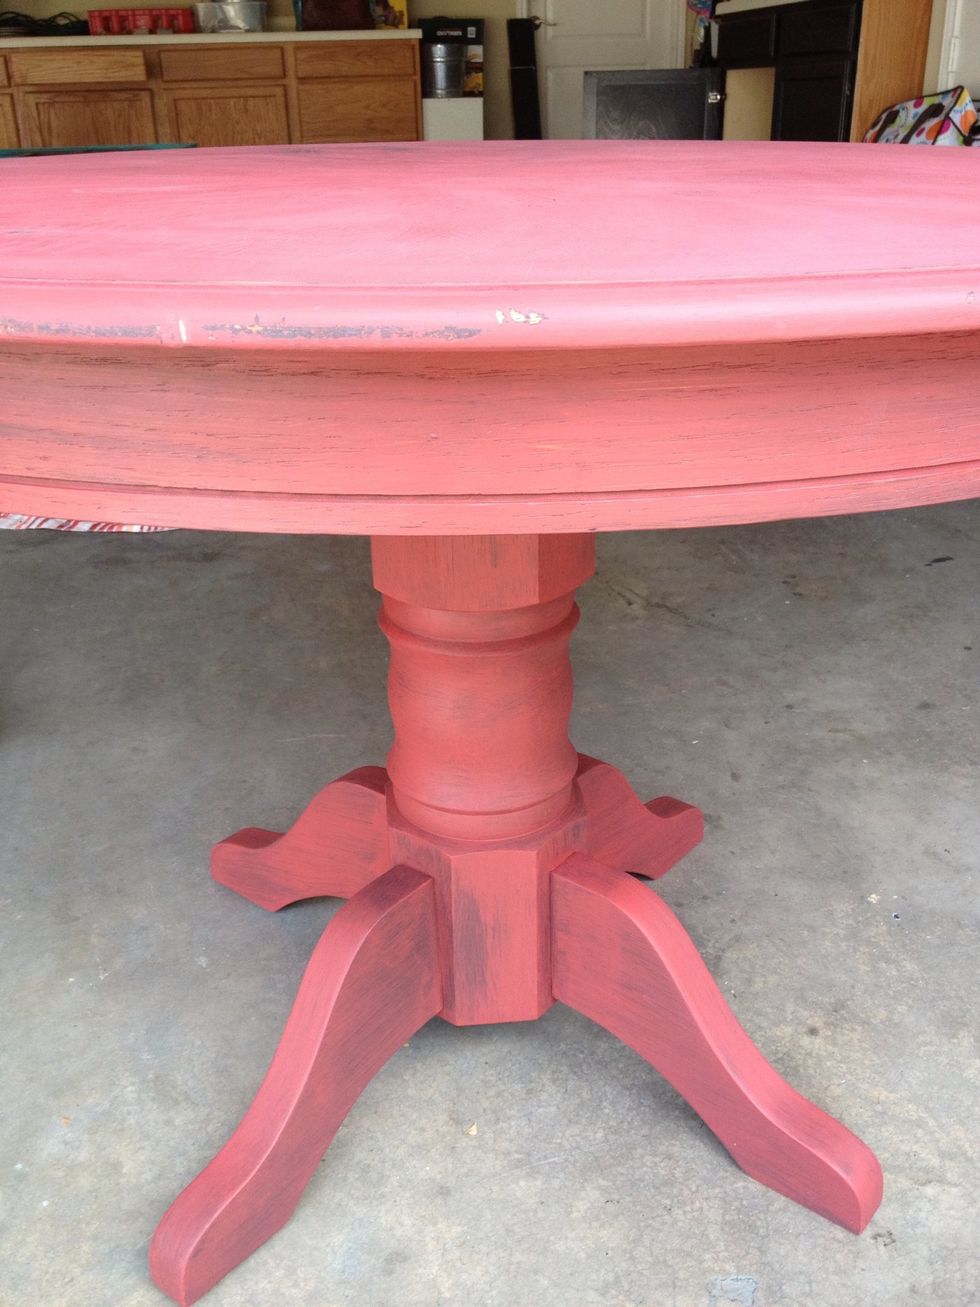
Well now that's a mind changer. Going back to black!!
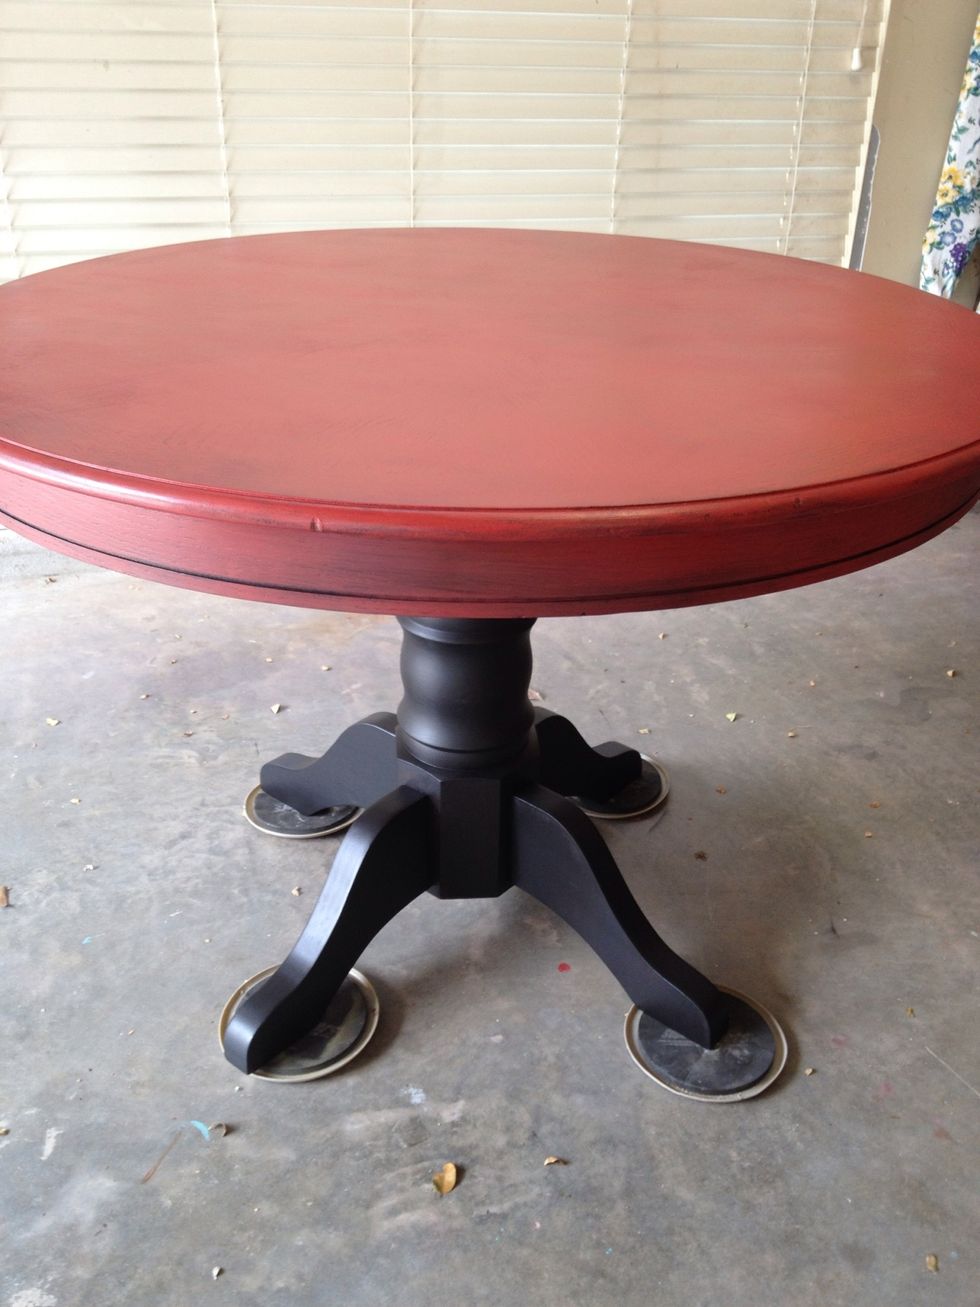
Repainted the base. Added black to detailed groove also. I will seal entire table with wipe on poly.

Looks much better!! She loves it now.

Used a microfiber towel to apply poly. No lint and no streaks.