The Conversation (0)
Sign Up
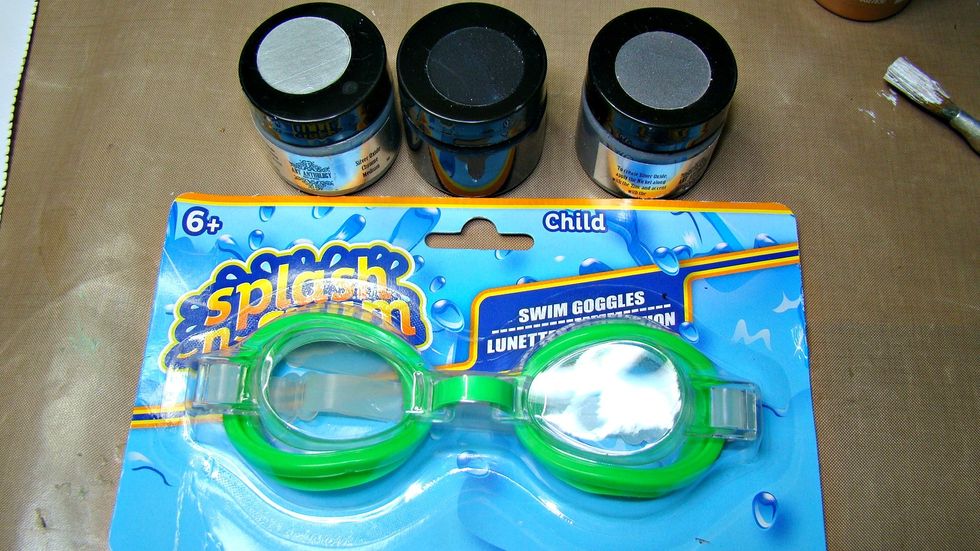
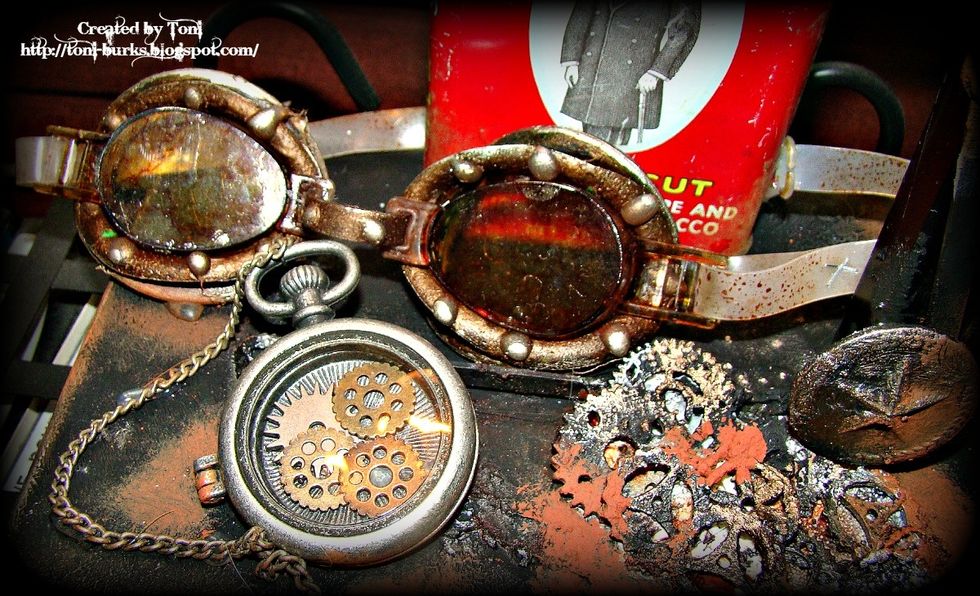
I purchased this water goggles at the dollar store. Completely take apart in order to alter.

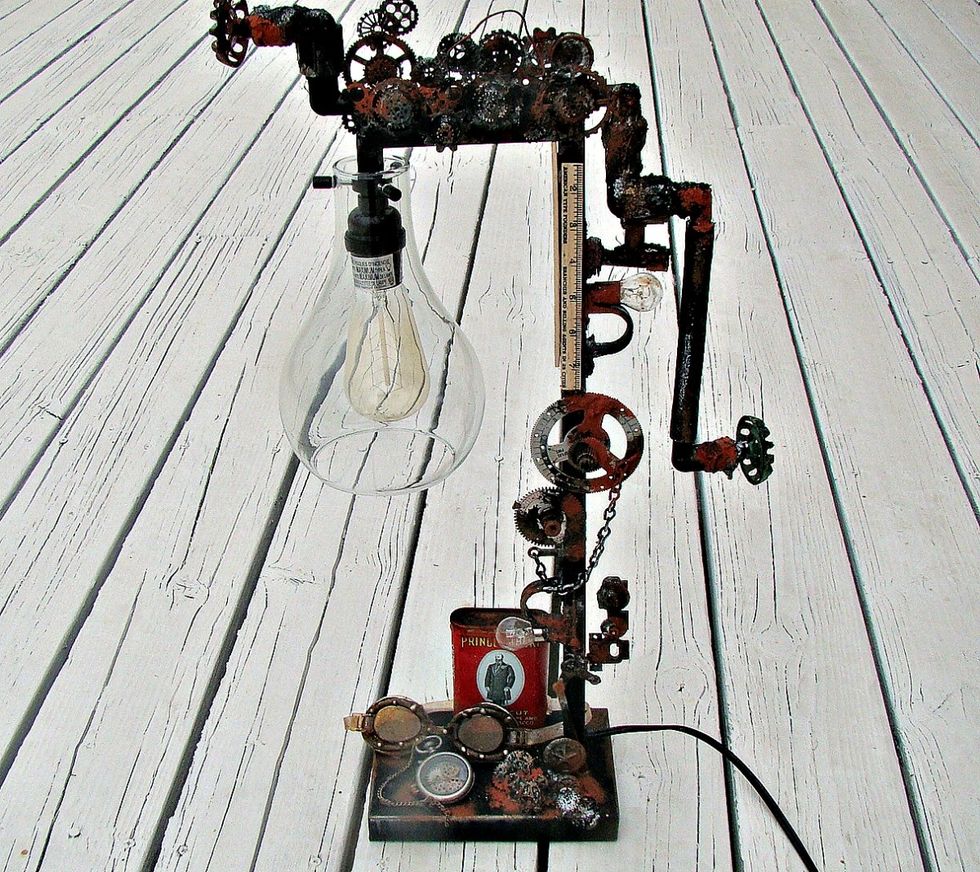
Here is the basic lamp I purchased for $25.00.
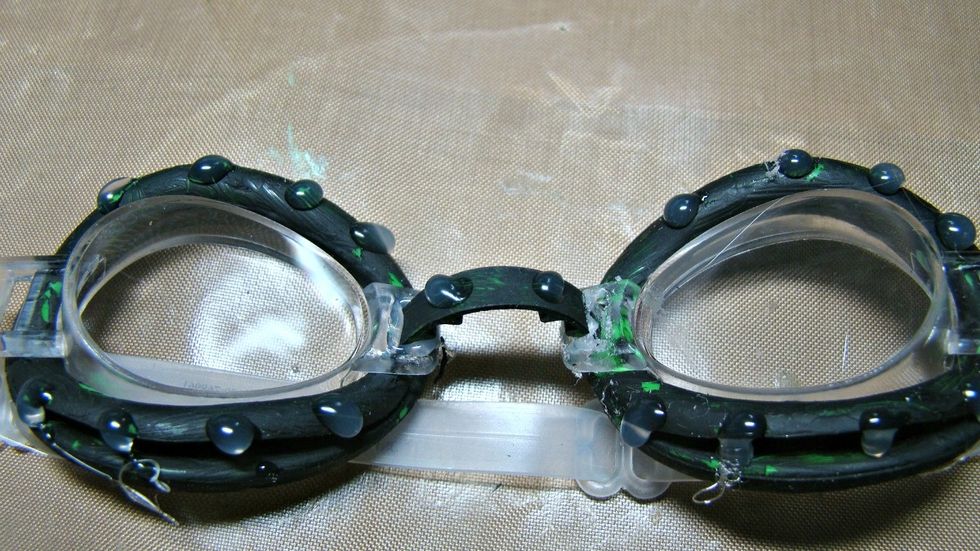
Give the outside rim of the goggles a coat of black gesso in order to prime the surface for other paints. Use glue gun to make drops to resemble rivets.
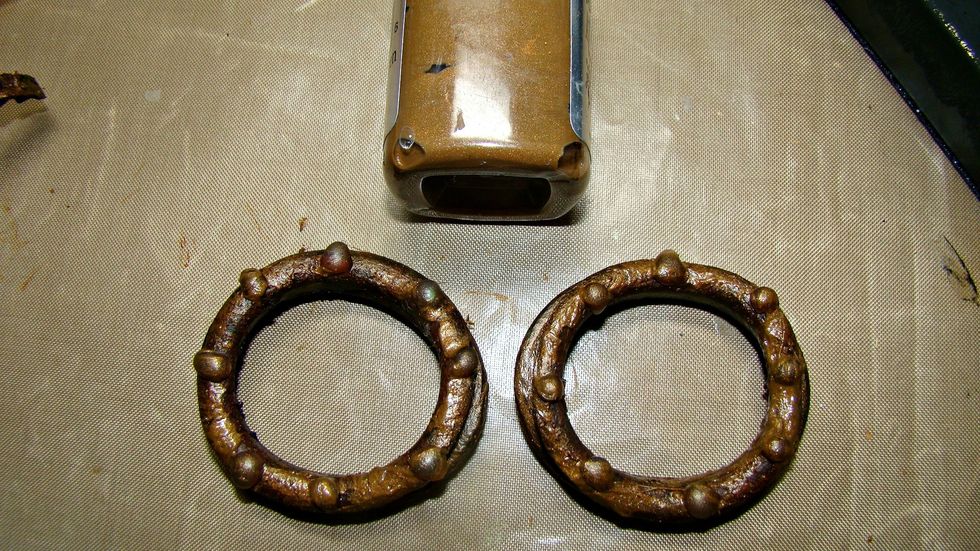
Apply a nice coat of Kona paint over the tops of the goggle frames, once dry insert your lenses and tint them with alcohol ink in Caramel.
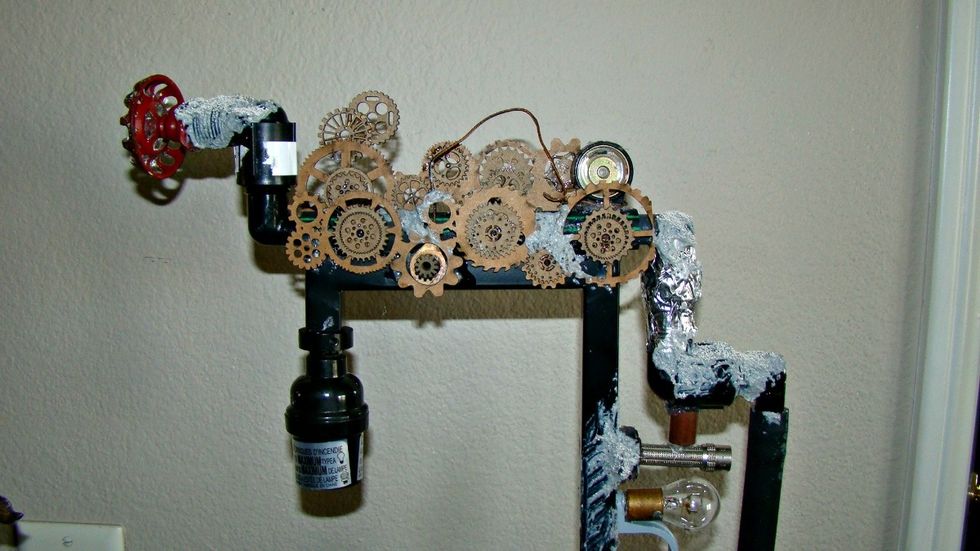
Apply multiple pieces of chipboard, wire, metal pieces, pipes etc.

Take your time doing this because the more details the better. I used E6000, glue gun and 3D Mat Gel for adhesives. Mix Mud Paste with craft sand and apply here and there for texture.
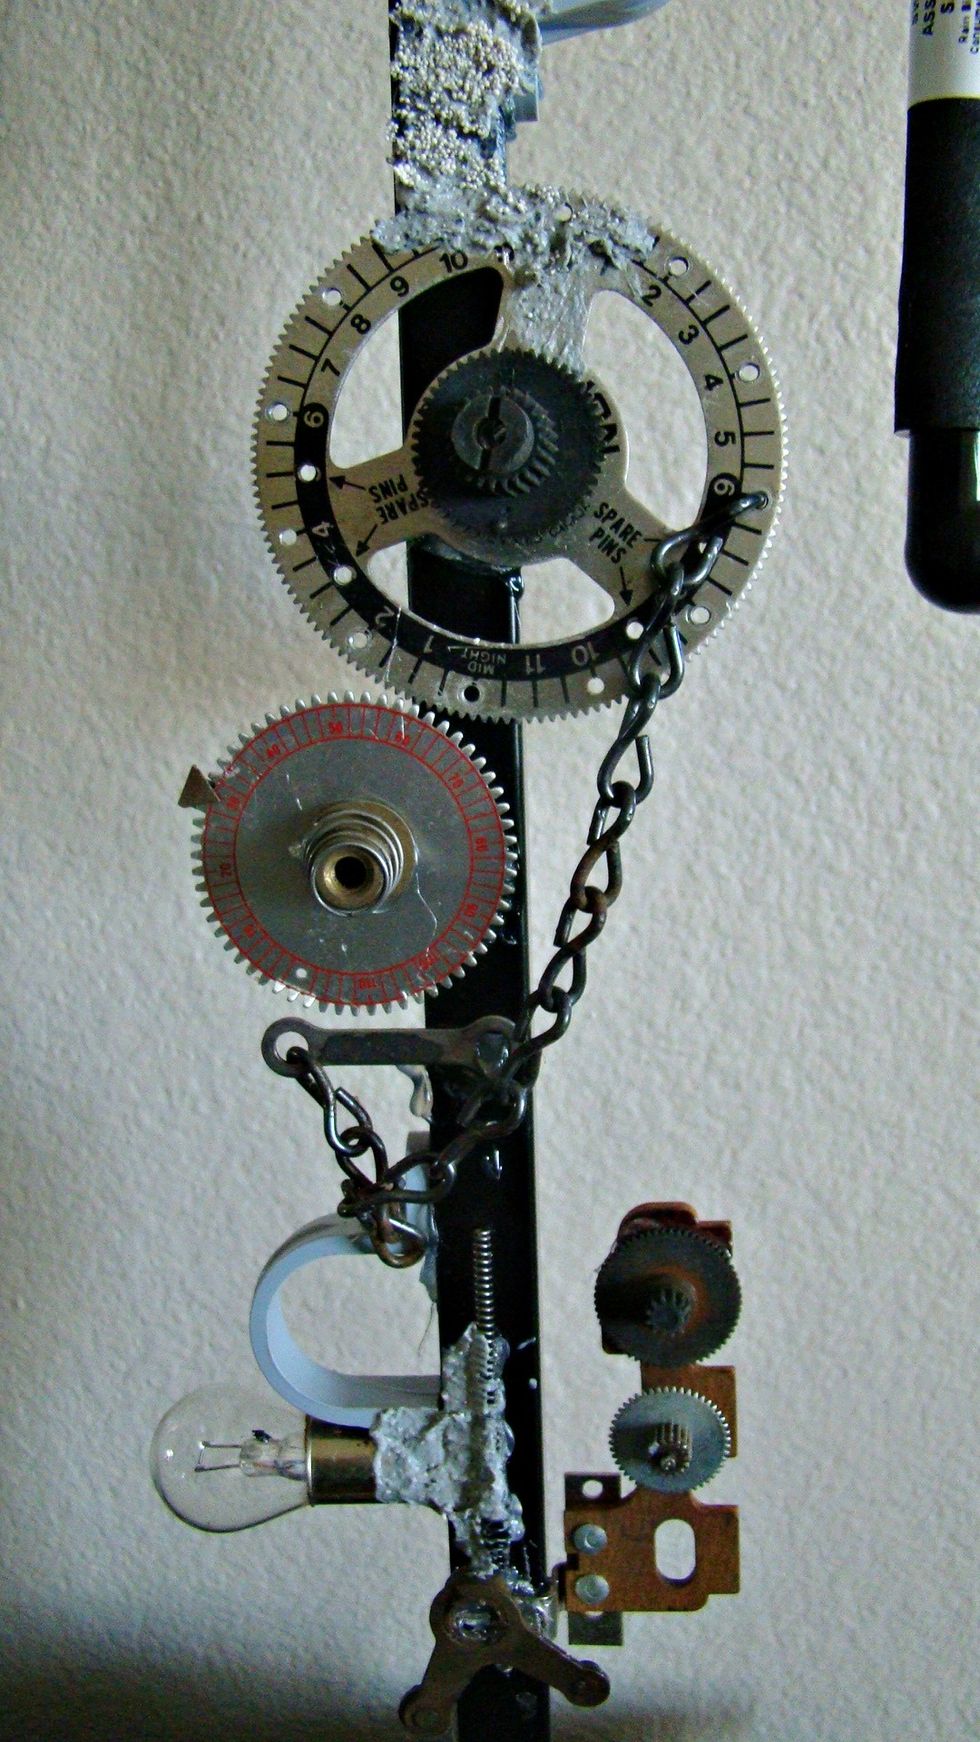
Continue adding all your gears and gadgets and adding more texture paste.
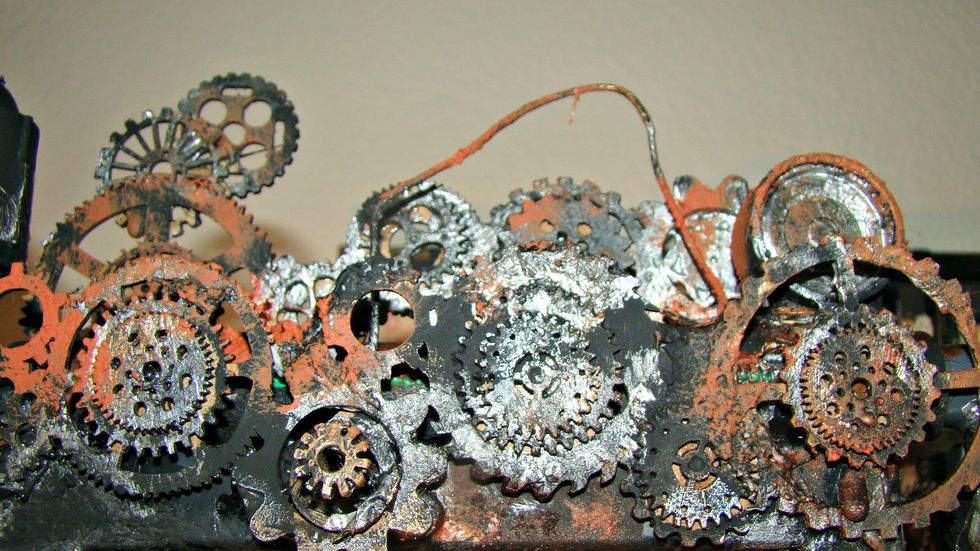
Now apply coat of black gesso here and there on your gadgets and then apply your rust texture set and spritz water to blend and run. Then highlight with your silver, gold and copper paint.
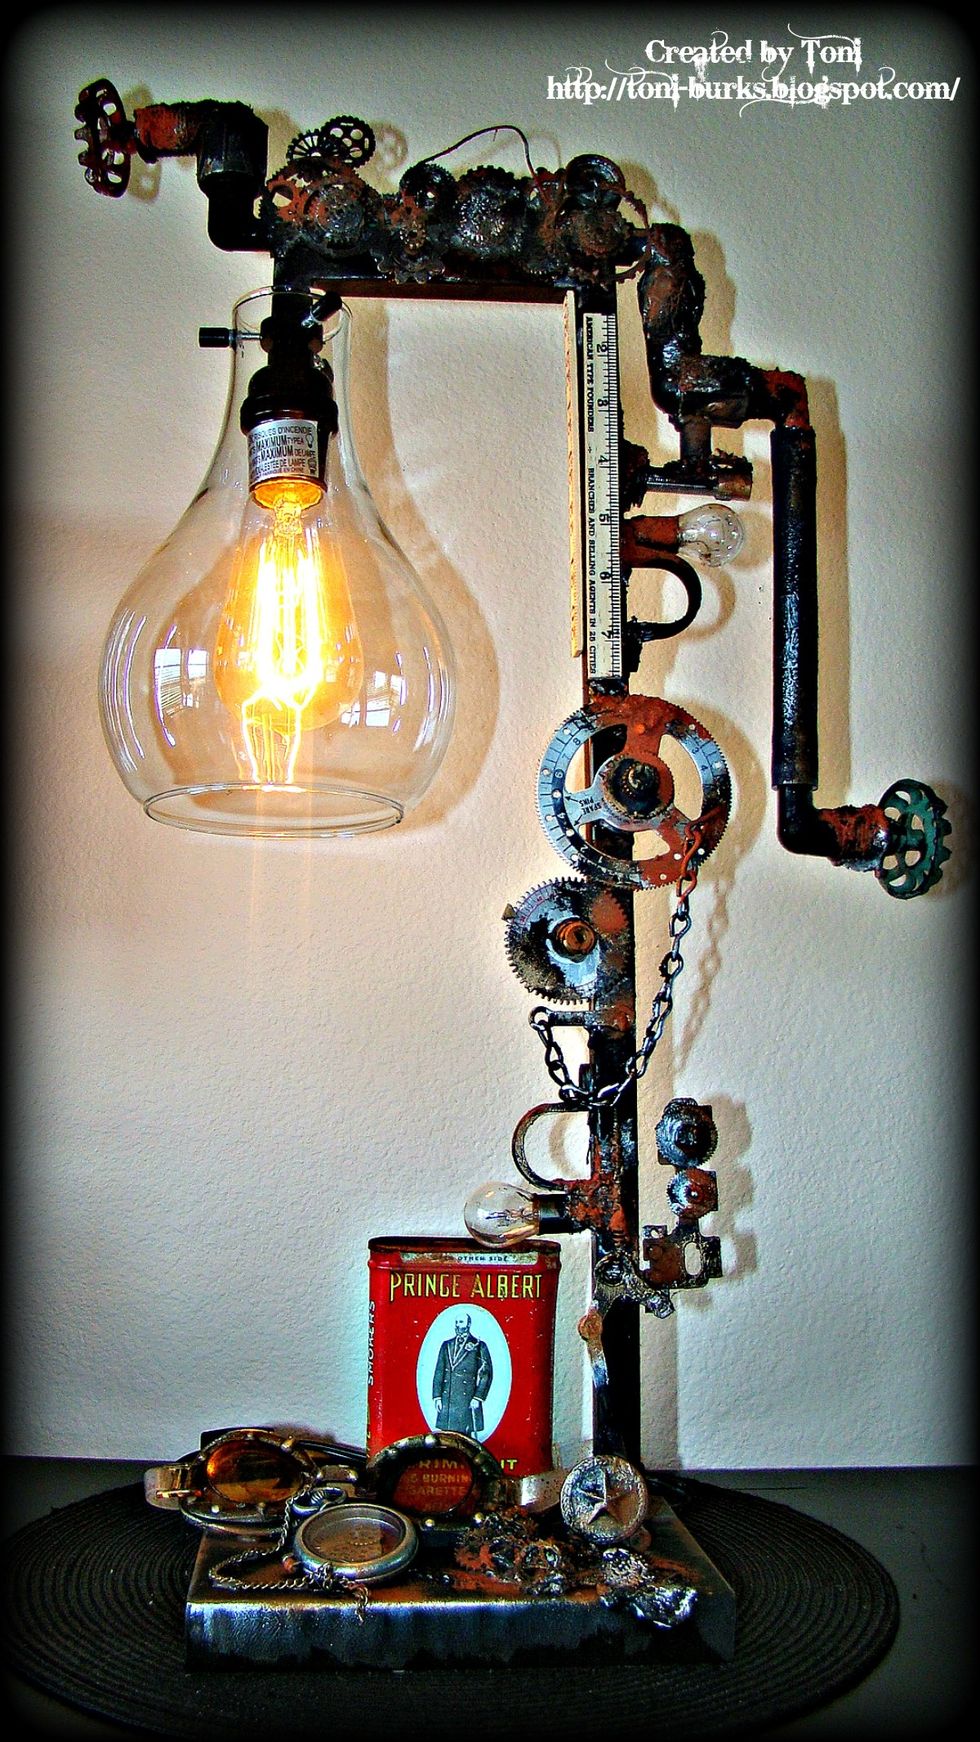
Here is a photo a photo of the lamp in my craft room.
Hoping you enjoyed this tutorial and will give our rust texture pastes a try.
For more inspiration follow us on Facebook https://www.facebook.com/groups/741057632686564/ and to order products listed with * in front of them https://www.artanthology.net/
Also follow us at https://www.pinterest.com/artanthology/ also sign up for our monthly newsletter for new product info etc at http://artanthologyinc.com/