The Conversation (0)
Sign Up

Start off with a cloth napkin. Fold the napkin into a square and turn the napkin diagonally as seen in the image. Make sure the open ends are pointed toward you.
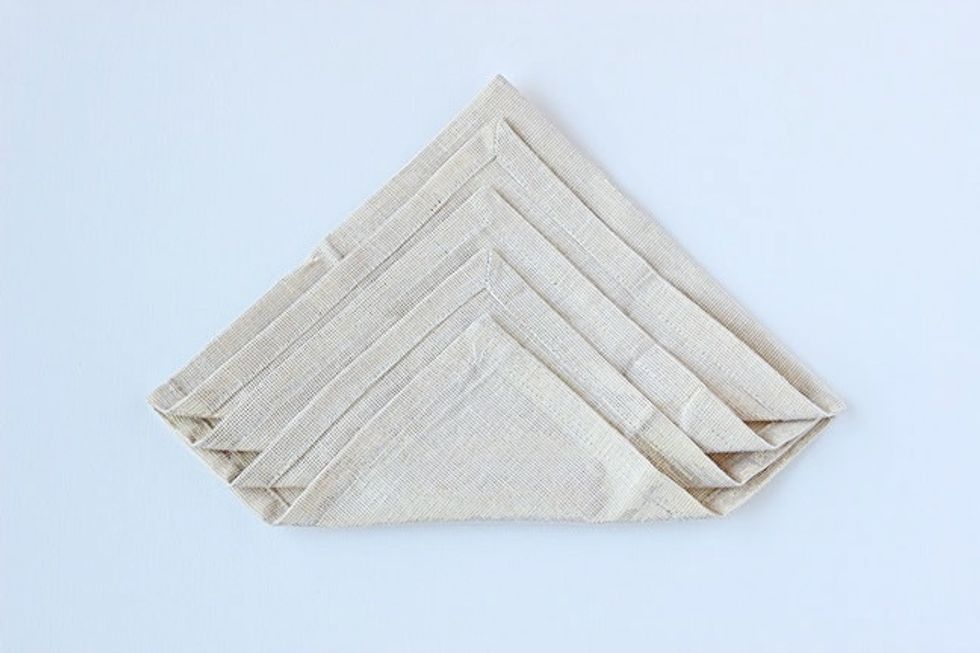
Fold each layer toward the top as seen in the picture.
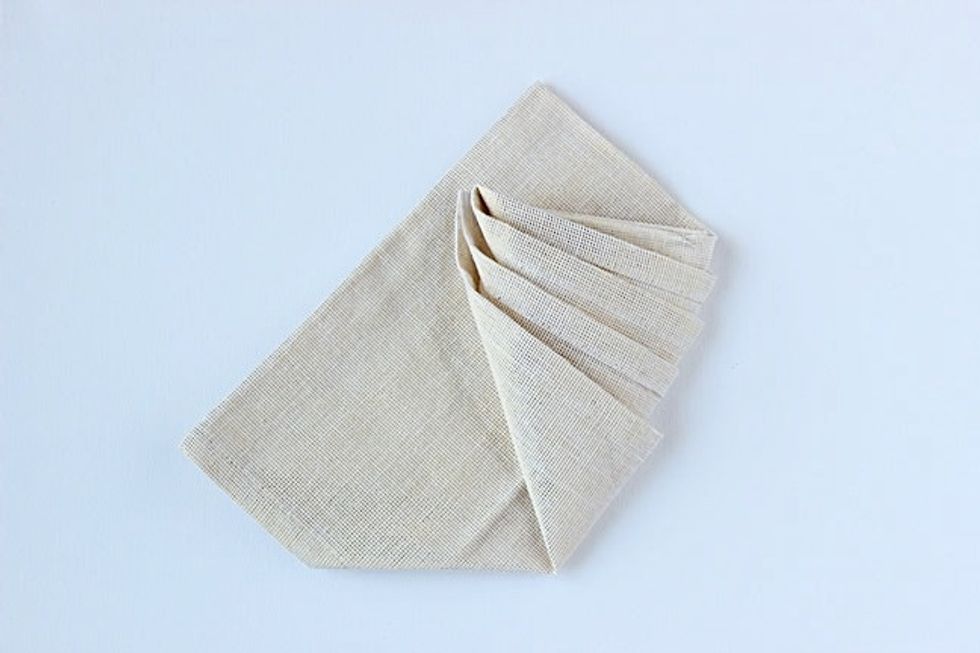
Turn the napkin over, holding all the layers you folded in place. Then, bring the right corner up and to the left side as pictured.
Bring the left corner up and to the right side, going on top of the area you folded in step three. To make sure everything stays put, I used a big pin to secure the two folds.
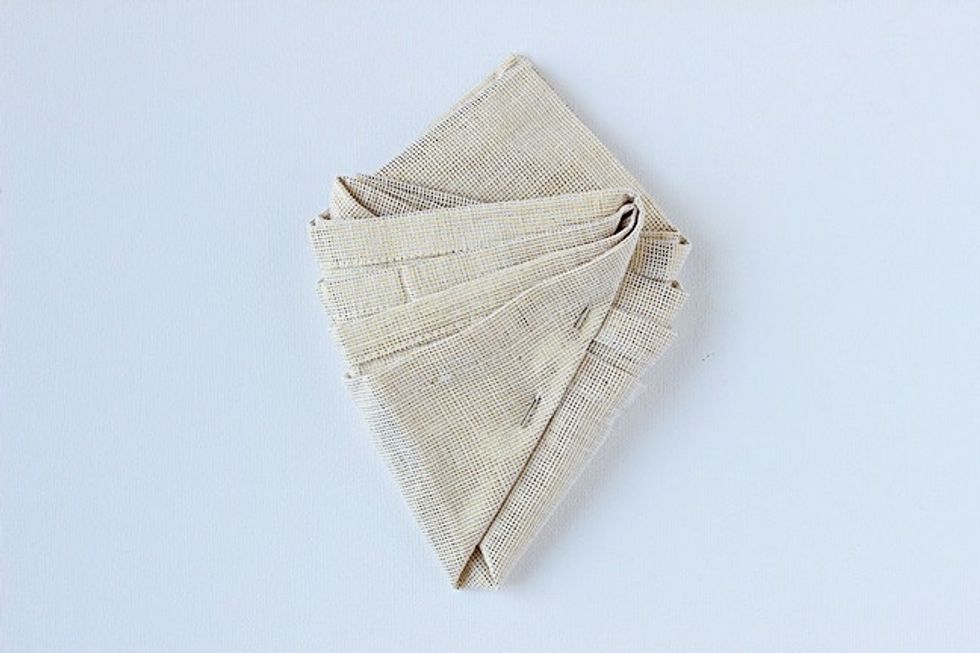
Turn the napkin over, make sure the layers point down towards you.

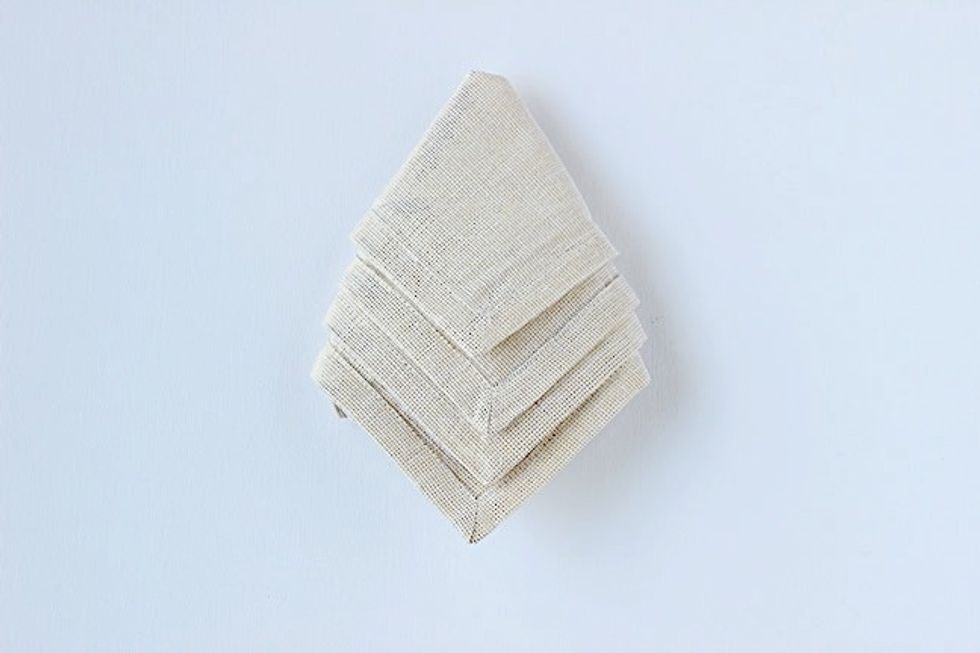
Lastly, form the pointed tree top by folding the top layer upward, Continue folding upwards for the rest of the layers but tuck the point into the folded layer above it.

Once the tree is complete, you can add a small item on the treetop, I added a snowflake sticker.
Hope you all enjoyed this tutorial! Let me know how your Christmas trees turn out. <3
For more Christmas DIY projects, visit my blog www.vickyb.tv | Follow me on Snapchat @vickybtv