The Conversation (0)
Sign Up

Use the "move" tool to rotate and center your work.
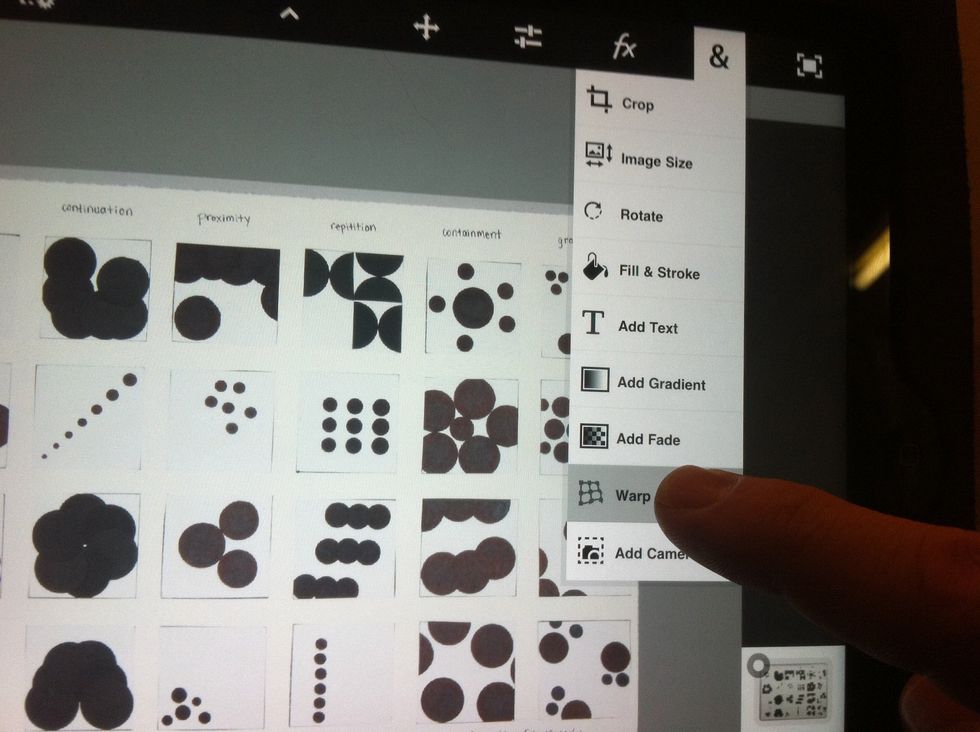
"Warp" let's you stretch an image until it is perfectly square.
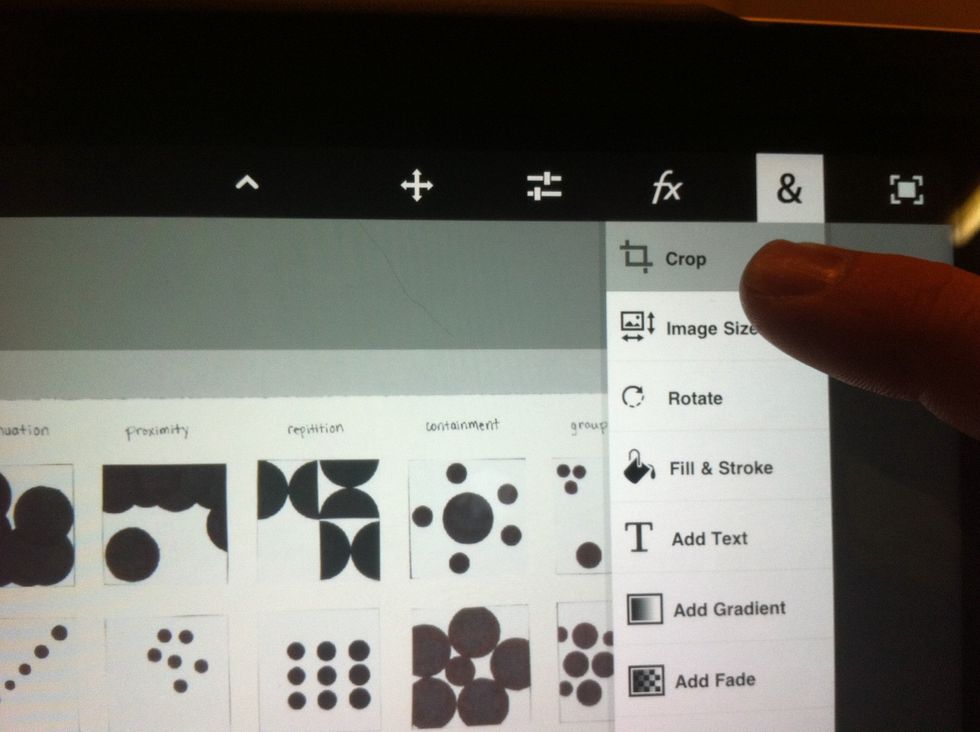
Crop to remove any extra background.
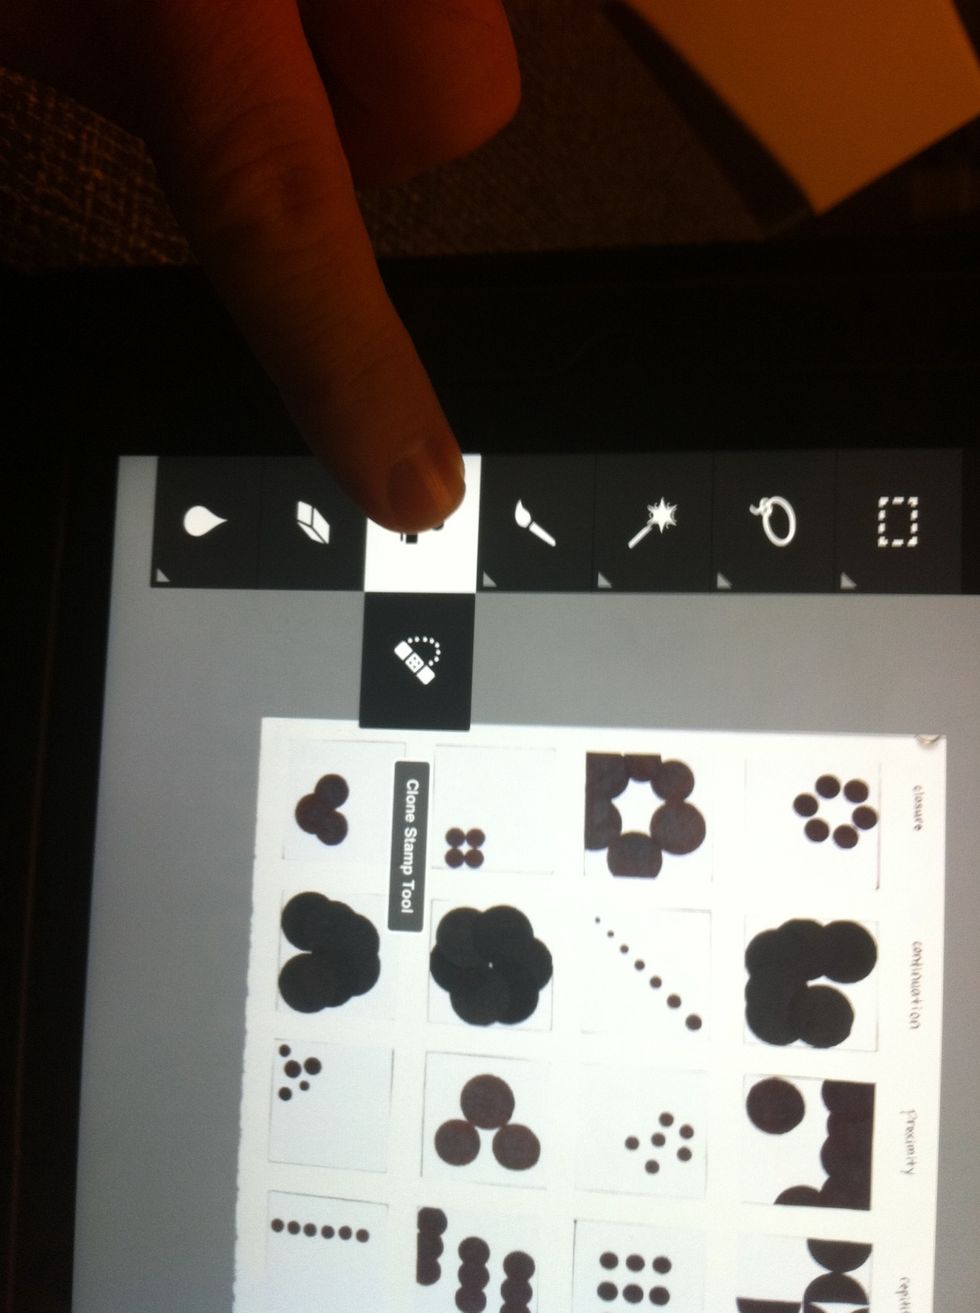
To edit out pins, magnets, or small blemishes, use the clone stamp tool.
In the top row, the adjustment sliders icon will let you adjust exposure, contrast, color, and more. Aim for the most accurate representation of the way your work really looks.
The arrow in the top left saves your changes and returns to the PS hone screen.
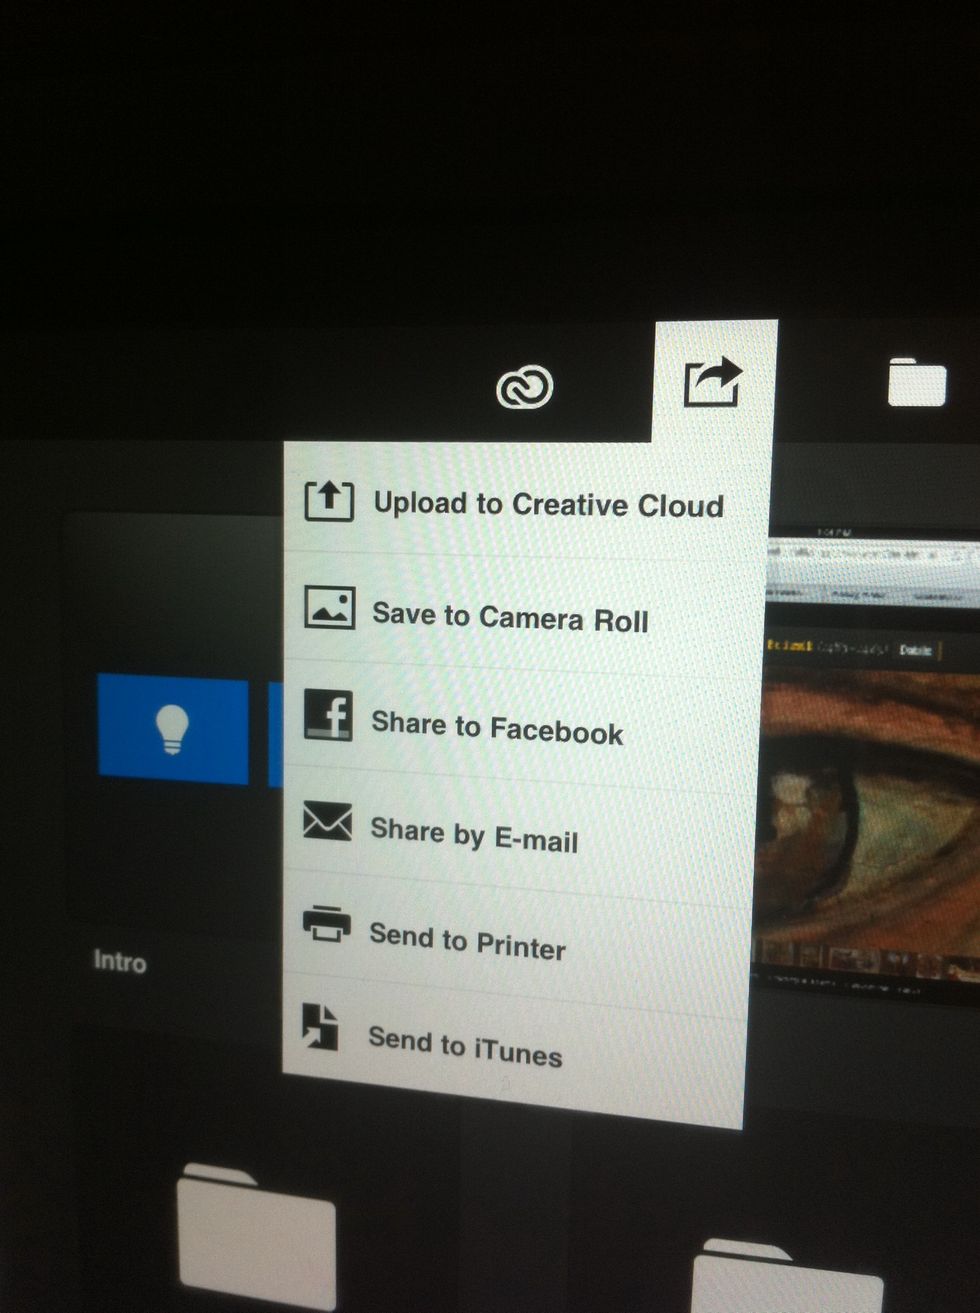
Share or upload your new image by selecting the action first, tapping images to be shared, then selecting the file type and hitting "ok.". You're done!