The Conversation (0)
Sign Up
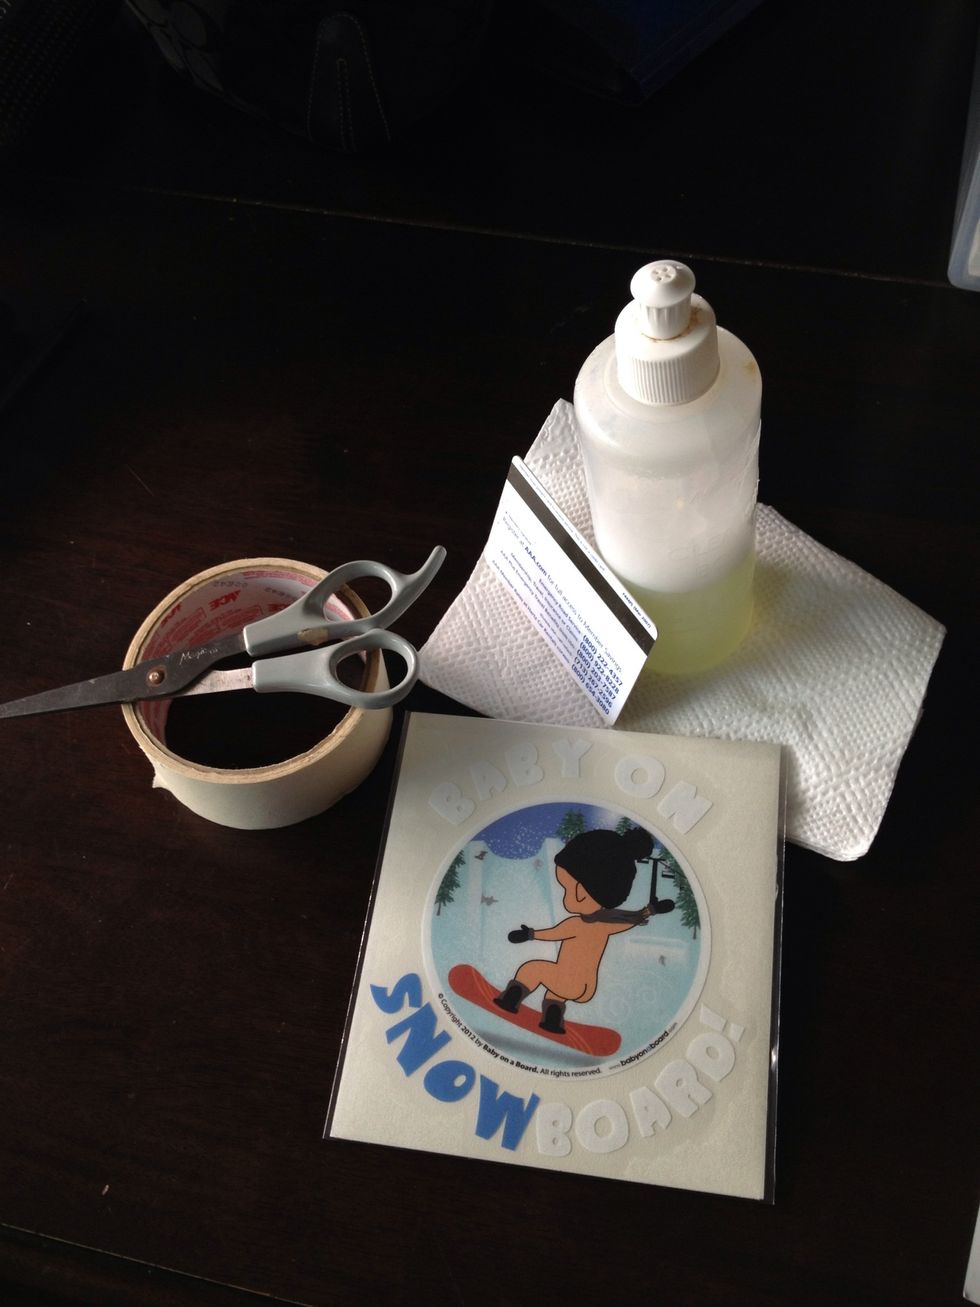
all you need...
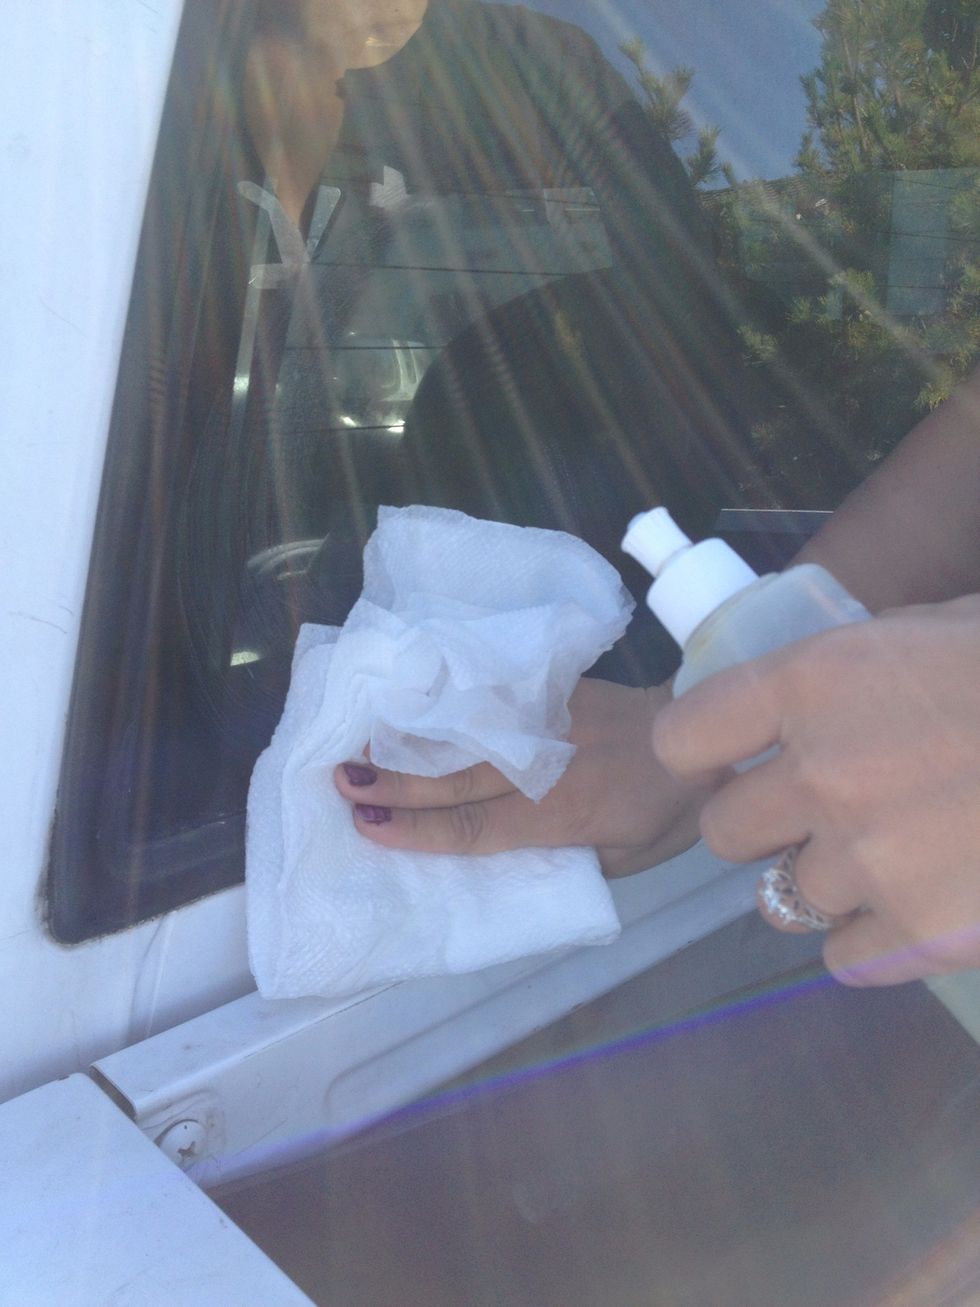
wipe surface clean with paper towel and Glass cleaner/alcohol
your decal comes in 3 layers: top application tape or transfer tape / middle is your actual vinyl decal / bottom layer is the backing...your vinyl decal will be 'stuck' to the top application tape.
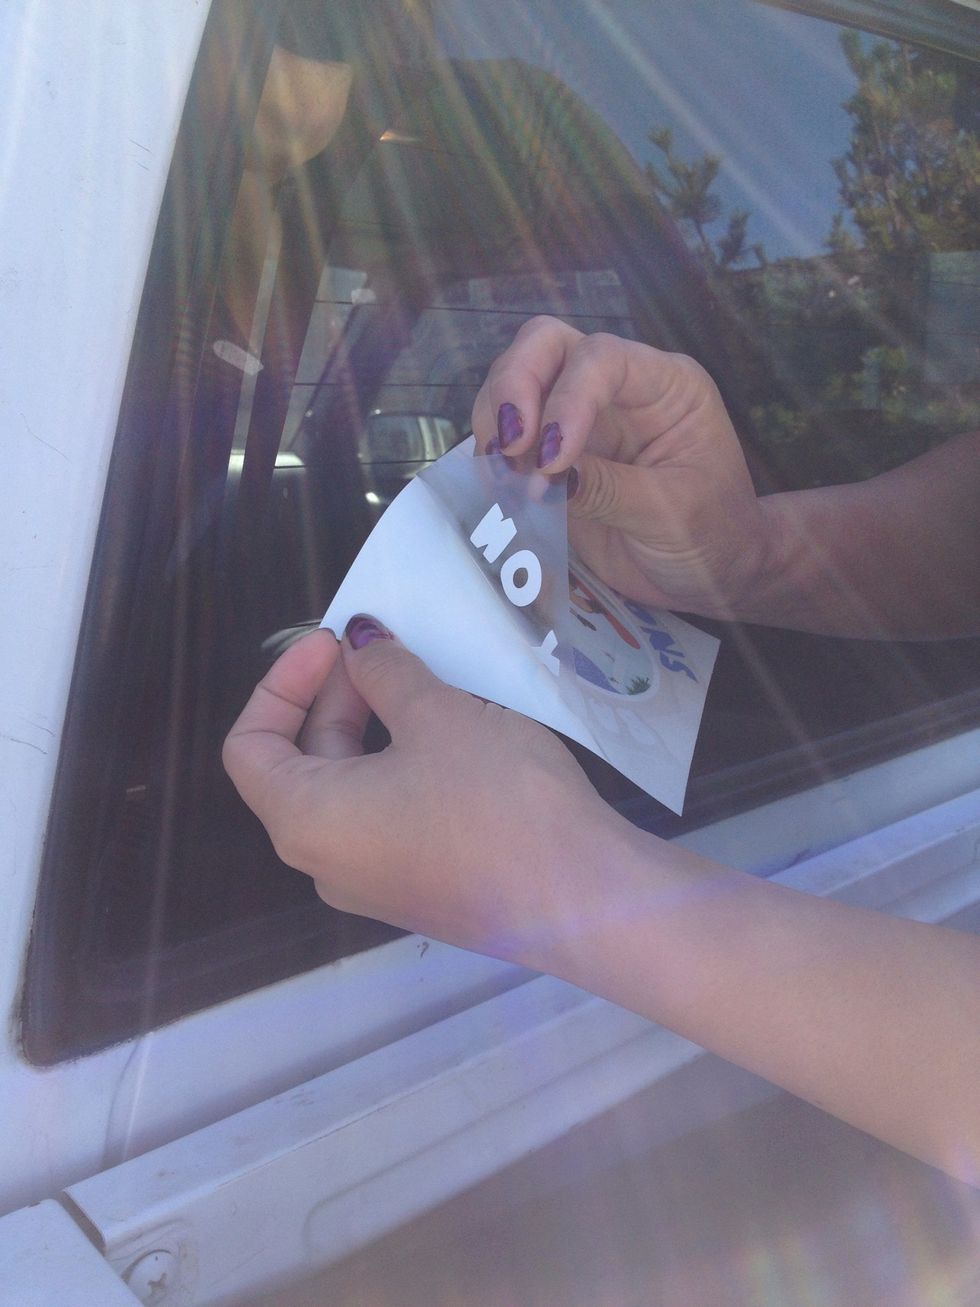
peel backing about 1/4 from the top and crease.
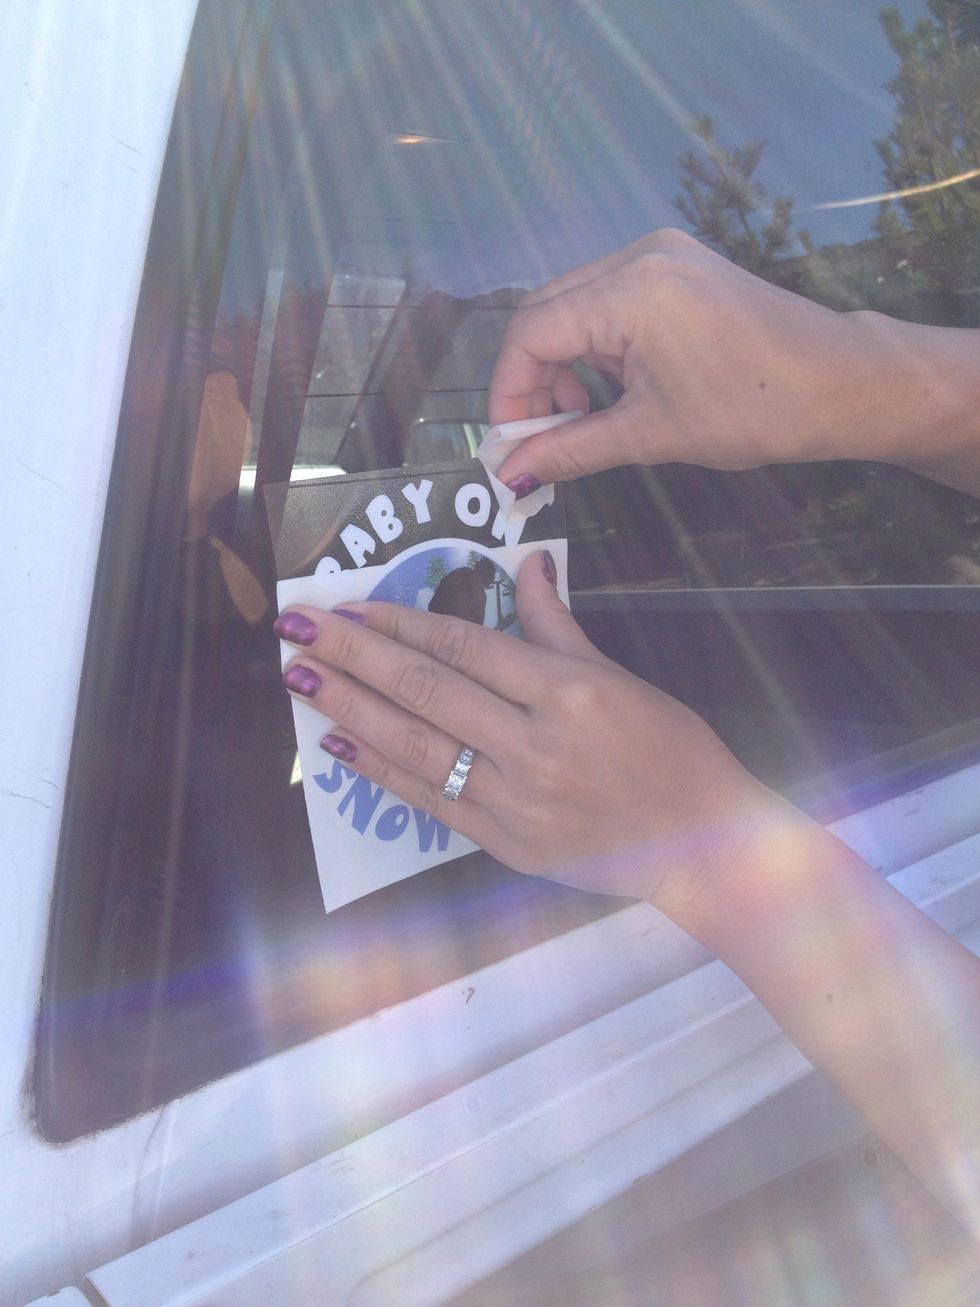
position decal and place two pieces of masking tape to secure.
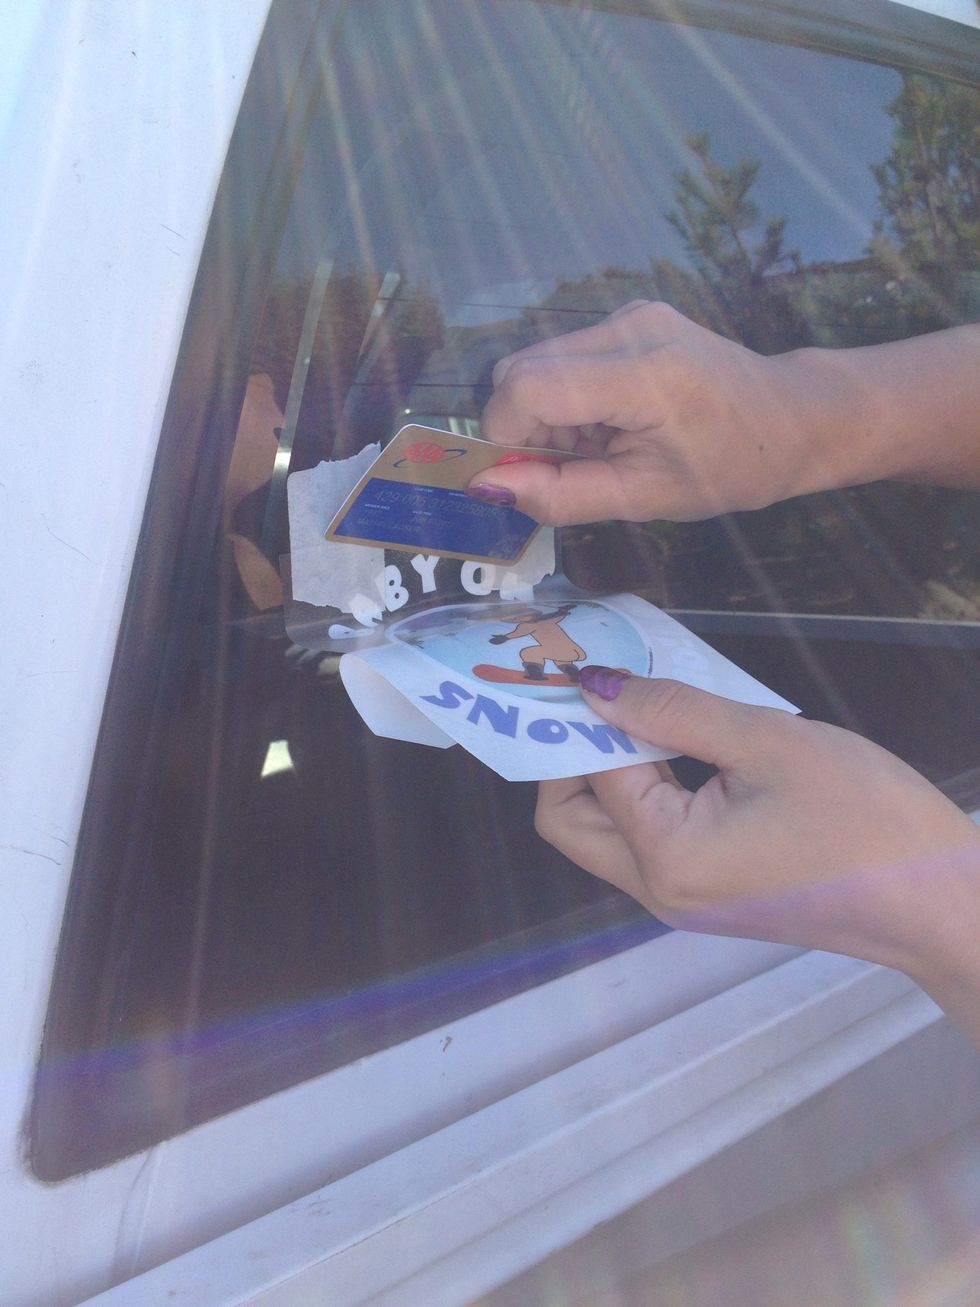
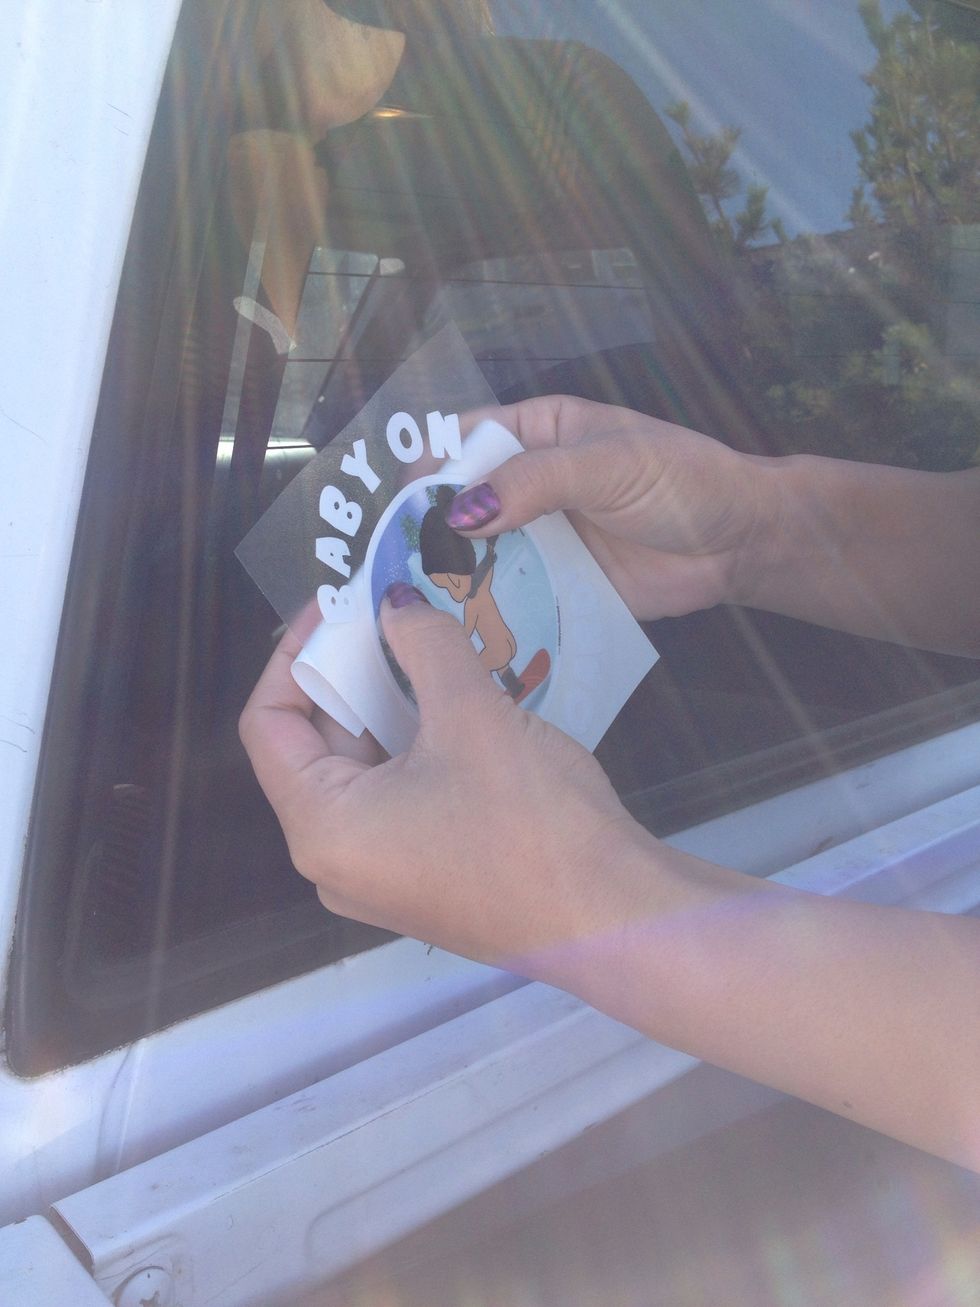
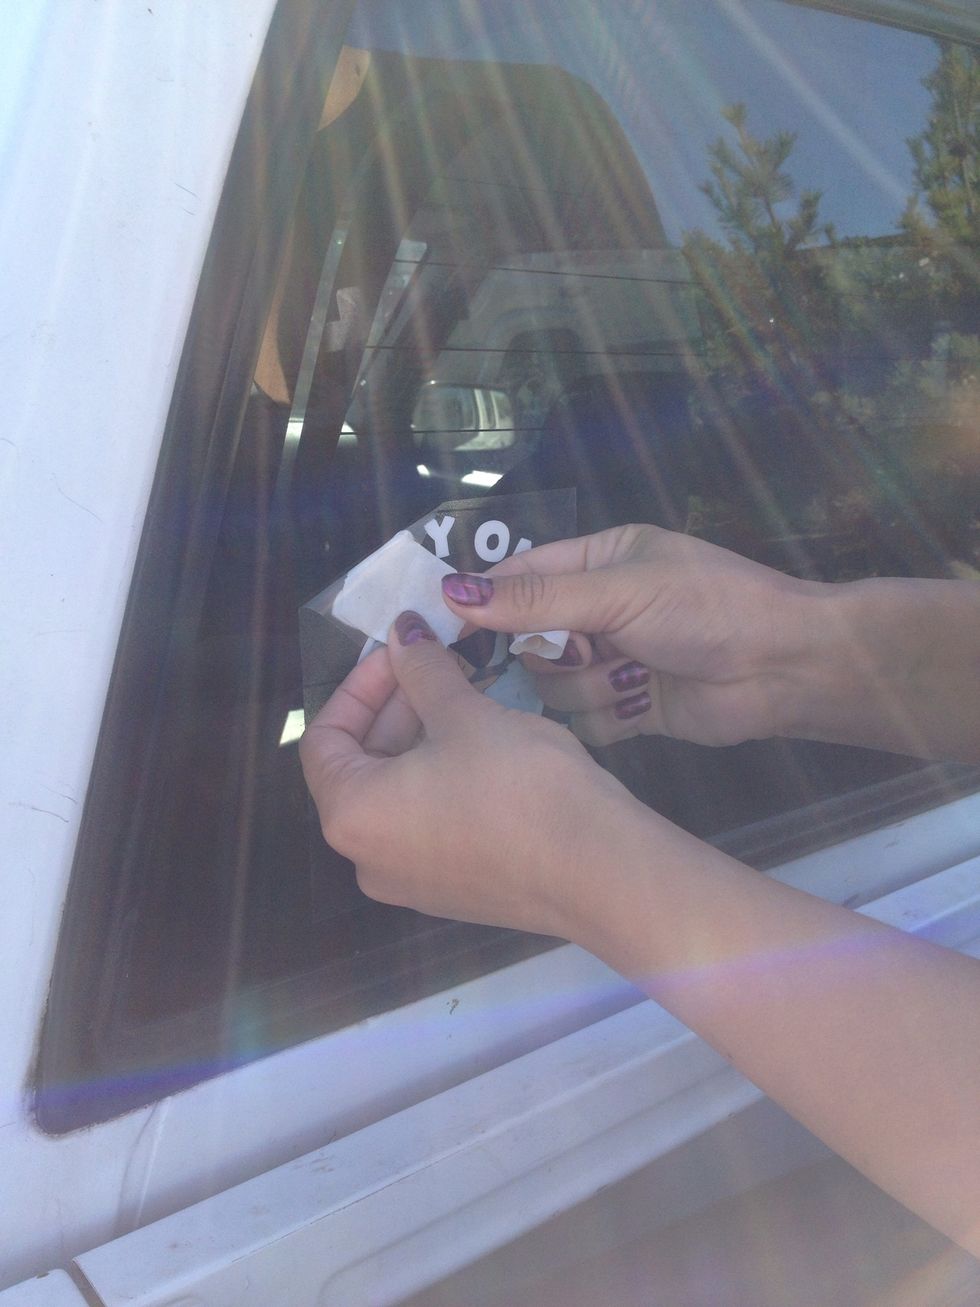
take your straight edge (or credit card/AAA card :) in this case) and firmly rub/scrape against top application tape from top to bottom as you slowly peel down the backing.
use your straight edge to continuously scrape from top to bottom to prevent air bubbles.
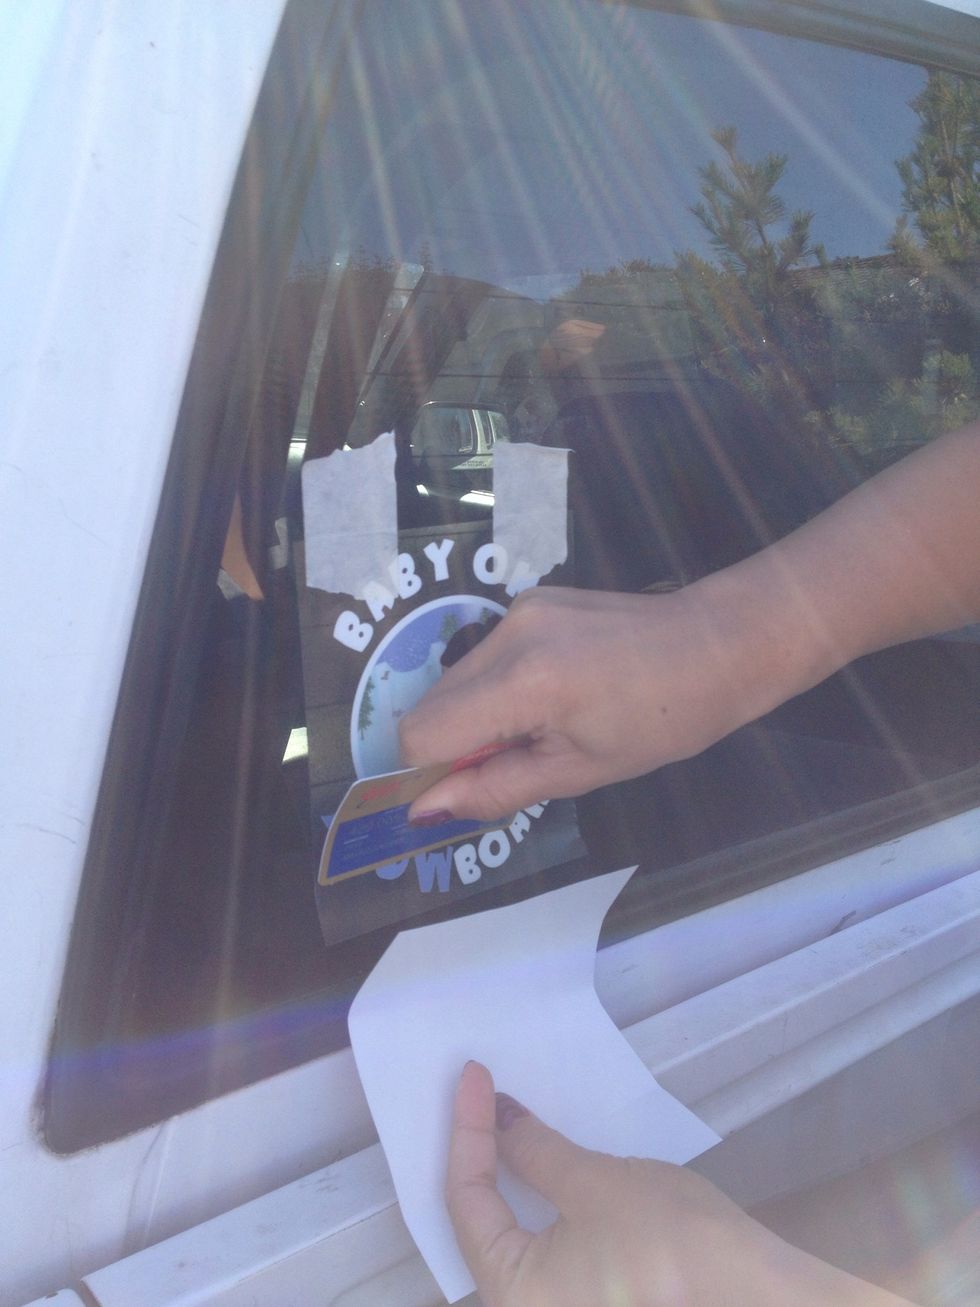
discard backing and go over with straight edge again..wait a few minutes to ensure surface is dry and decal adhered completely to the surface.
now...the unveiling :) ever so slowly, peel down your masking tape and clear application tape...pull downwards to prevent decal from pulling up.
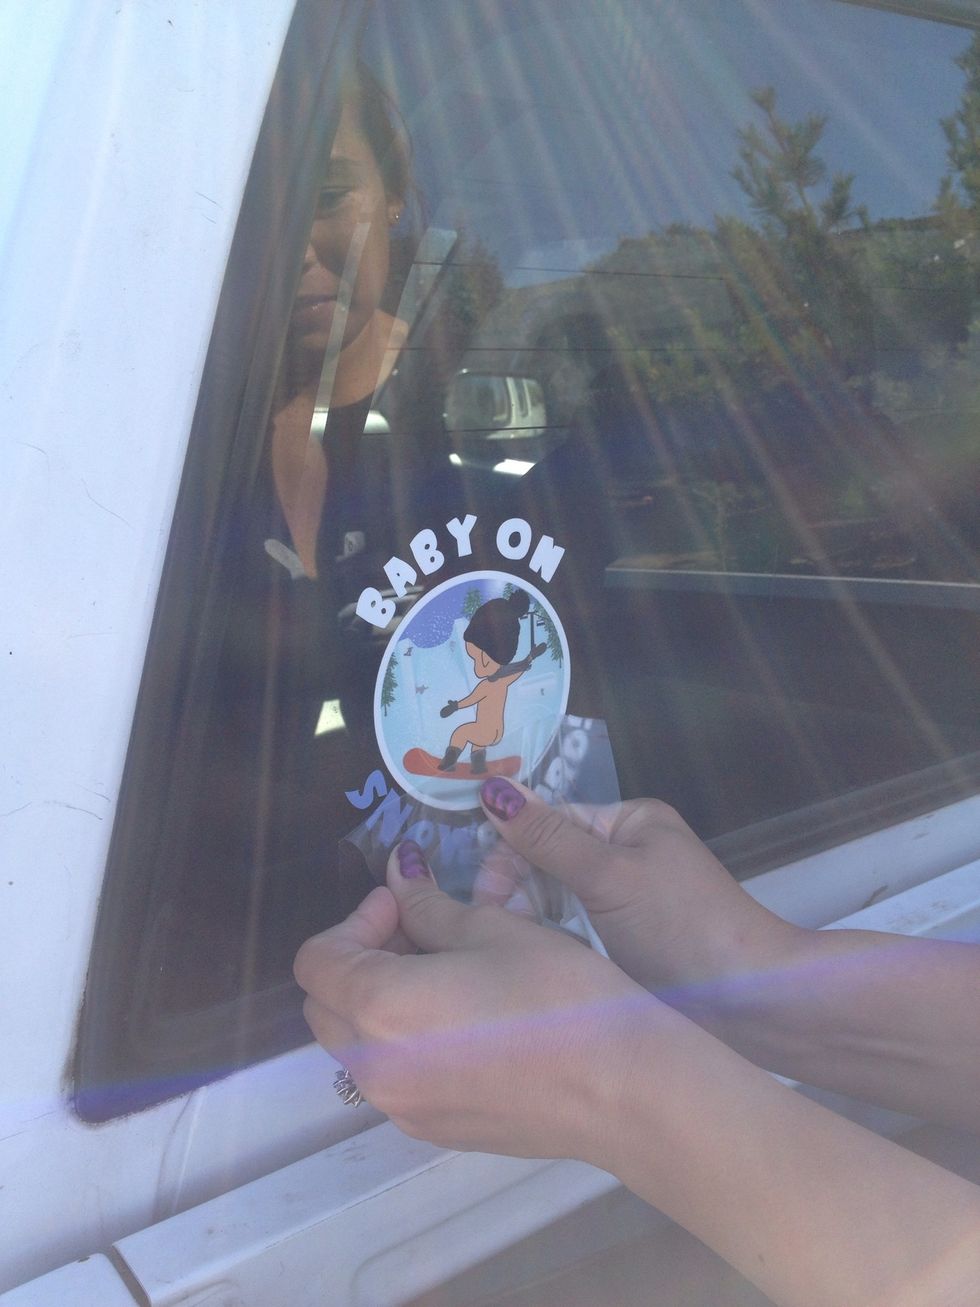
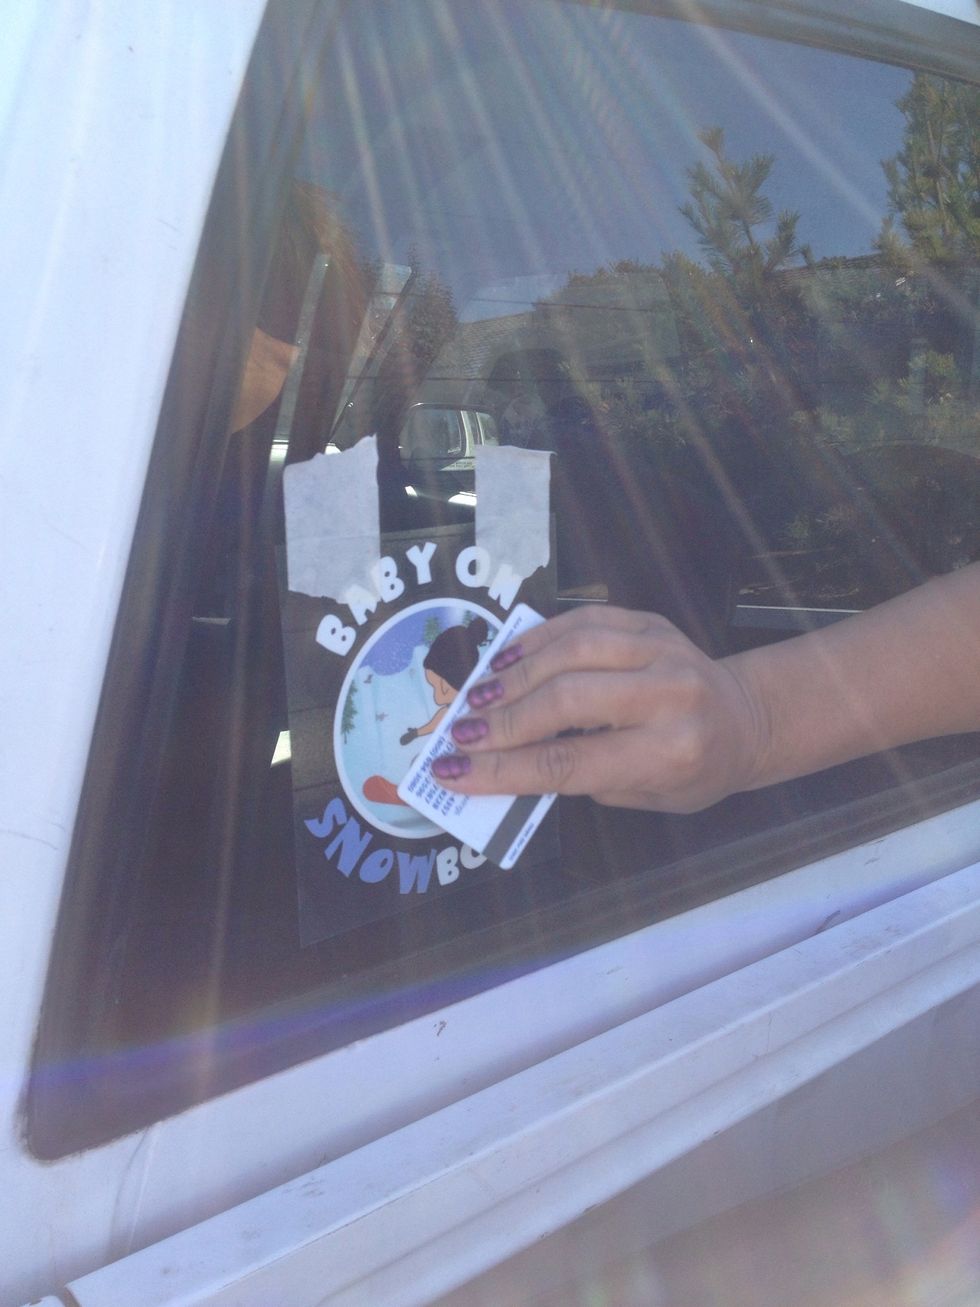
continue slowly pulling downwards. if any part of decal pulls up, rub again over application tape with straight edge then try to pull down again.

Continue until application tape is completely off then discard...and....

VOILA! you are now one of the many proud owners of The Original Baby on a Board decals!!! www.BabyonaBoard.com