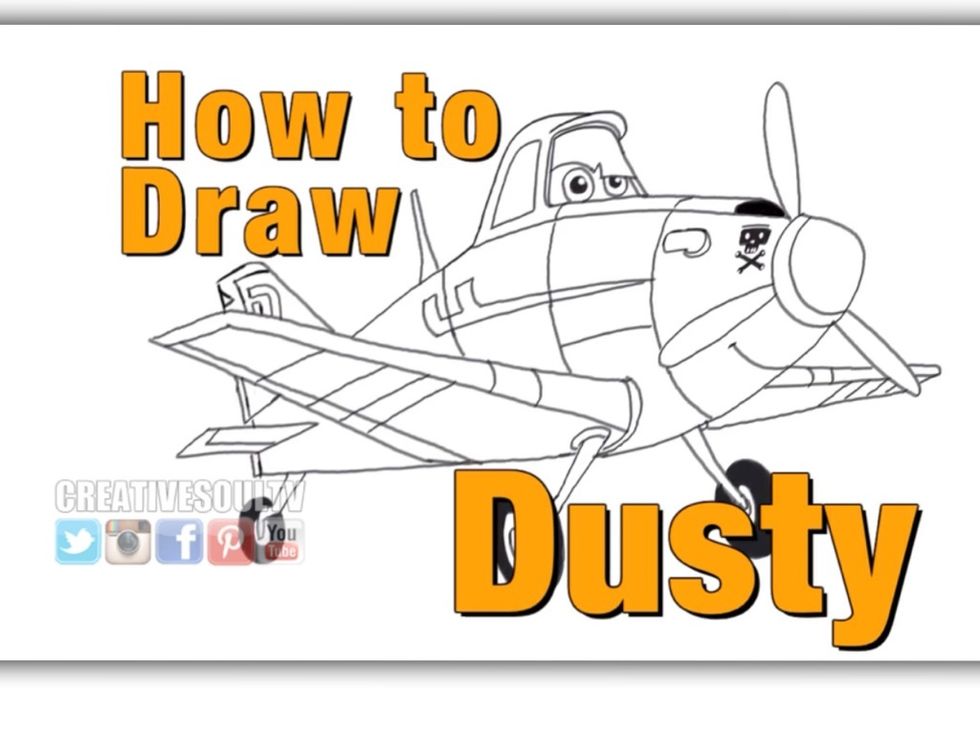
How to draw dusty from disney's animated movie planes
This step by step drawing tutorial will show you how to draw Dusty the crophopper with several videos to see as a visual snapguide.
694
STEPS
TOOLS
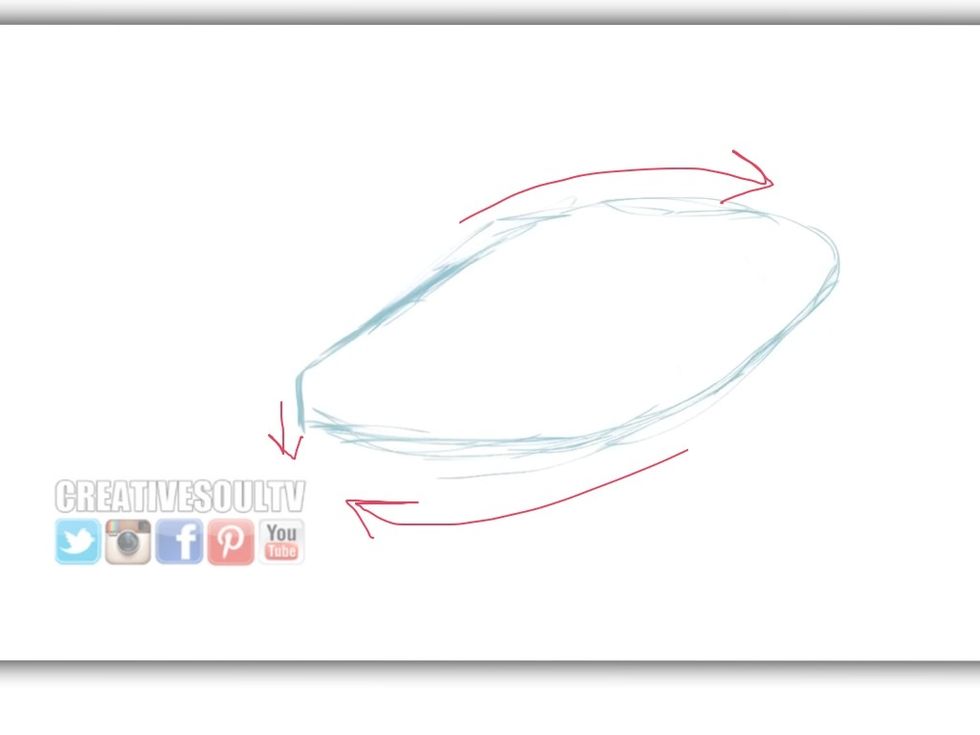
Start your drawing rough and sketchy which can be cleaned up later. Draw the body of the plane like the shape above.
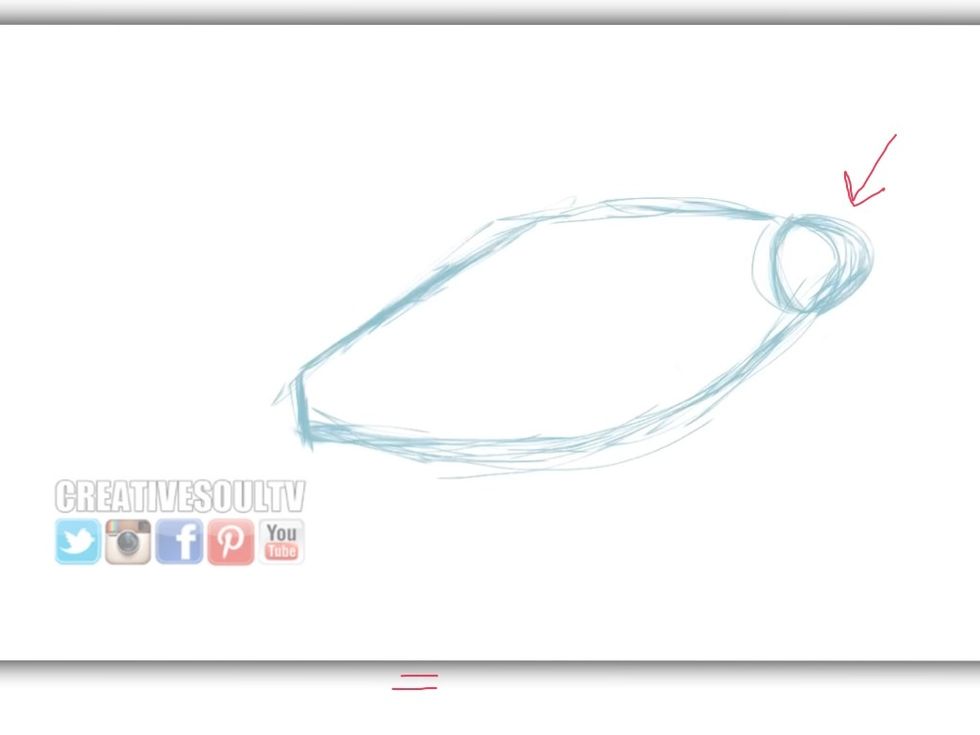
Draw the nose of the plane.
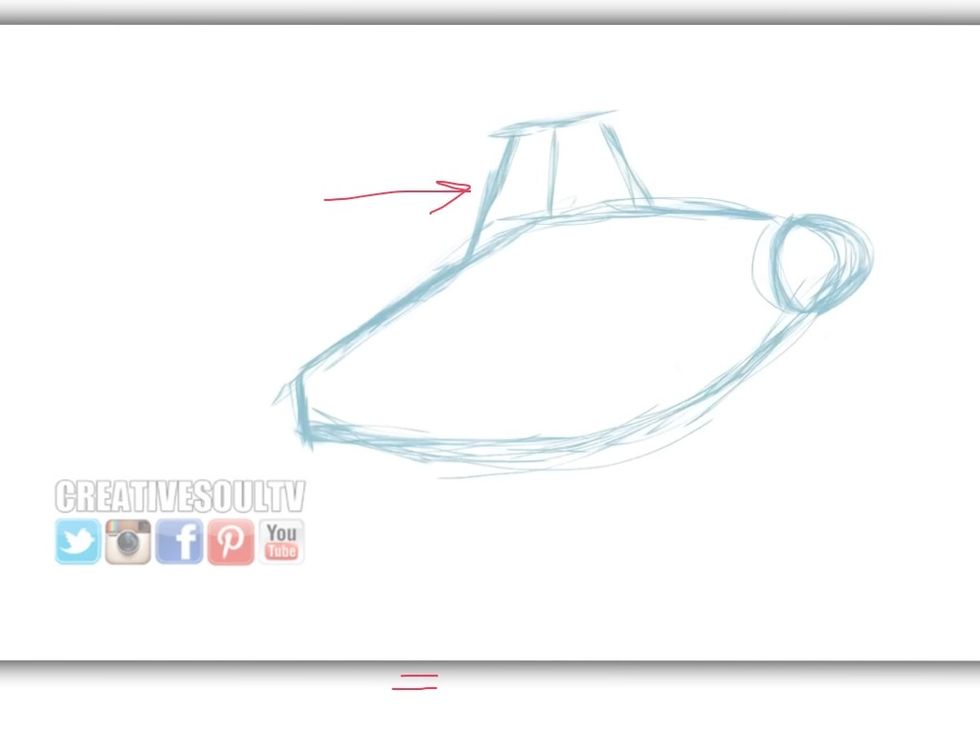
Now, draw the cockpit in the shape of the image above.
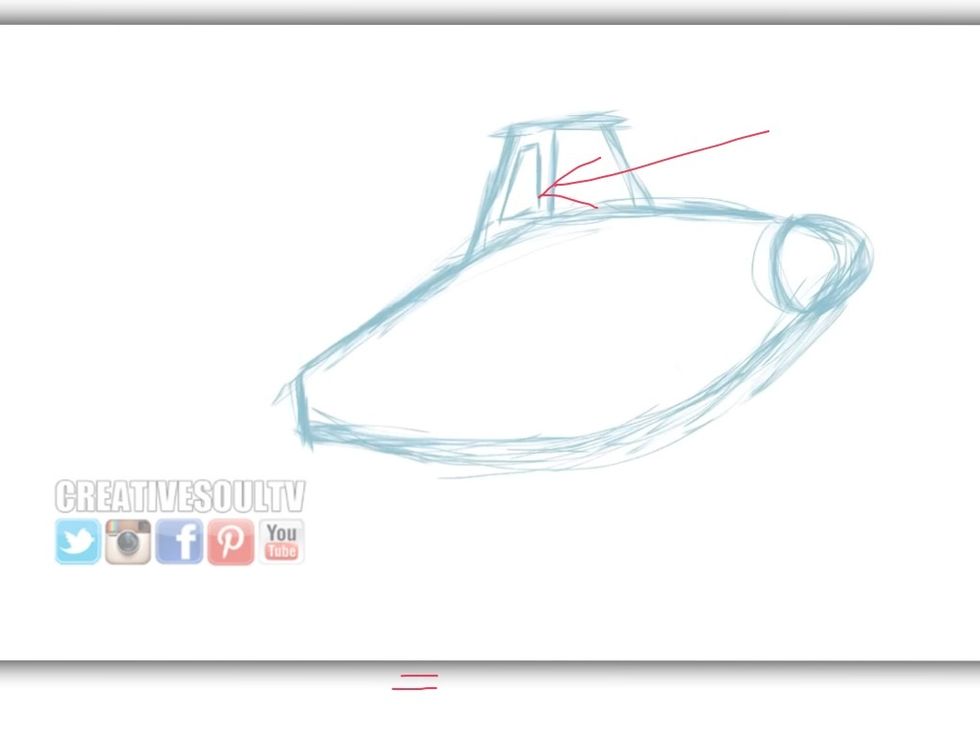
Draw the small window on the cockpit.
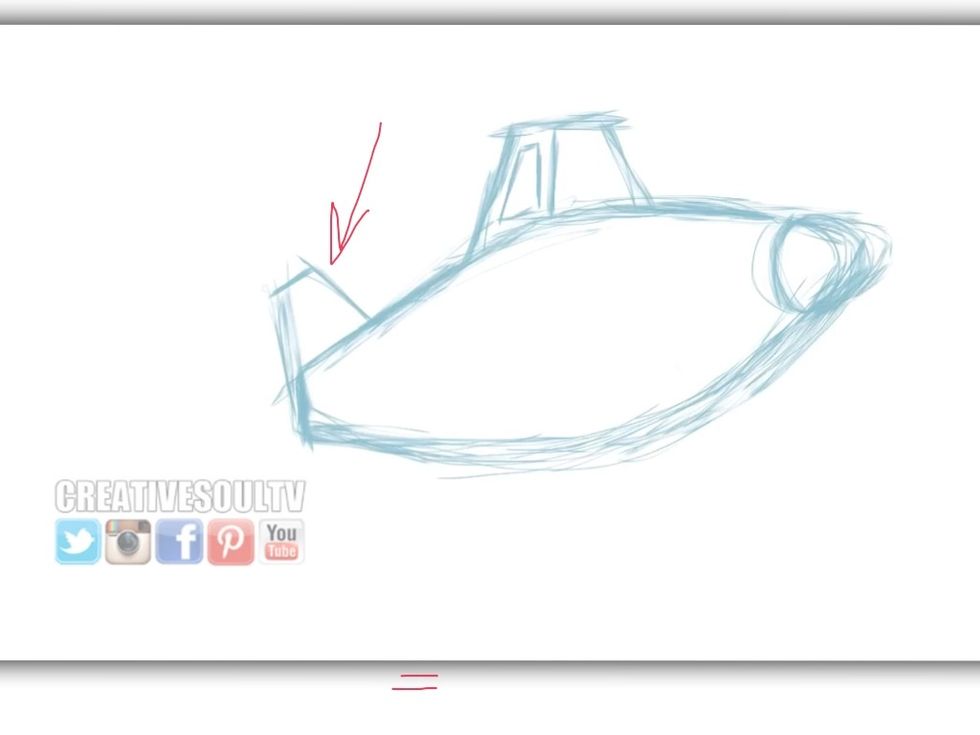
Draw the tail like the image above.

Don't worry about perspective right now when drawing the wings on the plane. Just sketch it like the drawing above.
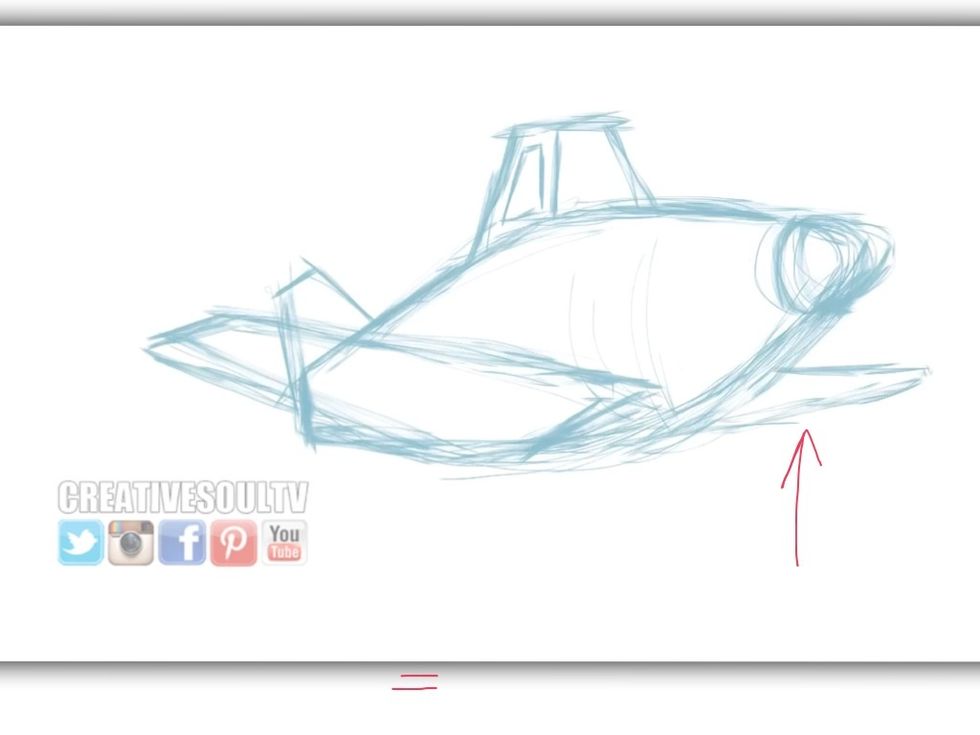
Sketch the other wing on the opposite side of the plane.
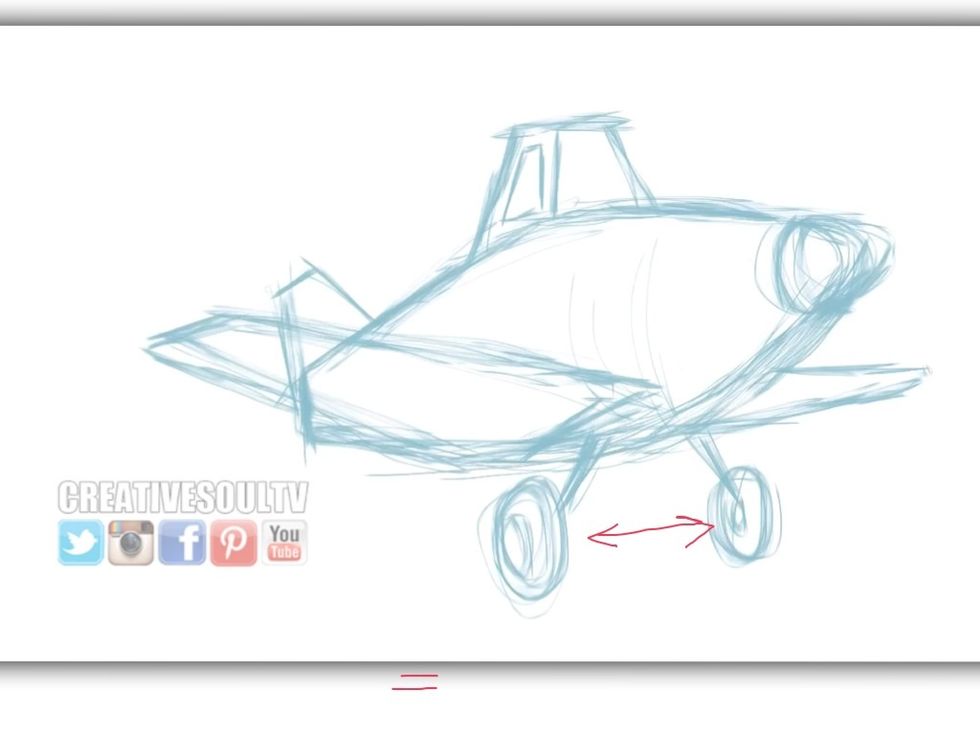
Draw the wheels.

Draw the following items on the plane, small back wheel, the vertical object located behind the cockpit and Dusty's smile and eyes.
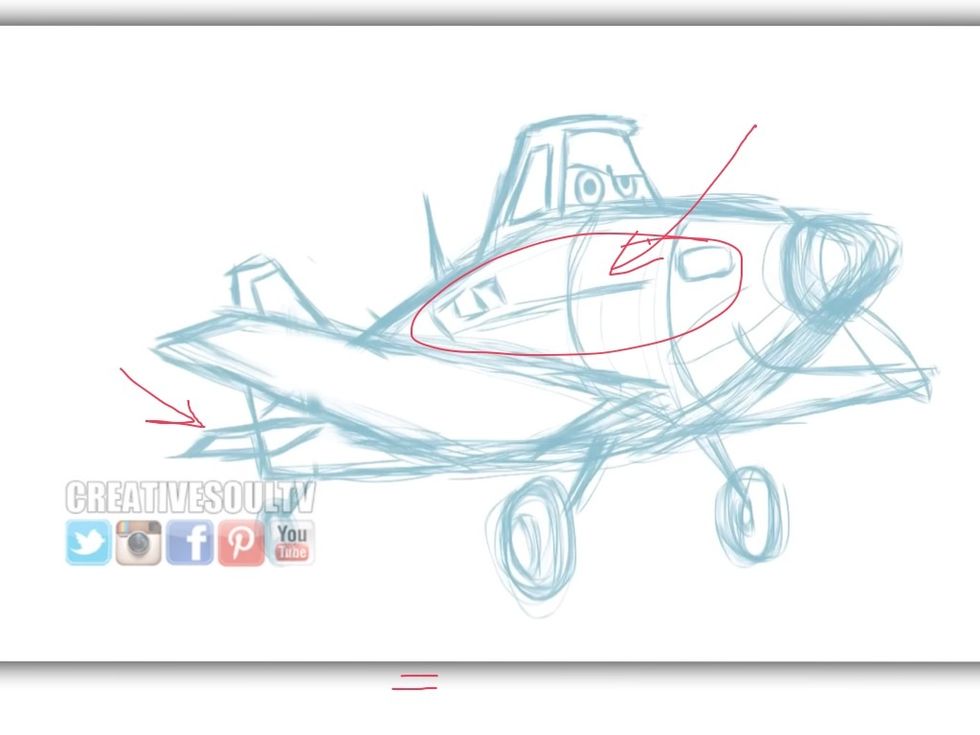
Start to draw in the front plane propeller. Now, draw the back tail fin of the plane and add the small exhaust pipe and design emblem.
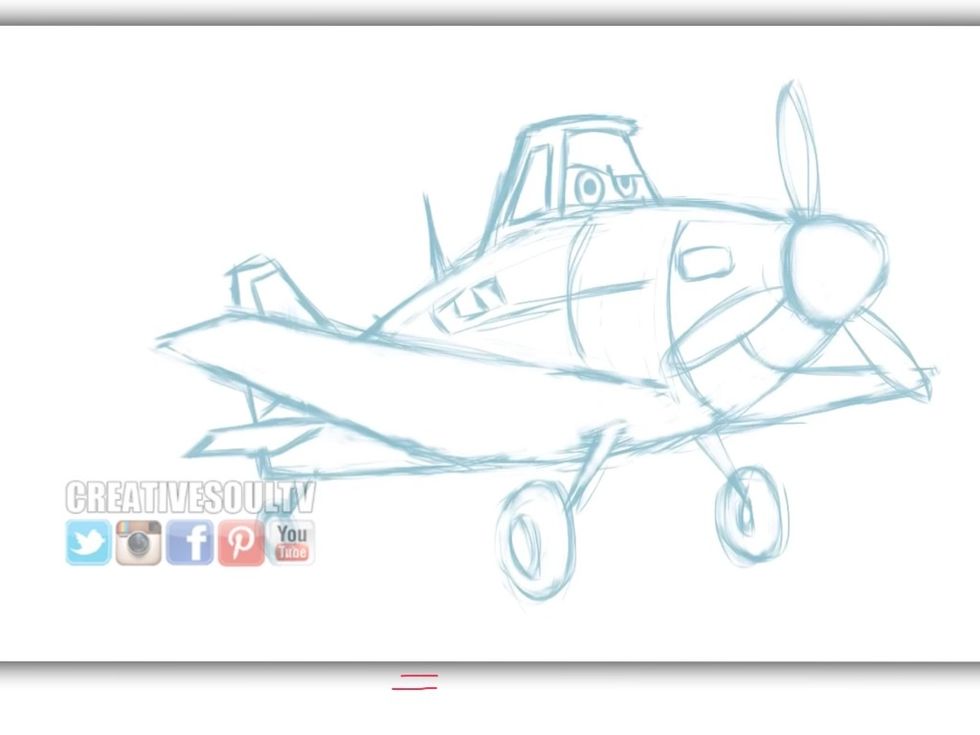
In this drawing you can see that I have added all of the plane propellers, which are only three. Now, you can start to clean up your sketch and rough lines with your eraser.
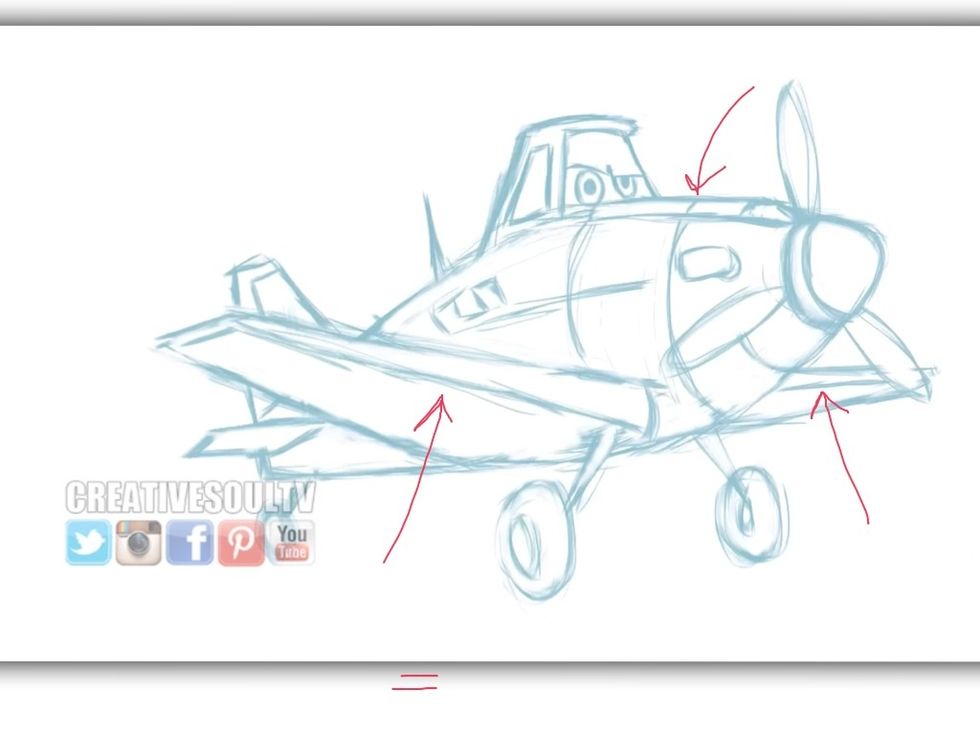
Draw in the other details on the plane, see the image above.
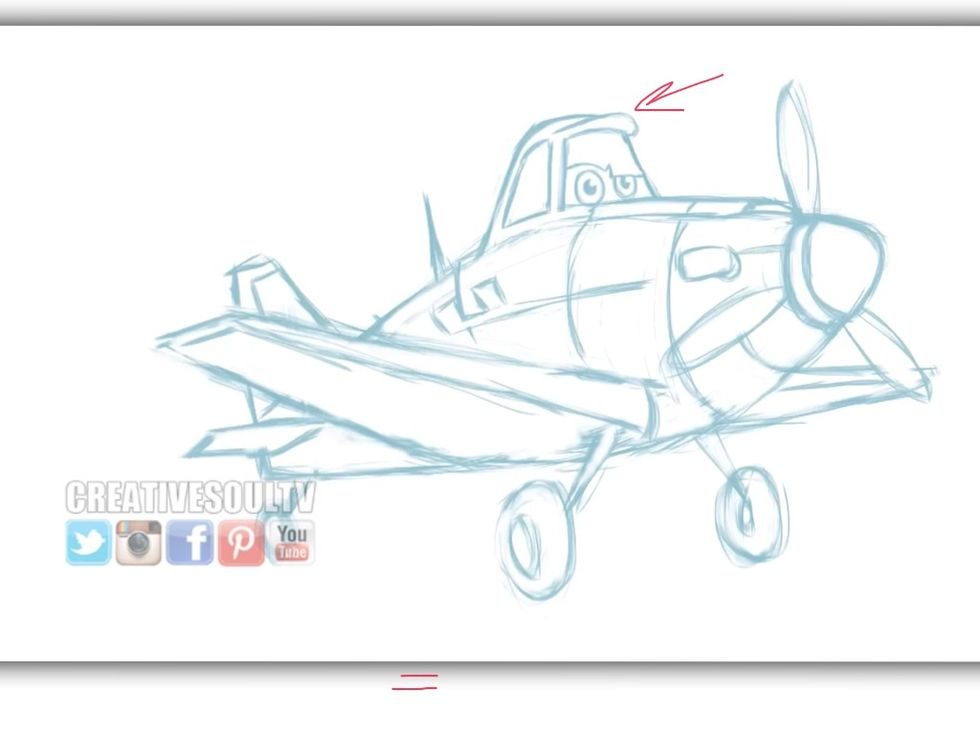
After cleaning up your rough drawing, you can now add other details like rounding off the cockpit top and adding a small hood to it. (see above image)
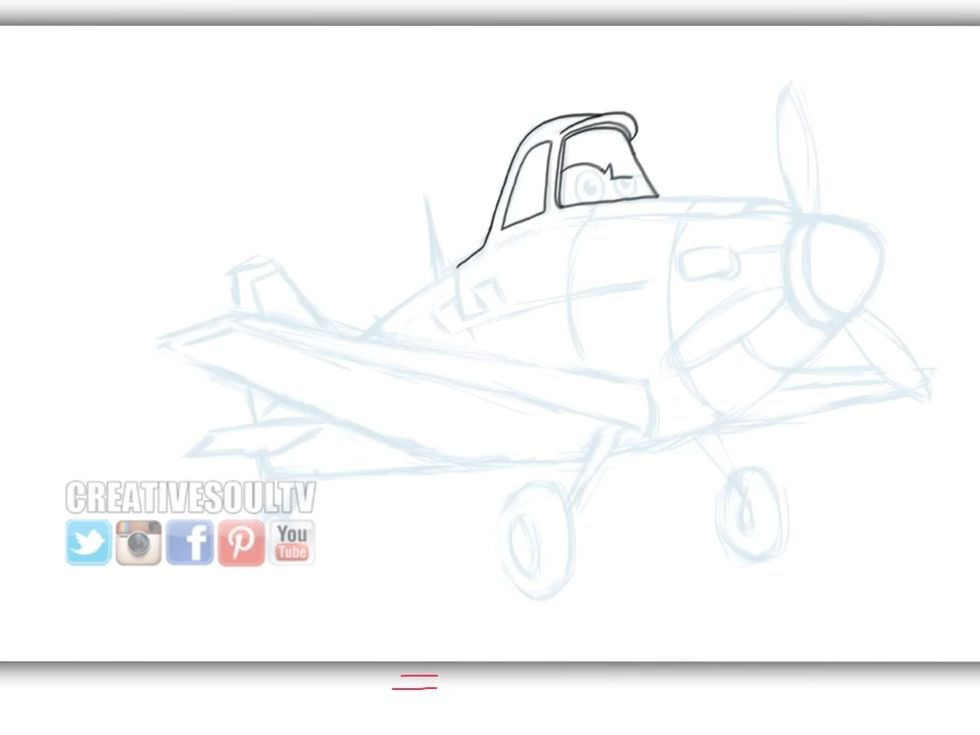
Now, it's time to start inking the drawing with your black marker, pencil or pen.
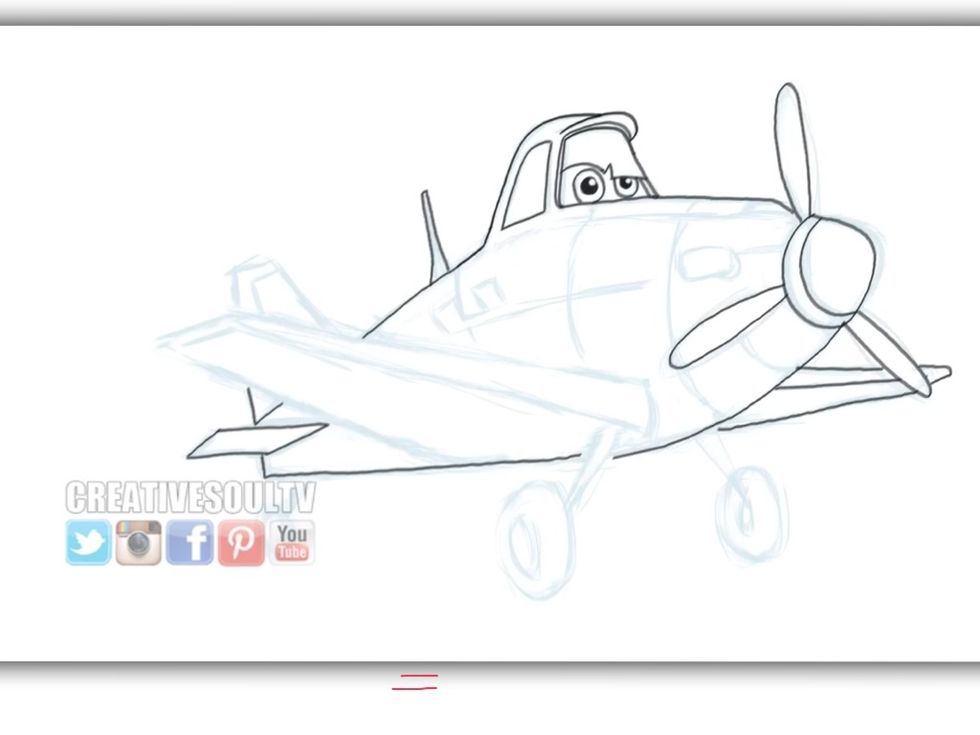
Take your time tracing the drawing.
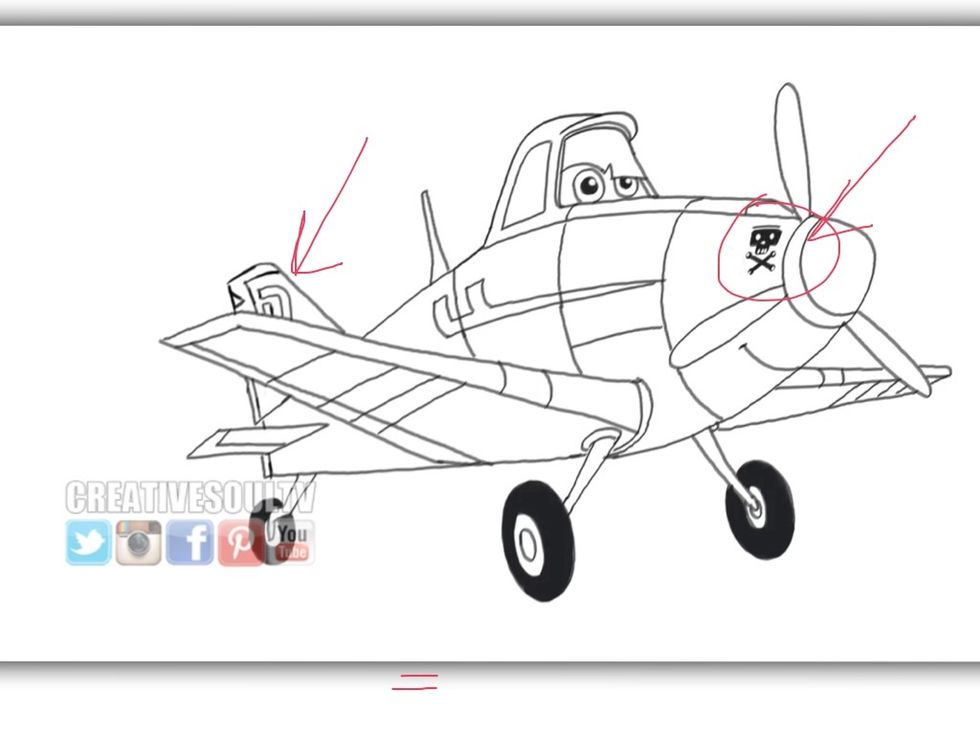
Add the little skull emblem on the front of the plane and the half "D" on the back tail. The exhaust pipe is missing near the emblem because it was too close to it. I erased it and moved it...
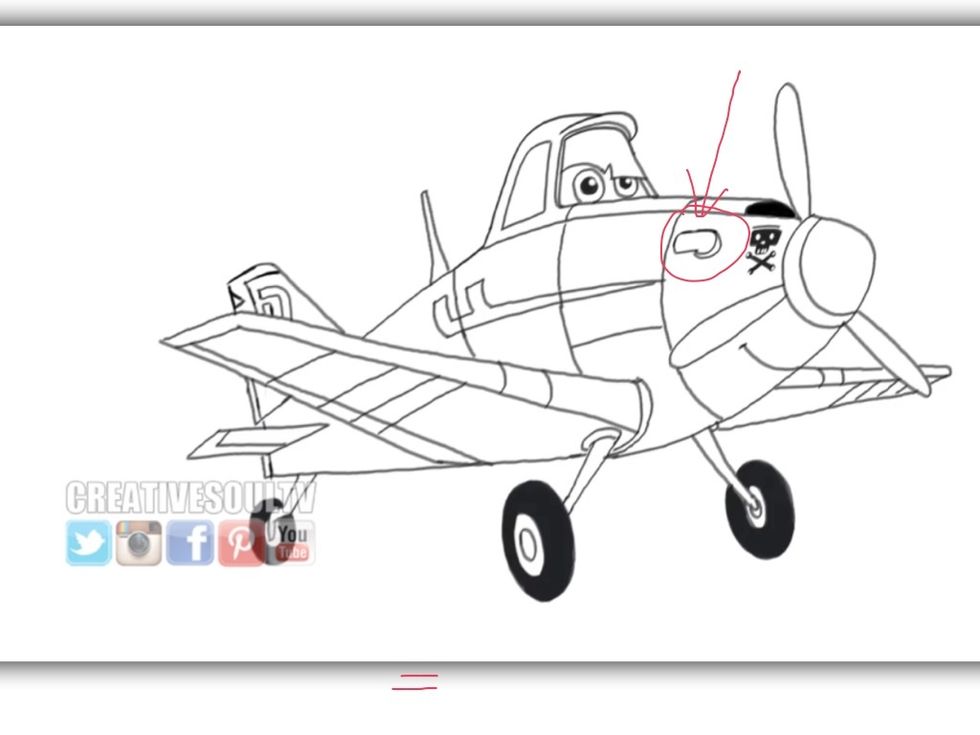
In this finished drawing you see that the exhaust pipe is back in the drawing and moved away from the emblem.
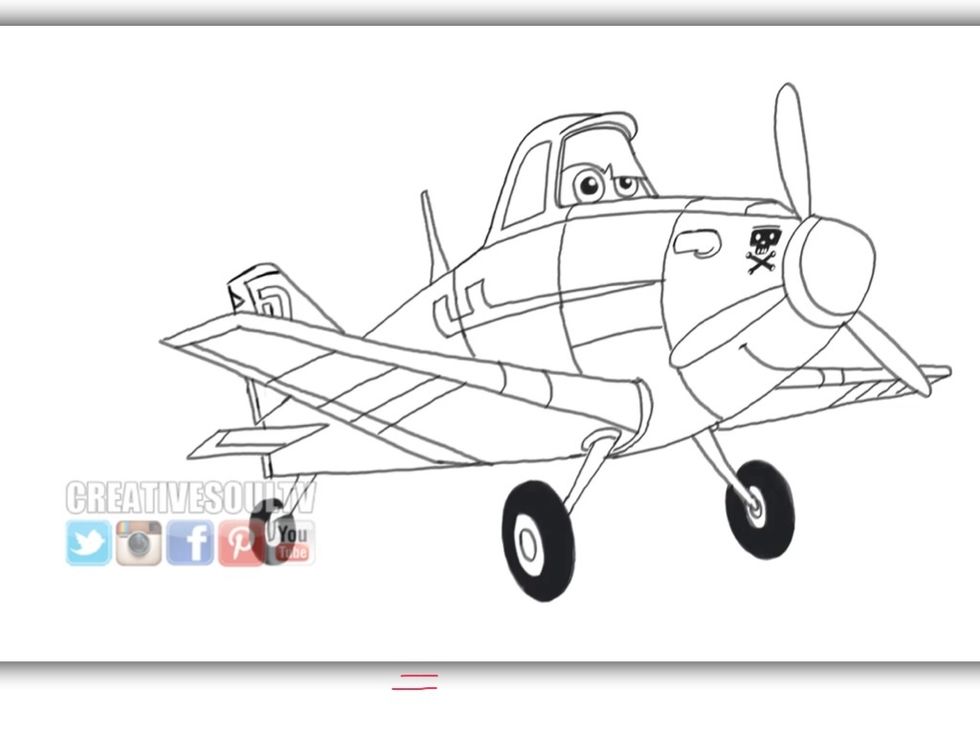
Have fun drawing Dusty!
- 1.0 Black Pencil, Marker or Pen
- 1.0 Light Blue Pencil
- 1.0 Sheet of white paper
- 1.0 Tracing Paper (Optional)
Creativesoultv .Com
Artist/Designer • Creative Soul • Vlogger • Geek • Flawed Genius • Foodie • Amateur/Expert
Hampton Roads, VA.
The Conversation (0)
Sign Up