The Conversation (0)
Sign Up
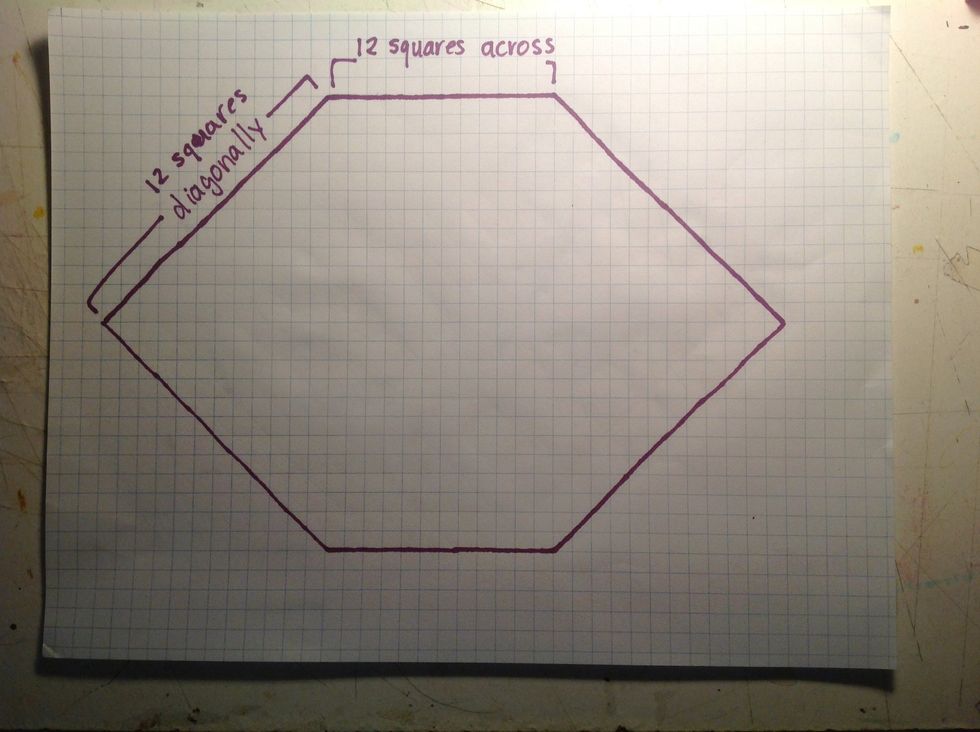
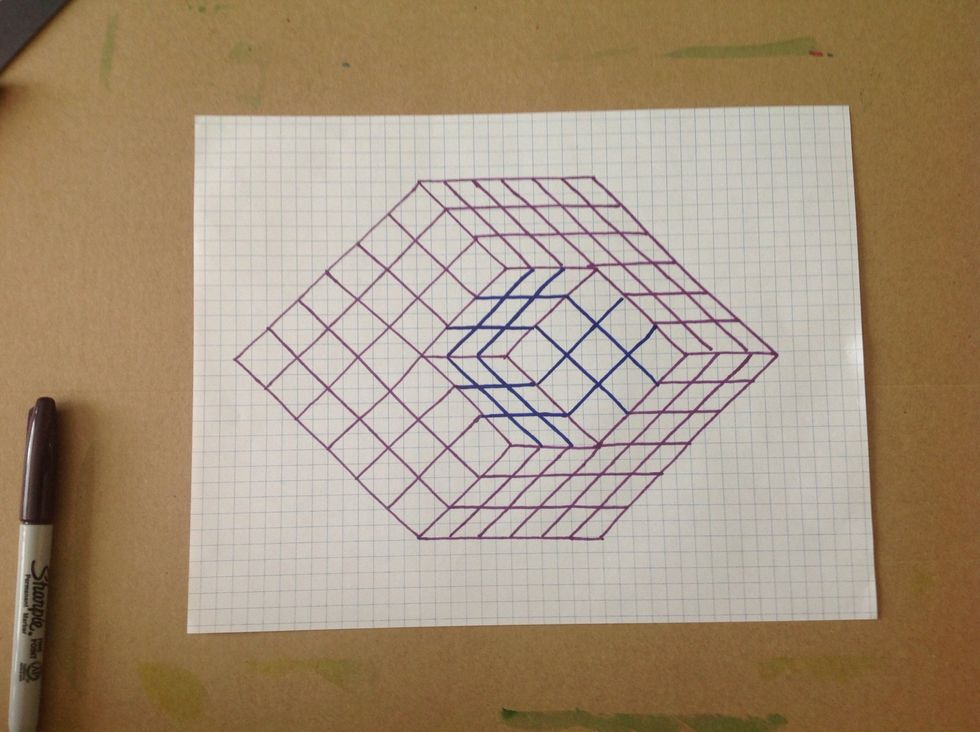
Use your graph paper create a hexagon using lines that cross 12 squares. The diagonal lines will appear longer than horizontal or vertical lines. You can use any even number to create the sides.
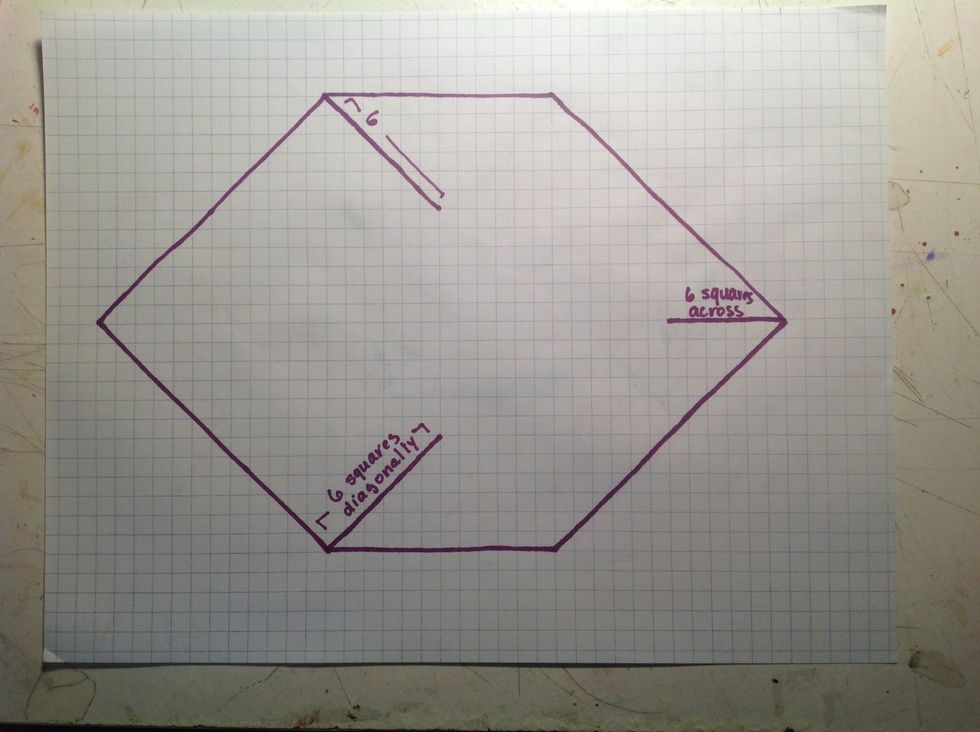
Use the image to guide your next lines. My lines go six squares across. Basically it is half the length of your first lines.

Draw a smaller hexagon that connects to the smaller lines you just made. The length of the sides is squares long.
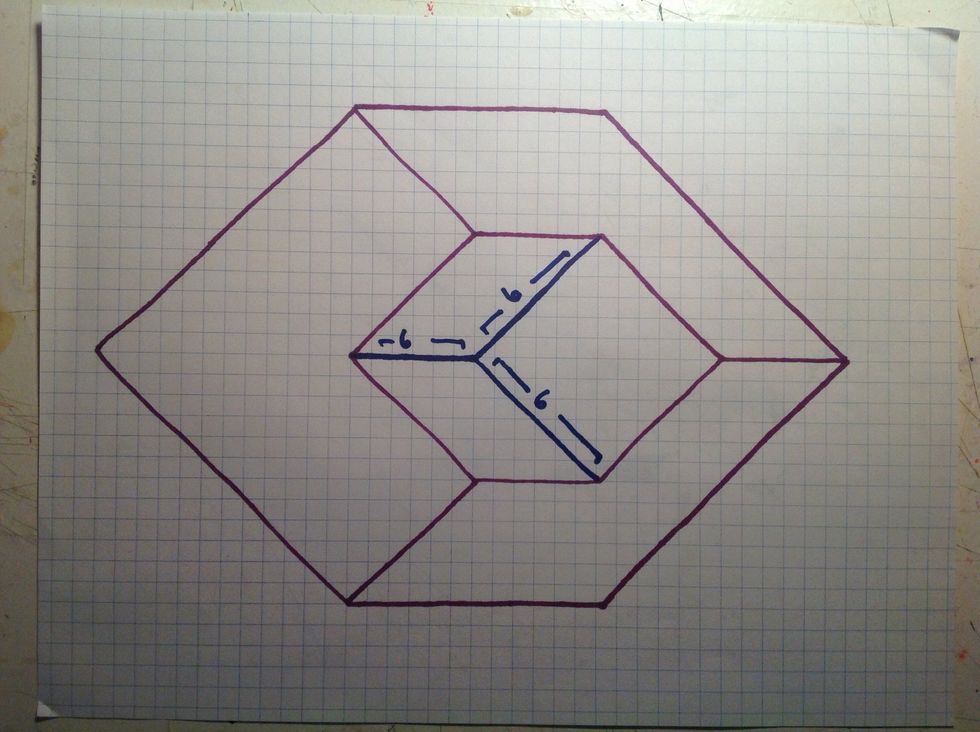
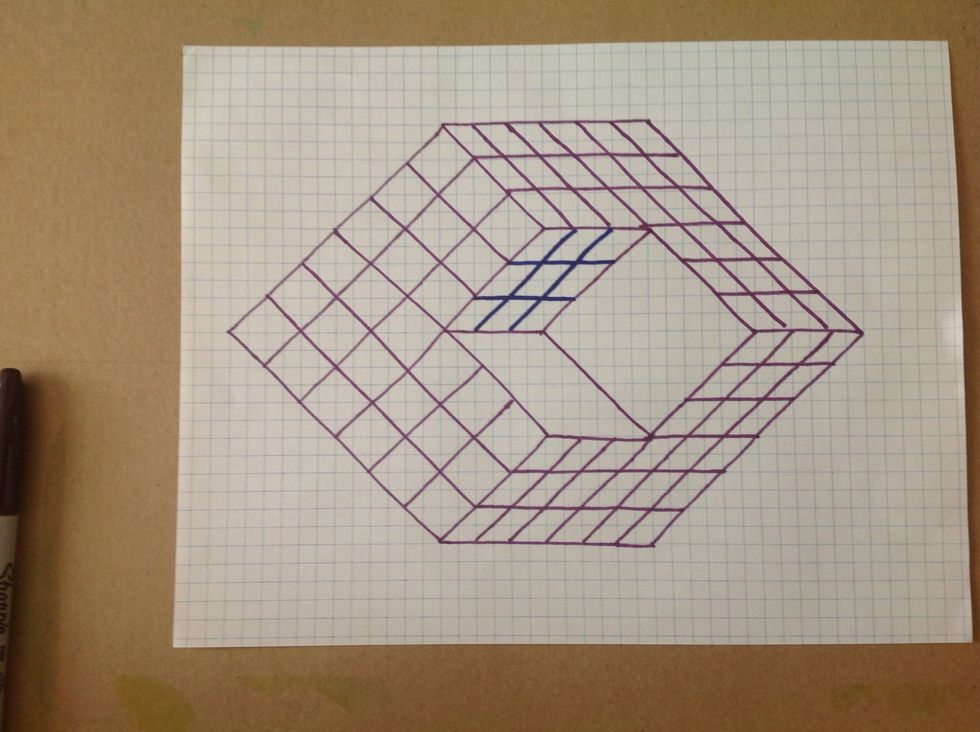
Add the lines in the smaller hexagon as shown in the image.
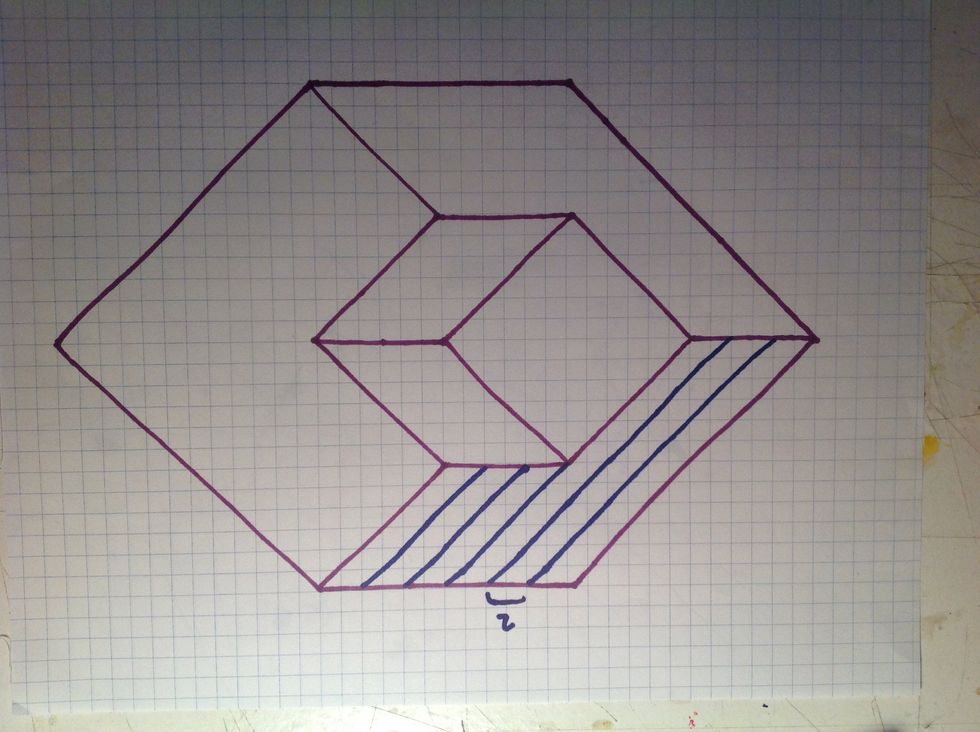
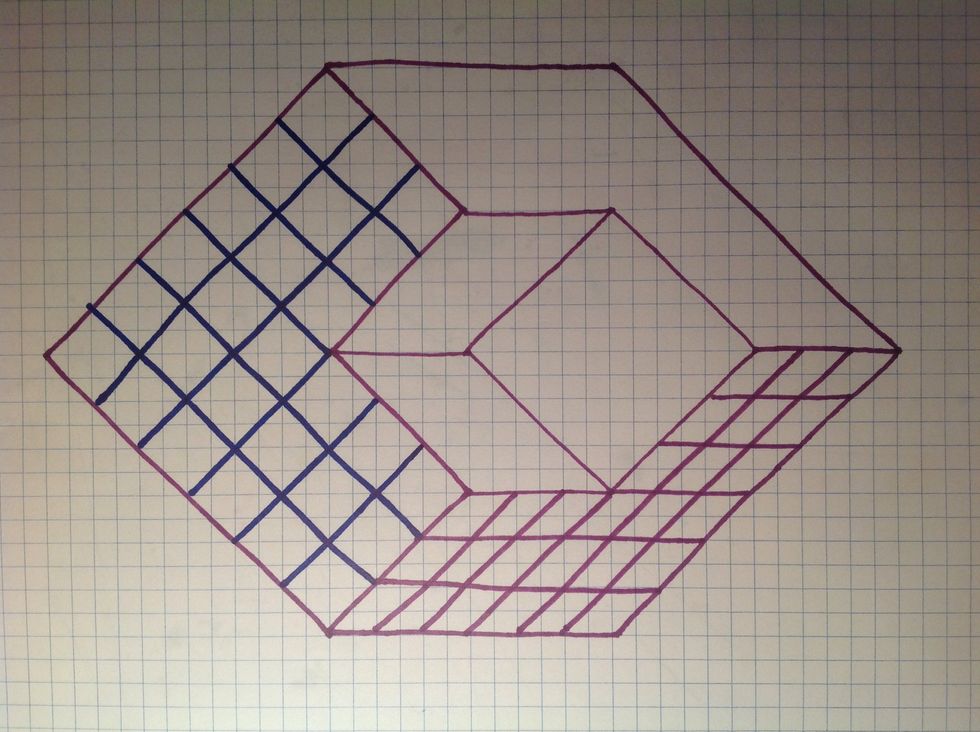
To create the checkerboard effect start by drawing parallel diagonal lines in one of the "L" shaped sections. They should be 2 squares wide.
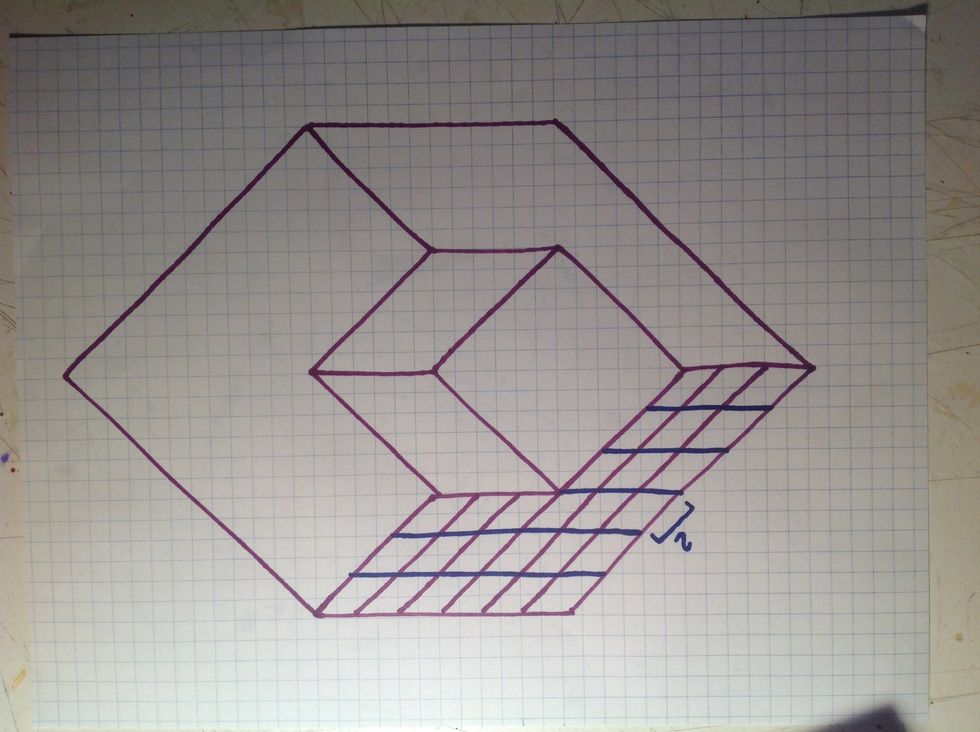
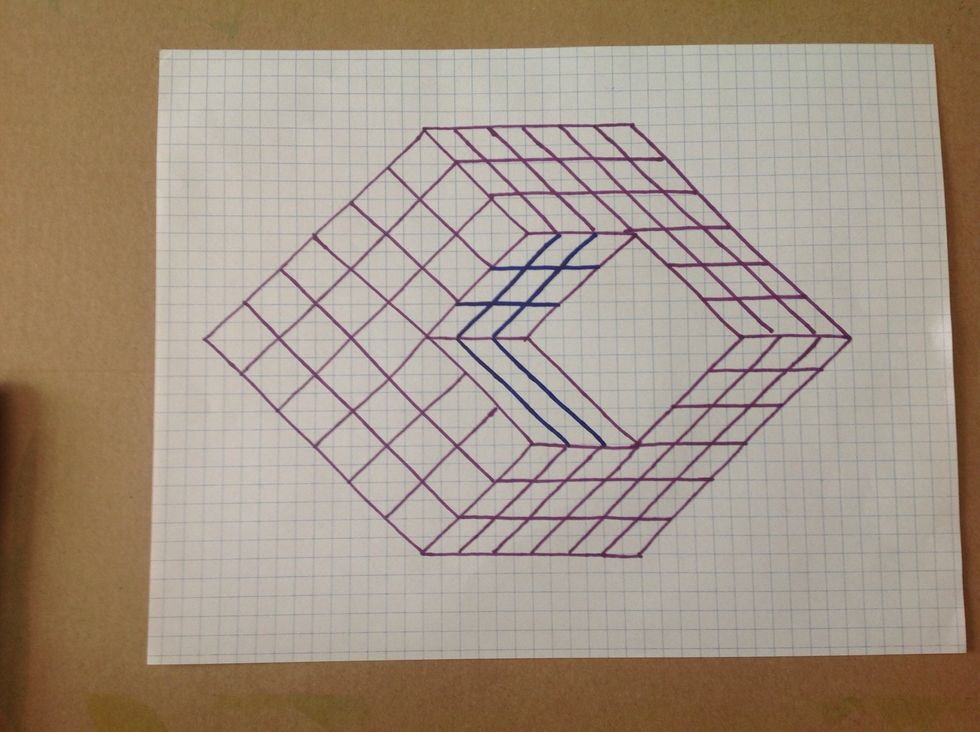
Now add horizontal lines in the same section. These are also 2 squares wide .

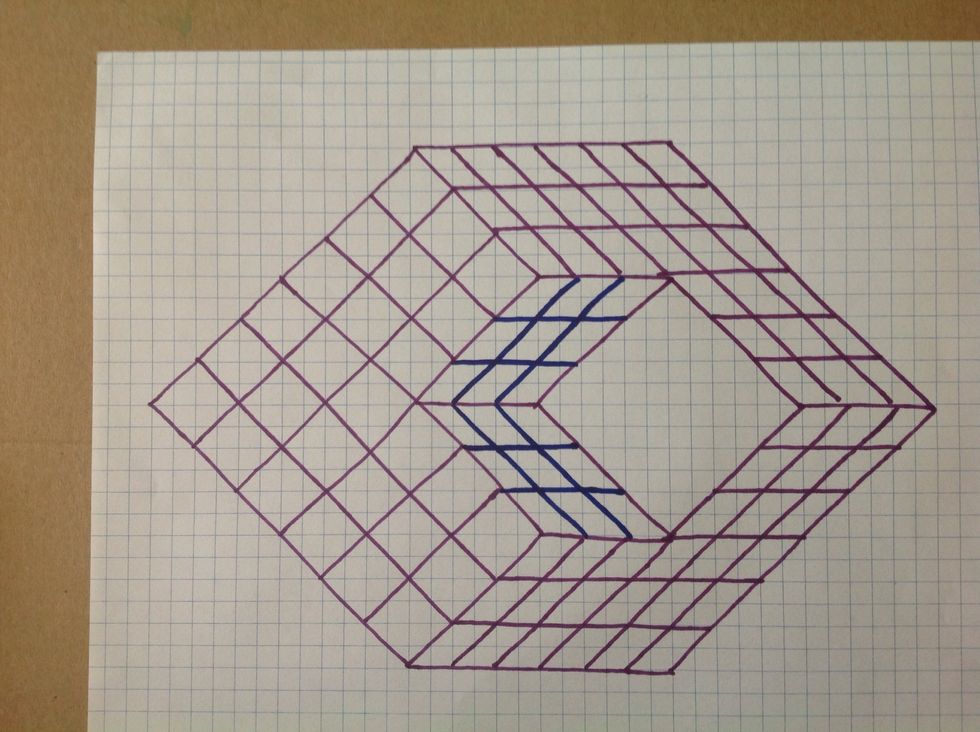
Repeat the process in the other two "L" shaped sections. Your lines should be parallel to the sides of the "L".
Refer to the image in the next few pages.
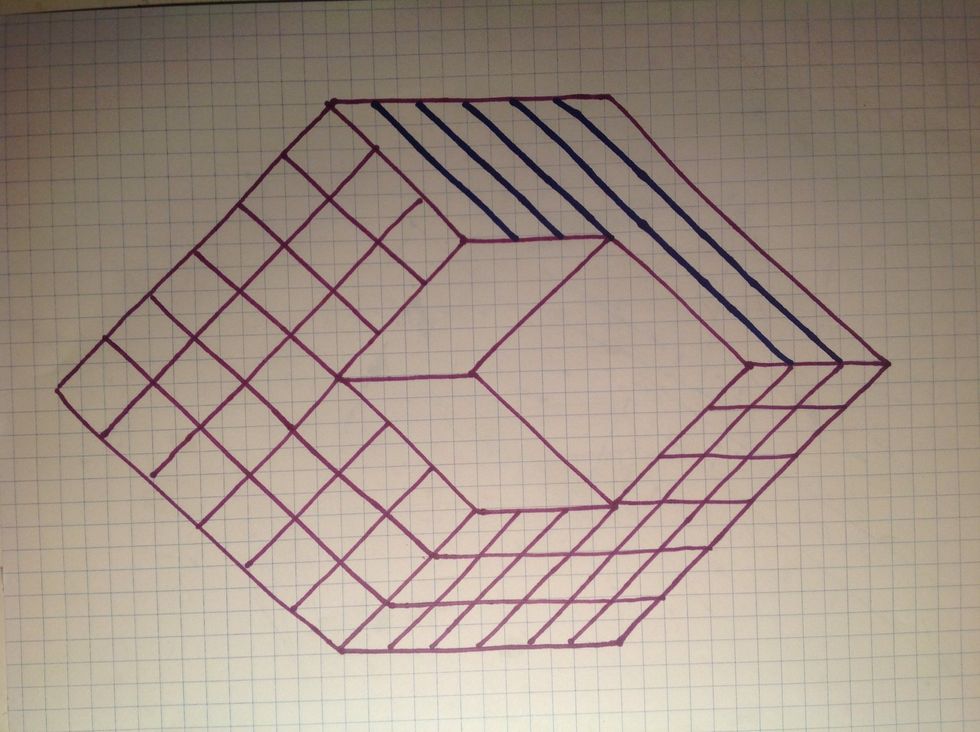
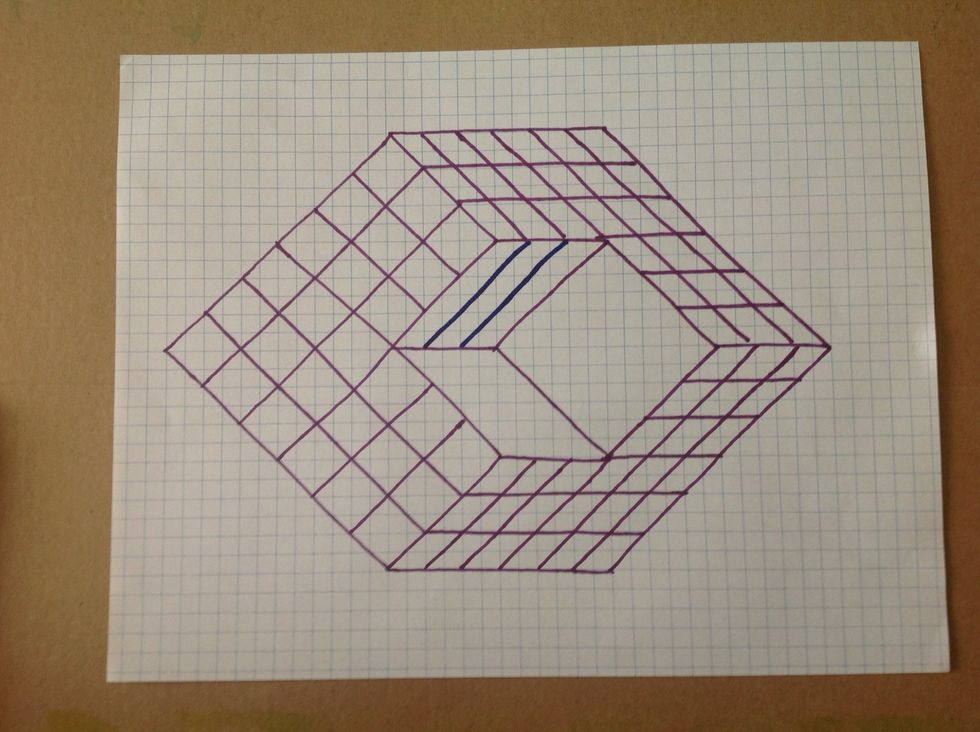
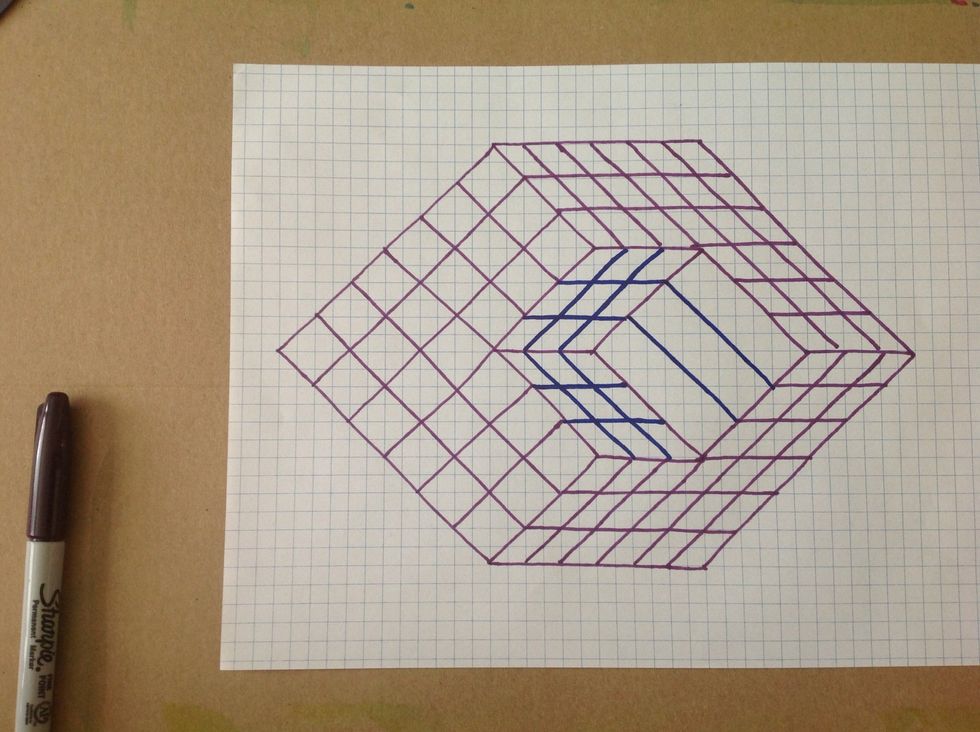
Now you can add the grid lines to the smaller cube. They are still two squares wide. Remember to keep the lines parallel.
Once the grid is in place you are ready to add color. I recommend using two contrasting colors of colored pencils so that you can vary the darkness.
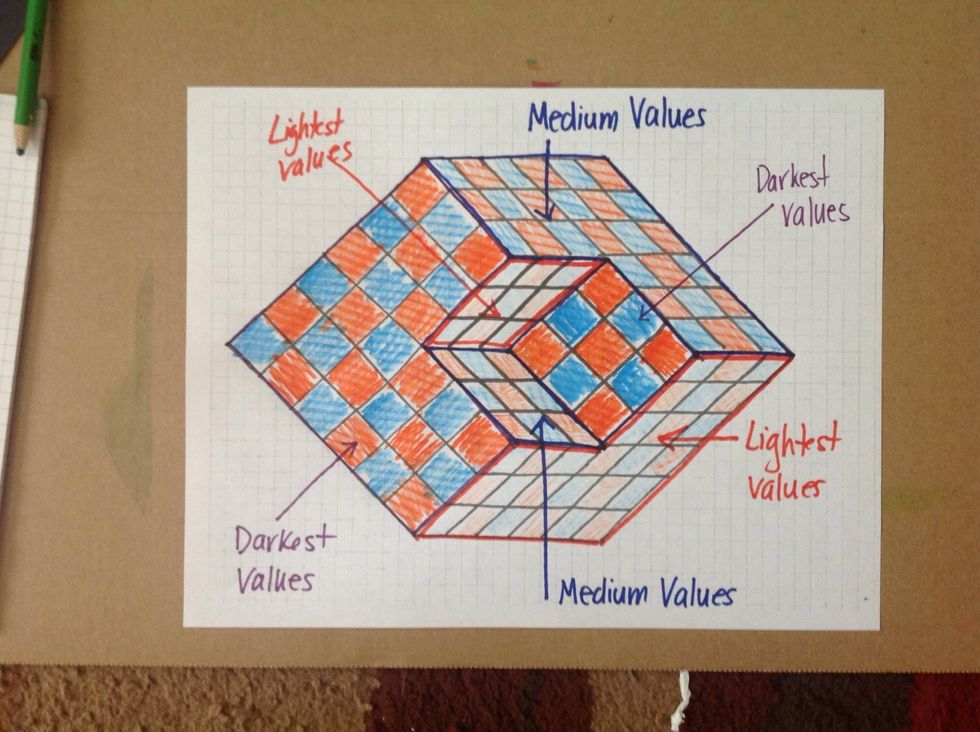
When you want to add color, do so carefully so that it fills each grid space. The coloring in this image is sketchy because I only wanted to show where the dark, medium, and light colors go.
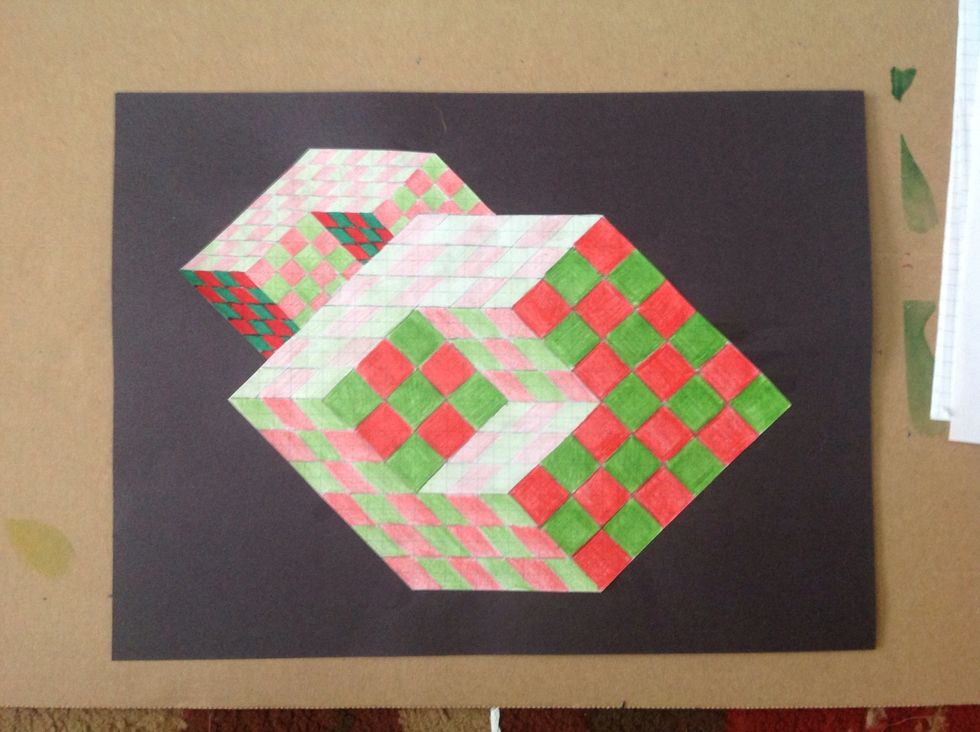
Cut out your image and glue to a contrasting color paper.