The Conversation (0)
Sign Up
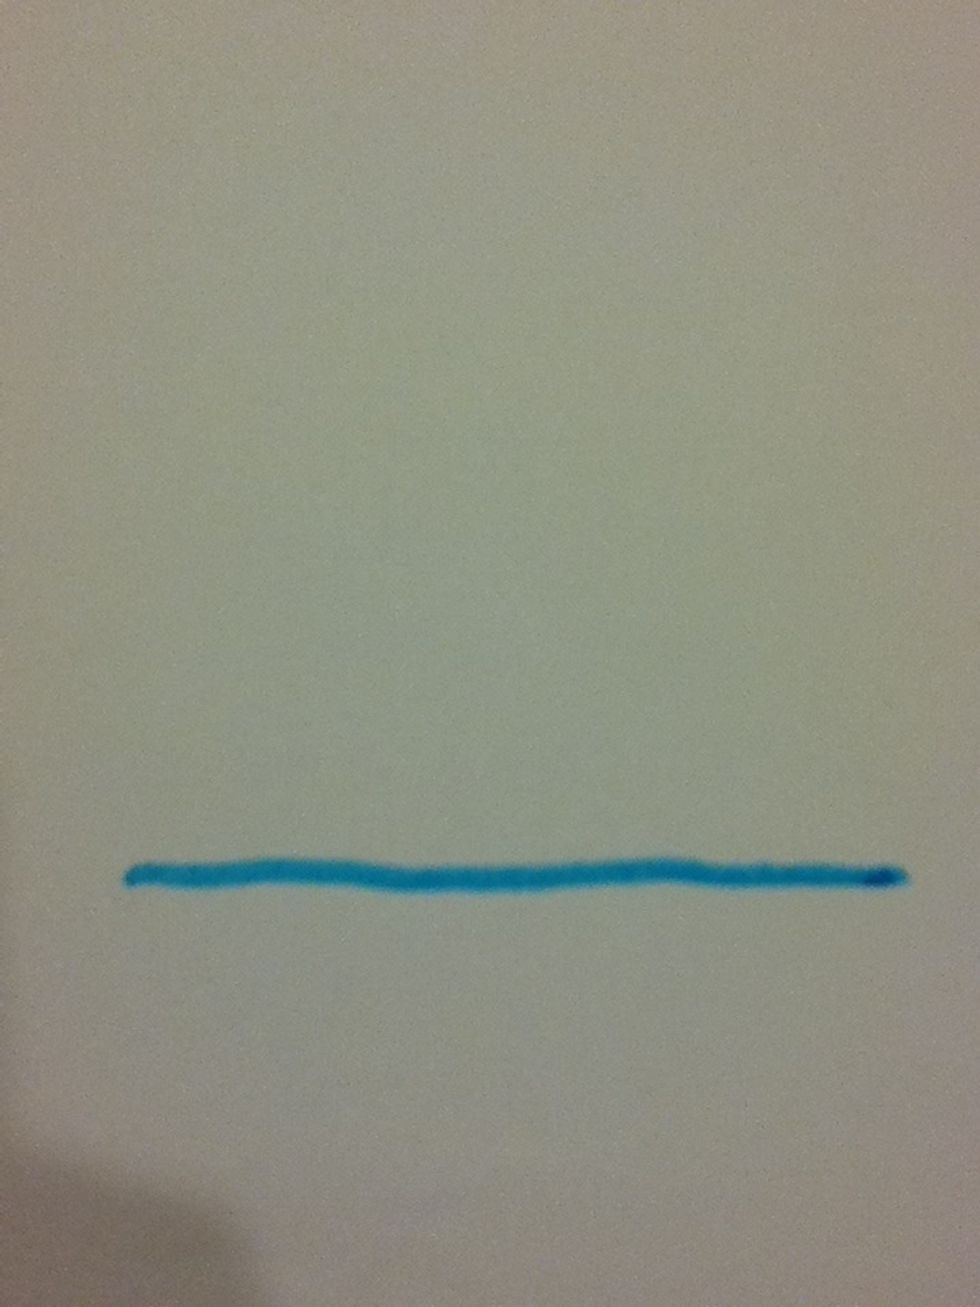
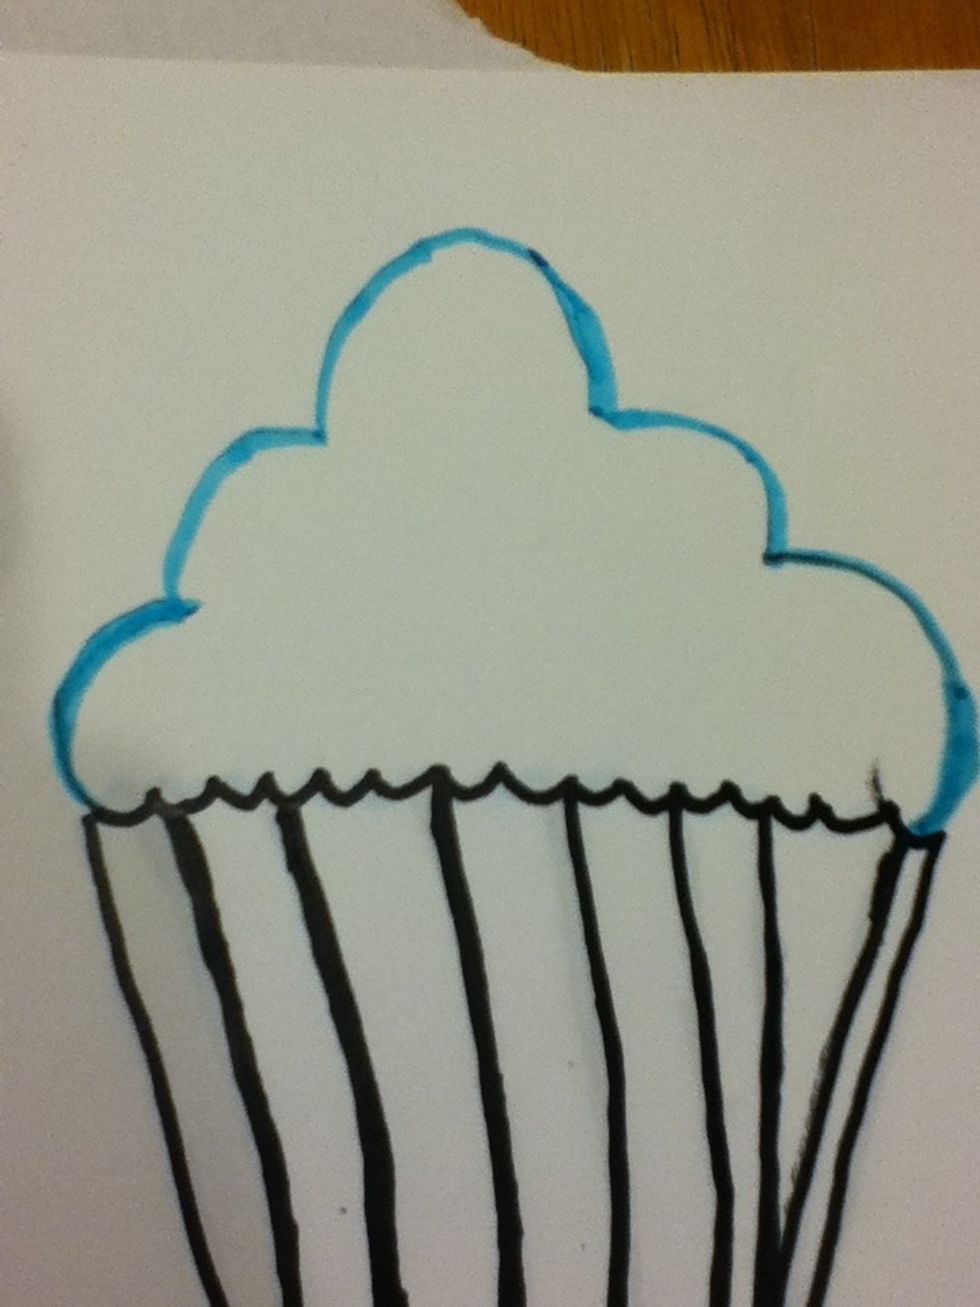
First, make a strait line which will end up being the bottom of the cupcake.
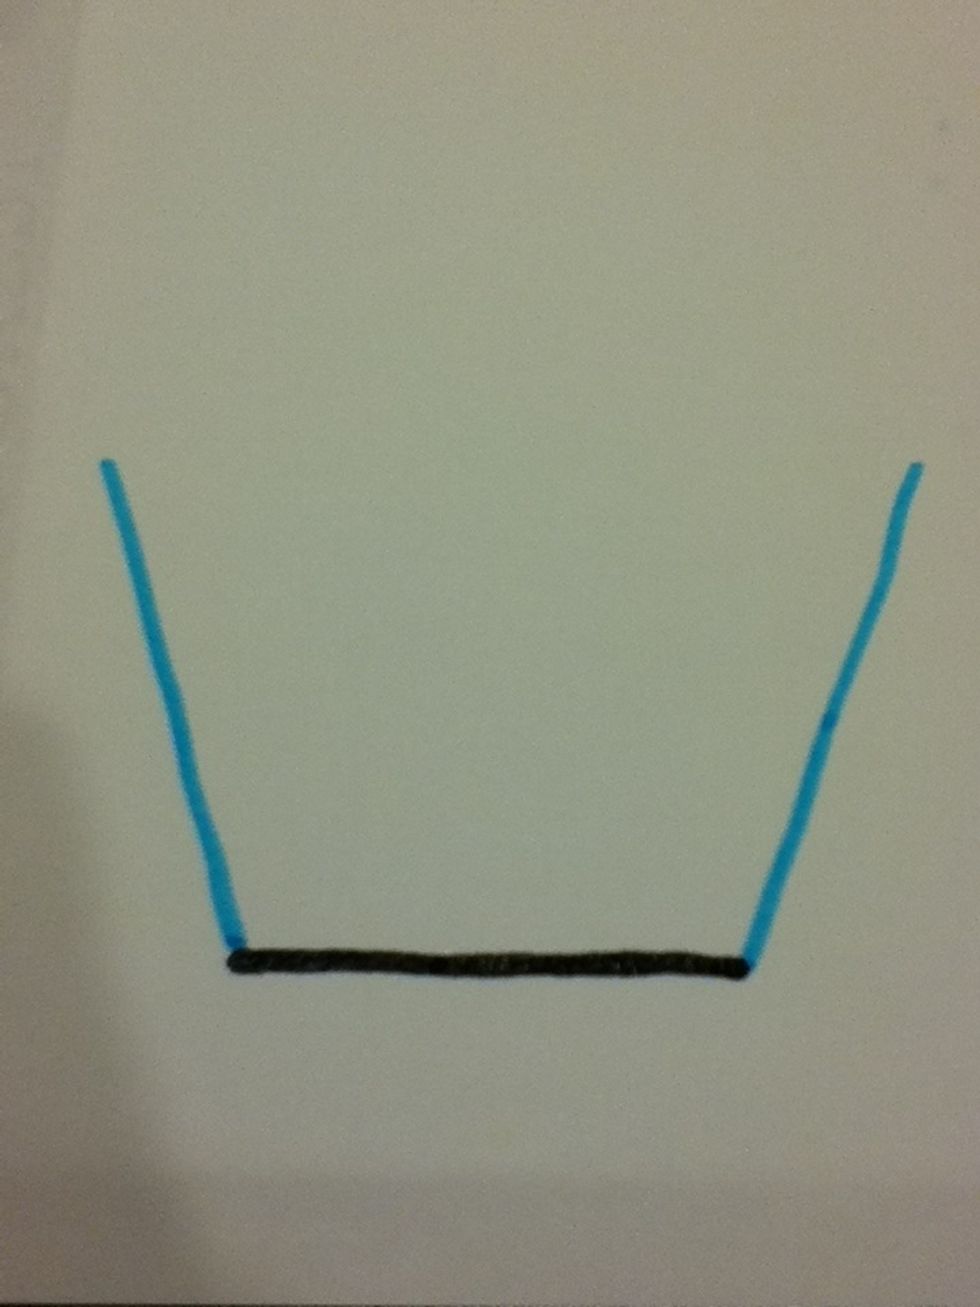
Then draw two slanted lines connected to the bottom of the cupcake.
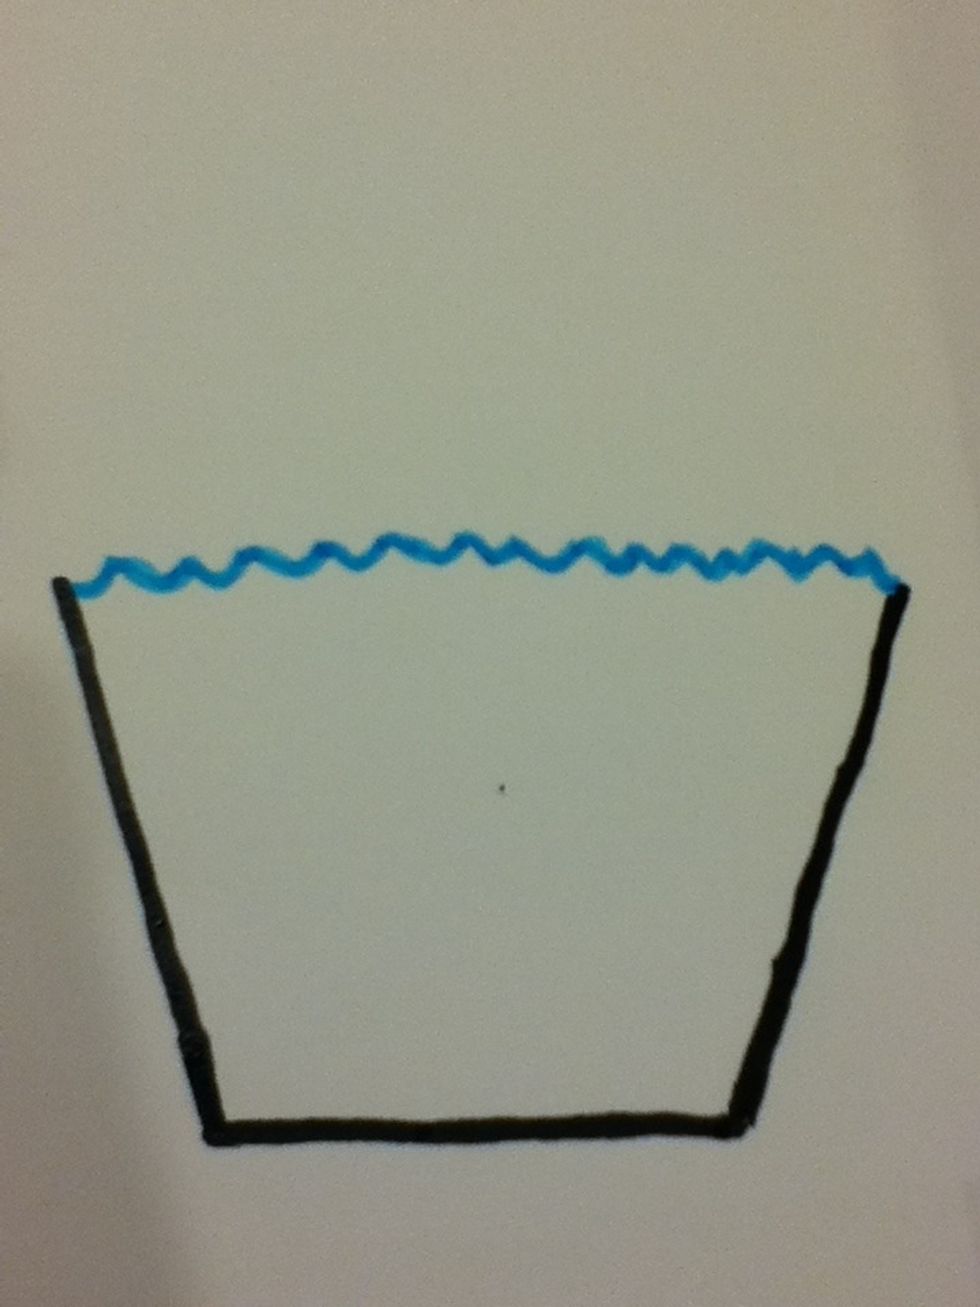
Now draw "wave like" squiggles on the top connecting the two slanted lines.
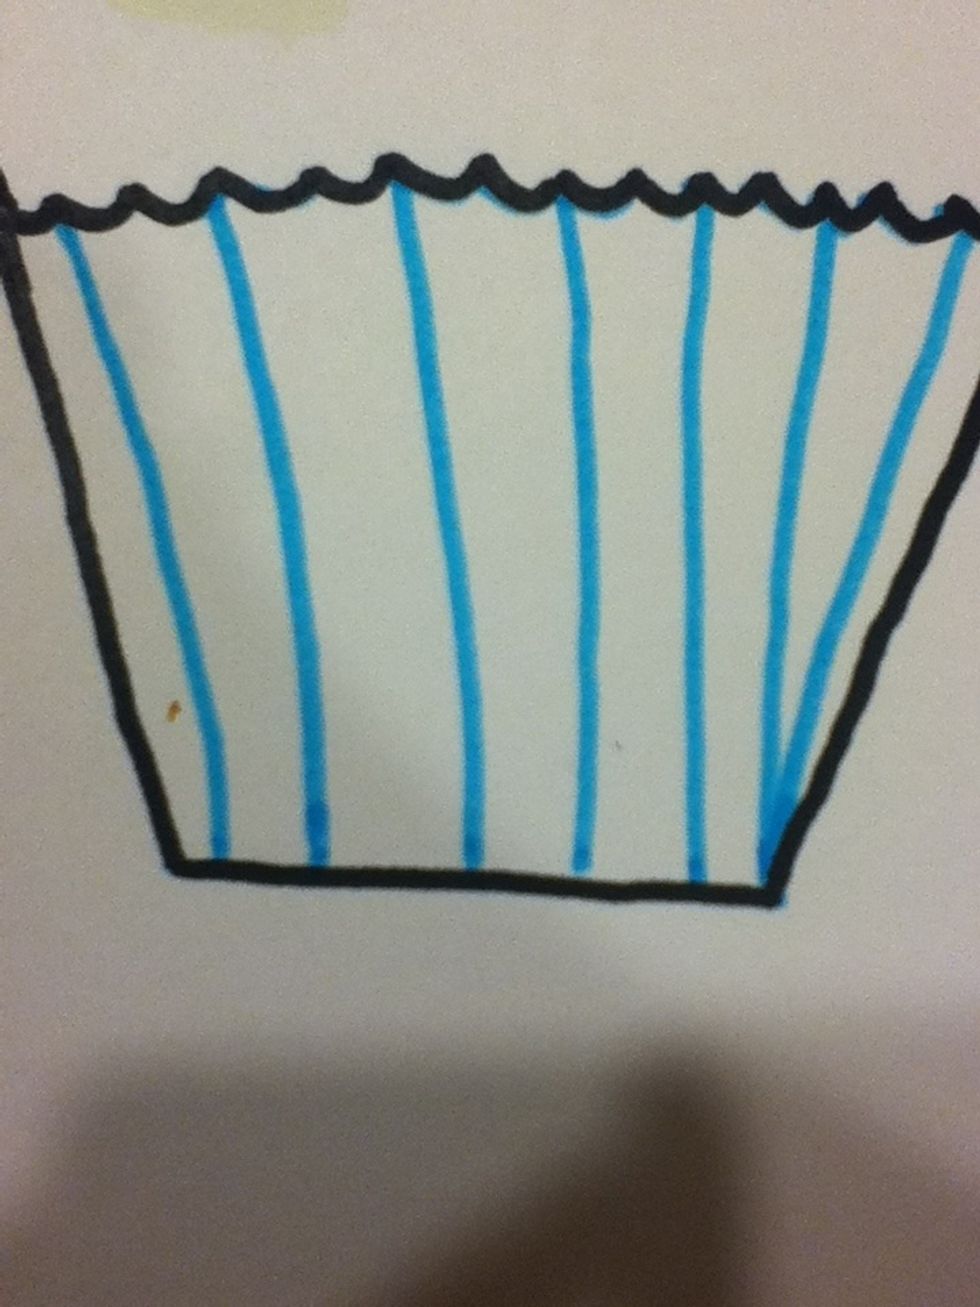
Then draw strait or slightly curved lines in the cupcake wrapper (I prefer putting the lines at every other point of the waves).
Then draw little "bumps" on the side going towards the middle up to one big "bump" on the top.
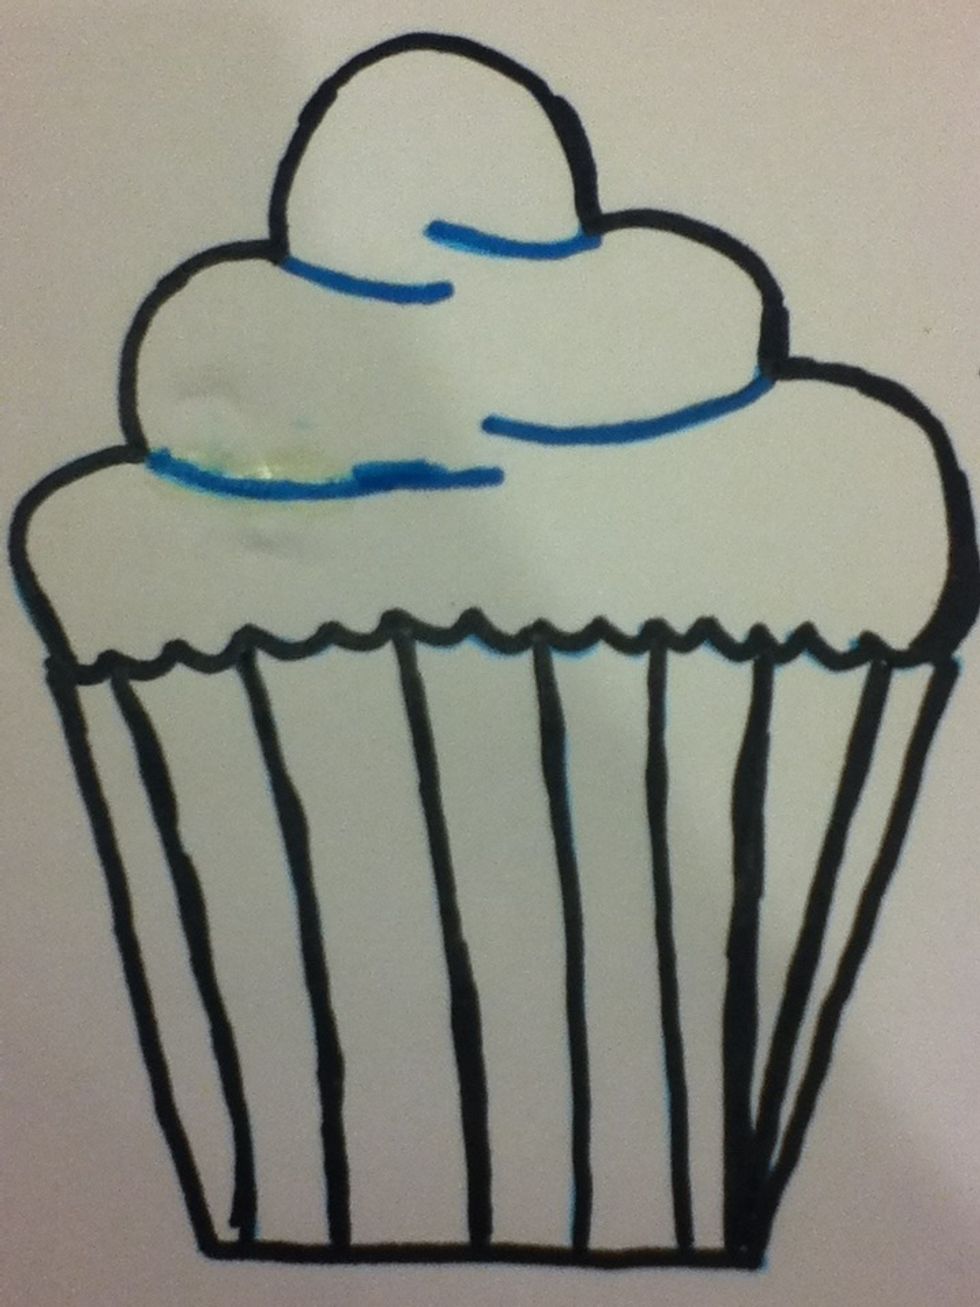
After that from the bump "points" draw curvy lines towards the middle like it the picture.
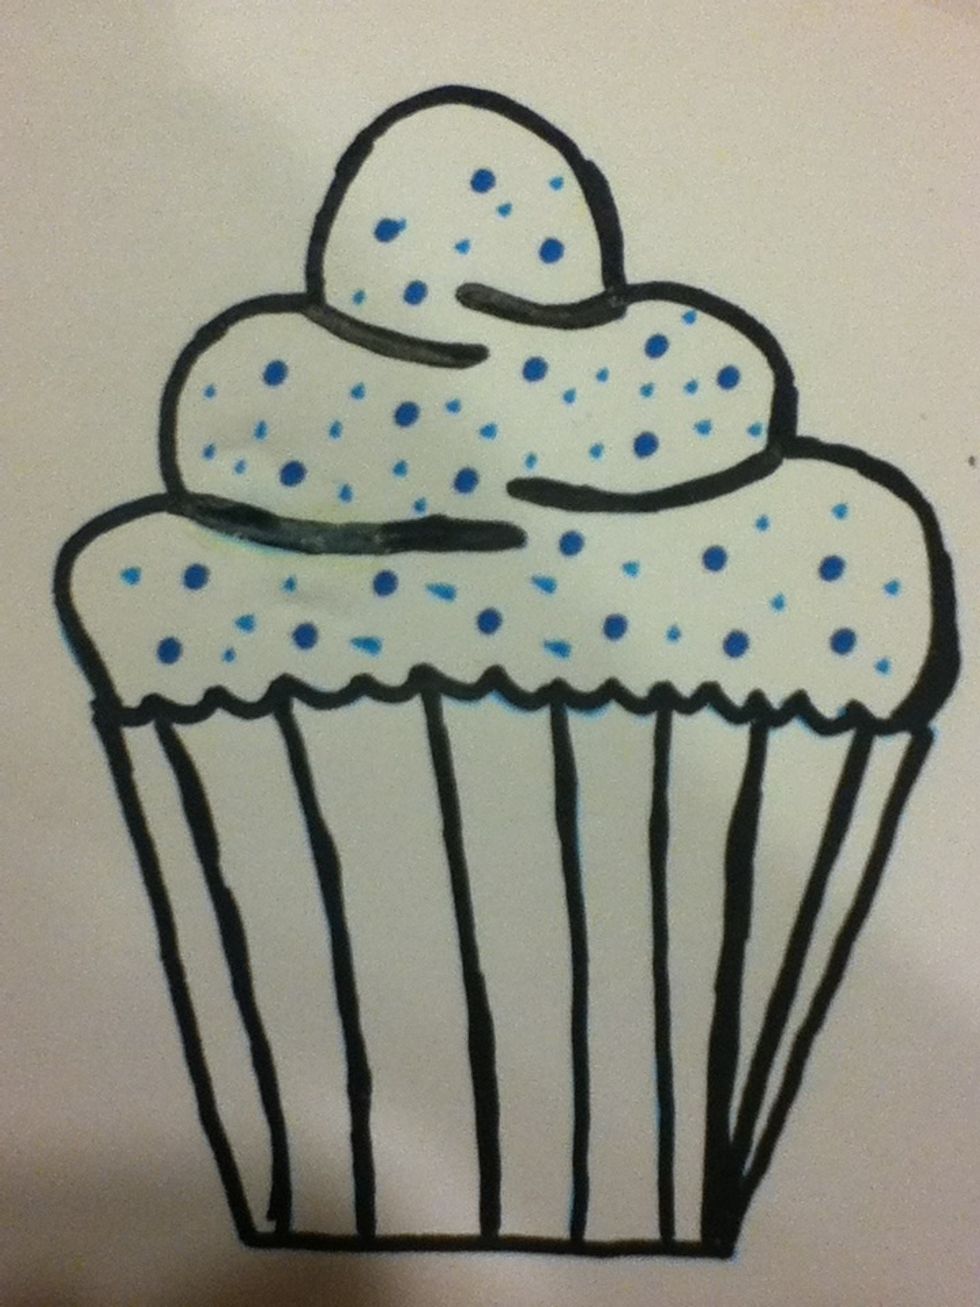
Finally if you would like you can add sprinkles and/or a cherry (I'll show how to make the cherry next).
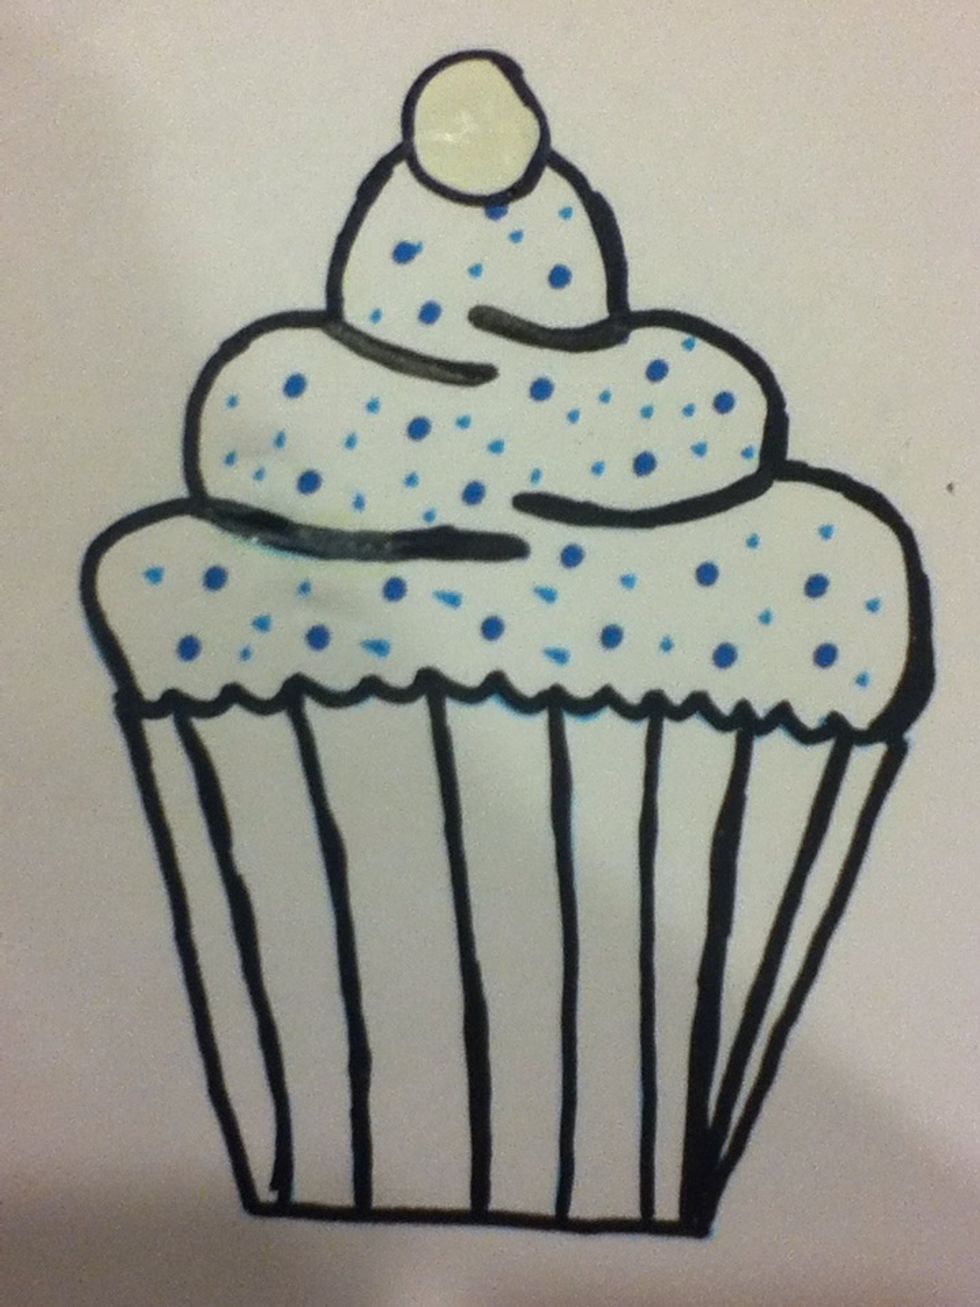
Now if you want a cherry, first draw a circle on top of the cupcake then erase the inside.
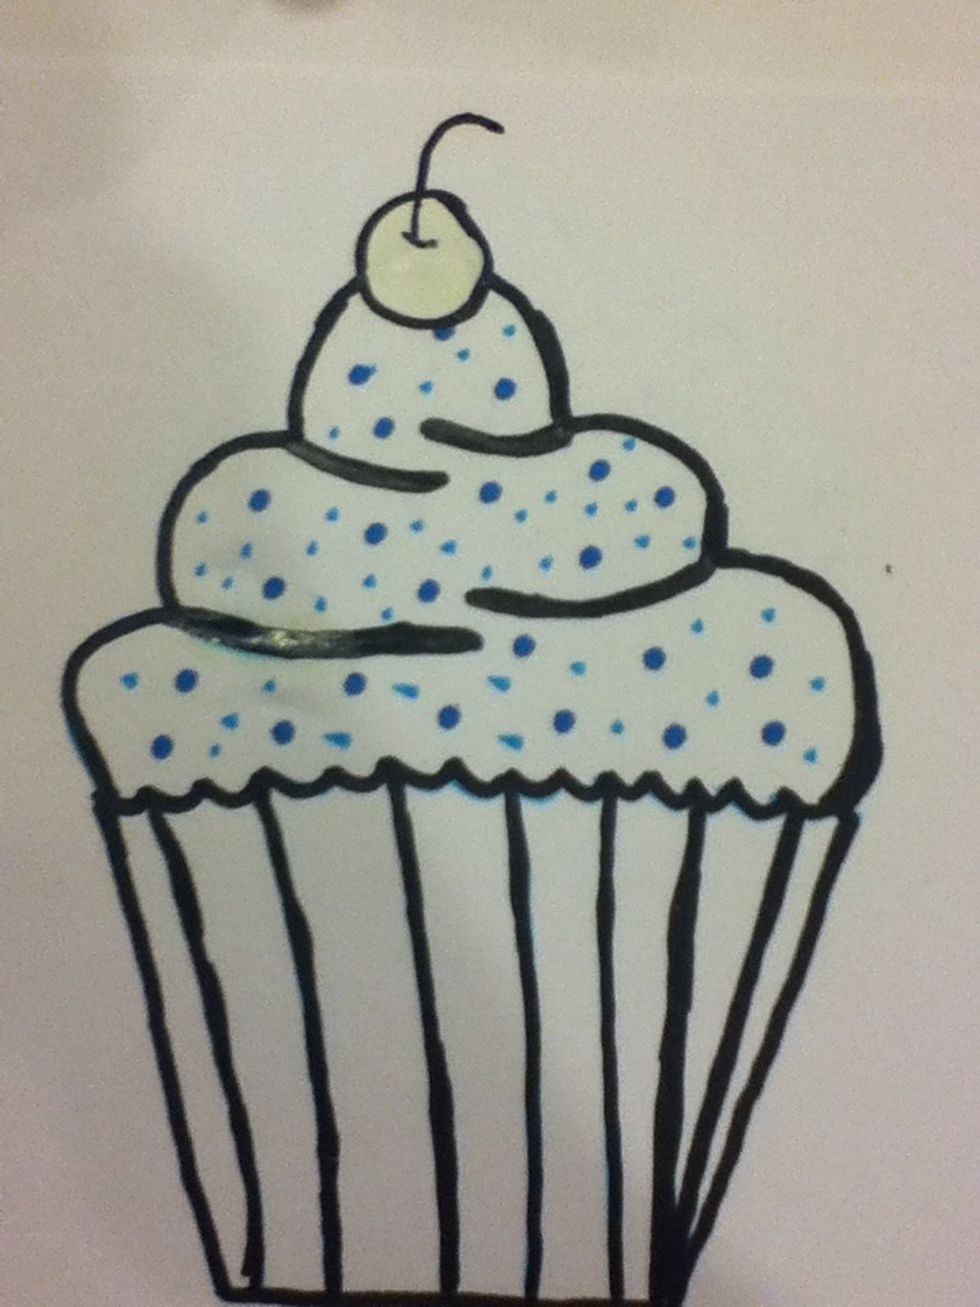
(Continuing with the cherry) then draw an upside-down "mountain" on the top and in it the stem.

Now color and enjoy!