The Conversation (0)
Sign Up
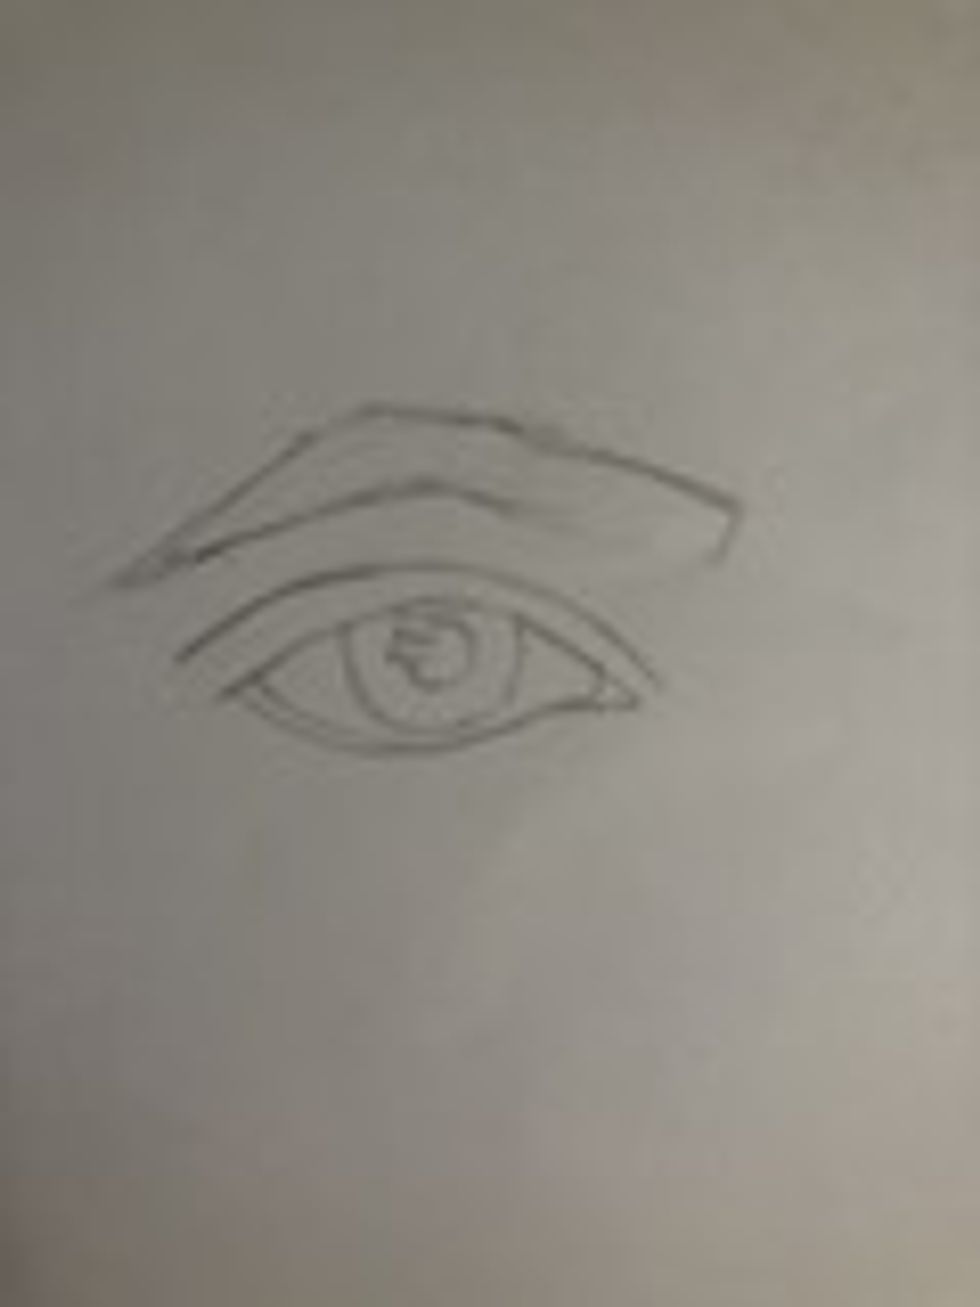
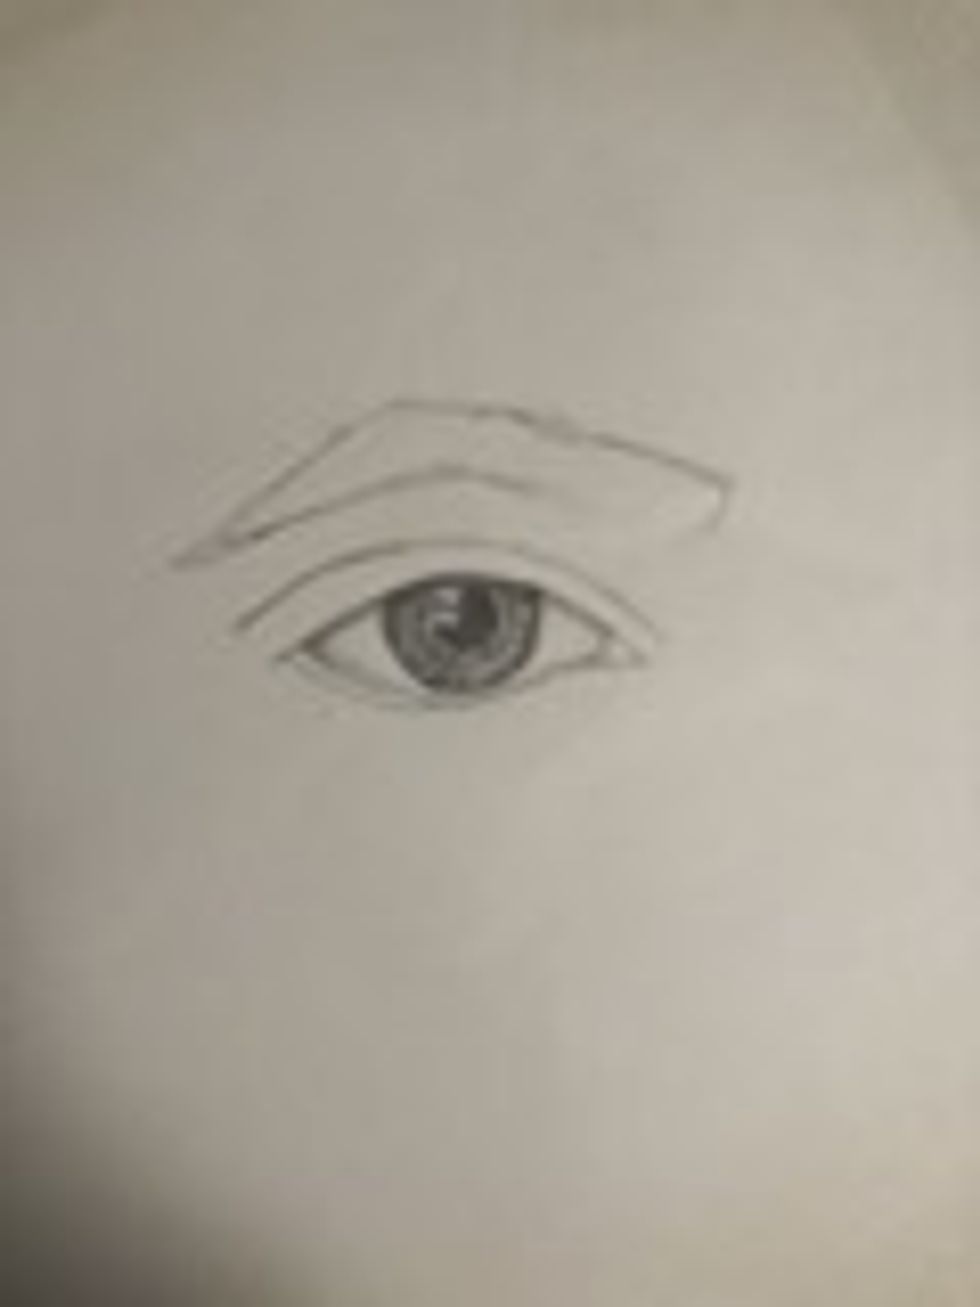
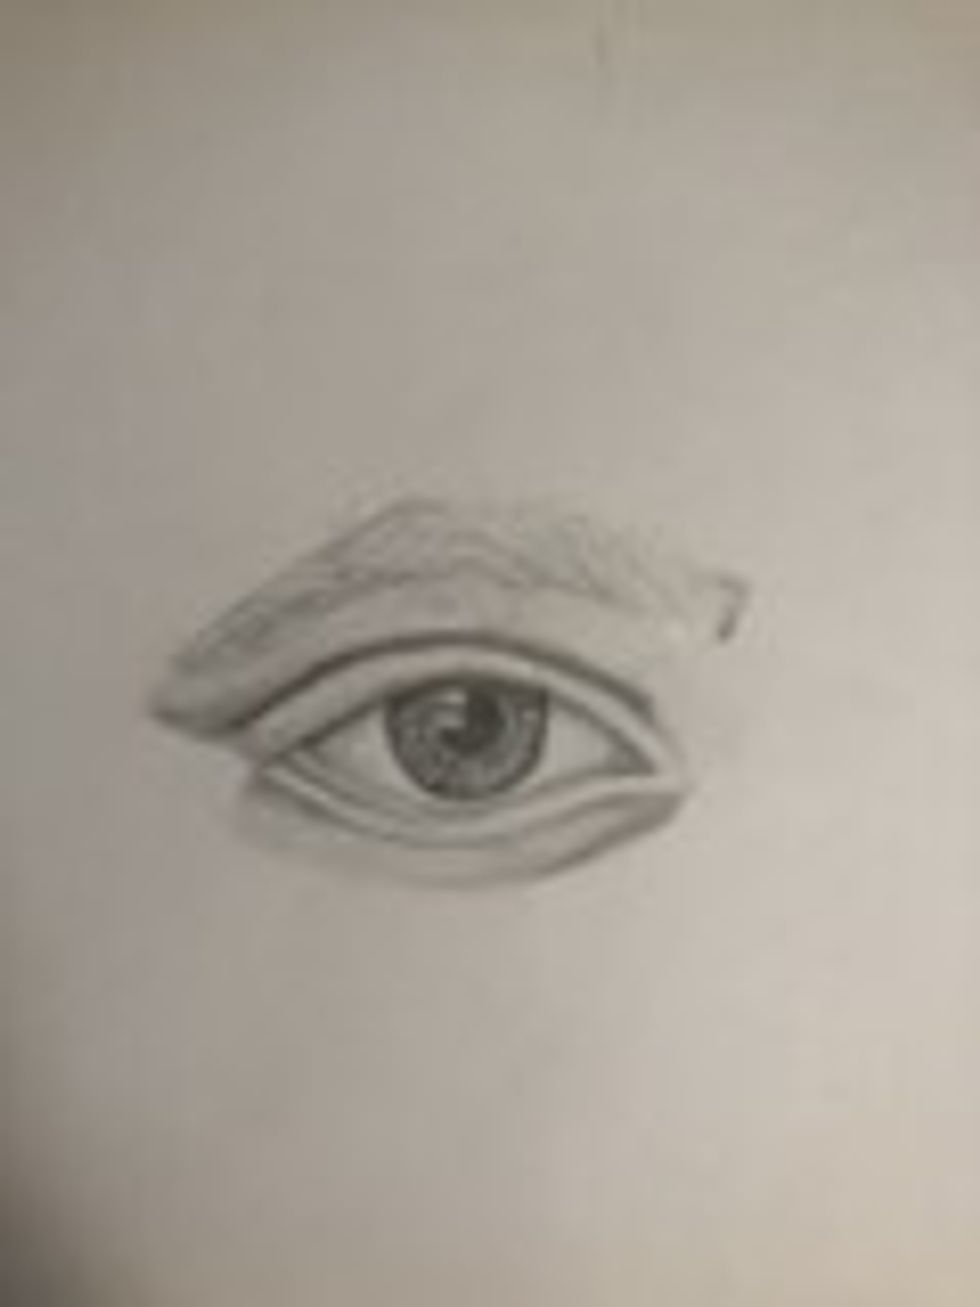
To begin, draw the outline of the eye and eyebrow. It is important to draw very lightly, and keep the lines thin. You also want to draw a highlight on the iris.
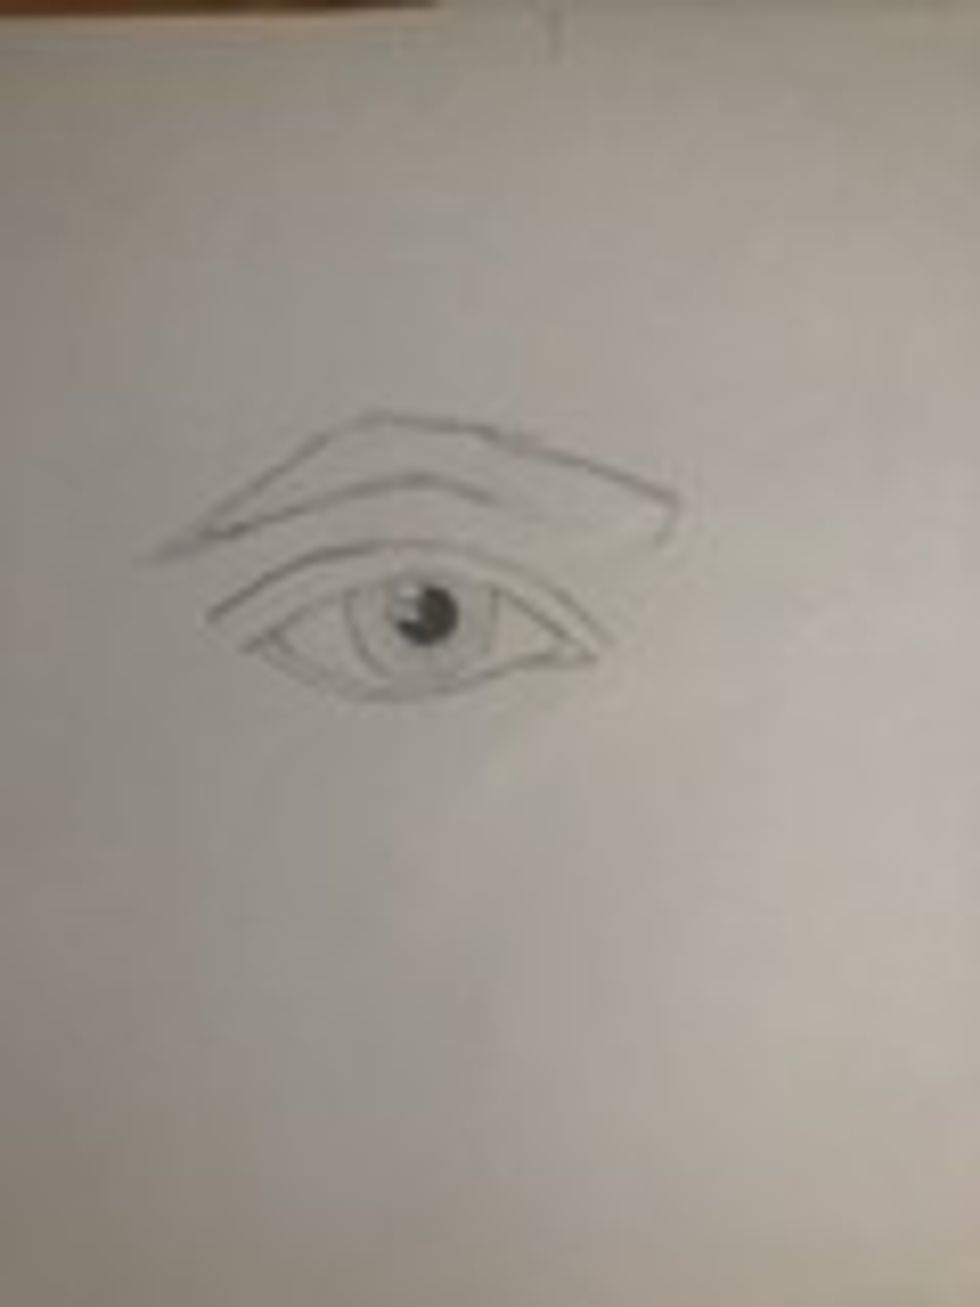
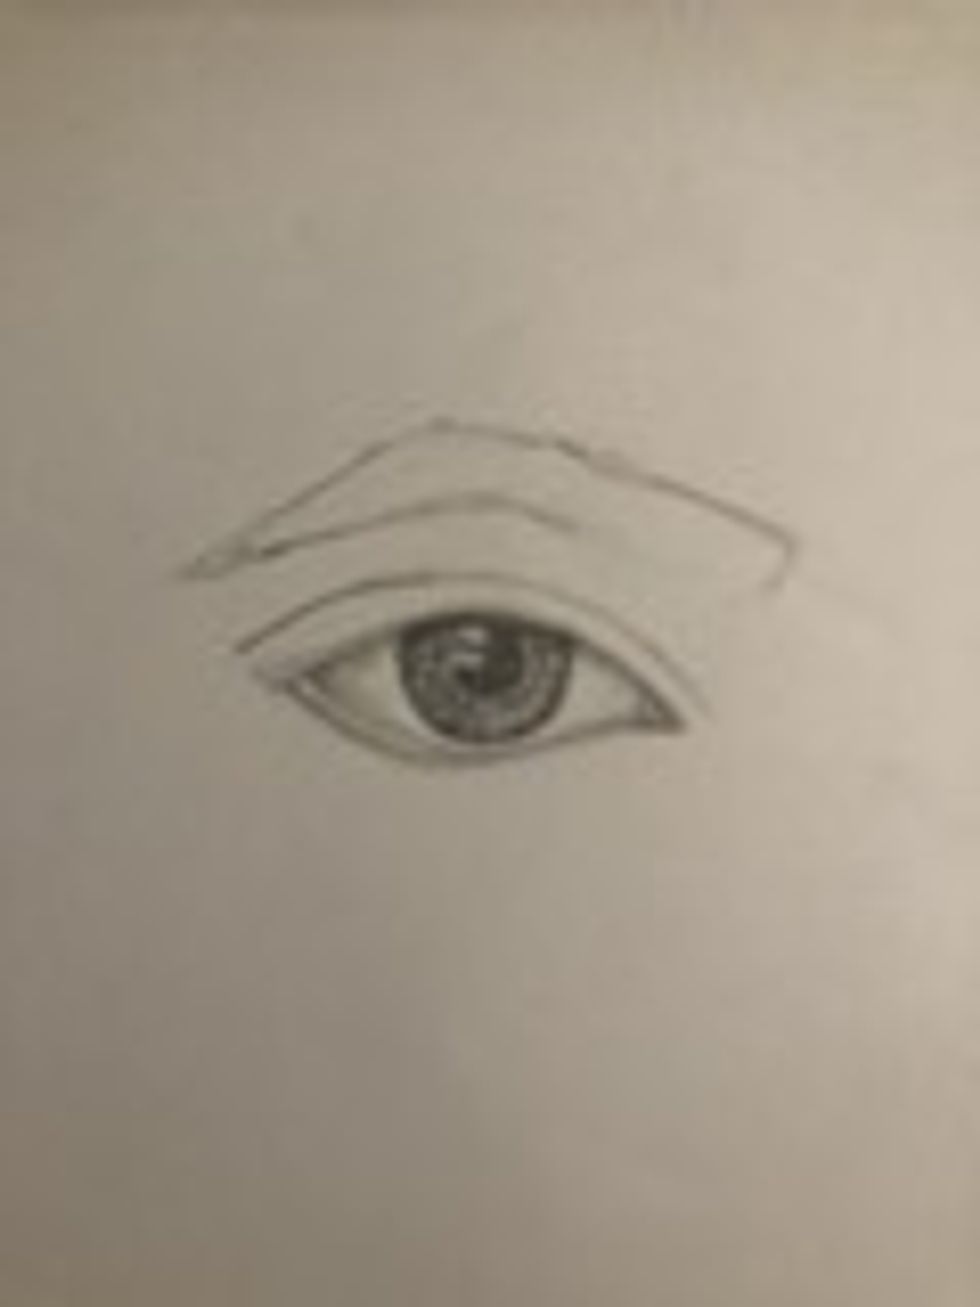
After drawing the outline, fill in the pupil as dark as you can. The darker your pupil, the more contrast throughout the whole drawing, so you want this to be as dark as you can.
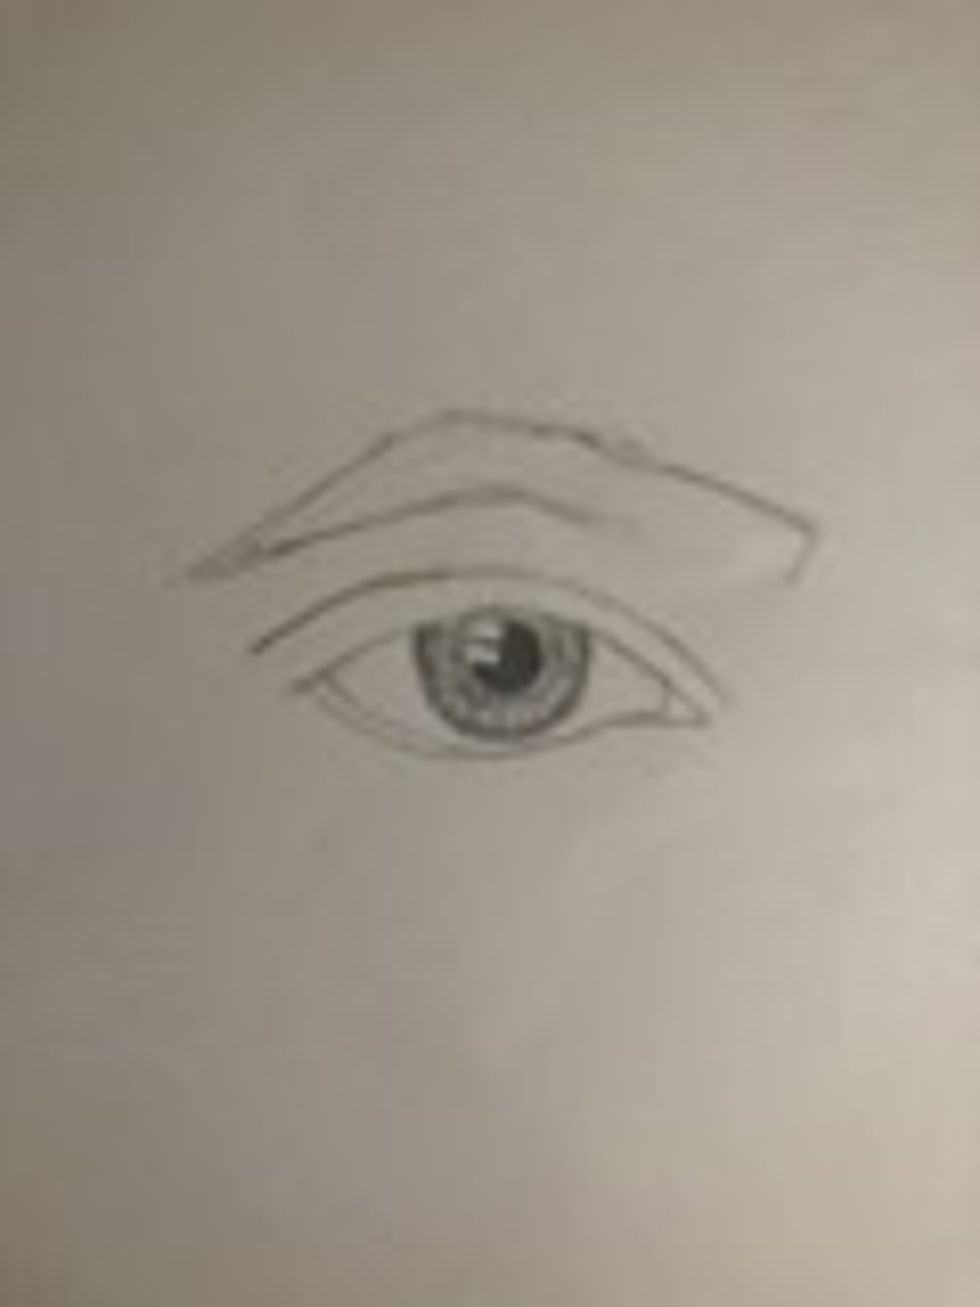
Following the lines, darken the outside of the iris. You also want to draw a dark ring surrounding the pupil.
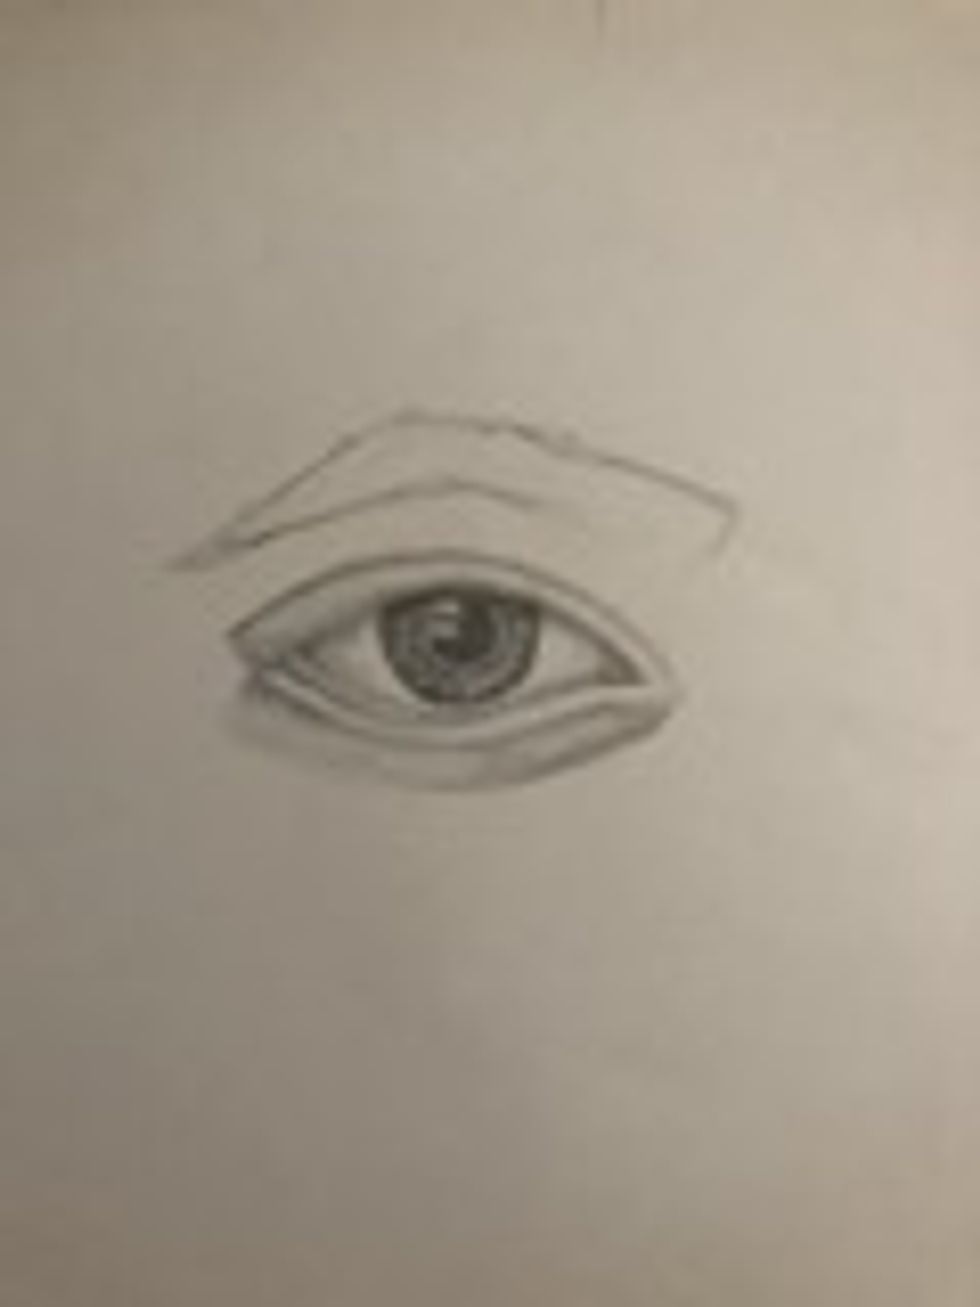
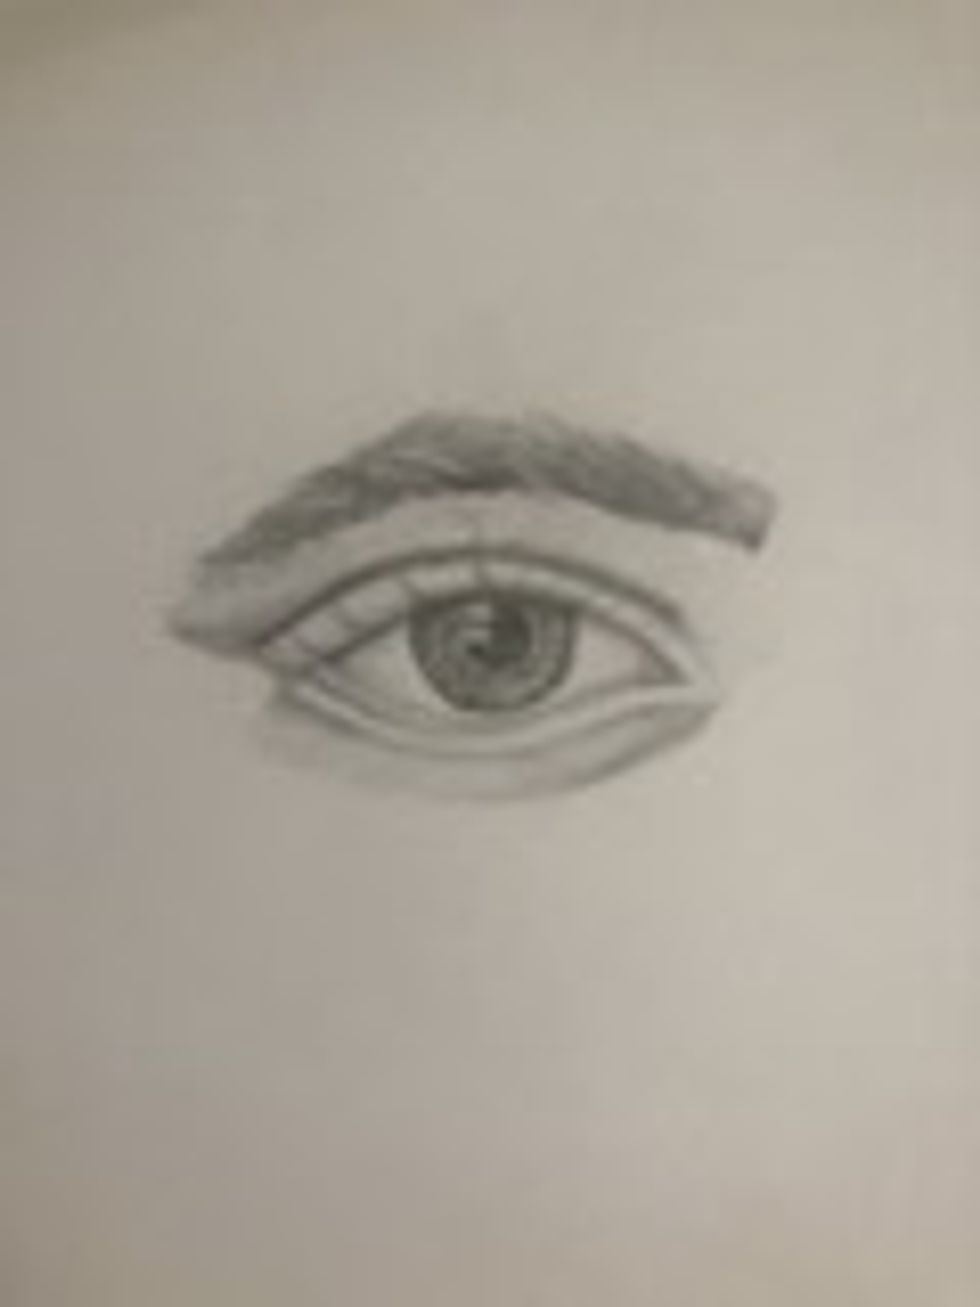
Continue to darken the iris, and draw a shadow along the top of the iris. This shadow comes from the eyelid, so follow the curve smoothly.
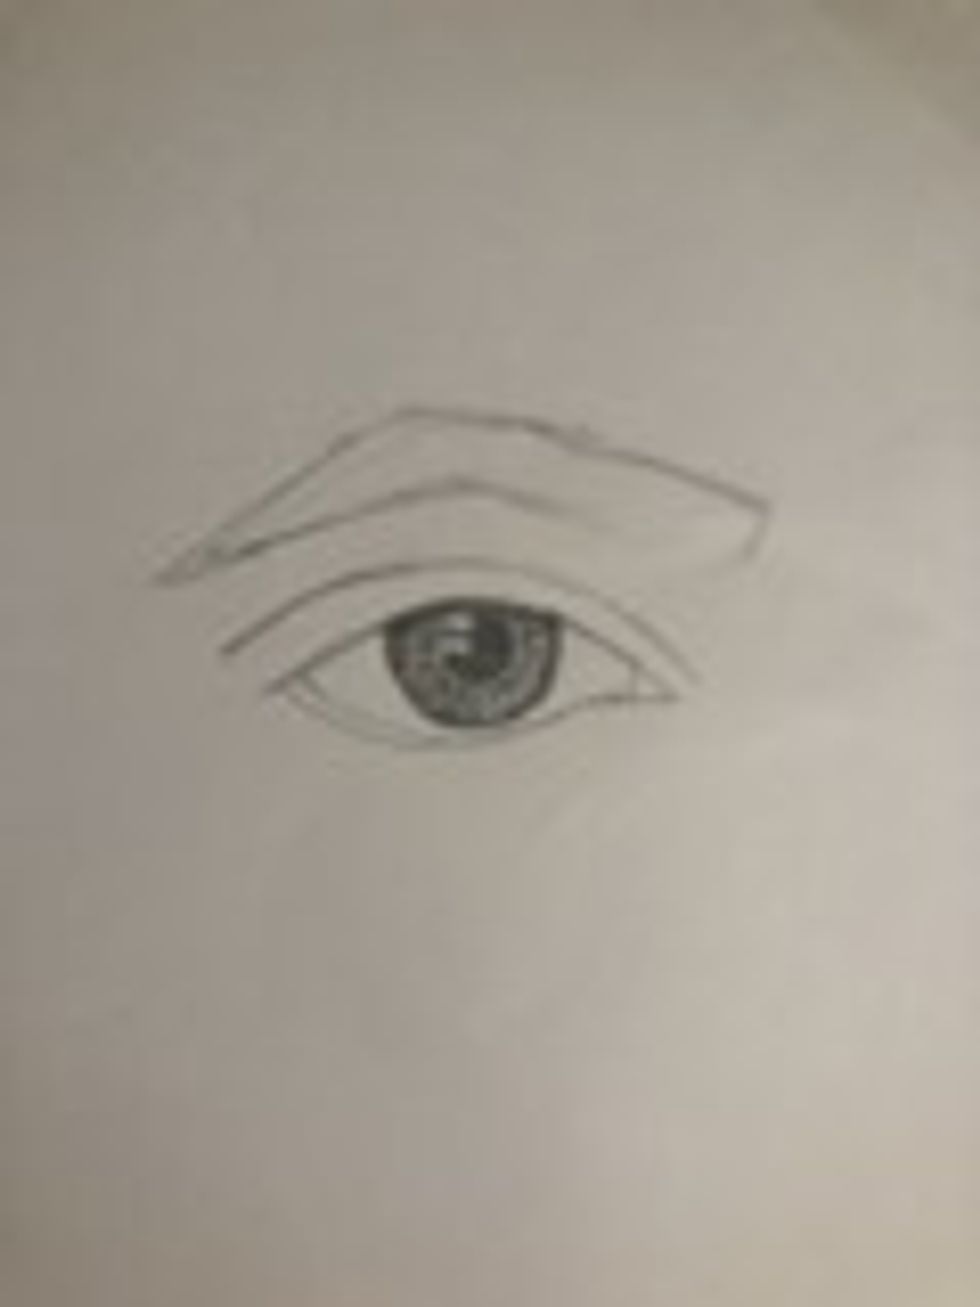
Following the shadow over the iris, follow the shadow along the eyelid on the white of the eye.
Next shade the "lacrimal caruncle". This is wet and shiny, so it is very important to have highlights and contrast.
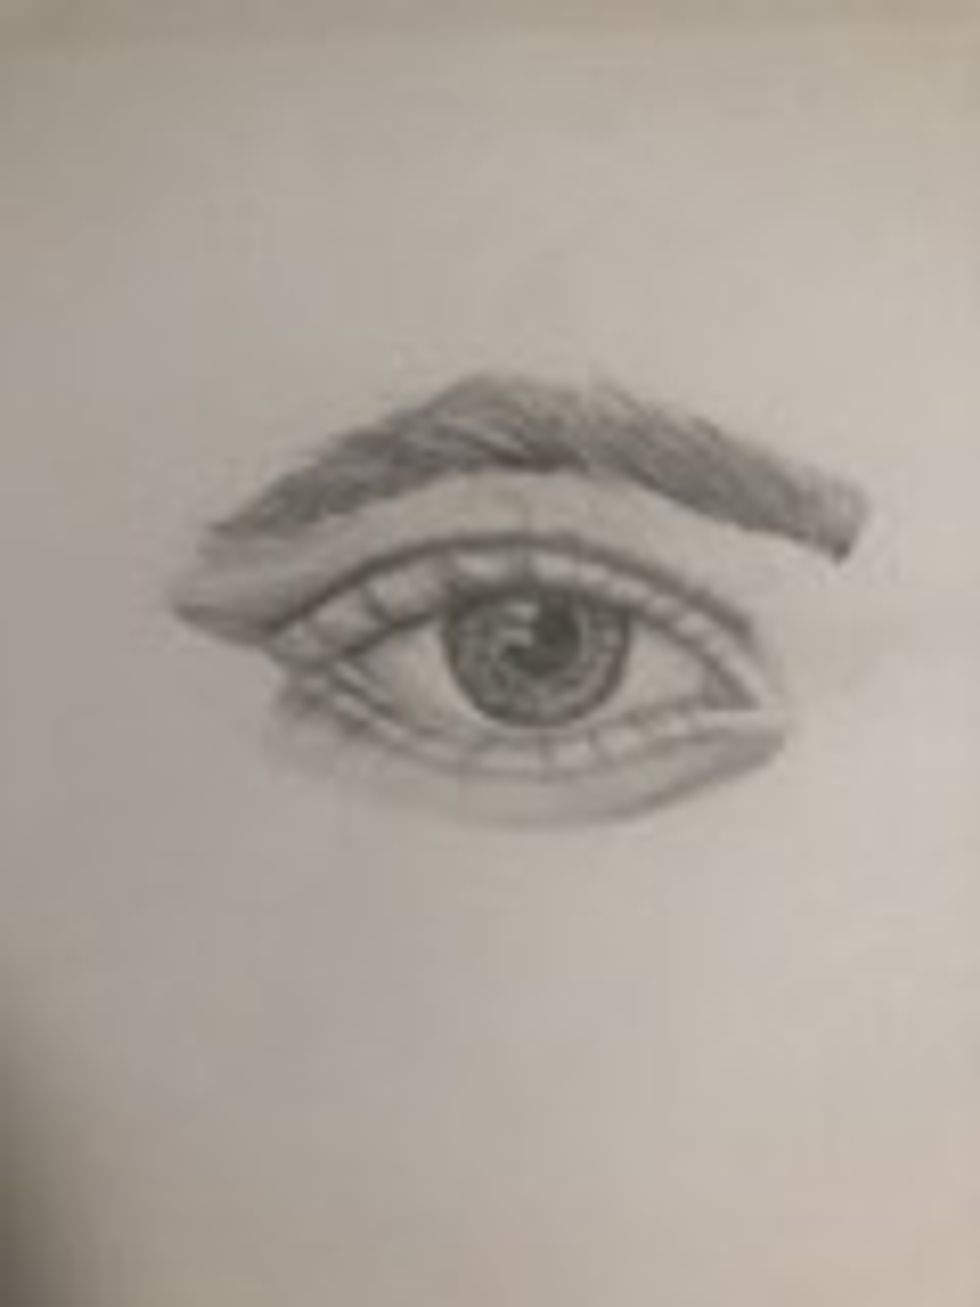
Now we are moving on to the eyelids. It is very important to shade smoothly, so angle your pencil, and start light. Build on your shading to increase contrast.
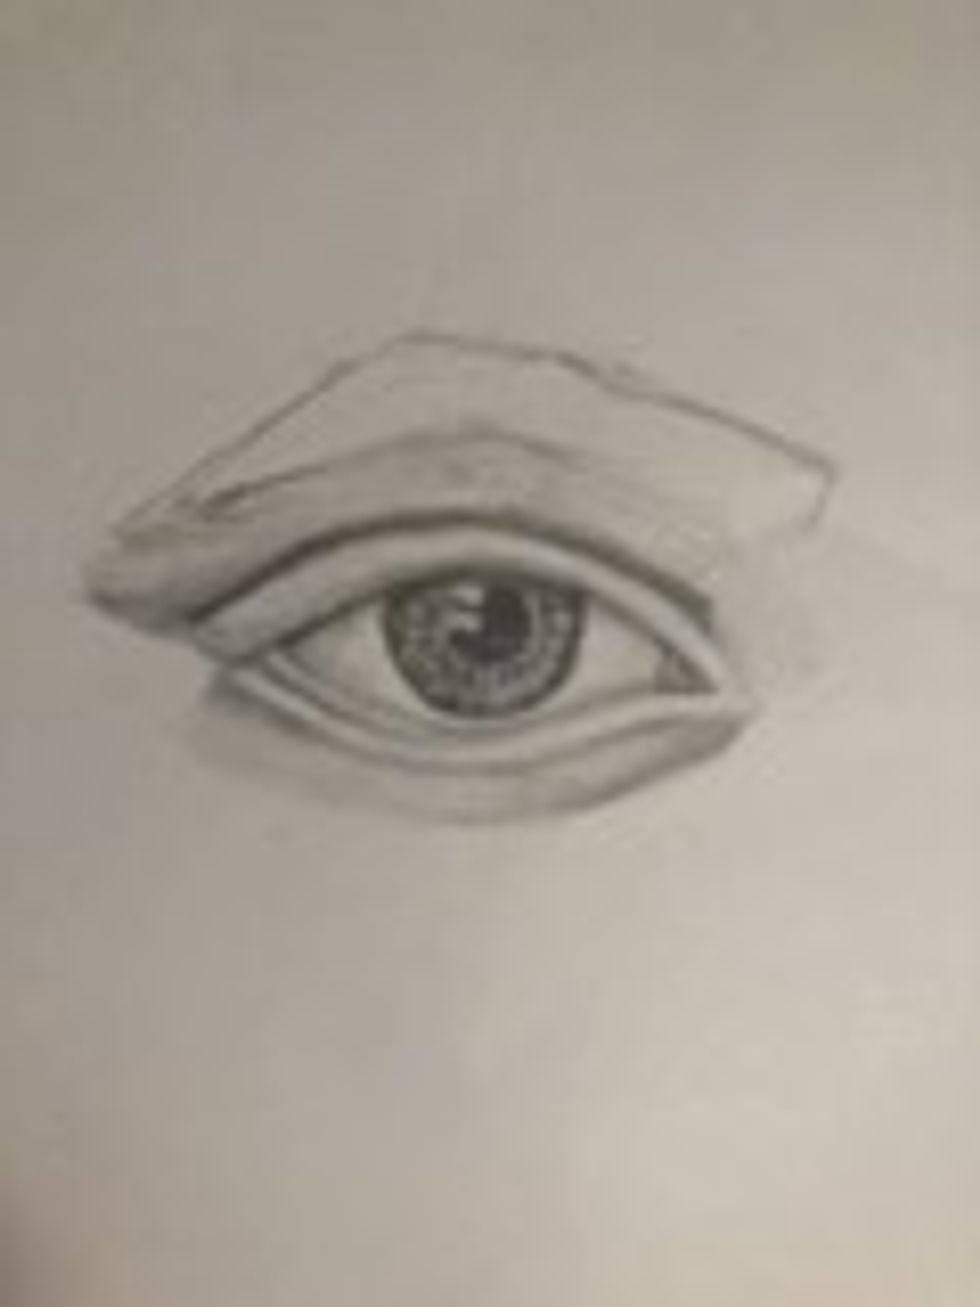
After shading the eyelids, move onto the area between the eye and the eyebrow. This area has lots of depth, so shading through here should show a lot of darkness in the fold of the eyelid.
Subsequently, begin to layer hairs in the outline of the eyebrow. Start light with these hairs, and make sure they follow the direction of the brow.

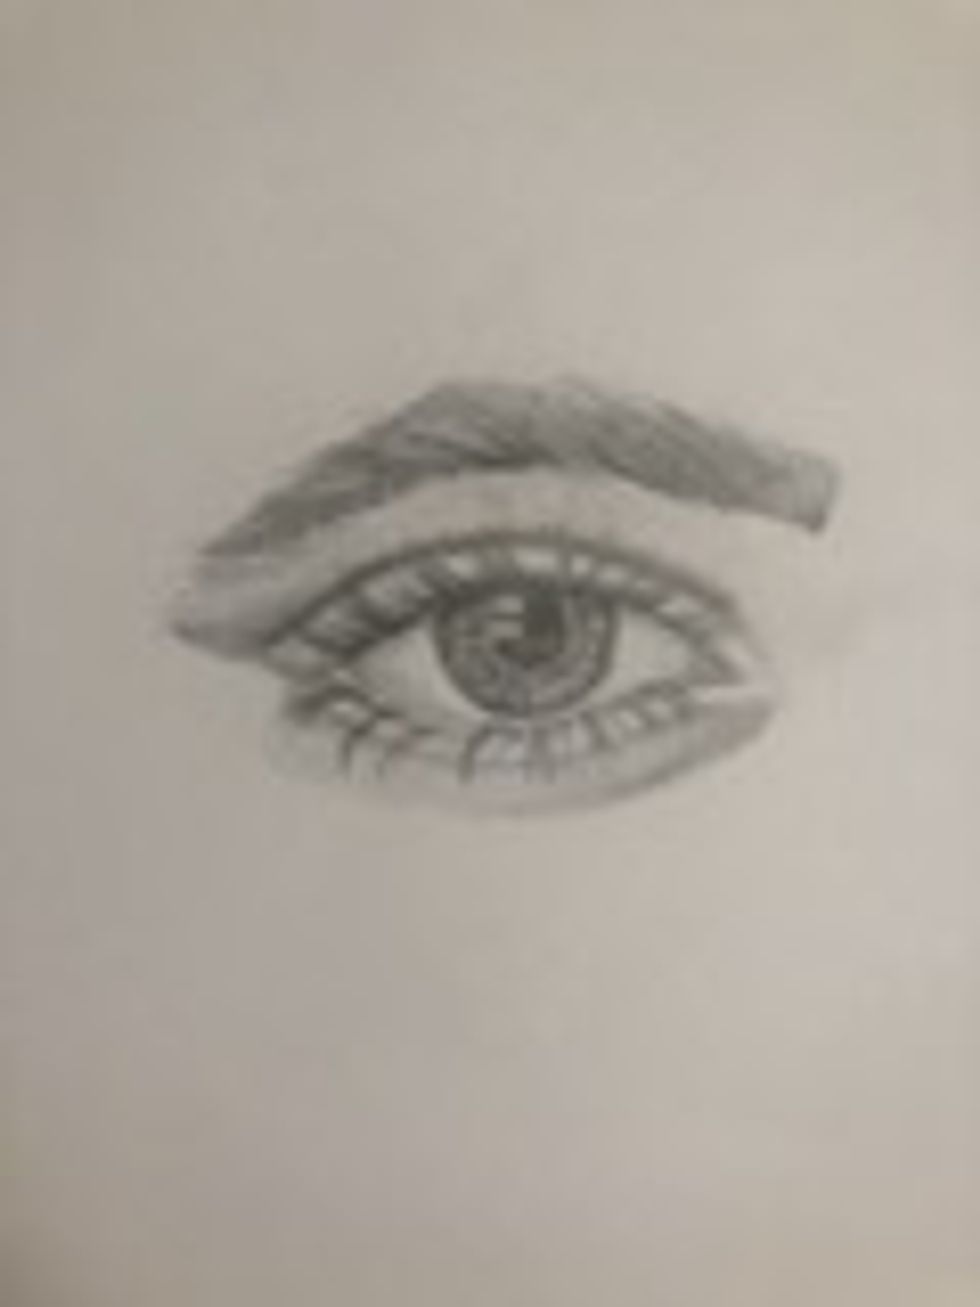
Continue to layer hair, putting on more pressure for darkness. It is important to thicken the lower eyebrow.
Following the eyebrow, begin to draw in the eyelashes. They curve towards the outside of the eye, split down the middle. For reference, look up pictures of eyes, or look at your own.
In the same manner as the upper eyelashes, draw the lower ones. Lashes like friends, so they grow in clumps. Be sure to group them together, and layer them over eachother.
There-after, continue to darken and layer the lashes. Eyelashes aren't uniform, so some elements of randomness add to the realism.
Lastly, take a step back from your eye, and look at all of it. You may notice that it could use some more shading, or highlights. Thanks for your view!