The Conversation (0)
Sign Up
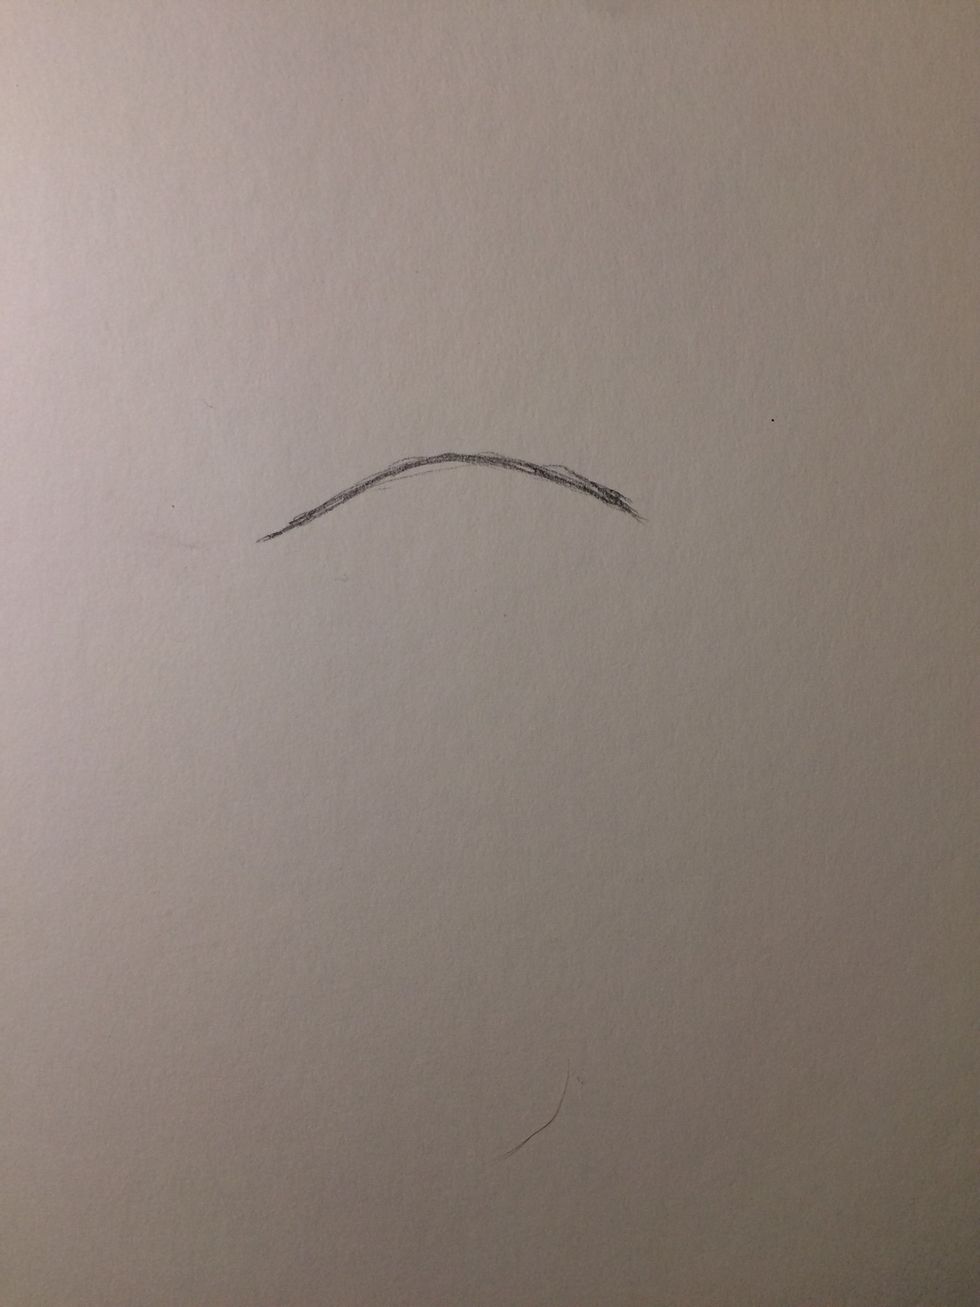
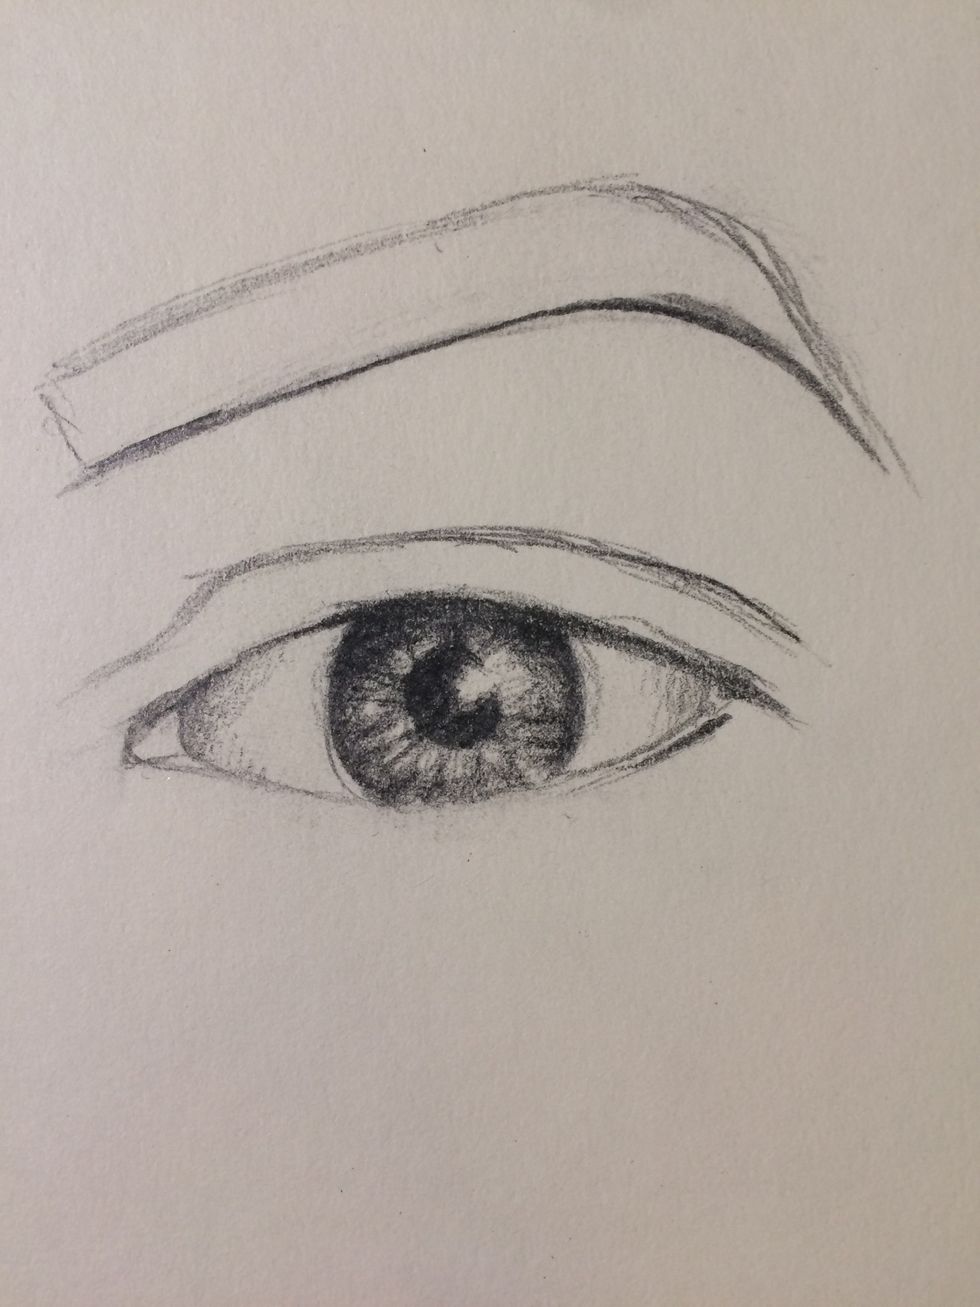
Start with the top lid

Draw the bottom lid like so
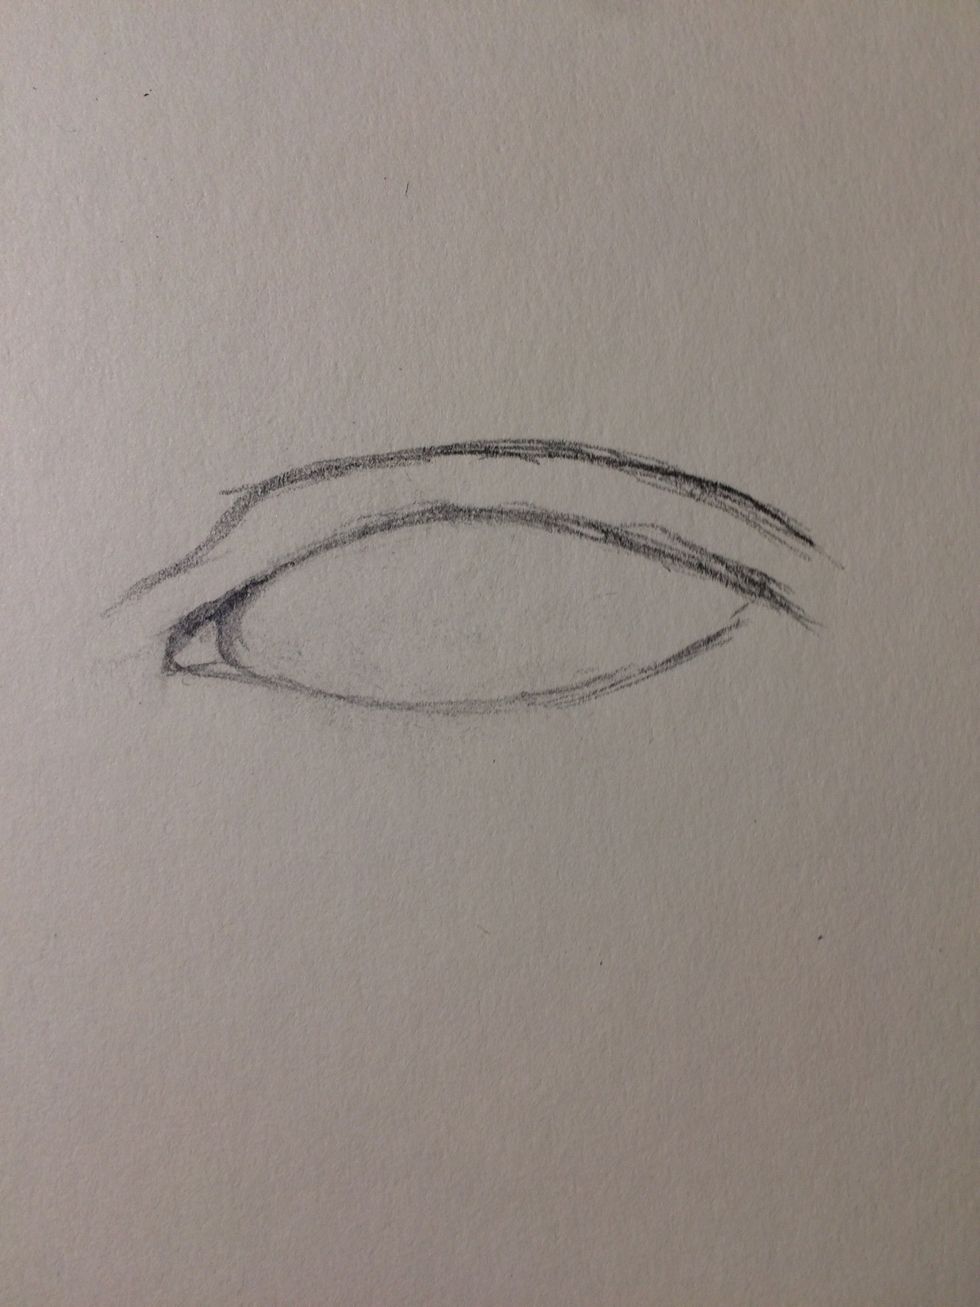
Add inner corner and erase the excess, then add crease like so

Draw the eyebrow, with the top lining of it very faint, because we will add hairs later
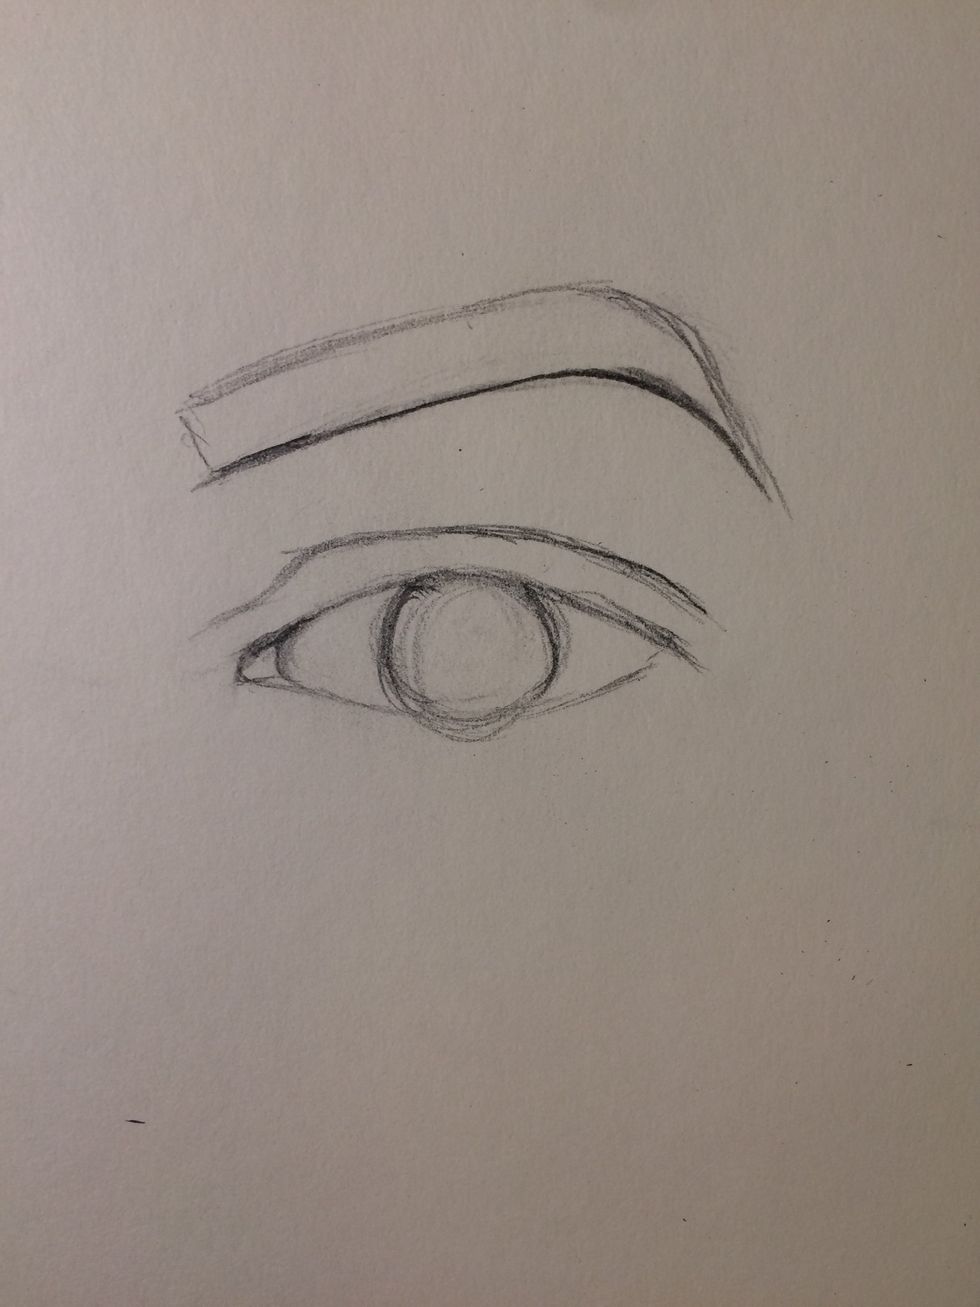
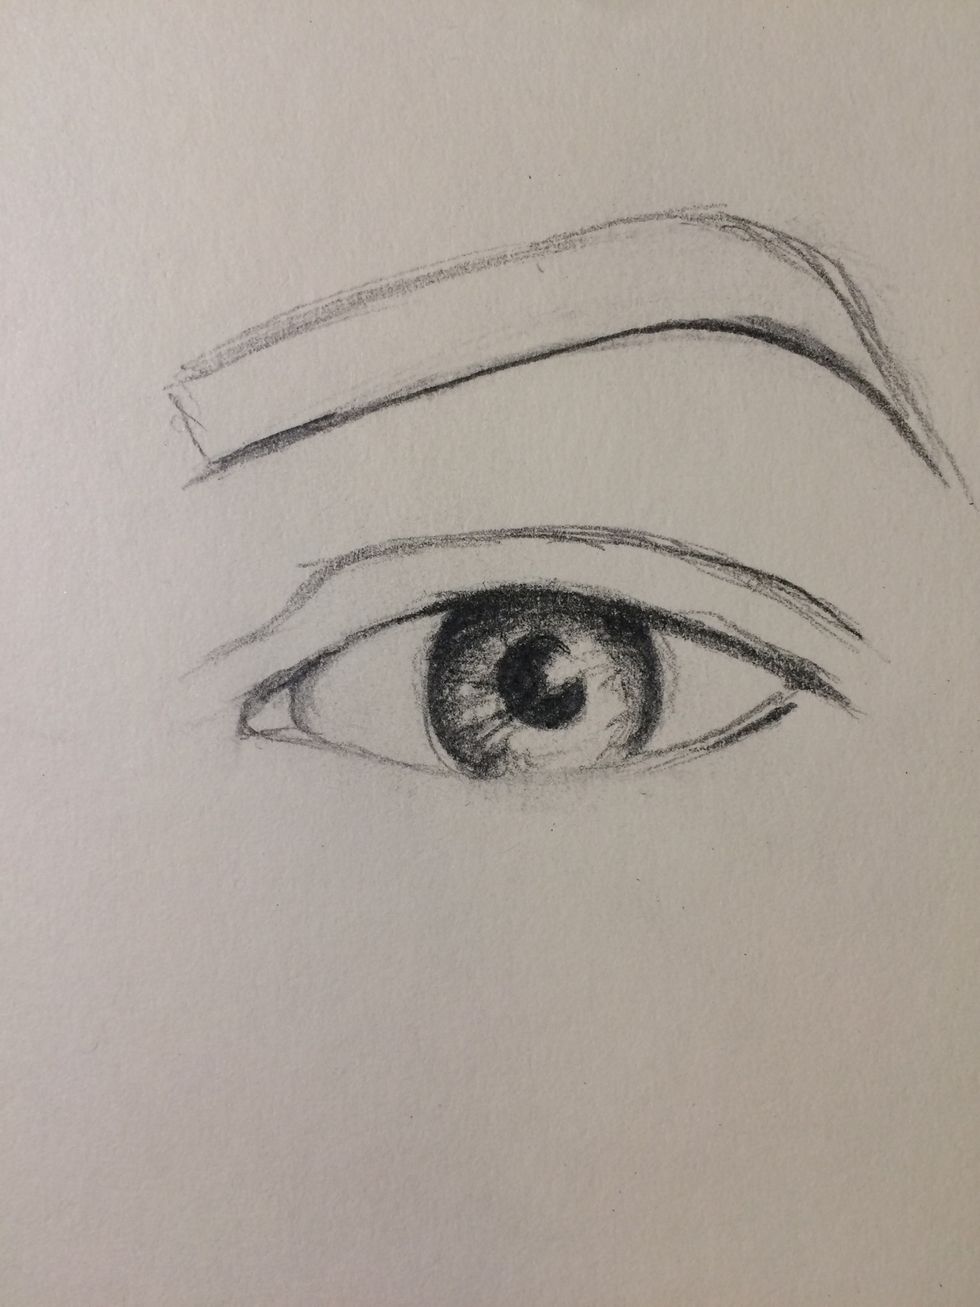
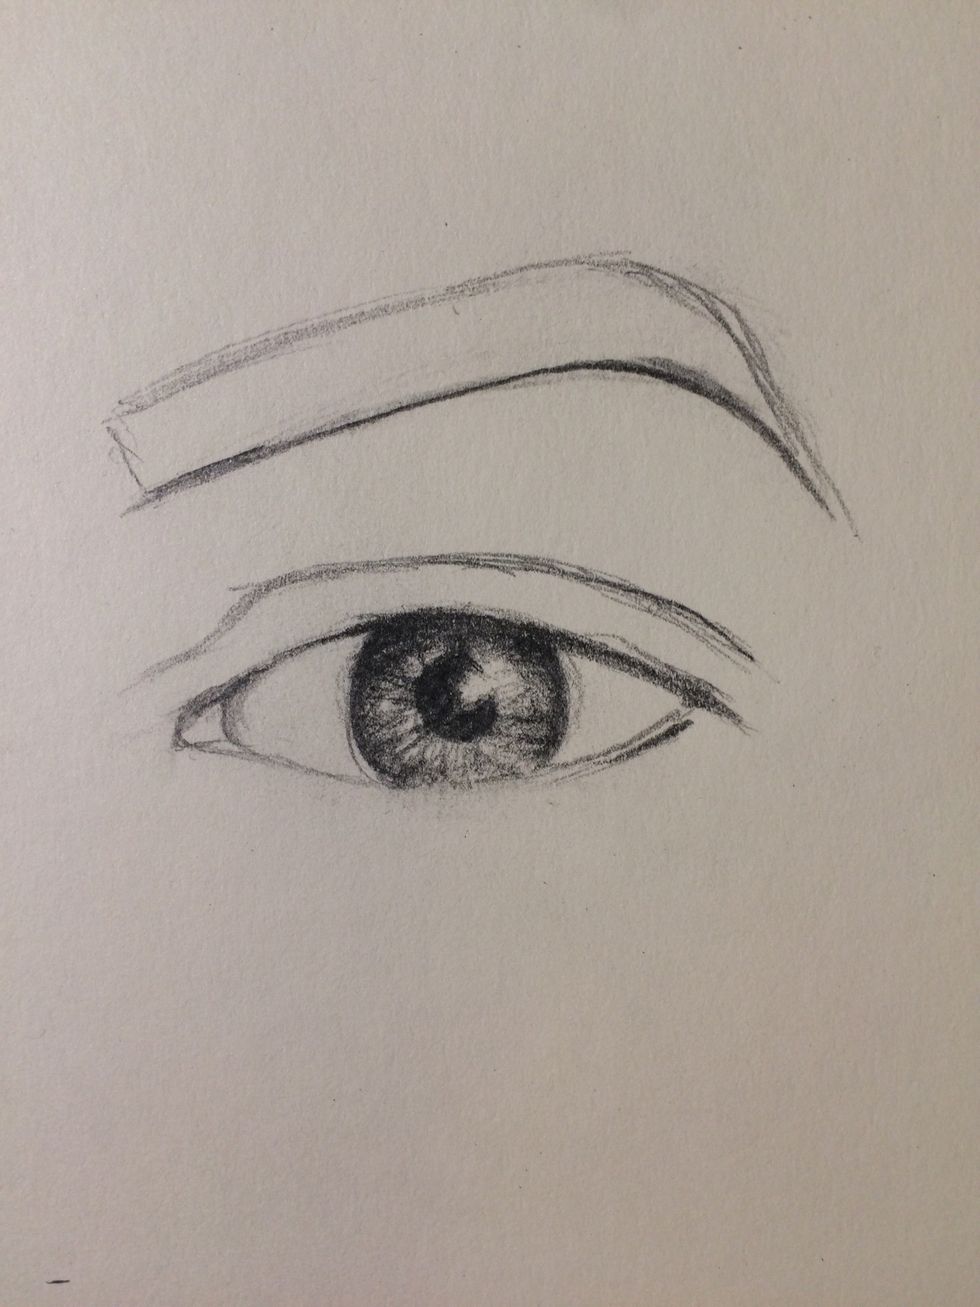
Draw a basic outline for where you want the iris to be

Do the same for the pupil, making sure that it is in the middle of the iris
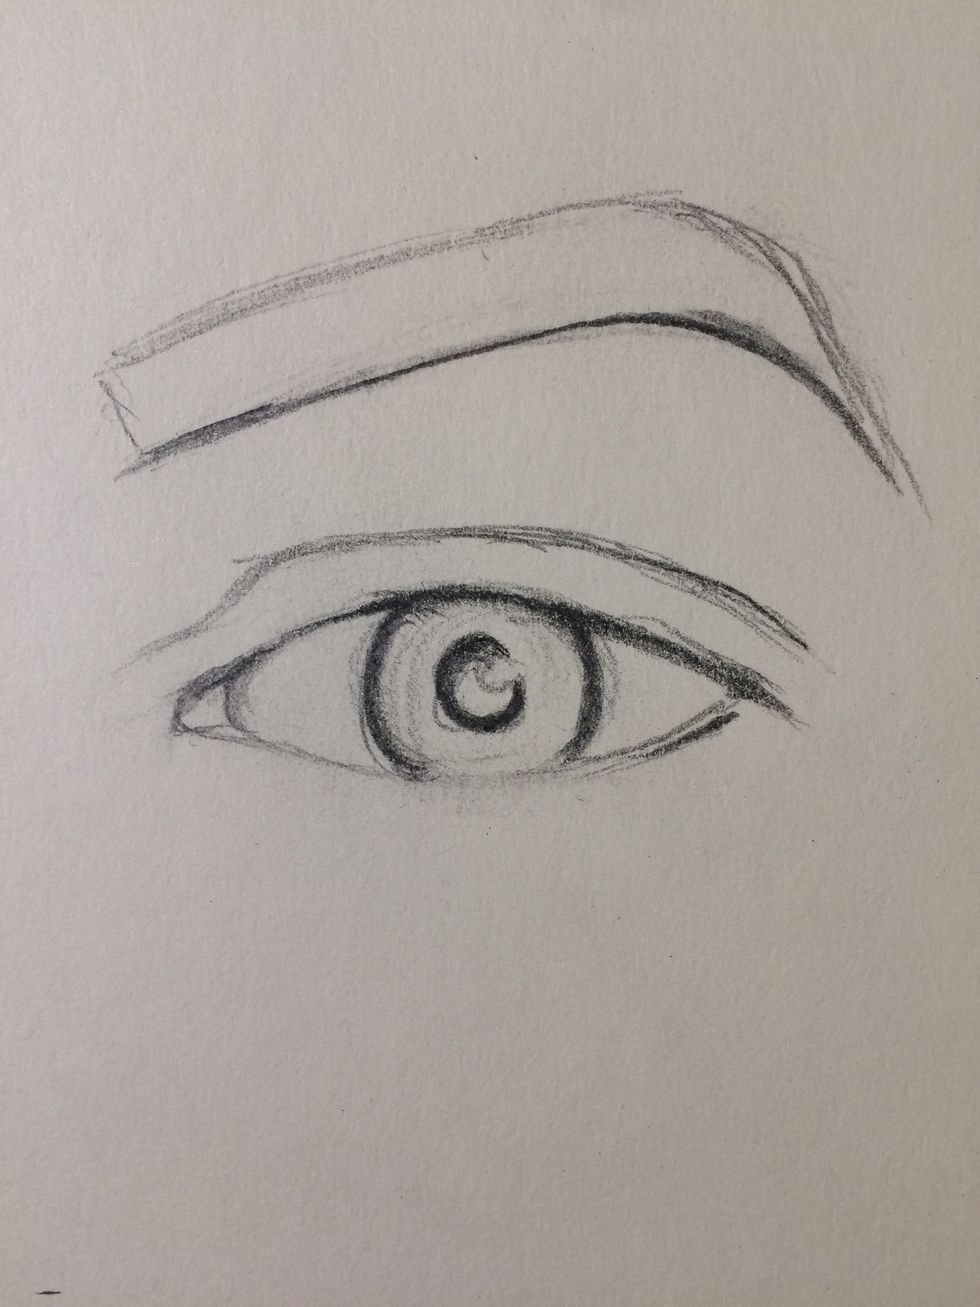
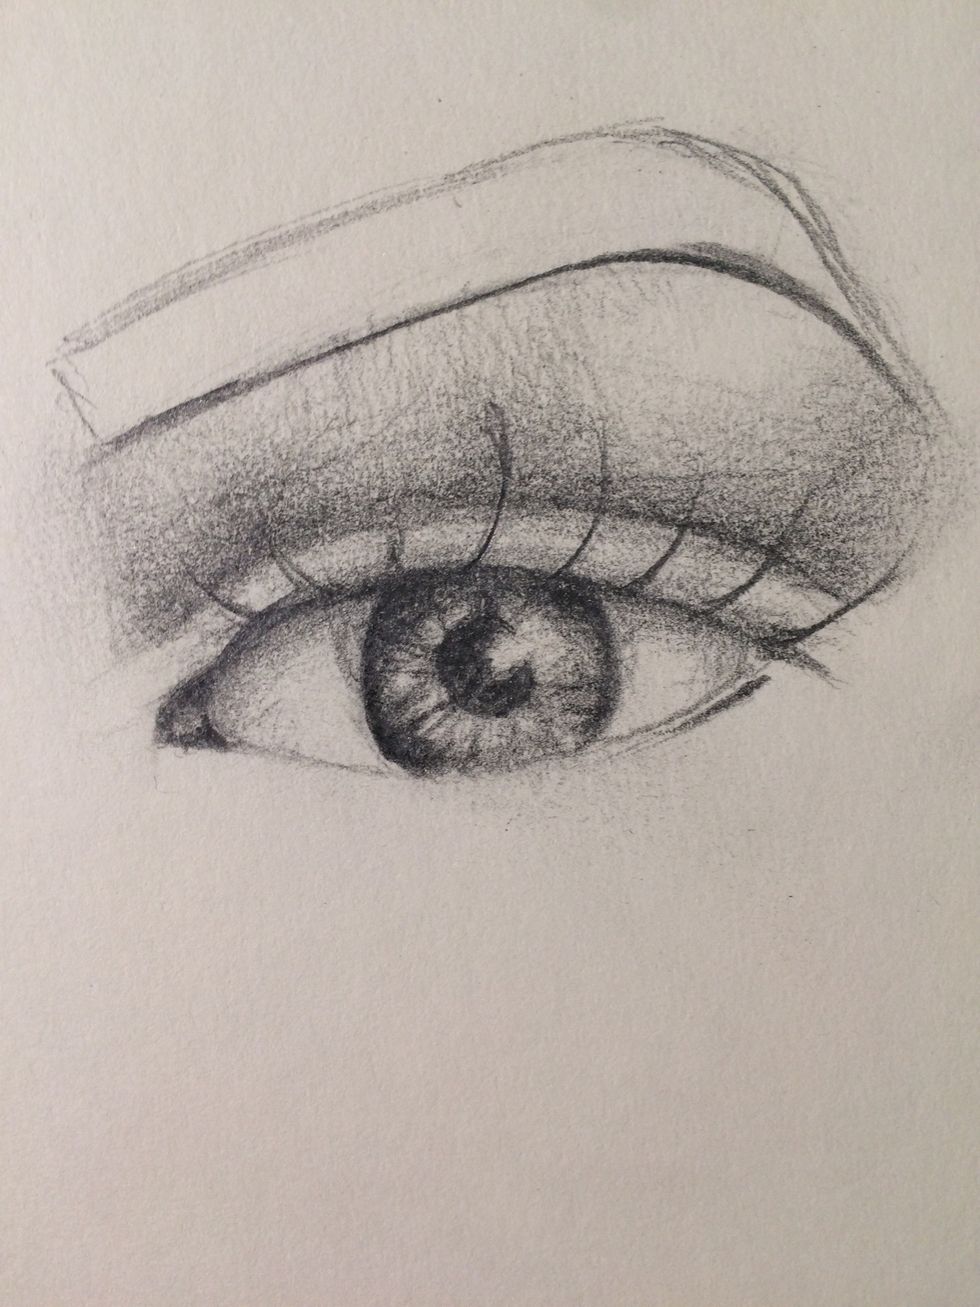
Define the lines more clearly, it is ok if they are dark. Line the top lid a bit more, and add a small waterline to the bottom lid
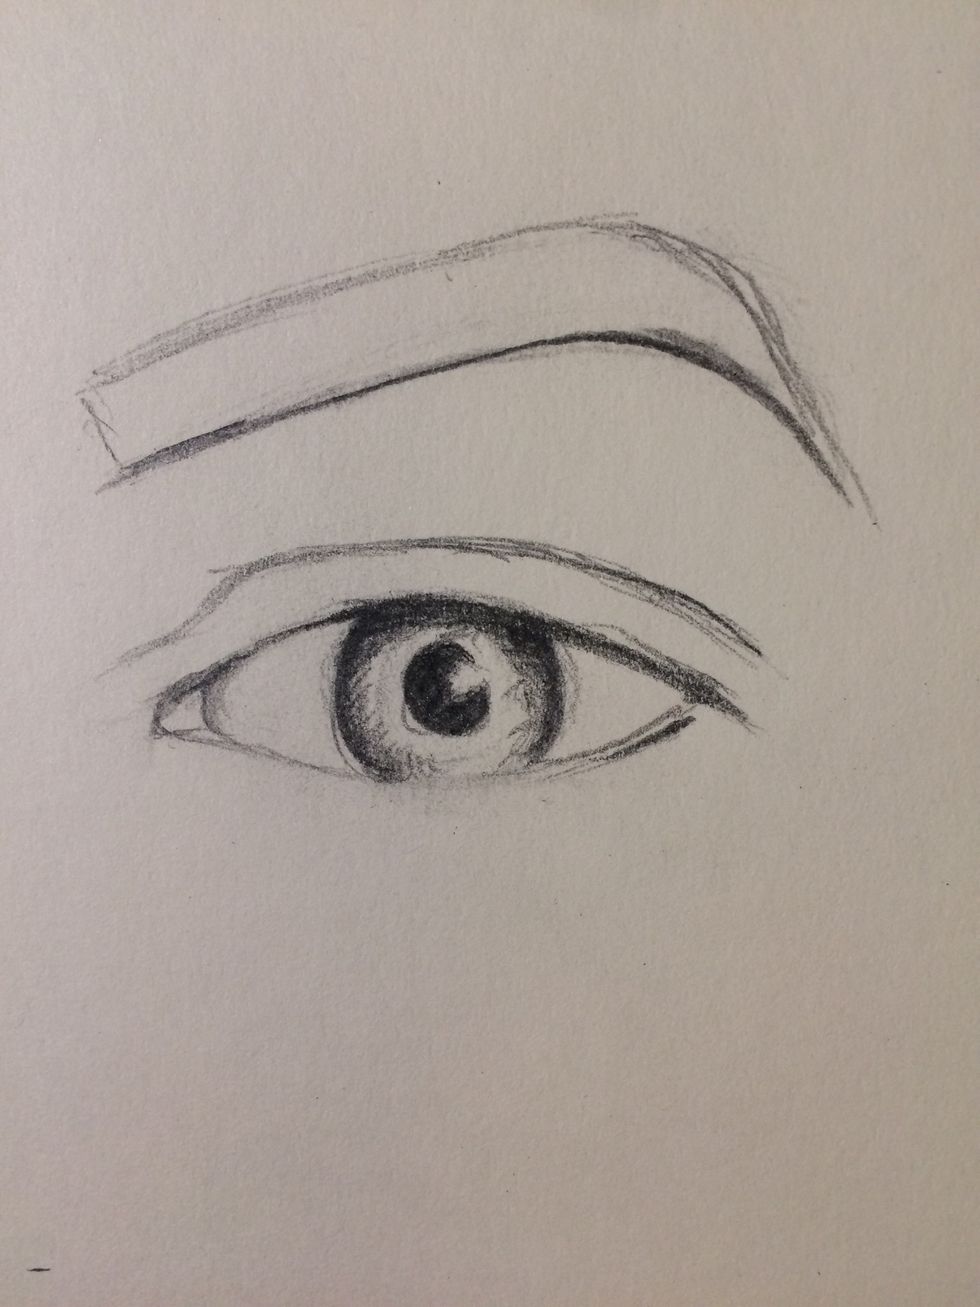
Start to shade the inside of the iris, making a dark crescent shape at the top, and make the outsides darker than the insides
Start to connect the outer line of the iris to the pupil using scattered and faint lines
Continue shading, make sure there is a specific shine spot, but shade everything else
Start to lightly shade the white of the eye. A big tip for drawing eyes, always shade the white of the eyes
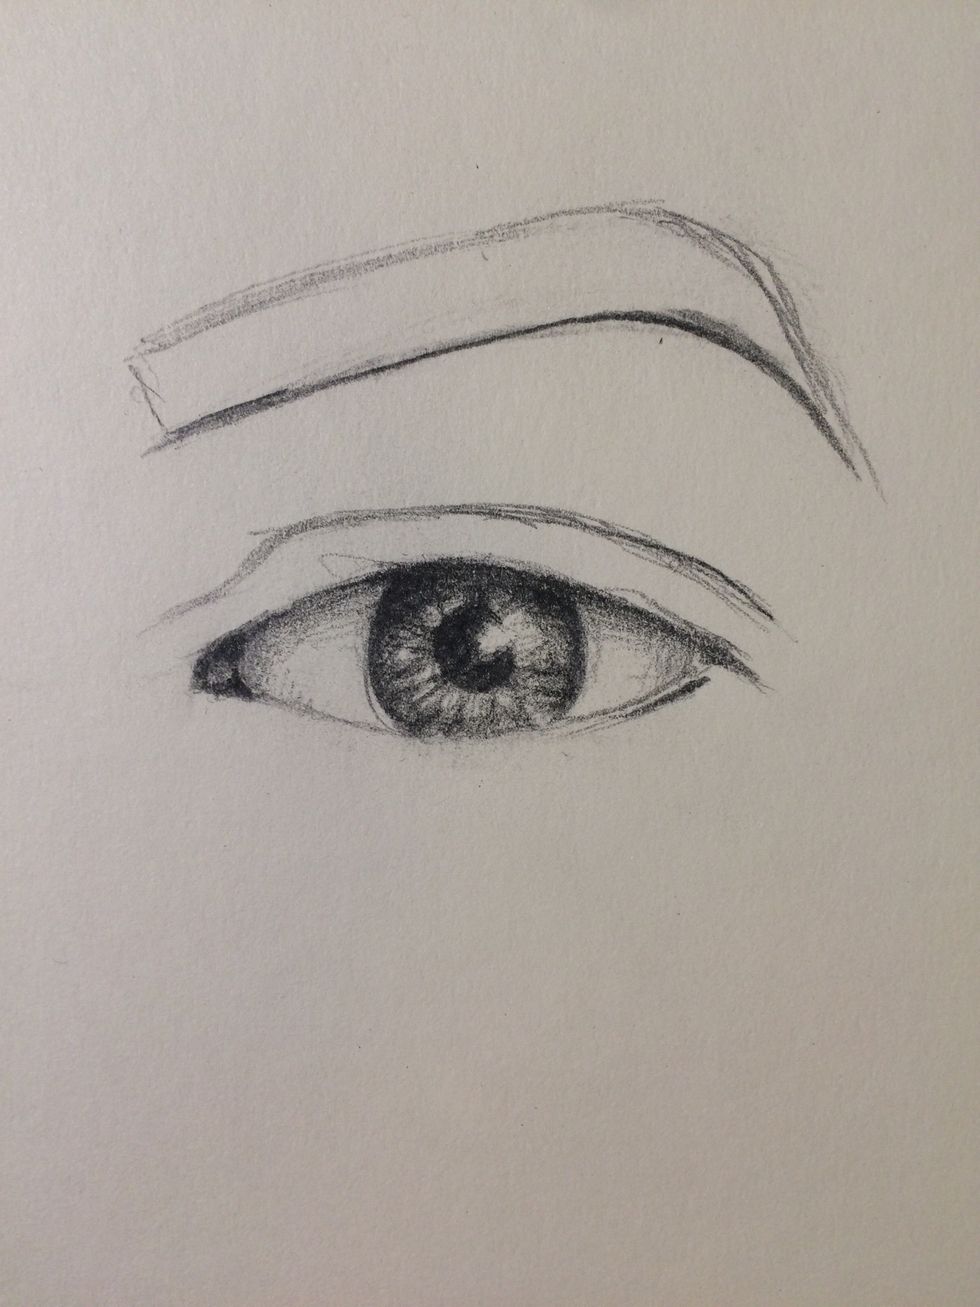
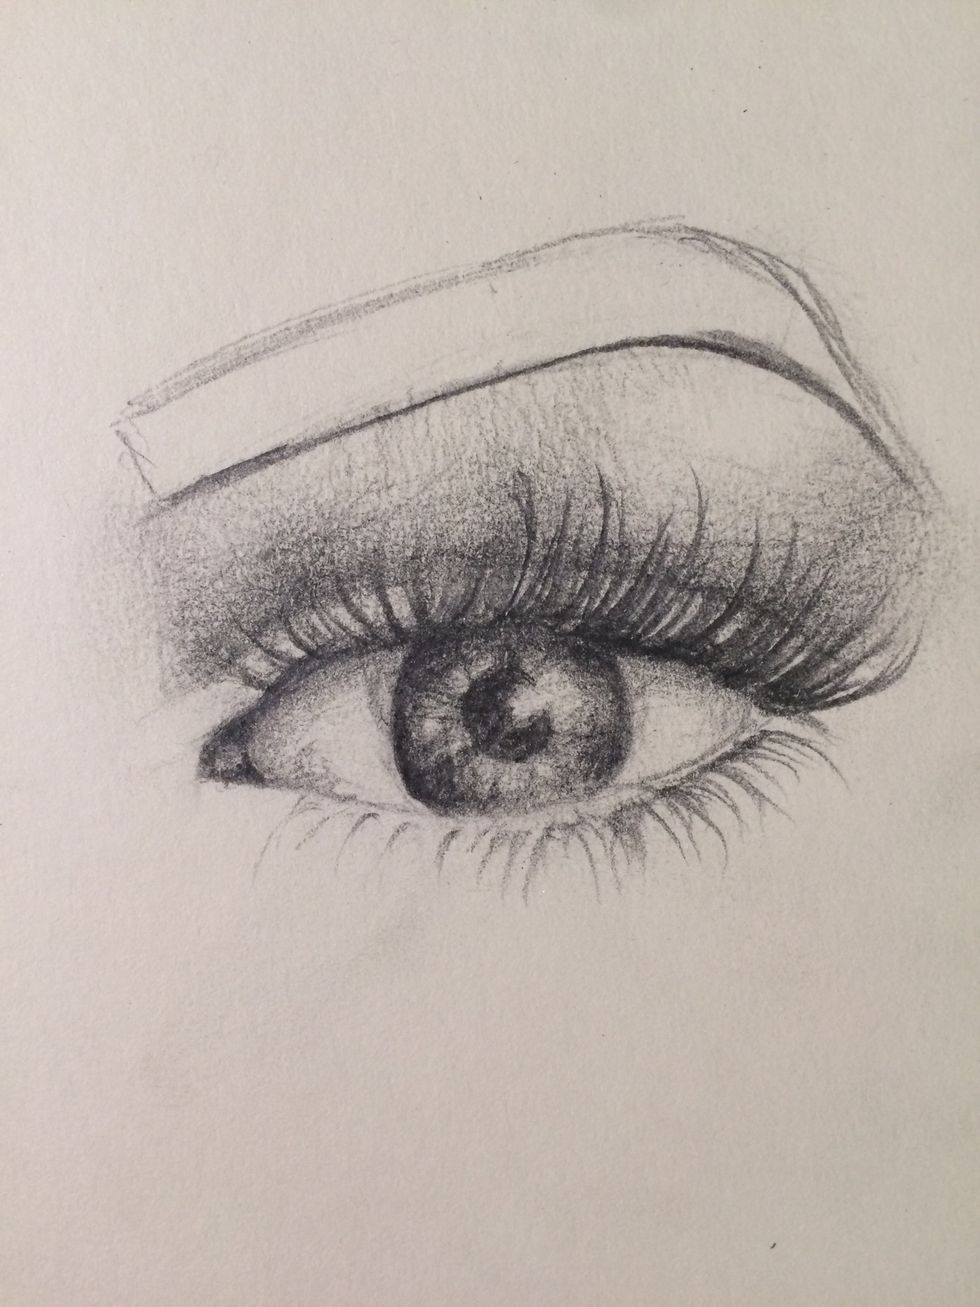
Continue shading, making a sort of shadow under the lid, and fill in the corner of the eye like so

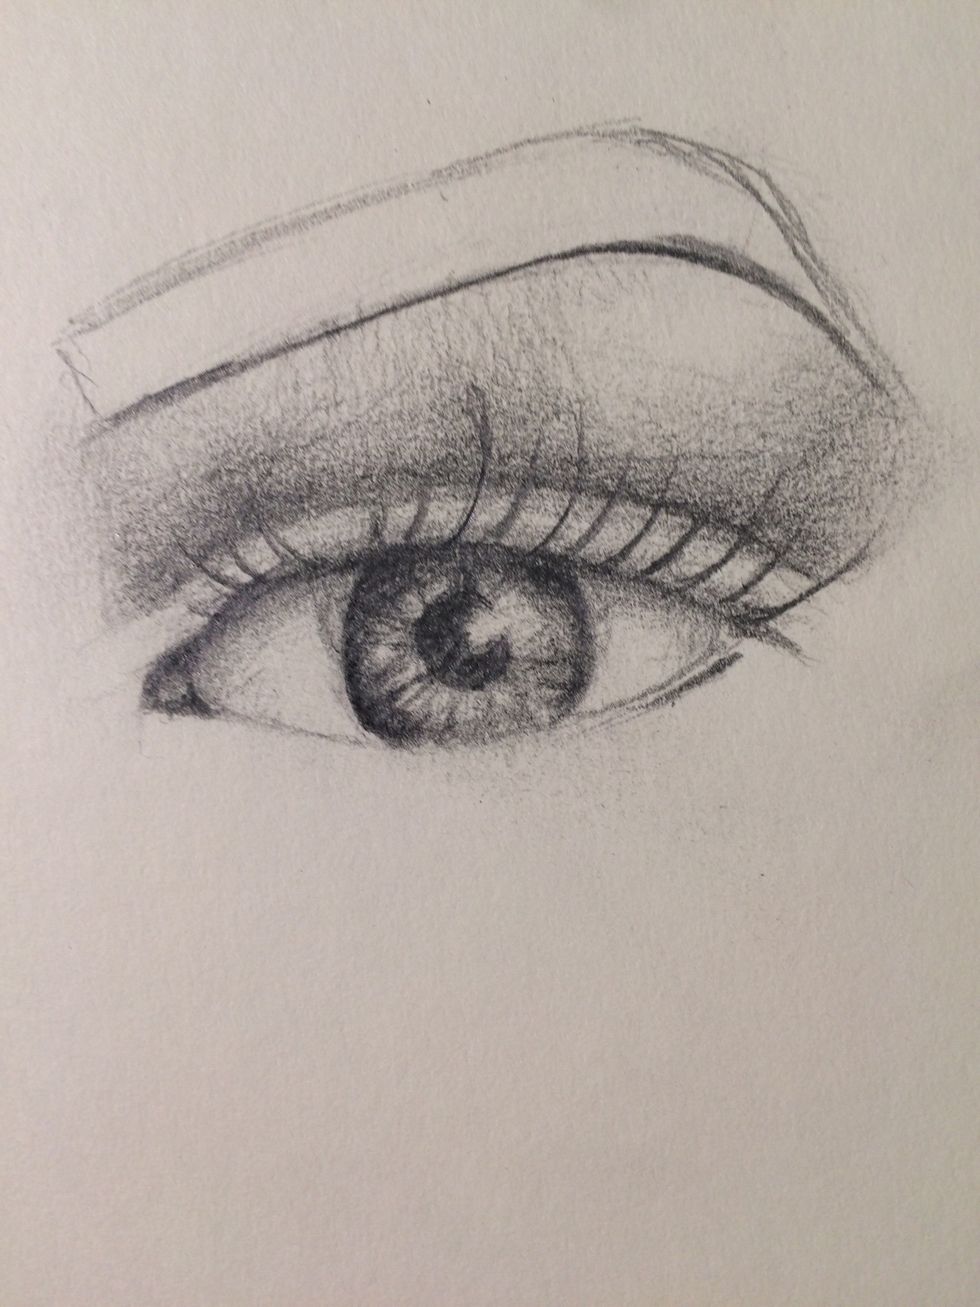
Start to shade above the crease
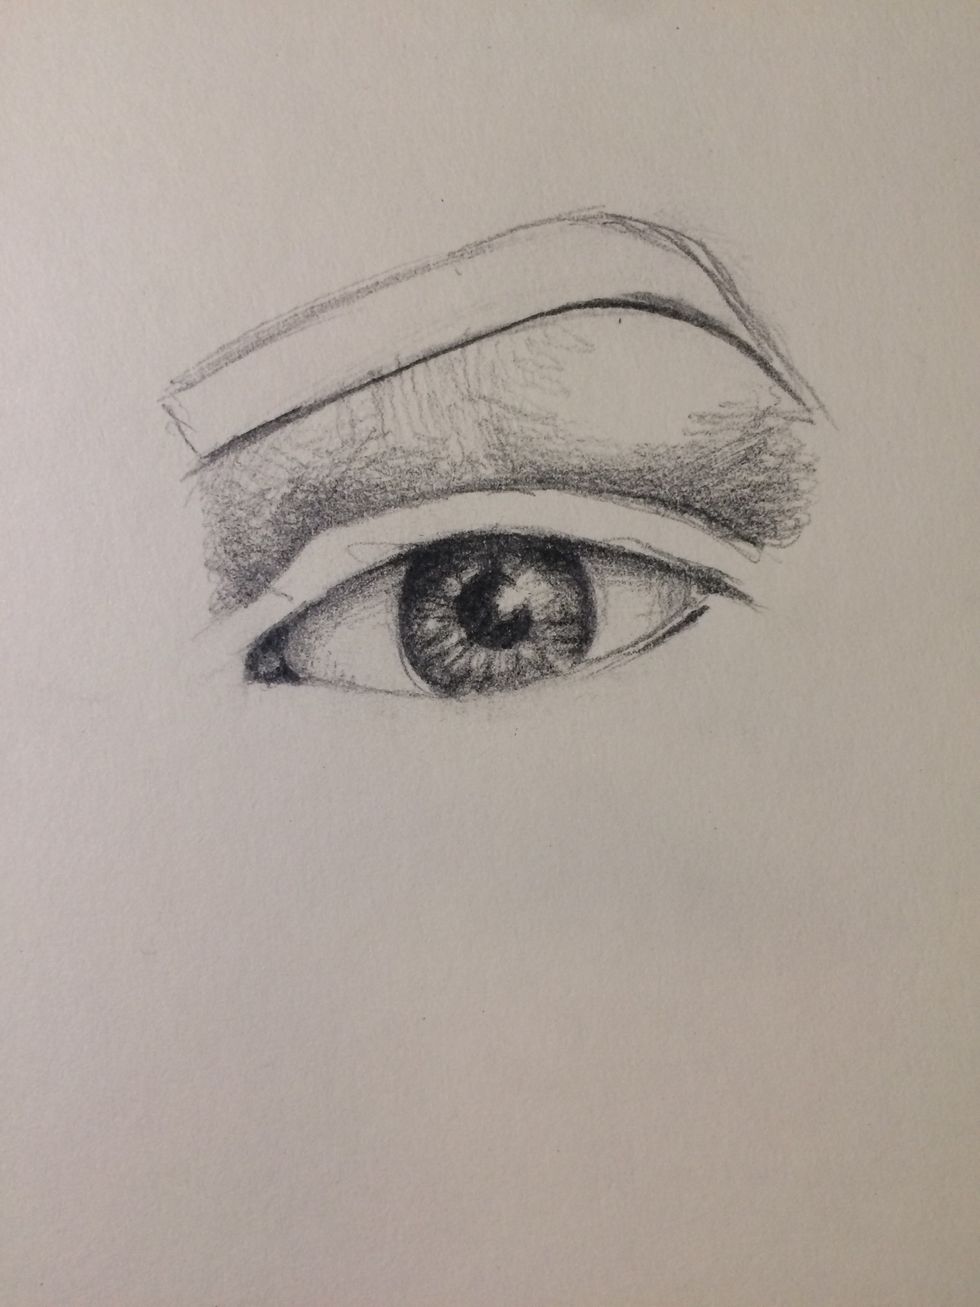
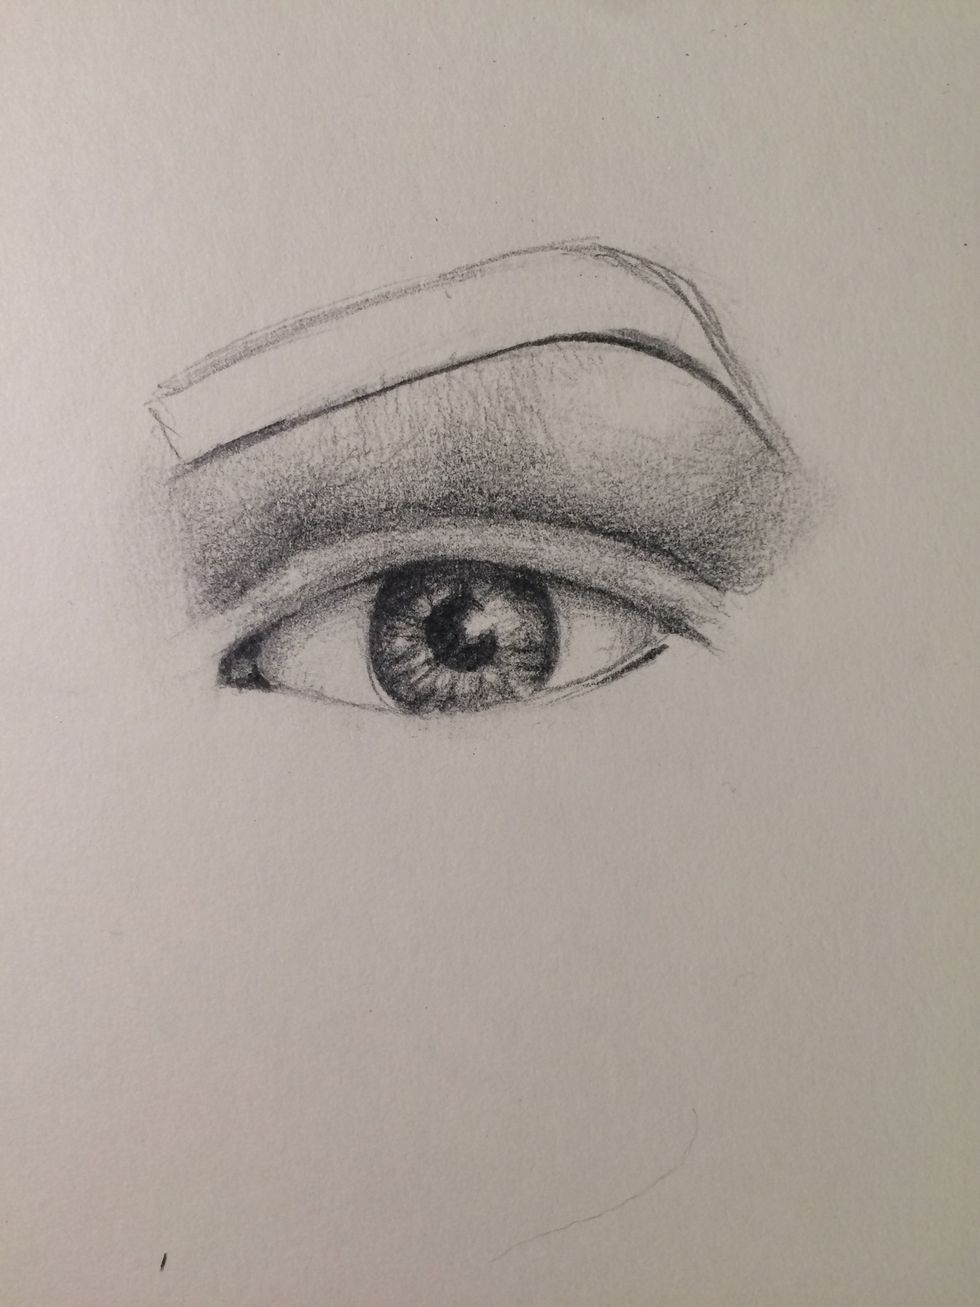
Make the crease darker than the rest of the above the eye area. Start to lightly shade below the crease, but don’t make it darker than what is above the crease. Blend lightly with your fingertip.
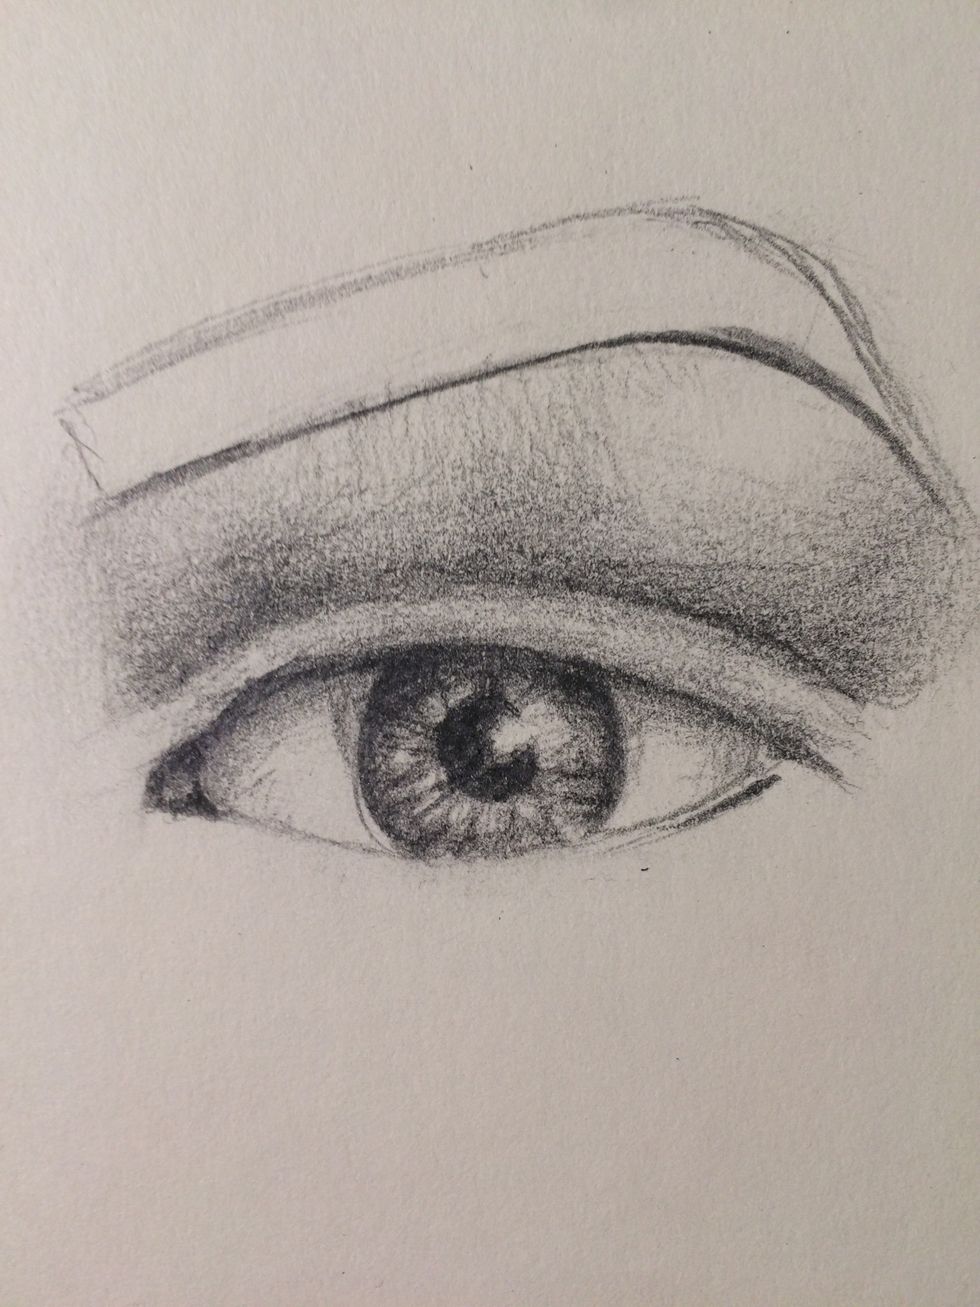
I added a bit more detail shading around the eye.
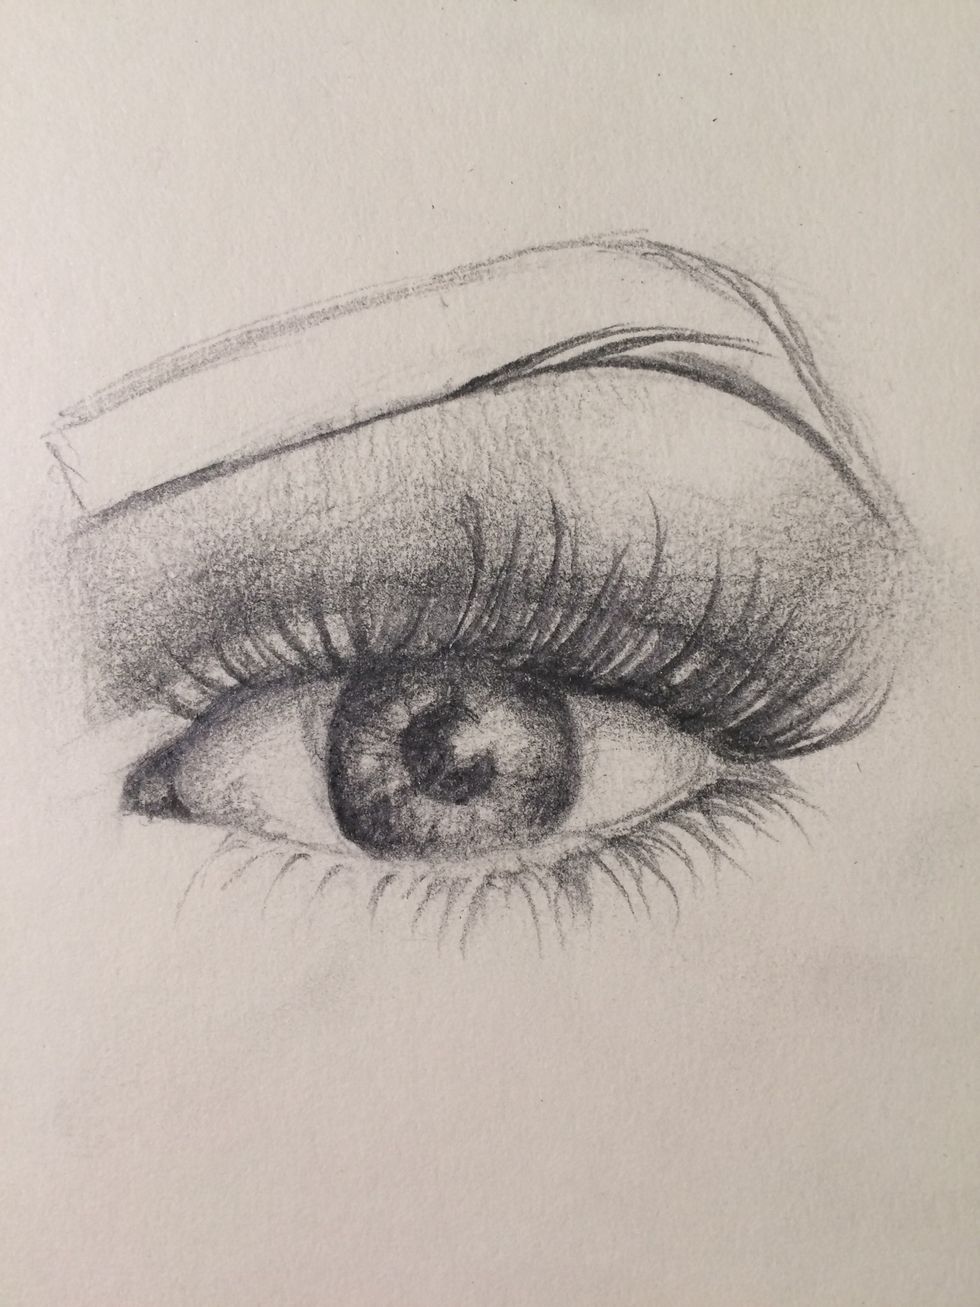
Start the eyelashes like this. I know it looks really weird, but I promise it won’t in the end
Start to slowly fill them in, making sure to make them look natural with different lengths and thickness
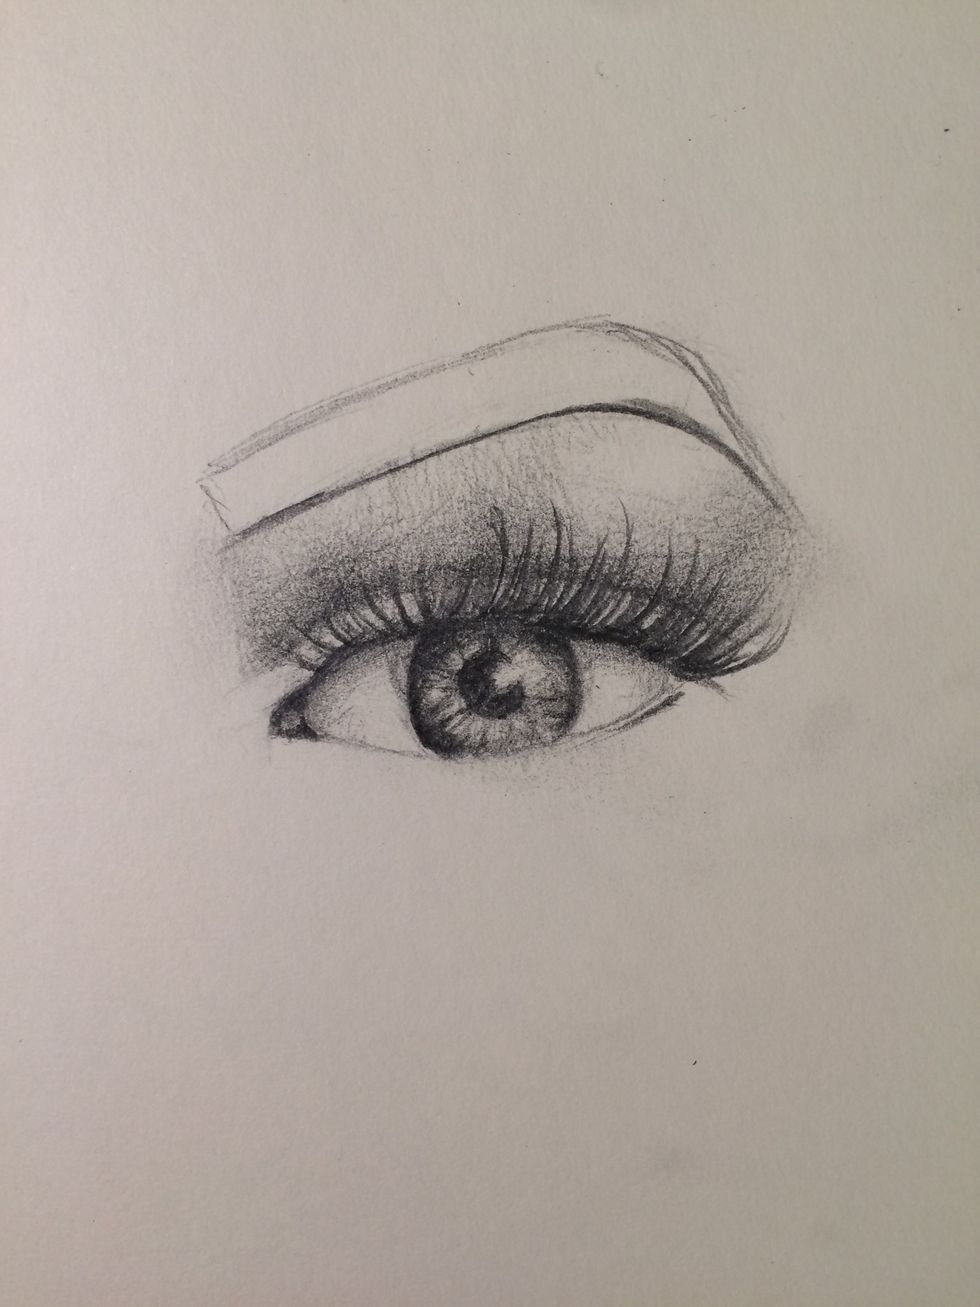
Continue slowly doing this
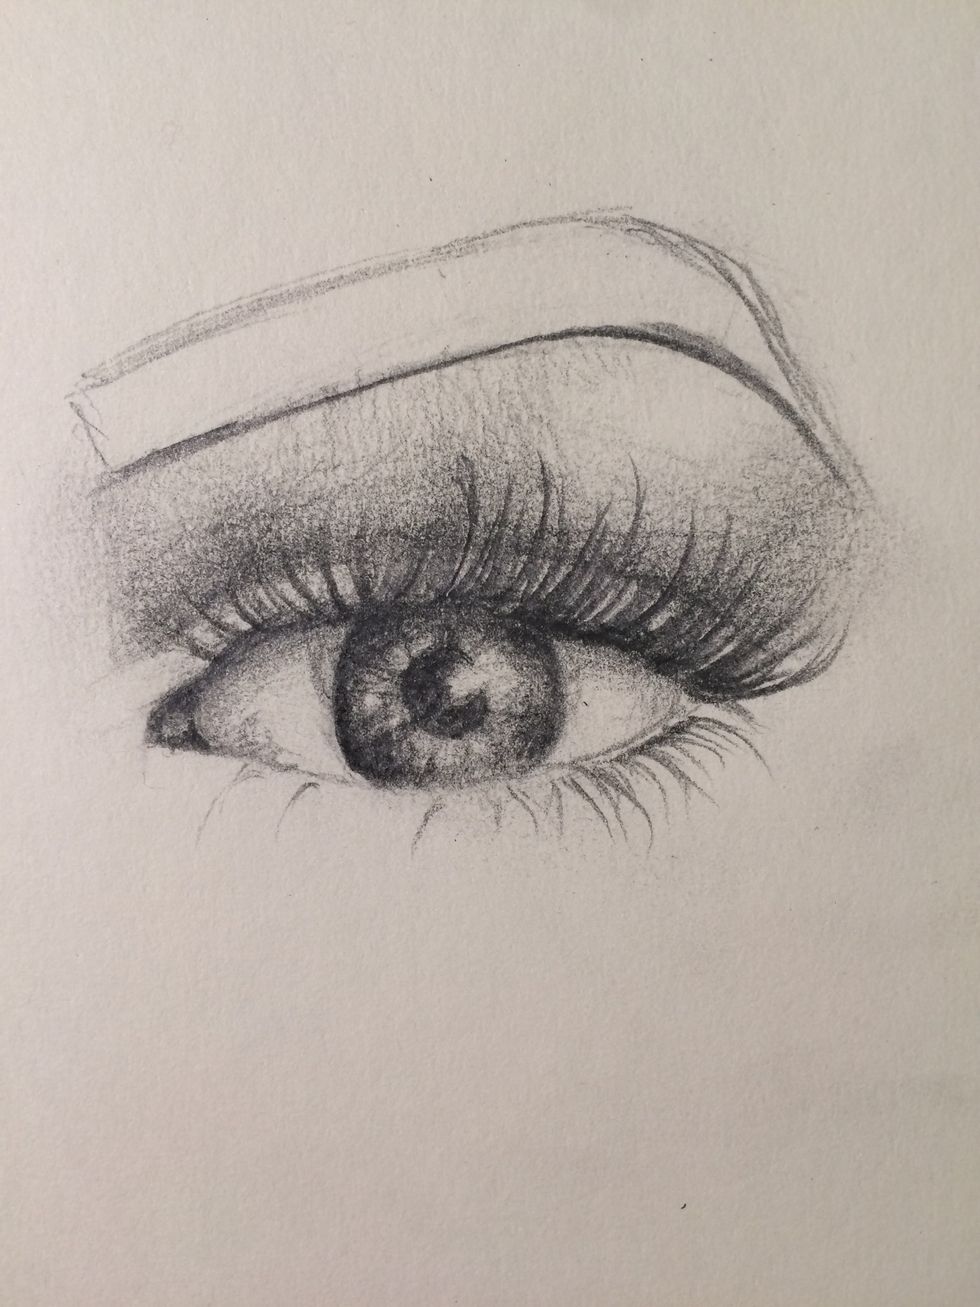
Start to do the bottom lashes. Make them much much lighter than the top lashes, and draw much less of them, and mainly in the outer corner
Finish them like so, but leave room for a waterline, so don’t draw the lashes right up against the eye like the top lashes
Start to draw hairs for the eyebrows

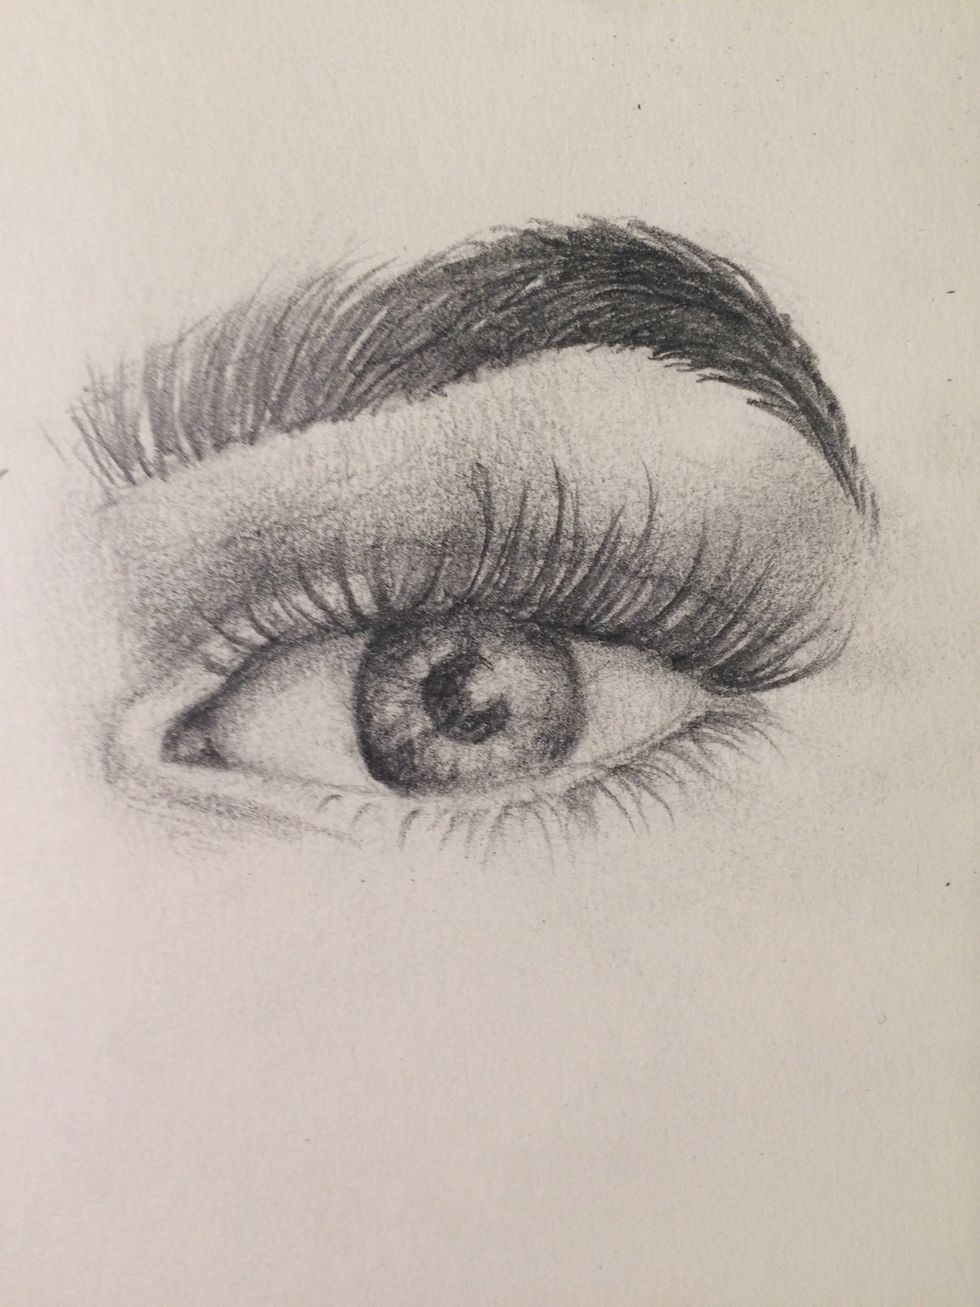
Shade around the corner of the eye like this. Make sure the corner is pretty white compared to the rest of the eye

Continue doing short lines like this, making a sort of feather shape.
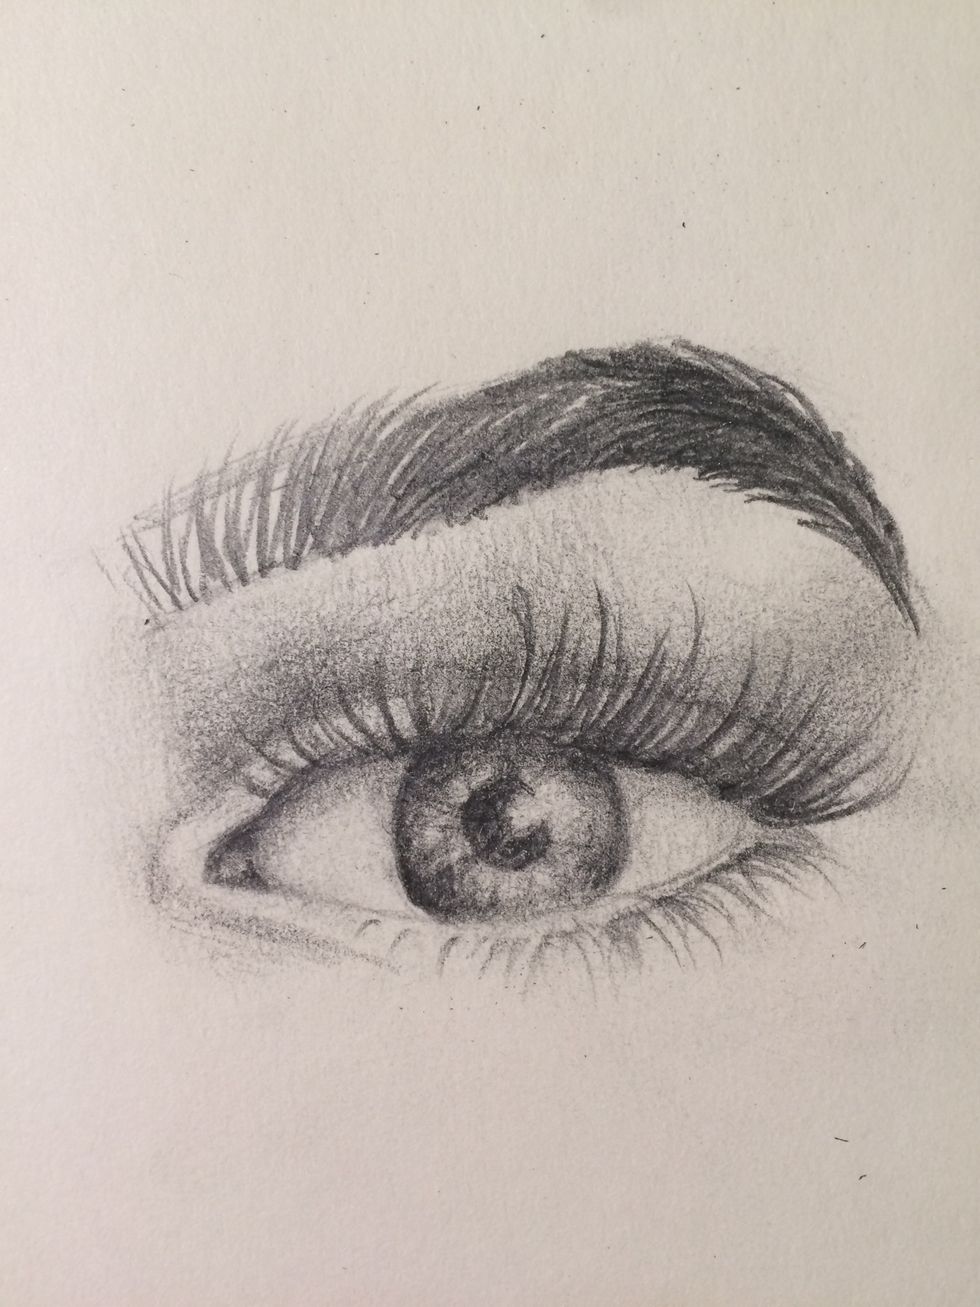
Lightly draw hairs at the beginning of the brow, making them thinner than the hairs on the end of the brow
Finish stroking in the brows, and erase the previous pencil lines of necessary
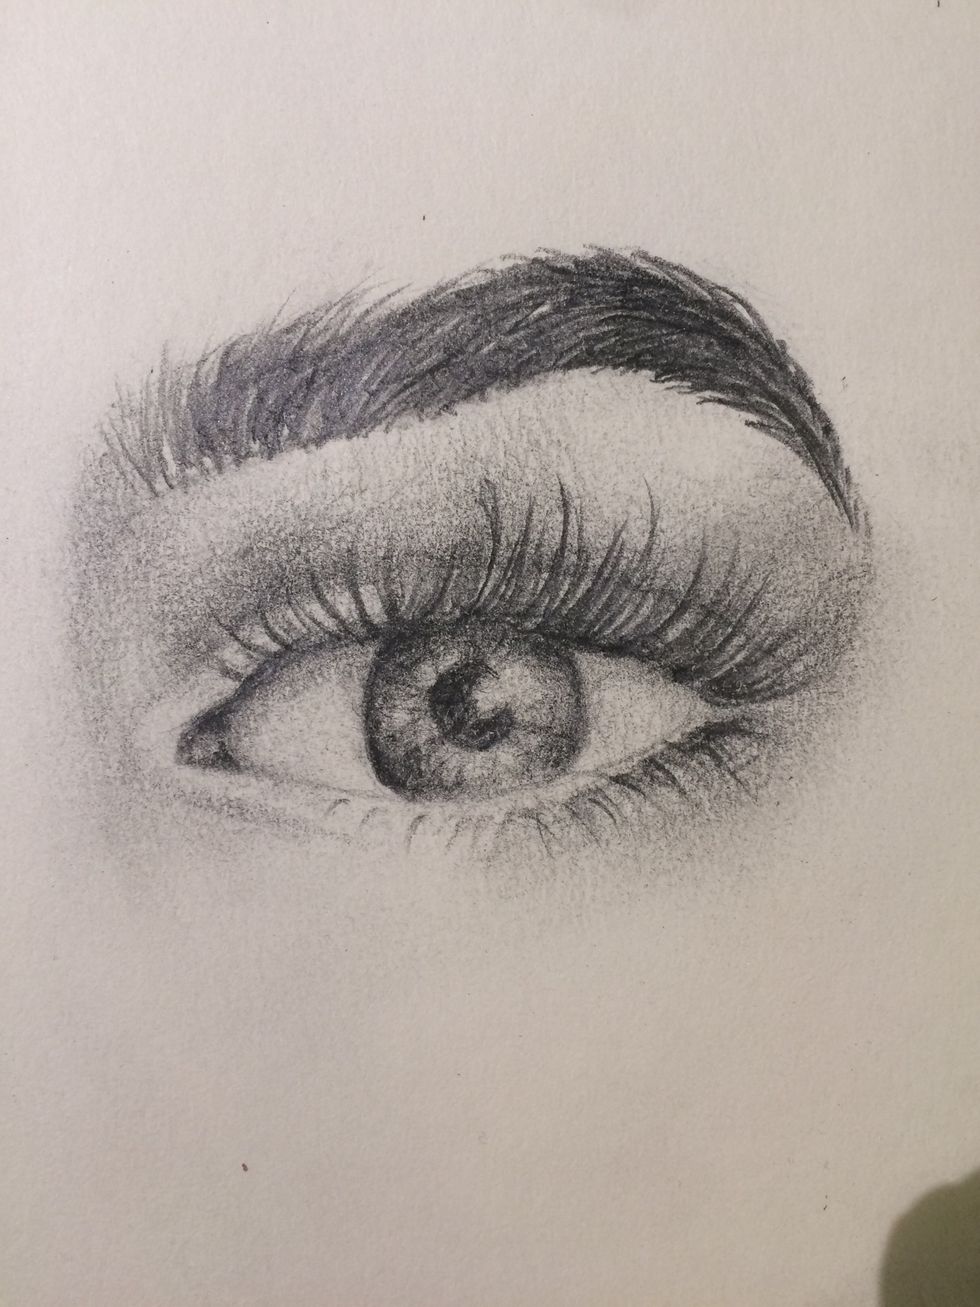
Shade a bit more like this on the outside of the eye and you’re done! Hope you enjoyed! Sorry if I’m bad at explaining things, but please leave a comment telling your thoughts!