The Conversation (0)
Sign Up

Start with a base coat. This will help the polish stay on longer and strengthen nails.
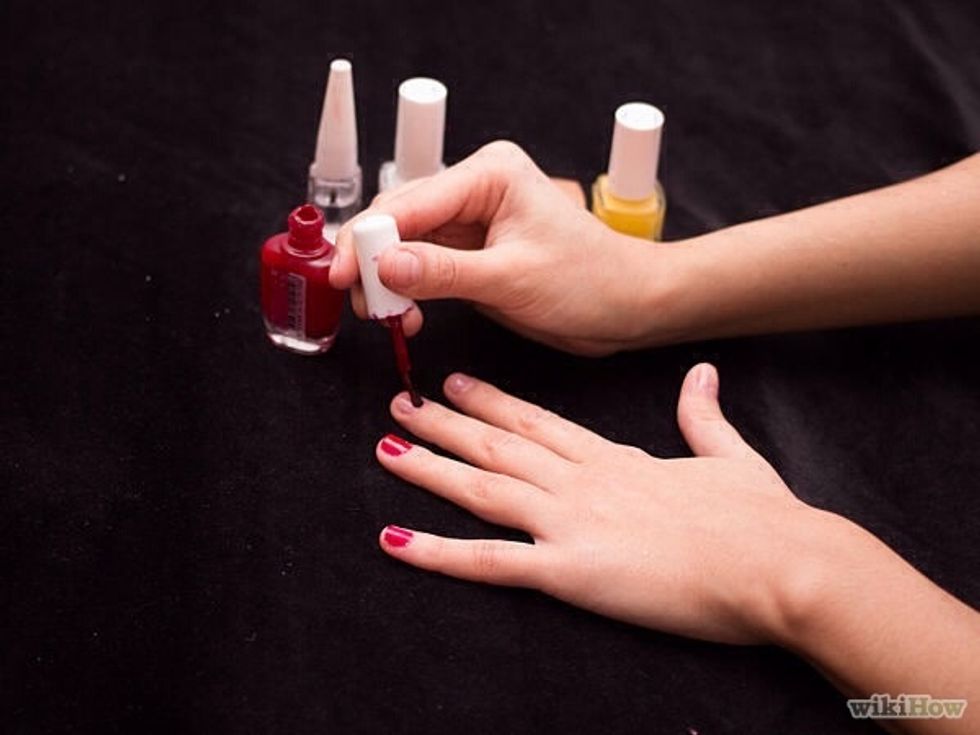
Paint your nails a strawberry red. Allow them to dry well before moving on.
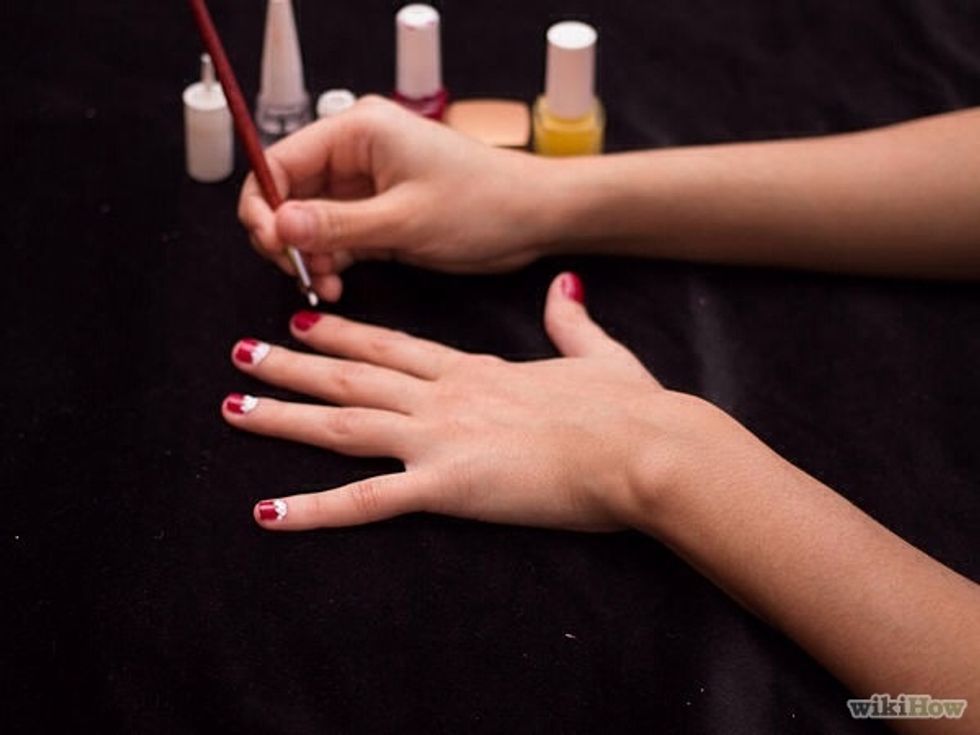
Paint the strawberry leaves white first. This helps the green pop out. Also make 4-5 triangles and fill in at base of nail.
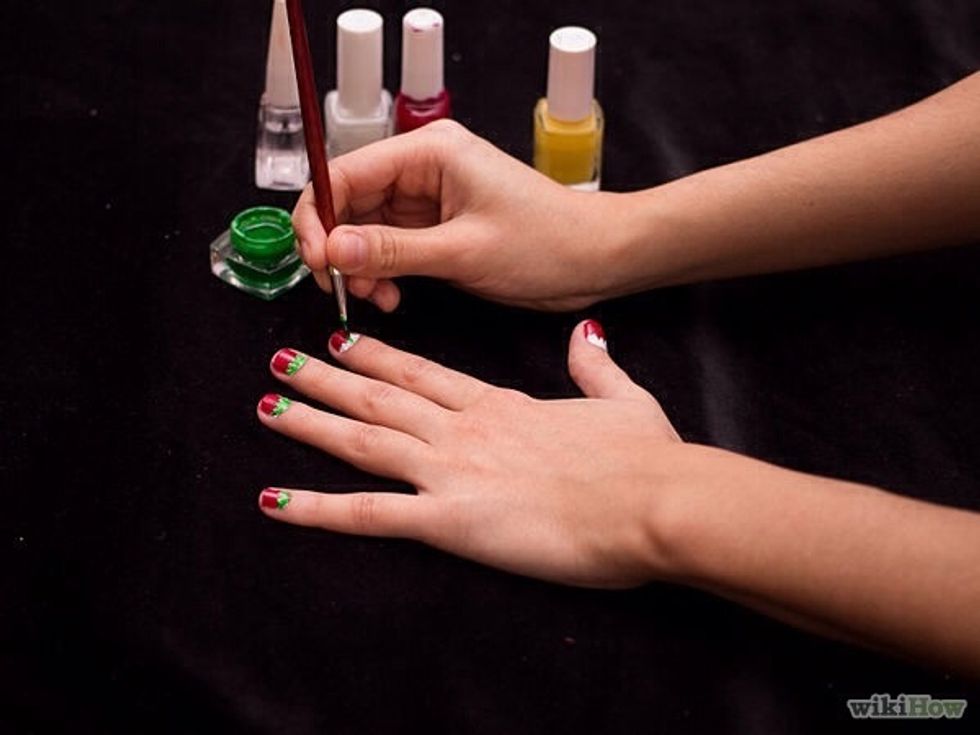
Paint the leaves green. Trace over with green and then fill in like the previous step.
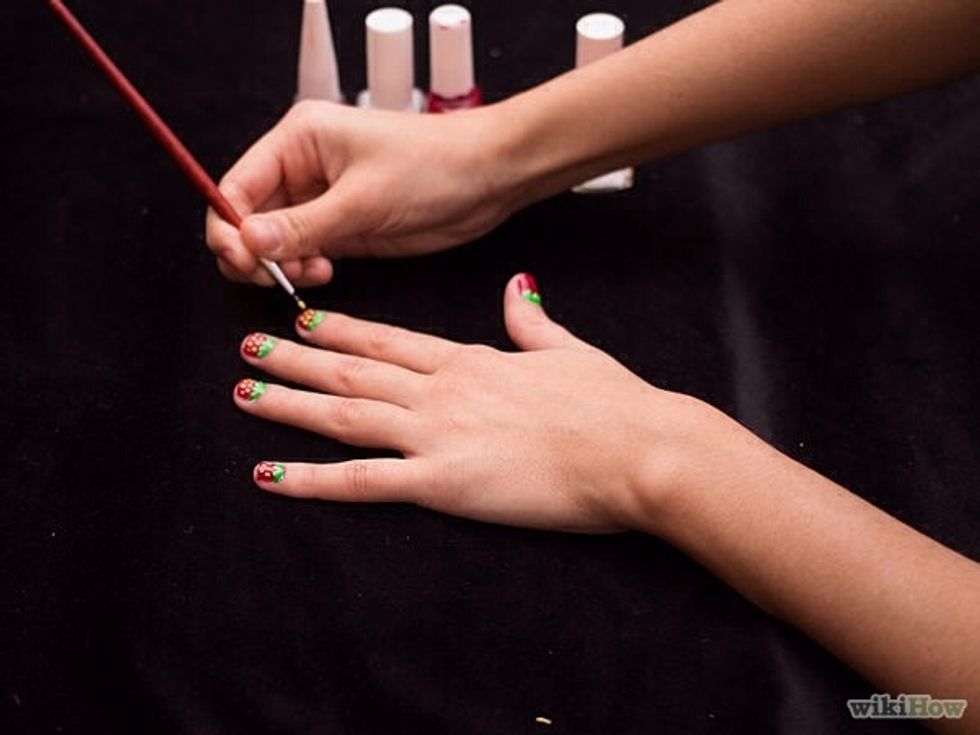
Paint the seeds the yellow colour. Dip toothpick in polish and paint seeds on spread apart very evenly.
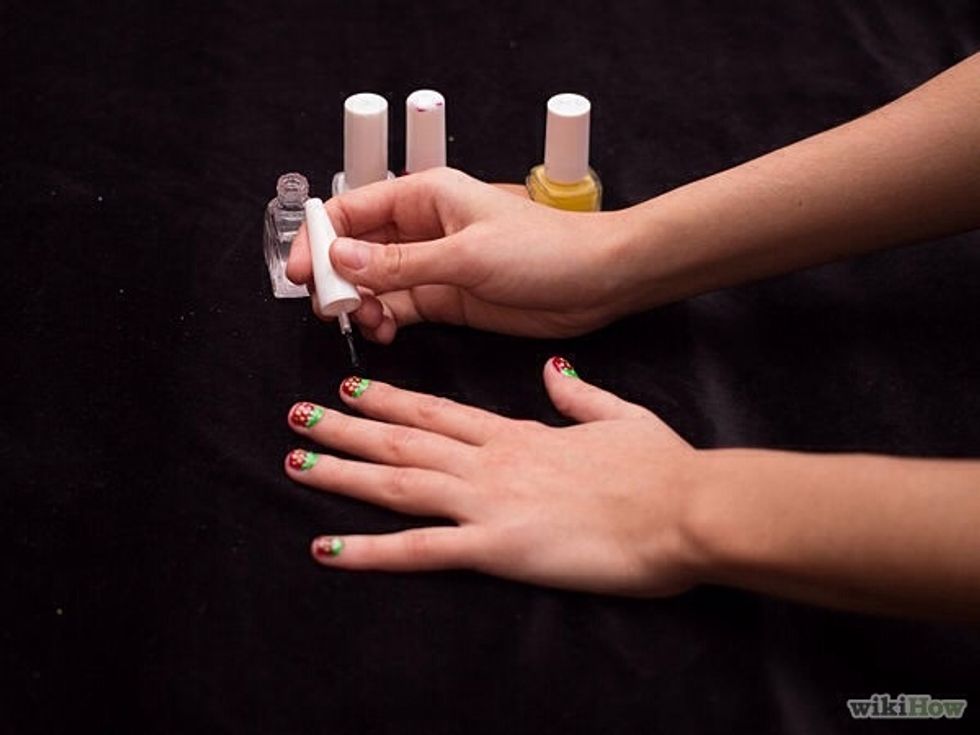
Time for a top coat! Wait until other polish is completely dry to prevent smudging.
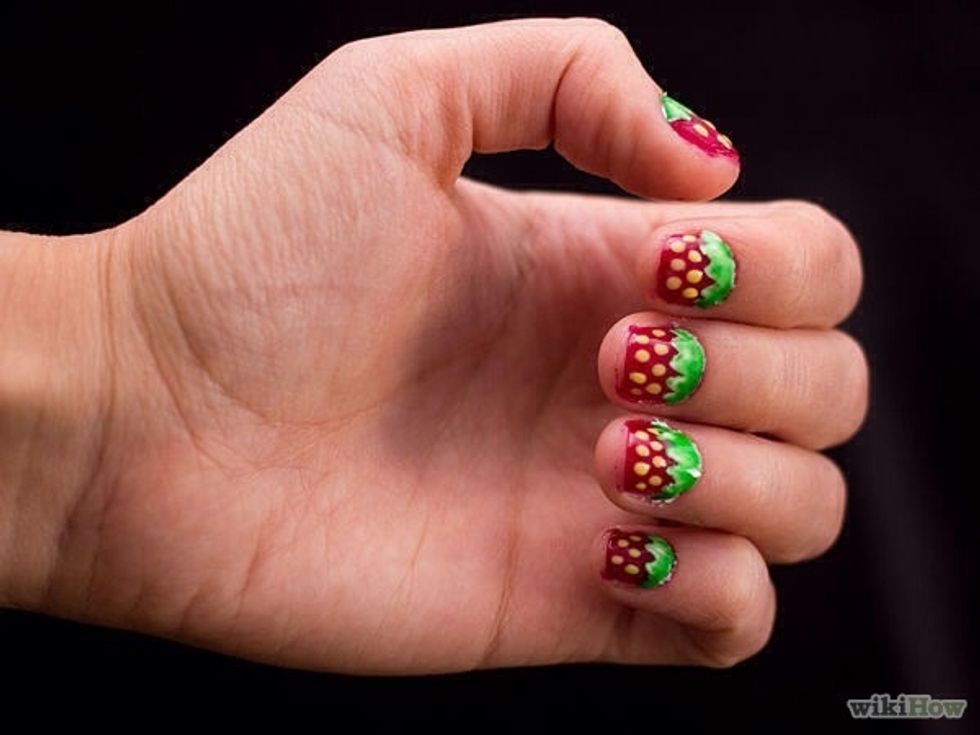
Le fini! All finished now, hope you enjoy. Follow for more! Also suggest some and I'll make the if possible. Cheers!