The Conversation (0)
Sign Up
Today we gonna code a "Hello World" App for iPhone / iPod touch, to get a realy simple example for developing in objective C. Because everyone need to understand this things first...

We have set up our "Single View Application" in the last guid, now on the left we see some files. Interresting for us are just three files at the moment: ViewController.m, .h, and .xib
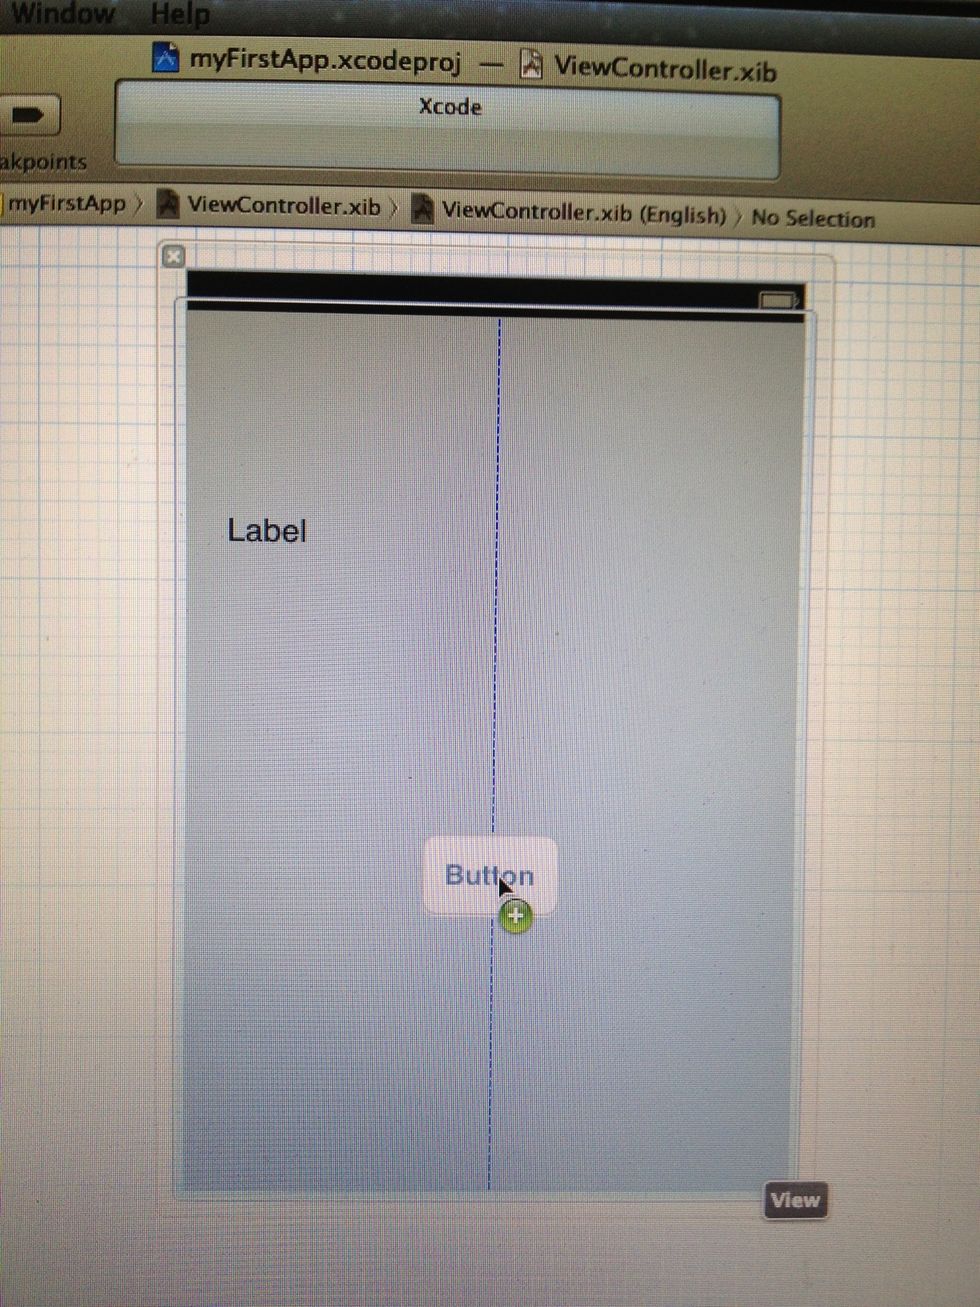
If we click once on the ViewController.xib file, we see it contains our User Interface, which we will see, as the App on our devices. By drag and drop from the right menu we can add and position...
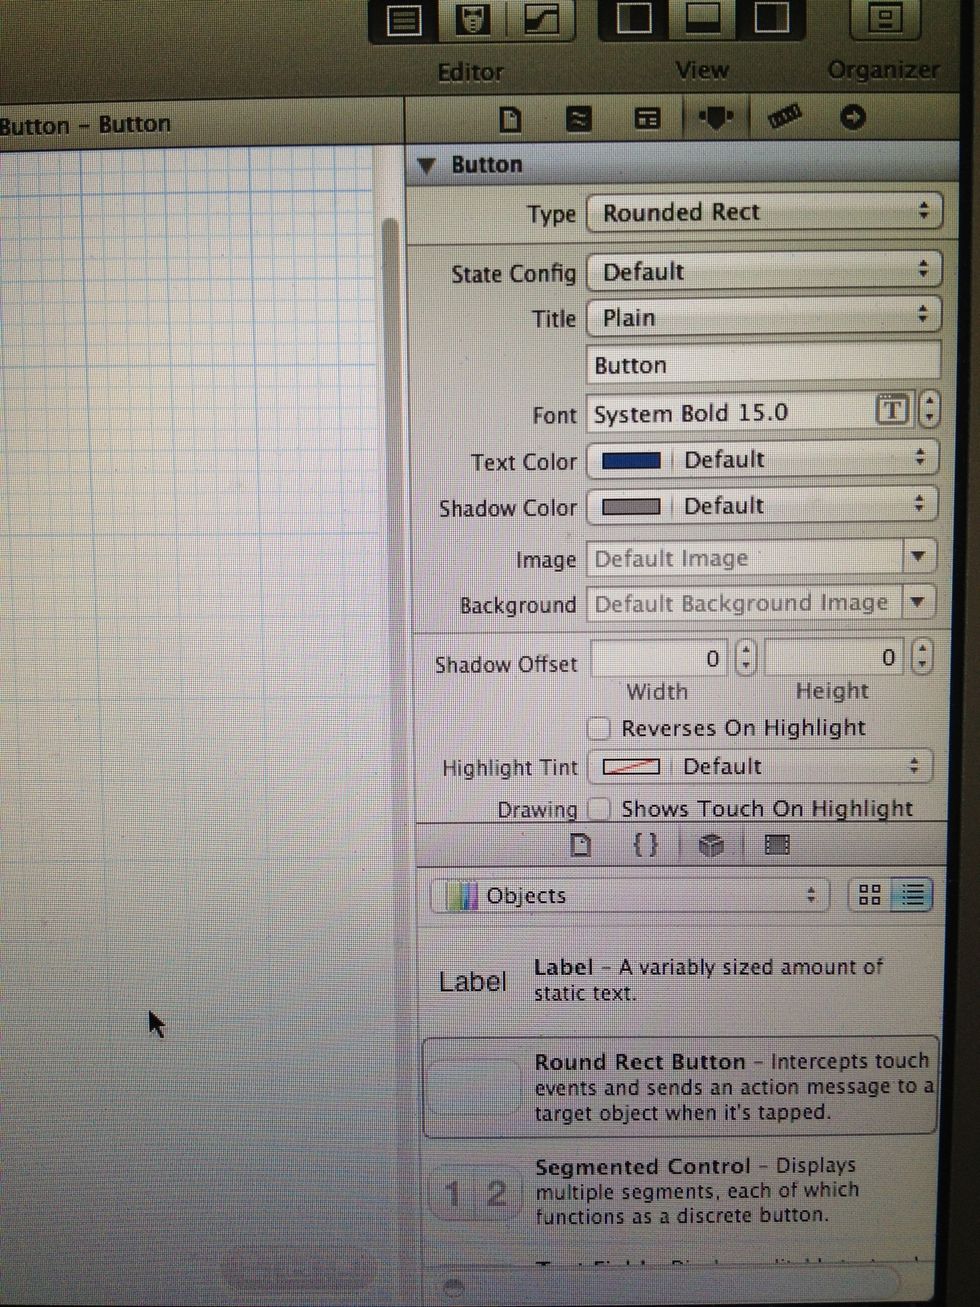
Here you see the right side of the Screenshot before.. You see we can drag and drop all native Interface Objects from the right menu, to our Interface in the middle and set some settings above
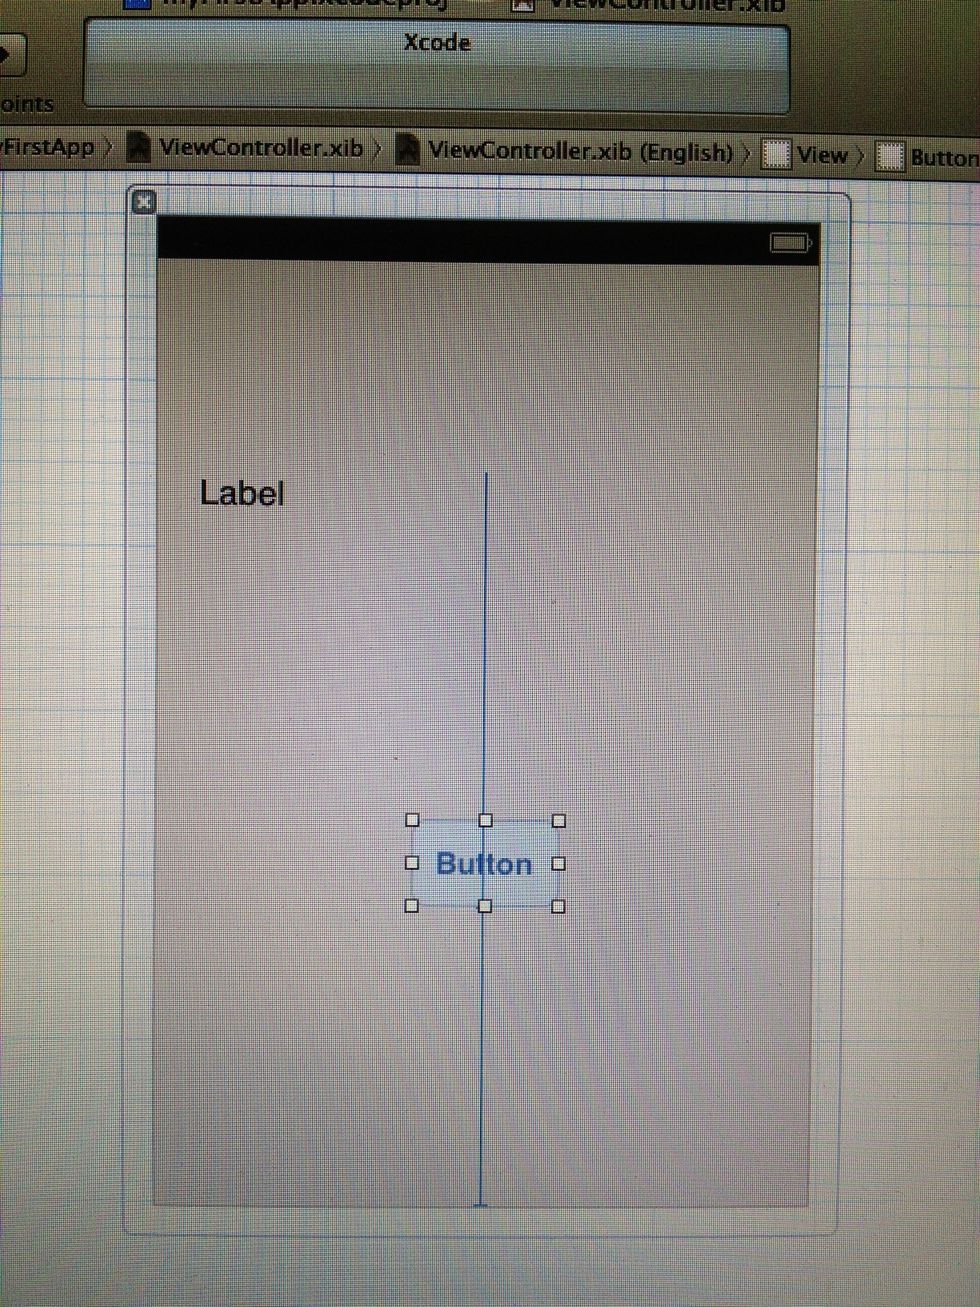
For our App, we use a Label and a Button Object and place them in the Position we like on the Screen.
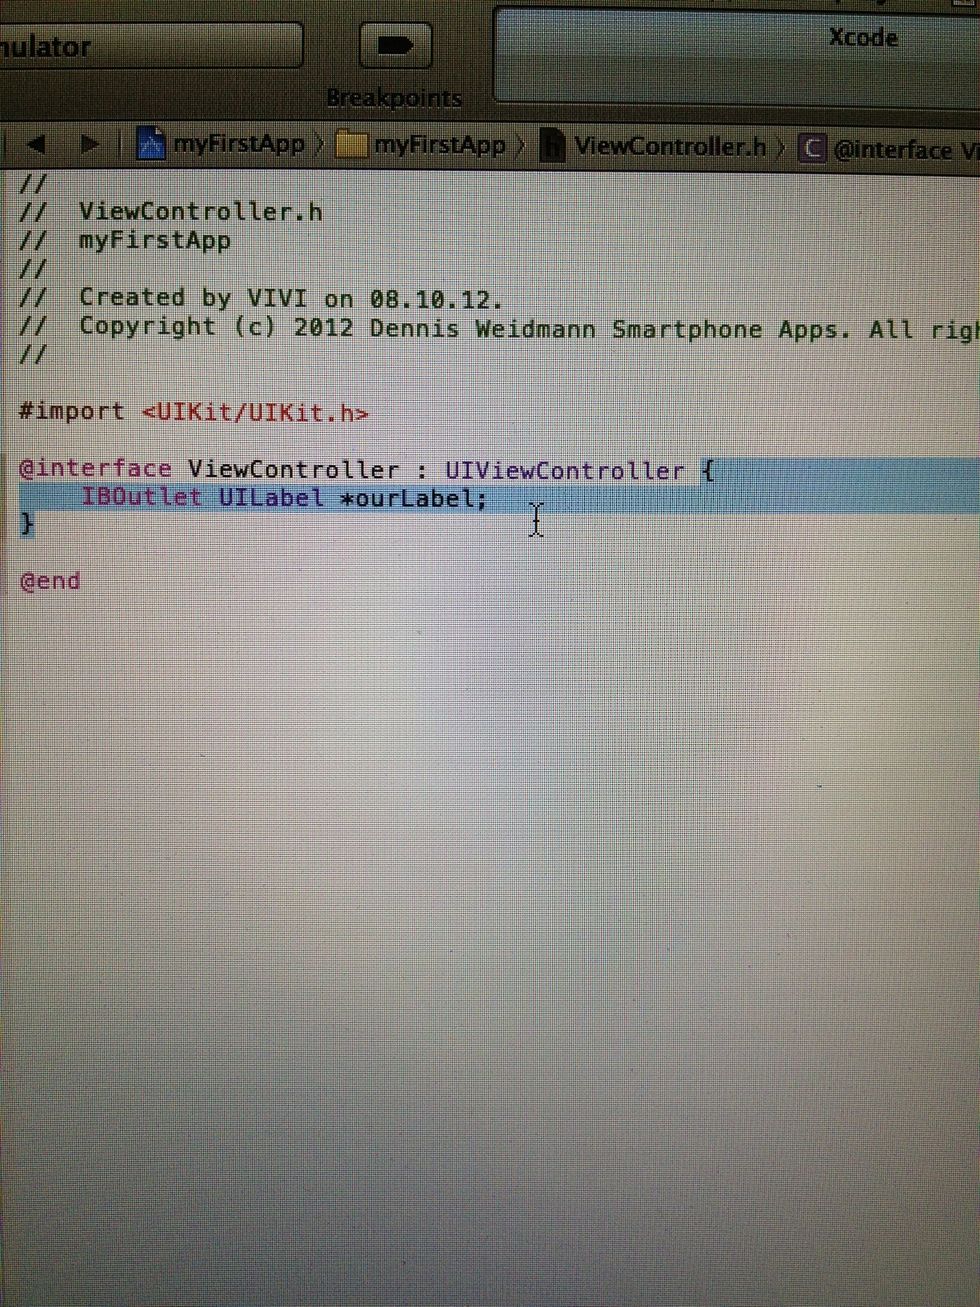
Now we need to declear our Label in the .h File by giving it a name. So click once in the left menu on ViewController.h. Now you add the Code which is selected on the Screen above...
With this Code we tell the iPhone, we would like to use a Label, called "ourLabel" in our App, to set it some text, or other settings...
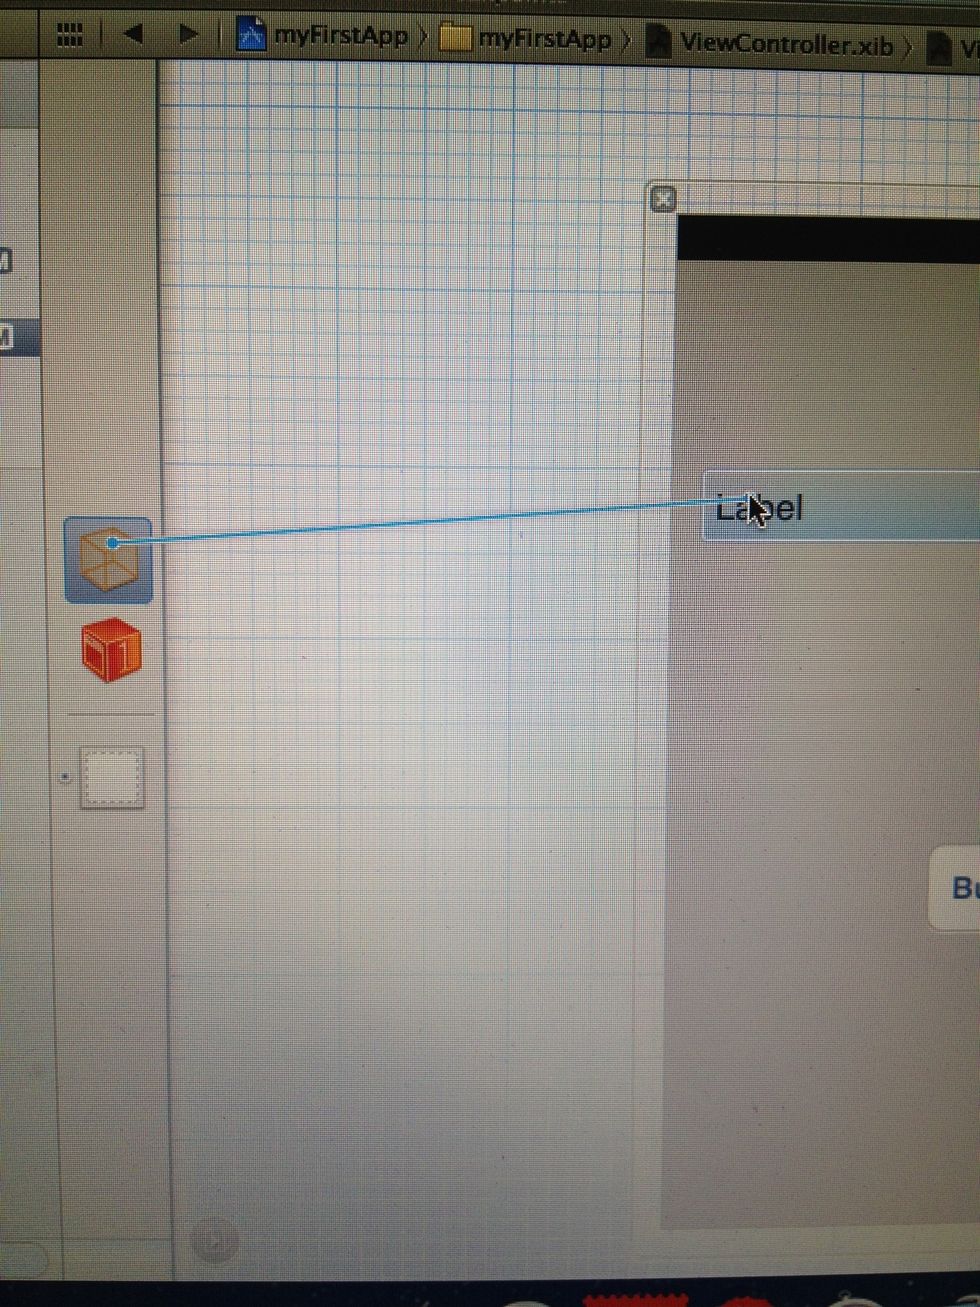
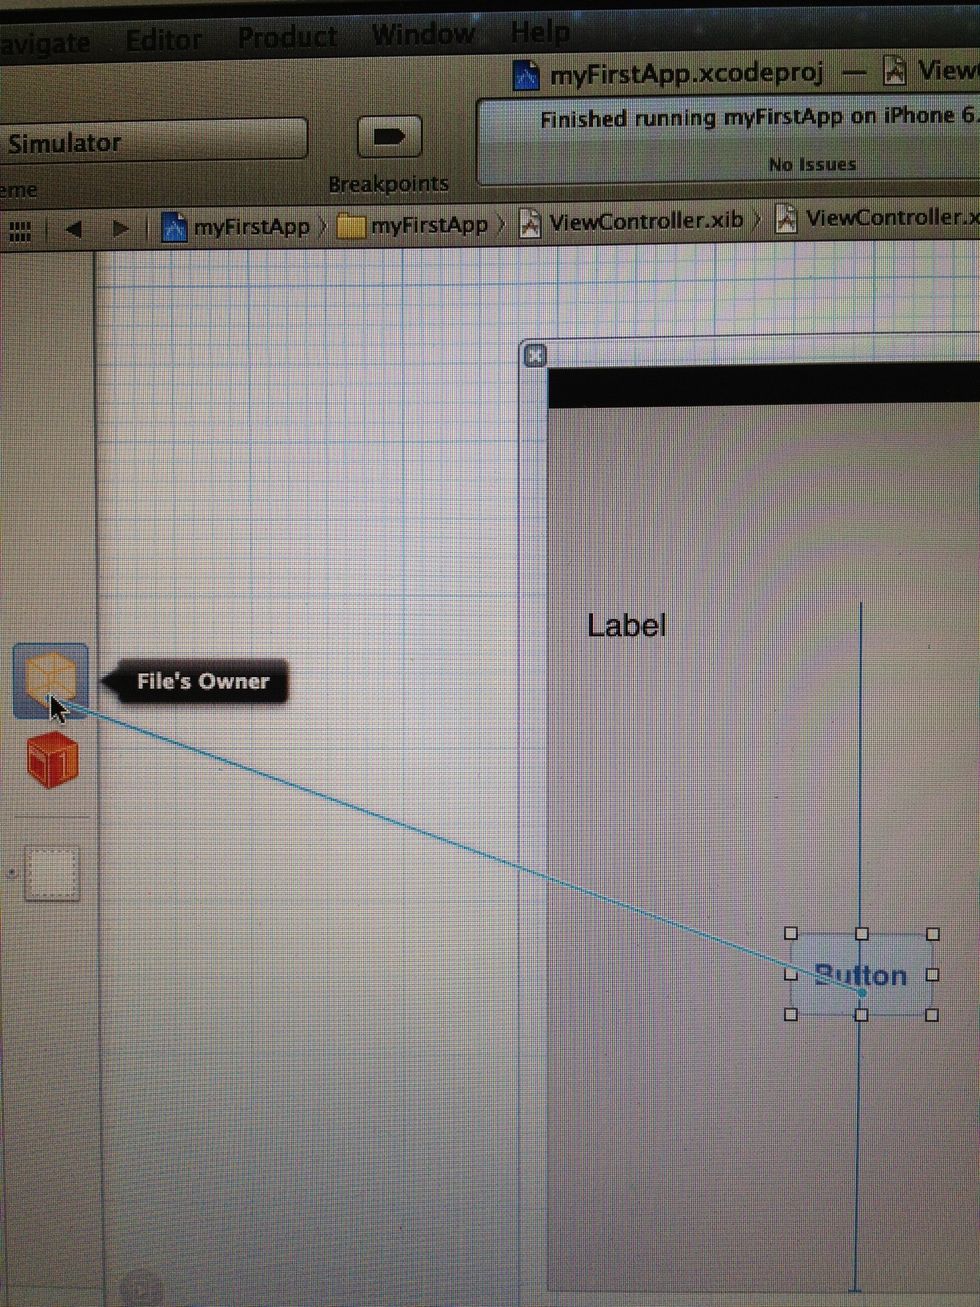
Lets connect the Label object with our Label on the Interface... For that, go to ViewController.xib, click once on the little box, hold "ctrl" key and the mouse button and drag a line to our lable
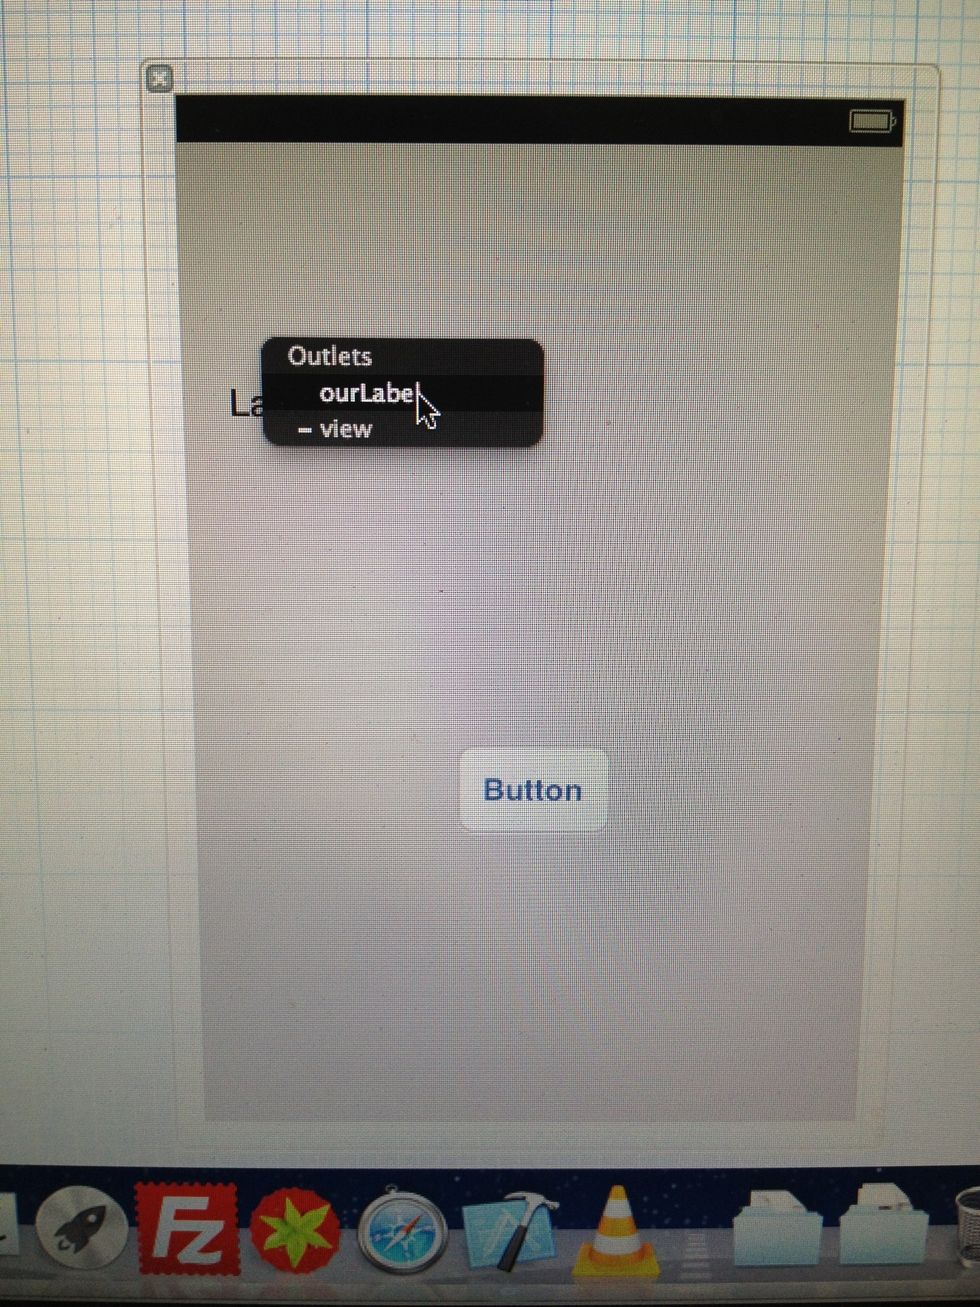
Select "ourLabel" from the litte black Menu. Now we have connected the Label object "ourLabel" with the Label on the User Interface... Every time we use "ourLabel" in Code, we mean this Label now
To drag a line from the little Box to an object, we need to hold the "ctrl Button" on Keyboard and the mouse on the box and release the mouse just over the Label or Button we want to connect...
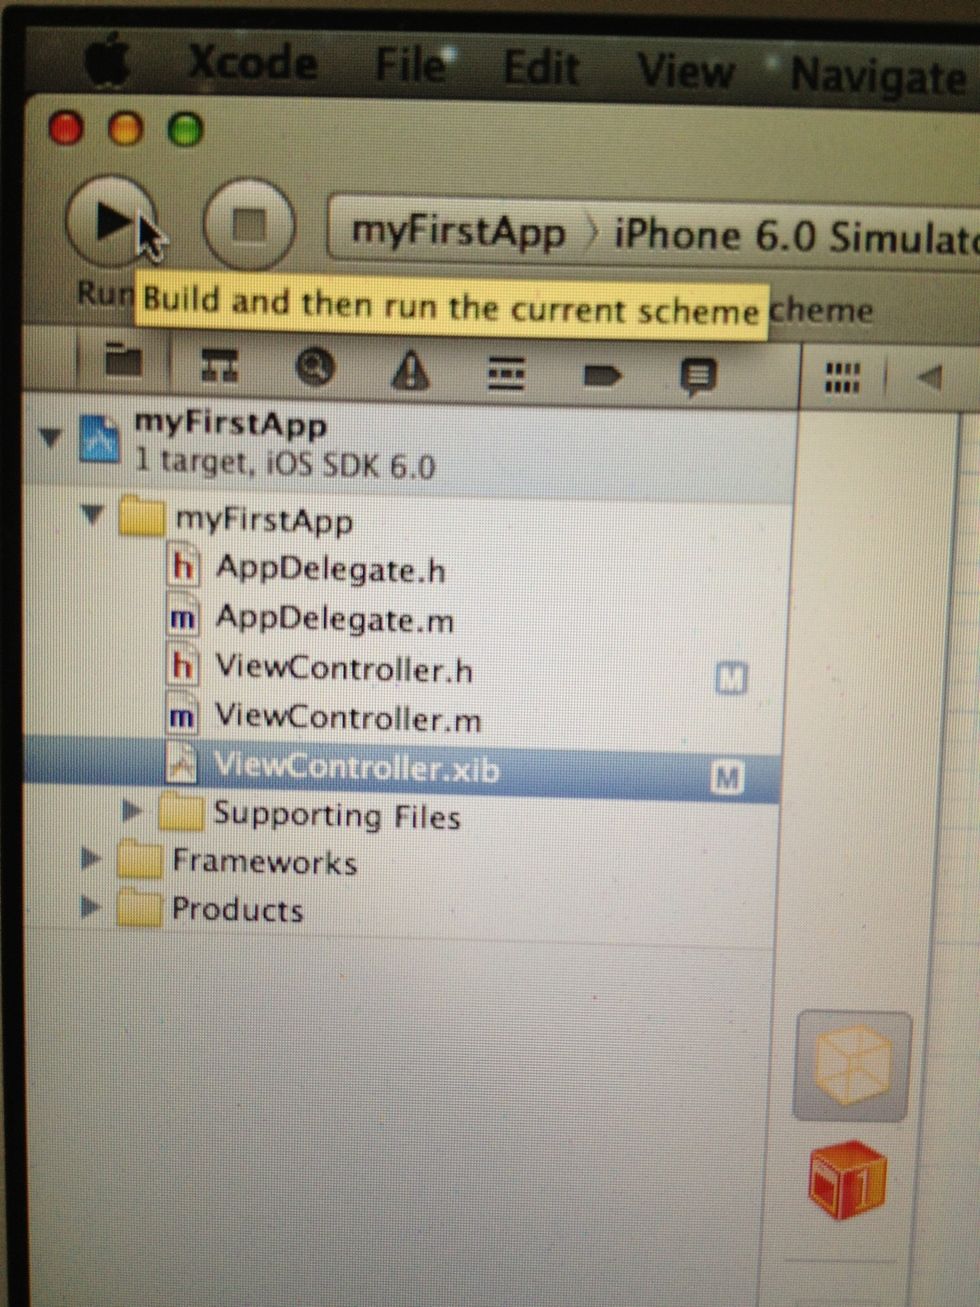
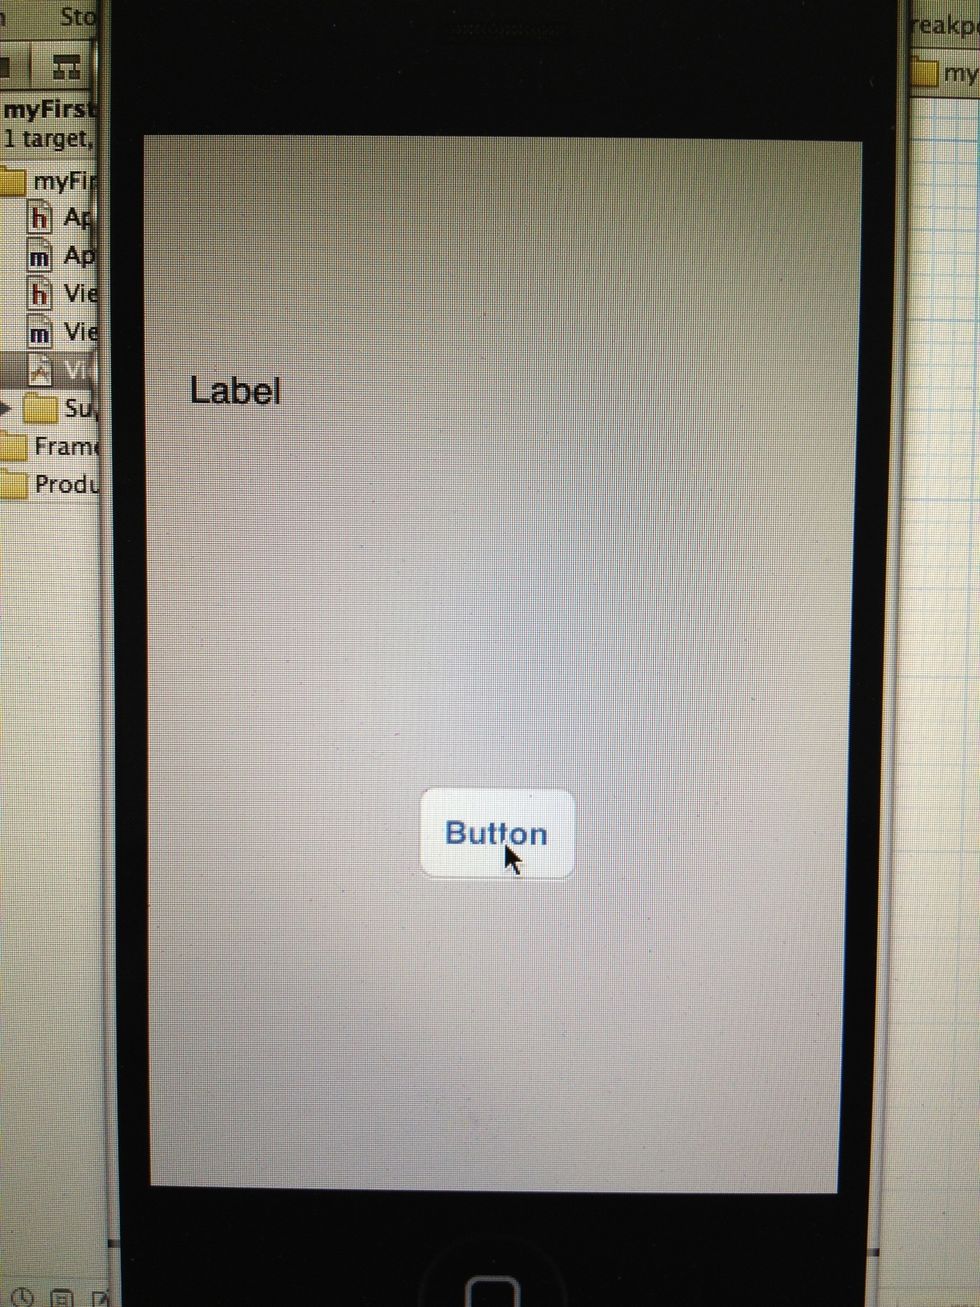
Now lets see what we have done in the iPhone Simulator. For that, just press on the big play button on top left of XCode. Then wait until you see the simulated iPhone on your Mac
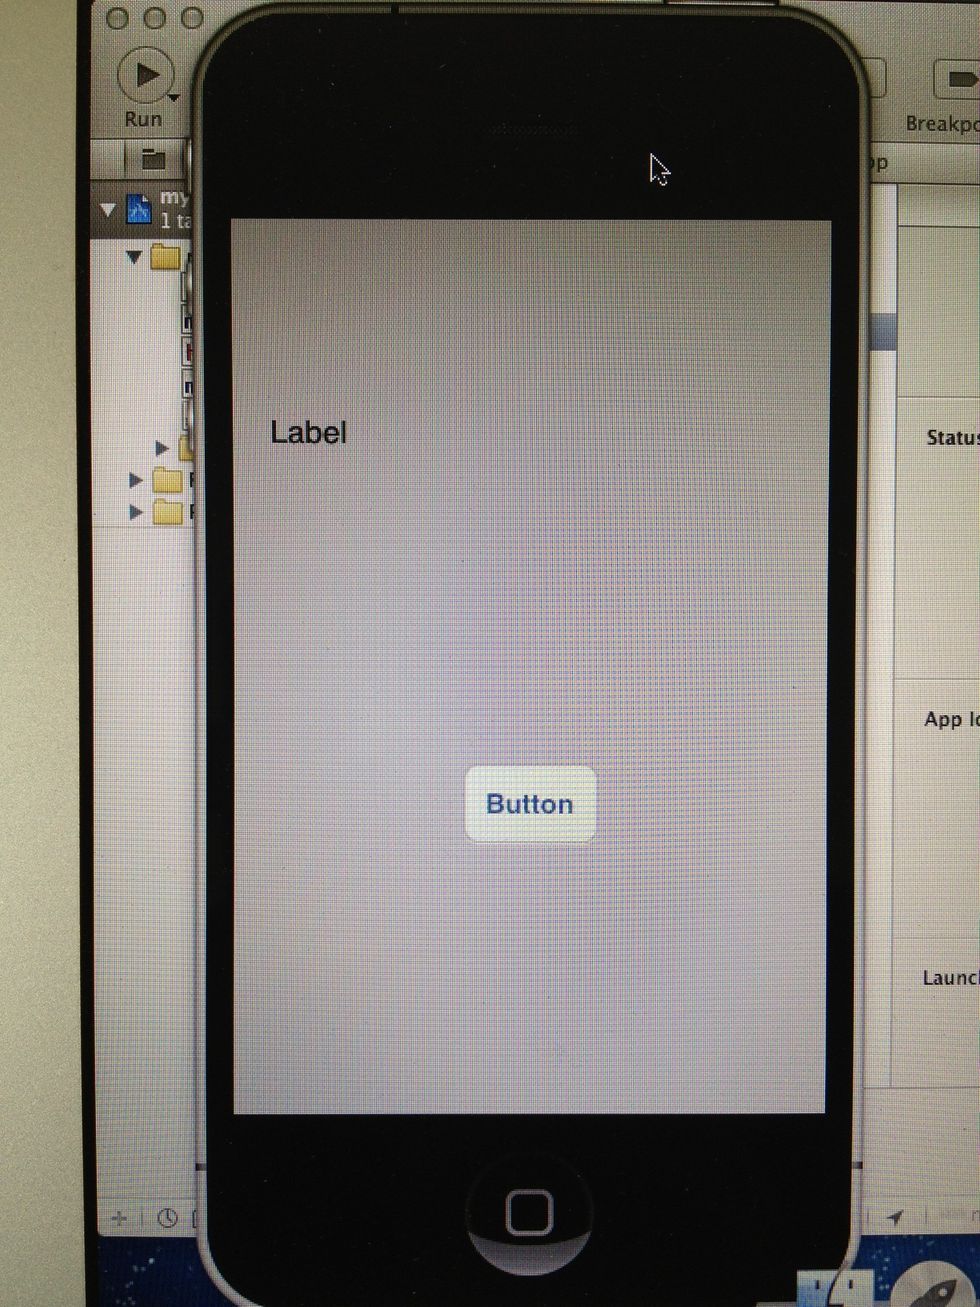
The iPhone Simulator looks like this... You can see the Interface we build in the Interface Builder before... Now lets give the Button an action, to get our very first "Hello World" App done.
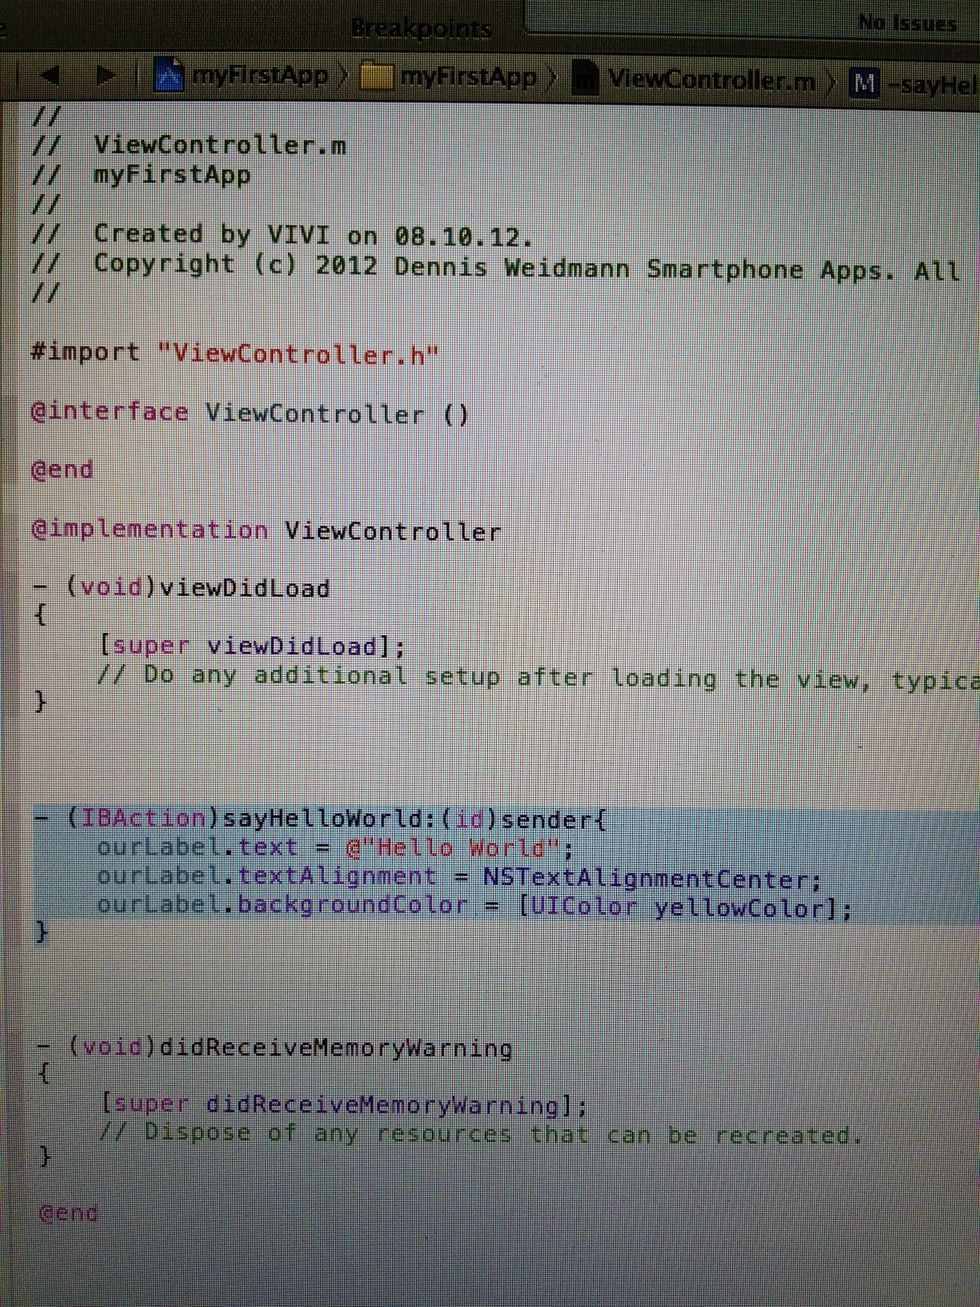
To add working code, click once on the ViewController.m in our left menu. Here you see what your app is doing... Not selected code will be added by XCode as default, the selected Code we have to add.
We just add an IBAction, named "sayHelloWorld". Between the {...} we add the Code, which will be executed, after calling the action... In our Case: ourLabel should change its text to "Hello World"...
...its text alignment to center, and its Background Color to yellow. Now we will connect the Action with our Button on the Interface Builder
To do that, we change to ViewController.xib, and as we have done before, we click and hold ctrl key and mousebutton while draging a line from our button to the little box on the left. Than release...
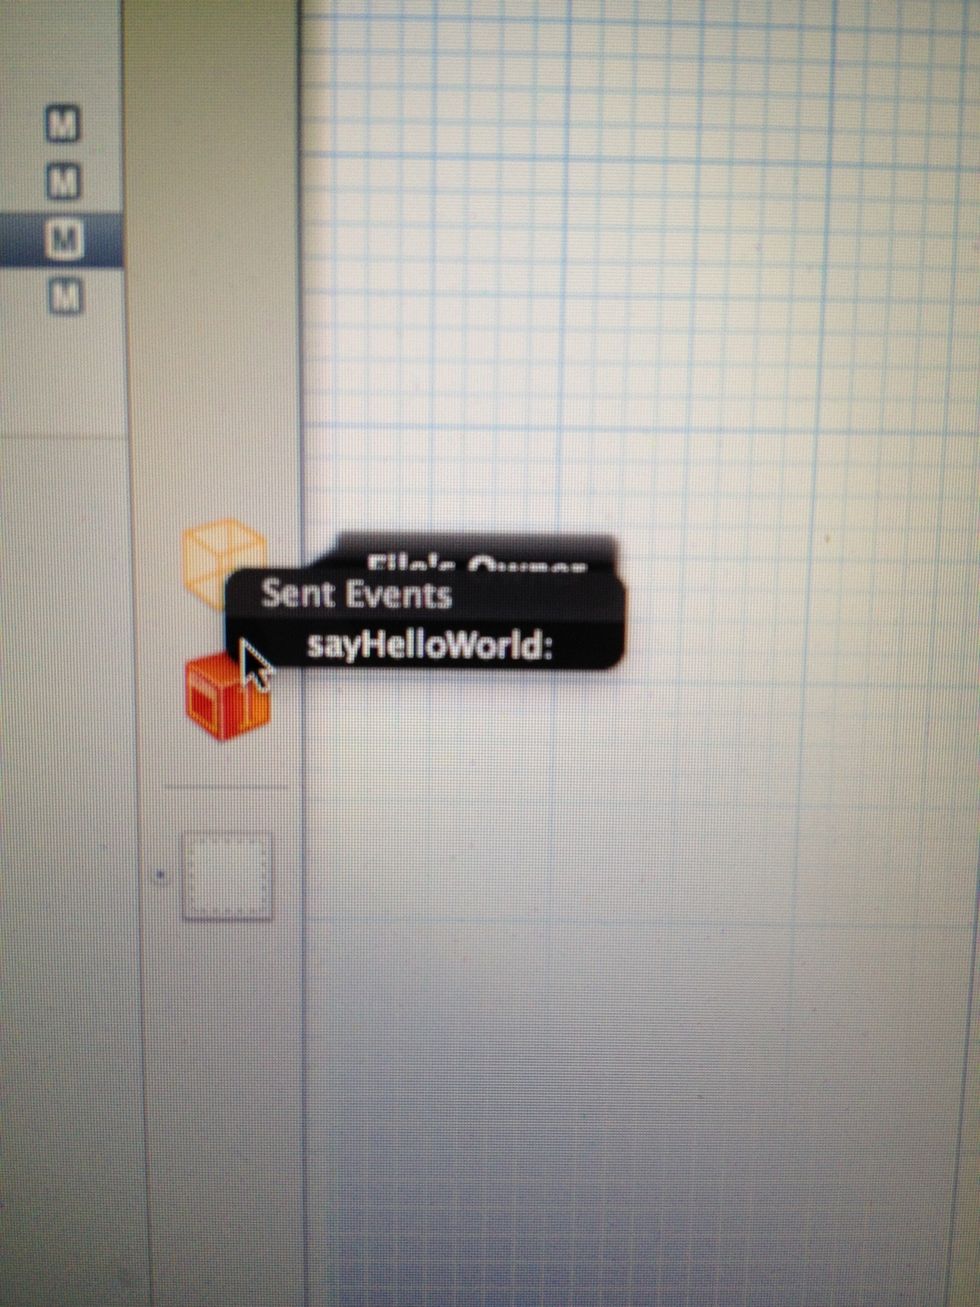
Now a little window opens, with our "sayHelloWorld" Action clickable... We rember, that was the Action we wrote in the *.m file before. So we click on the Actions Name in the window to connect it...
Now we made the following... We added a Label and a Button in the .xib file. Created a Label-Object, called "ourLabel" in the .h file and an Action called "sayHelloWorld" in the .m file. Also we...
... connected the "ourLabel" Object with our Label, and the Button with our action. So we are ready to press Play again and watch what we have done in the iPhone Simulator...
In Simulator we see what we have done, everything is like we have set it up, now we want to call our action, by pressing the Button...
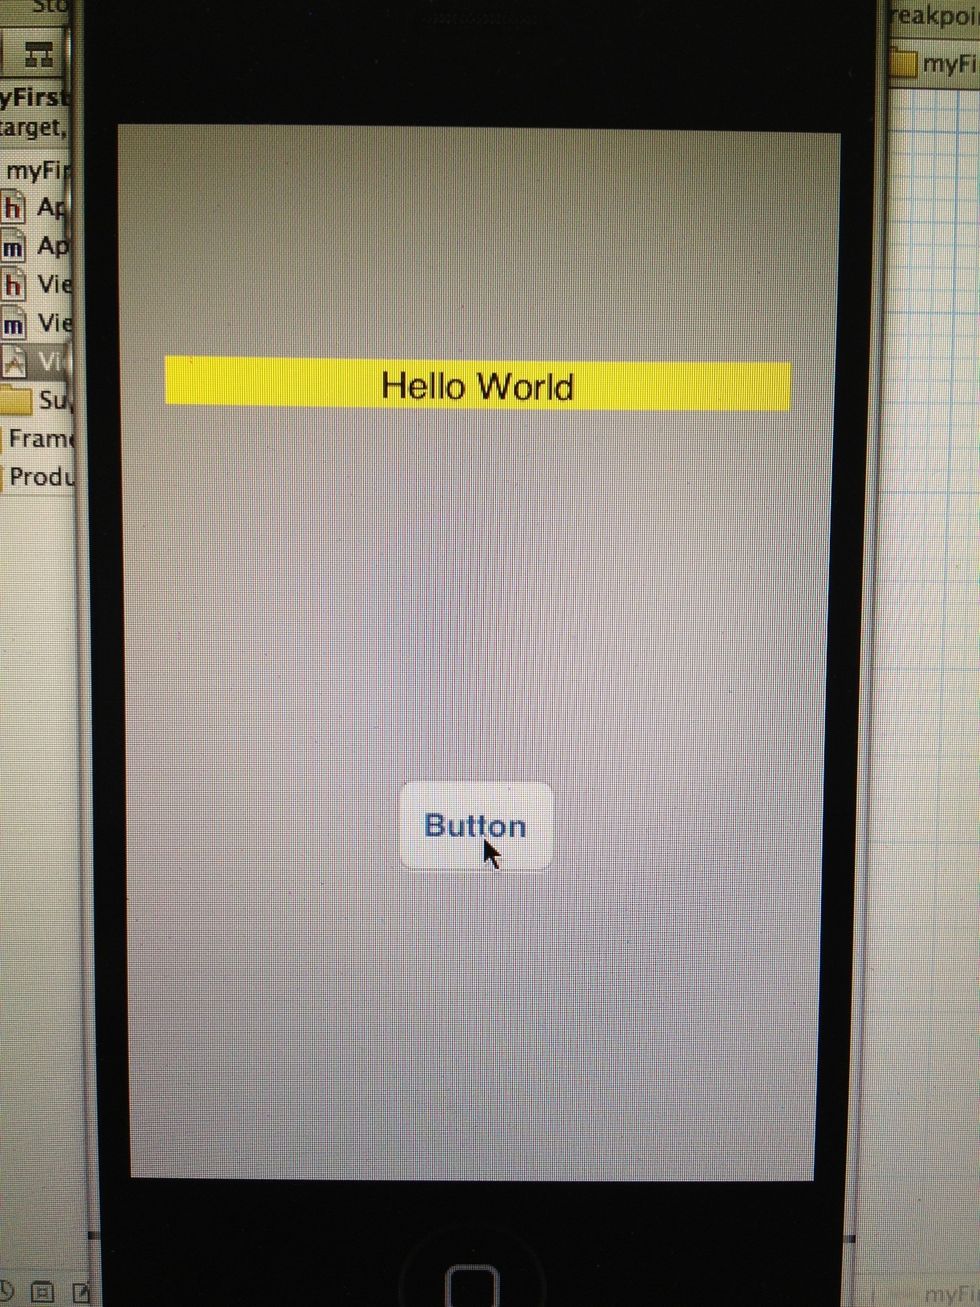
After pressing, you see our Label is filled with our Text, its background color is yellow, and the alignment changed to center... Seems like our "Hello World" App is finished. :-)
Summary: *.h files are (basicly) used to declear our objects... We declear in here a Label, a TextField, or Buttons, give them names to connect them with our visual objects from Interface Builder...
... *.m files are for our actions and the main important coding. Here we give our App every function, it should do with the objects. And we got the .xib files for placing our Objects on the Interface
The next how to will be a how to use the UINavigationcontroller, because we will develop an App with a Listing and a View change after selection of a list item. With this you can create your first...
... realy impressive App, with multiple Views and a Table View usage. If you have questions to any Step, or if I explain too fast, please leave me a comment, to improve my upcoming guids Thank you :-)