The Conversation (0)
Sign Up
Paint your nail with a clear base coat
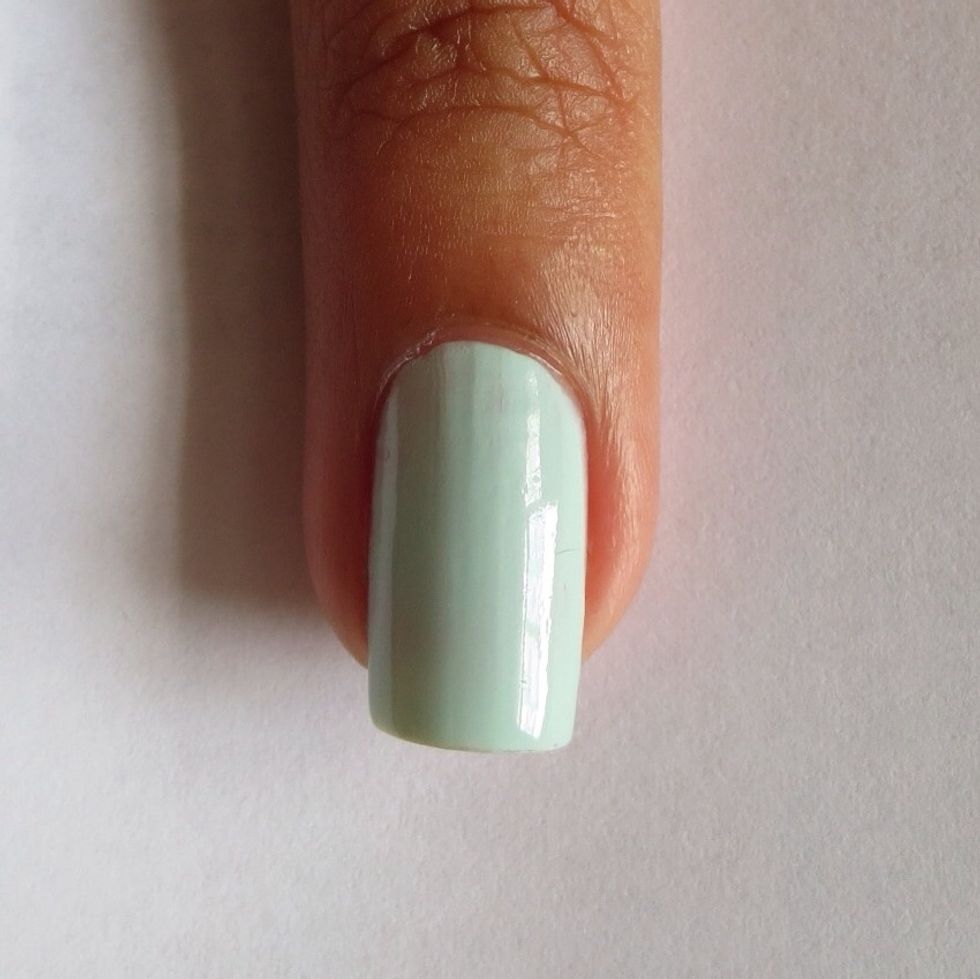
Paint your nail with 2 coats of mint green polish (or any other desired base colour)
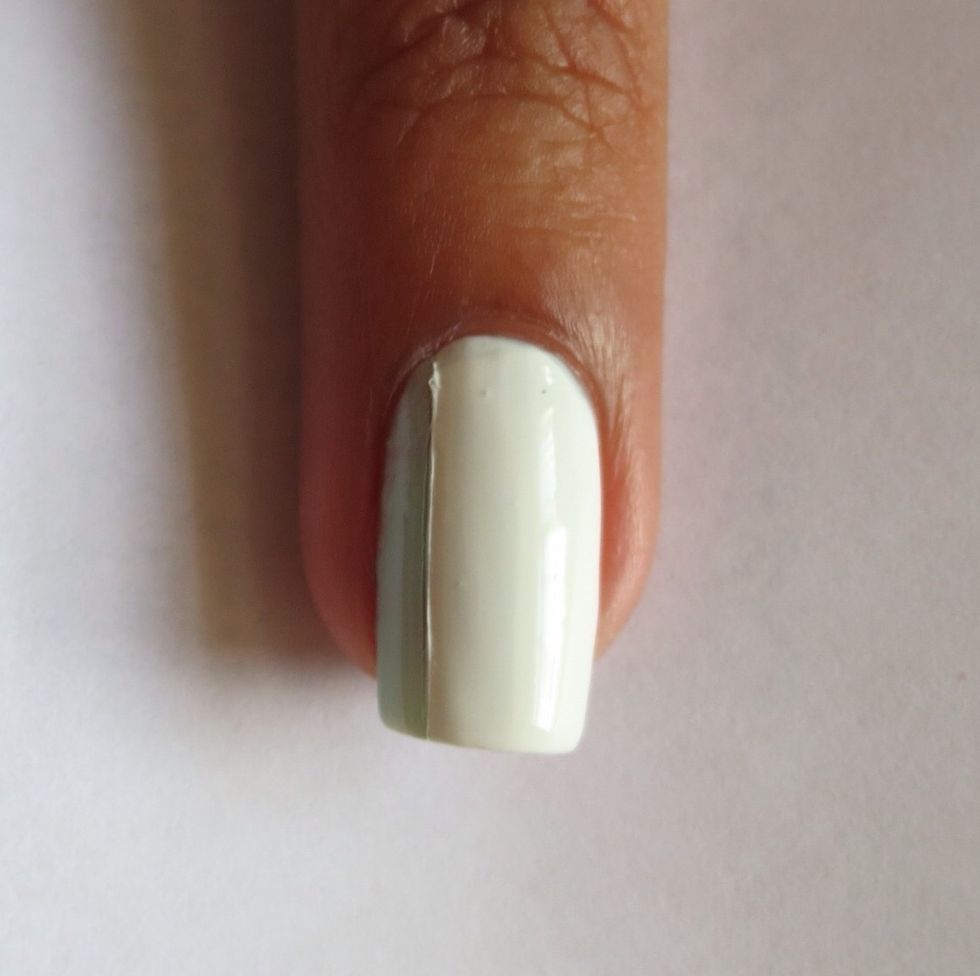
Use a nail art brush to draw a white line down the nail and fill the section in with white polish
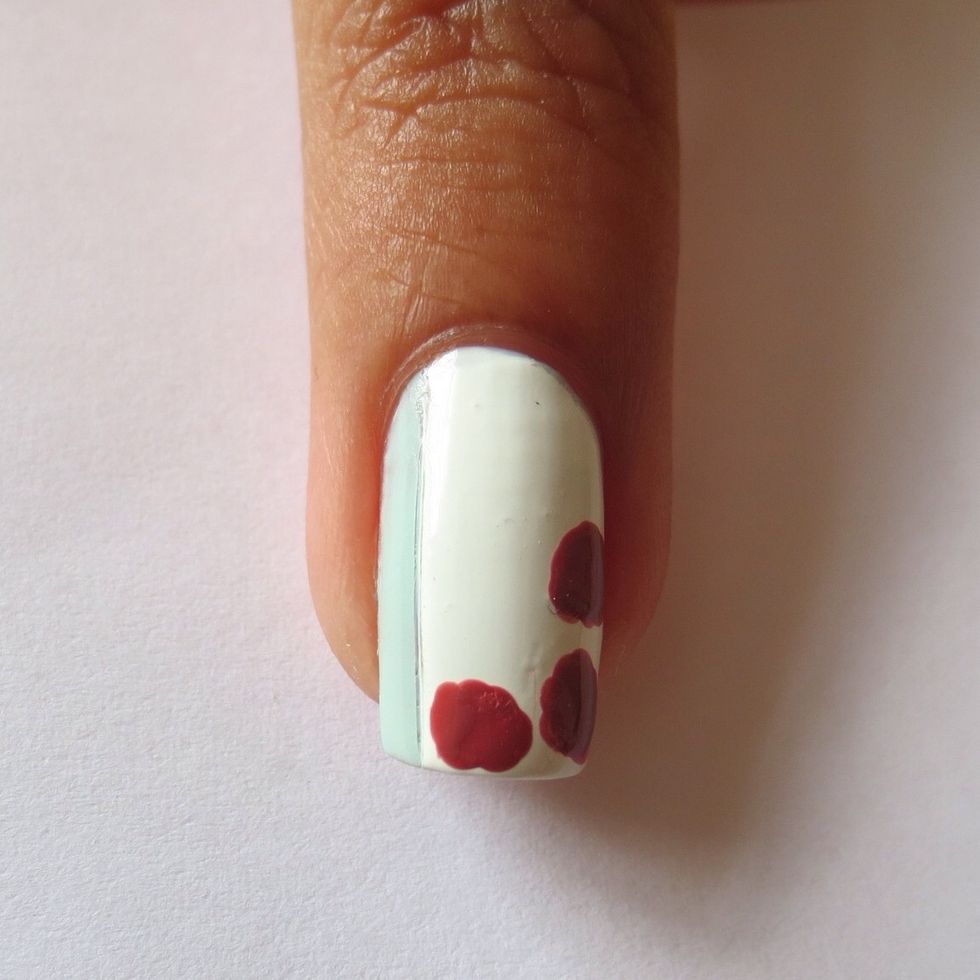
Use a dotting tool or small brush to create three rough circles using the darkest pink polish
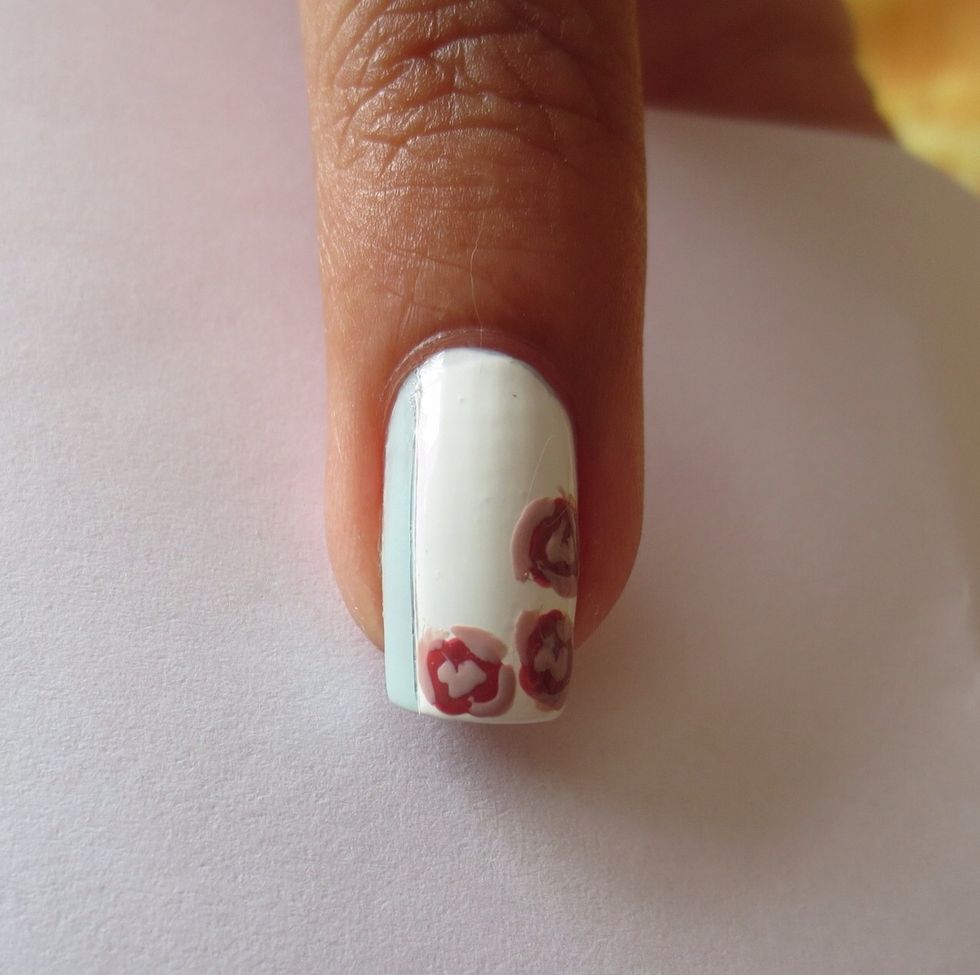
Use a fine nail art brush or toothpick and use a lighter pink polish to add small strokes randomly around the dark red circles to make petals
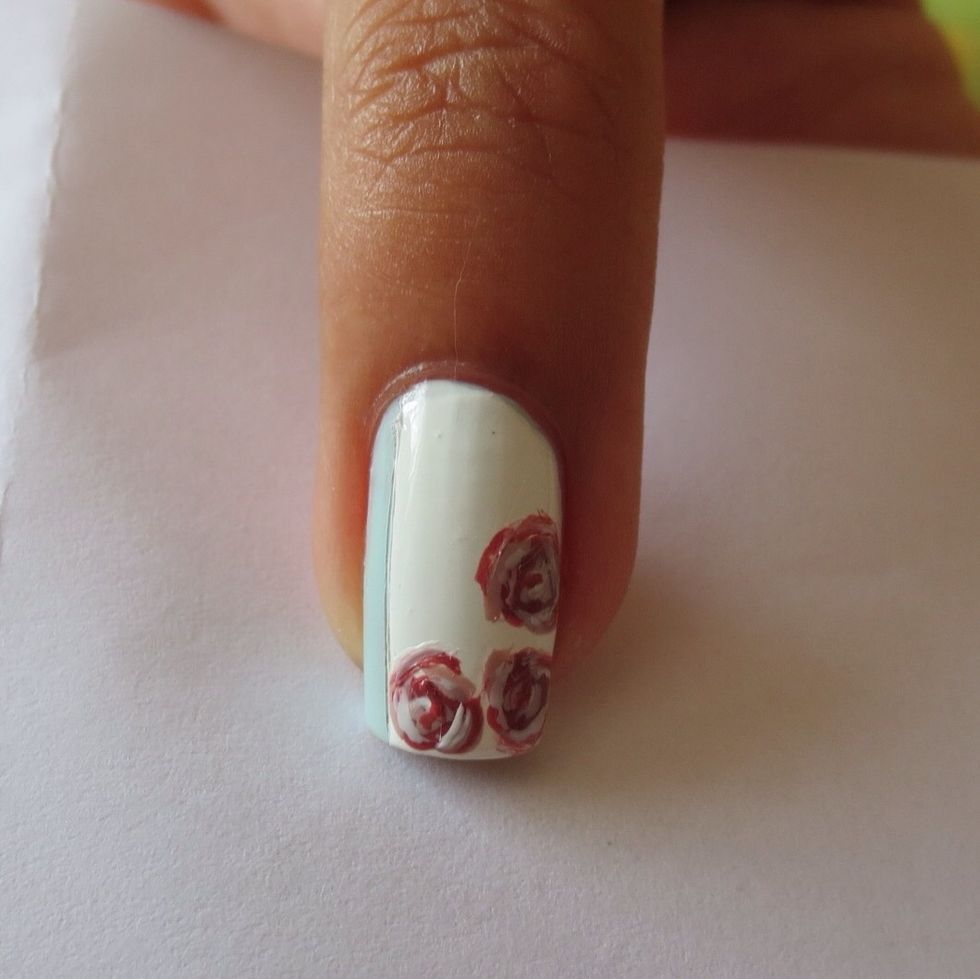
Add small shadows to the rose to make them look more 3D with a thin nail art brush and white polish (or toothpick)
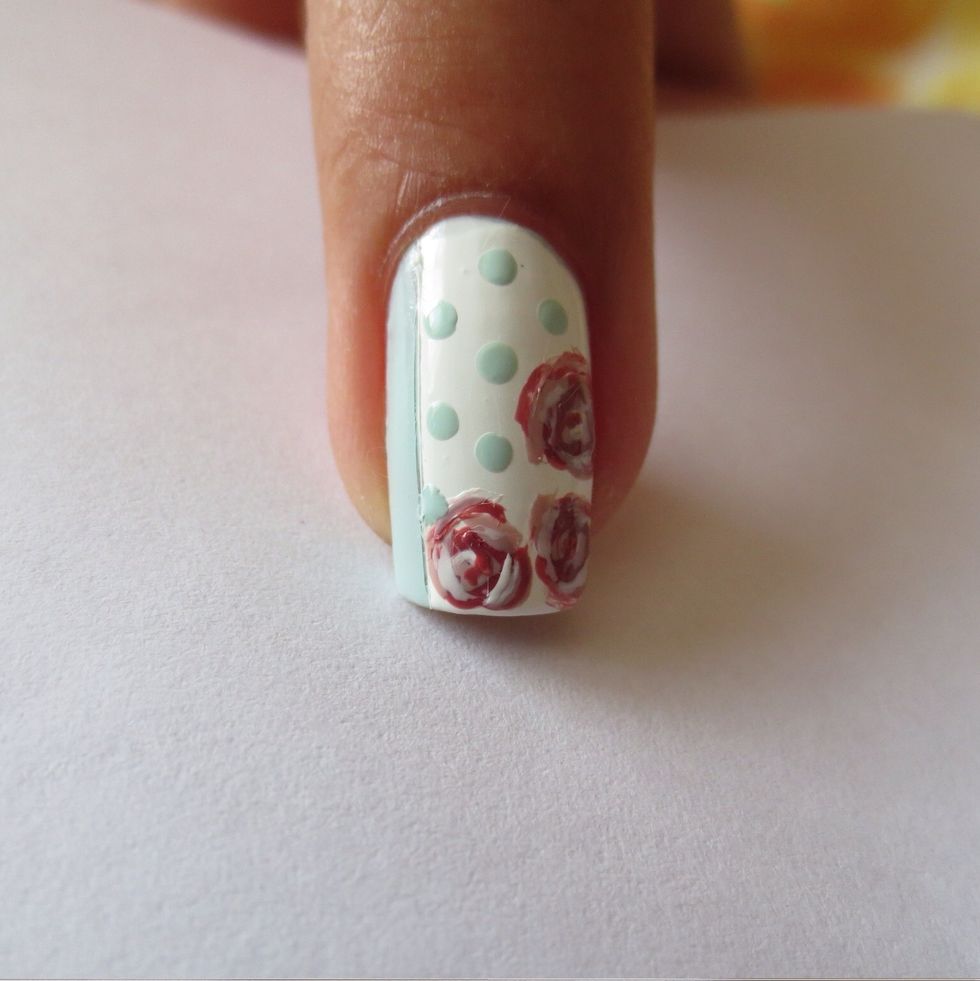
add mint green polkadots onto the clear white area with a medium dotting tool or toothpick
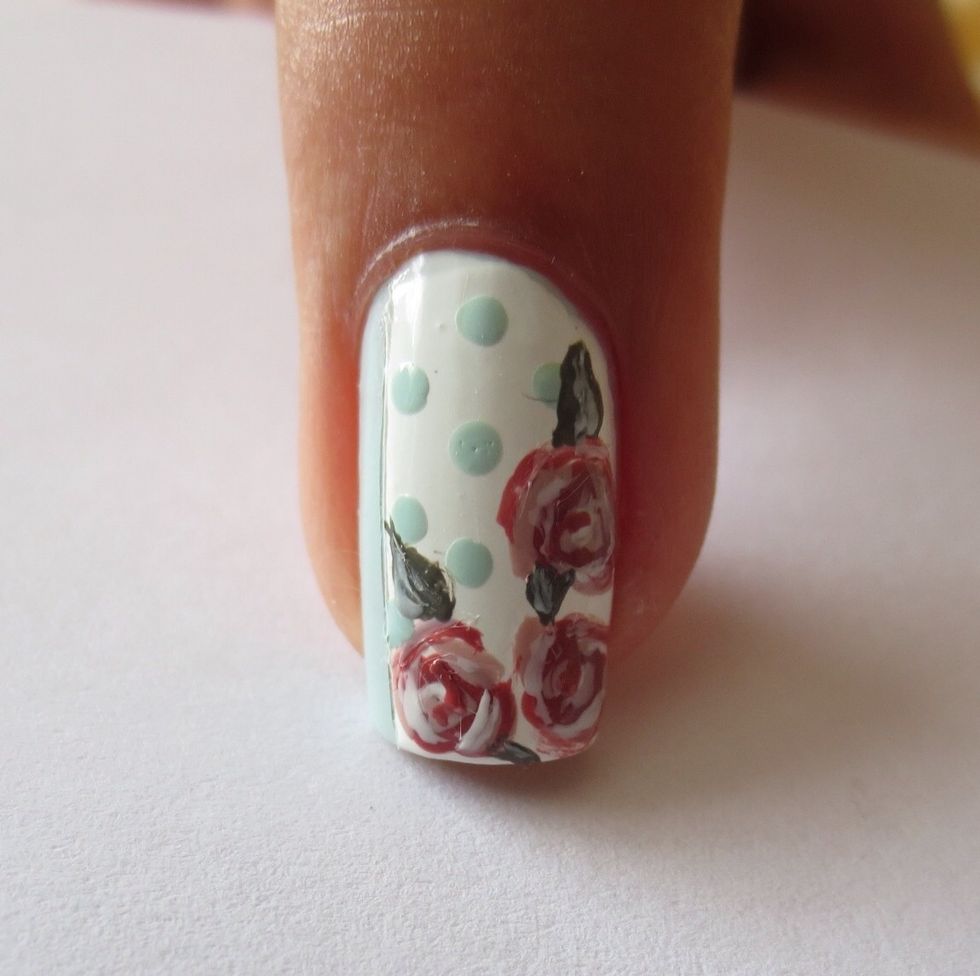
Use a brush and dark green polish to create small petals around the roses and add shadow with a small amount of white polish
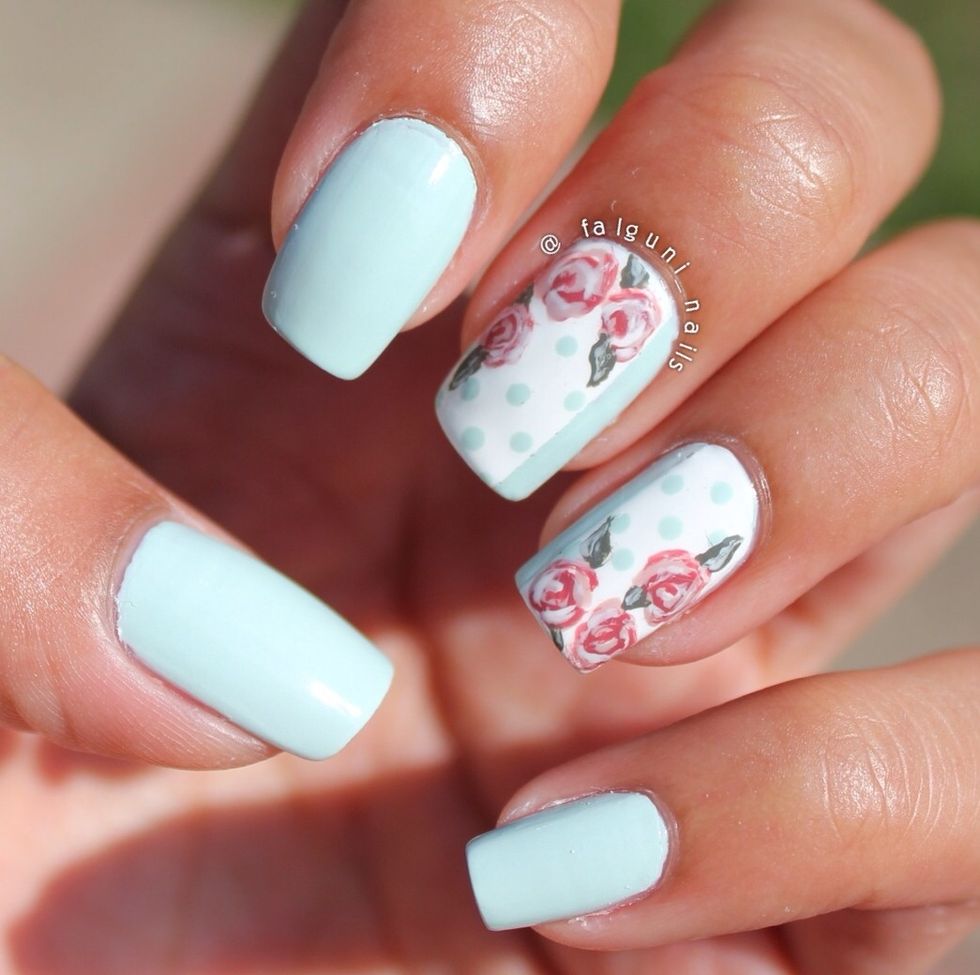
Finish with a clear topcoat and your done!! 😀