The Conversation (0)
Sign Up
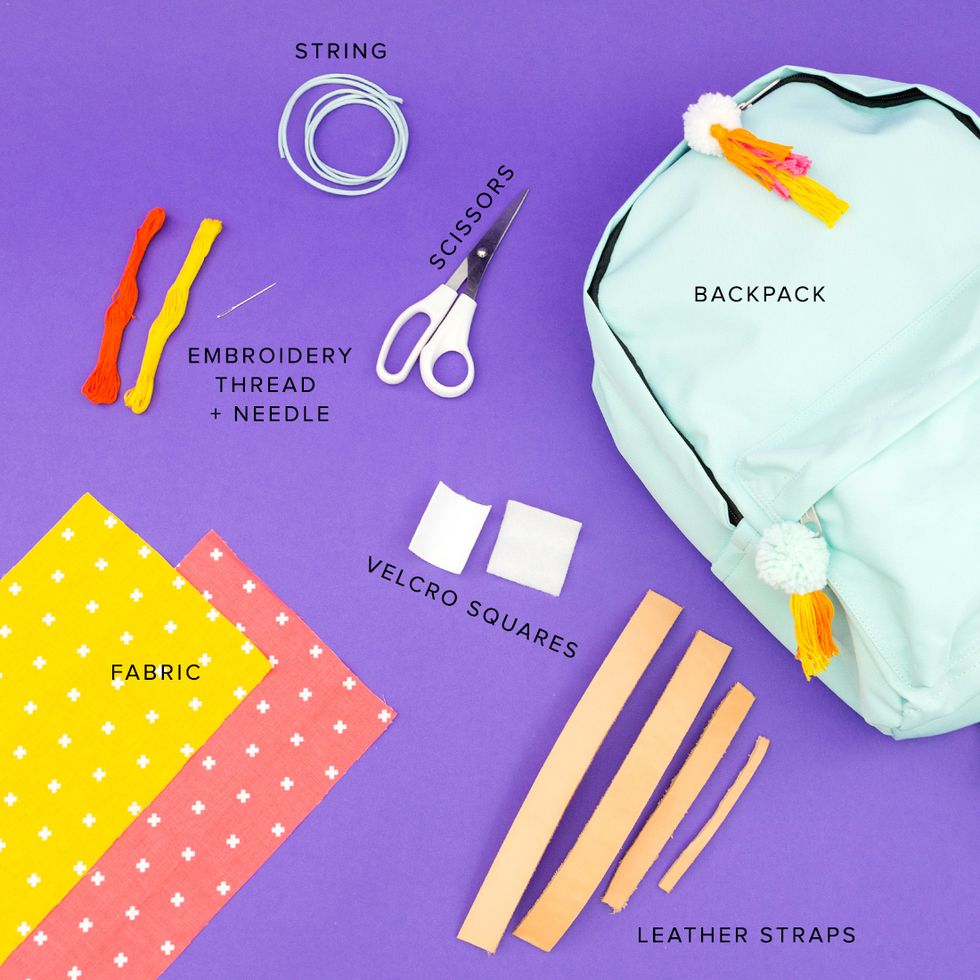
This cute and fully functional lil’ backpack will definitely help you take full advantage the spring season. It holds two wine bottles + houses all of your picnic needs.
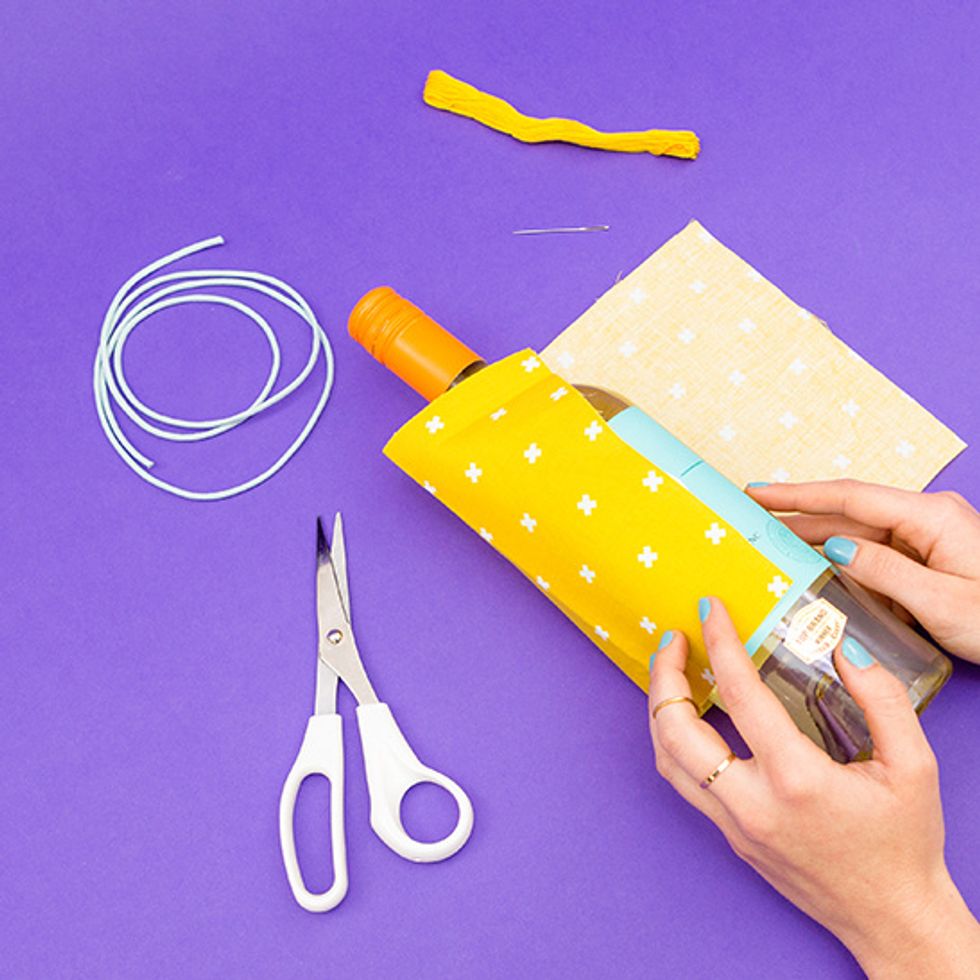
Measure your fabric around the bottle and cut.
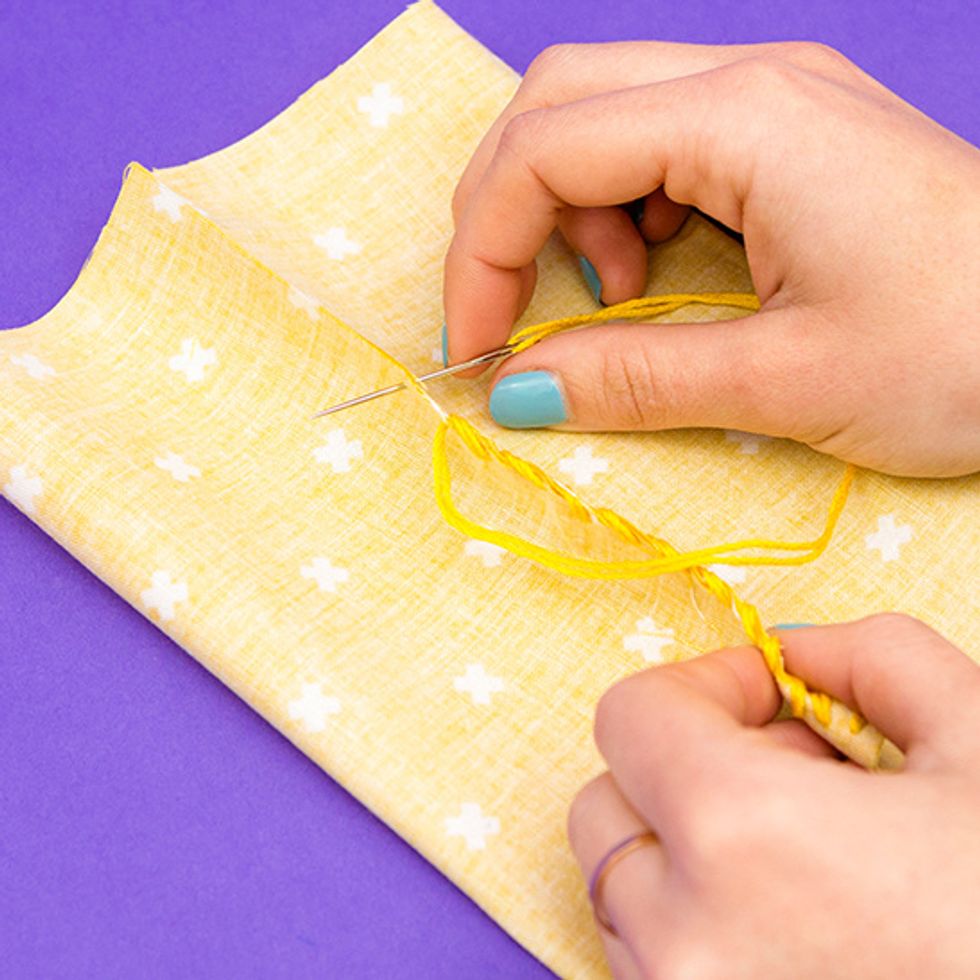
Whipstitch ends together to form a tube.
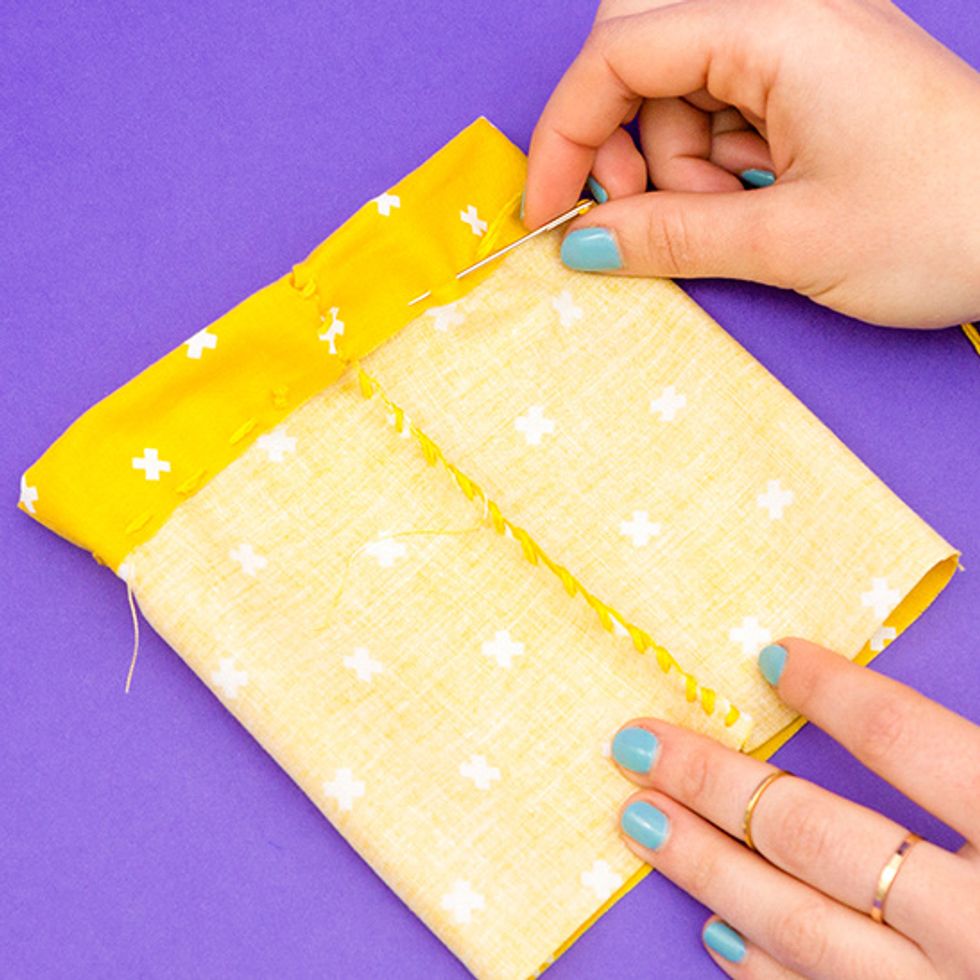
Fold over ½-inch of fabric on one end of the fabric tube and stitch down.
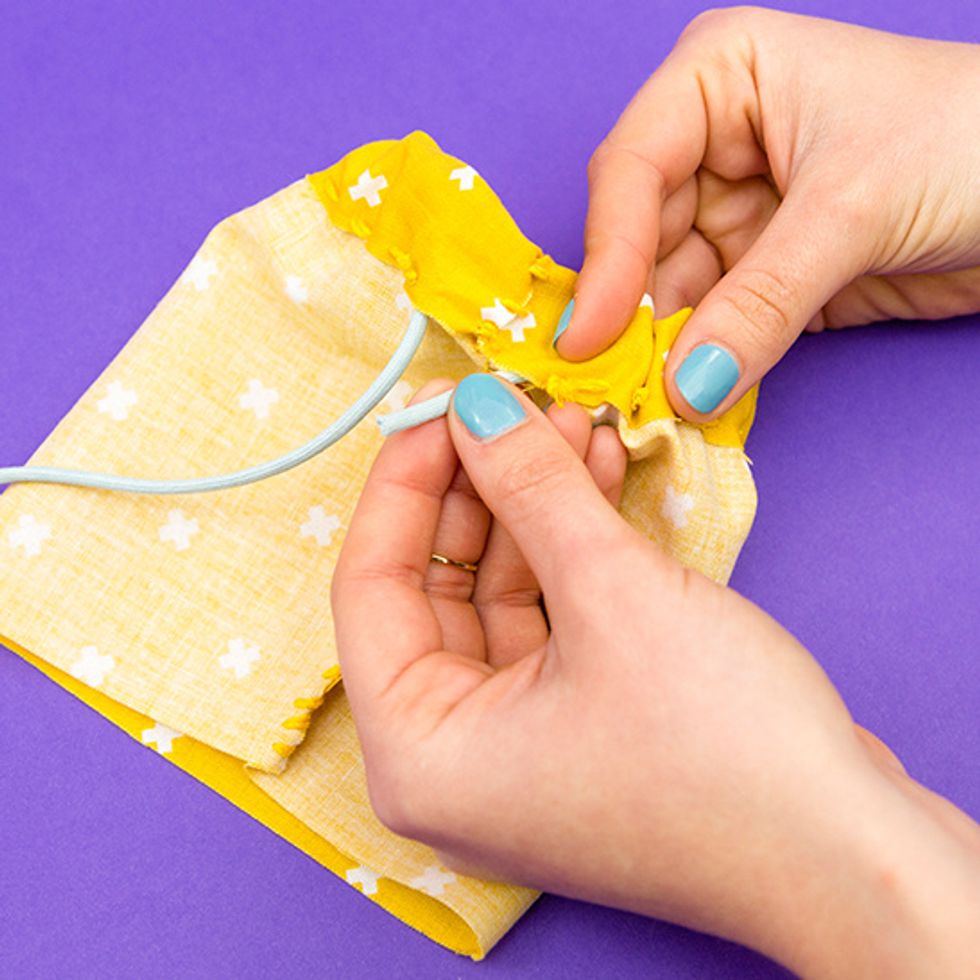
Insert the string through this space to create a drawstring.
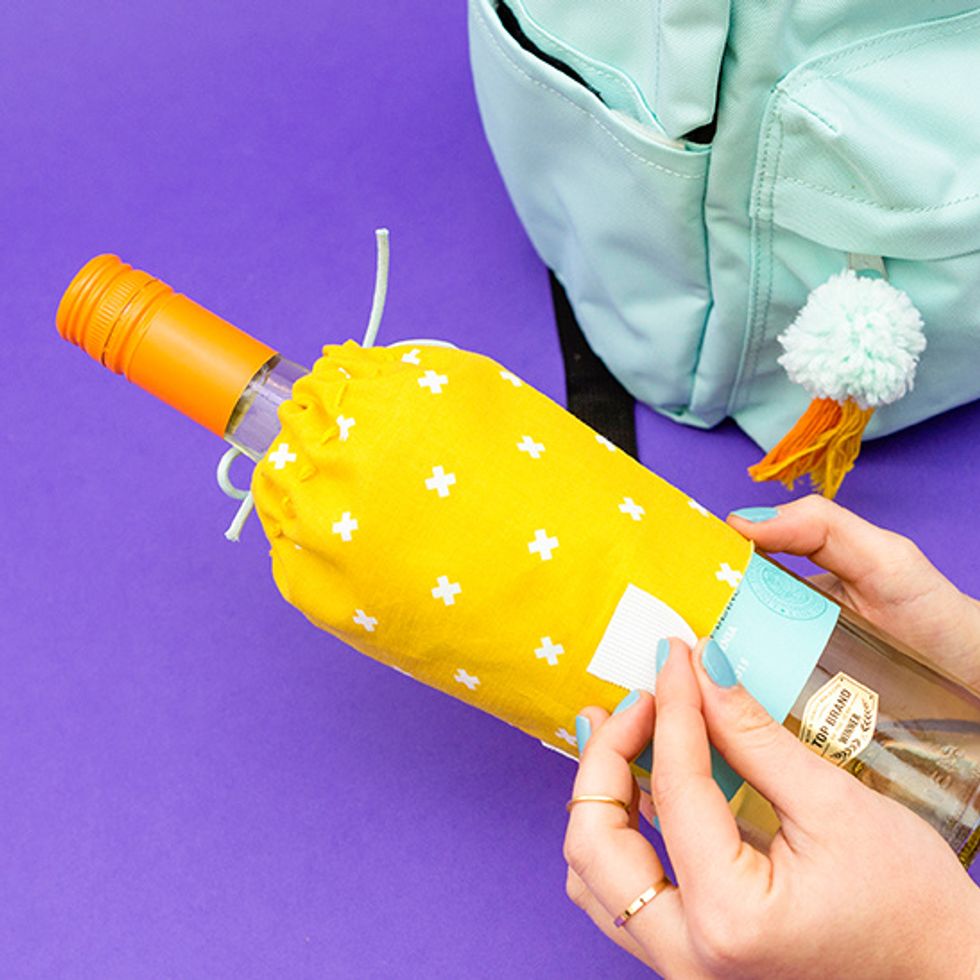
Separate 4 of your velcro squares. On the bottom side of the pouch, add one side of the velcro pieces to outside of the fabric.
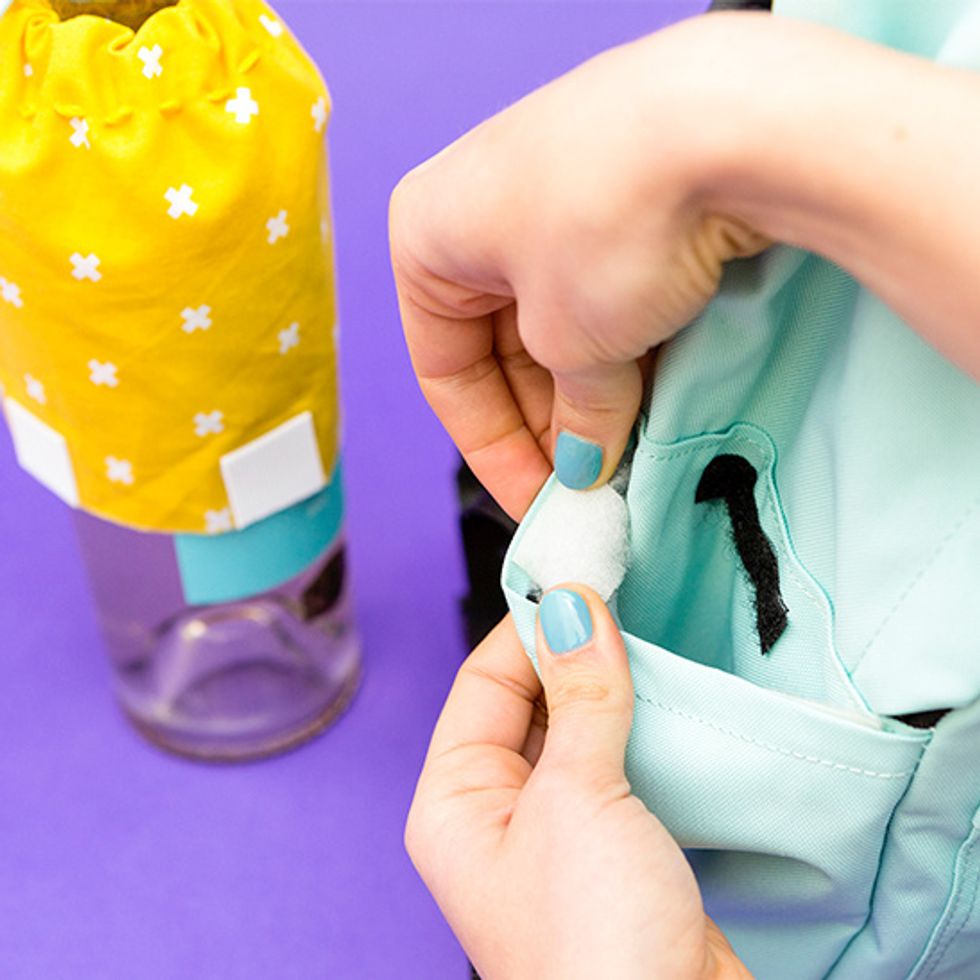
Adhere the other side of the velcro from the fabric on the inside of the backpack pocket. Make sure the velcro pieces up, so they will connect when you add the pouch to the pocket.

Connect the two pieces and you’ve got yourself a perfectly handy wine carrier. The best part is the pouch adds a personalized pop of color to an otherwise ordinary backpack!
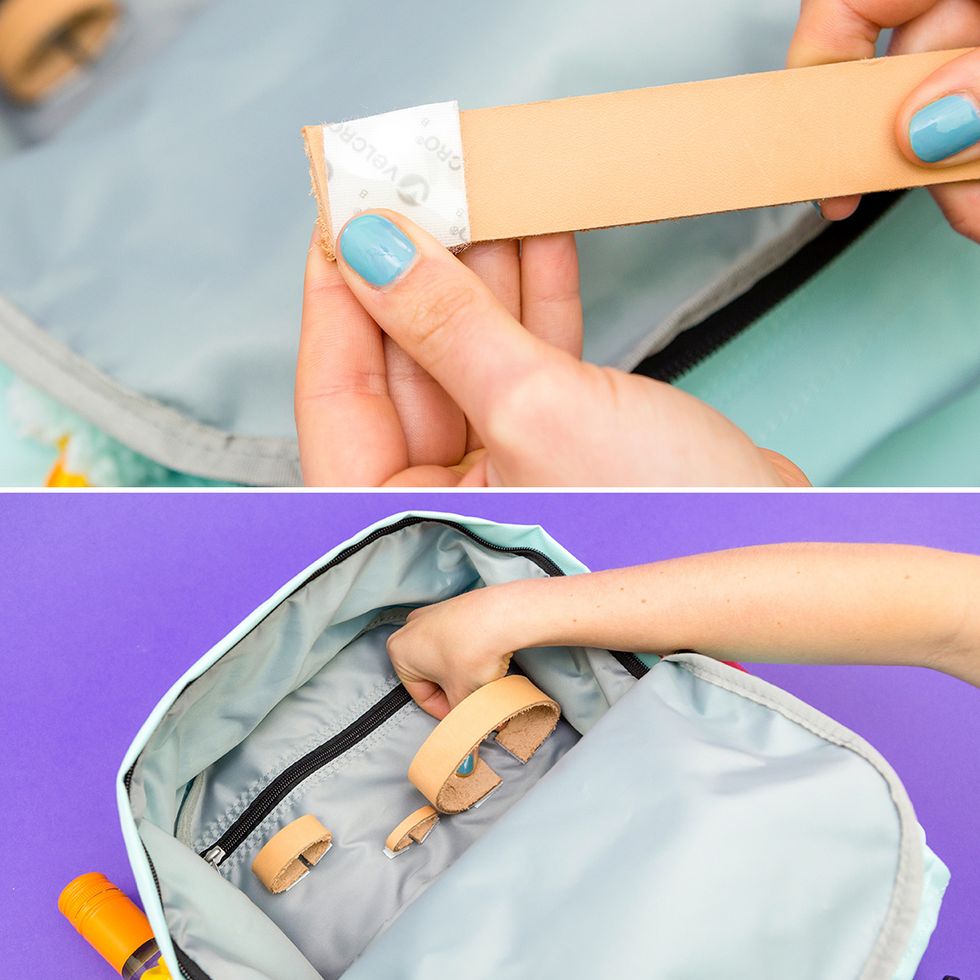
To create a storage space for all of your picnic needs, adhere one end of the velcro pieces to the ends of the leather strap and then place the other end of the velcro to the inside of the backpack.
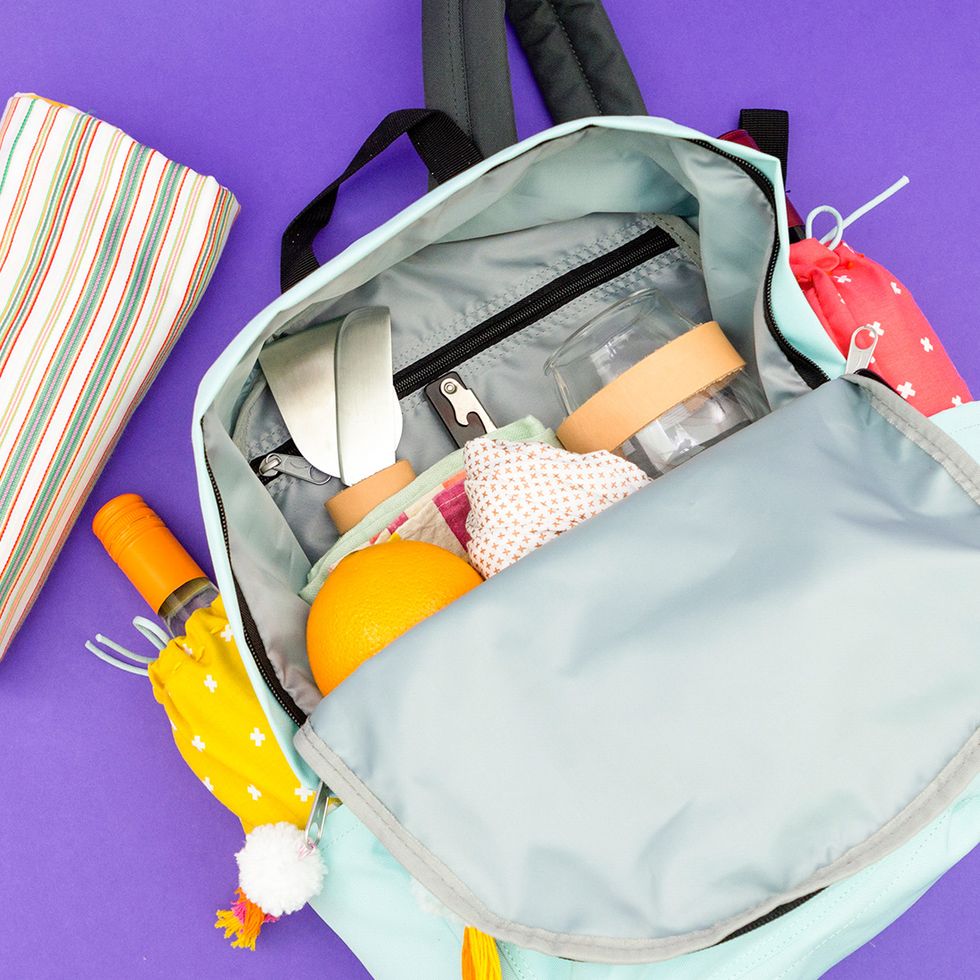
Connect together to create loops and straps for your wine glasses, bottle opener and other picnic tools you may need (cheese knife, perhaps?).

Fill up your backpack with your picnic favorites, tasty spread and get ready for your next adventure.

You never know where you might end up.
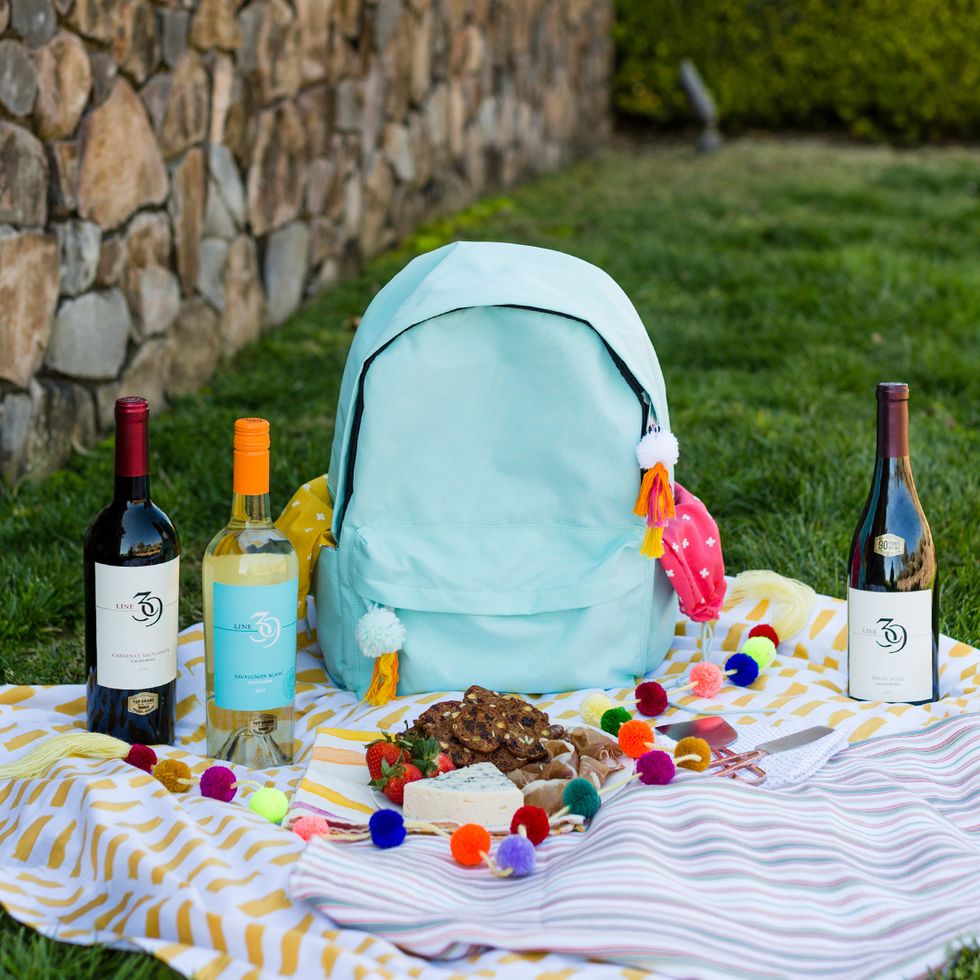
No picnic is complete without some tasty treats and your favorite bottle of wine. Not sure what the occasion calls for? Bring a bottle of red and white, so you have a little of something for everyone.

Now that’s something to cheers about! Make sure to check out the full post for how to DIY your own wine backpack: http://go.brit.co/2nejT9m