The Conversation (0)
Sign Up
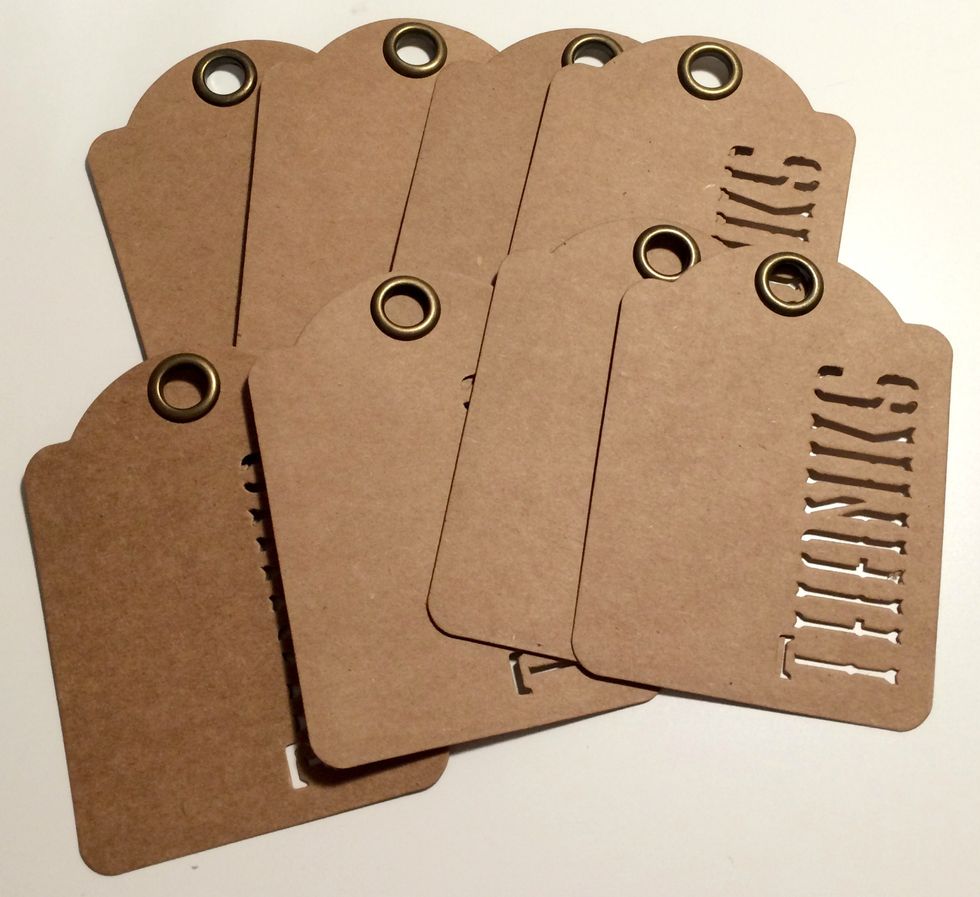
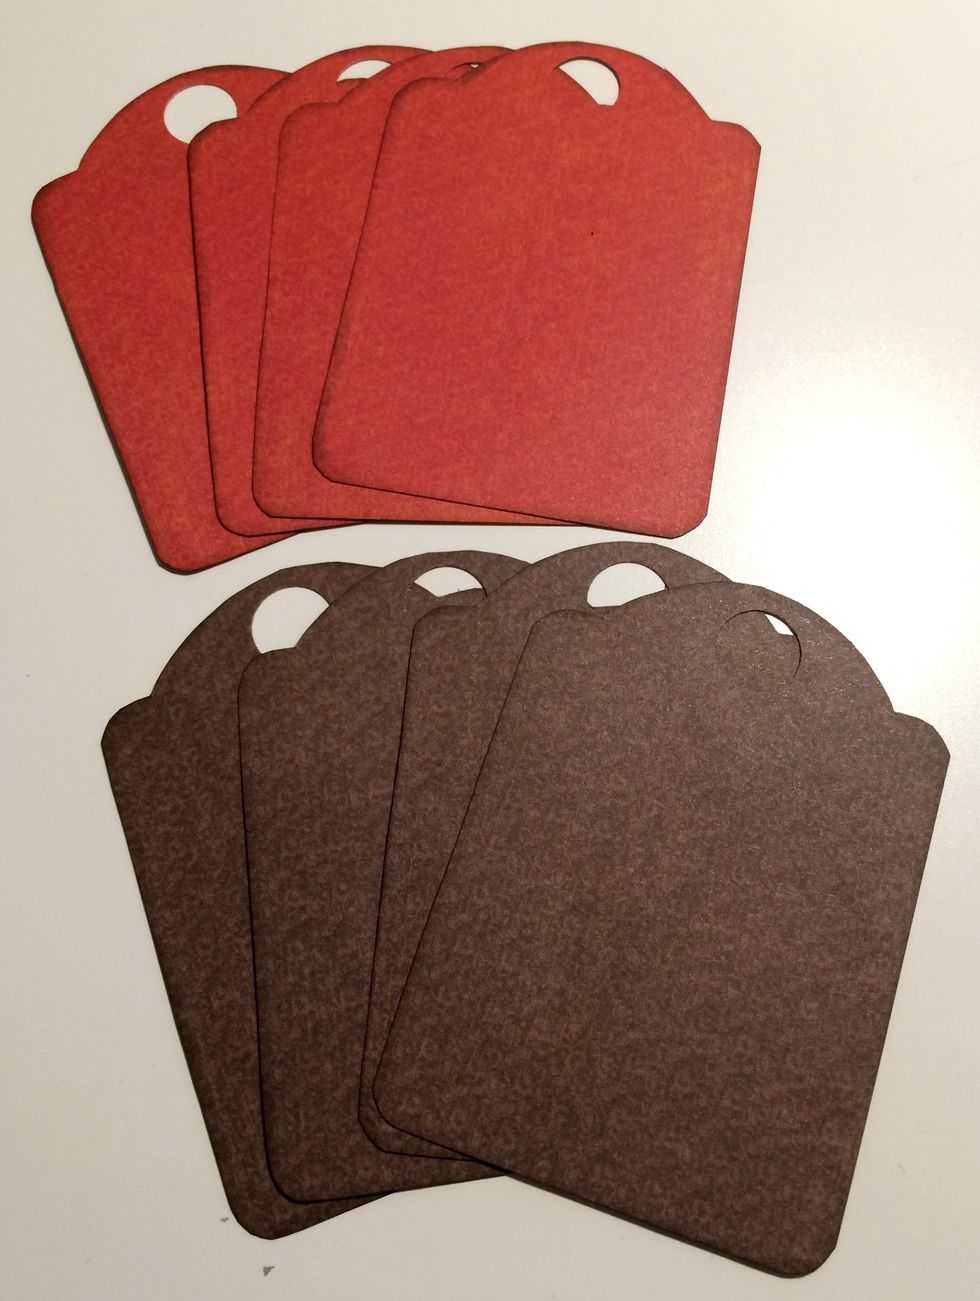
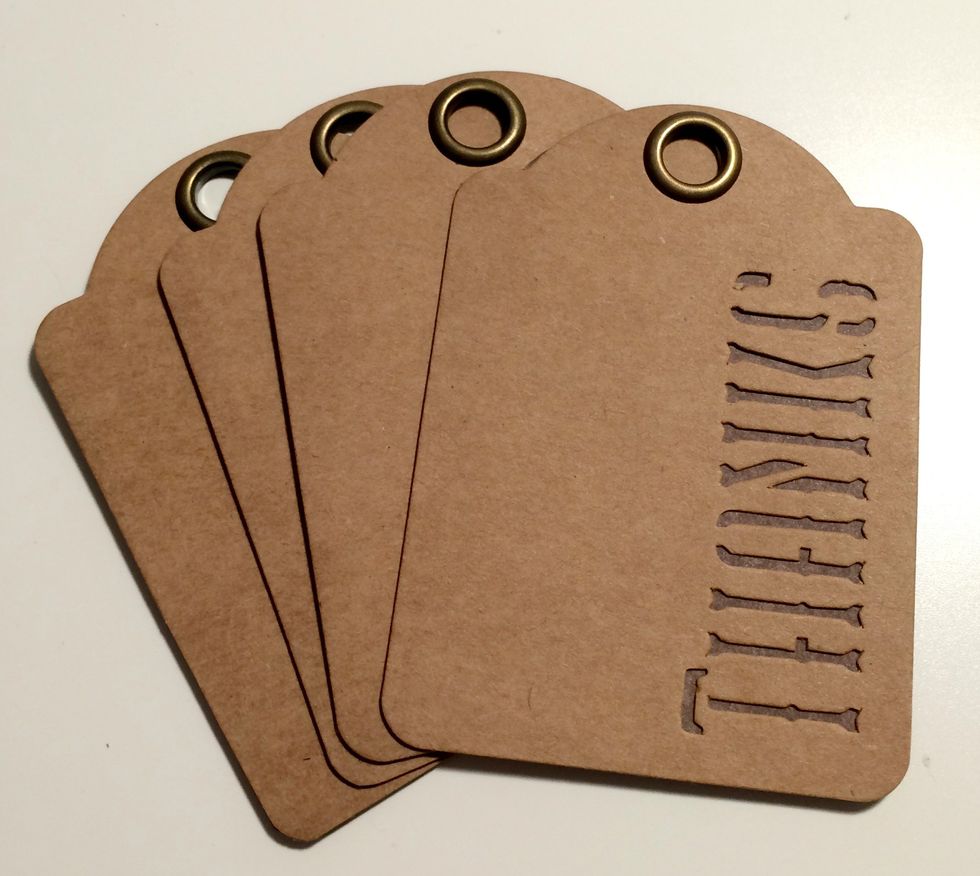
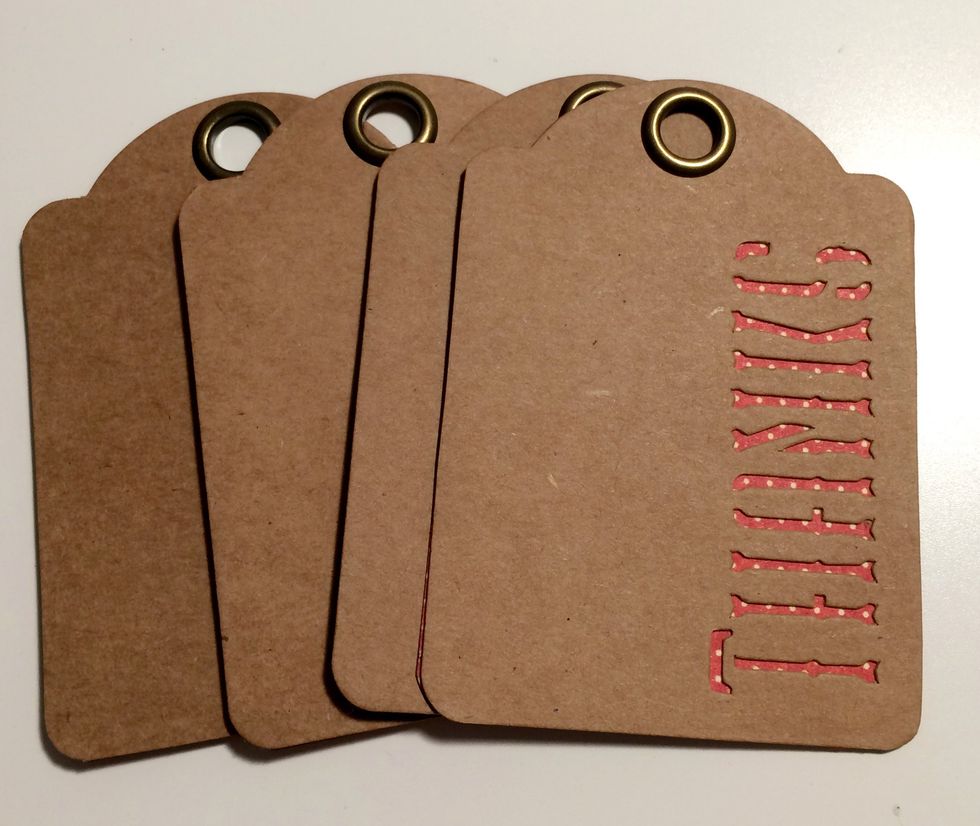
To start, you'll need to pull out 8 tags from the Kraft "Thanks" ATC Package.
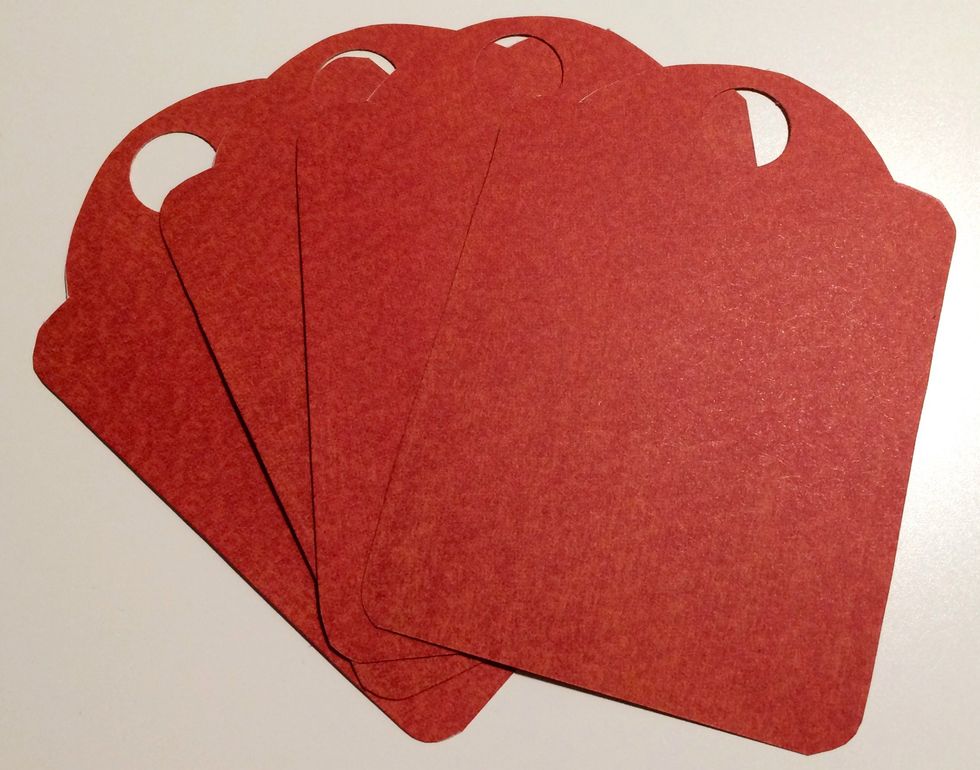
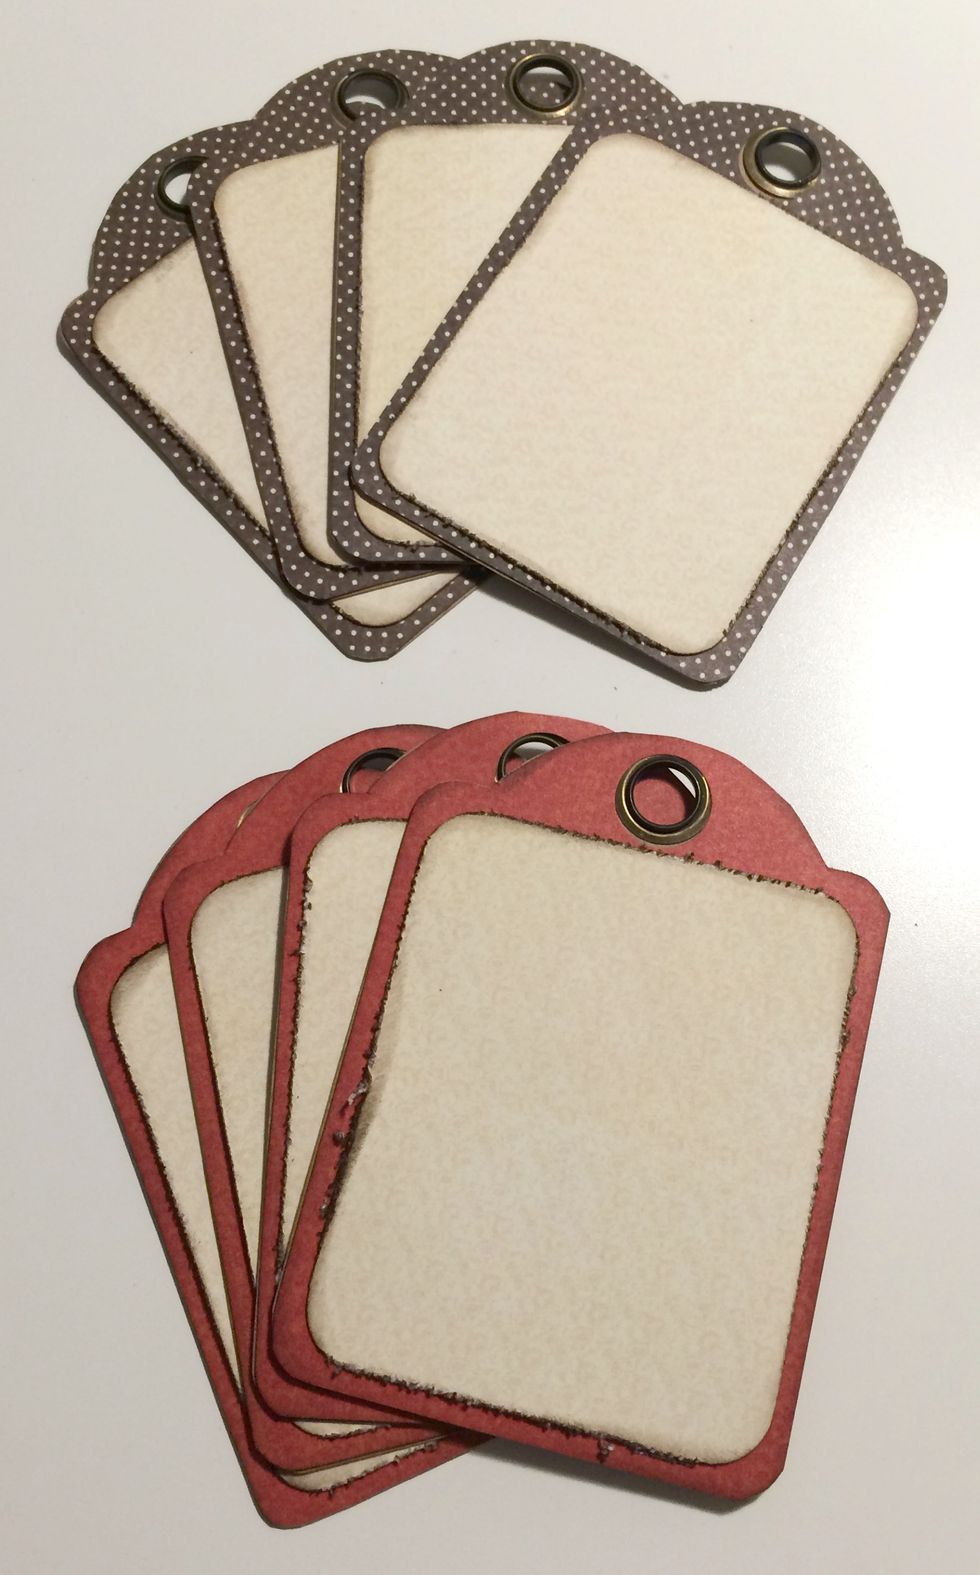
From the 6x6 pad, pull out 2 red dot papers. Trace a Thanks tag 4 times on the red dot paper. Cut each tag out. With a 1/2" circle punch, punch a hole at the top of each tag so the eyelet can fit.
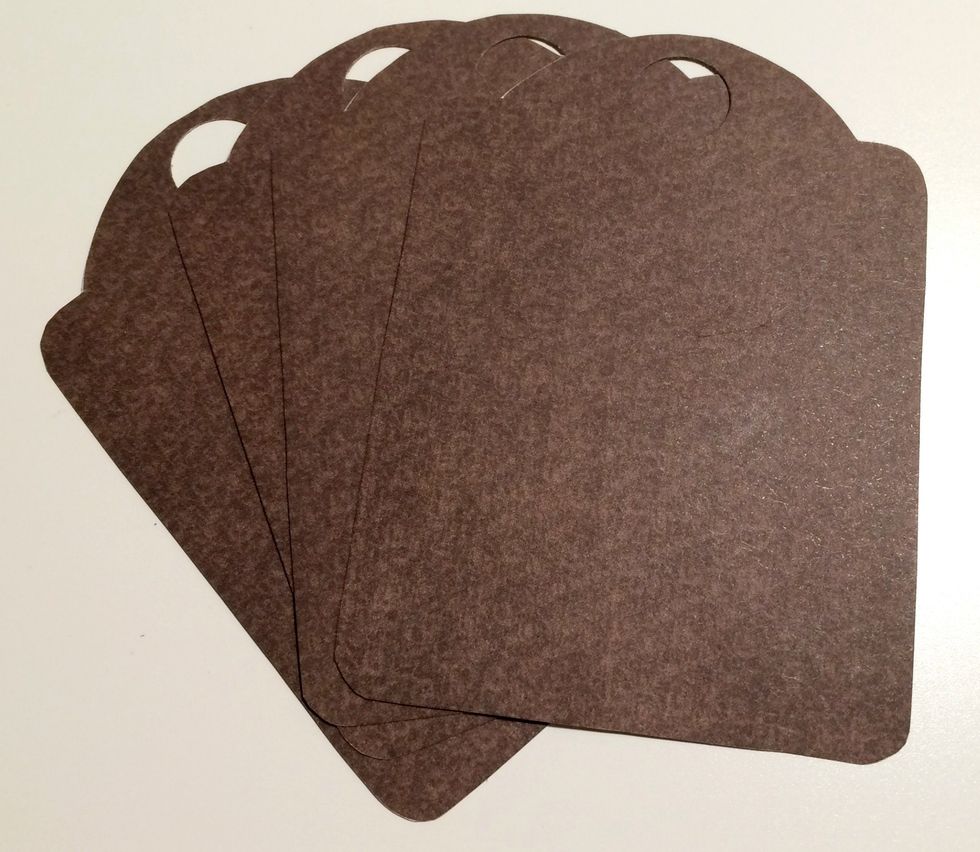
From the 6x6 pad, pull out 2 brown dot papers. Trace Thanks tag 4 times on the brown dot paper. Cut each tag out. With a 1/2" circle punch, punch a hole at the top of each tag so the eyelet can fit.
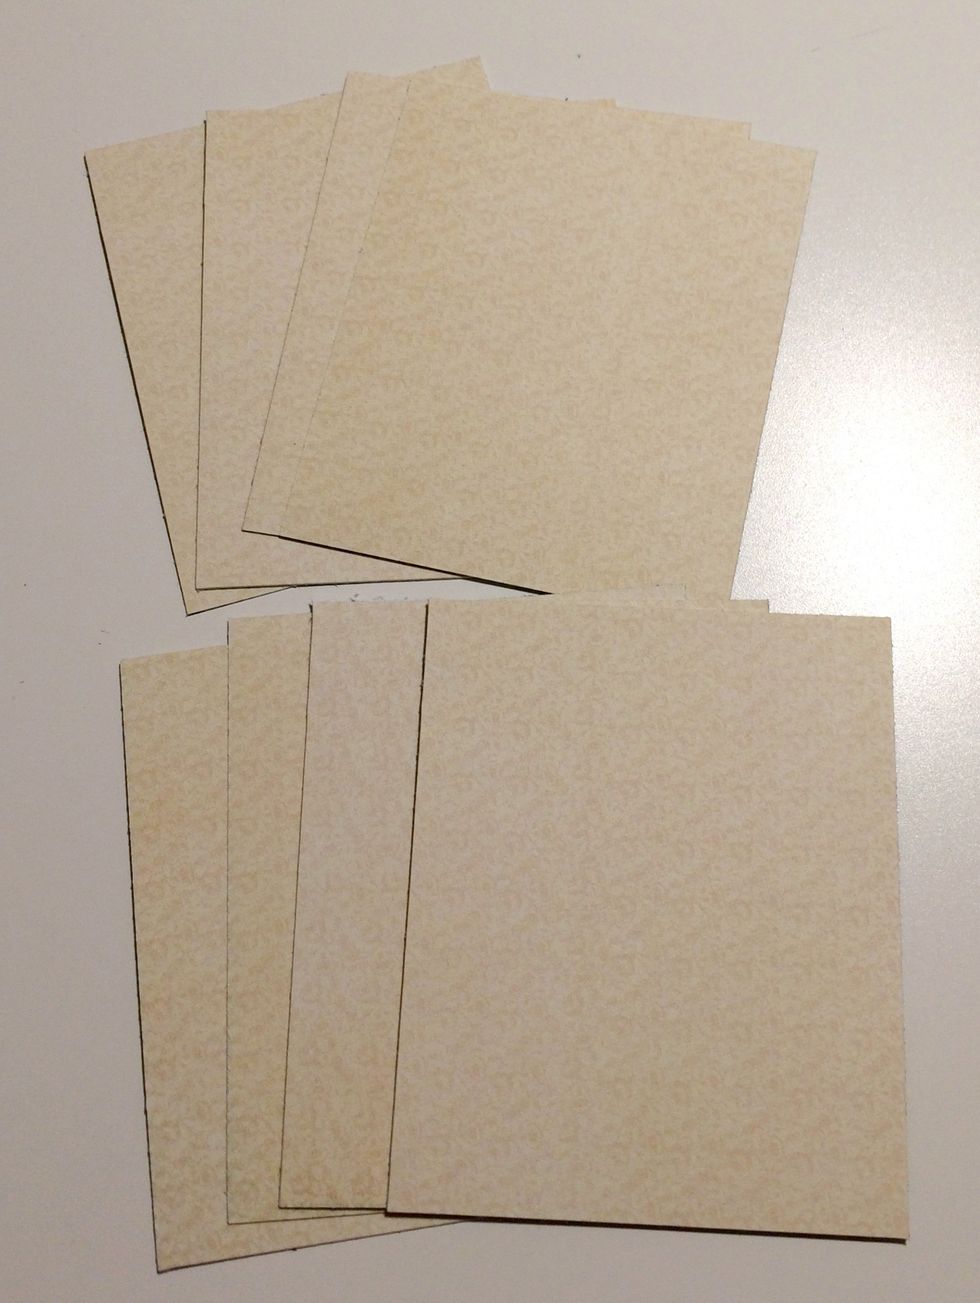
From the 6x6 paper pad, pull out two cream papers. From the cream papers, cut 8 pieces that measure 2 1/4" x 2 3/4".
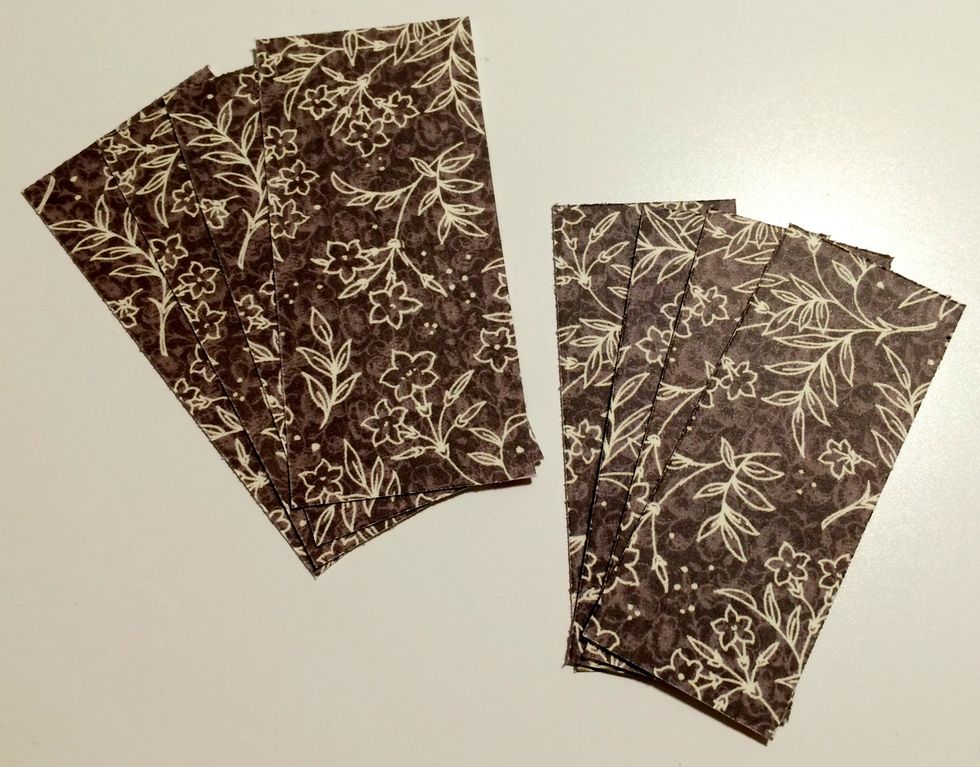
From the brown floral side of the November Montage paper, cut 4 pieces that measure 1 1/4" x 2 3/4", set aside. From the same side of paper, cut 4 pieces that measure 7/8" x 2 1/2", set aside.
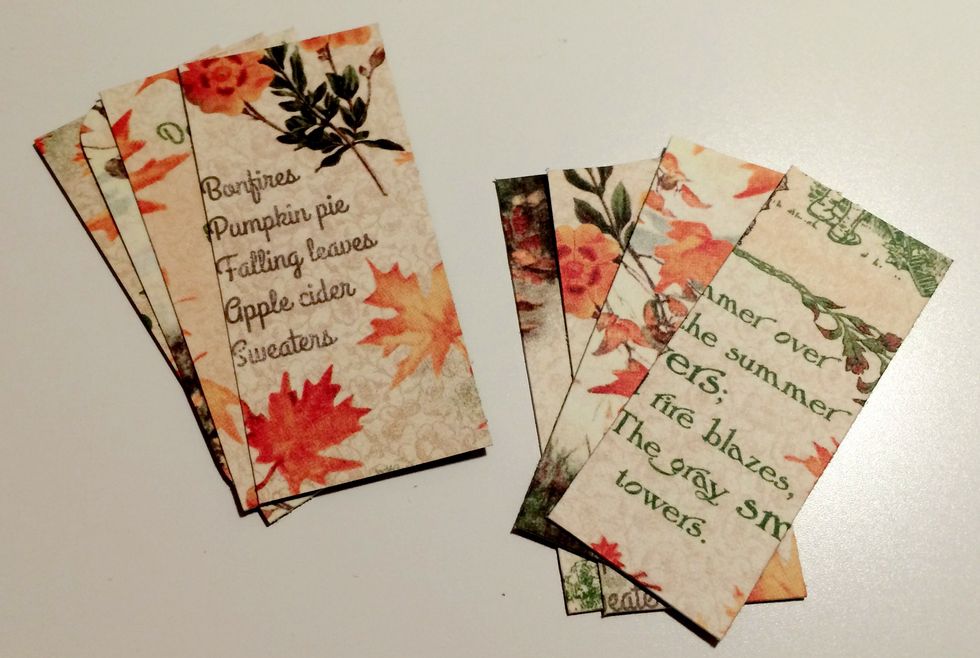
From the fall side of the November Montage paper, cut 4 pieces that measure 1 1/4" x 2 3/4", set aside. From the same side of paper, cut 4 pieces that measure 7/8" x 2 1/2", set aside.
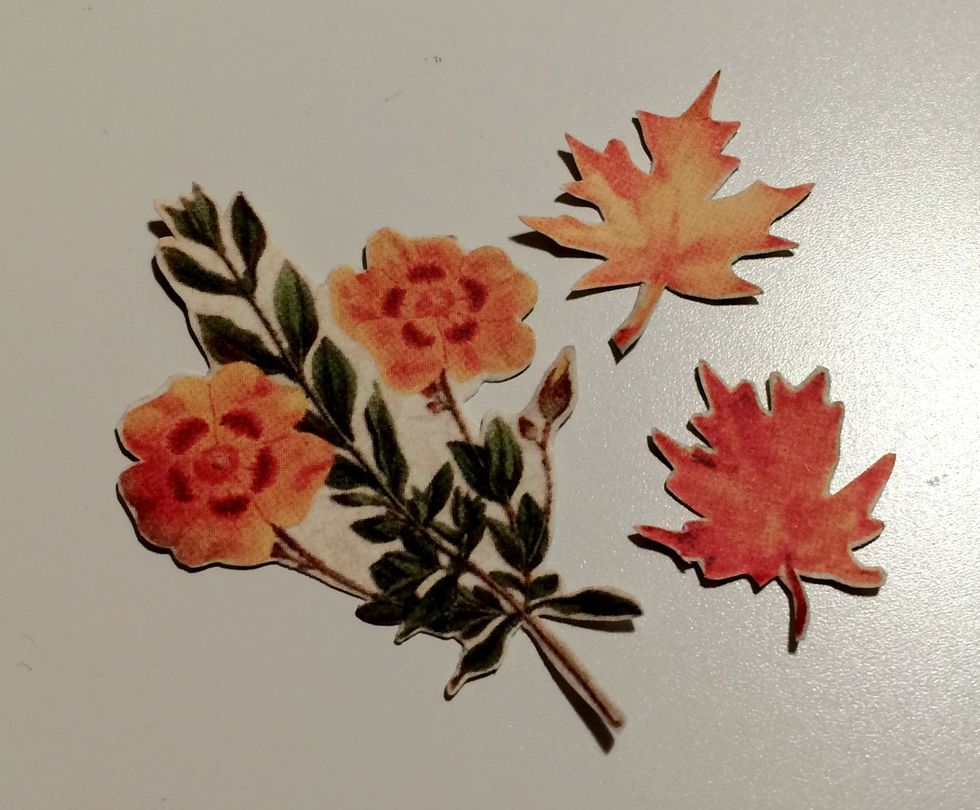
From the leftover November montage paper, fussy cut 2 leaves and one floral bunch from the fall side.
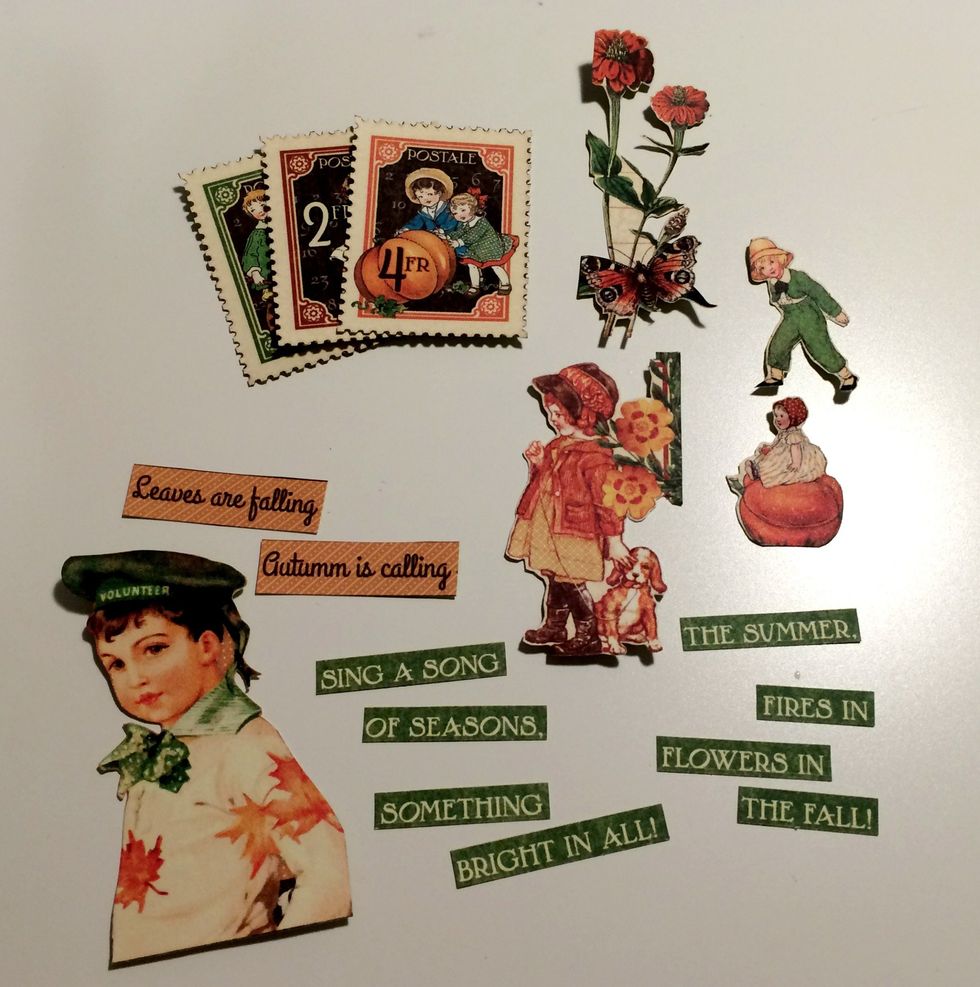
From the November Collective paper, fussy cut: 3 stamps, 2 fall sayings, little boy, little girl & dog, little boy & girl with pumpkin, floral element with butterfly & cut apart the sentiment border.
Ink the edges of the cut out paper tags using a blending tool and Walnut Stain Distress Ink.
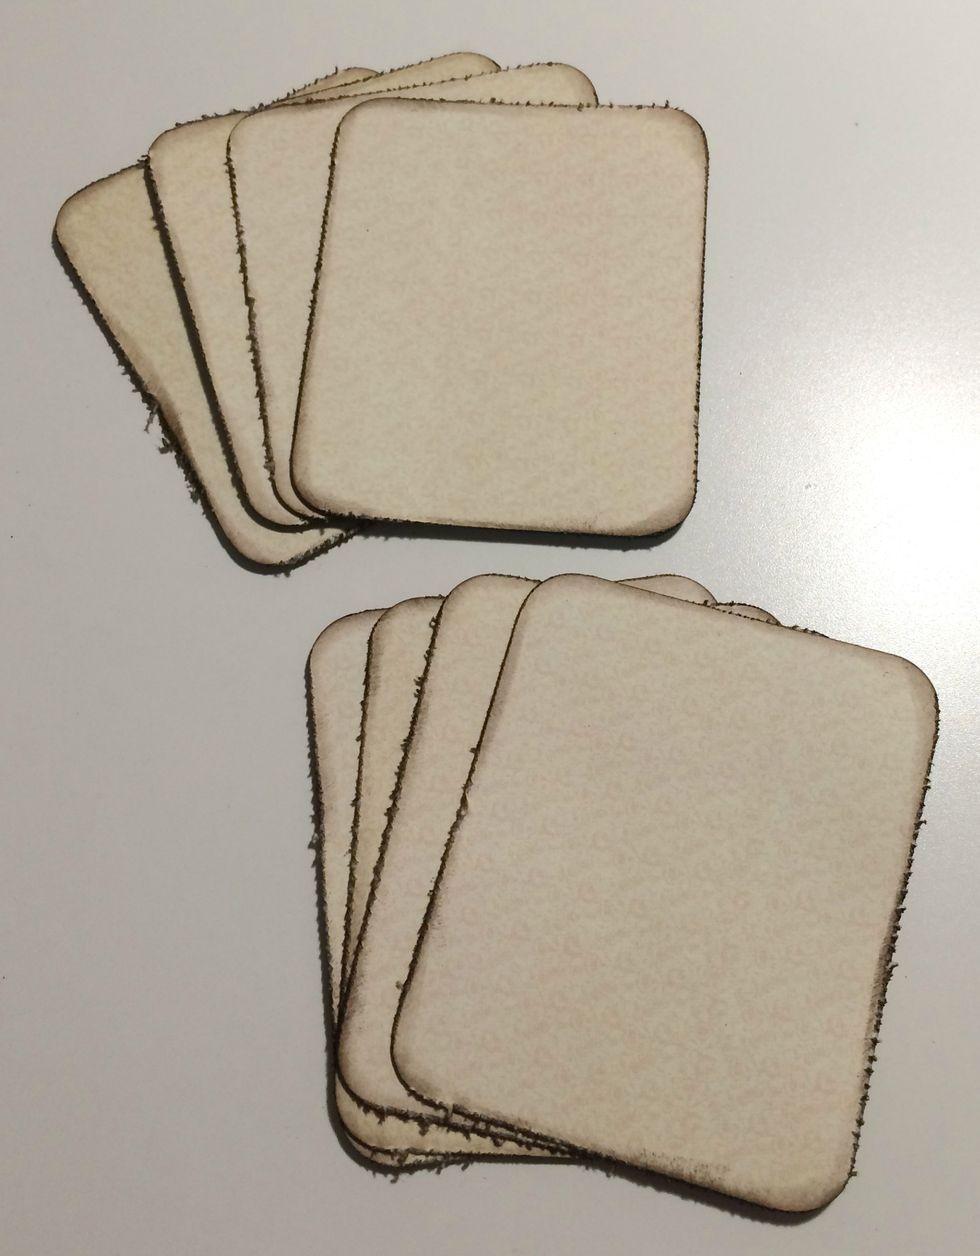
Round all four corners of the cream pieces. Once the corners have been rounded, edge distress them. With a blending tool ink the edges of the paper using Walnut Stain Distress Ink.
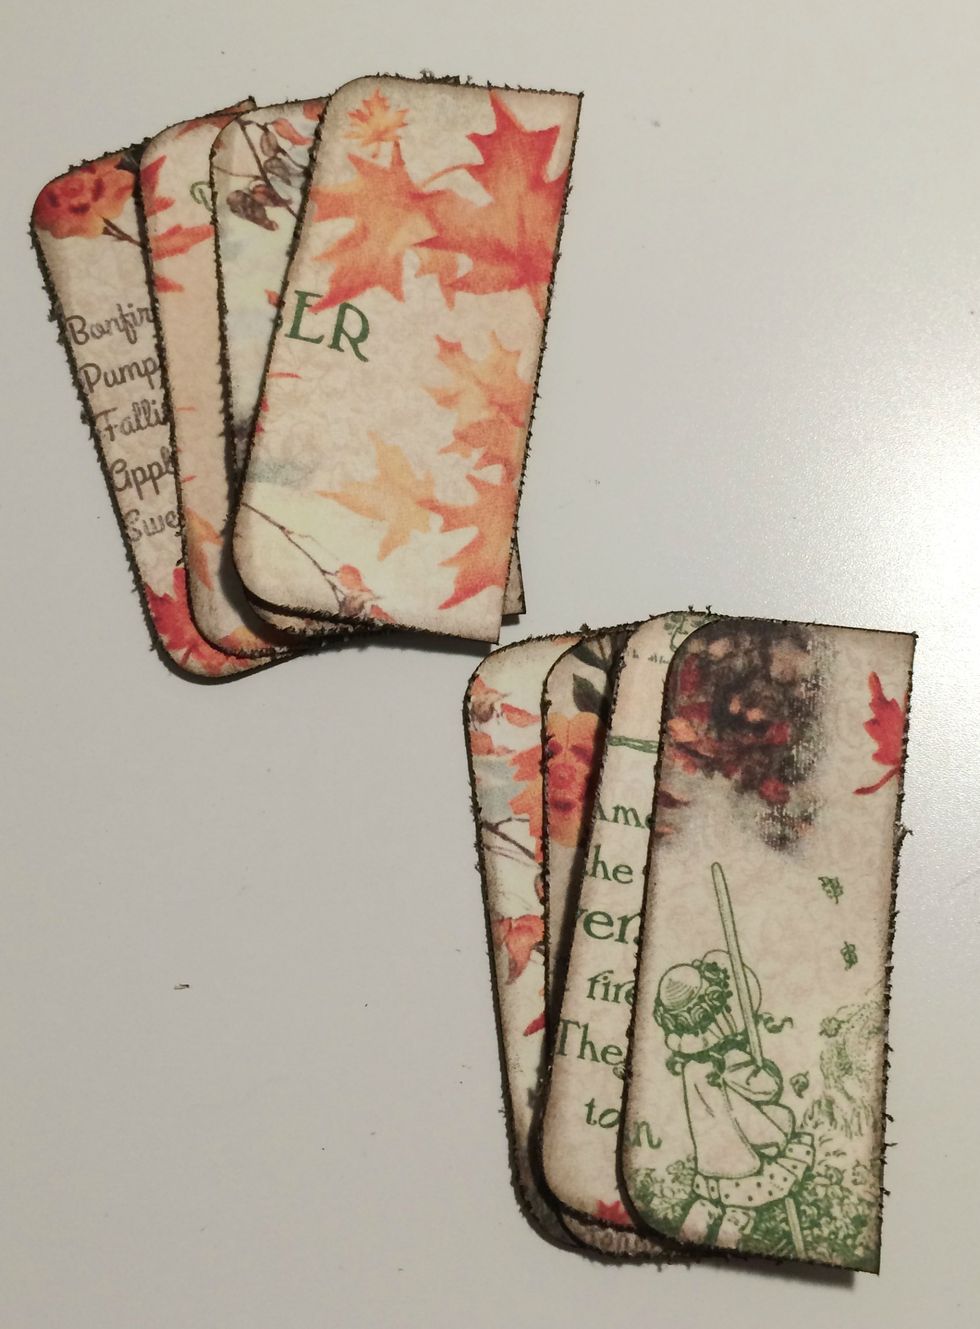
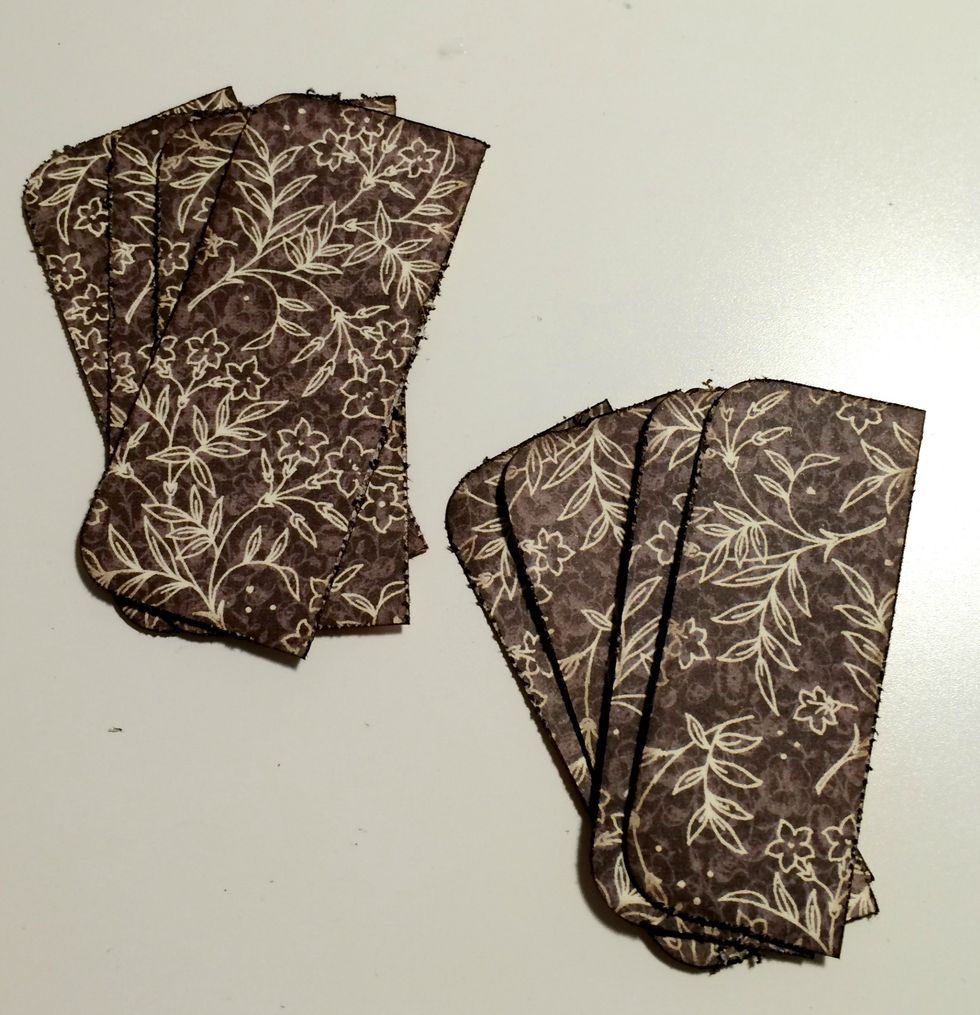
Round the top left & bottom right corners on all 8 pieces of cut floral paper. After the corners are rounded, edge distress the edges. Take a blending tool & Walnut Stain Distress Ink, ink the edges.

With a blending tool and Walnut Stain Distress Ink, ink all the edges of the fussy cut images.
Adhere the plain brown side of the cut paper tags to the back of four thanks tags. You'll have the brown dot side of the paper showing on the back of the Thanks tag.
Adhere the red dot side of the cut paper tags to the back of four thanks tags. You'll have the plain red side of the paper showing on the back of the Thanks tag.
To add a writing spot on the back of the thanks tag, adhere one cream paper square to the back of each of the tags.
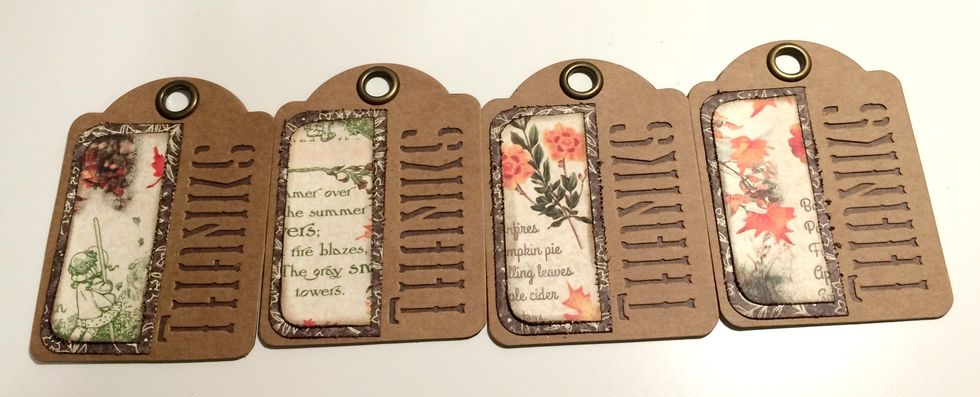
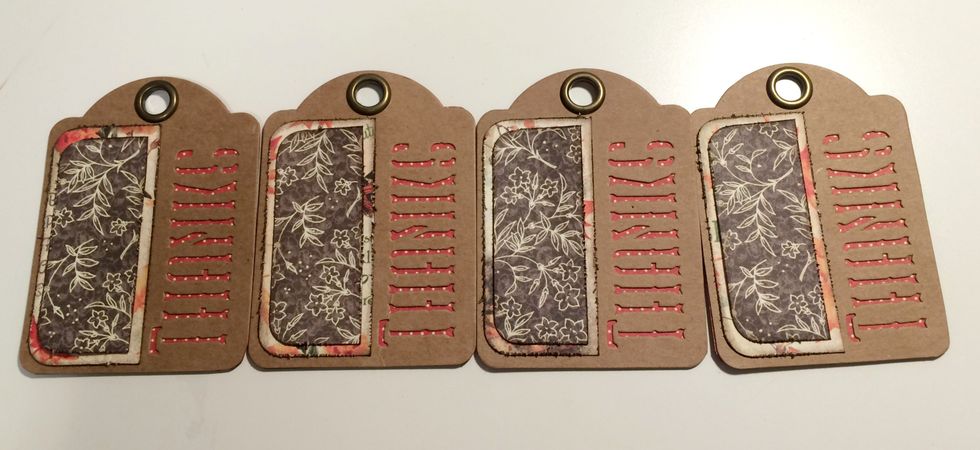
Grab the 4 tags with red dots showing through the thanks. Adhere the large fall piece to the left of thanks on each tag. Adhere the small brown floral piece overtop of fall paper piece on each tag.
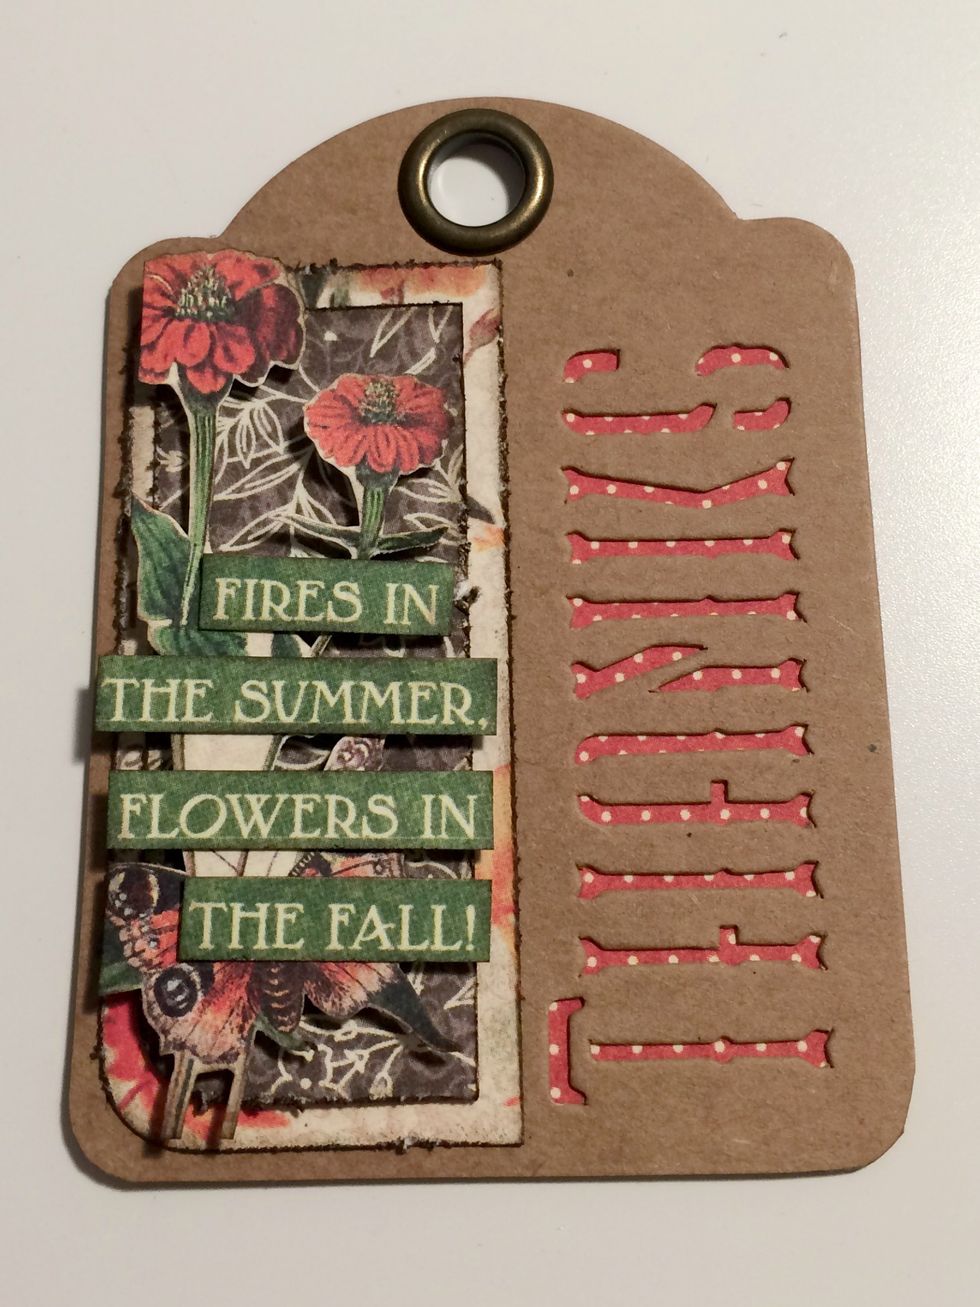
Start with a red dot thanks tag. Foam square the flower with butterfly to the left of the fall paper. Adhere the "Fires in the Summer" quote overtop of the flower and butterfly.

With a second red dot thanks tag, foam square a stamp on an angle overtop of brown floral piece. Roll the top left corner down. To finish, adhere "Autumn is" to the bottom left of the stamp.
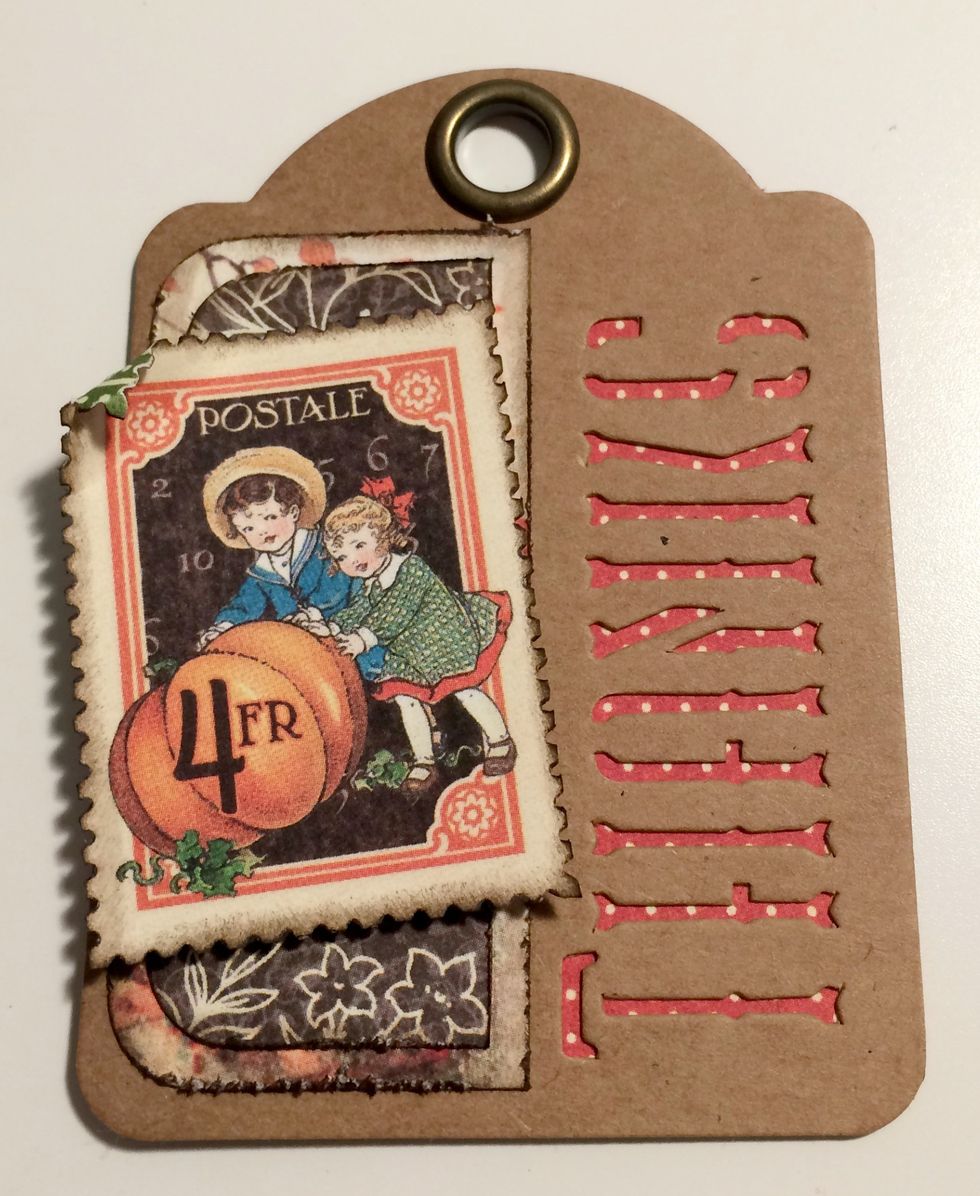
With a third red dot thanks tag, foam square a stamp on an angle overtop of brown floral piece. Roll the top left corner down.
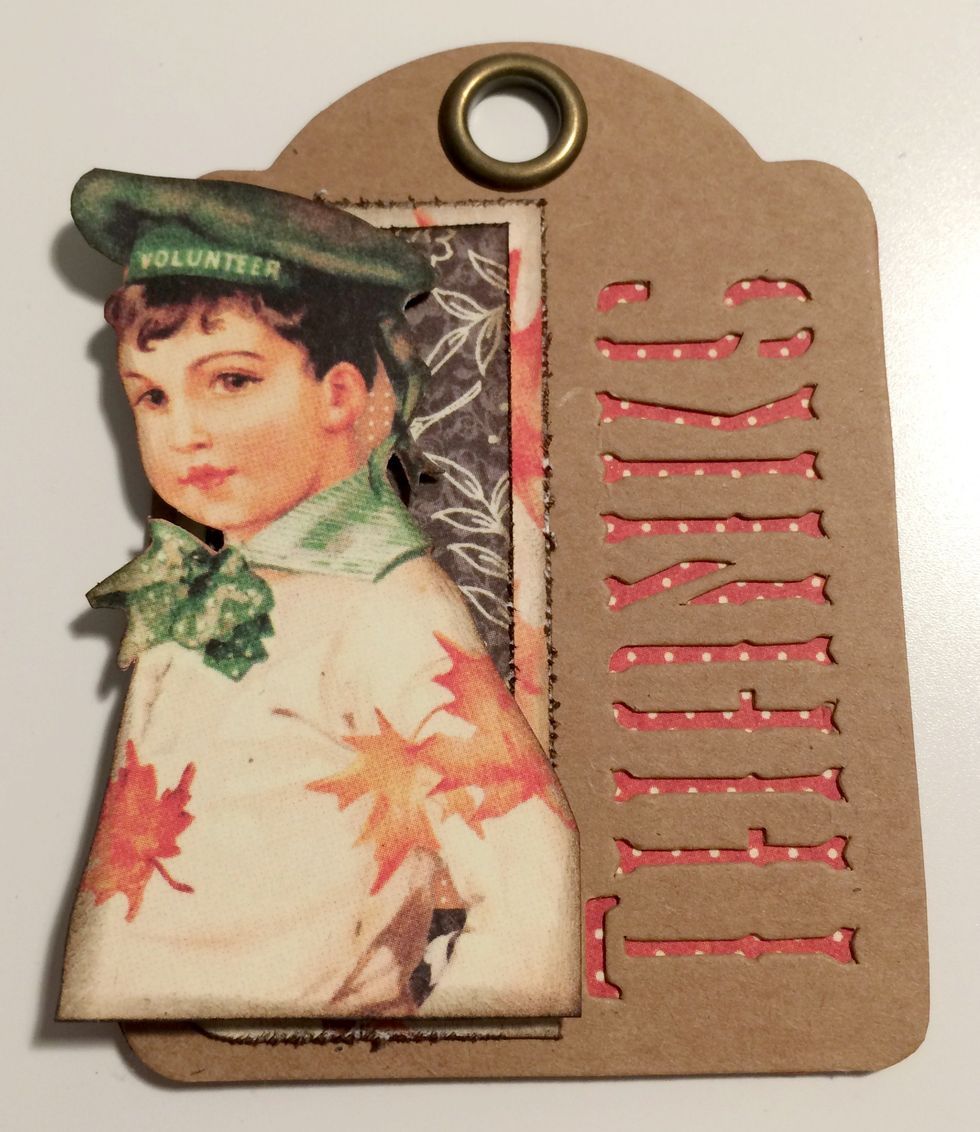
With a fourth red dot thanks tag, foam square the boy overtop of the brown floral piece.
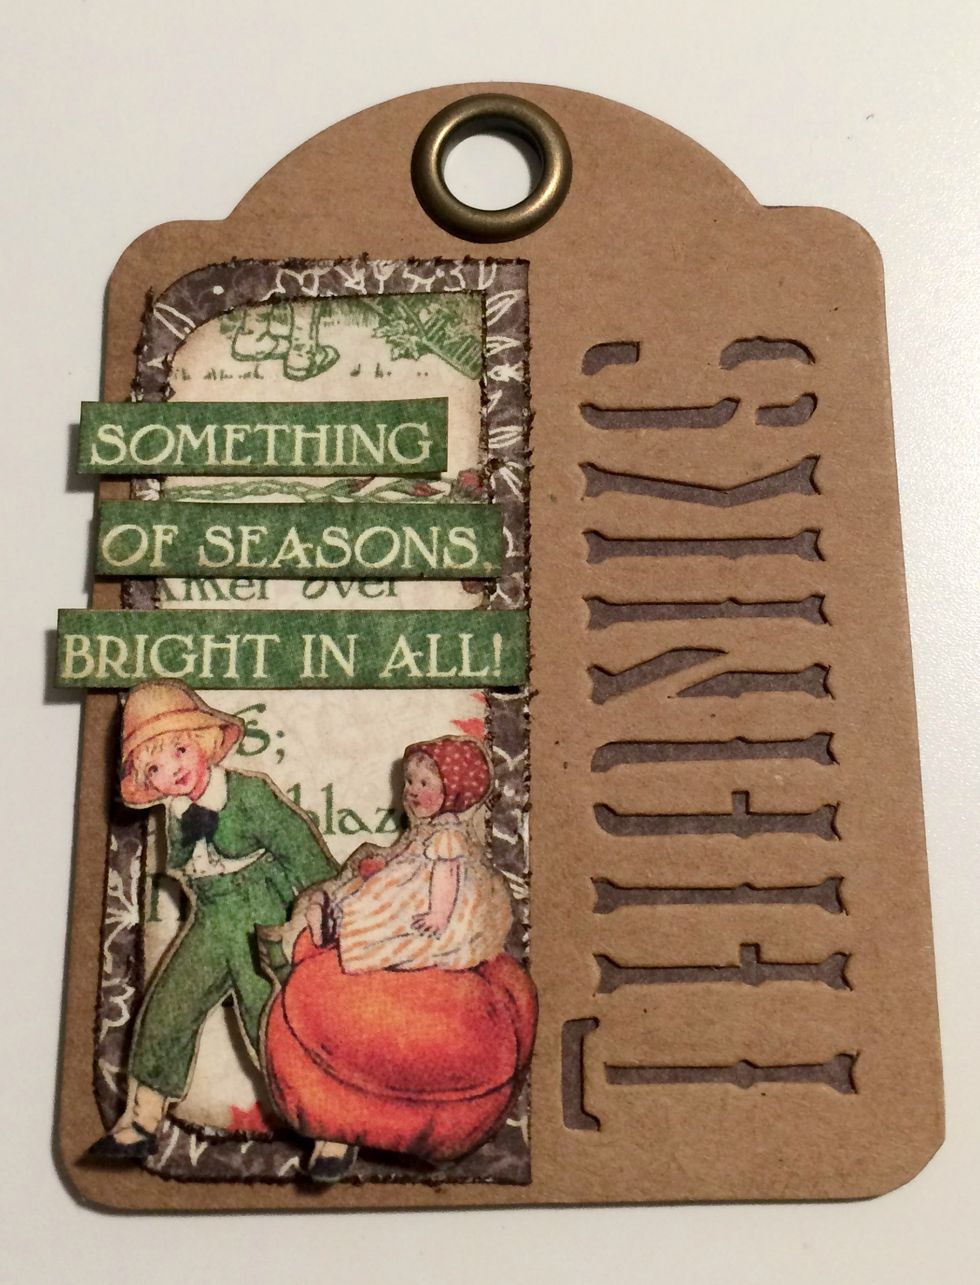
Start with a brown thanks tag, foam square the boy & pumpkin to the bottom of the fall paper. To finish, adhere "Something of the Season" saying above the boy & pumpkin.

With a second brown thanks tag, foam square the girl with dog overtop of the middle of the fall paper.
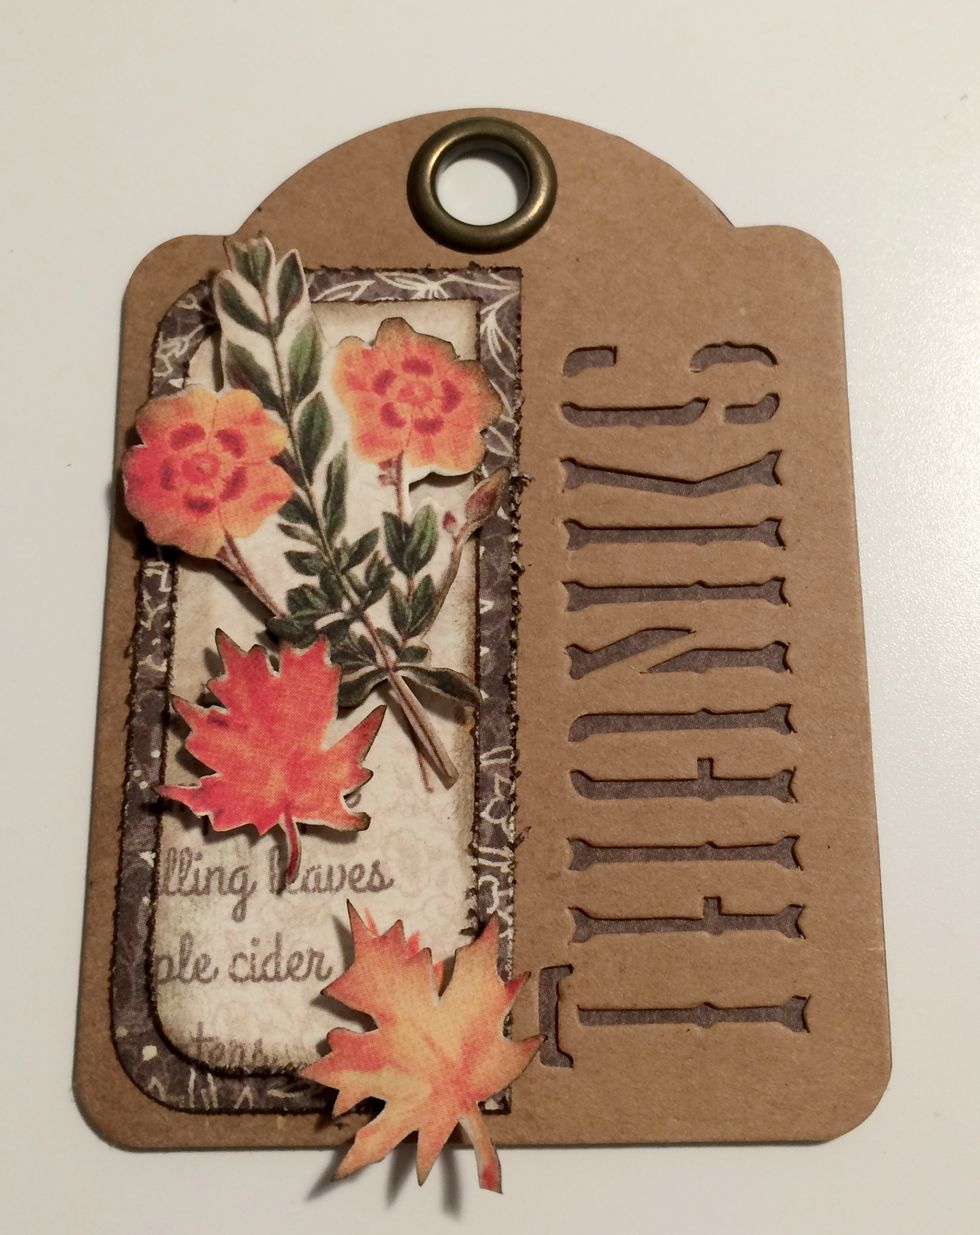
With a third brown thanks tag, foam square the floral piece to the top of the fall paper. Foam square the two leaves randomly overtop of the fall paper.
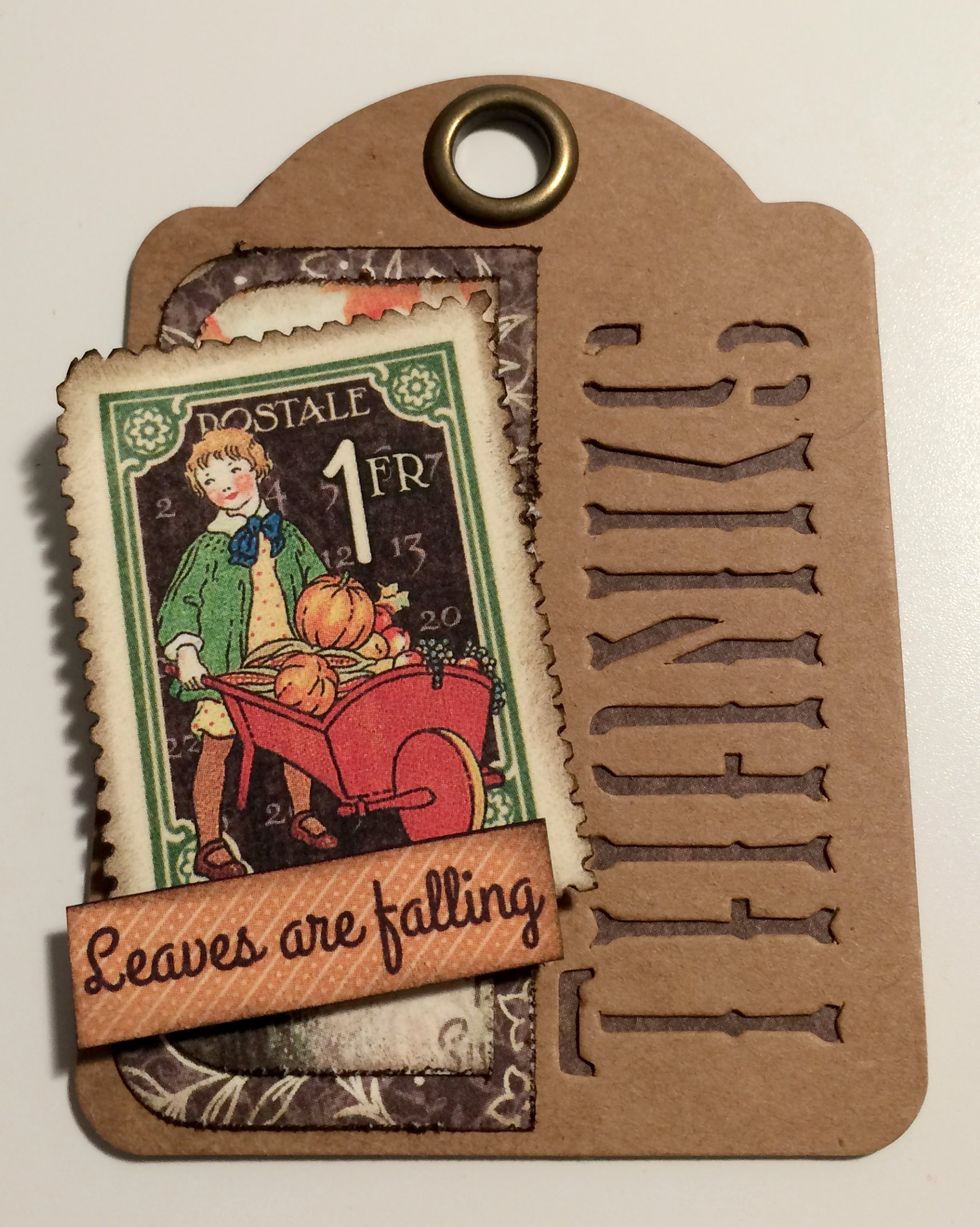
With a fourth brown thanks tag, foam square a stamp on an angle overtop of brown floral piece. Roll the top left corner down. To finish, adhere "Leaves are" to the bottom left of the stamp.
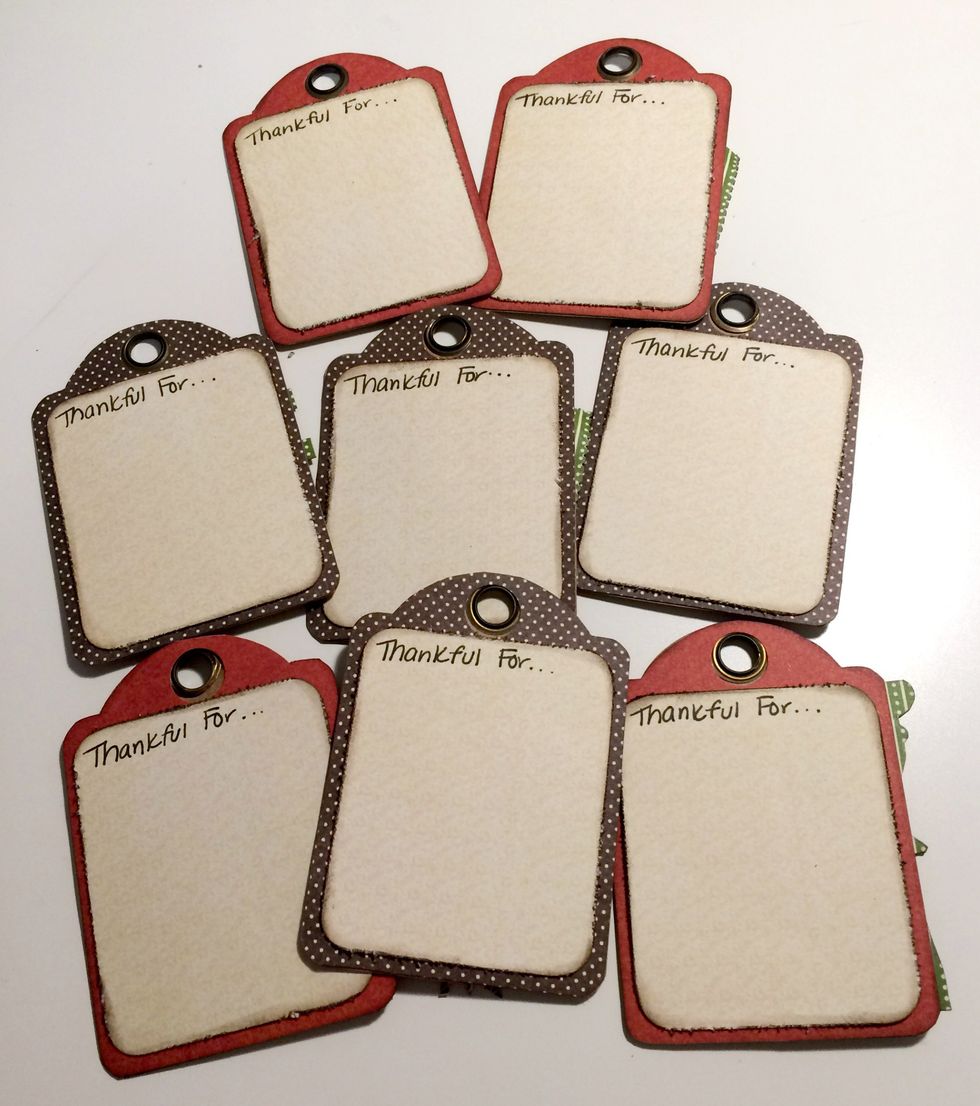
To finish the back of the tags, use a black journal pen to write "Thankful For" on the cream paper.
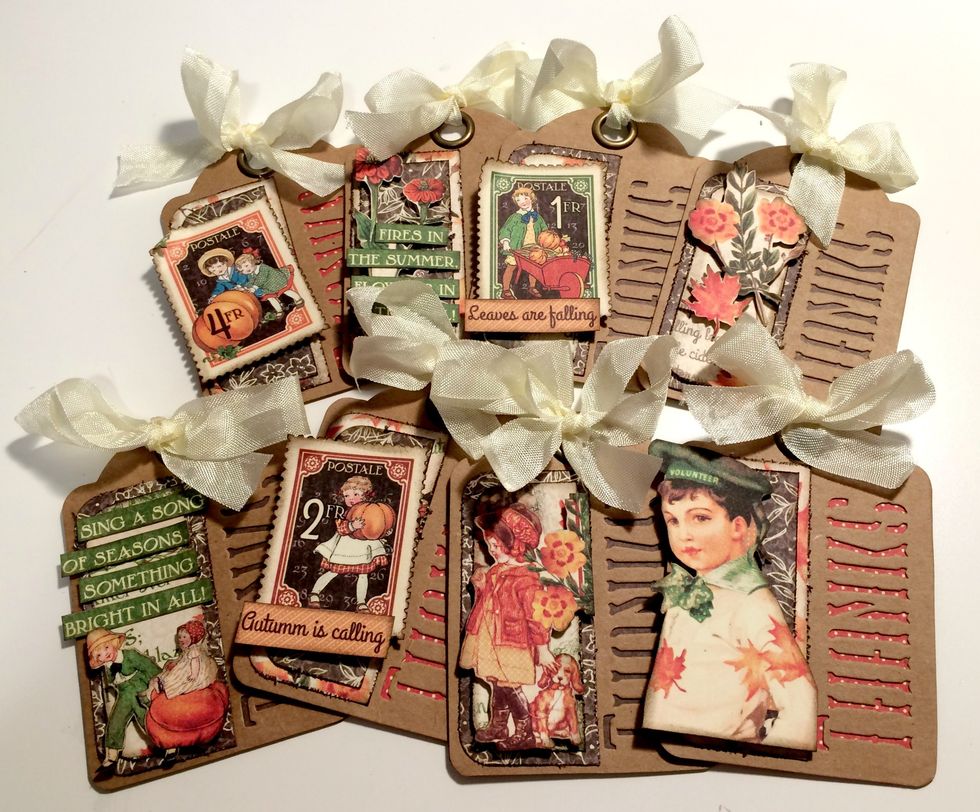
To finish the eight tags, tie a cream bow at the top of each tag. Once you've finished adding the cream ribbon to the top of the tags, your tags are complete.