The Conversation (0)
Sign Up

Use the stencil to draw a circle. Make sure to put a dot in the center.
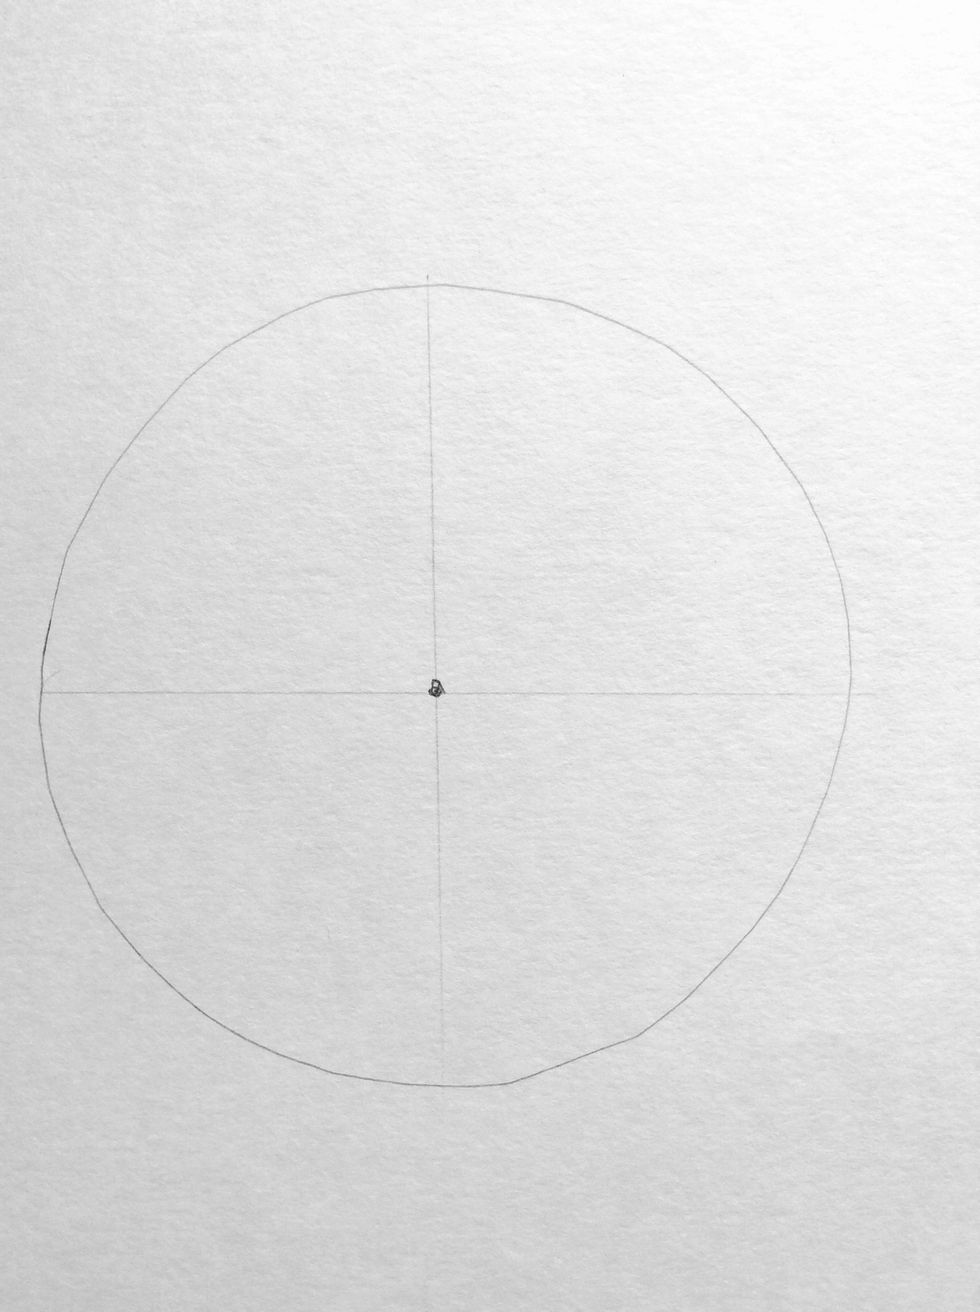
Use a ruler to divide the circle into 4 equal parts. DRAW VERY LIGHTLY!!
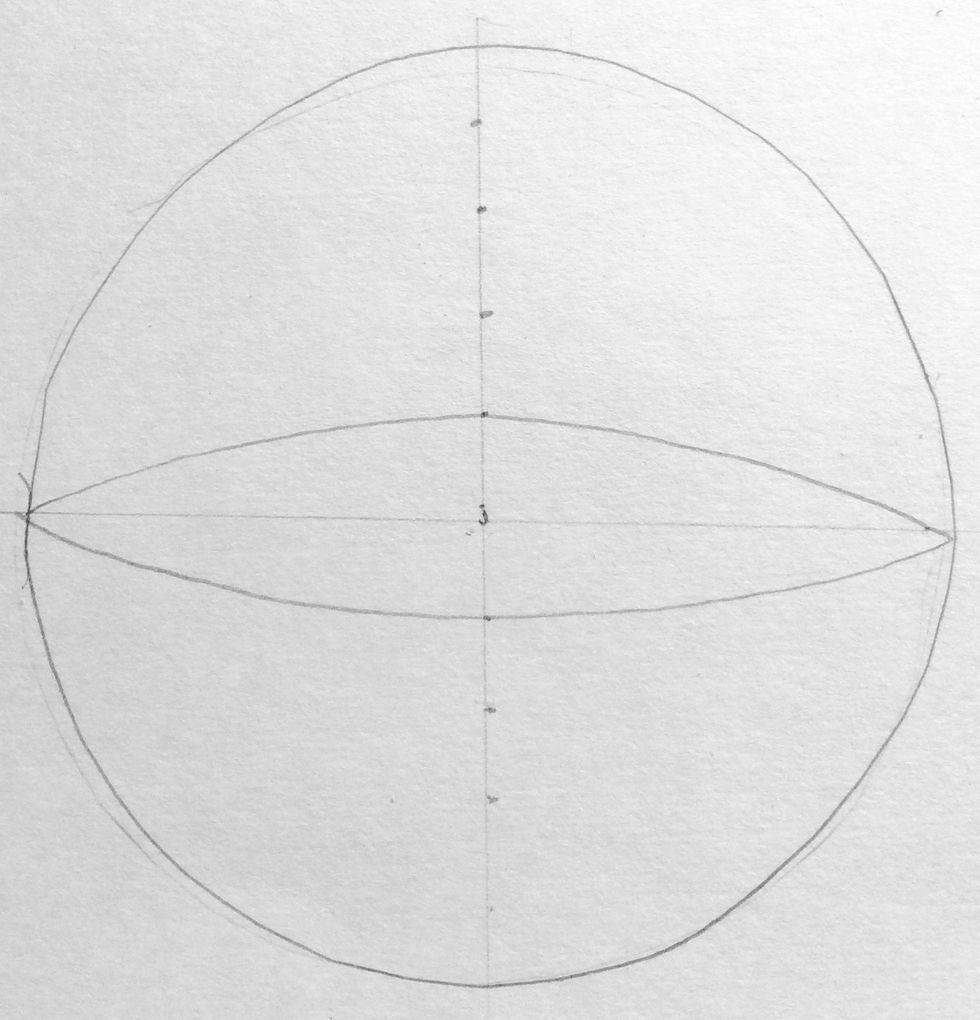
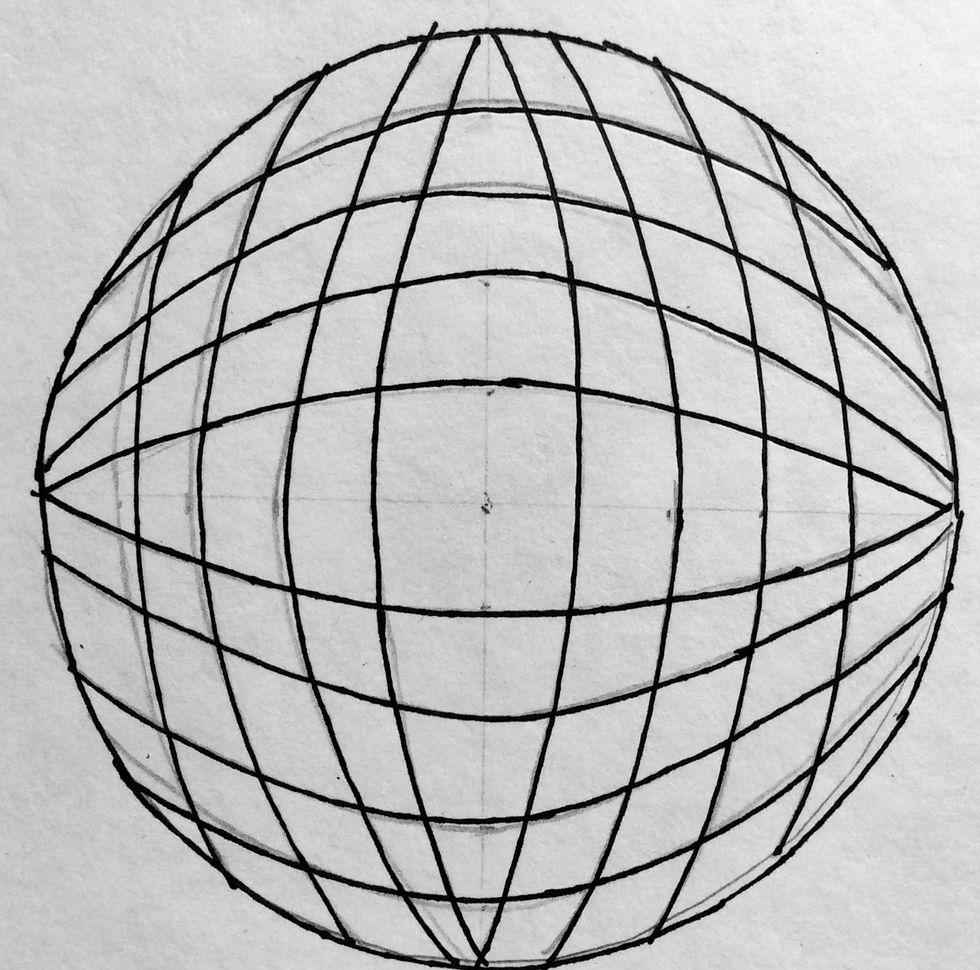
Mark approximately 4 dots on the top half of the circle and 4 on the bottom half of the circle. Use the dots to help you create an arching line above and below the center line.
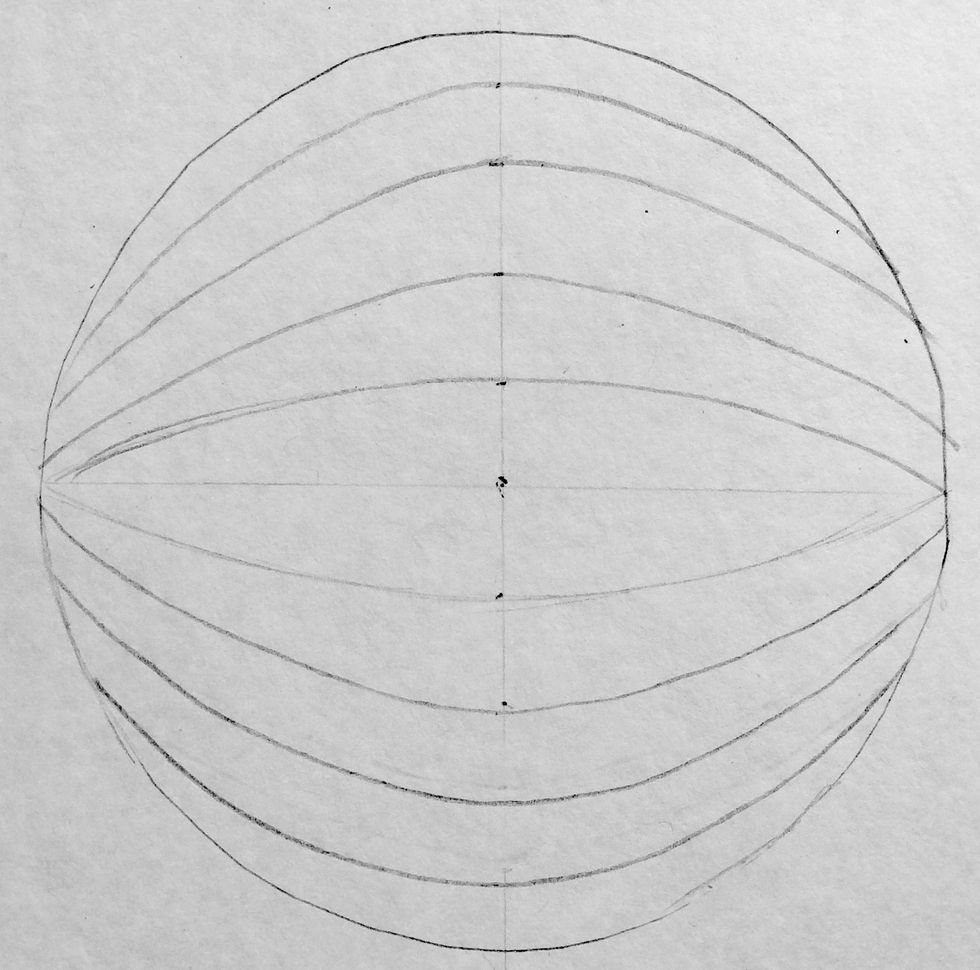
Add the rest of the arching lines above and below the center line.
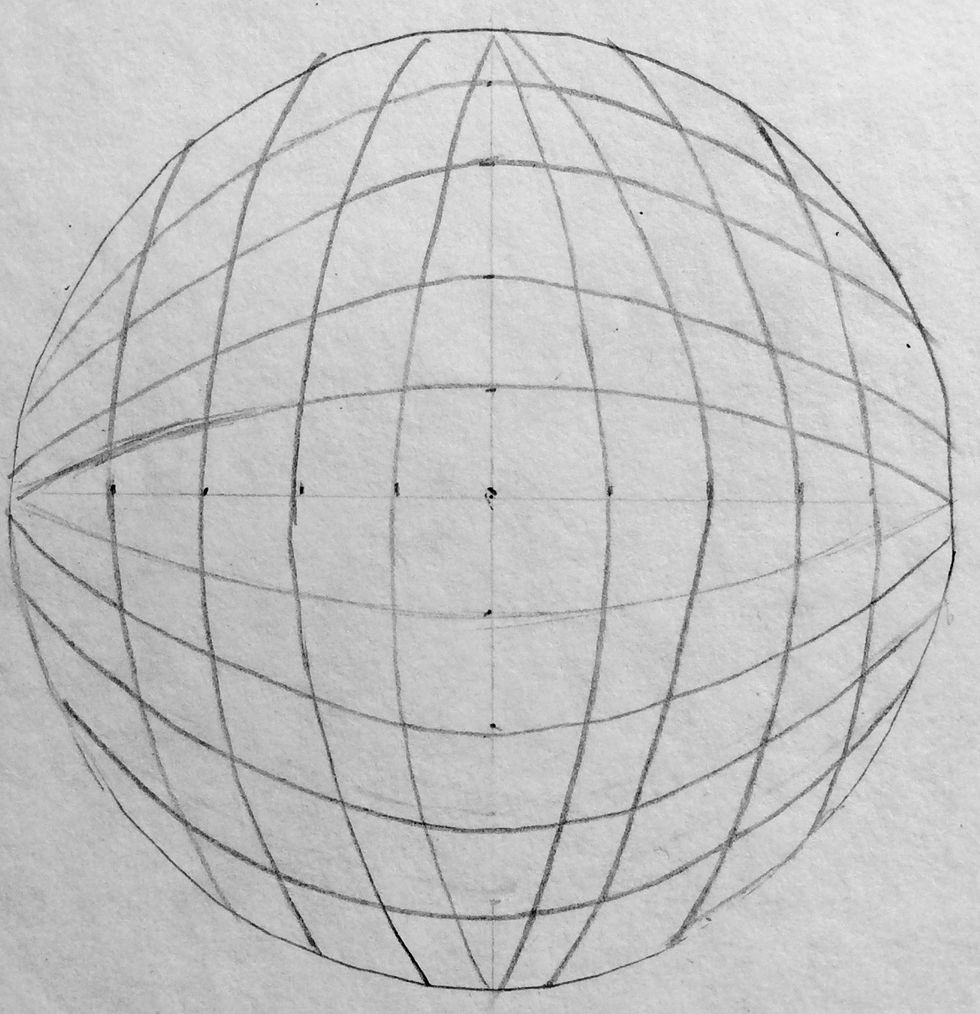
Repeat those steps on the left and right of the center line.
Use a ultra-fine point Sharpie to trace over all the lines EXCEPT the center lines (those will be erased).
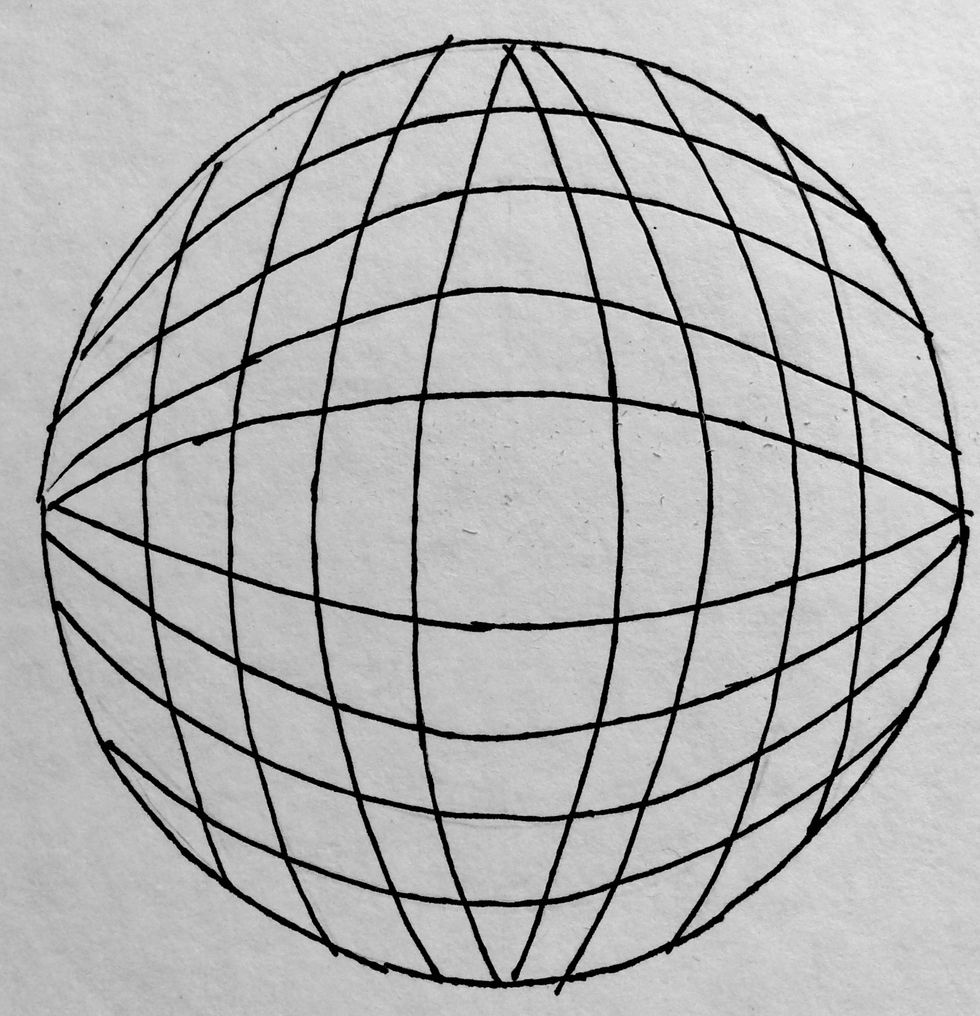
Erase the center lines, the dot and all your pencil marks.
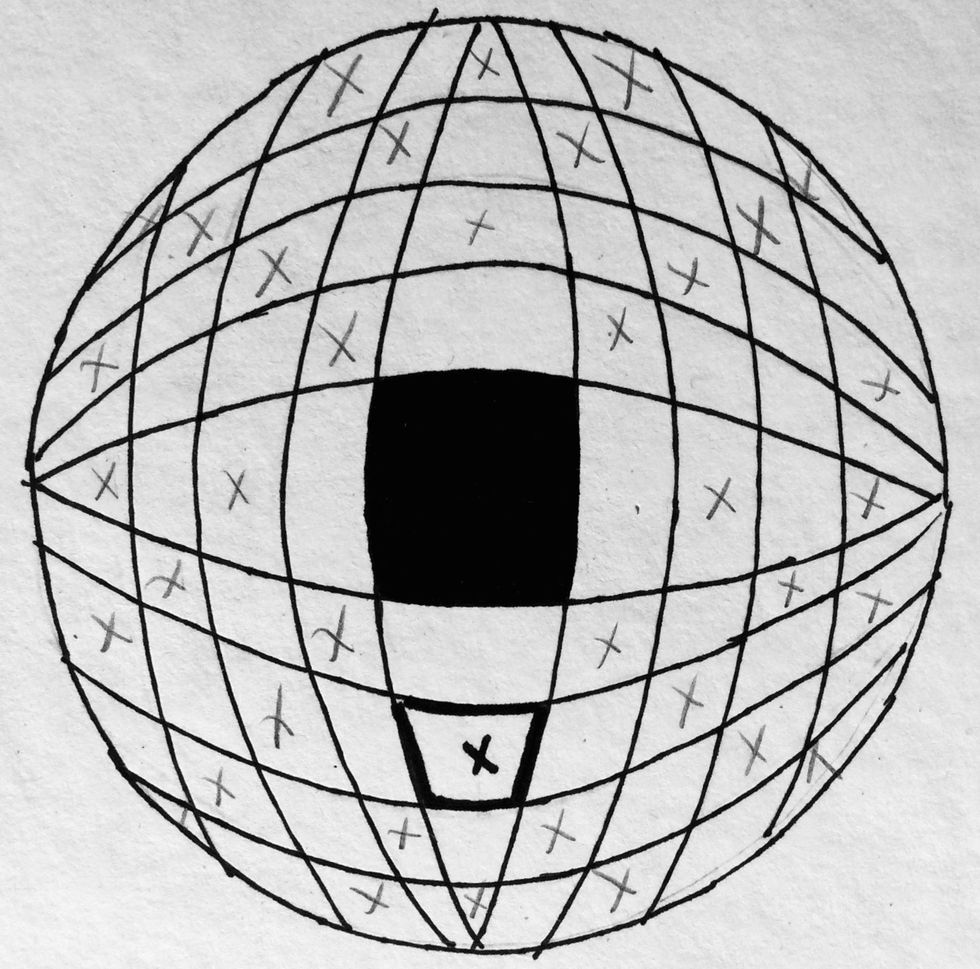
Start with coloring the center box black. Every other space will be colored in with black Sharpie. With pencil, put an "X" marks to show where to color the black.
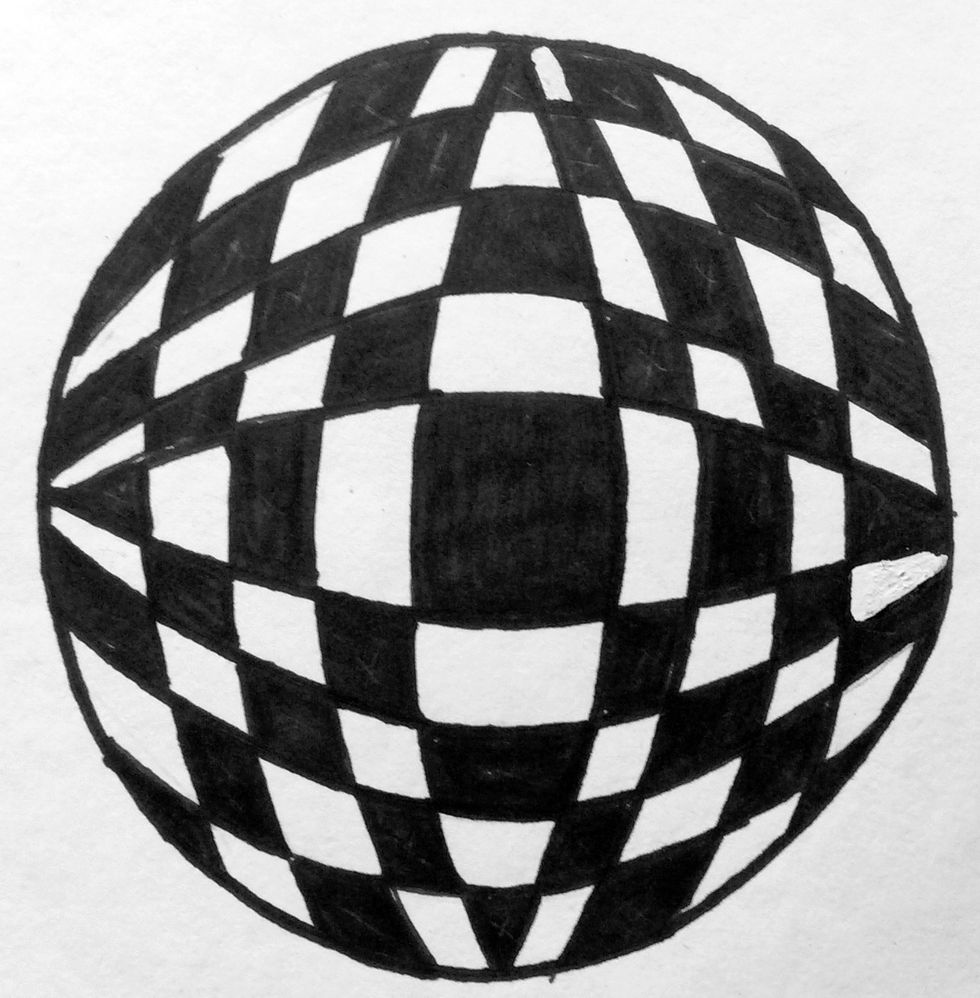
Color all boxes with the "X" marks. Take your time and keep your outlining and coloring NEAT! Continue these steps on all your spheres.