The Conversation (0)
Sign Up
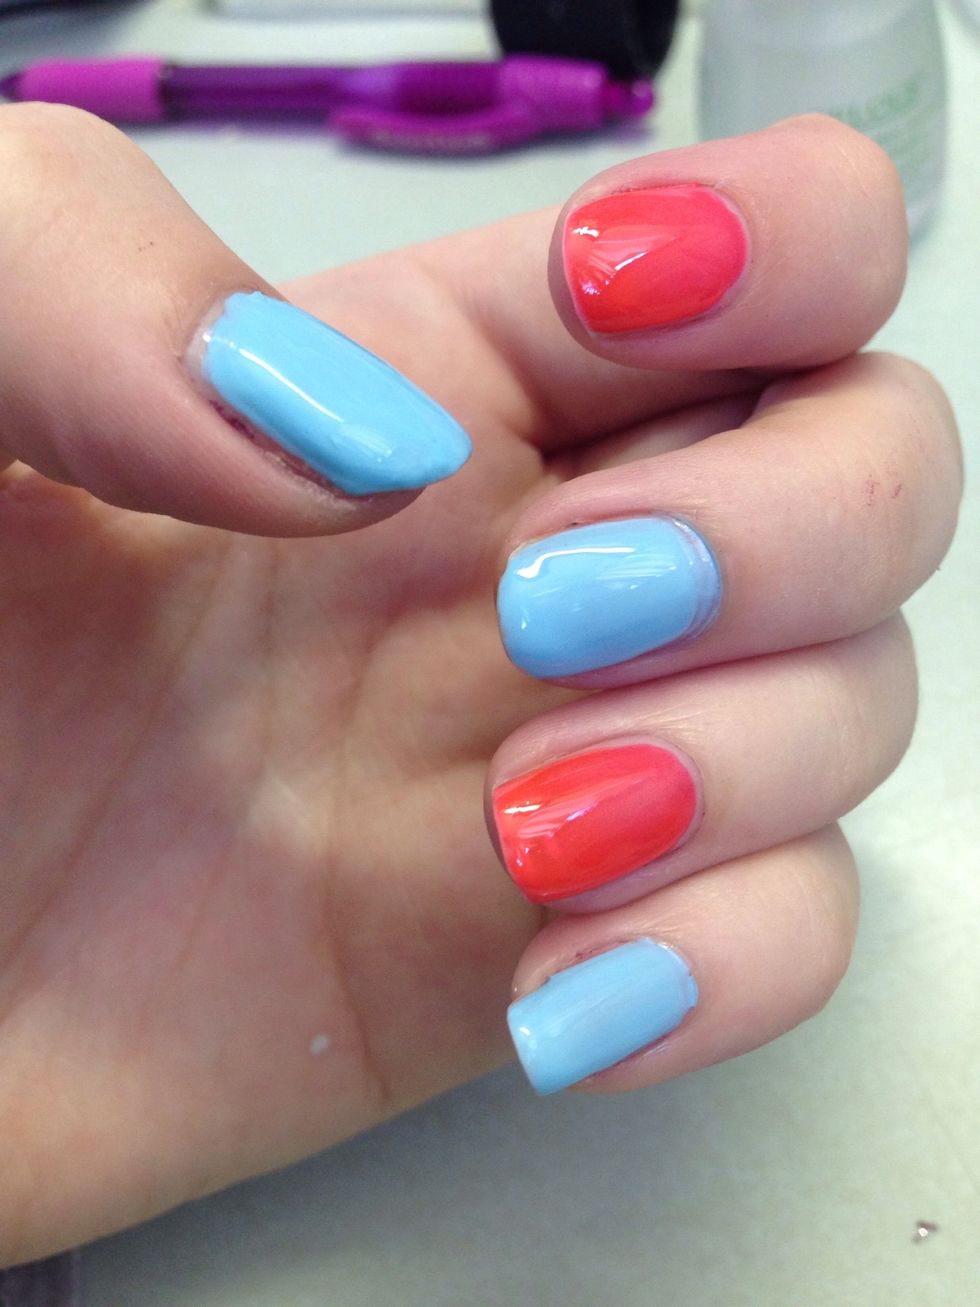
Start with your base color. You could do all nails one color, alternating or each nail a different color. Put on a fast drying topcoat in case you mess up the lines or dots; mistakes can be wiped off.
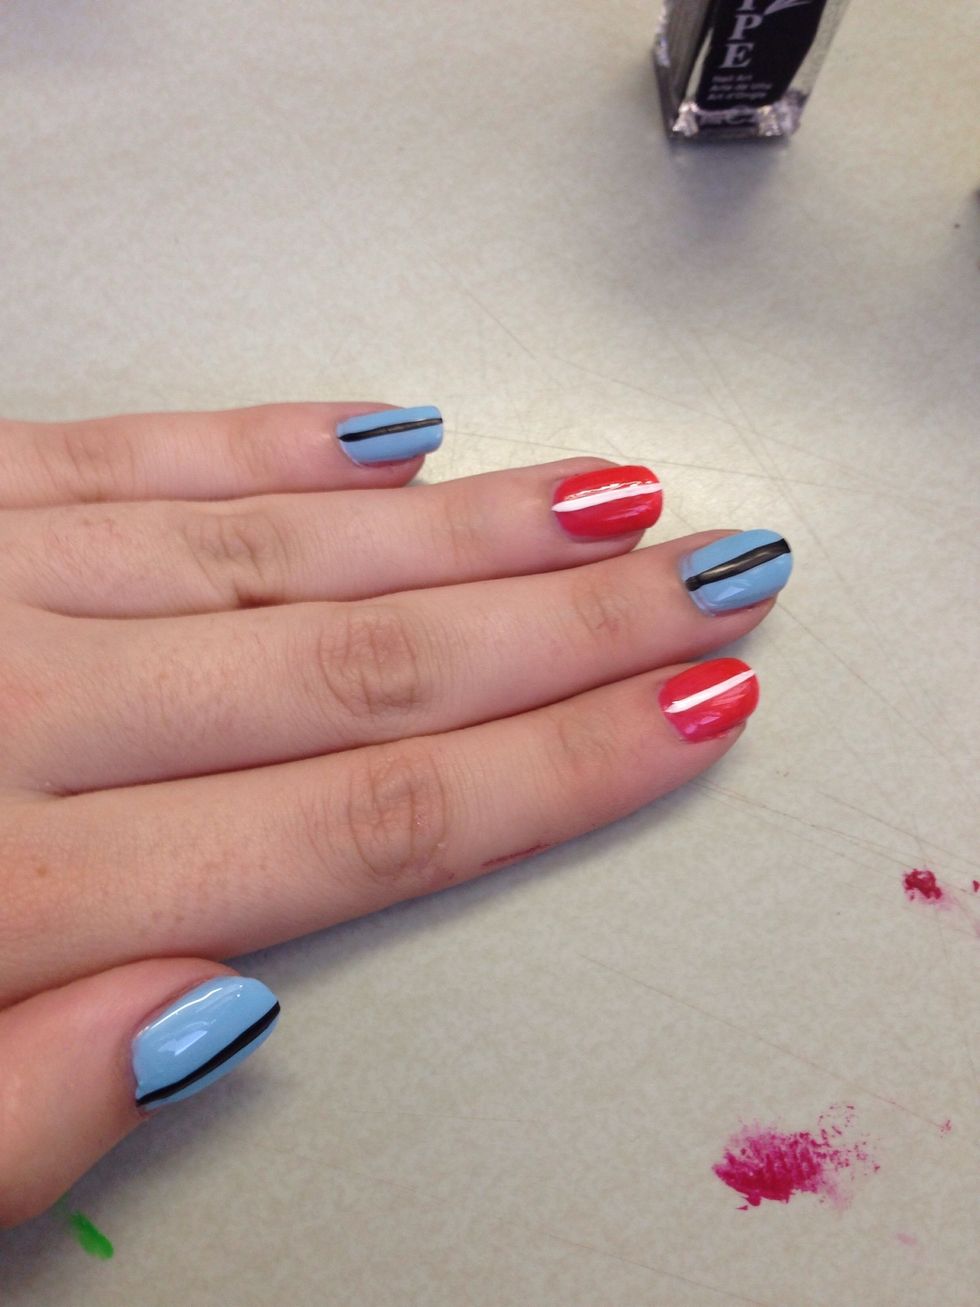
Put one line of a certain color down the center. I did black center with blue and white center with orange, then kept the pattern for each nail.
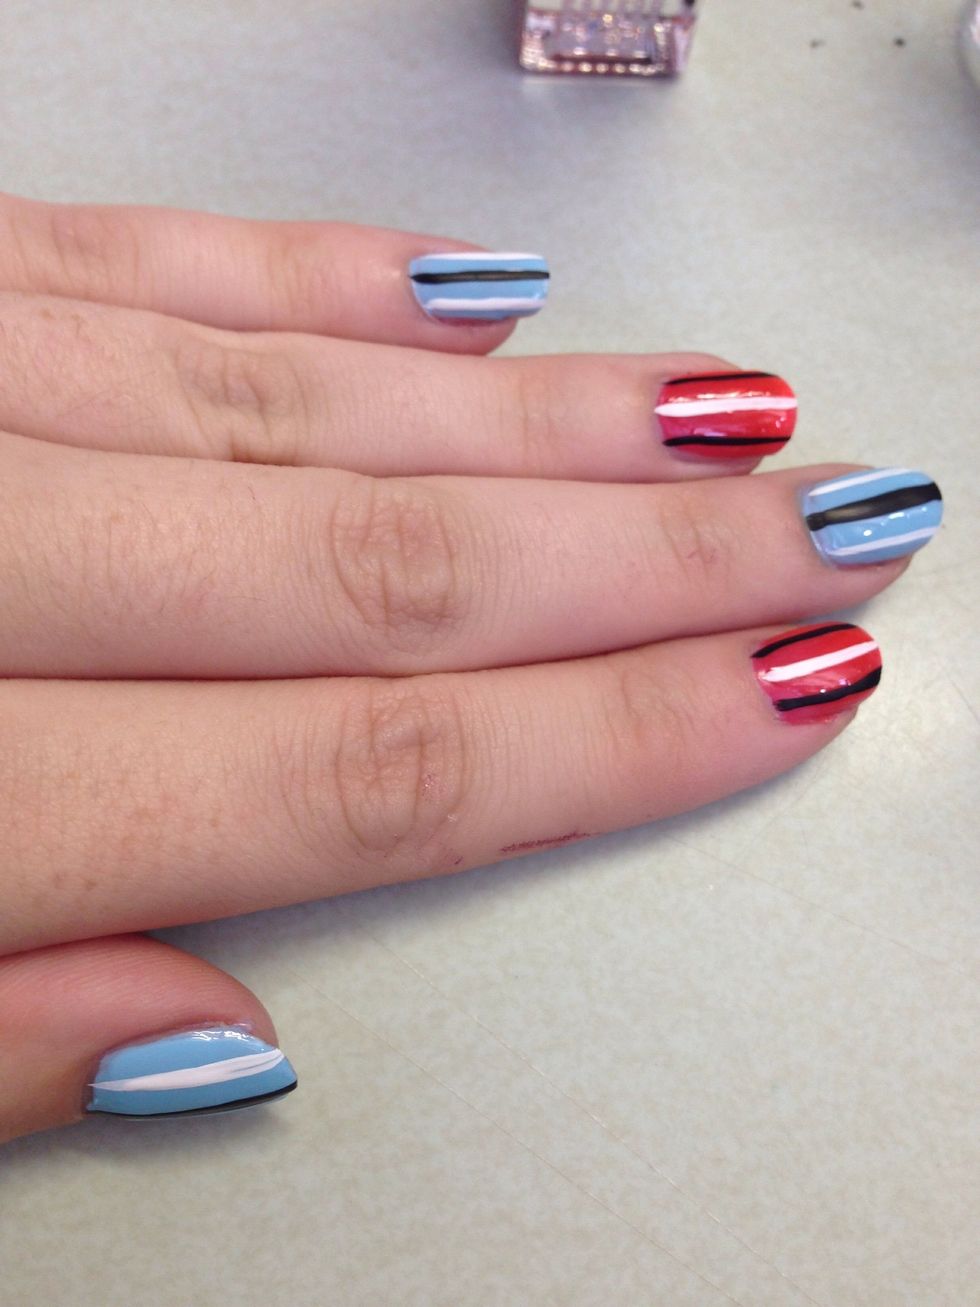
Put two lines of the other color on the sides of the first line. If your center line is black, do 2 lines of white and vice versa.
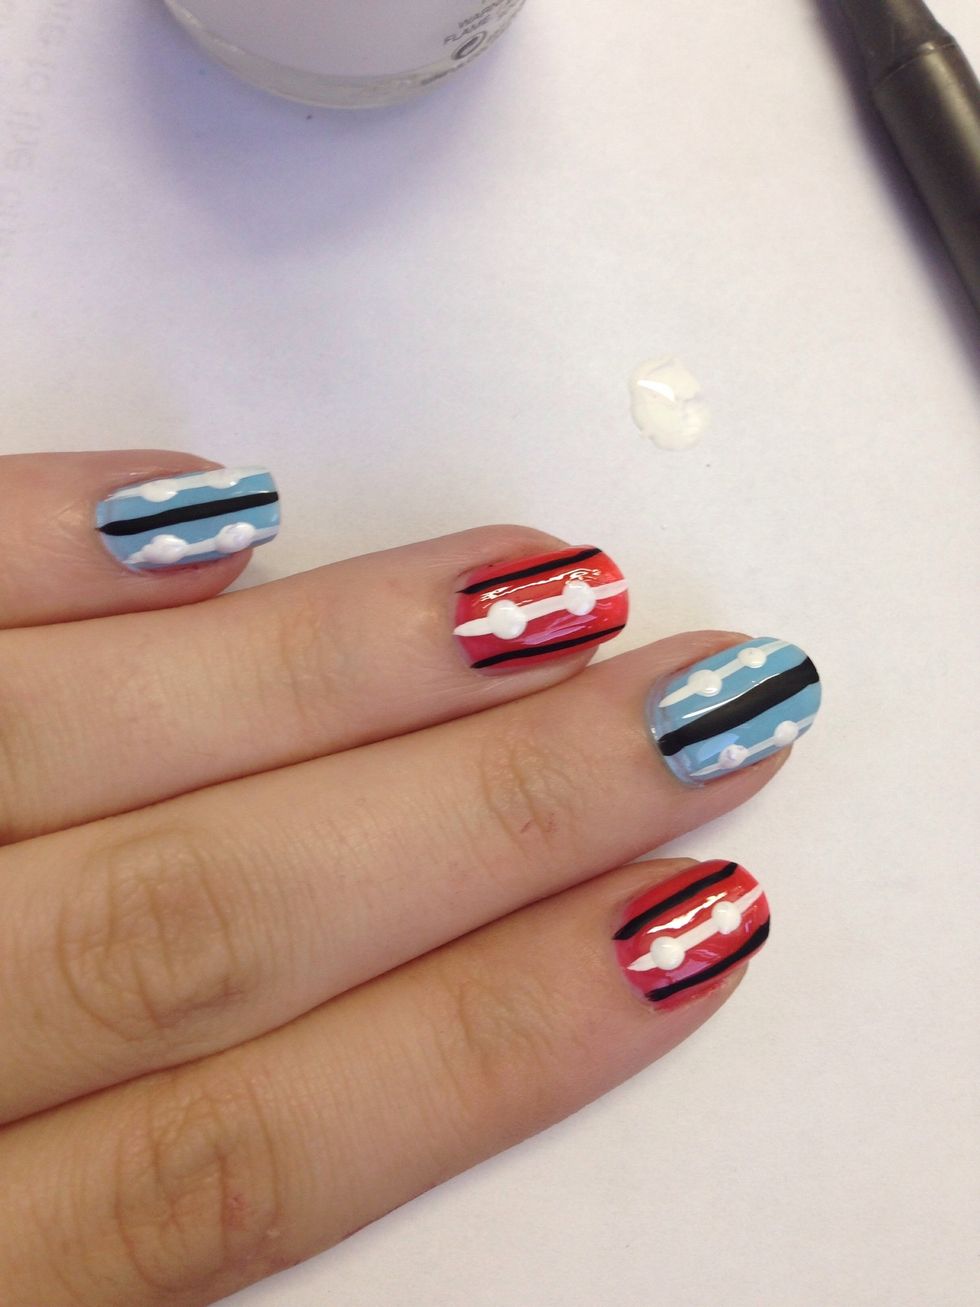
Put 2 or 3 dots of the same color on every line. I started with all the white lines and added white dots. Make them big enough to hold a smaller dot later.
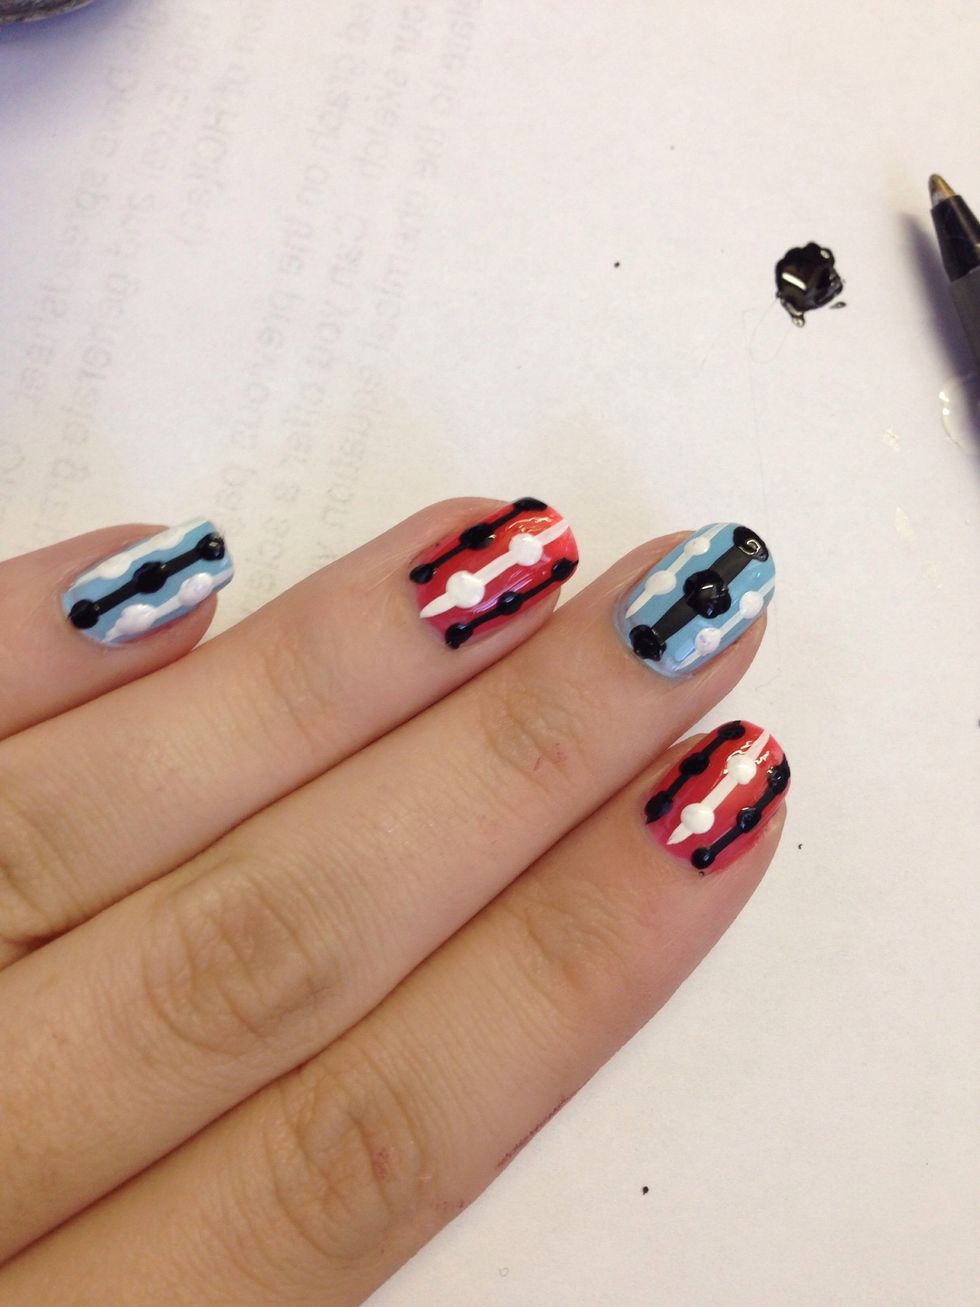
Add dots to the other lines, again using the same color of the line.
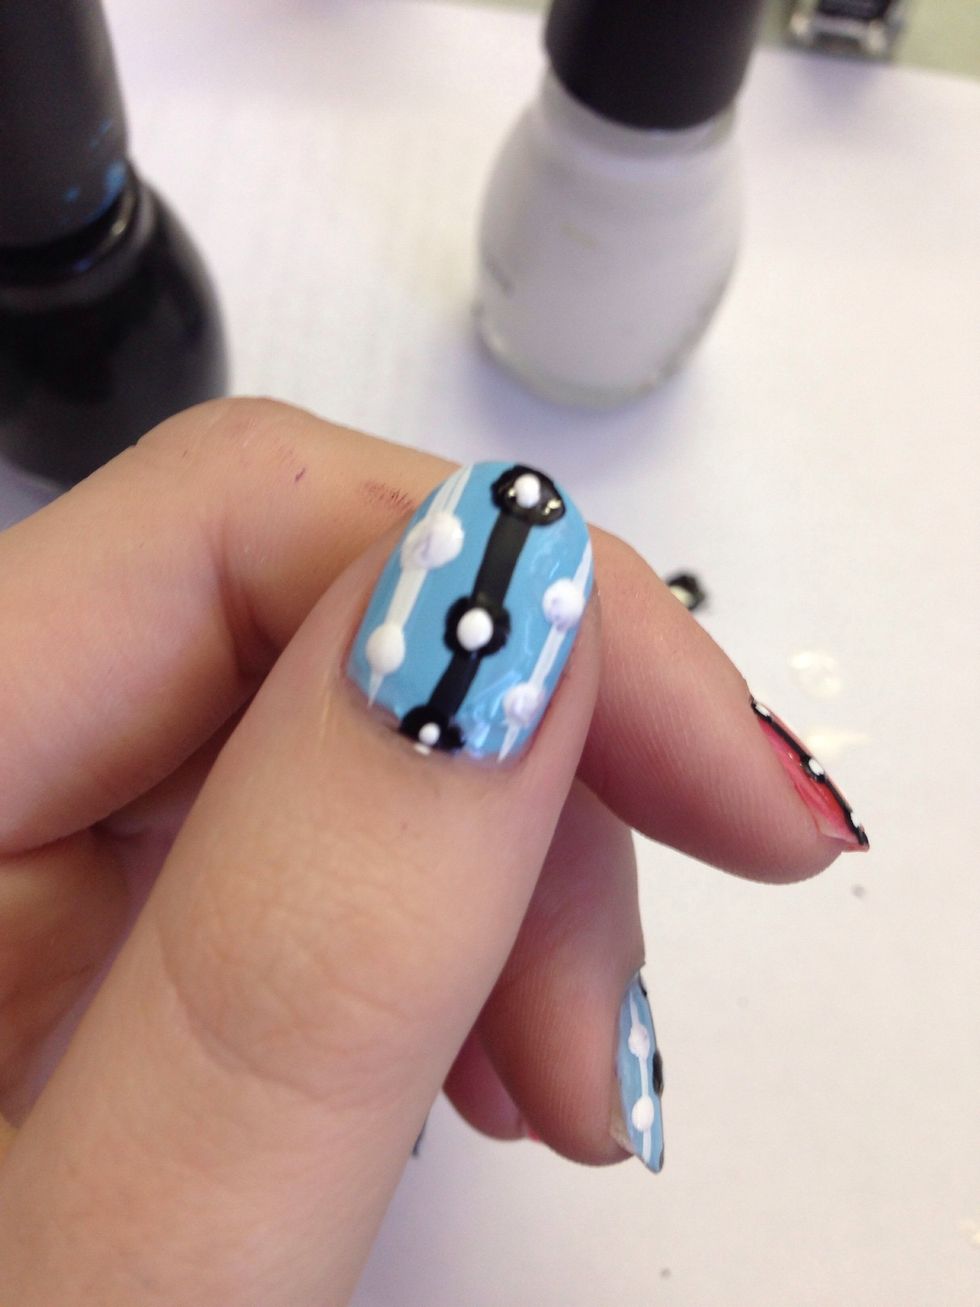
Take a smaller dotting tool and put a little dot of the opposite color into your original dots.
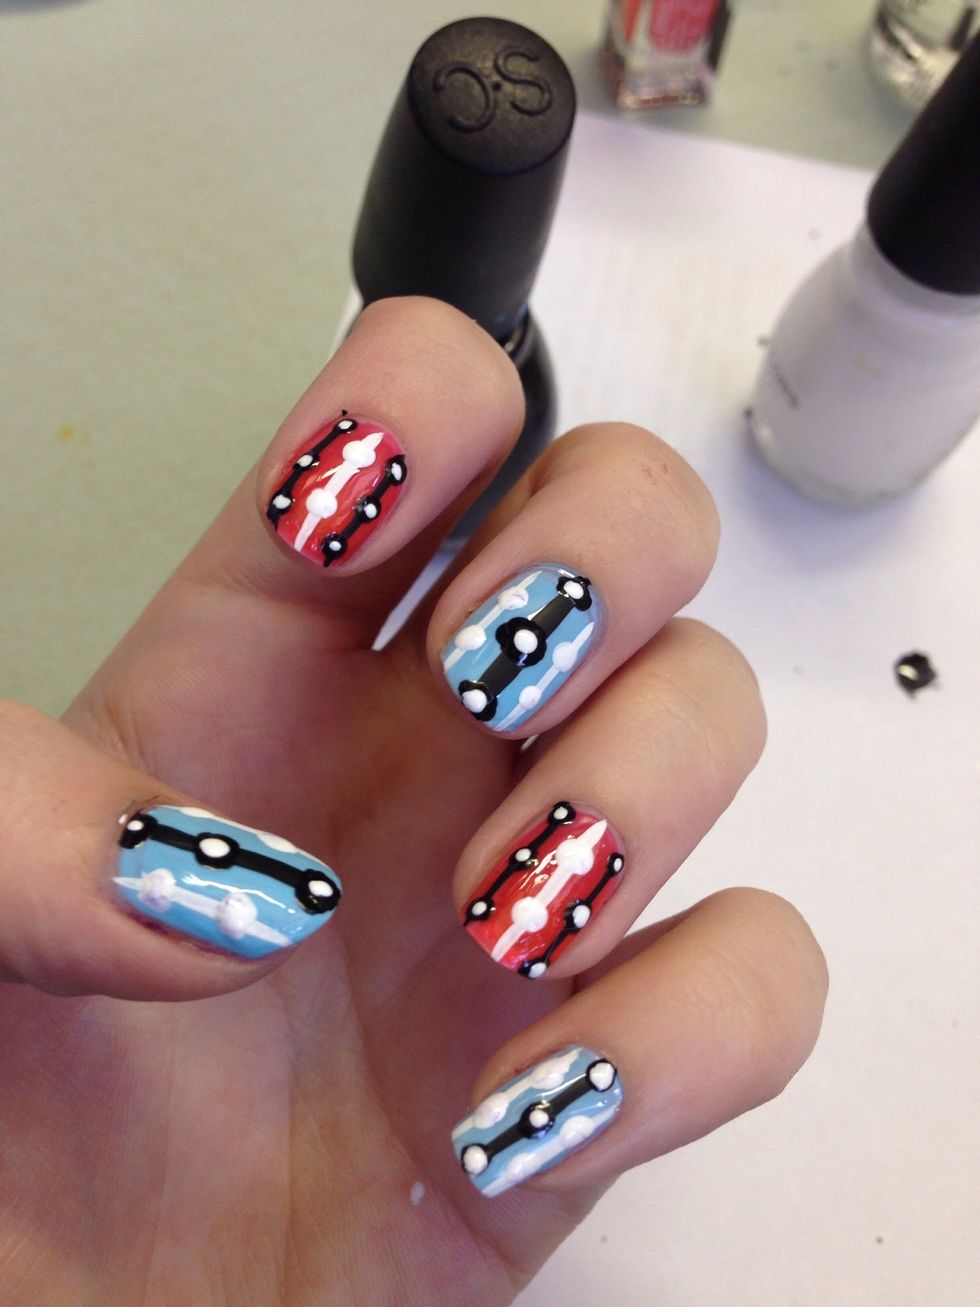
Add white dots to all the black ones on your nails. I like doing the whole hand at once instead of switching colors and tools to do one nail at a time. Then go through and add black dots to white dots
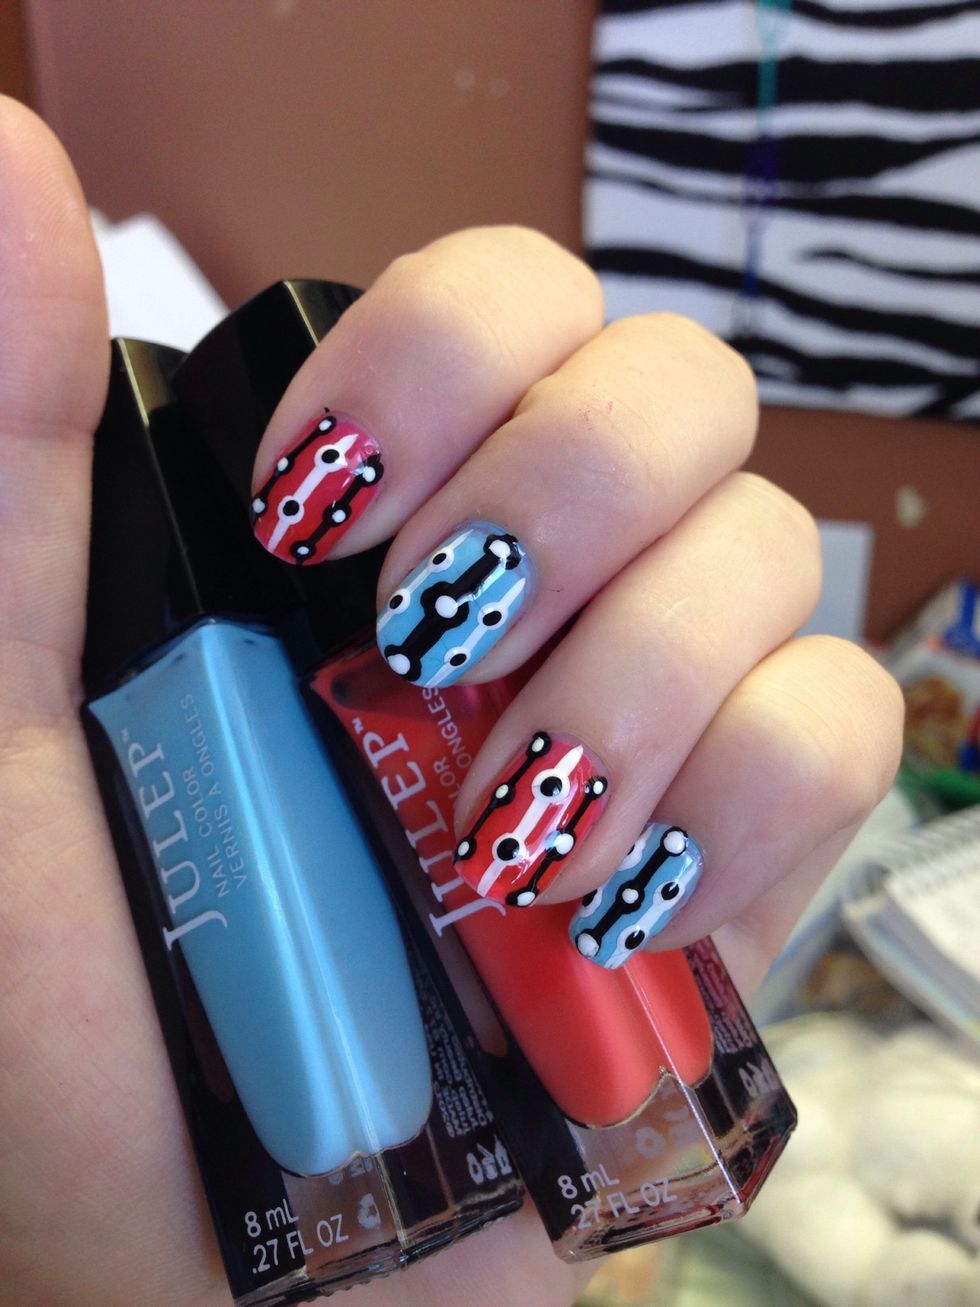
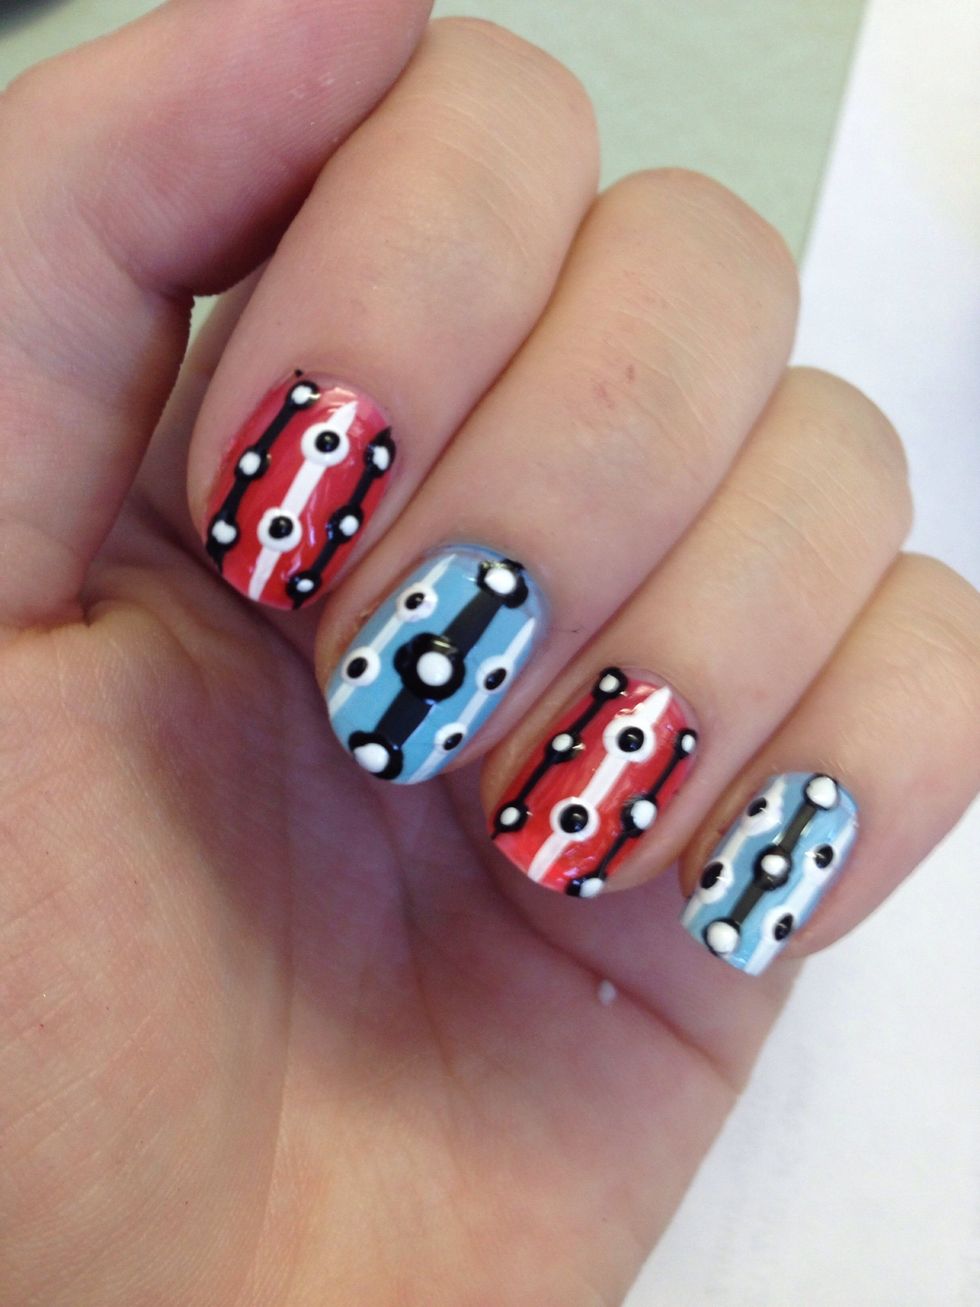
Finish up by, as always, adding a topcoat. For this manicure, make sure to wait a few minutes for the thick dots to dry. There's nothing worse than doing all this work, then smudging it! Enjoy!