The Conversation (0)
Sign Up
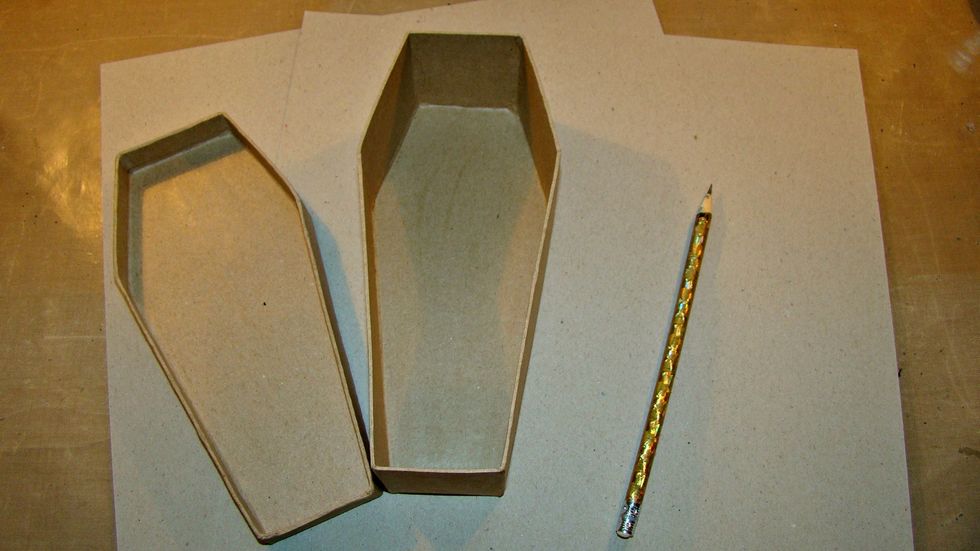
This tutorial is basically for the coffin but the first few steps show how I created the foundation for my mini album to fit inside.
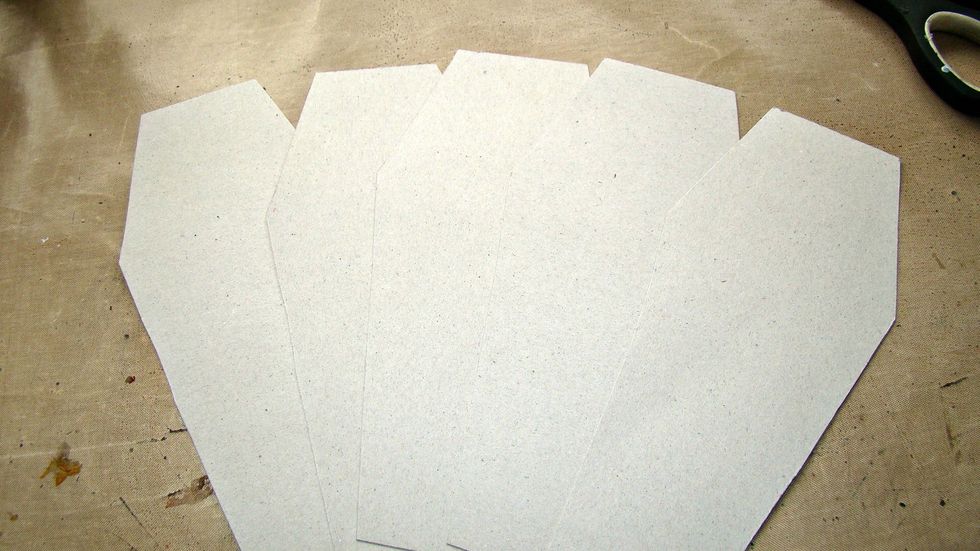
Trace on chipboard the shape of the coffin and cut 5 pieces.
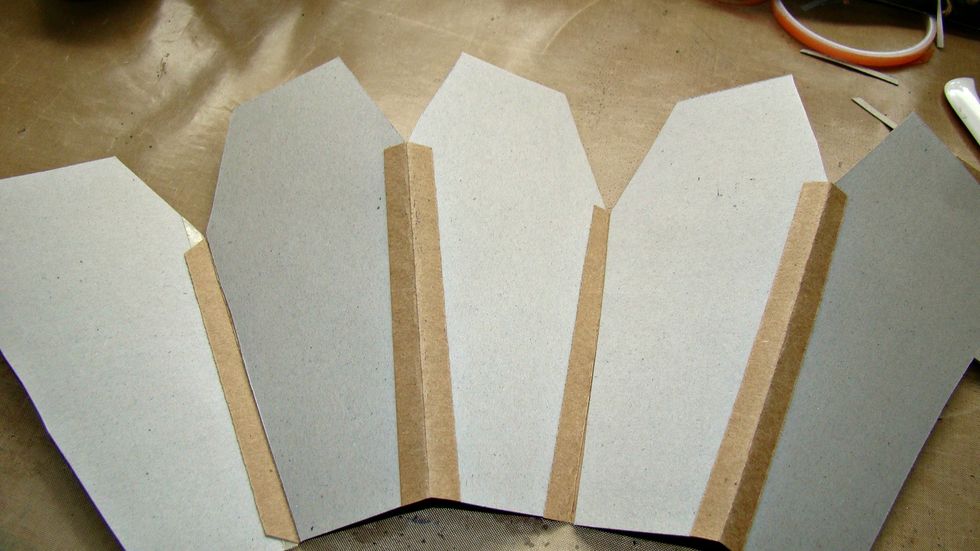
Take a piece of cardstock 1" wide and score down the middle to attach each coffin to each other as follows. Go ahead and create your mini album.
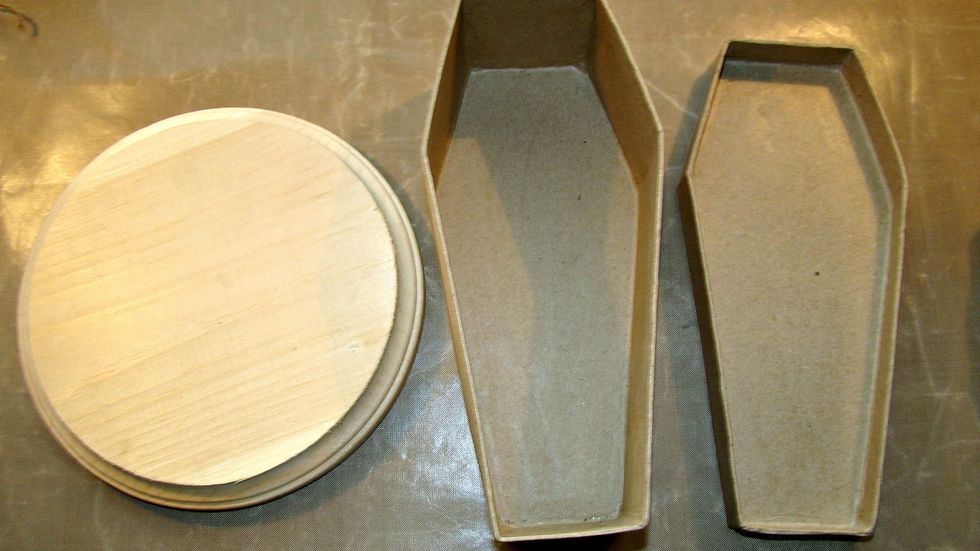
For the coffin I wanted it to be held together with a base. I purchased this wood piece at the craft store for $2.99 and the coffin was from the dollar store.
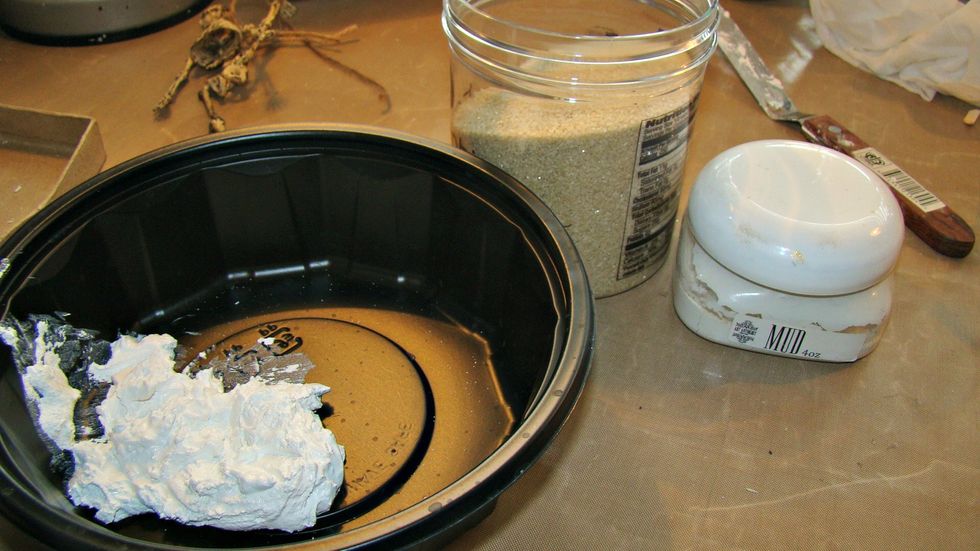
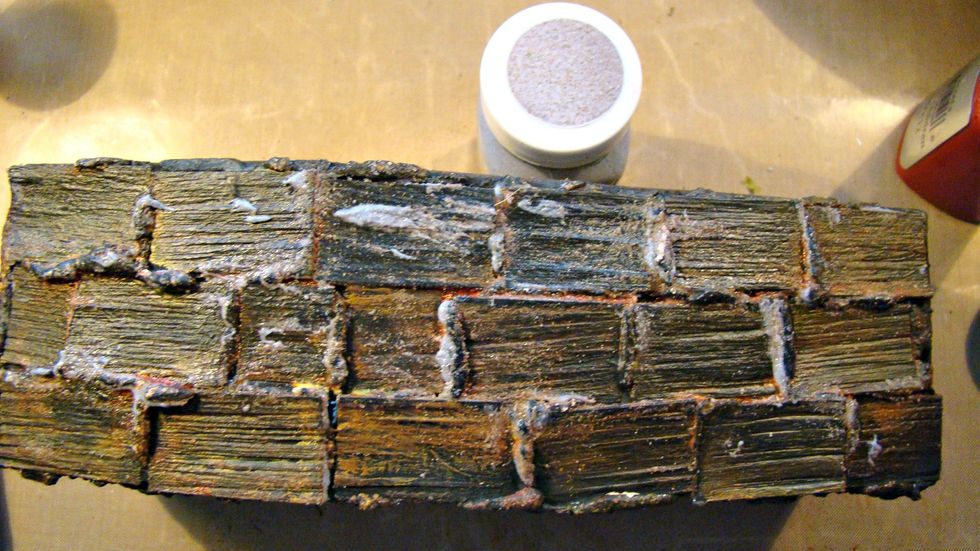
Take your Mud Texture Paste and mix some craft sand for some texture.
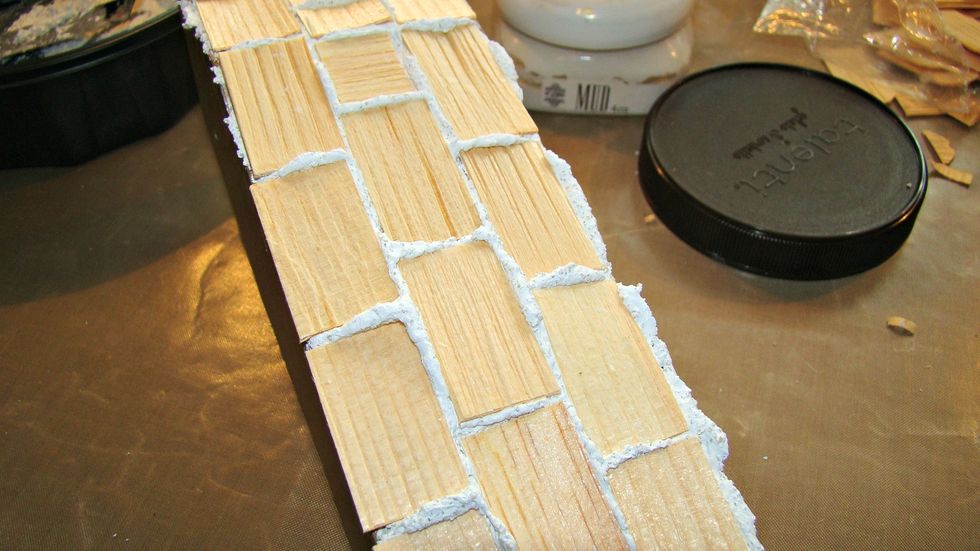
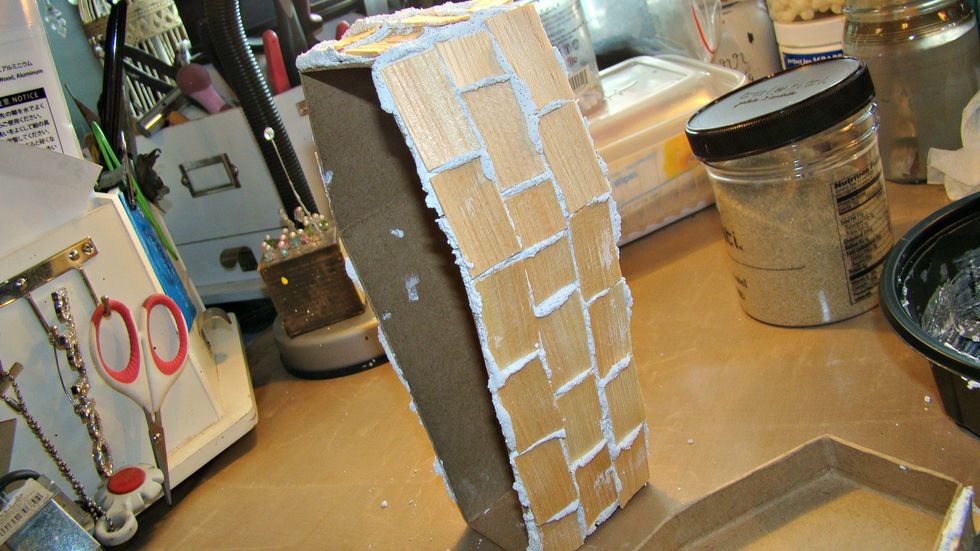
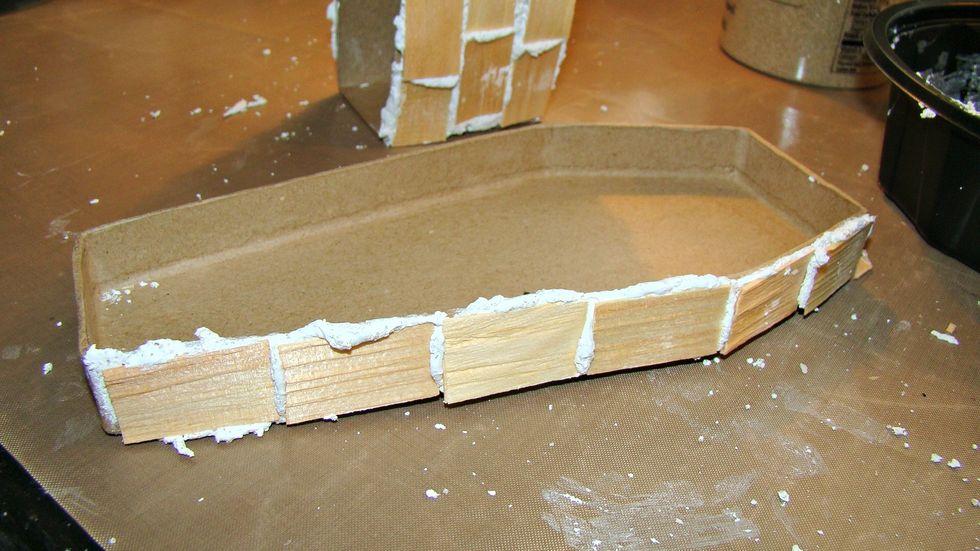
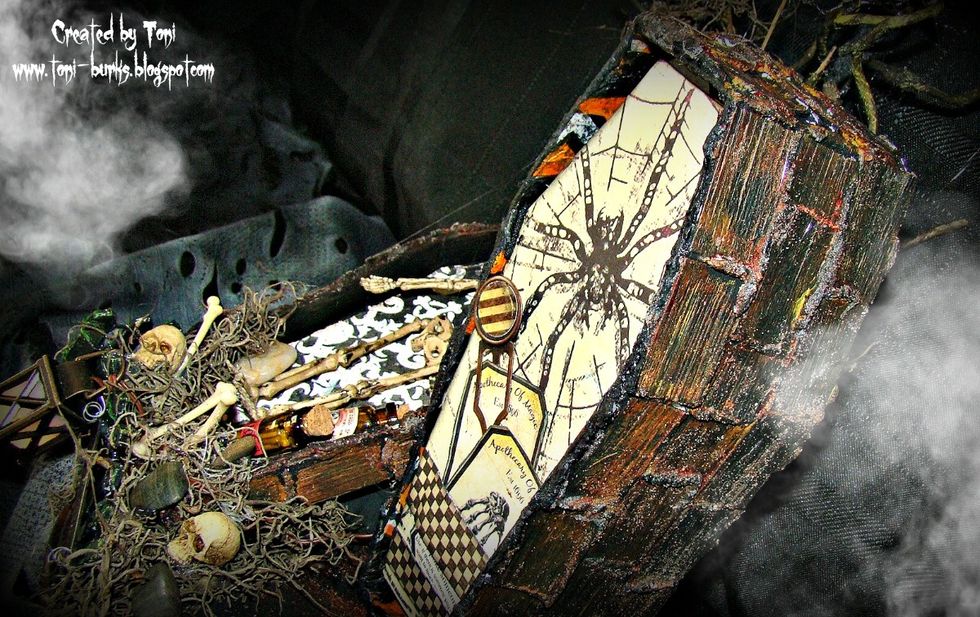
For dimension, using the texture paste mixture I pushed into place these wood pieces I got at the craft store. Let the paste ooze from the middle like grout. Set aside to dry.
Here is what the finished coffin looks like.
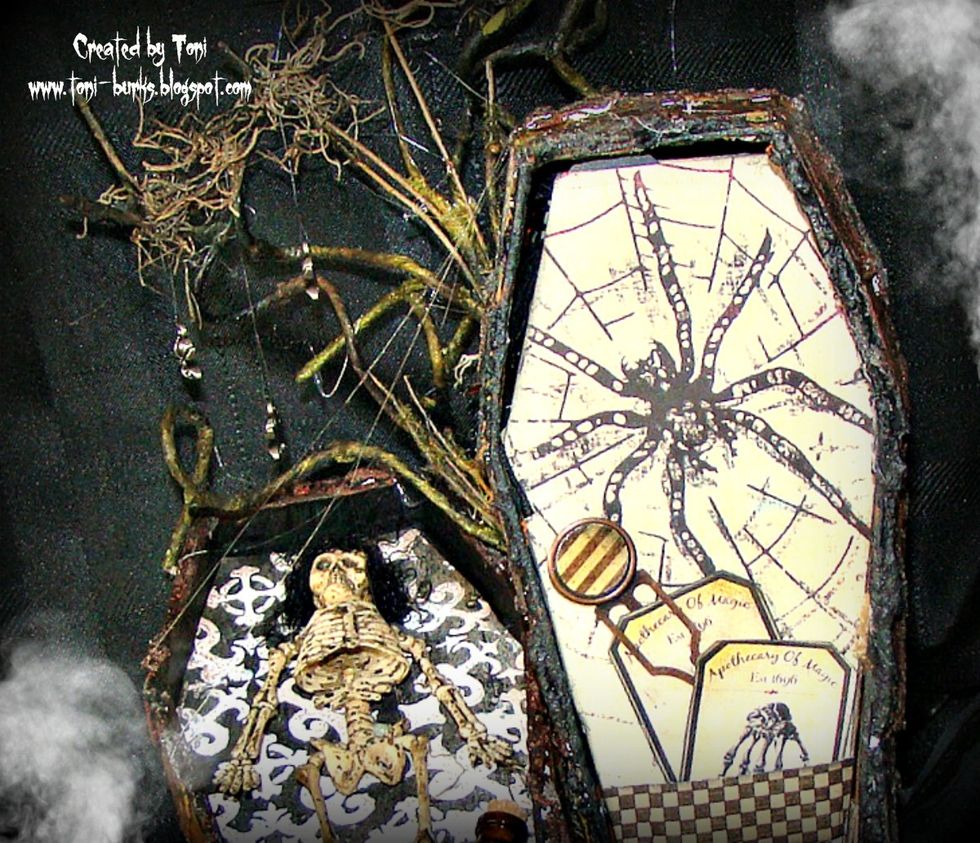
Don't forget to do the sides of the coffin lid as well.
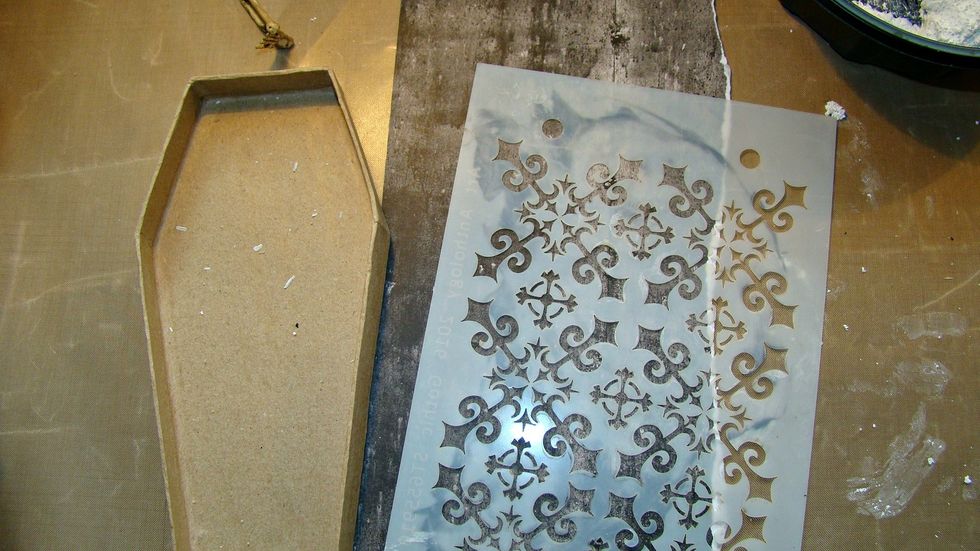
For the inside of the coffin lid I used a Gothic Stencil, ran the texture paste through on to some craft paper and allow to dry, Cut the size of the lid and insert.
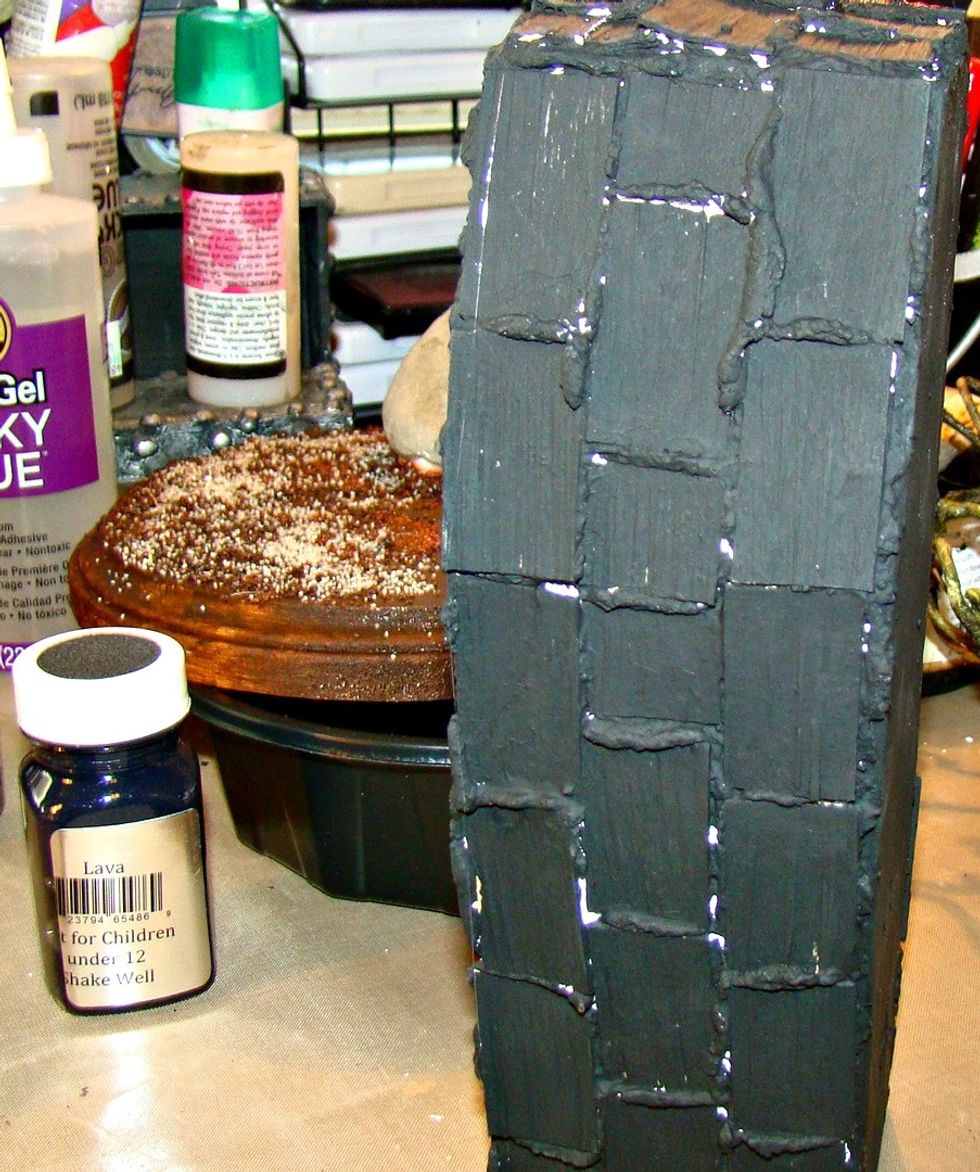
Once your wood pieces are dry, paint the entire surface with Tuxedo black.
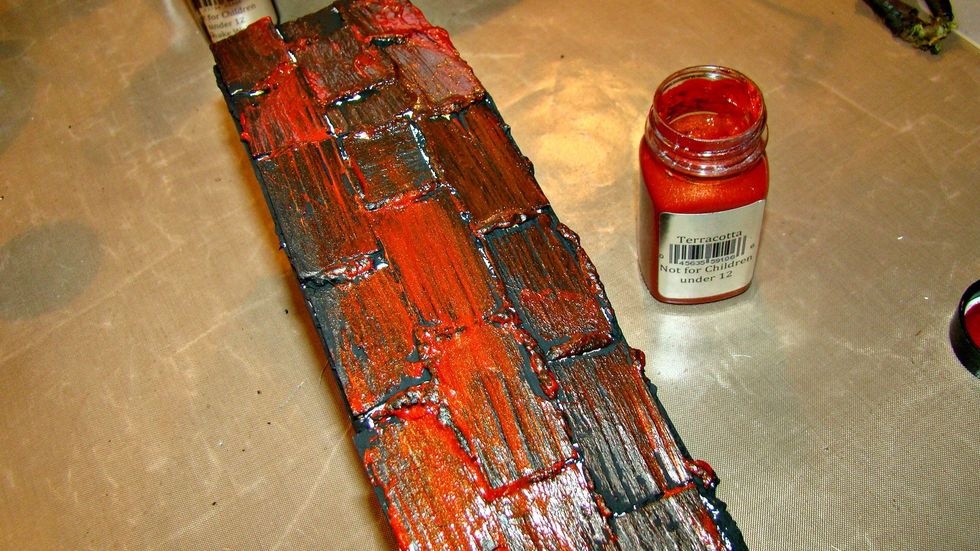
Using your finger swipe the rust colored paint over the top of the piece and allow to dry somewhat and then rub off with baby wipe to allow color to penetrate in the cracks of your coffin.
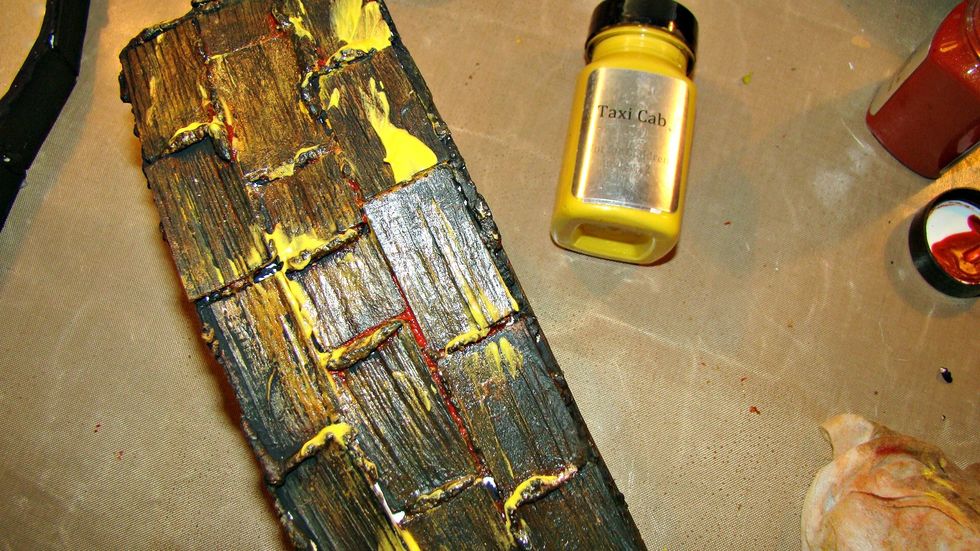
Using Taxi Cab do the same thing as the previous step.
The final is adding some more texture with Concrete Stone Effects. Swipe ontop of the grout .
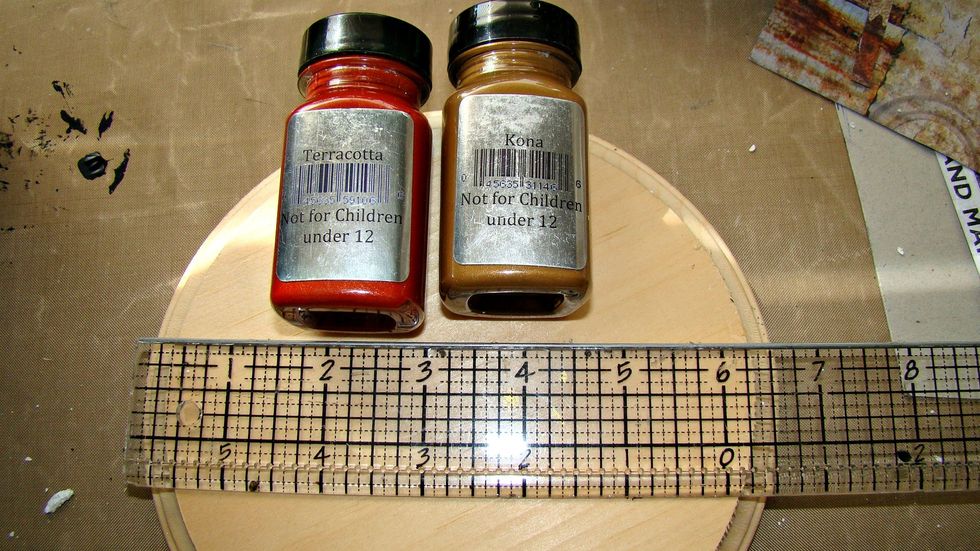
Now let's prepare the base for our coffin, Using a combination of theses two paints and craft sand I painted the foundation.
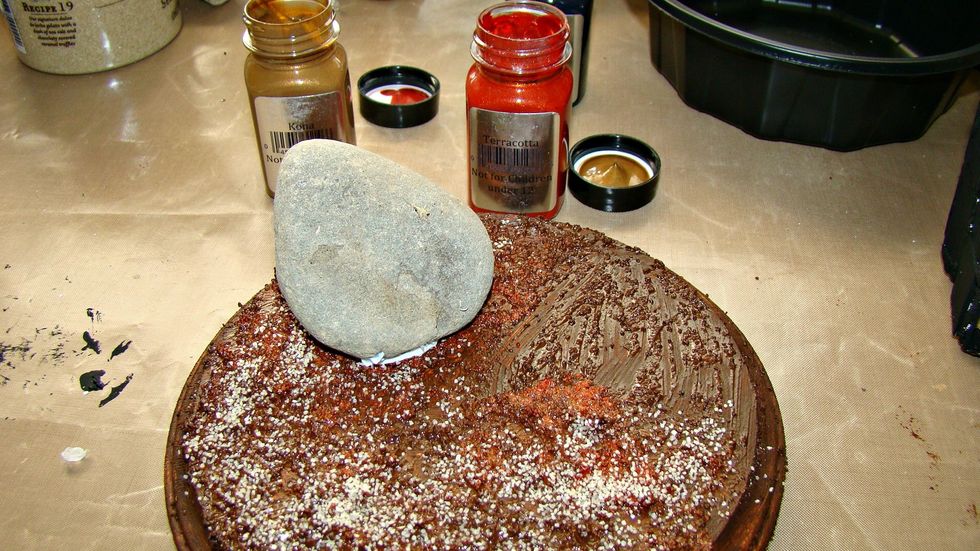
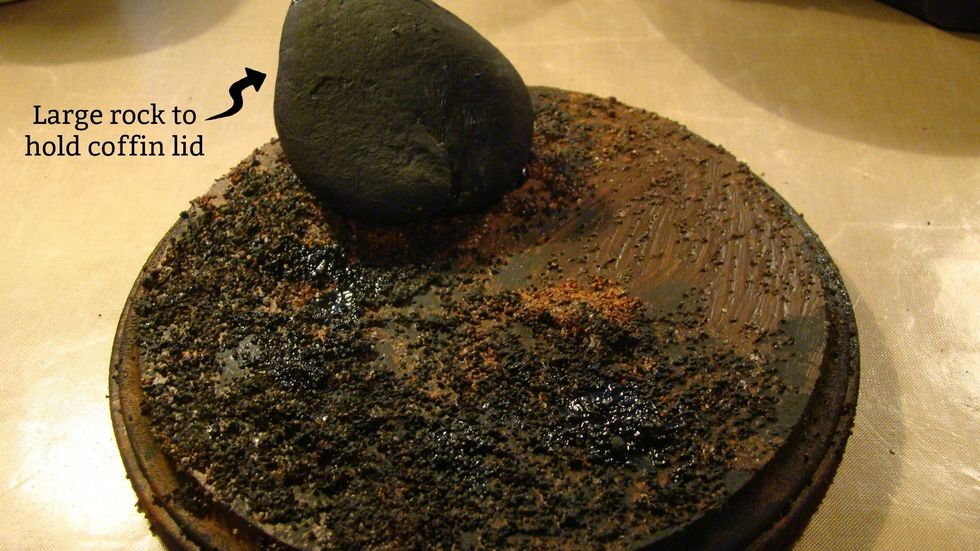
I got a rock from the outside and adhere with 3D Gel Medium to prop the coffin lid up on the base. Paint the rock black.
Let's add a bit more depth and texture with sponging on Black Lava.
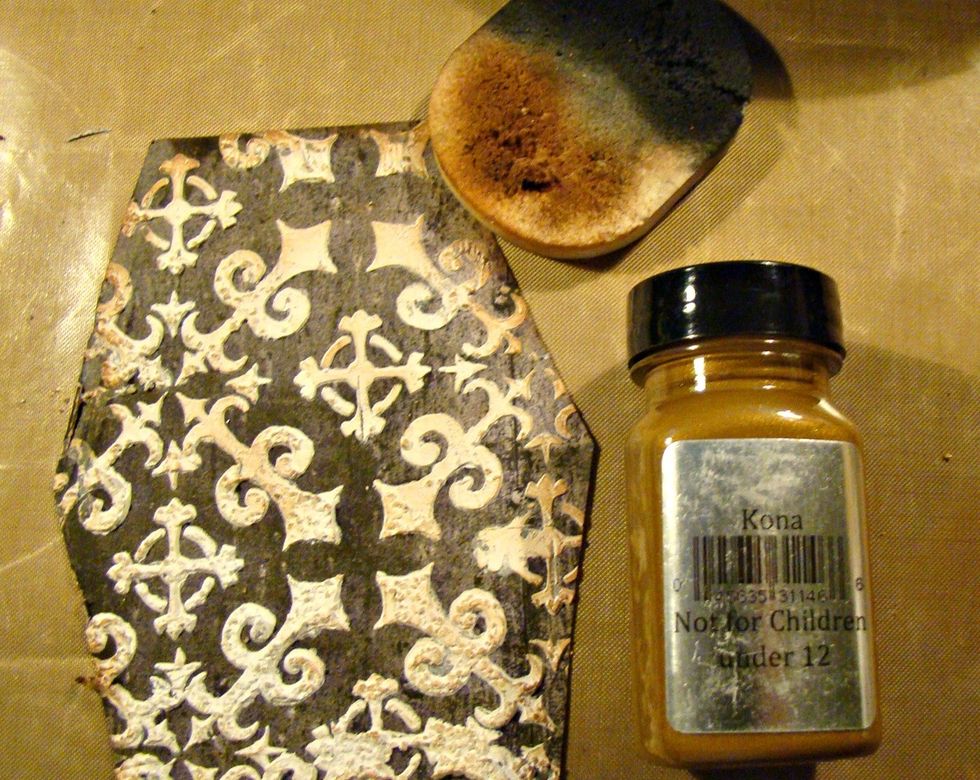
Before adding your insert to coffin lid distress the edges by sponging on Kona paint.

For the inside of the coffin, decoupaged a Halloween napking using Mod Podge.
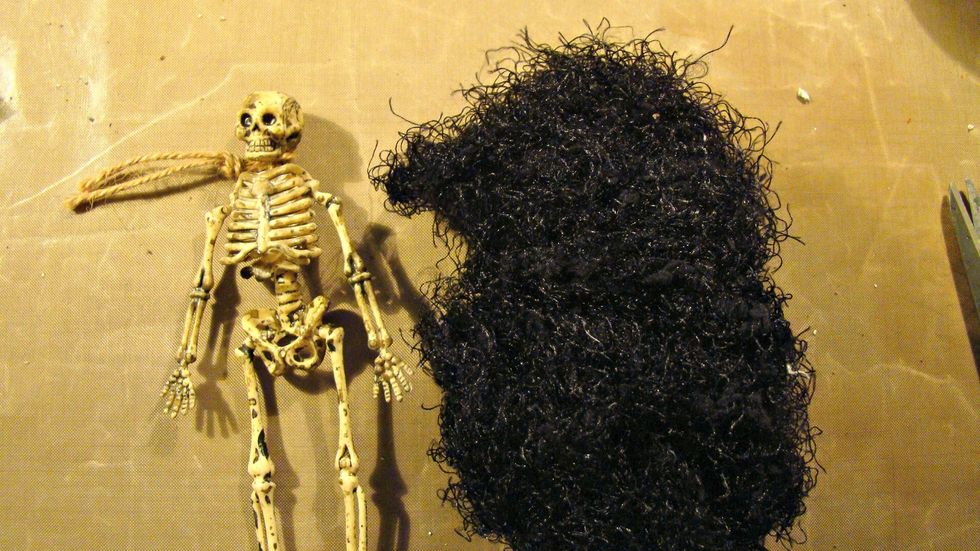
Let's pretty up our skeleton by adding some hair with this yarn.
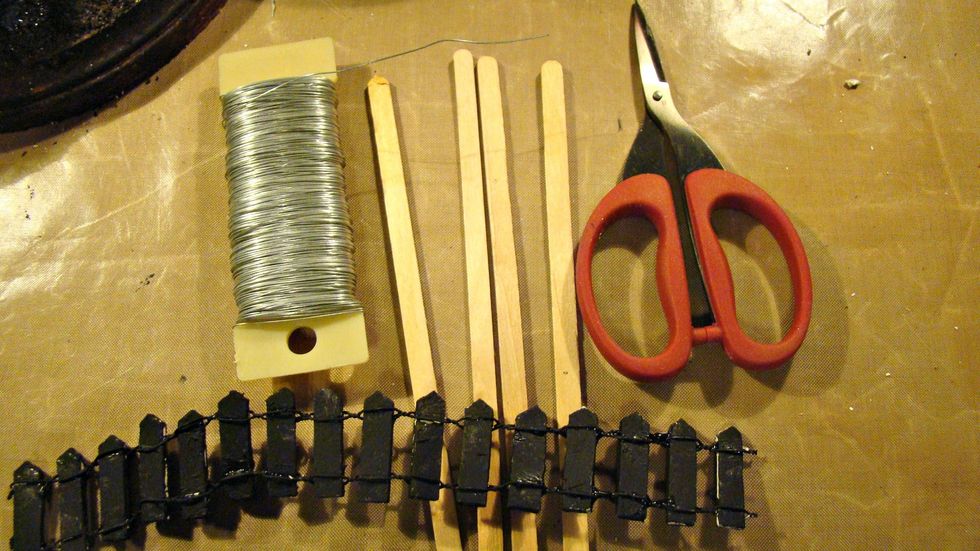
To make a rickety fence I took stir stick, cut them and pointed the tops and then attached them with floral wire. Paint with Tuxedo Black.
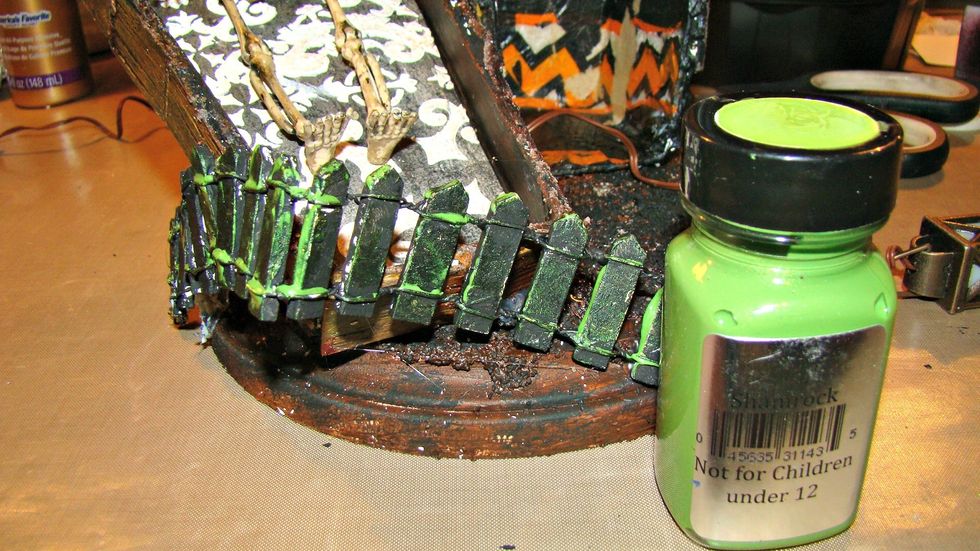
I wanted to add some more eeriness to the project, using my finger rubbed Shamrock Green here and there on the fence.
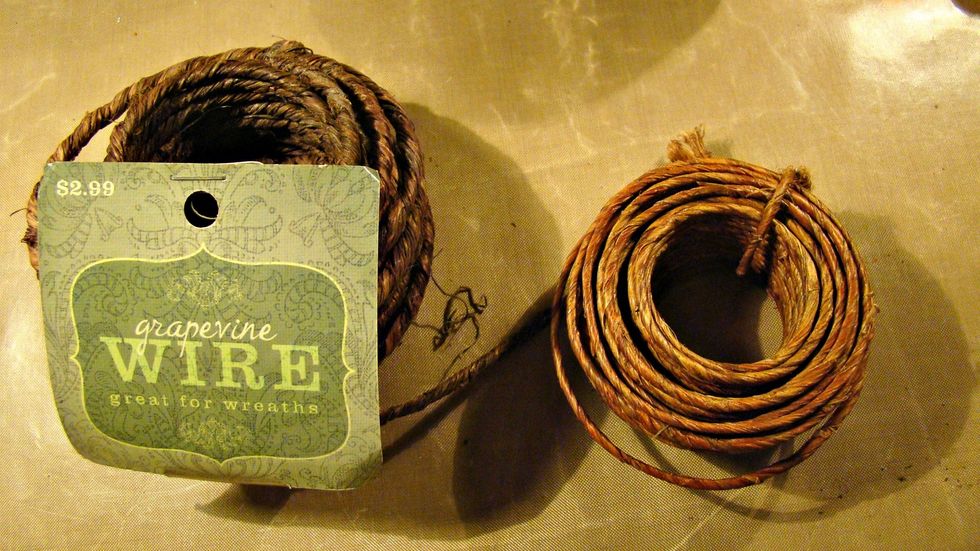
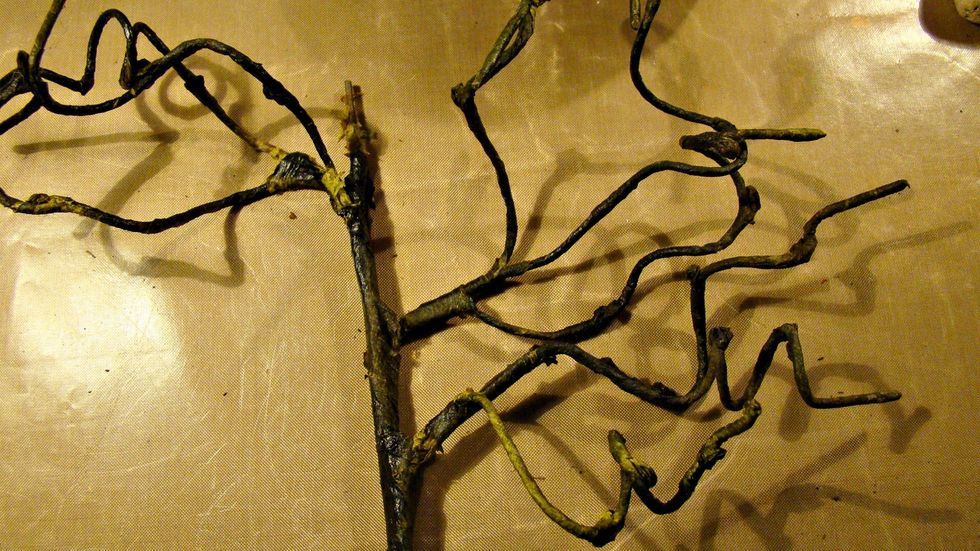
To make the tree I took two different sized of grapevine wire (found at the craft store) and bend it into a creepy dead tree.
Here is the tree after it's been painted ready to glue to the back of the coffin. Don't forget to hang your spiders, also hot glue some floral moss here and there.
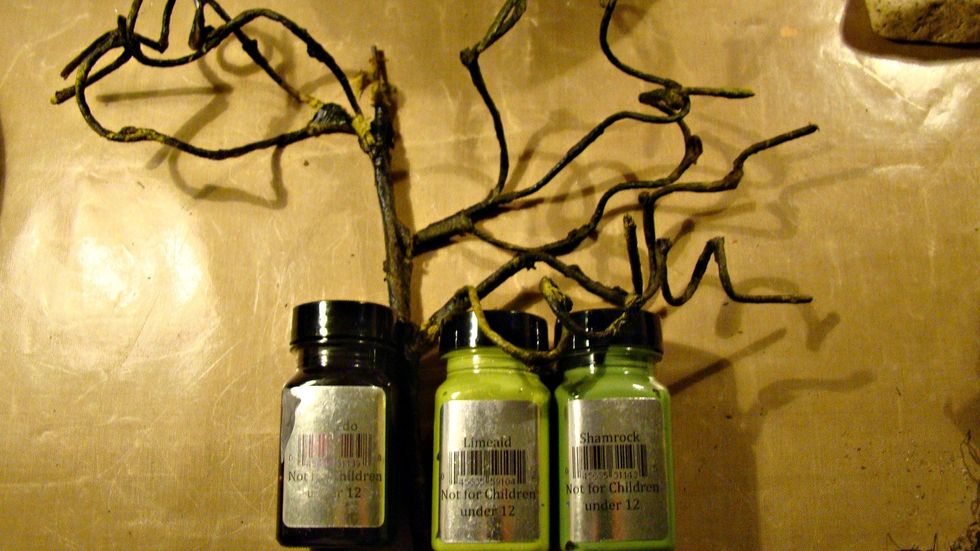
Using Shamrock, Limeaid, and Tuxedo paint your tree.
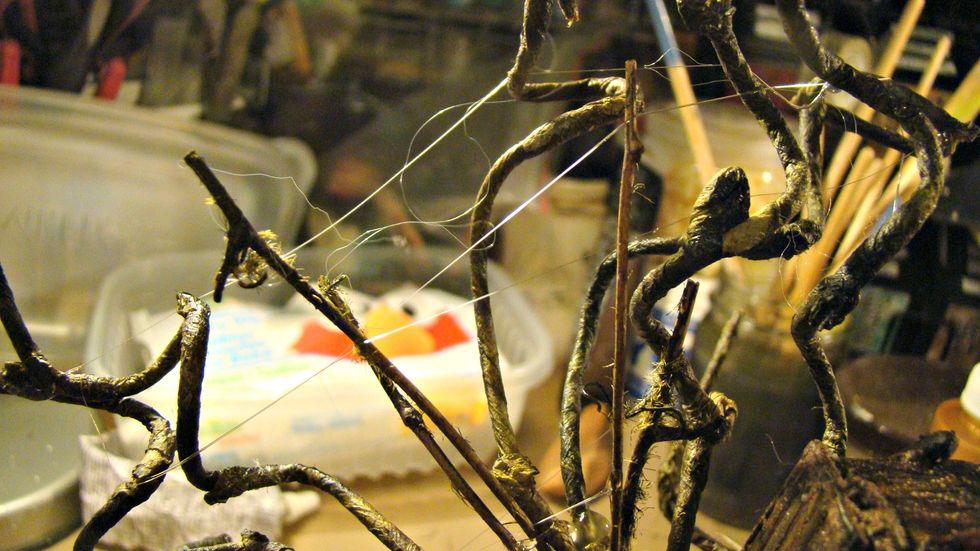
Now those hot glue strands reallly come in handy and the more the better. To make these just dab the hot glue and spread the strands from one side to the other.
Add Mr Skeleton to the coffin and here is a closeup of the tree with spiders and the webs.
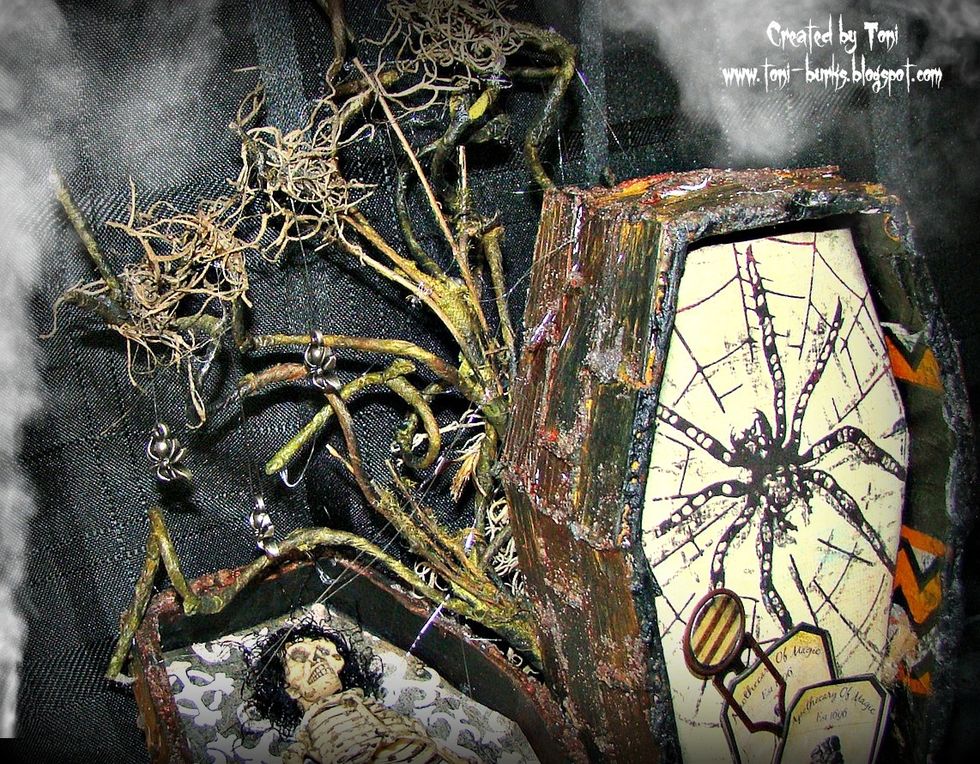
Another closeup of tree as well as the texture that was achieved for the sides of the coffin.
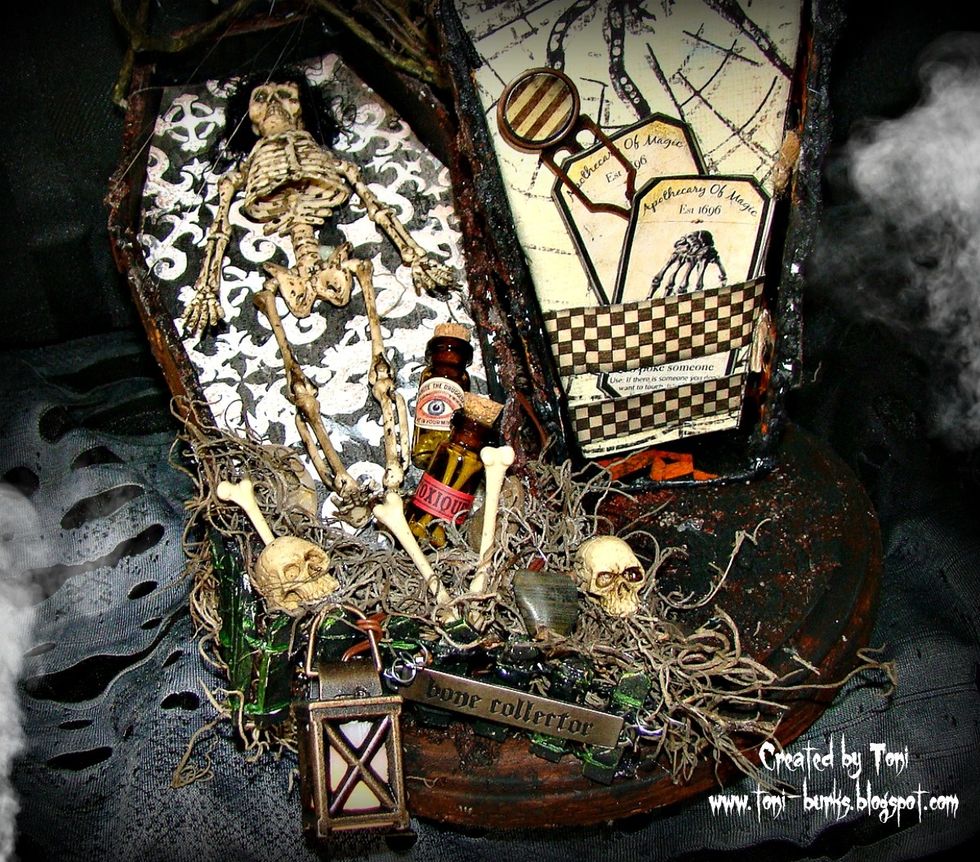
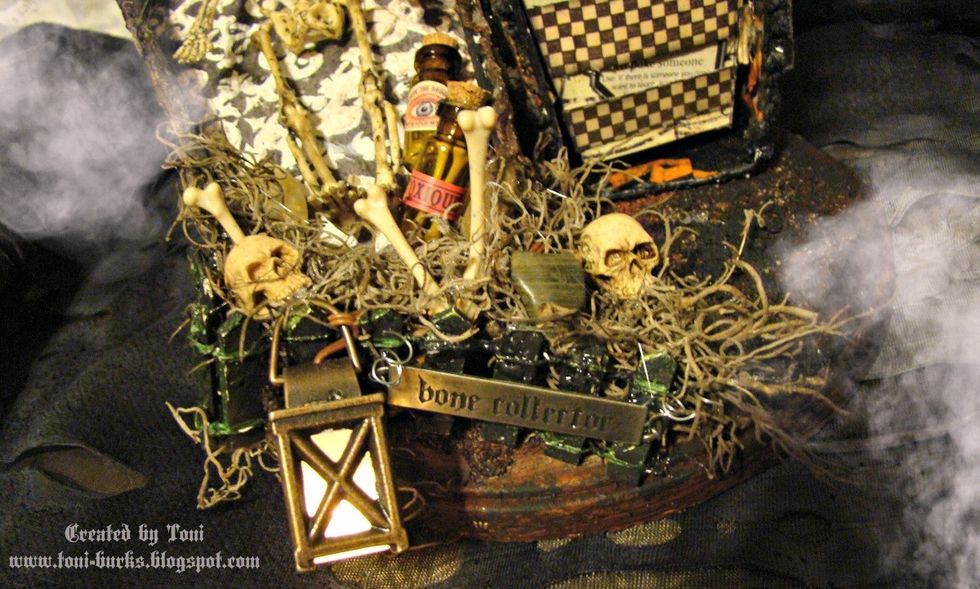
Bend your fence up and down and glue into place, tuck moss here and there for interest. Add your bones, vials, and skeleton heads.
For products with * in the list check out Art Anthology store here https://www.artanthology.net/
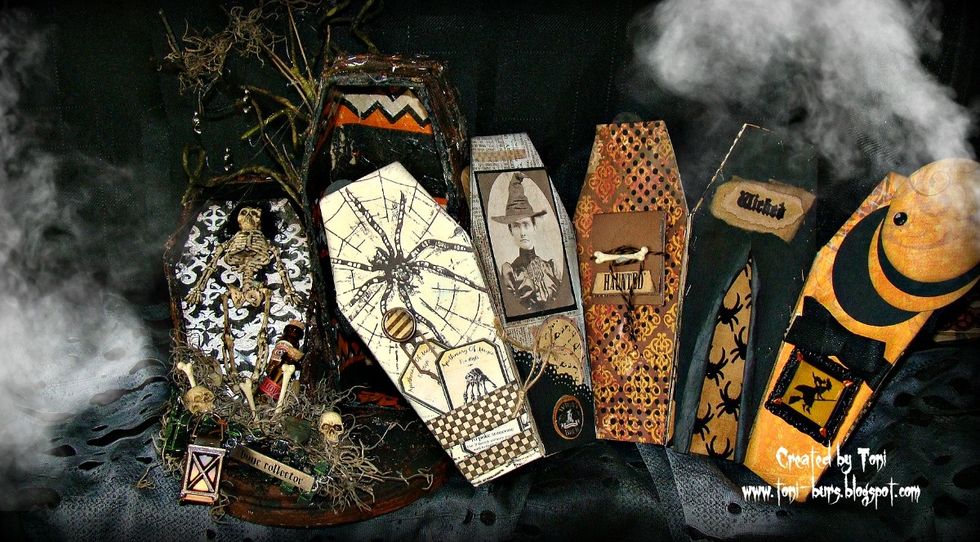
Here is one side of the mini album pages, The perfect size photos will be wallet size
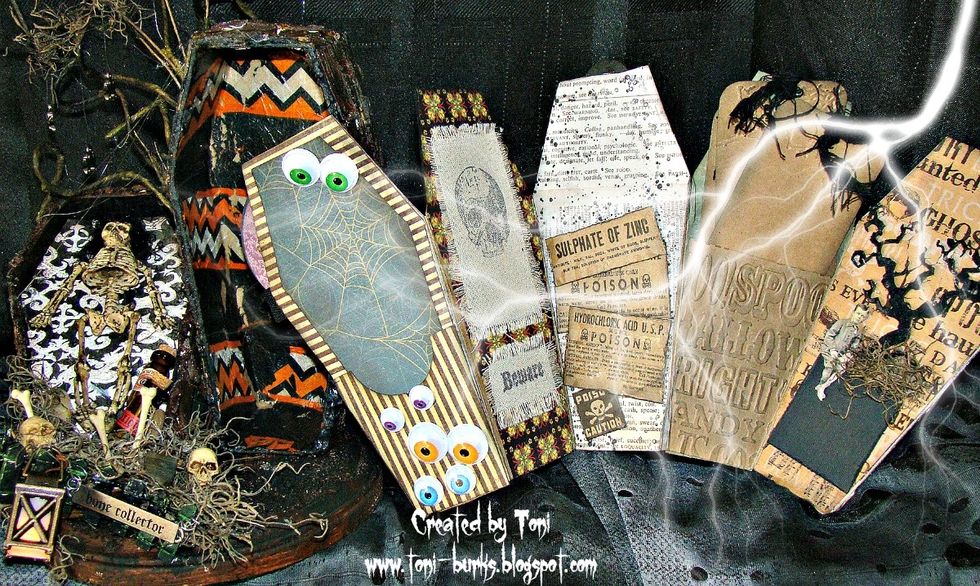
Here is the other side of the mini album, This album hold 30 photos. Let your imagination run wild when creating the album, doing each page different.
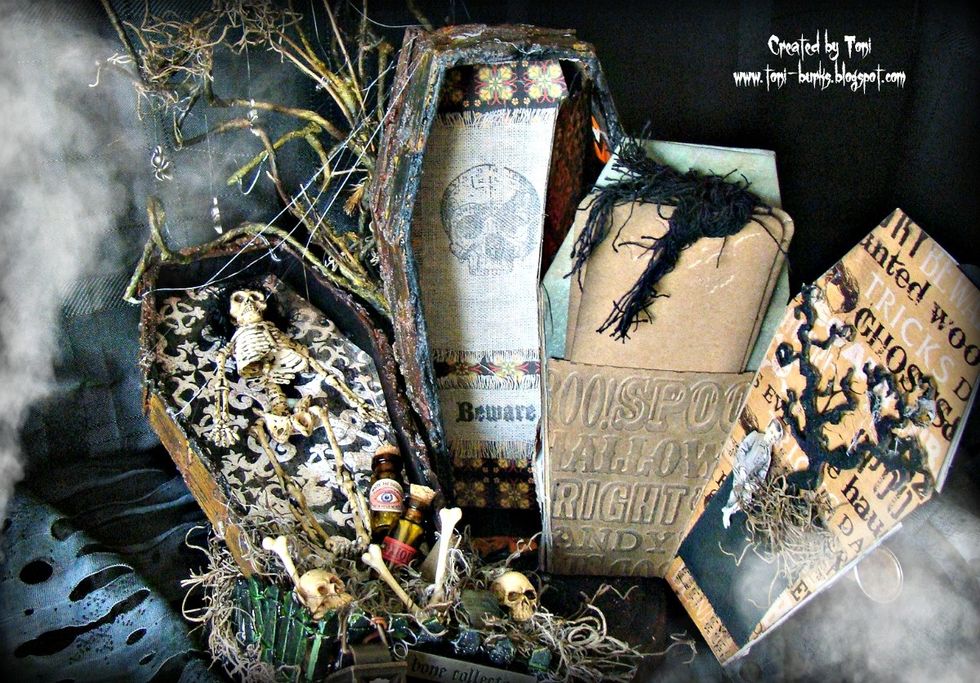
Last but not least, hook your lantern on the top of the fence as well as add your "Bone Collector" word band. Smudge Black Tuxedo on top to fill in the letters and wipe the top clean.

Here's Witching you a Happy Halloween !
For more inspiration please follow us here: http://artanthologyinc.com/blog/ https://www.pinterest.com/artanthology/ https://www.facebook.com/groups/741057632686564/the texture on the coffin.