The Conversation (0)
Sign Up
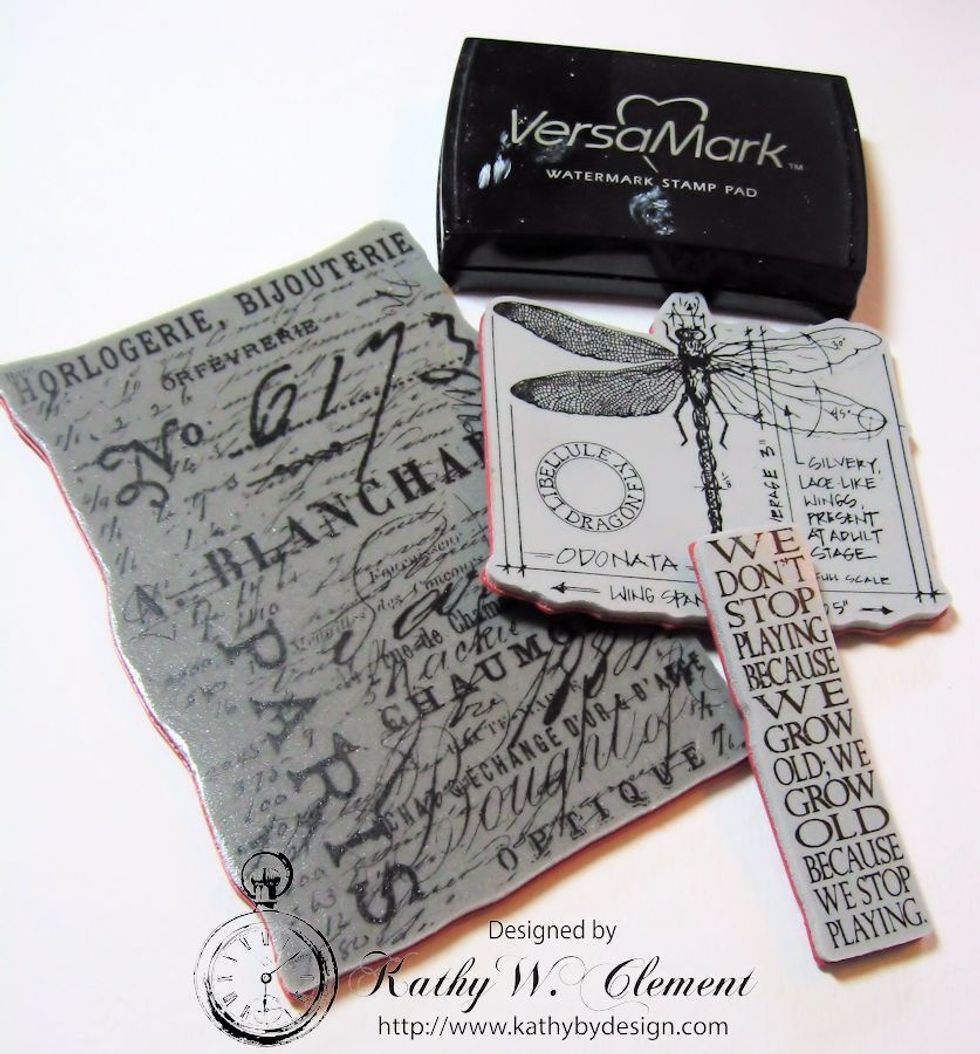
Select stamps from the Stamper's Anonymous Rubber Stamp sets. We are going to begin by stamping the French Text stamp onto watercolor paper using an embossing ink.
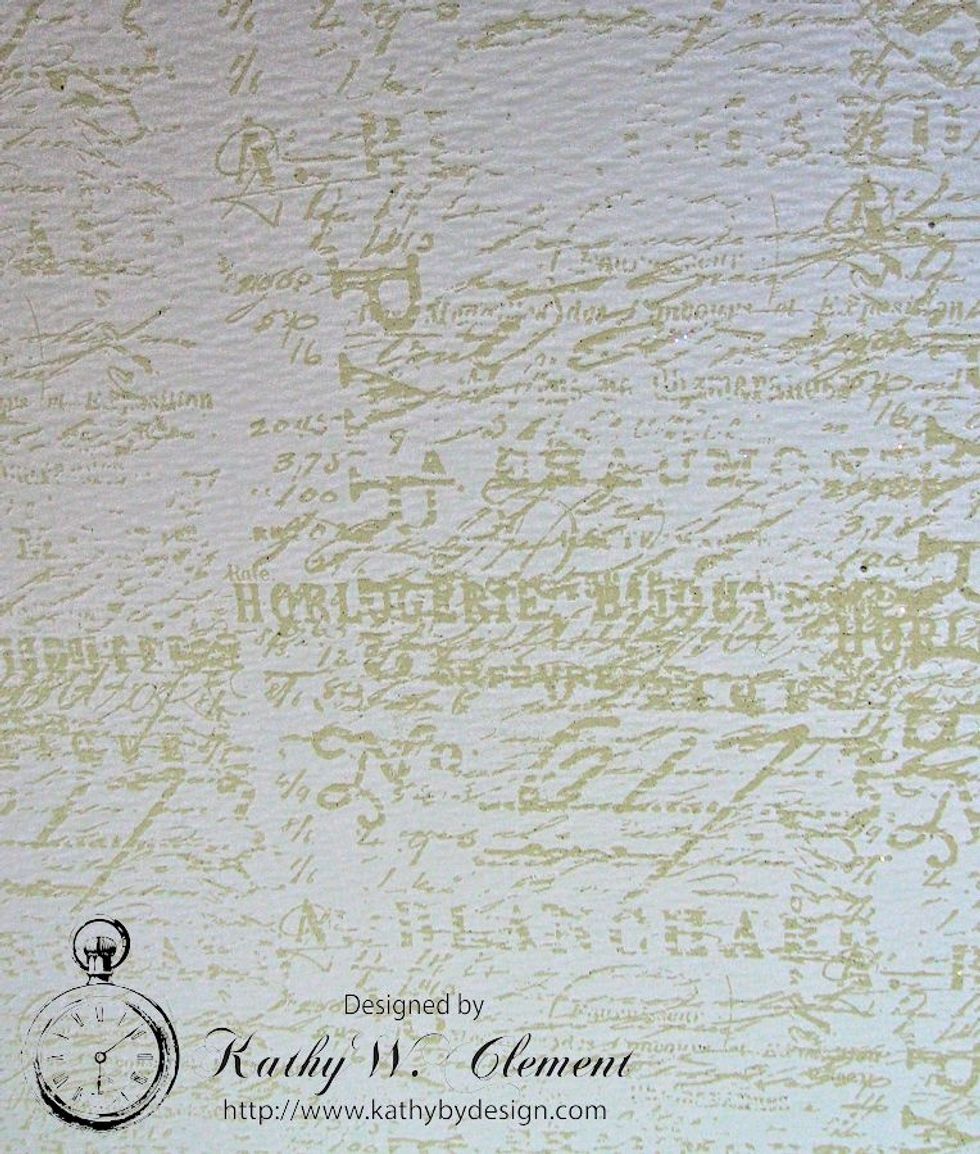
Randomly stamp the French text stamp over the entire surface of an 8.5" x 11" sheet of Ranger Watercolor paper. Sprinkle with Superfine White Embossing Powder and set with your heat gun.

Select Distress Inks in your preferred color palette. I've chosen to work with Tumbled Glass, Mermaid Lagoon, Spiced Marmalade, Twisted Citron, Fossilized Amber and Dried Marigold.
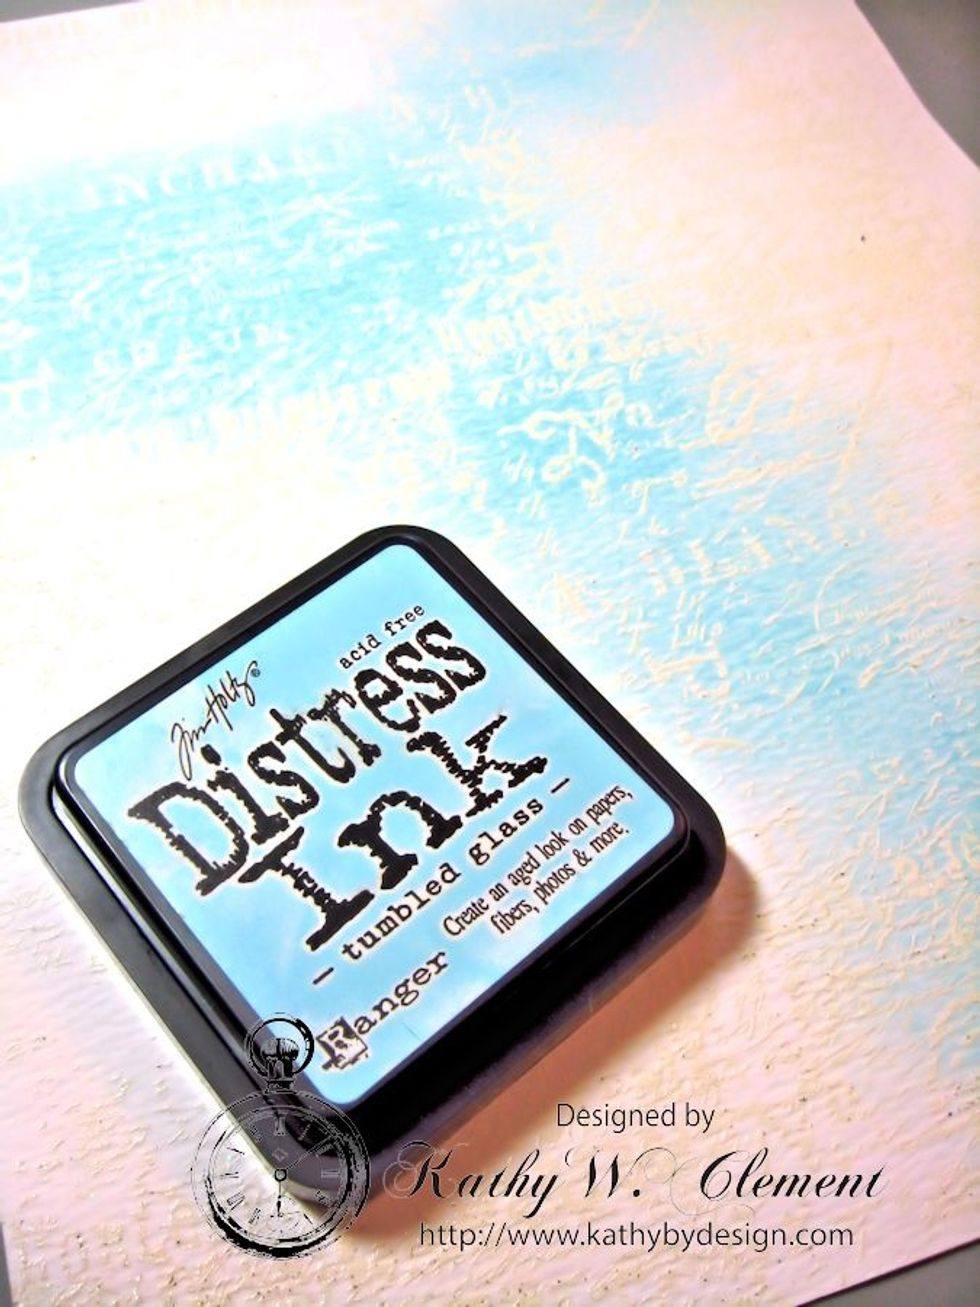
Choose the lightest color, and use a foam ink applicator tool to apply it randomly over the stamped and embossed background. See how the embossing does not take the color? This is called a resist.
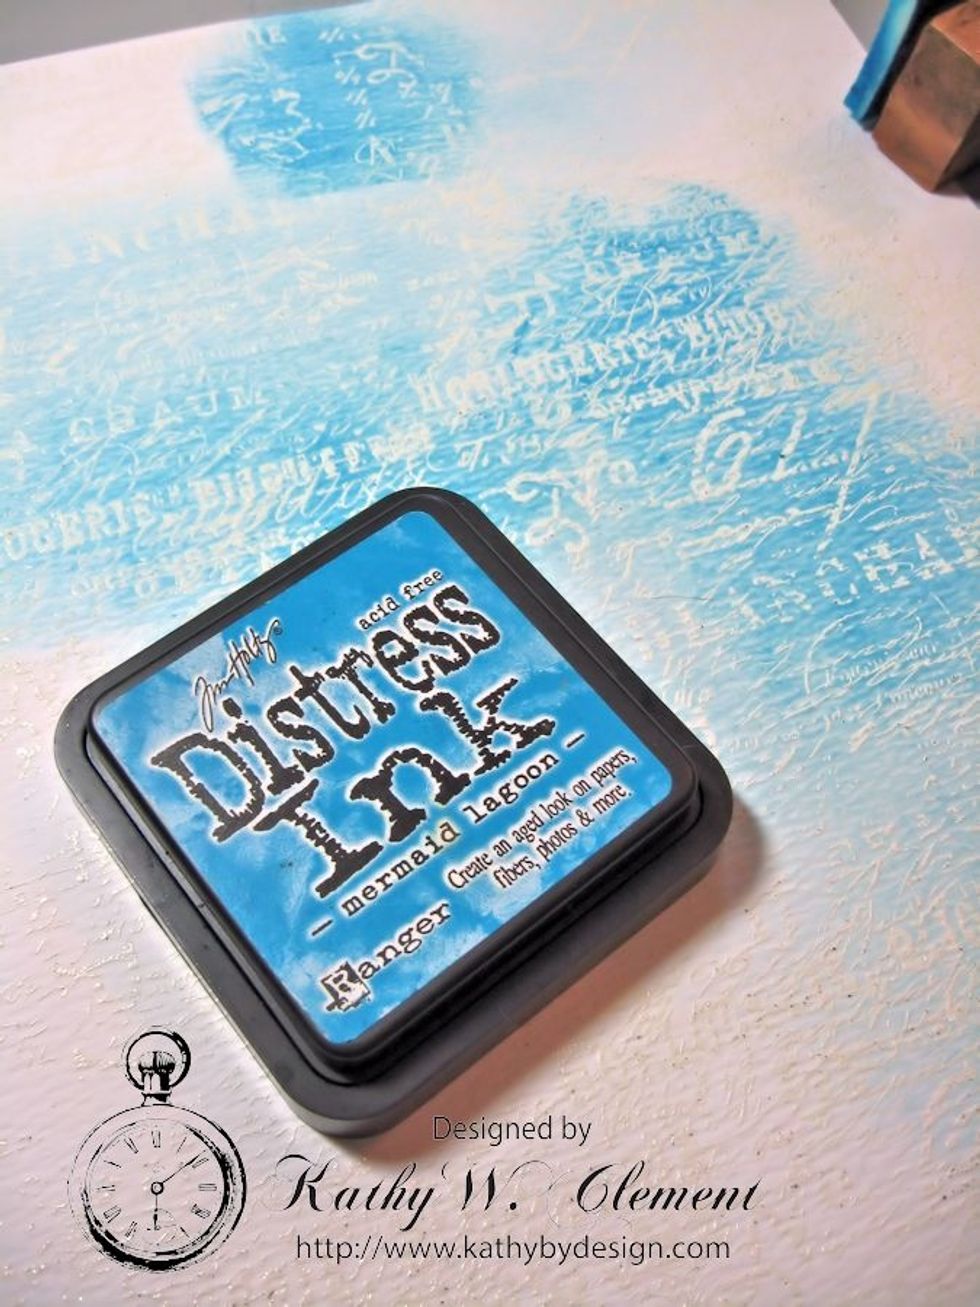
Next, I sponged on the Mermaid Lagoon Ink, overlapping with Tumbled Glass in some areas, and not overlapping in others. Experiment and see what you like. Relax and have fun!
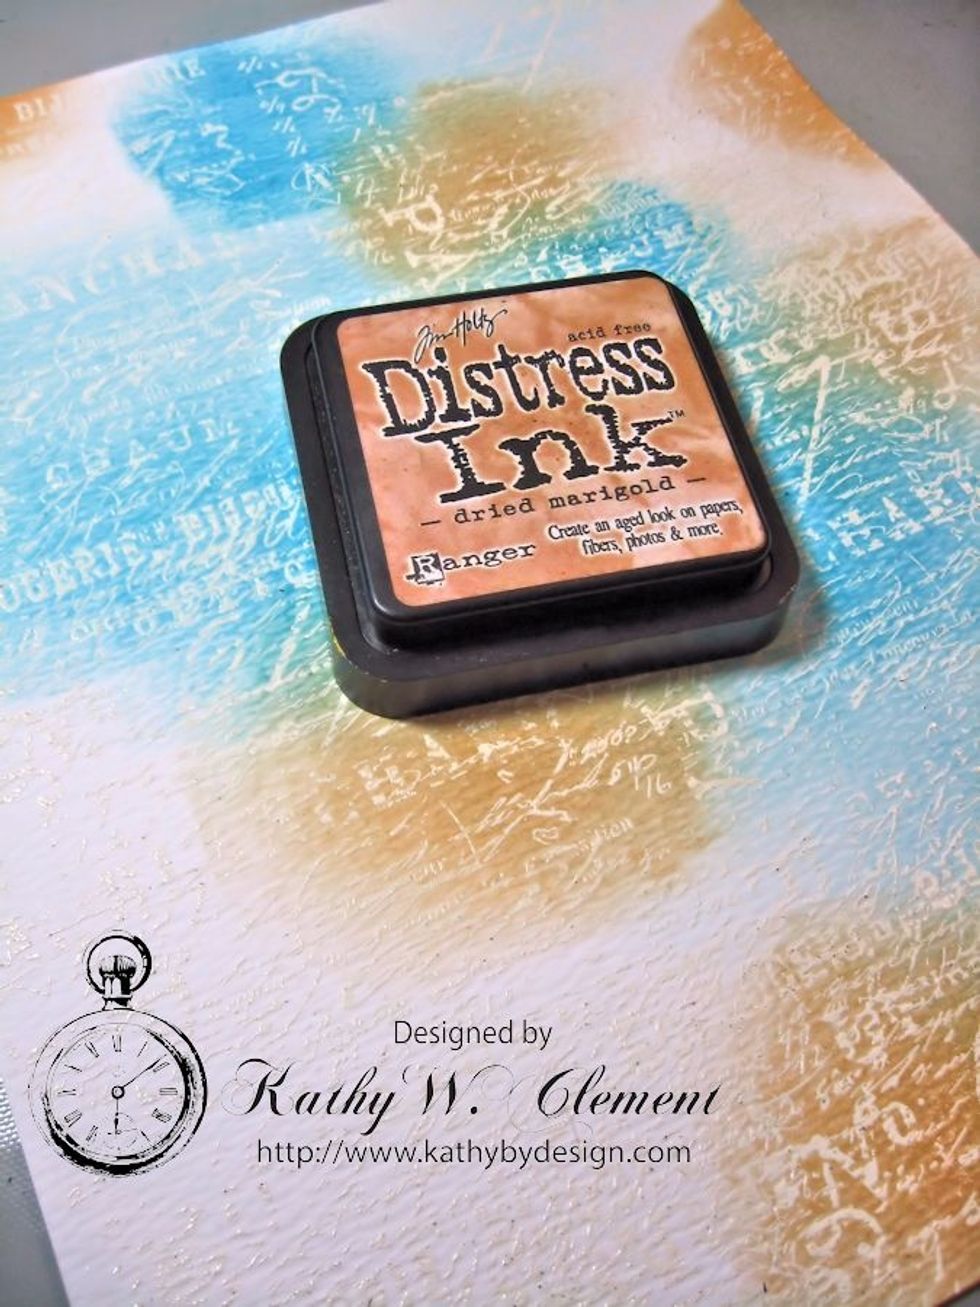
Next I chose to work with Dried Marigold. See how I am overlapping, laying the colors down next to one another? These will all blend together later on. Sponge away!
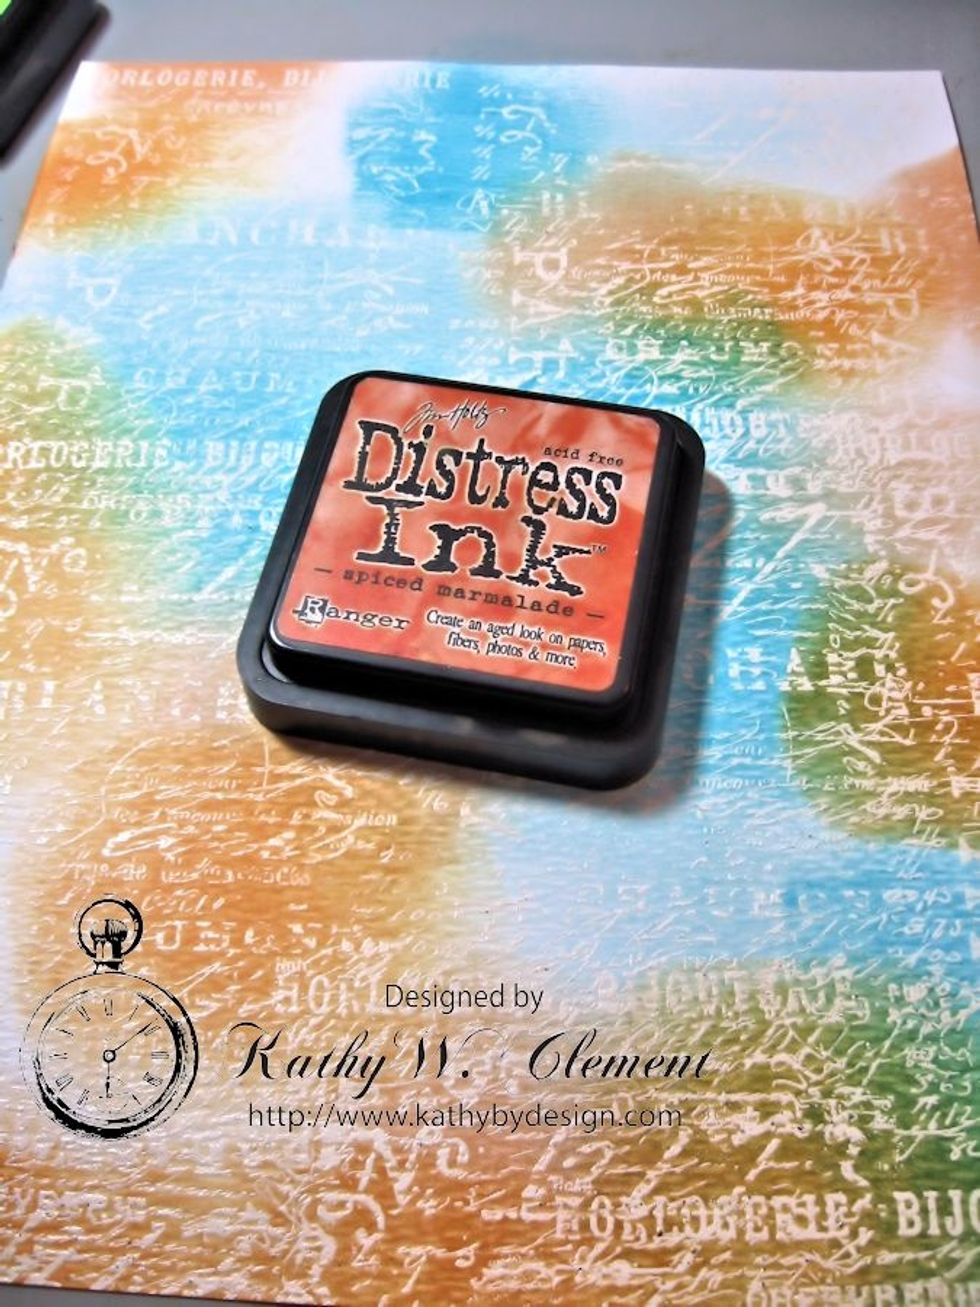
Since Spiced Marmalade is darker than Dried Marigold, I worked that color into the mix next. Look how the emboss/resist is showing through the ink. Isn't it cool?
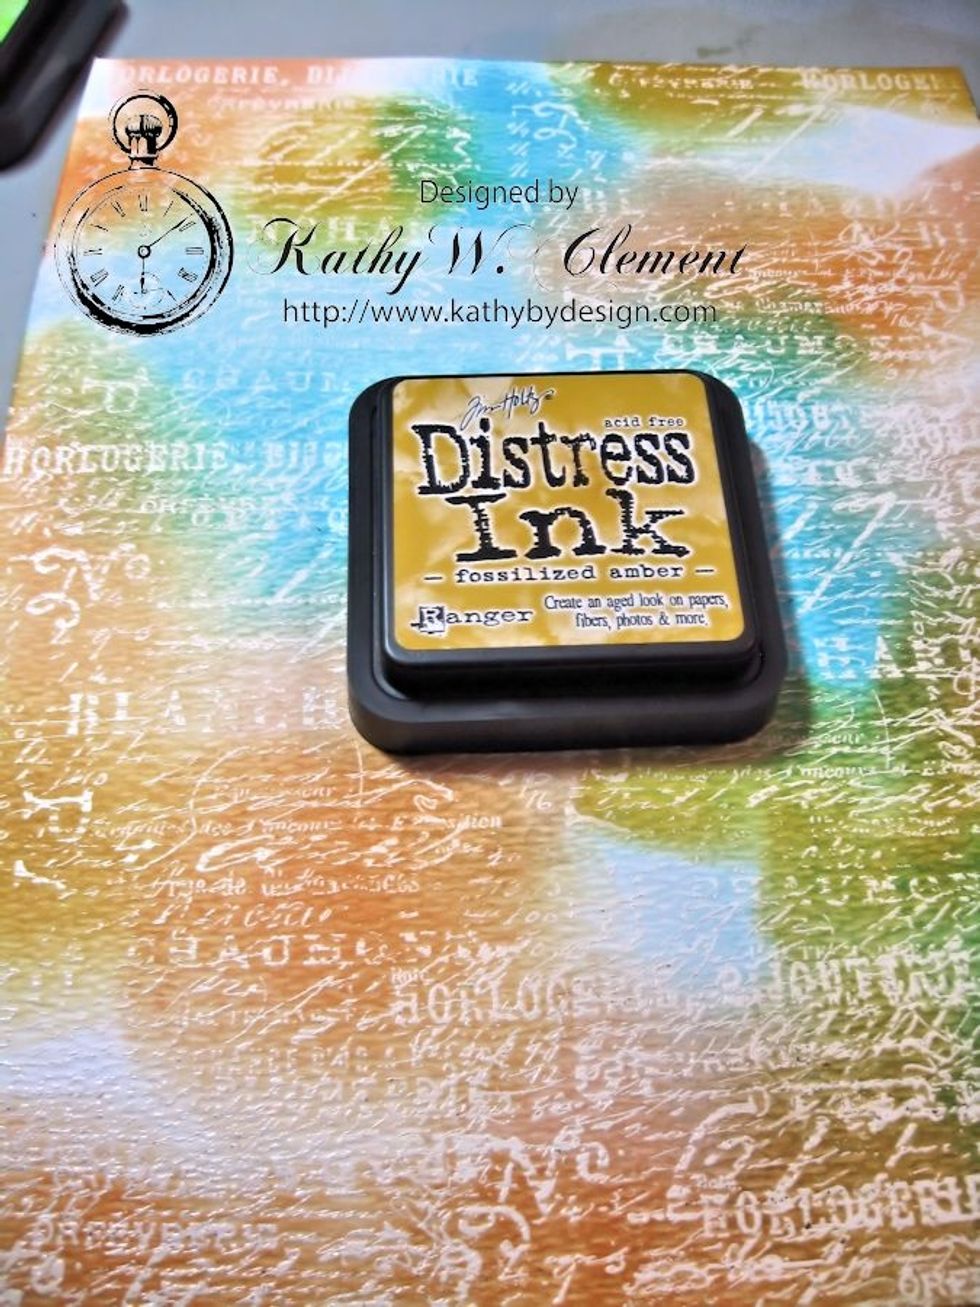
Keep adding color.
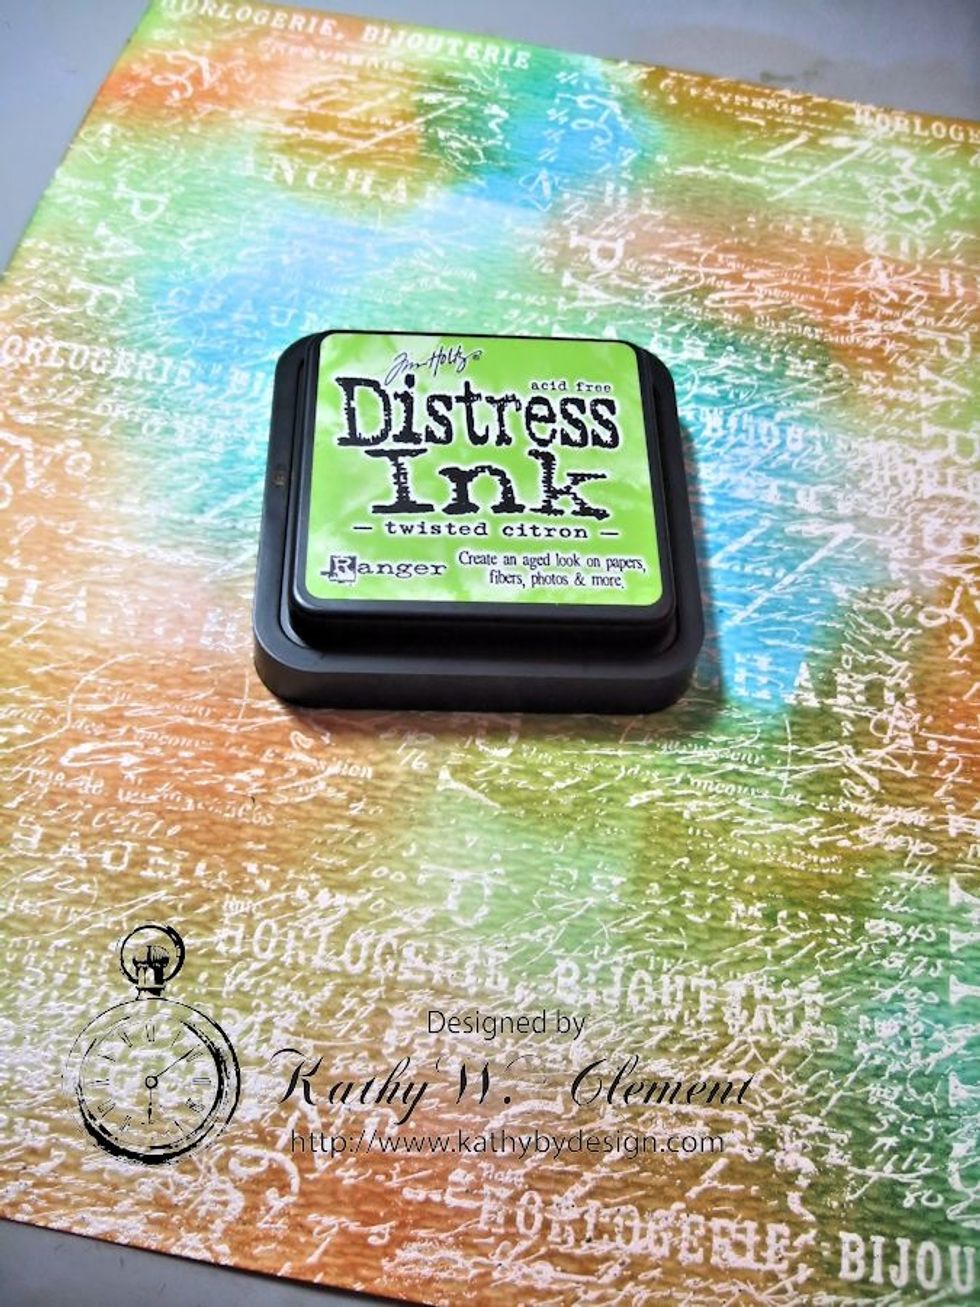
I finished with Twisted Citron to add pops of neon color to the background. As you can see here, the entire surface is colored, edges overlap and it looks like a rainbow!
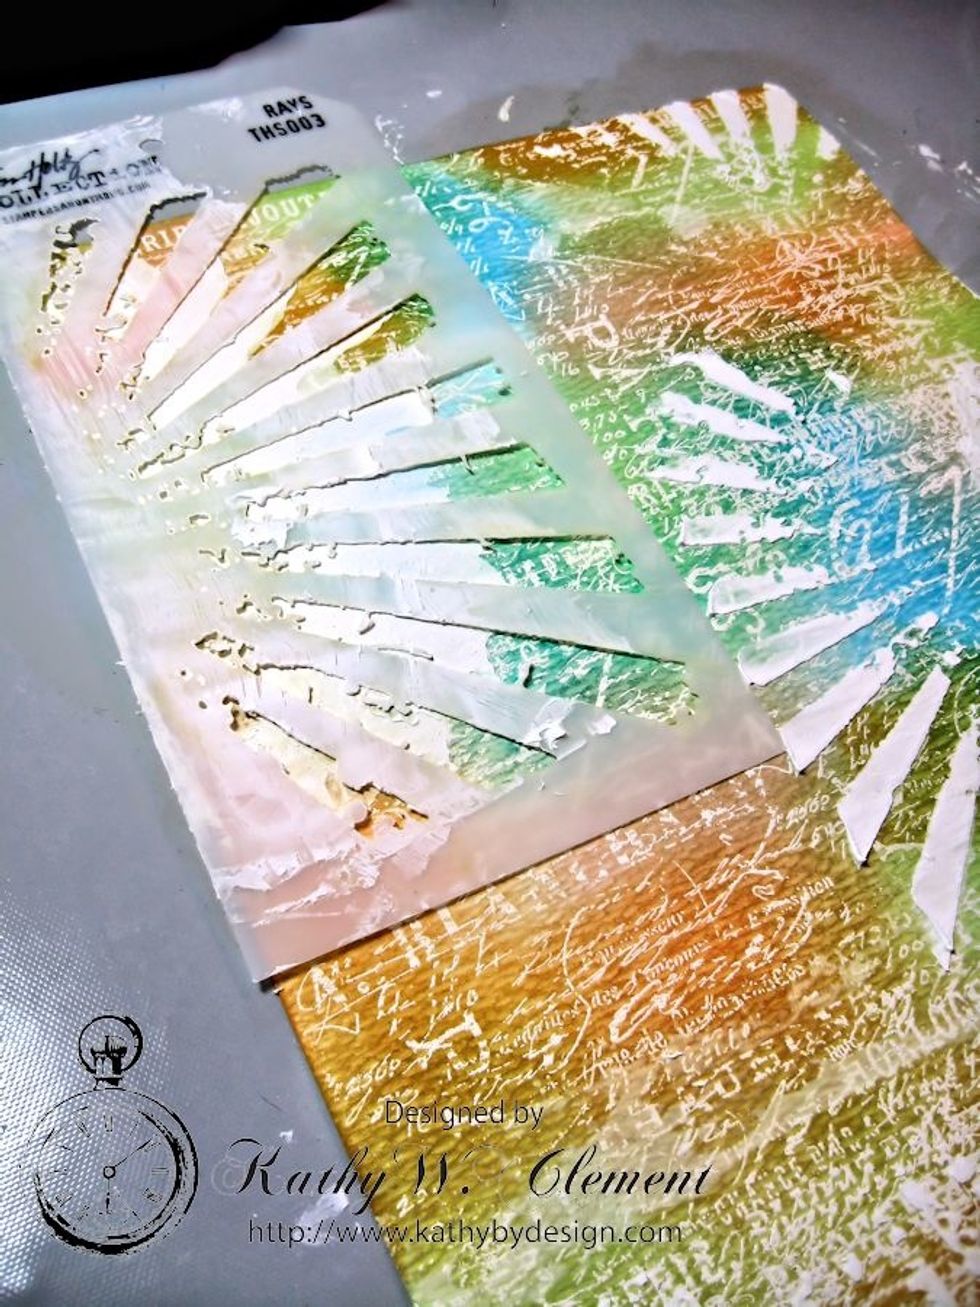
Use "Rays" stencil to add crackle texture over the top of the background, changing direction as you work. This creates a random pattern on the background. Apply with spatula knife or old credit card.
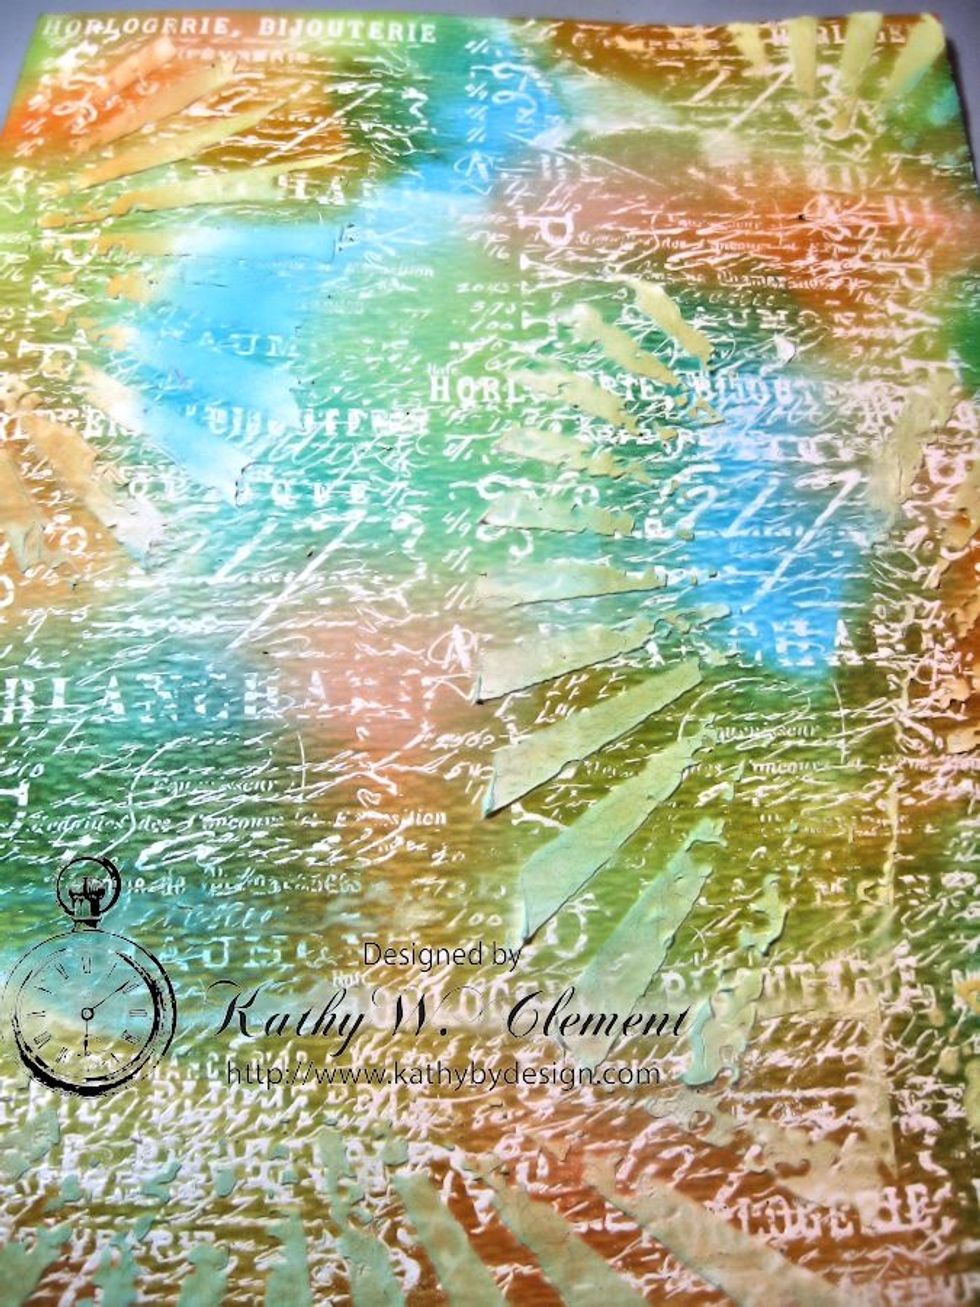
Let the crackle paste dry overnight, or dry carefully with a heat tool Spritz with a water bottle and flick water with your fingers to further blend and distress the background. .
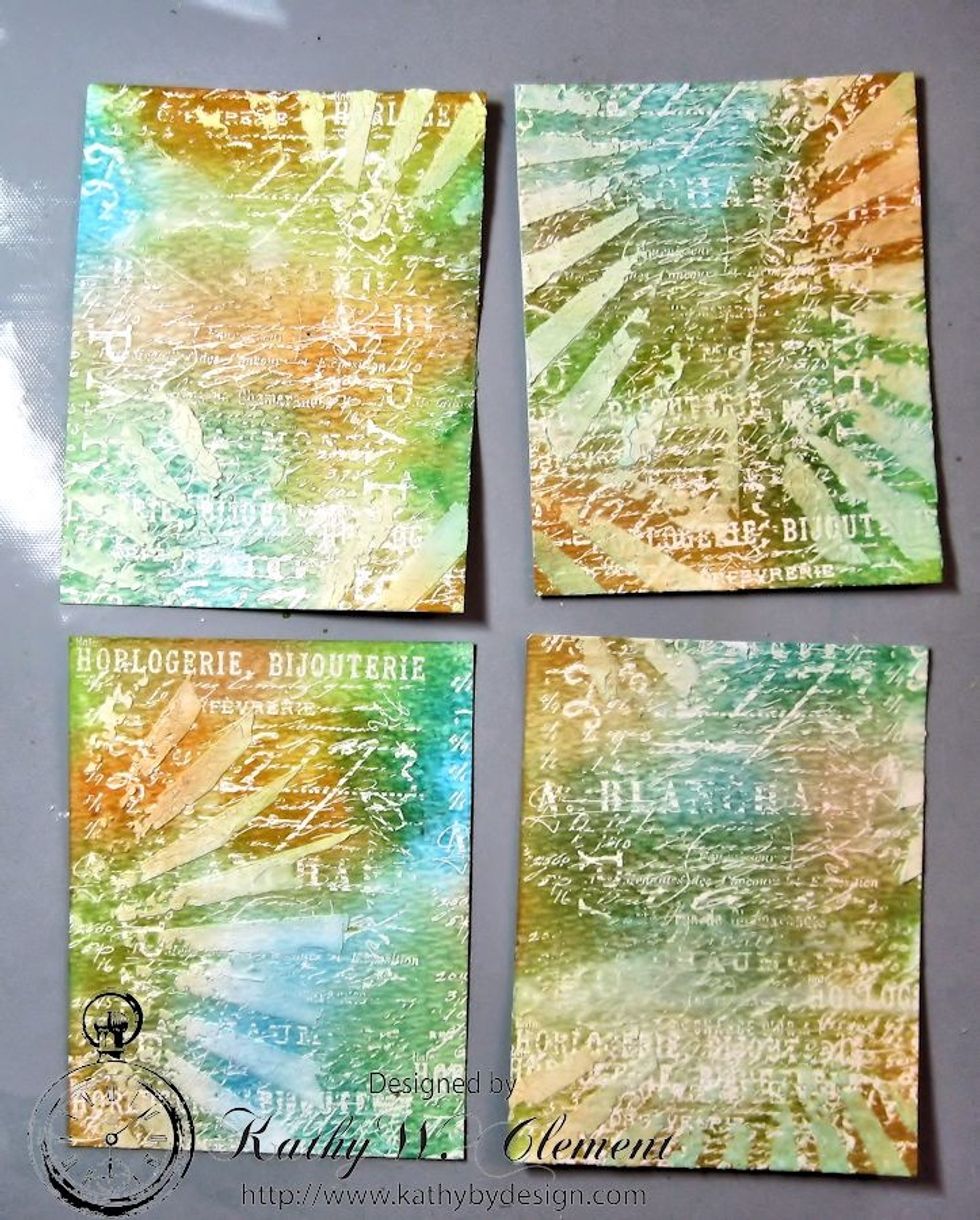
As the background dries, the ink colors will seep into the texture paste. Cut the dried background into 4 even rectangles. Each piece is a card base. Now that wasn't so hard, was it?
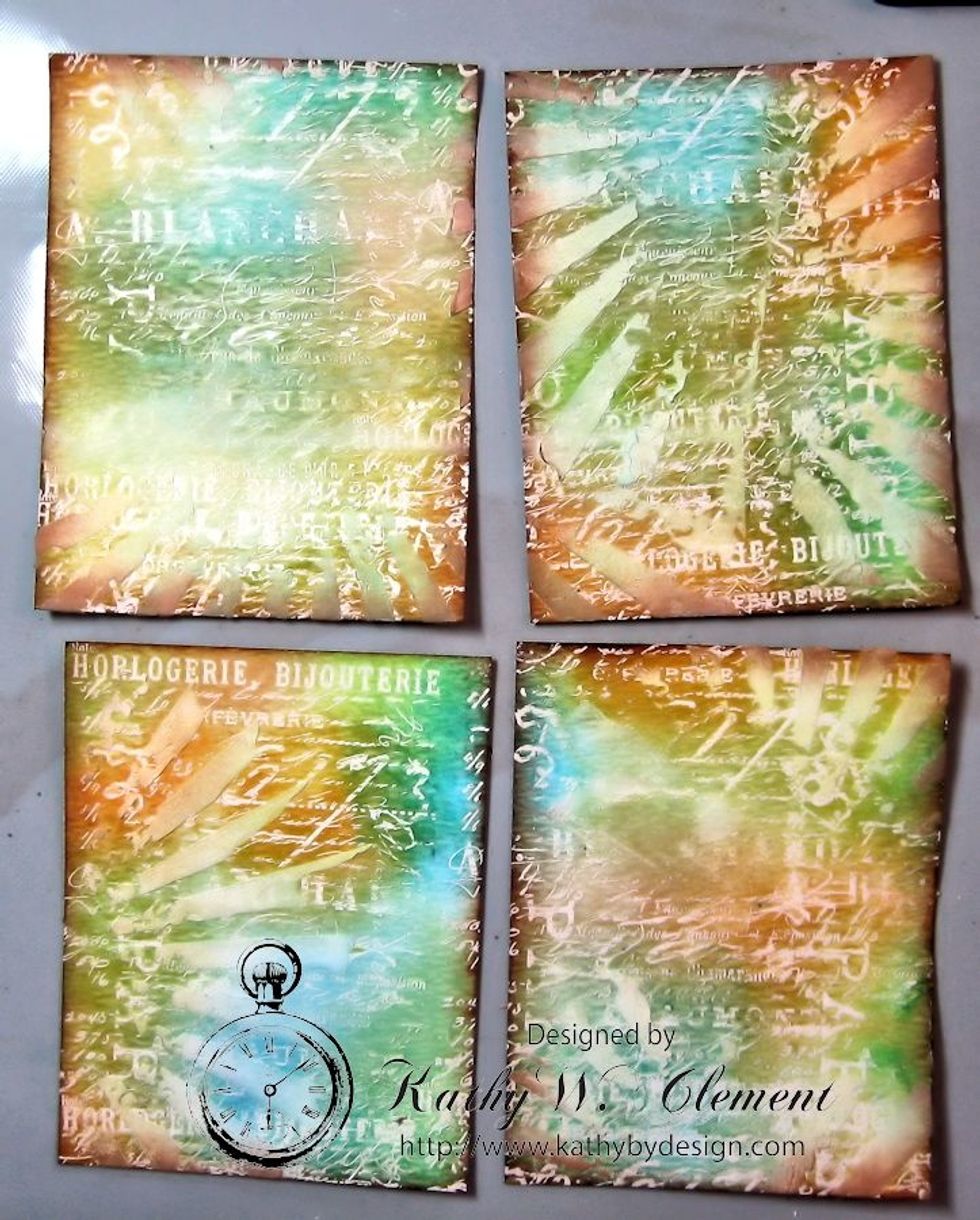
Ink the edges of each rectangle with Vintage Photo Distress Ink to create a border. This also causes the colors to POP of the page.
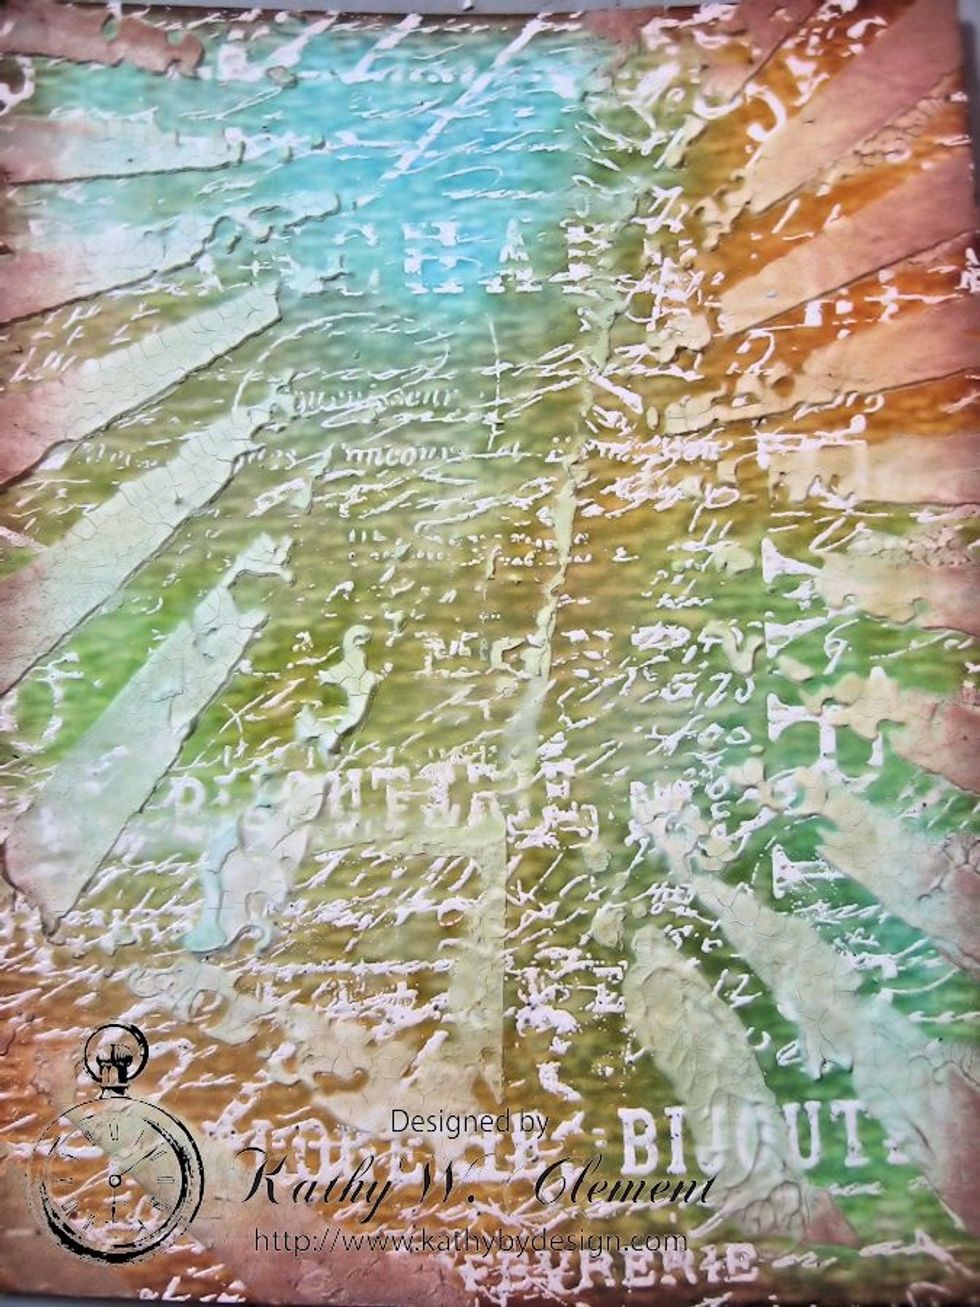
At this point, you can blend colors a little more, or spritz on more water to give individual character to each panel. I wiped ink away with a damp paper towel so the emboss resist would show better.
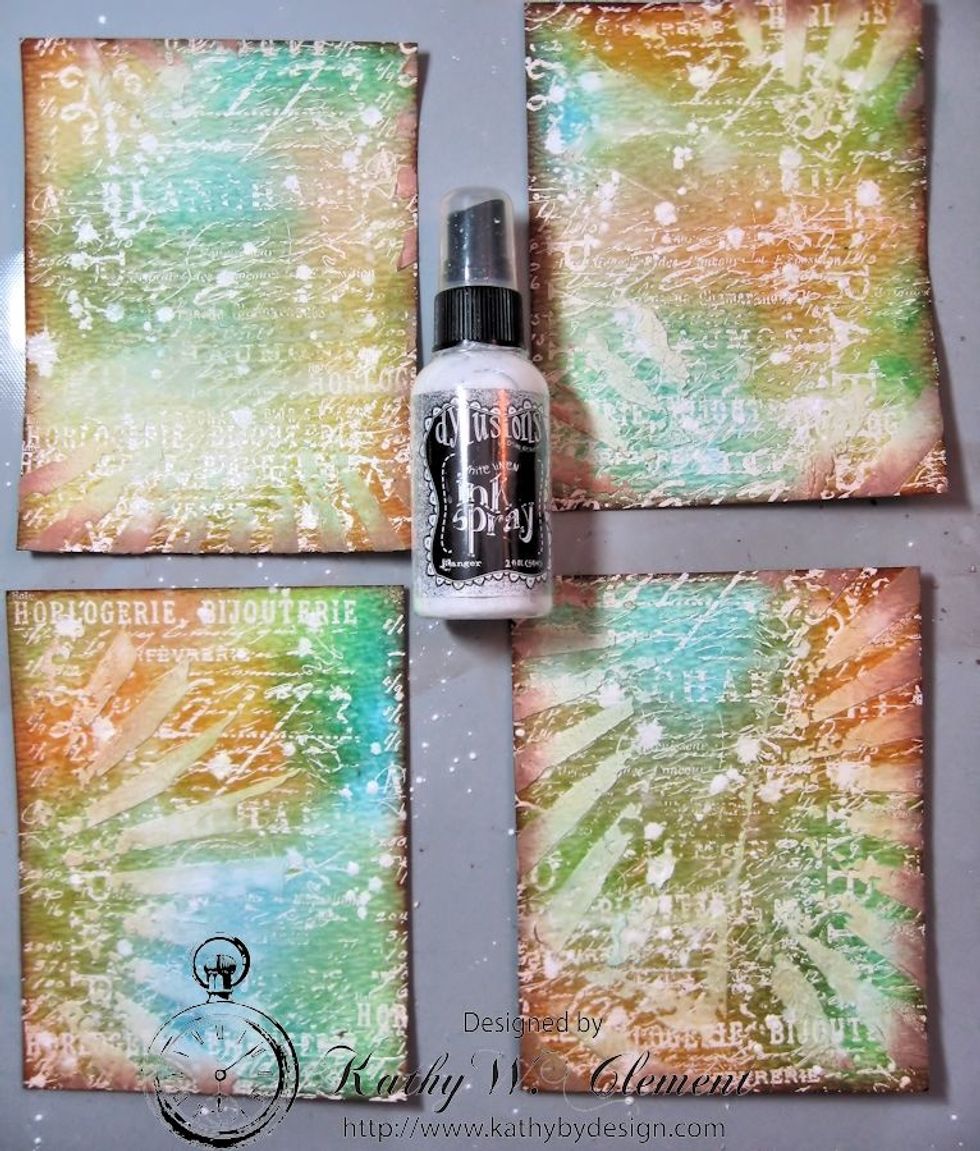
I added inky spatters with Dylusions Linen Spray. I spattered the surface by taking the top off the bottle and using the tubing to splatter the ink. Heat dry.
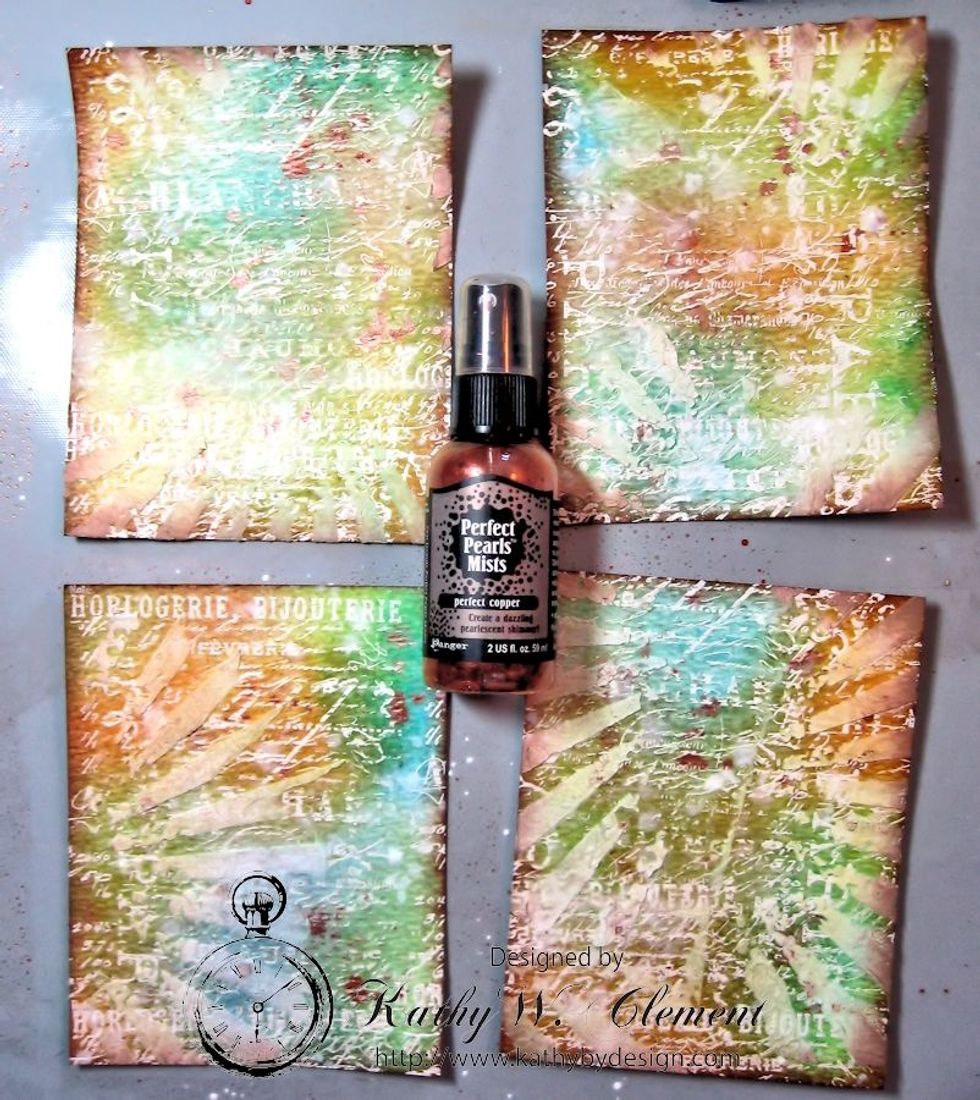
I did the same thing with Perfect Pearls Copper Mist. I love the metallic gleam this adds to the background pieces.
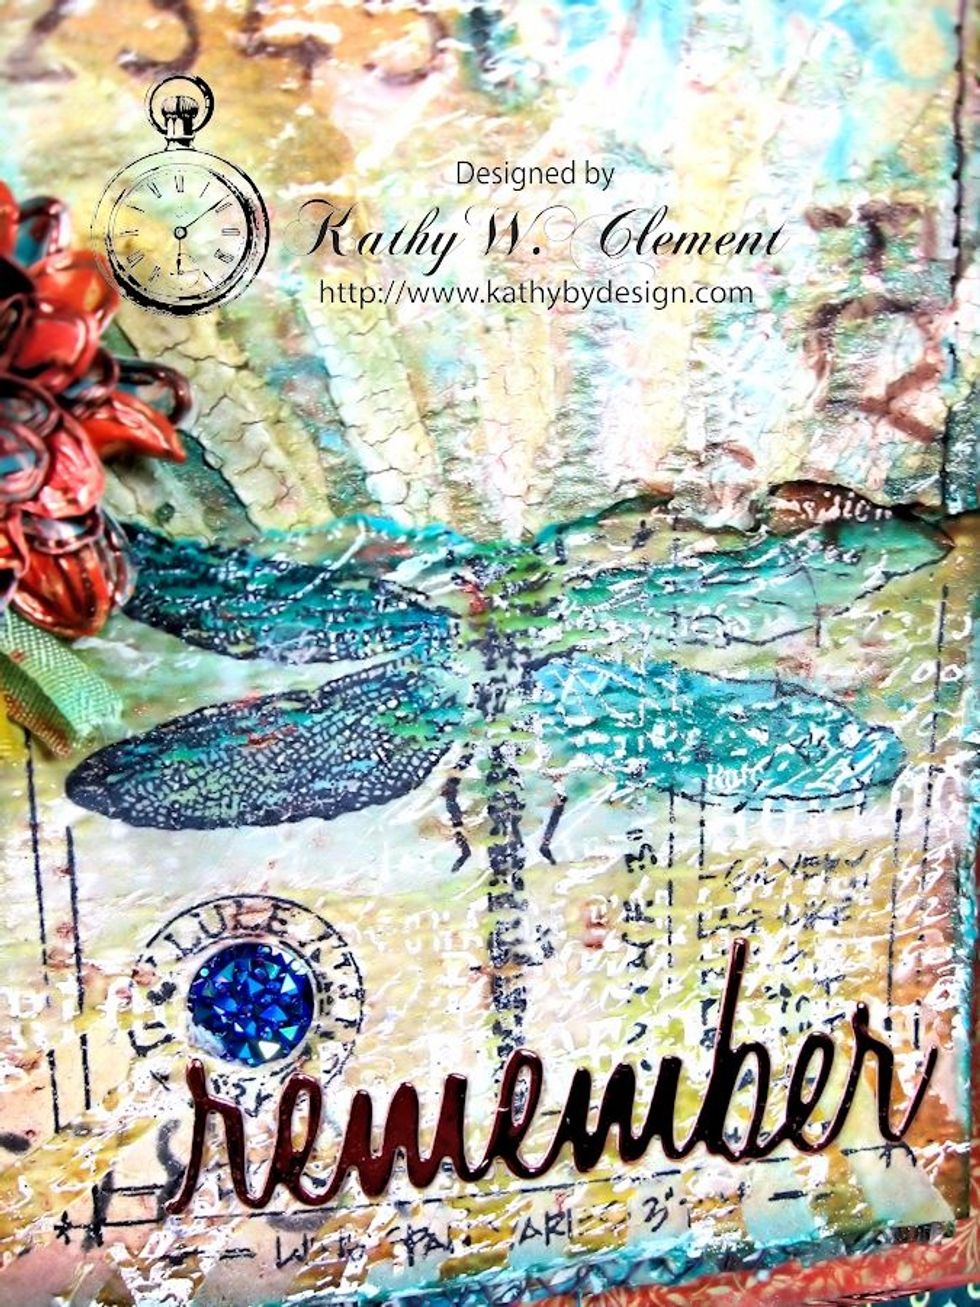
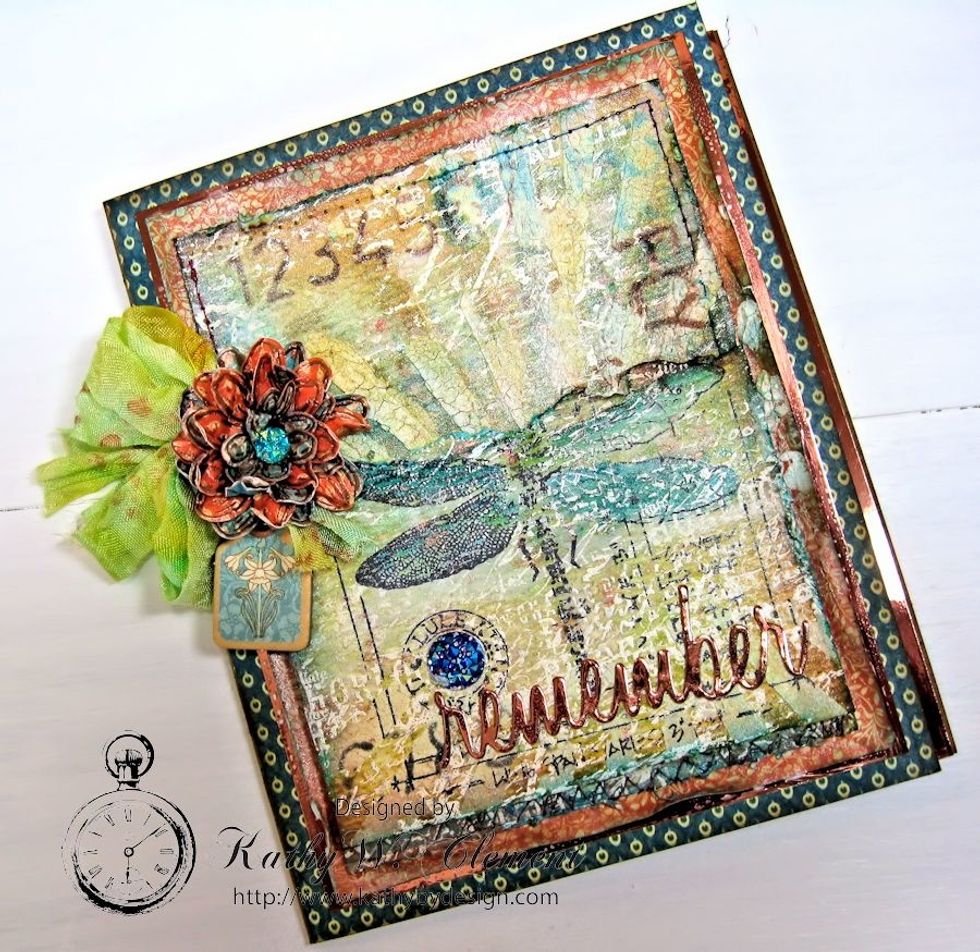
I used Ranger Jet Black Archival ink to stamp my dragonfly, then colored in the wings with Distress Re-inkers and a water brush. A sentiment was die cut from copper metallic paper & gems were added.
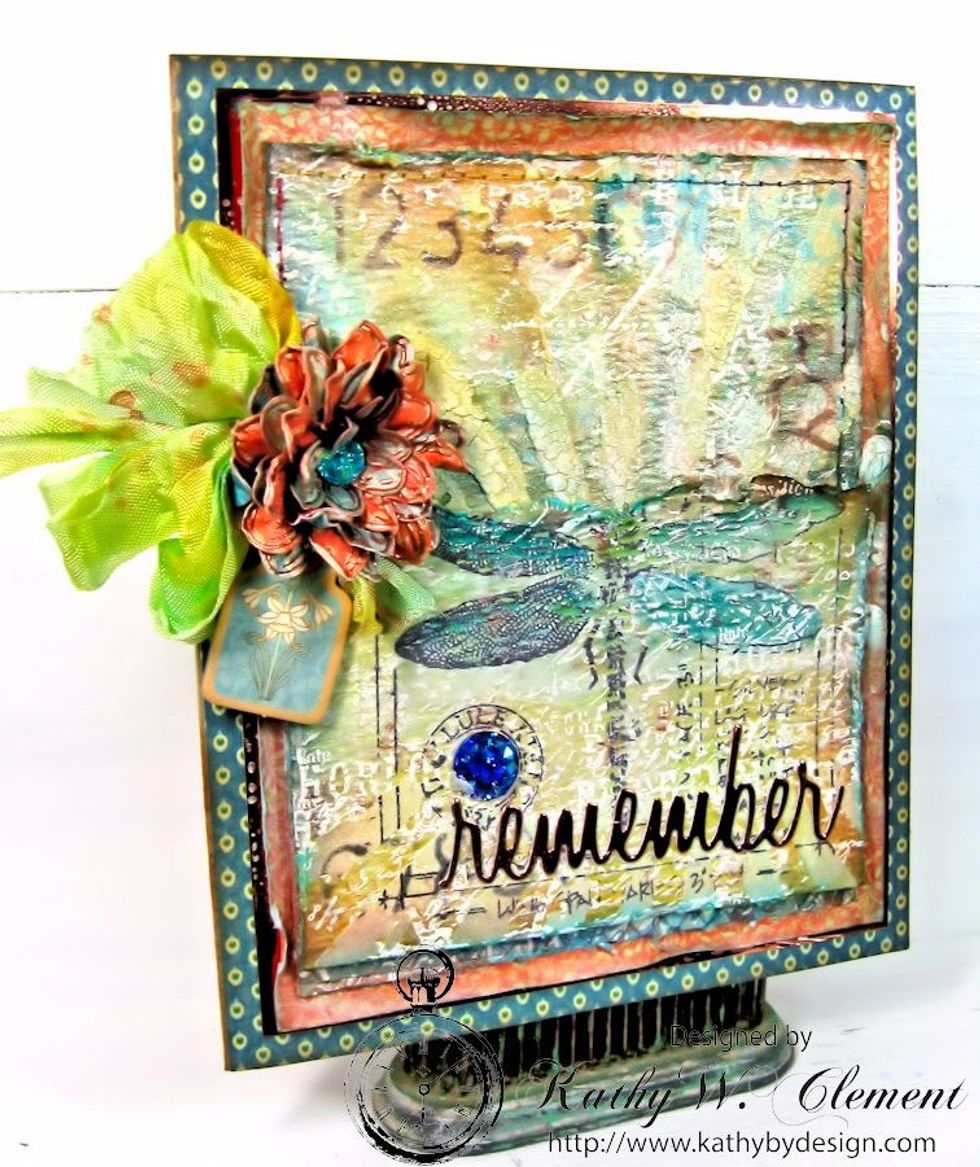
I wanted to add more layers, so I stenciled on numbers and letters from "Schoolhouse" Stencil in Vintage Photo Ink.
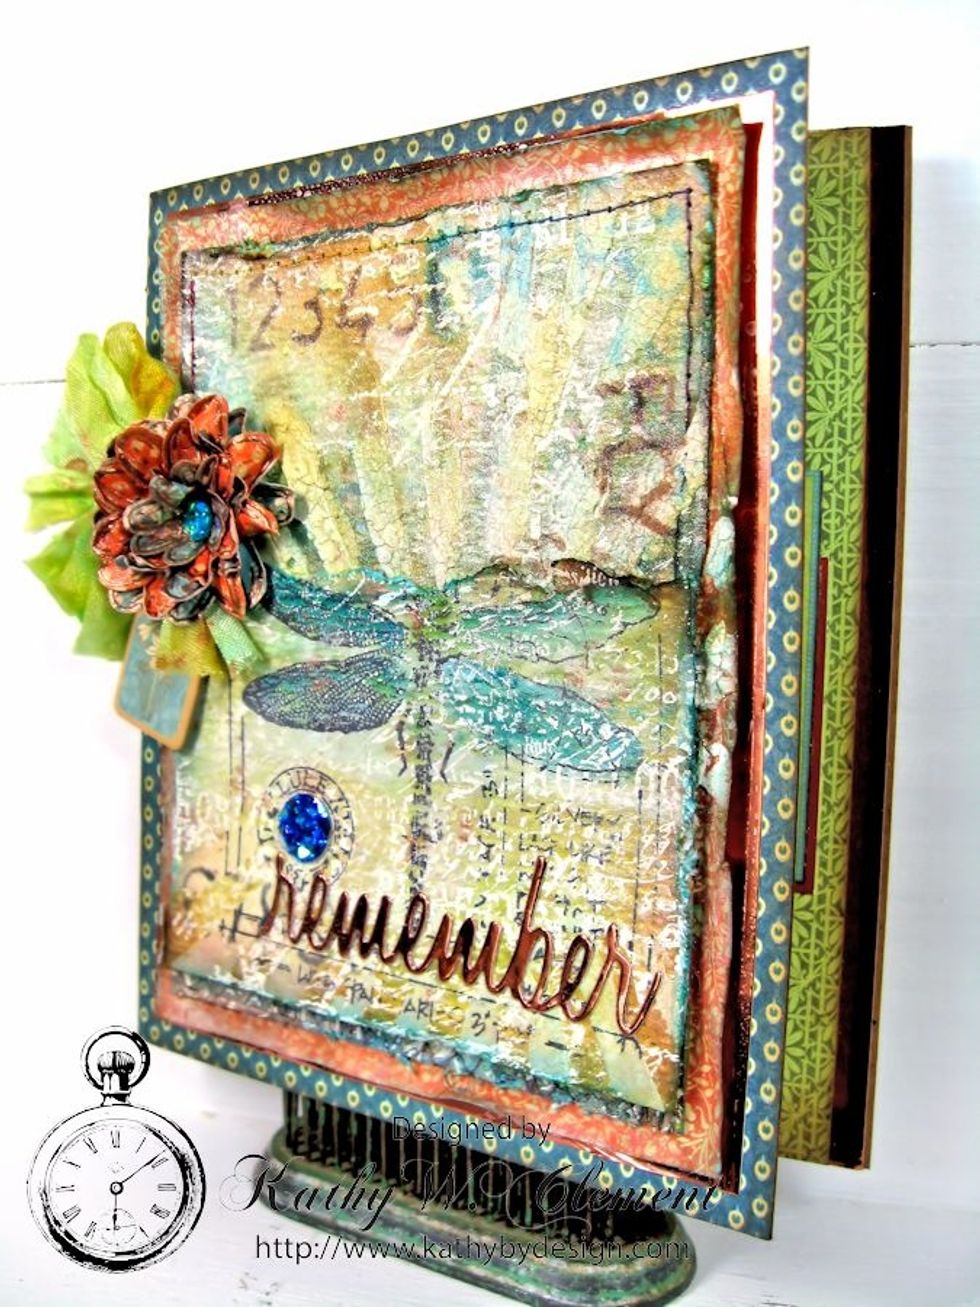
The edges were distressed, then the panel was stitched onto Graphic 45's Artisan Style papers &more copper cardstock. I custom dyed a seam binding bow &created a handmade flower to finish the card.
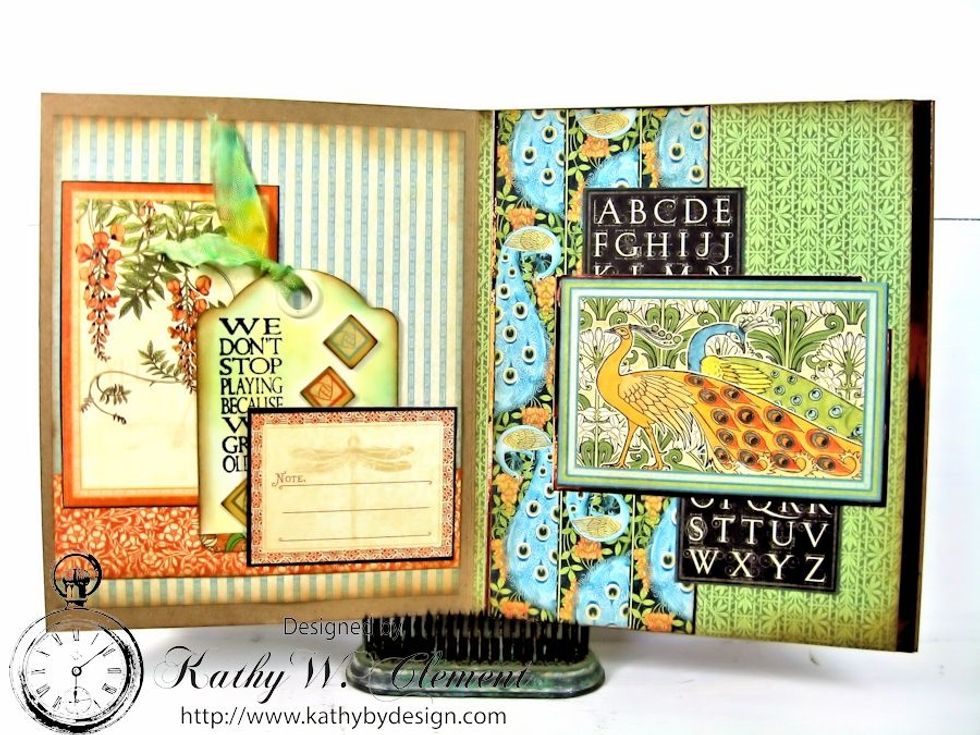
The interior of the card was finished with gorgeous layers of paper from Artisan Style. I tucked a Staples ATC tag behind the postcard. You can write a personal note on the postcard.
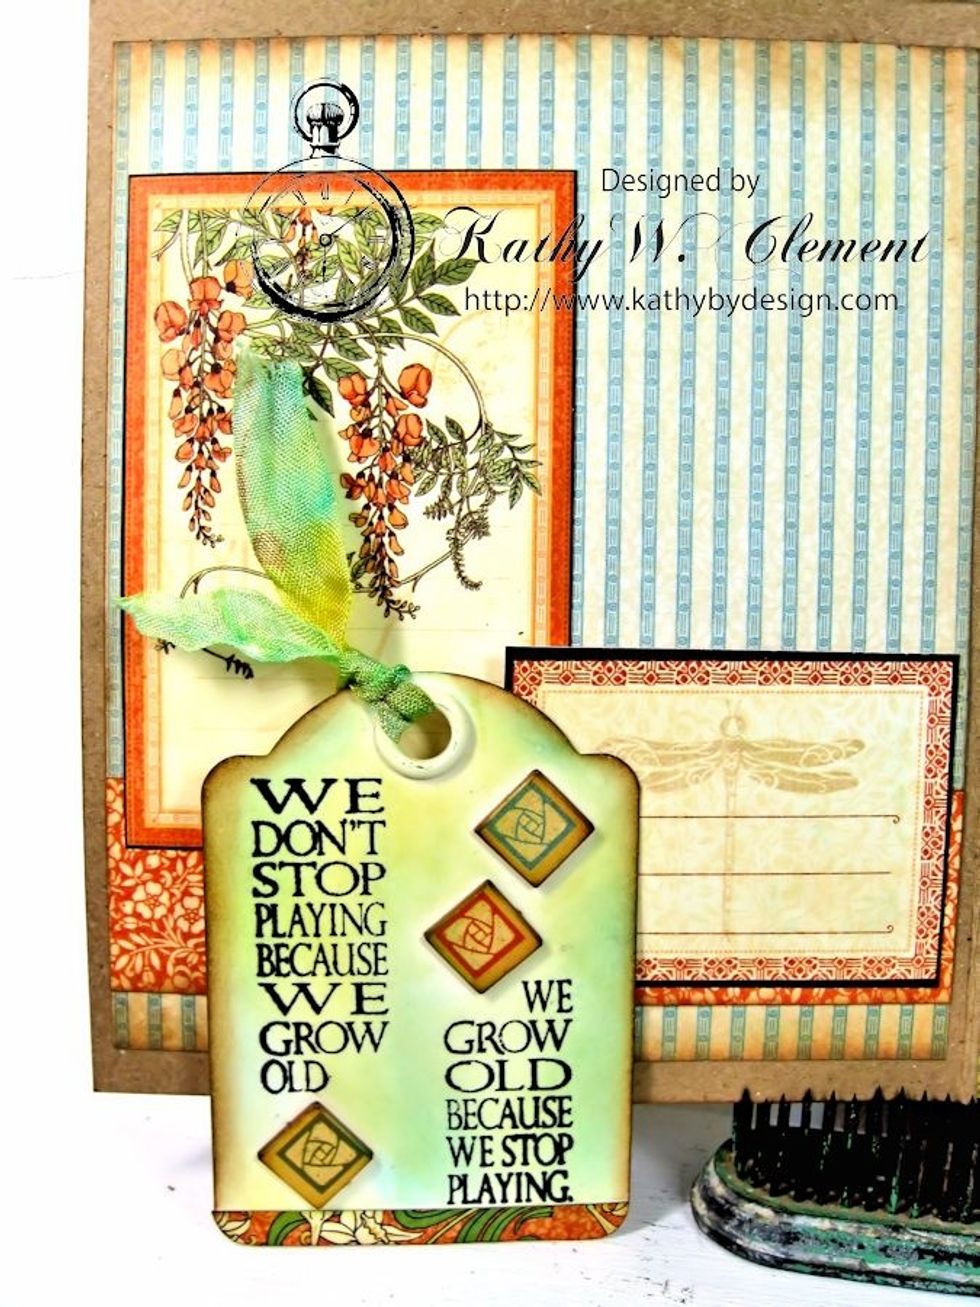
The little tag has been inked with the same colors used in the Master Board, then stamped with the sentiment in Jet Black Archival Ink.
You have 3 more panels that you can use to make more mixed media cards! So get inky, have fun, and make art! Thanks for joining me!