The Conversation (0)
Sign Up

Begin by painting nails your base color.. I have used Yodel Me On My Cell by OPI. It's best to use a color that is not thick so that it doesn't take long to dry.
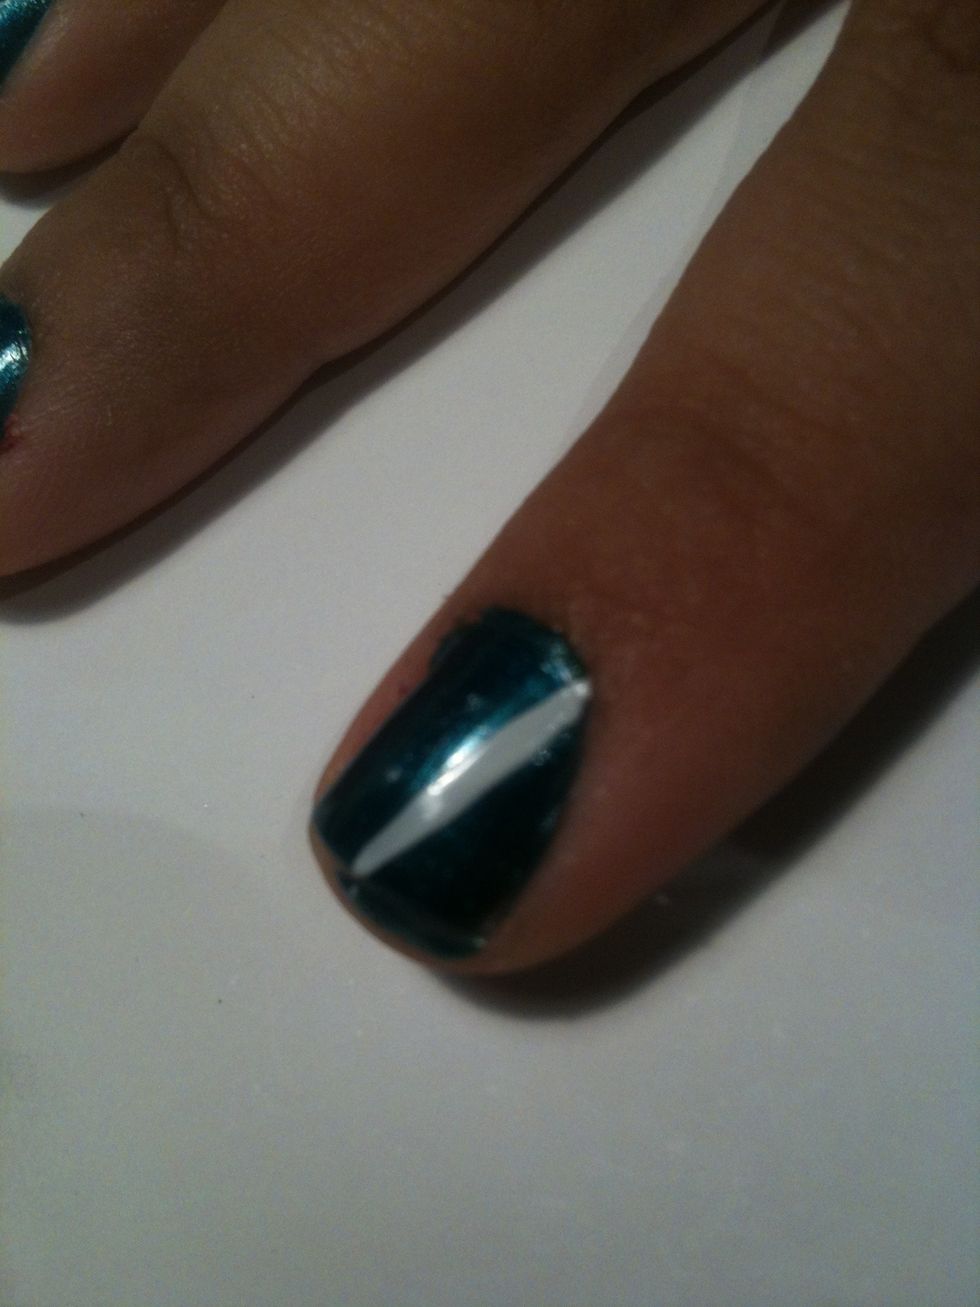
Starting just under the "corner" of your nail paint a line going down diagonally toward the centre tip of your nail. Do this with a fine tipped brush, then fill in the corner with the same color!
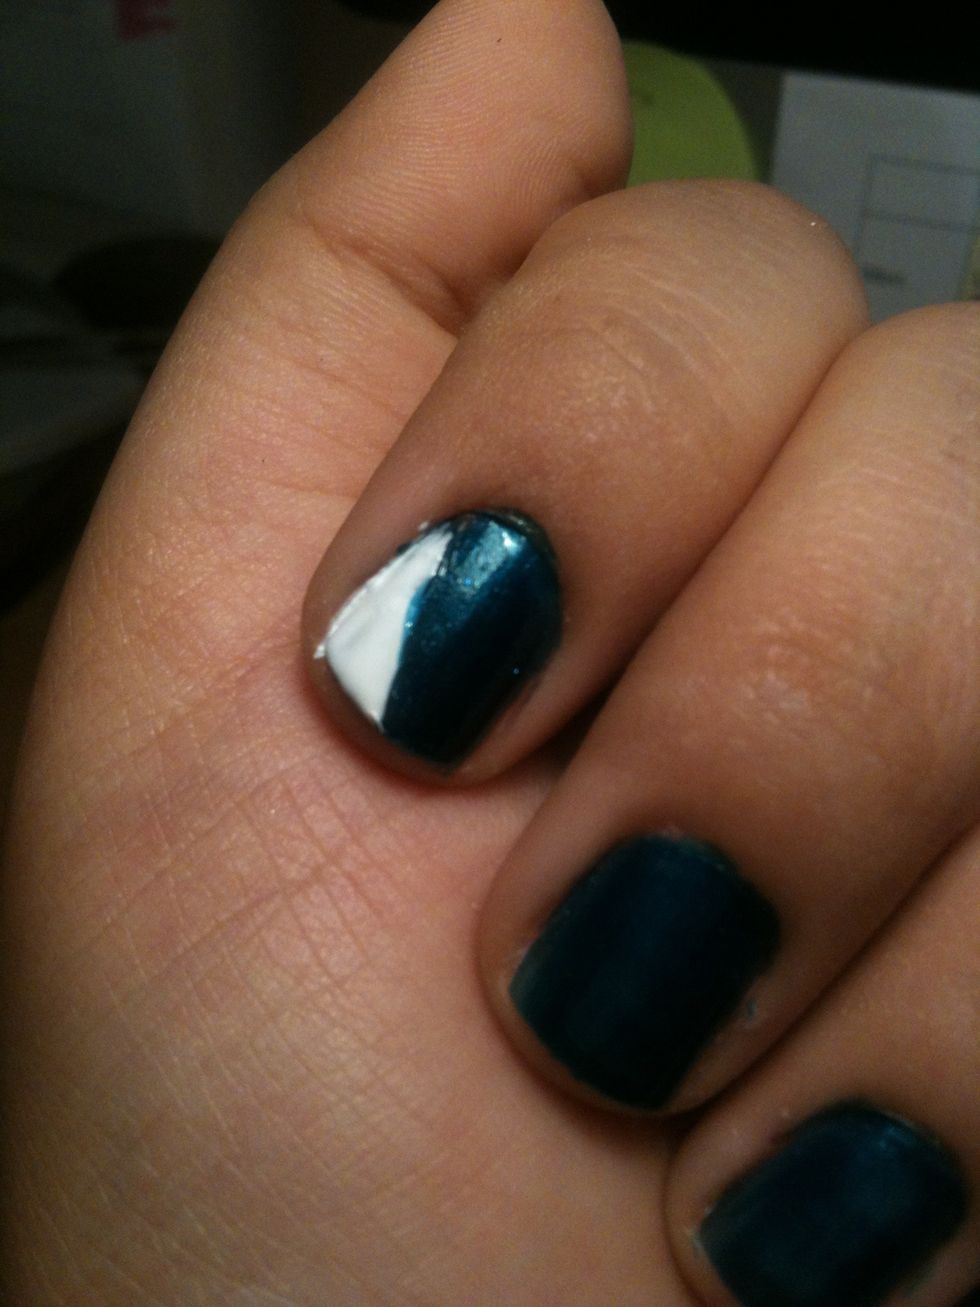
Here is a closer look at the first nail I did with the corner filled :)
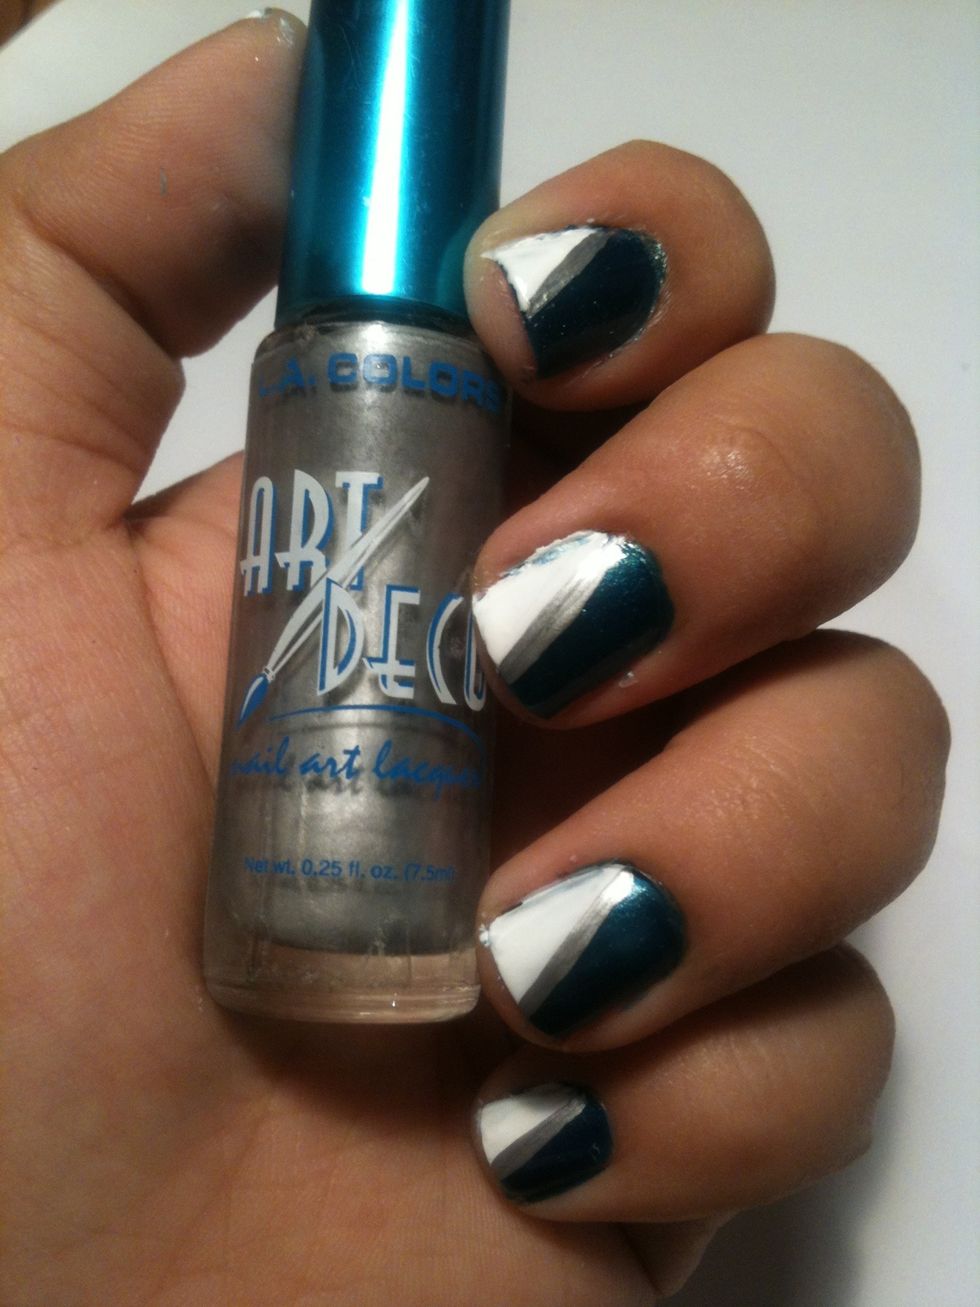
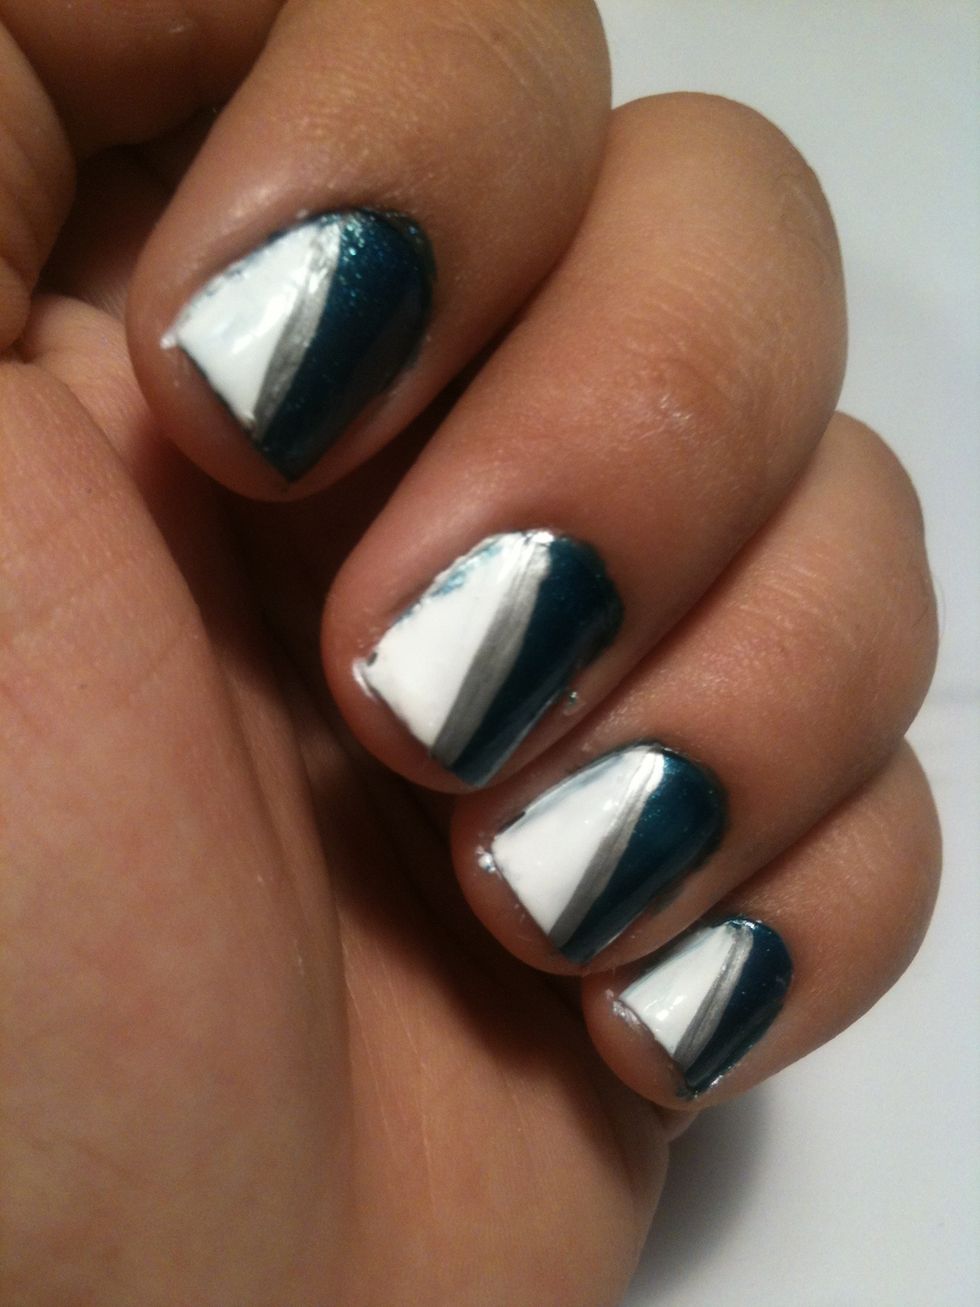
Now, using your metallic color & again a fine tipped brush paint a direct line between the two sections. This covers up any crooked/ messy lines and adds a little something to the design (=
TIP: Take your q-tip and pull off the cotton, revealing the end. Stick it in acetone and use it to scrape down any excess polish from the sides of your nail!
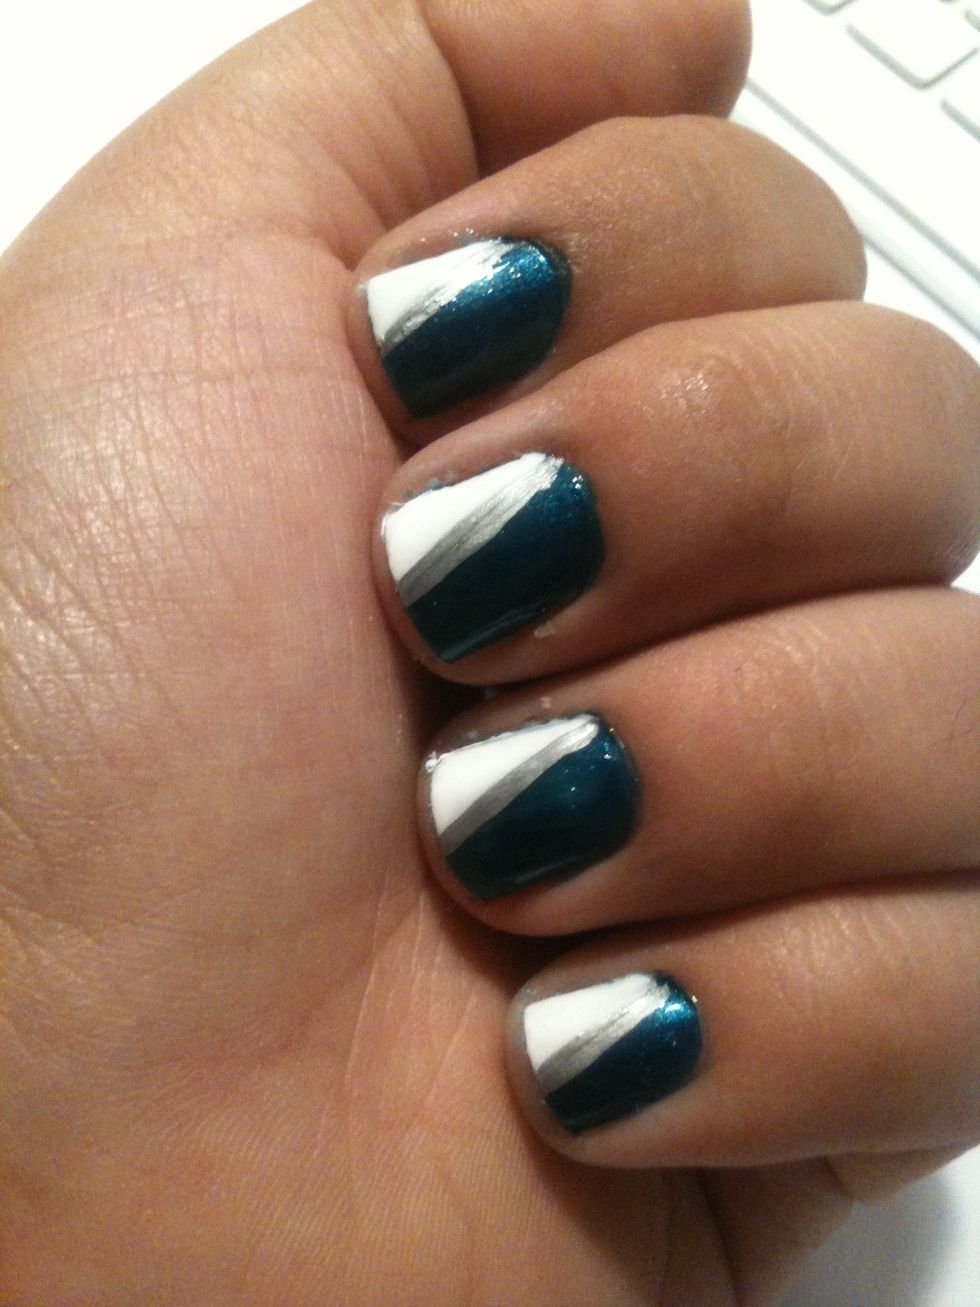
Add a top coat and your design is done!
Hope you've enjoyed this guide. Let me know what you think!! X