The Conversation (0)
Sign Up
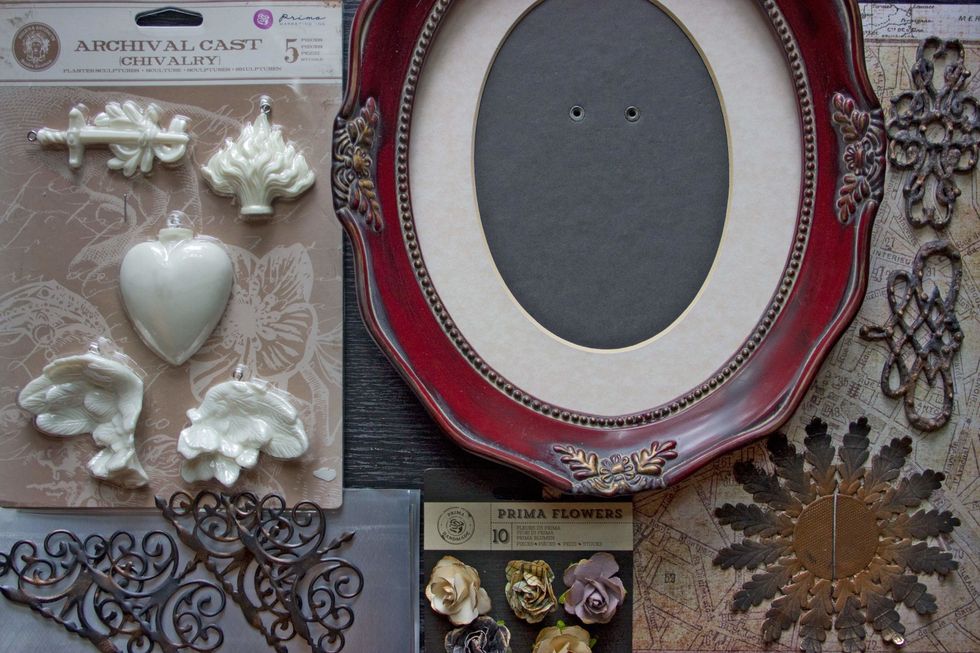
although I considered using the Prima flowers that you see in this photo, they were not used in this project.
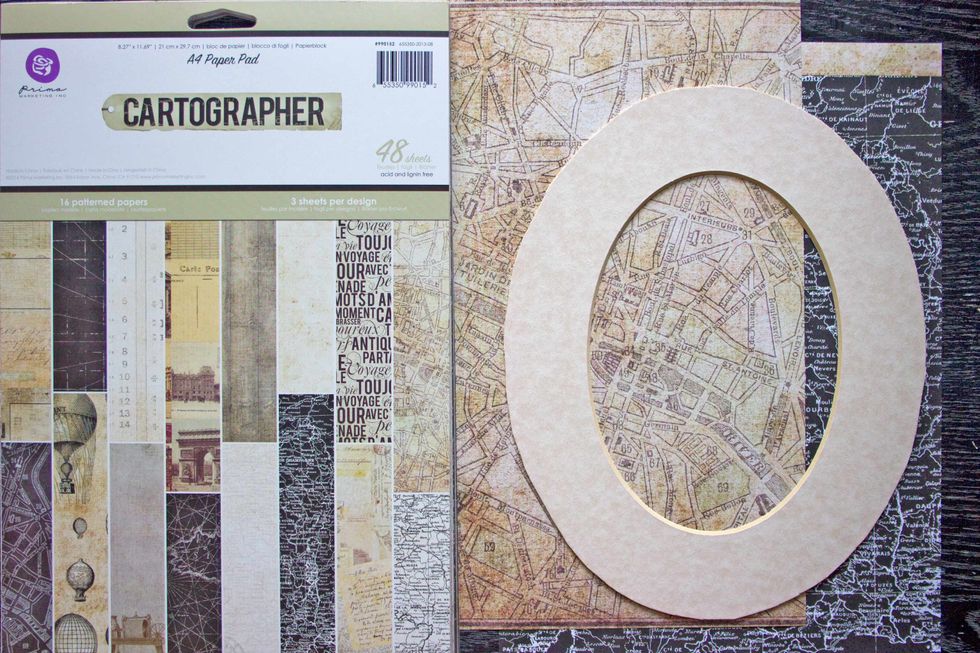
Remove the Matte from the frame, and select two contrasting papers from the Cartographer pack:
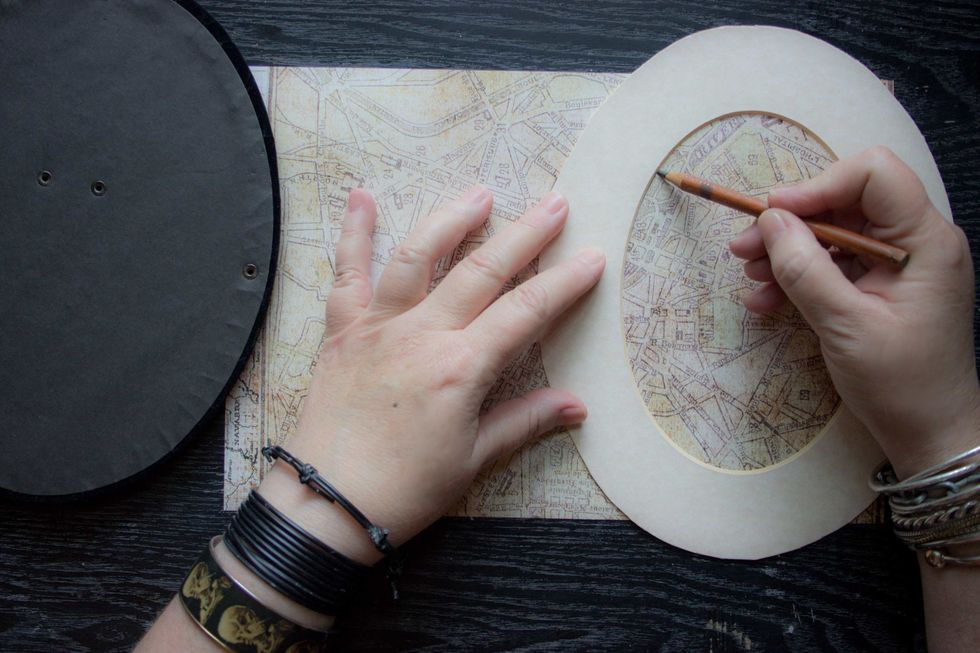
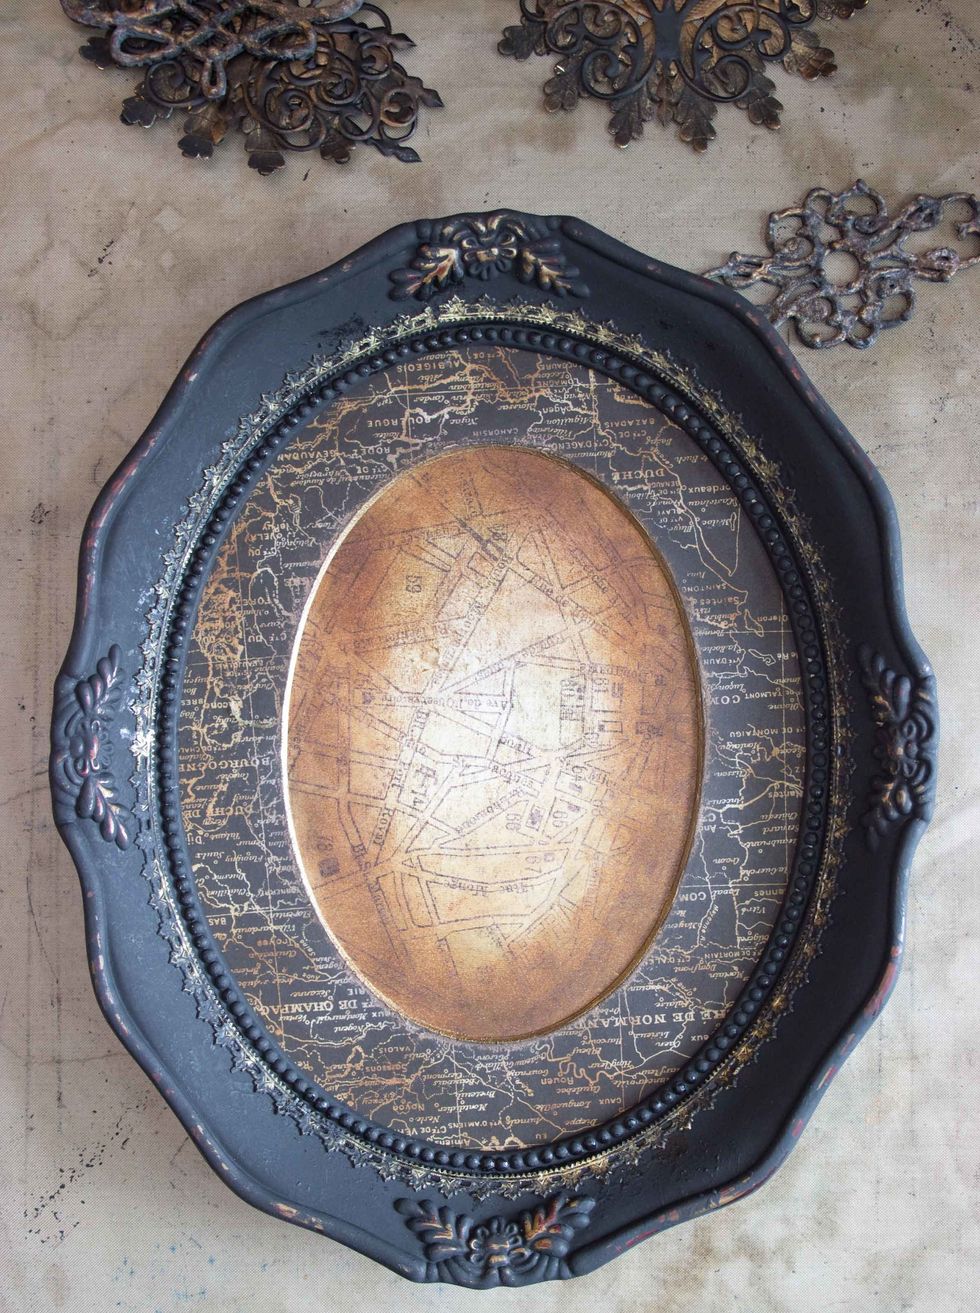
Use the lighter colored paper to create the background:
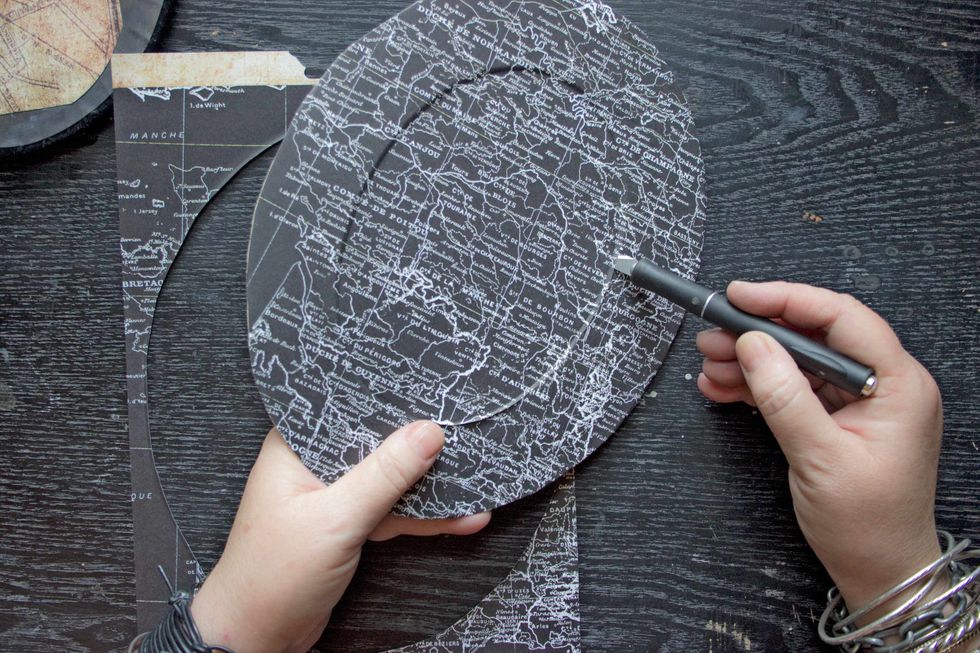
Adhere the darker paper on top of the Matte, allow to dry, then carefully trim the excess away with a sharp blade:

Distress the edges and surface of the Matte with a sanding block:
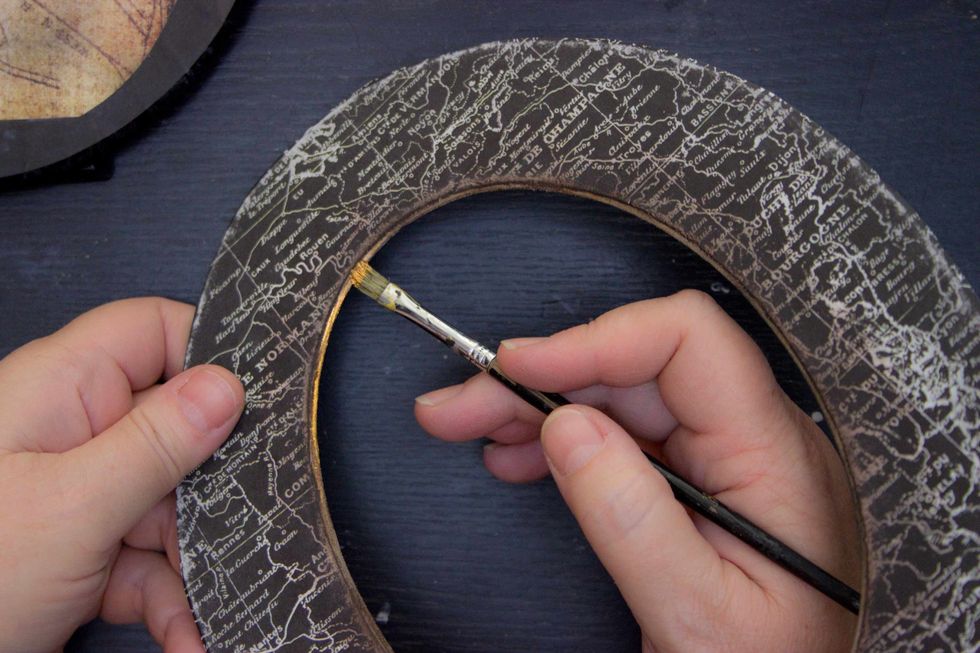
Add a tiny rim of Metallique "Steampunk Copper" to the inner bevel of the Matte:
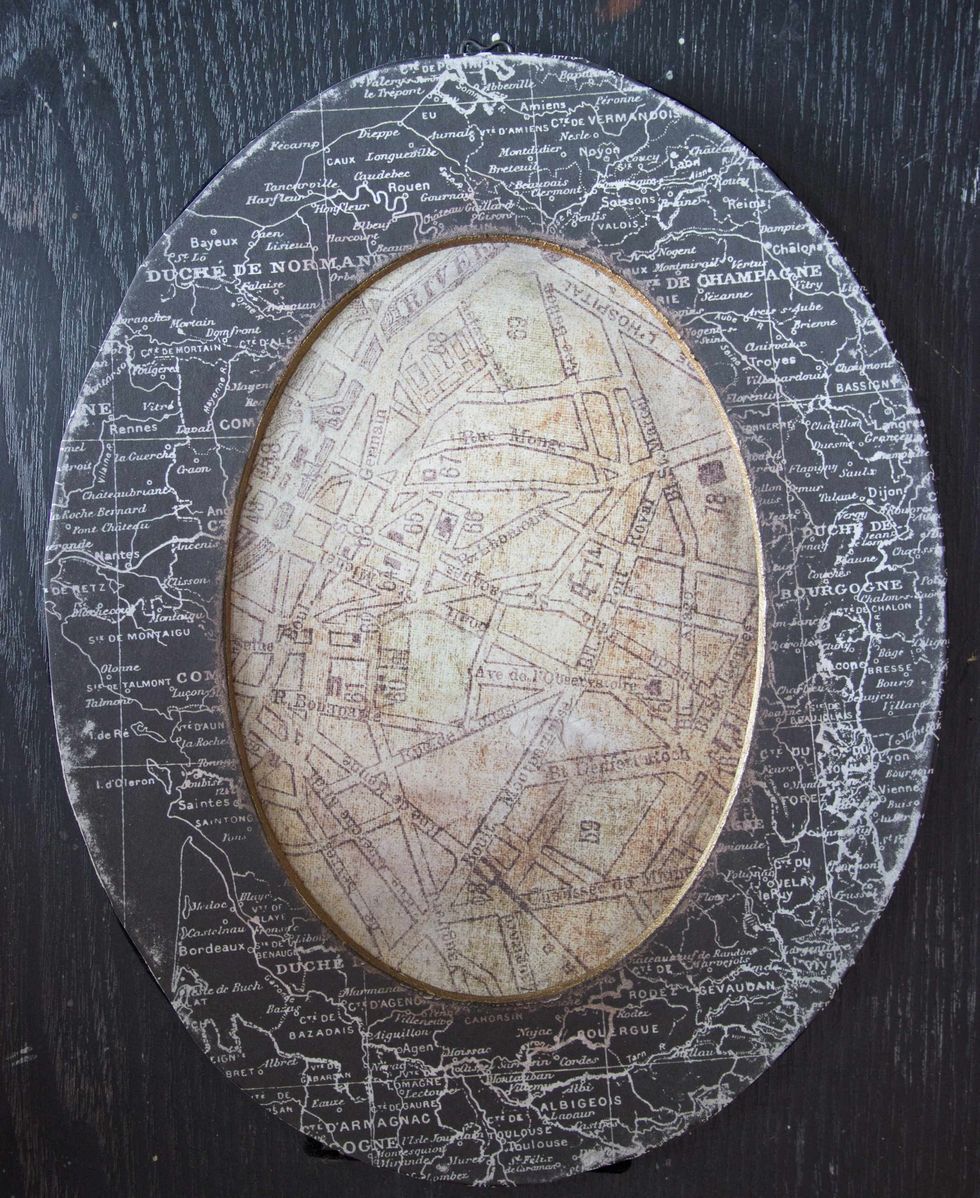
Glue the Matte to the backing board:
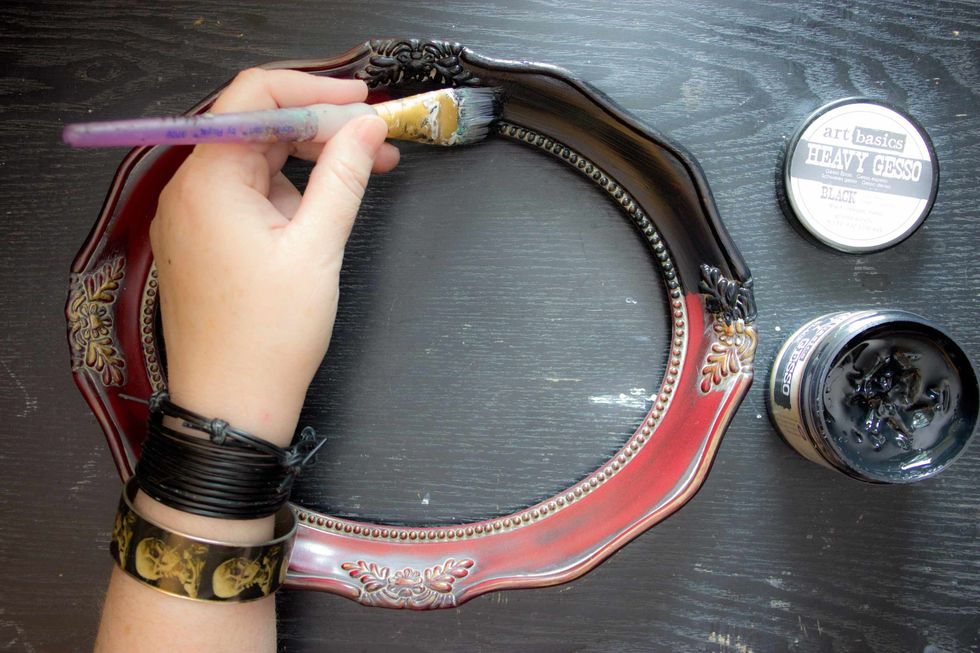
Coat the frame with Art Basics Heavy Gesso: "Black":
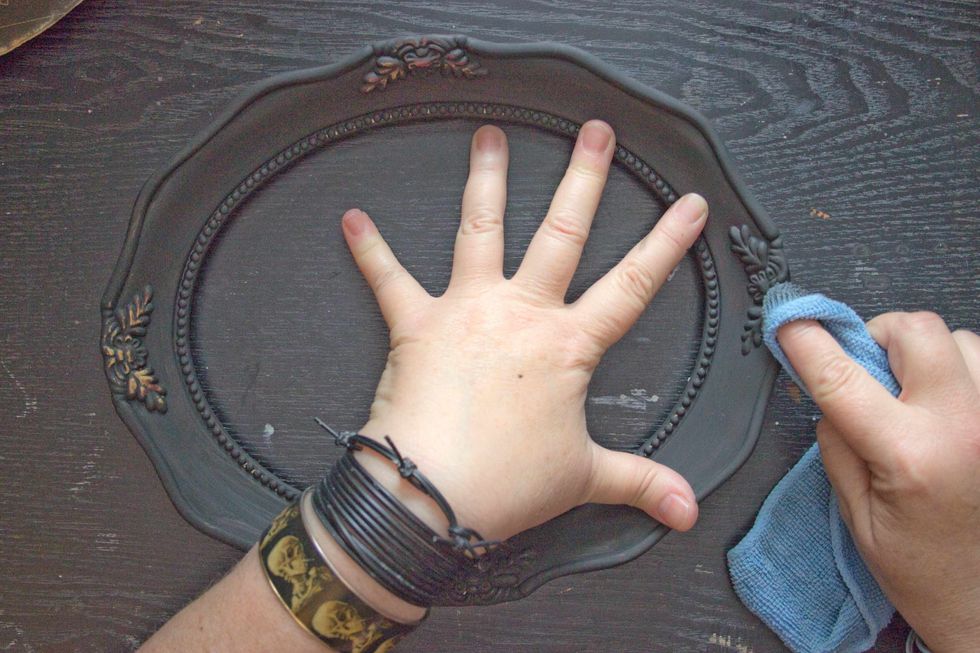
Using a damp cloth, "wet distress" any ornamental details on the frame:
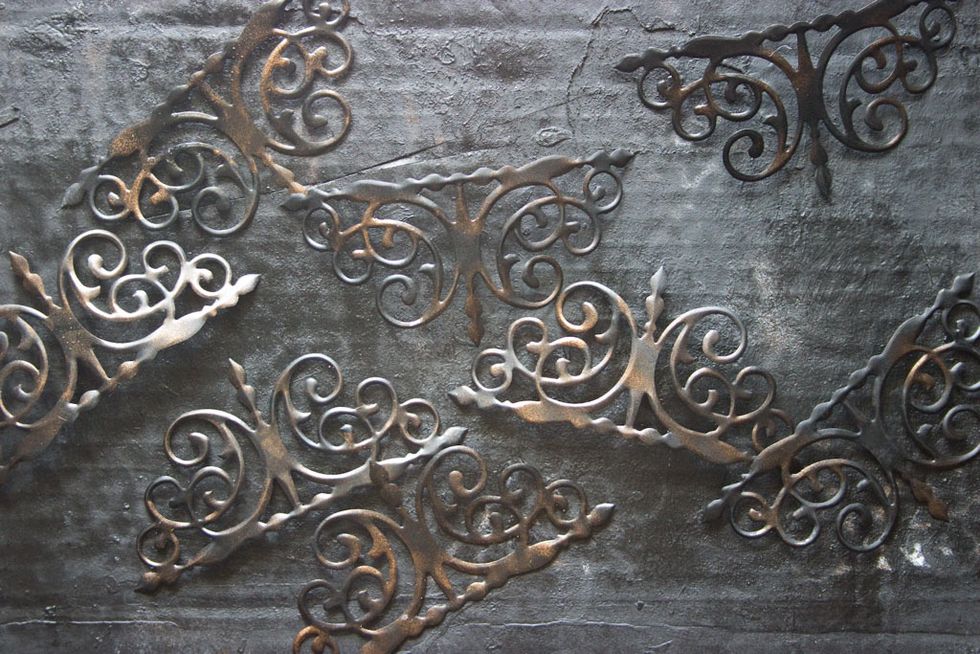
Die cut recycled Soda Cans, paint black, and highlight with "Steampunk Copper". (This die is "Curly Gate" by Sizzix)
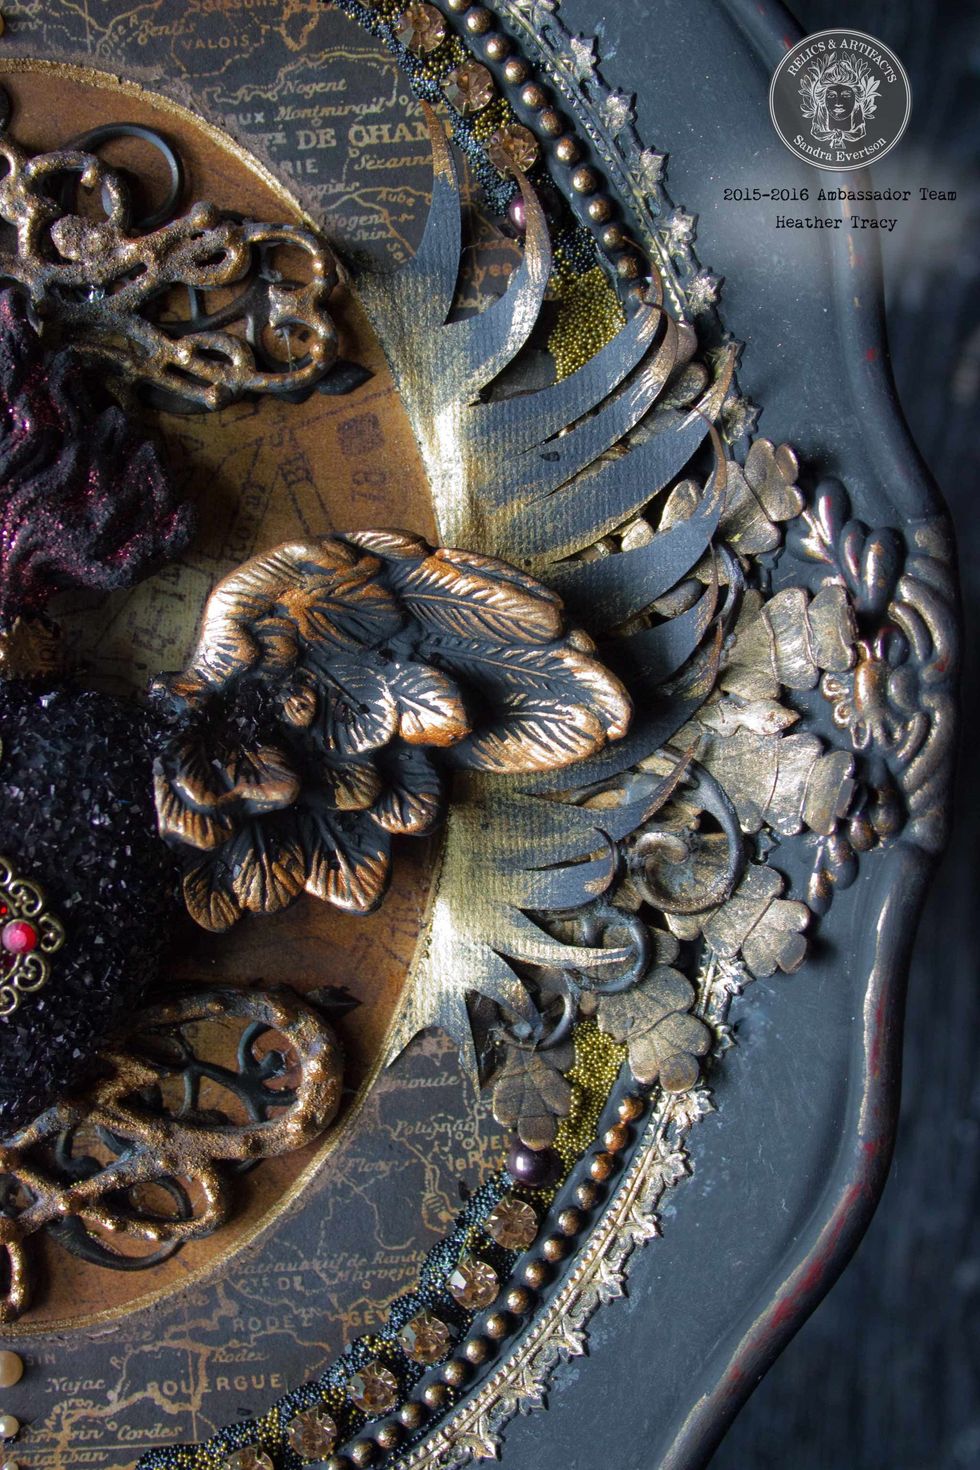
Layer the die cuts over and under Dresden Trim "Gold Rosette" and your Faux Wrought Iron pieces, and play with your design choices. Set embellishments aside for now:
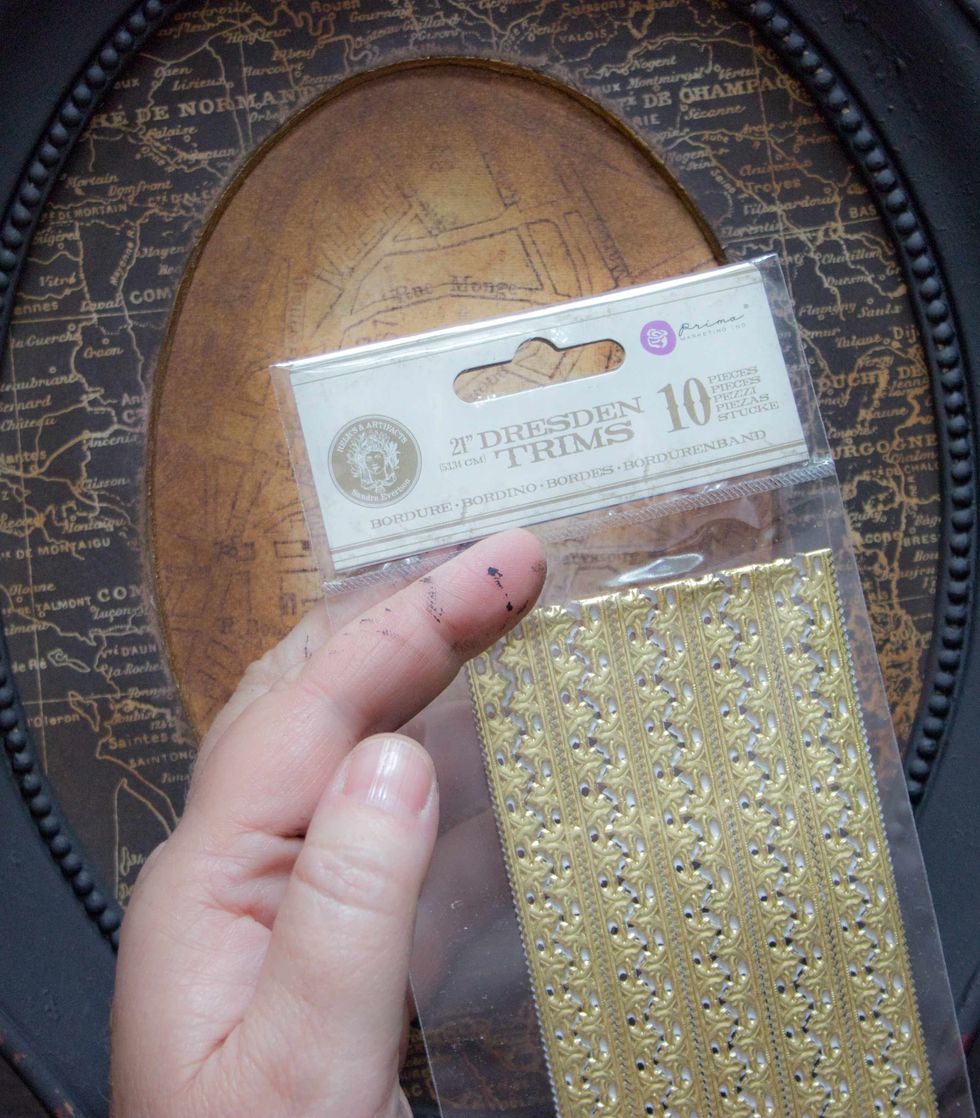
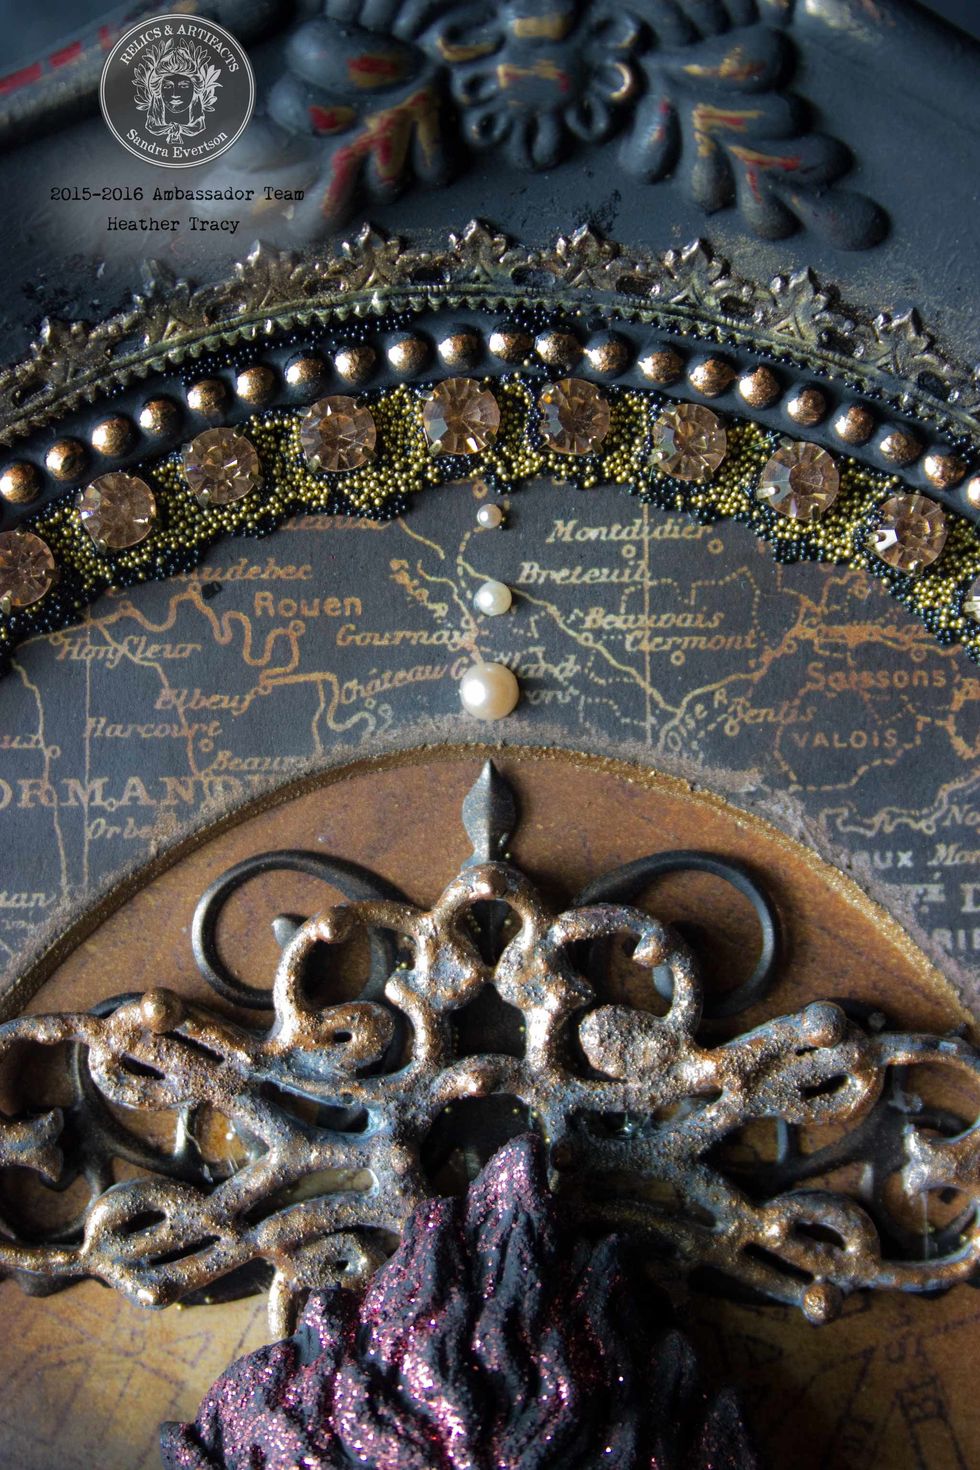
Grab your Dresden Trim: "Gold Scallop & Fleur":
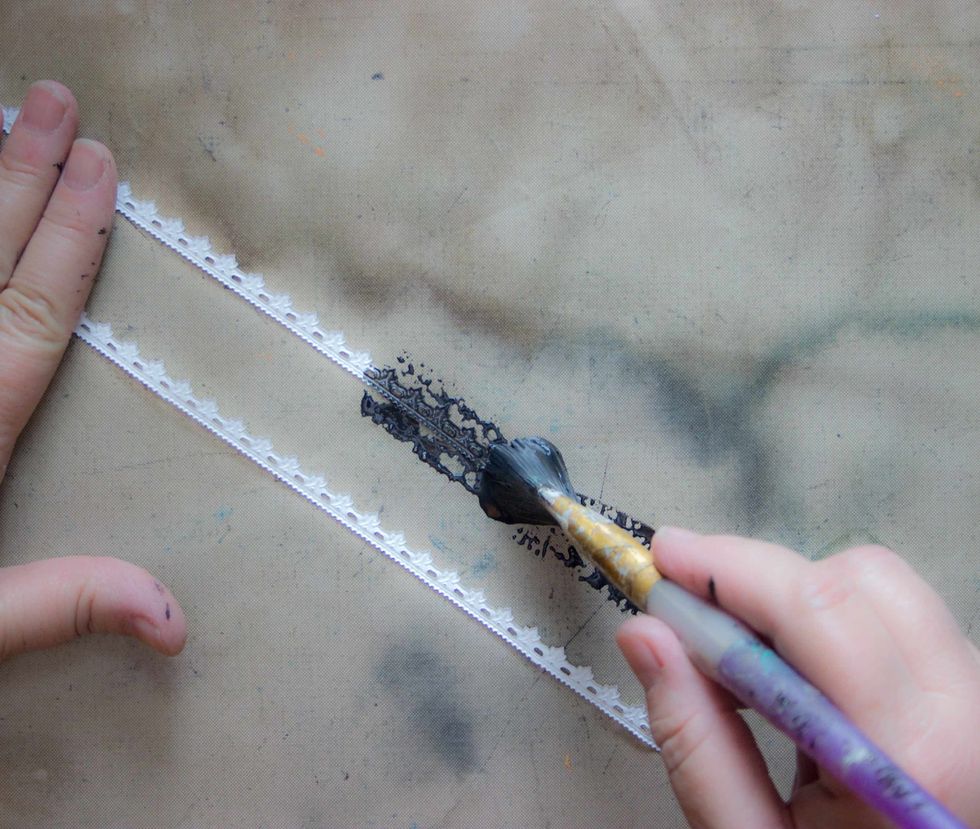
Create an aged look by coating the front and back with a layer of watered down Heavy Black Gesso:
When dry, glue the Dresden in place around the center of the frame:
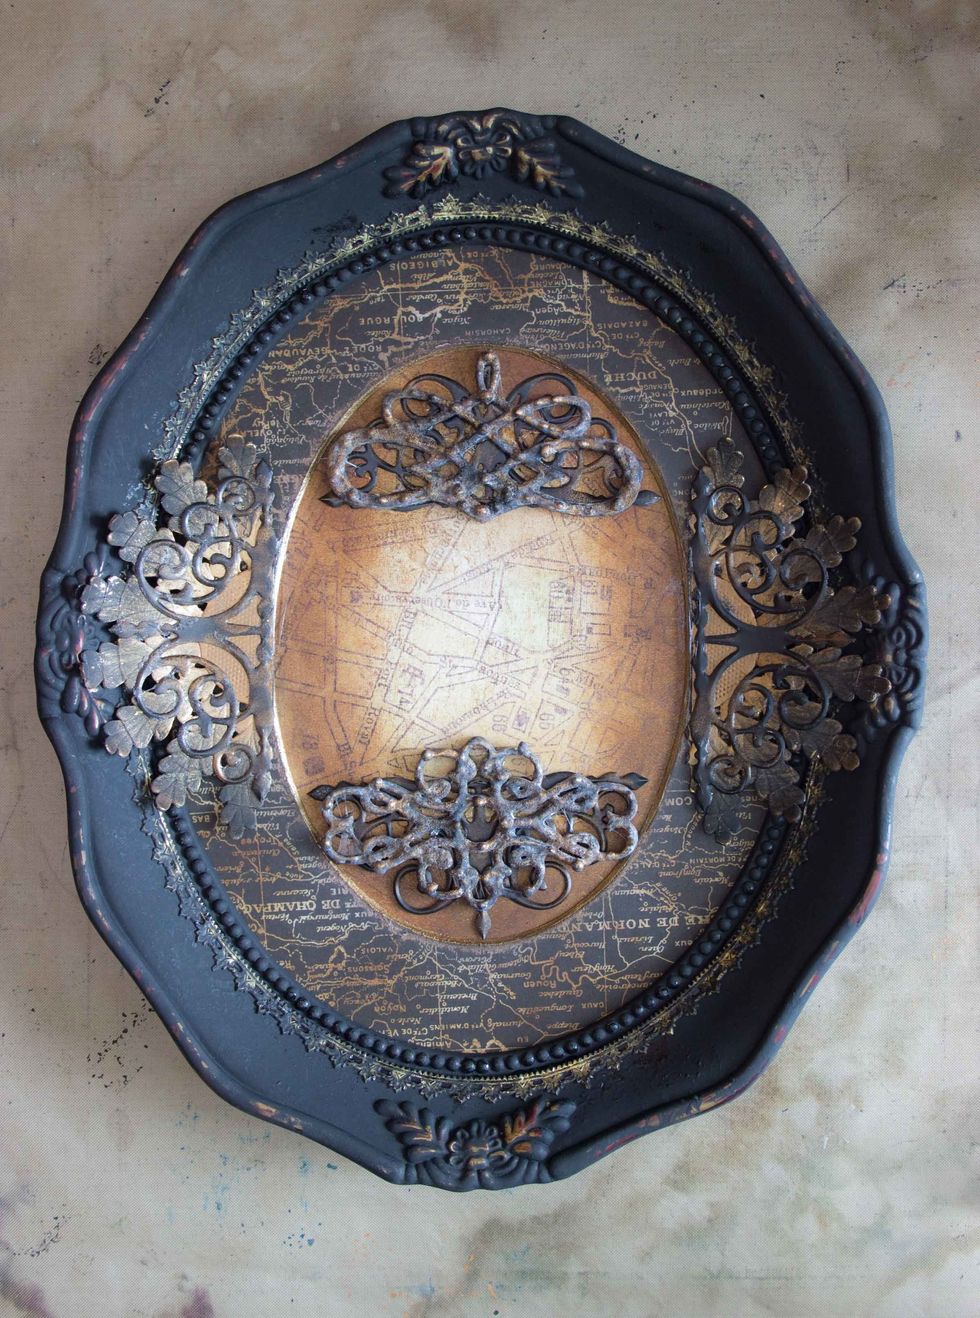
Make final design choices for the embellishments, and glue them in place:
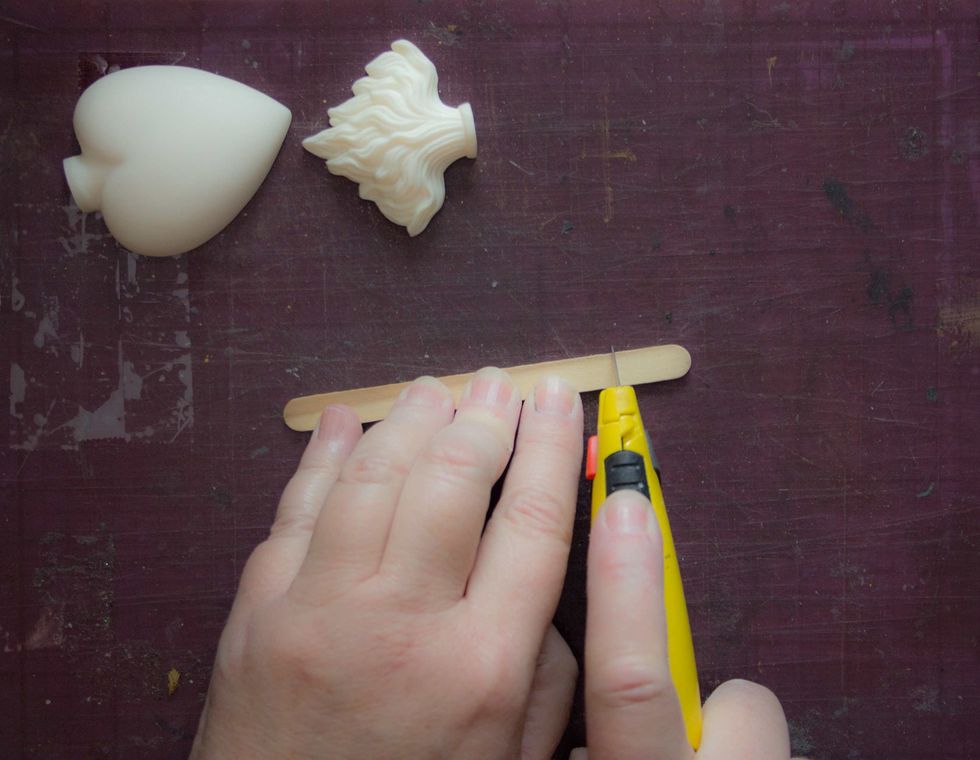
Create an armature for your Relics by trimming a craft stick to the correct length:
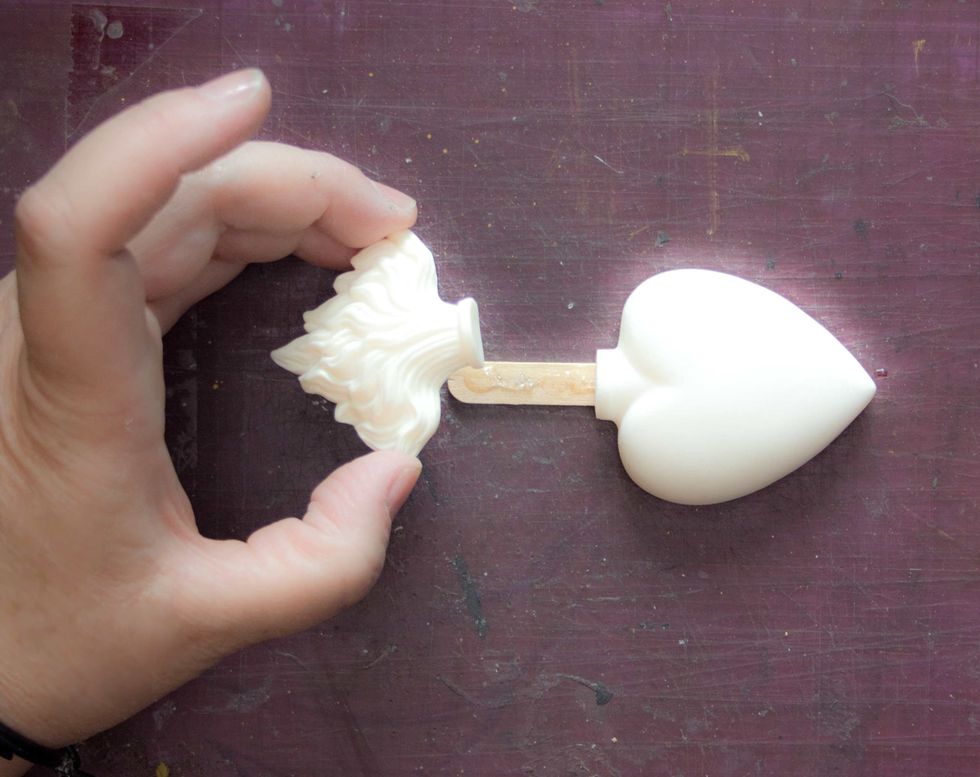
Add a layer of heavy-duty adhesive to the stick, and place the Heart and Flame on top. Allow to cure.
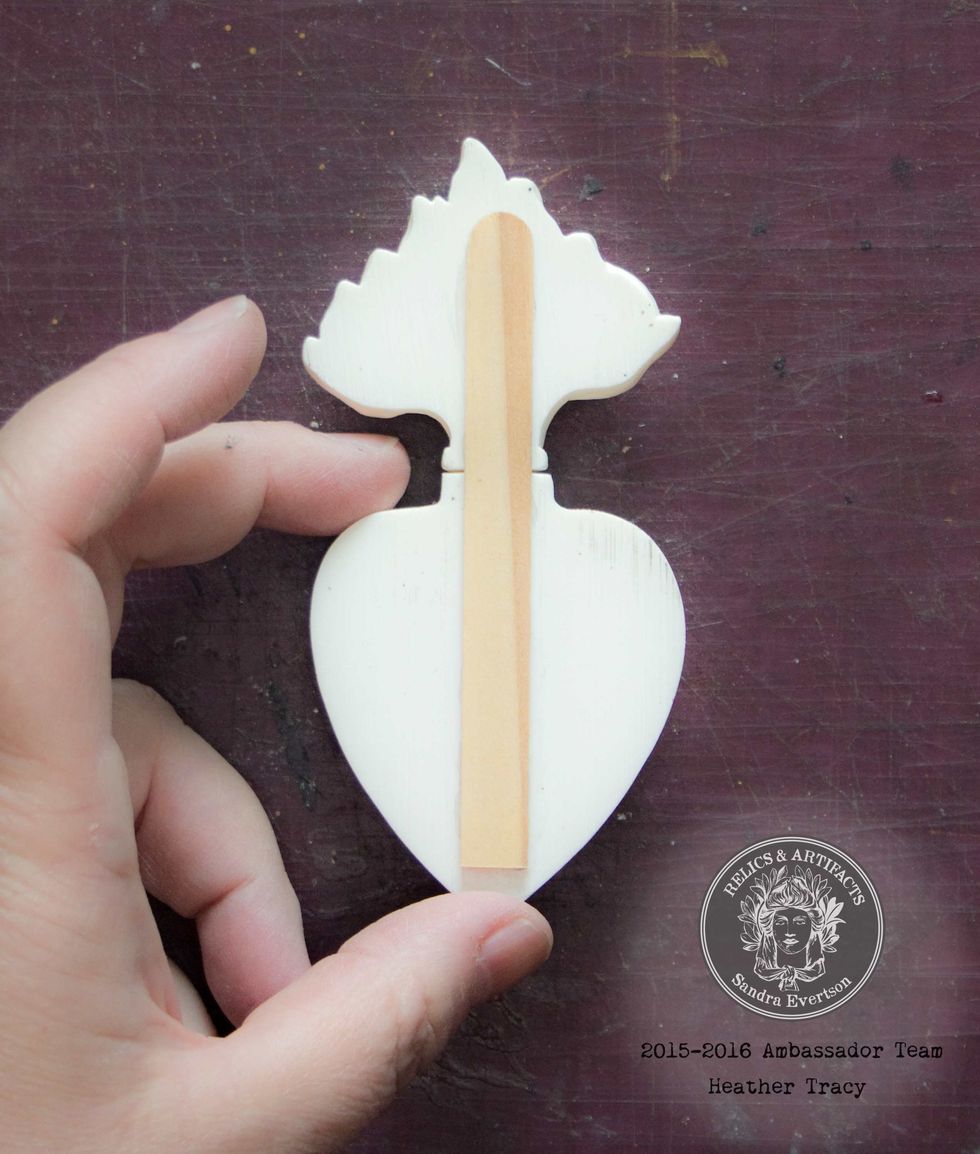
Once cured, you have a single strong unit that can be easily altered:
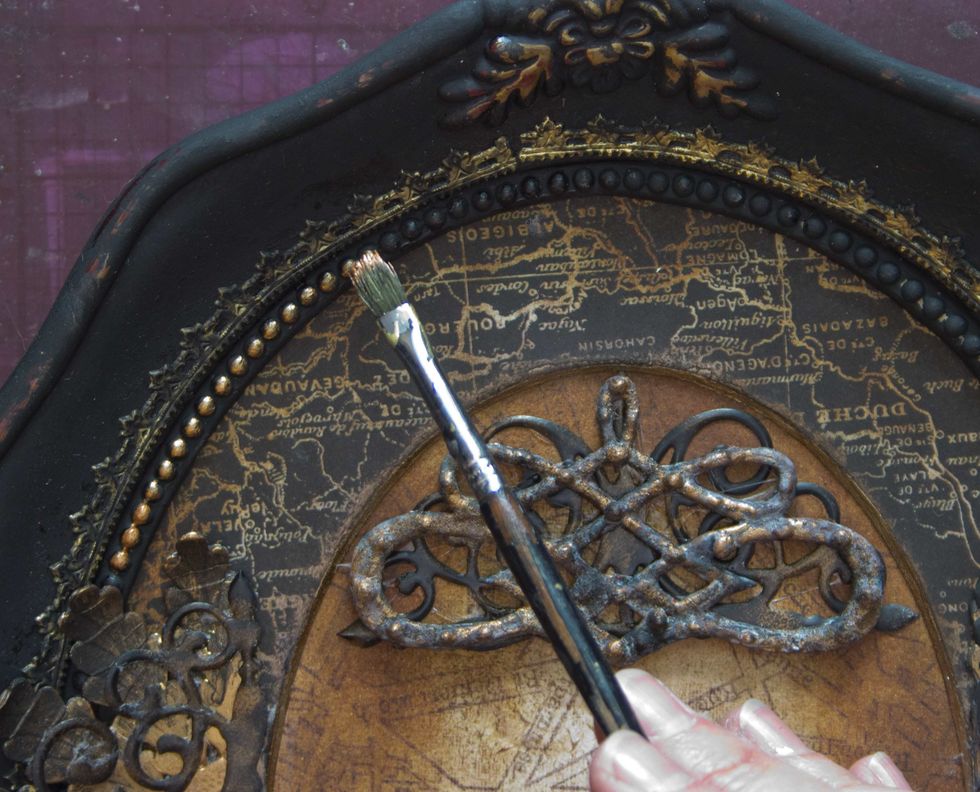
Add touches of "Steampunk Copper" to highlight the decorative elements on the frame:
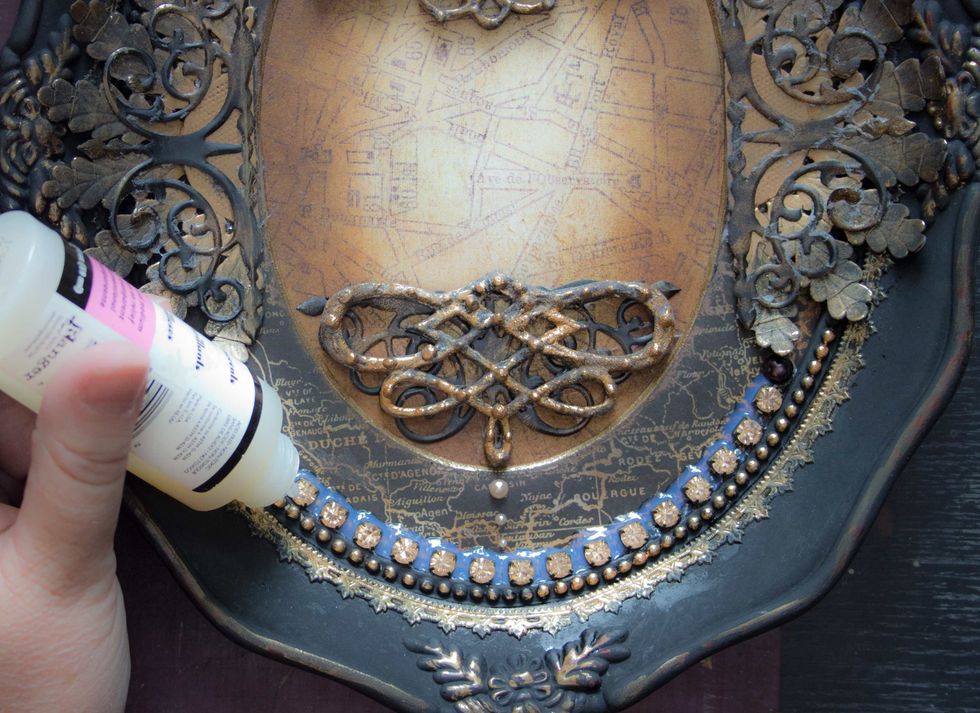
Adhere rhinestone chain around the inner opening of the frame, then add a layer of Glossy Accents and Micro Beads between each gem:
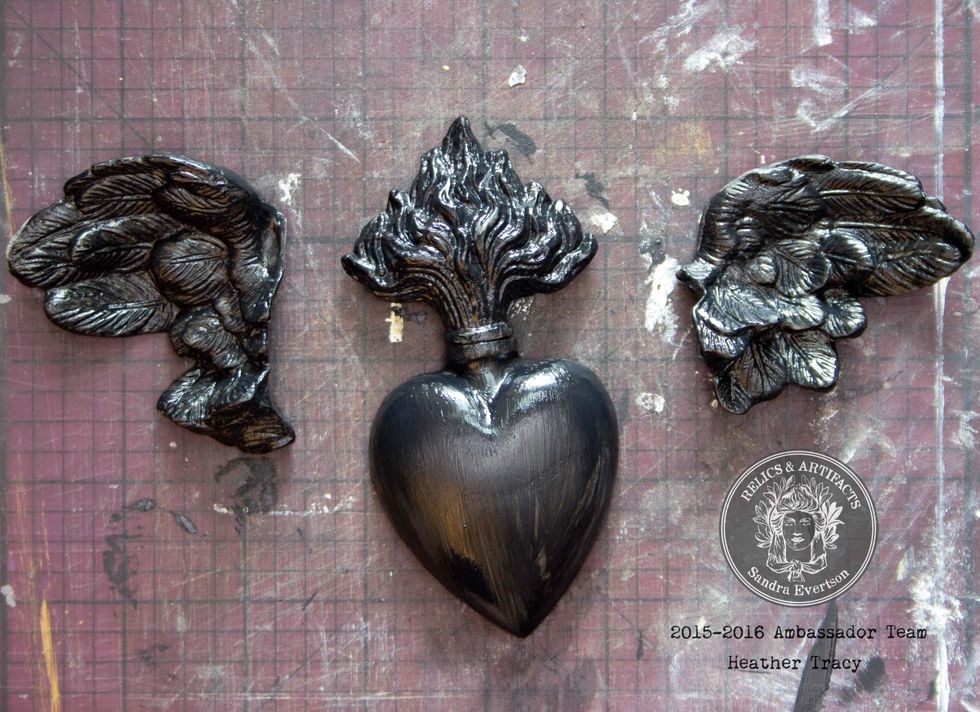
Coat the Relics with Heavy Black Gesso and allow to dry. It won't take long...Once dry, use Black Glass Glitter to coat the Heart Relic, and Black Cherry Mica Powder to coat the Flame Relic.

Cut plain black card-stock into feathery shapes that mimic the curve along the sides of the frame:
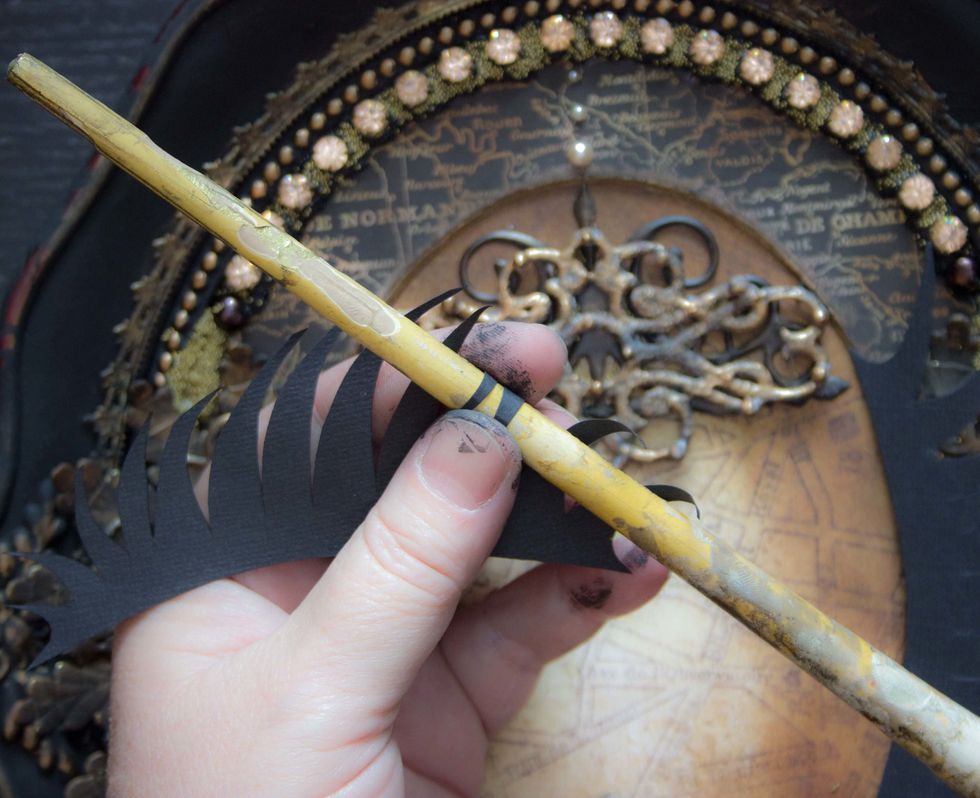
Use the handle of a paintbrush to create attractive curves for the 'feathers':
Adhere the feathery shapes, tip and edge them with "Steampunk Copper". Use heavy-duty adhesive and a bit of layered card-stock to affix the Relics within the frame:
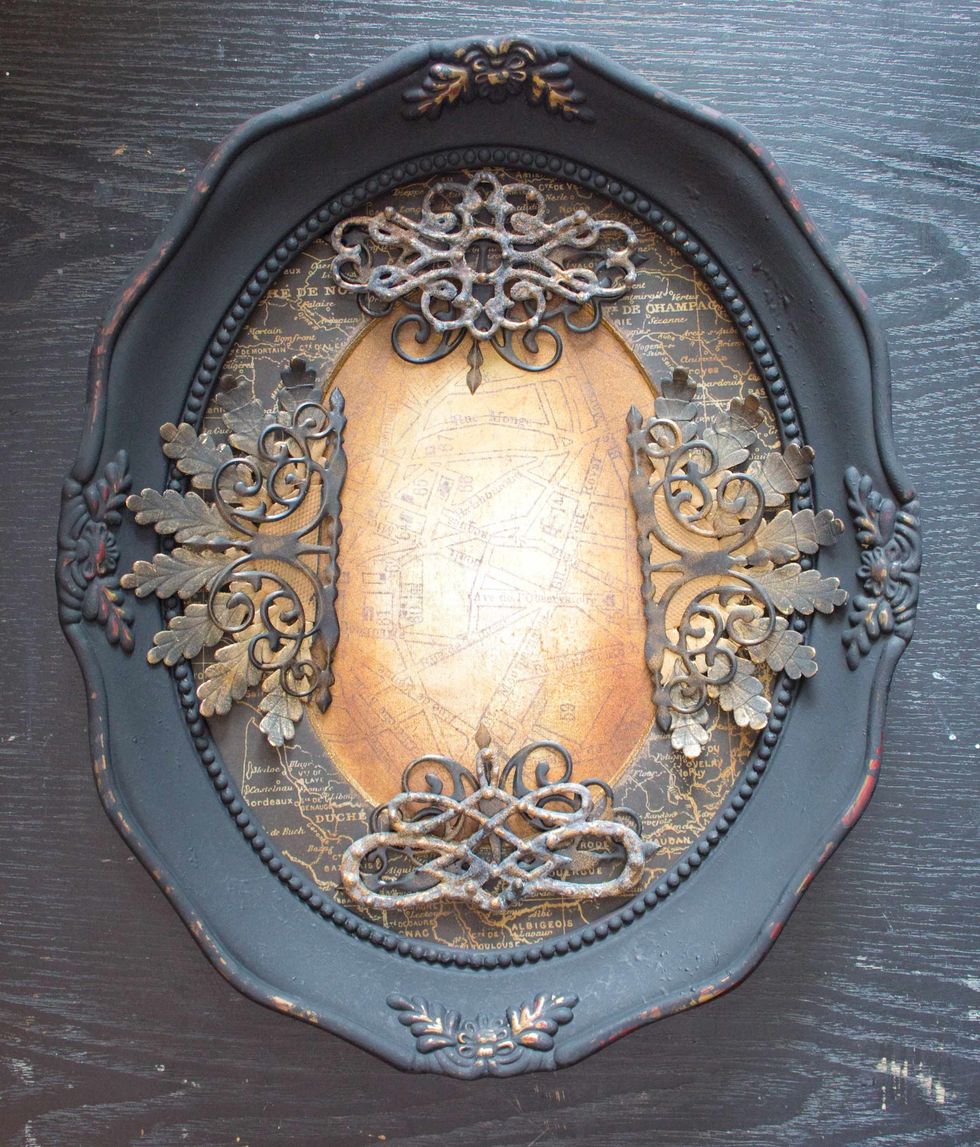
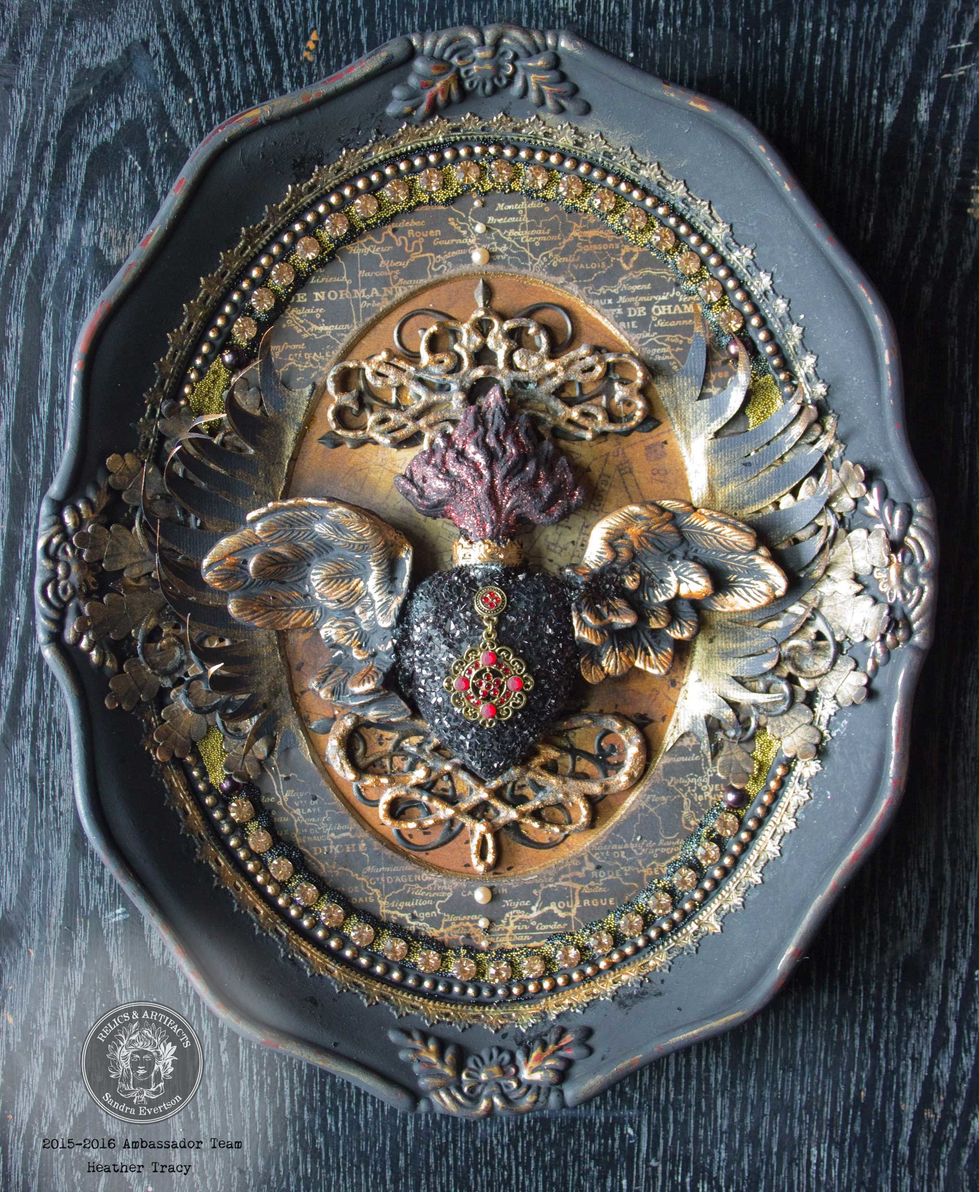
Voila! You're finished! A glimpse from above, giving you a clearer view of how dimensional the final result is:
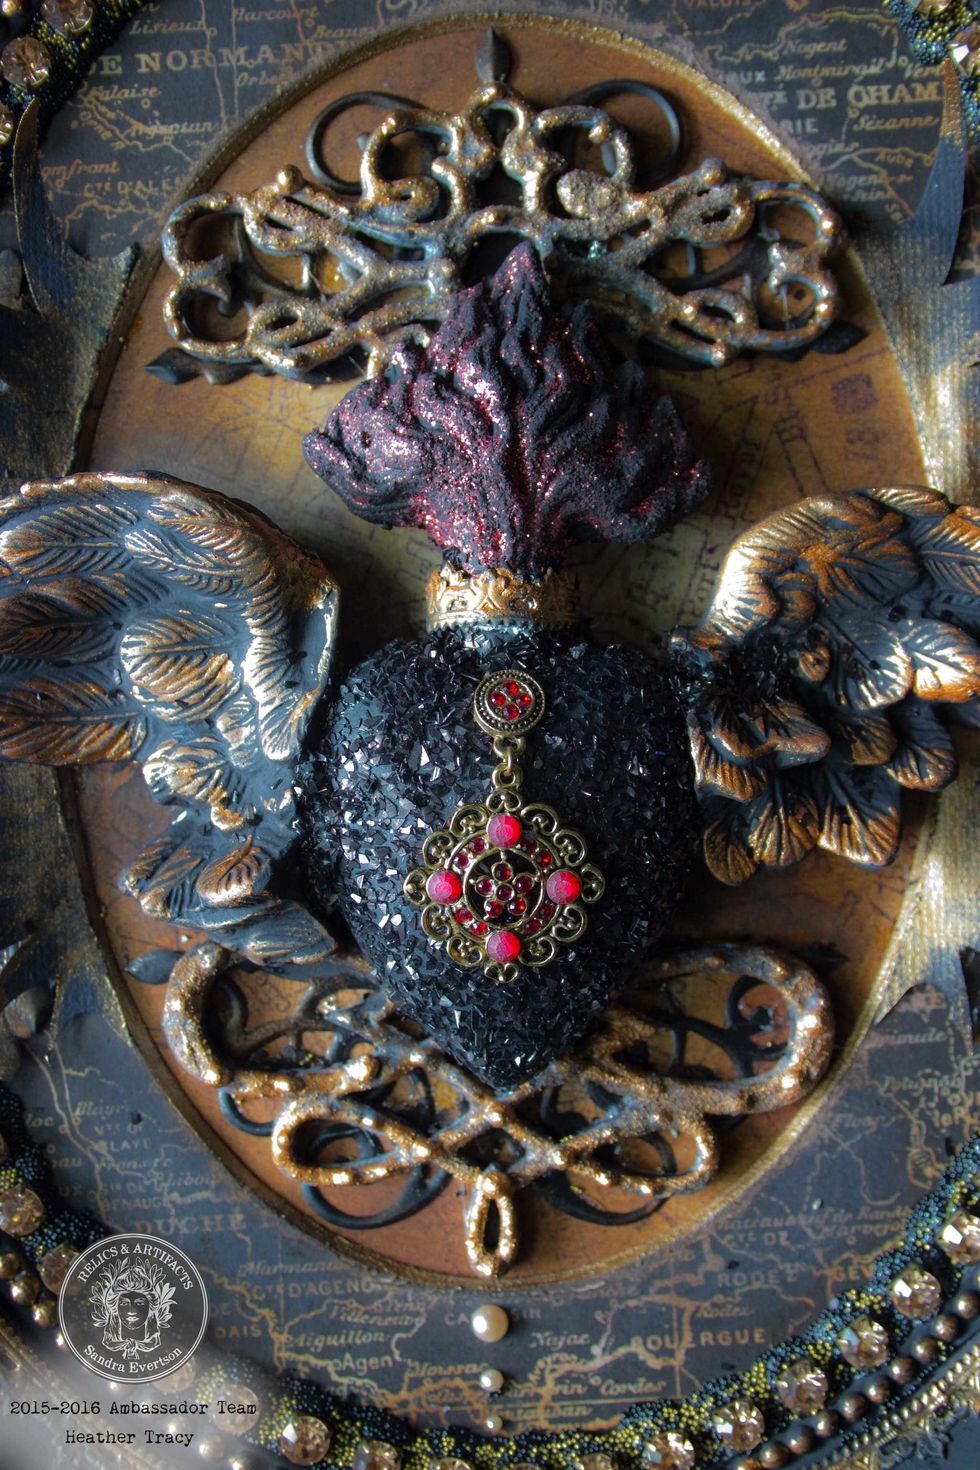
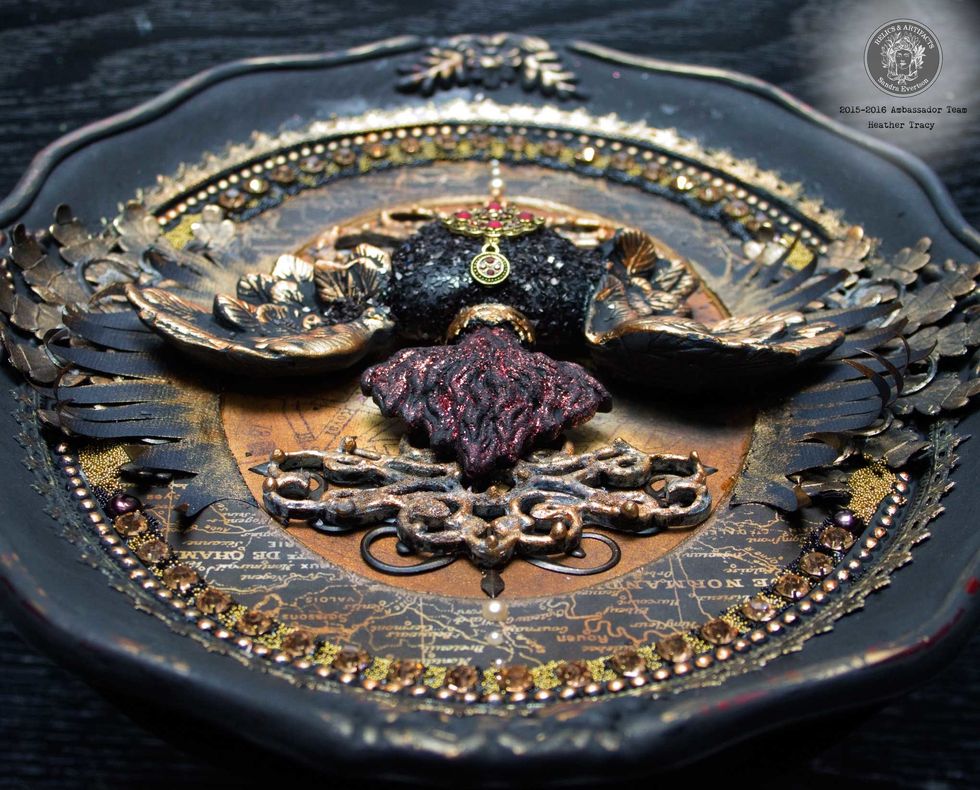
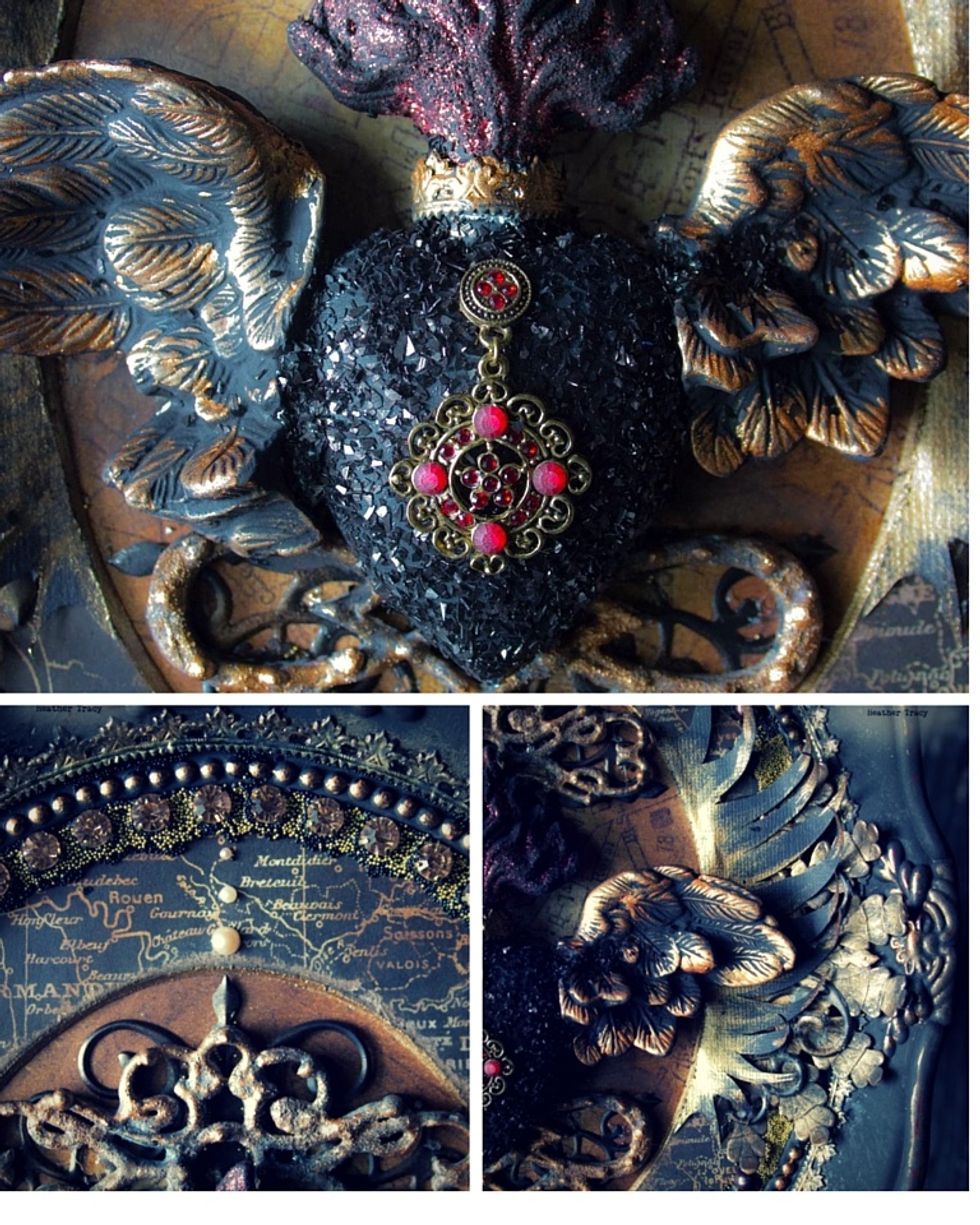
Heart Relic Detail:
Embellished Frame Detail:
Layers of ornamentation are what create the opulent feeling to this piece:
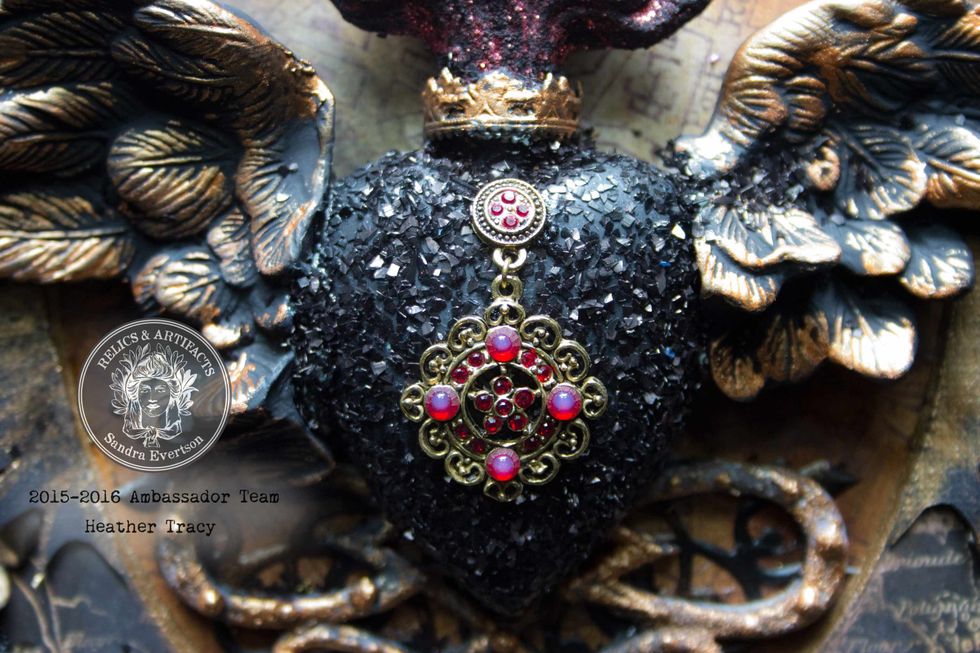
Tiny dabs of Glossy Accents on the 'jewels' of the earring give deeper dimension:
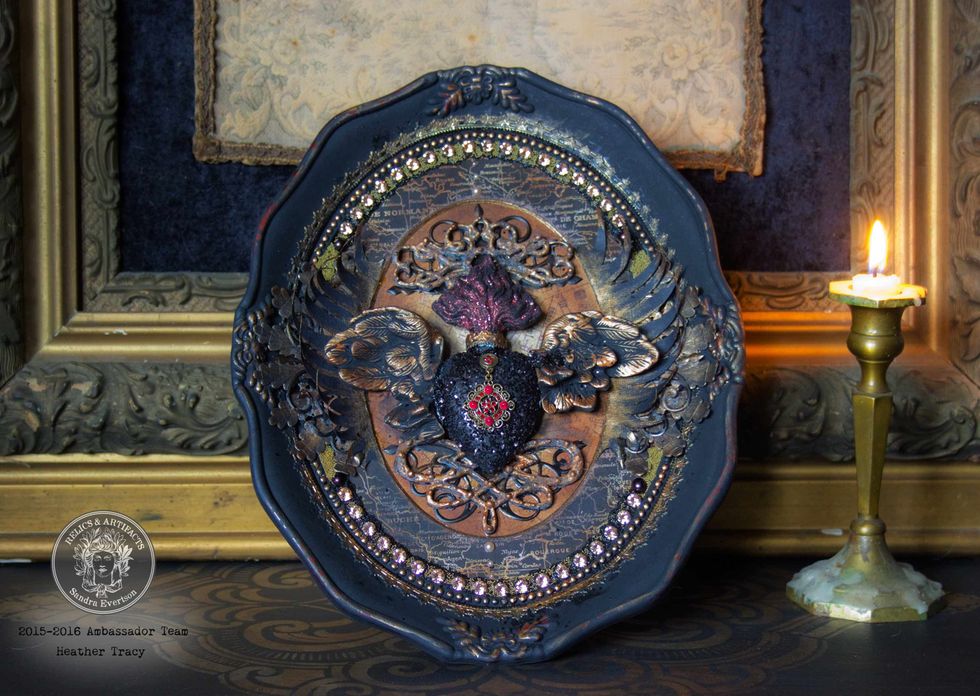
Enjoy your creation! Perfect for contemplating the secrets of the human heart....
Thank you so much for joining us here! It's a pleasure to share this satisfying creative process with you! go to the Muse for more www.sandraevertson.com