The Conversation (0)
Sign Up
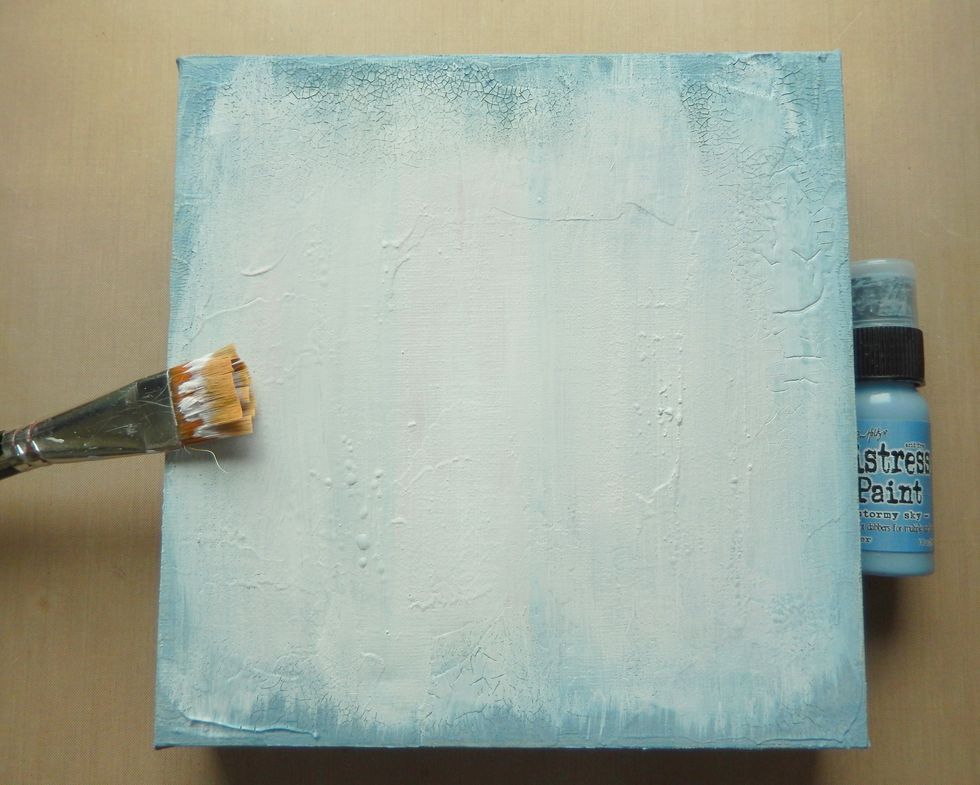
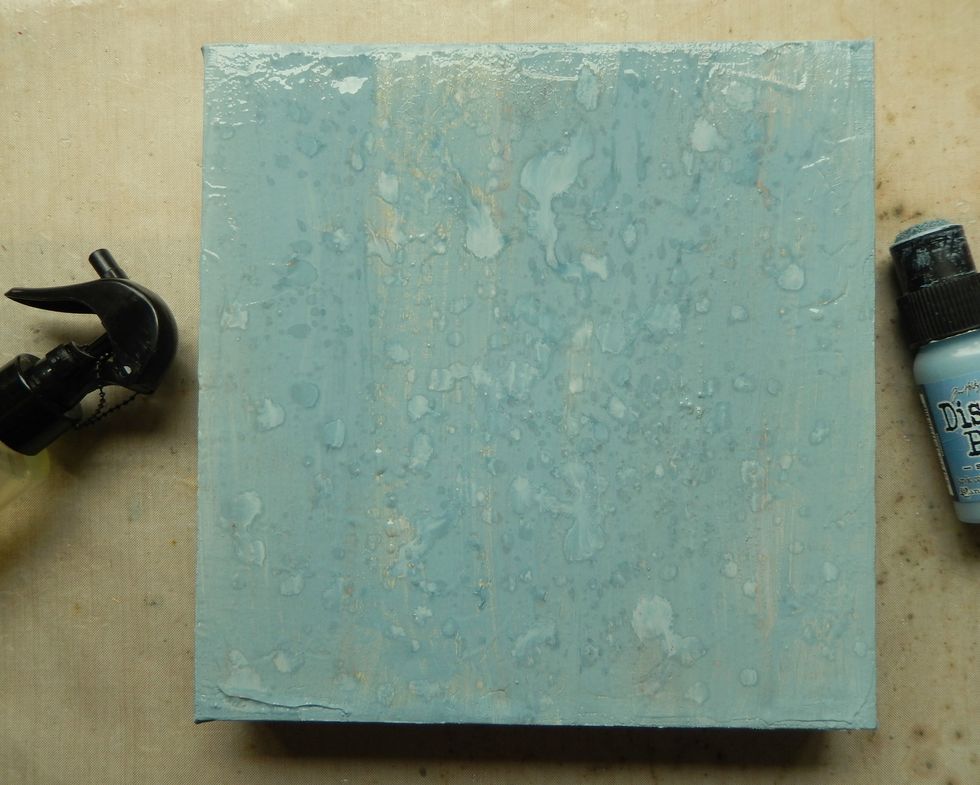
Cover a blank square canvas with a layer of Distress Collage Medium Crazing and allow to dry. Then paint over a layer of Stormy Sky Distress Paint followed by one of white gesso, avoiding the edges.
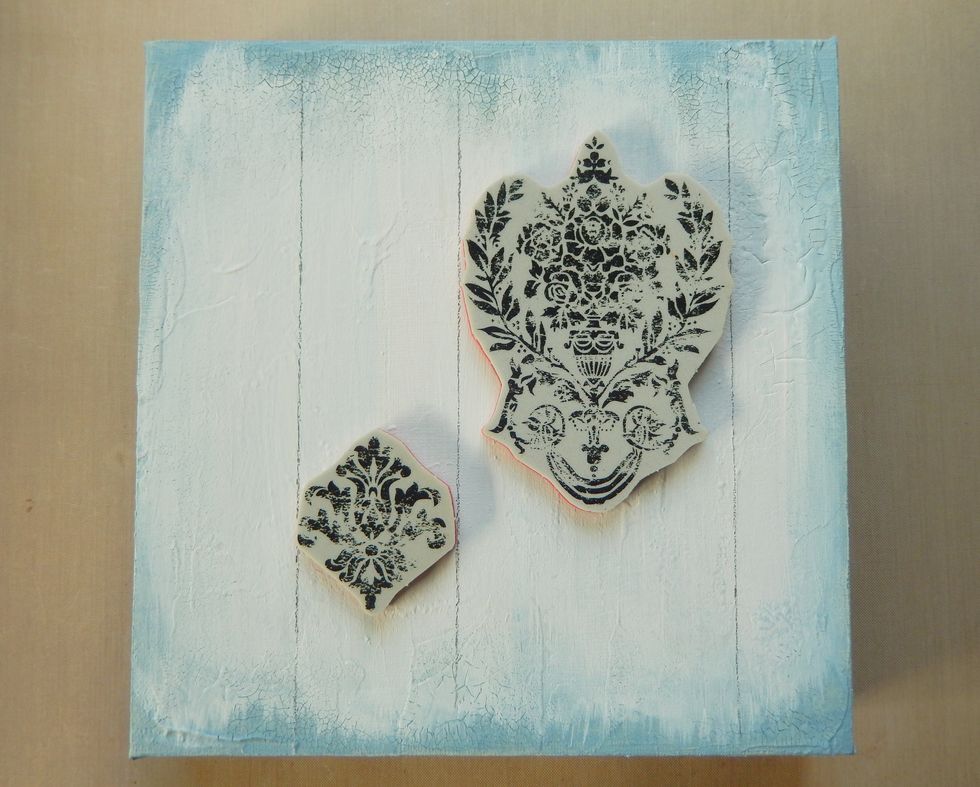
Take two of the Distress Damask stamps and use them as guides for drawing parallel lines onto the dry gesso.
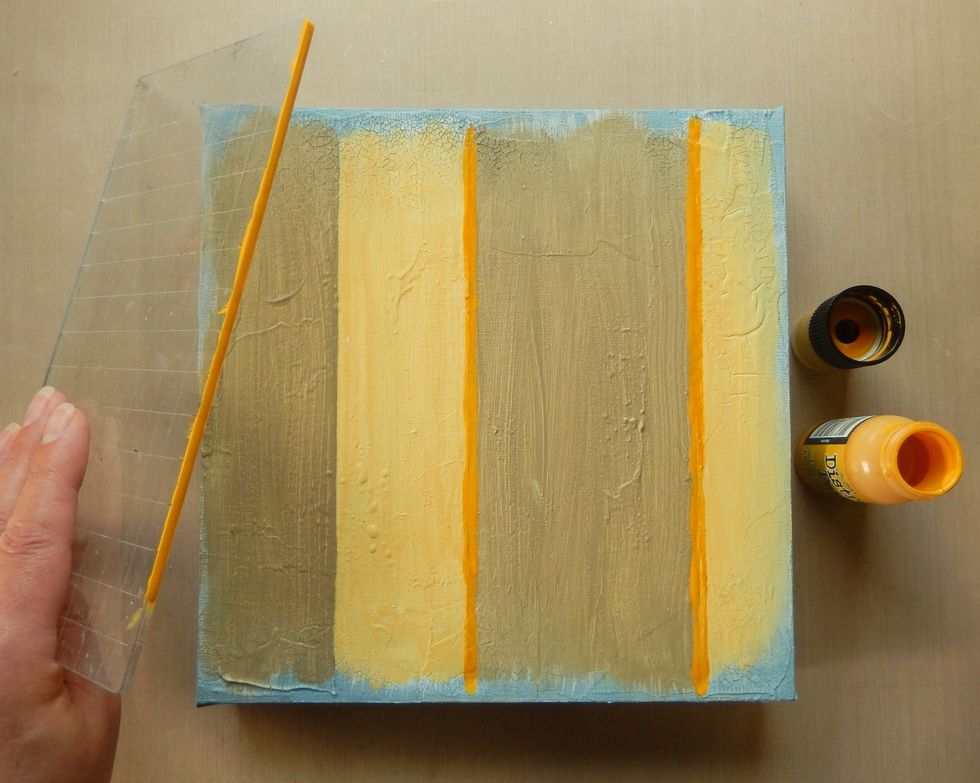
Paint stripes of Frayed Burlap and Scattered Straw Distress Paint between the lines. Then apply thick lines of Fossilized Amber Distress Paint using the edge of your stamp block.
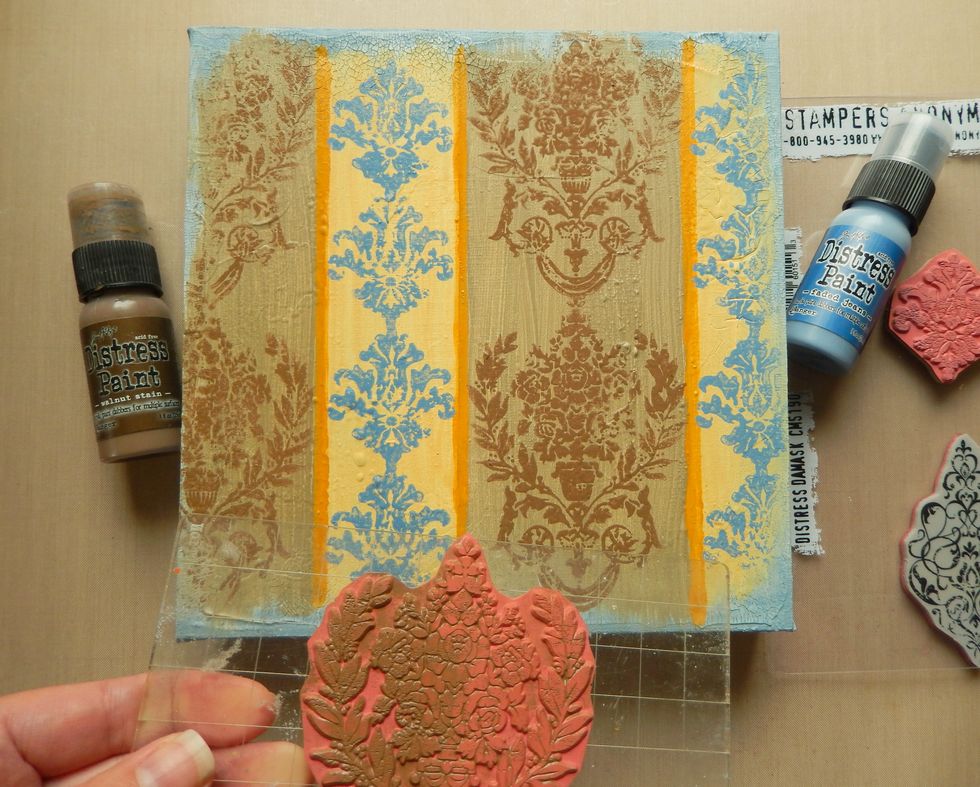
Stamp your chosen Distressed Damask designs using Walnut Stain Distress Paint over the brown lines and Faded Jeans Distress Paint over the yellow lines. It looks good if your stamping is uneven here.

When the previous layers are dry paint over with Antique Linen Distress Paint, dripping lots of water over the top immediately. Start to dry the paint with your heat gun but don't heat set completely.

Before the paint gets too dry wipe away the wet parts with s paper towel. You can mist the surface with water and continue to pat away the excess if it is drying too much.
Repeat the process using the Stormy Sky Distress Paint, applying fewer drips of water and drying some parts again with your heat gun.
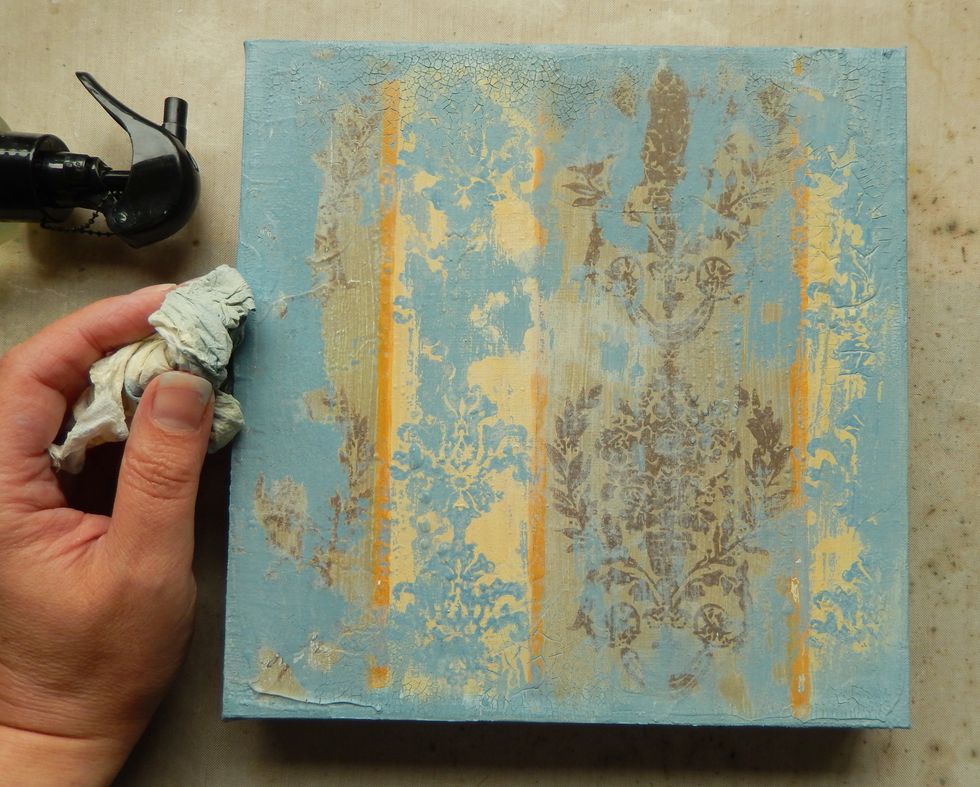
Once again dab away the wet paint areas. As before you can mist the paint with water to help this process if the paint has dried too much. Reveal as much of the pattern as required.

To finish apply a layer of Distress Collage Medium Vintage with a brush to accentuate and protect the crazing. This will also age the look of the background further.
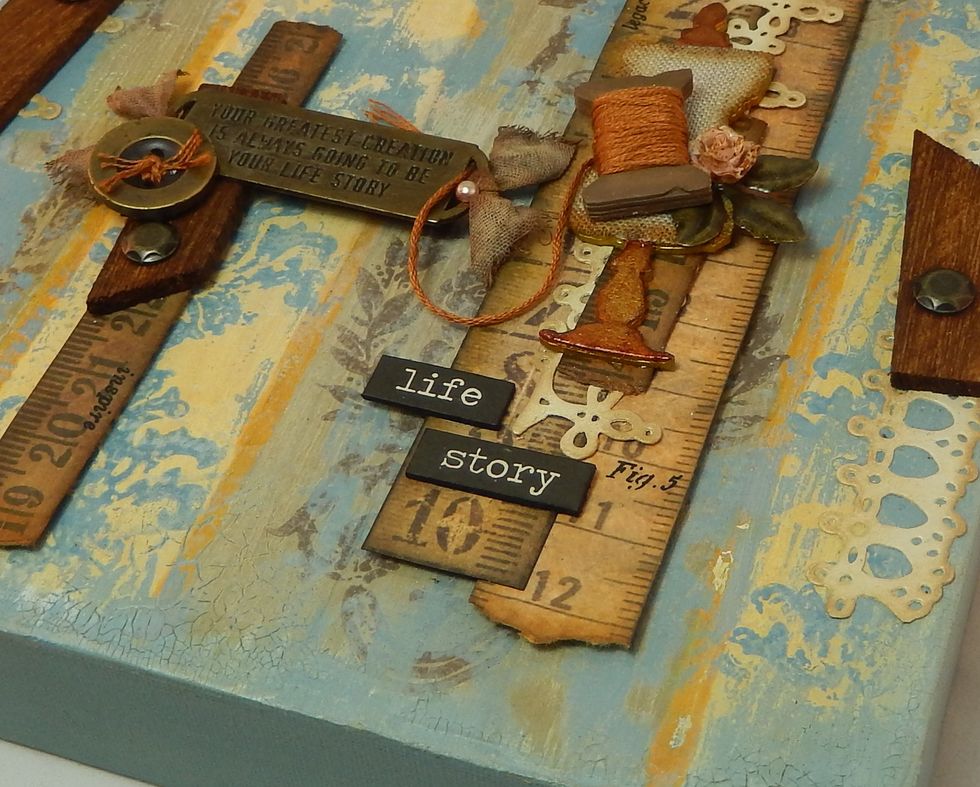
My canvas was finished with various sewing related paper strips, die cuts and metal embellishments. You could add your own choice of toppers at this stage.