The Conversation (0)
Sign Up
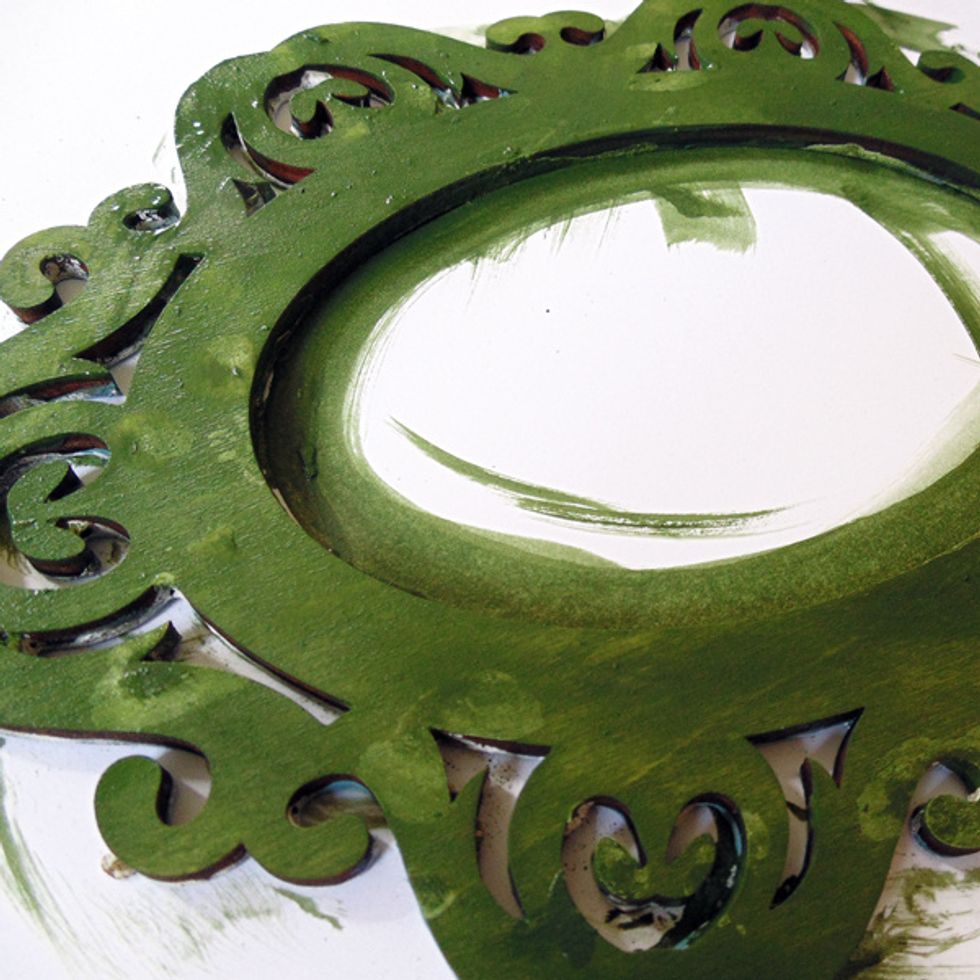
Paint your object with your base colour and allow to dry. This is the colour that will show through the cracks. I used VERY cheap acrylic craft paint from the $store.
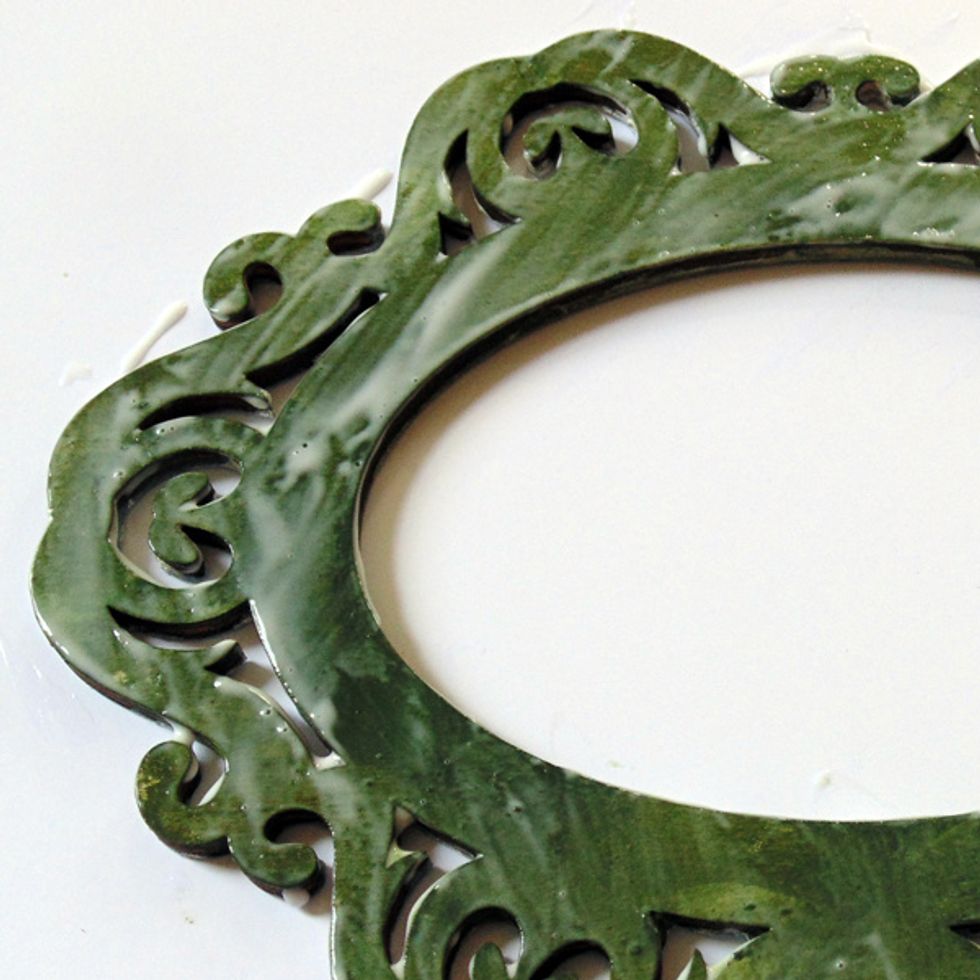
Apply a liberal layer of white school glue. Note: I used Elmers School Glue purchased for $1 BUT I also tried with other types and had the same results. Allow to PARTIALLY dry for about 30 seconds.
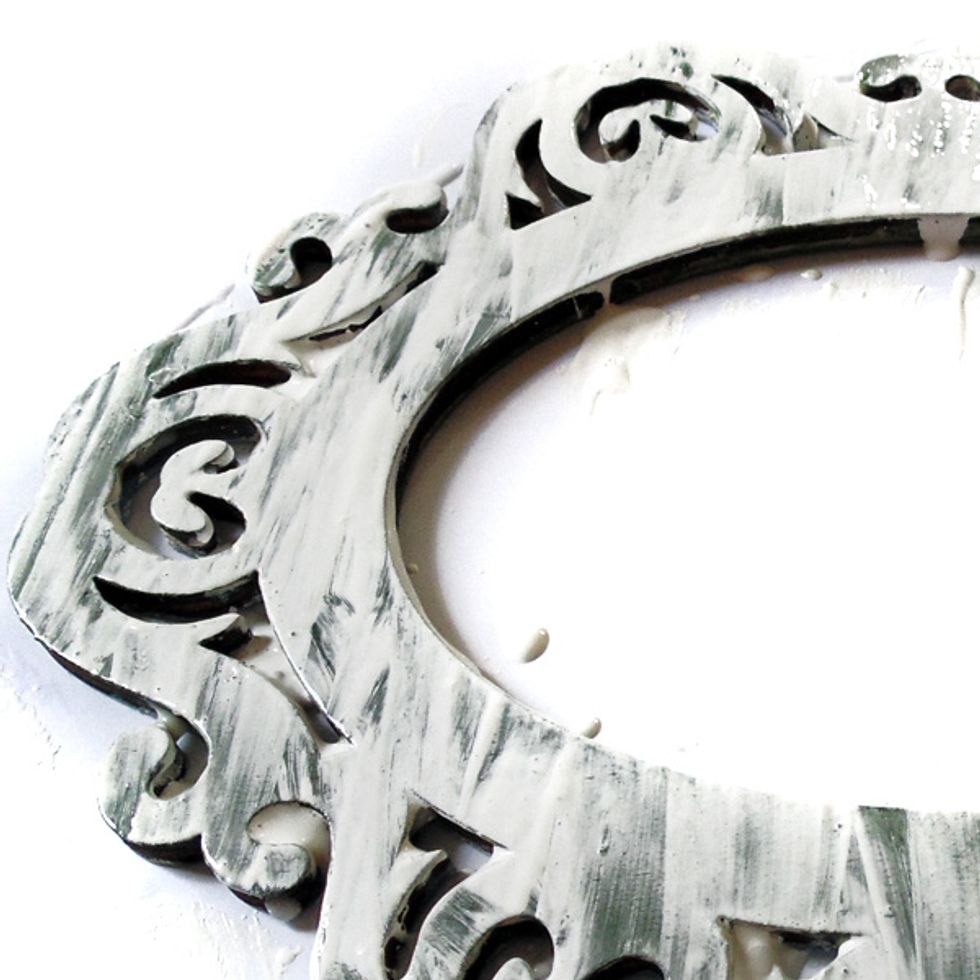
BEFORE the glue layer dries, slap on your top coat of paint. Again, cheap acrylic craft paint. IMPORTANT: The direction the paint is applied determines the direction of the cracks.
I applied my paint with vertical strokes, so my lines are vertical.
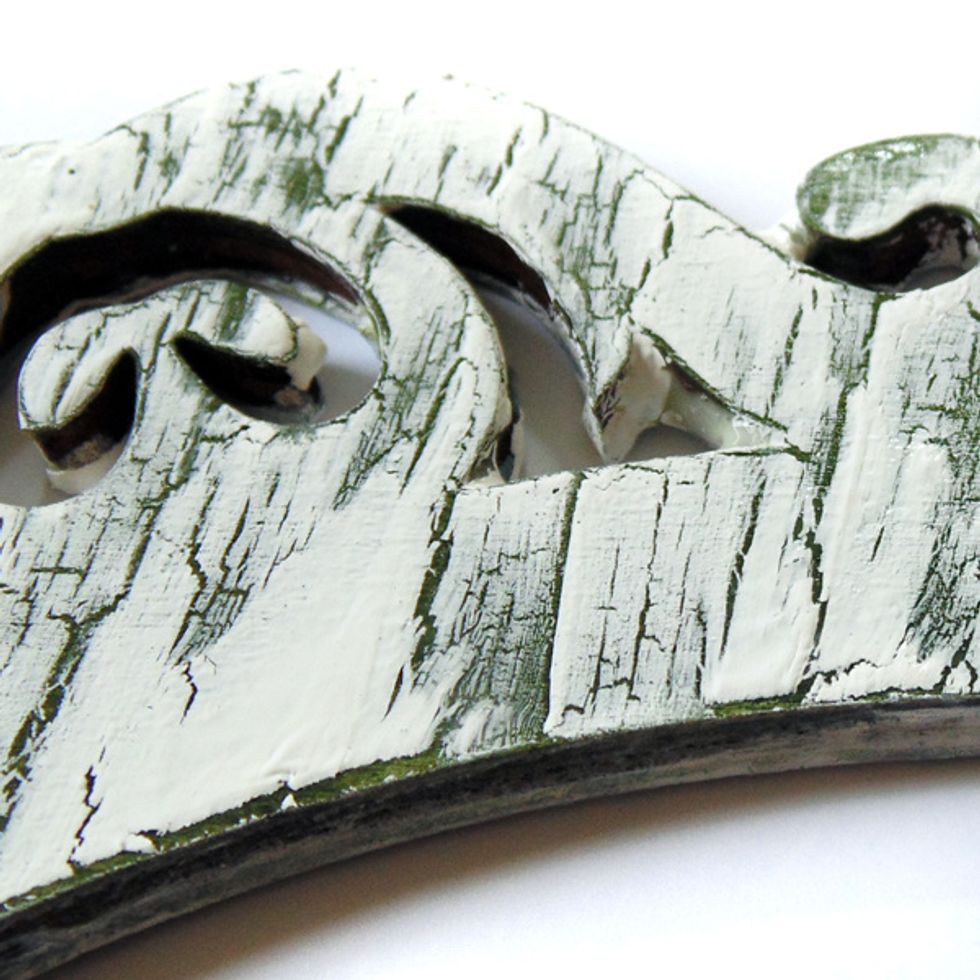
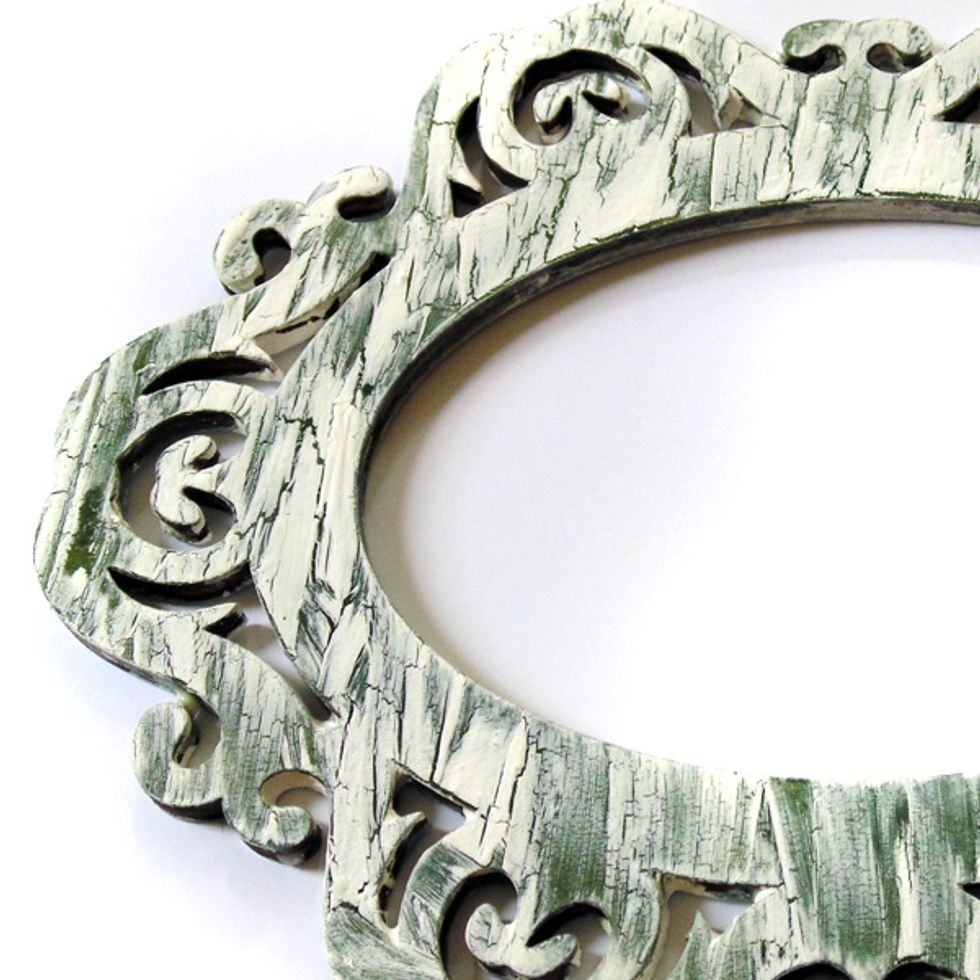
Thicker areas of paint will have yield larger cracks. You can dilute your paint with a small amount of water for finer, less obvious cracking.
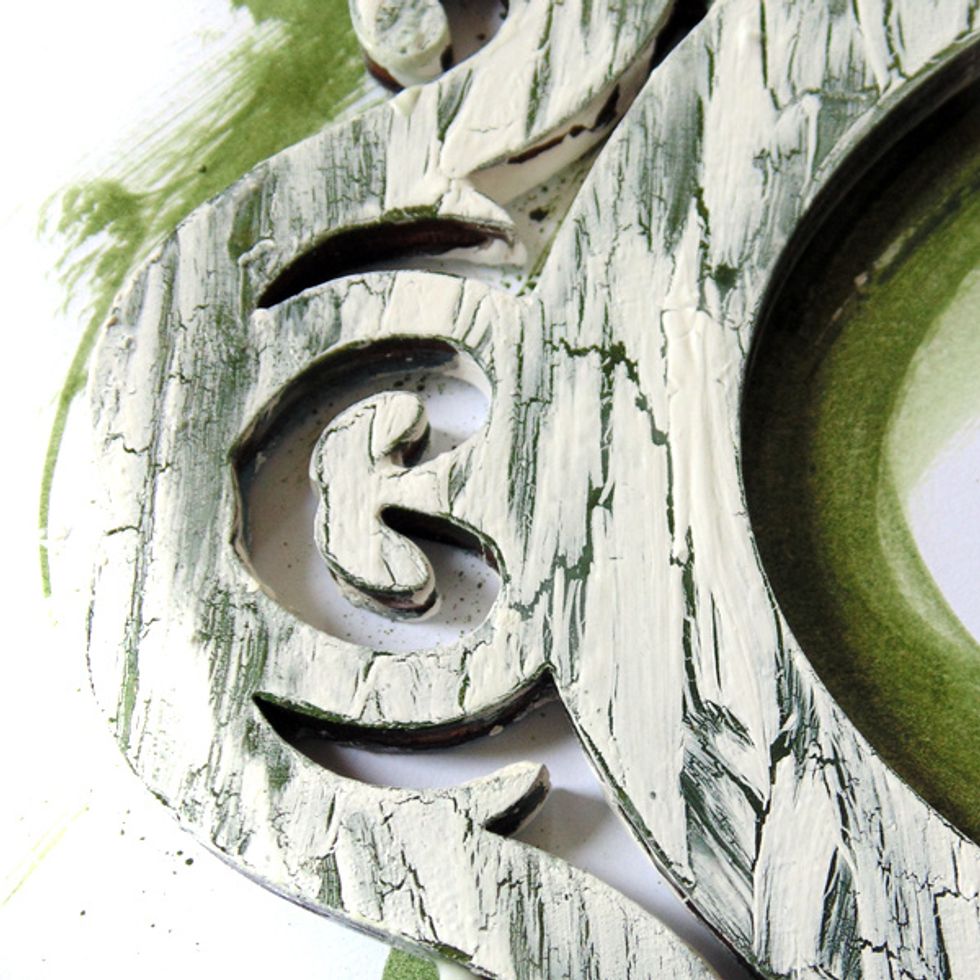
Finally, you can speed up the drying process with a heat gun but be careful that your glue doesn't bubble... if you mind that sort of thing.