The Conversation (0)
Sign Up
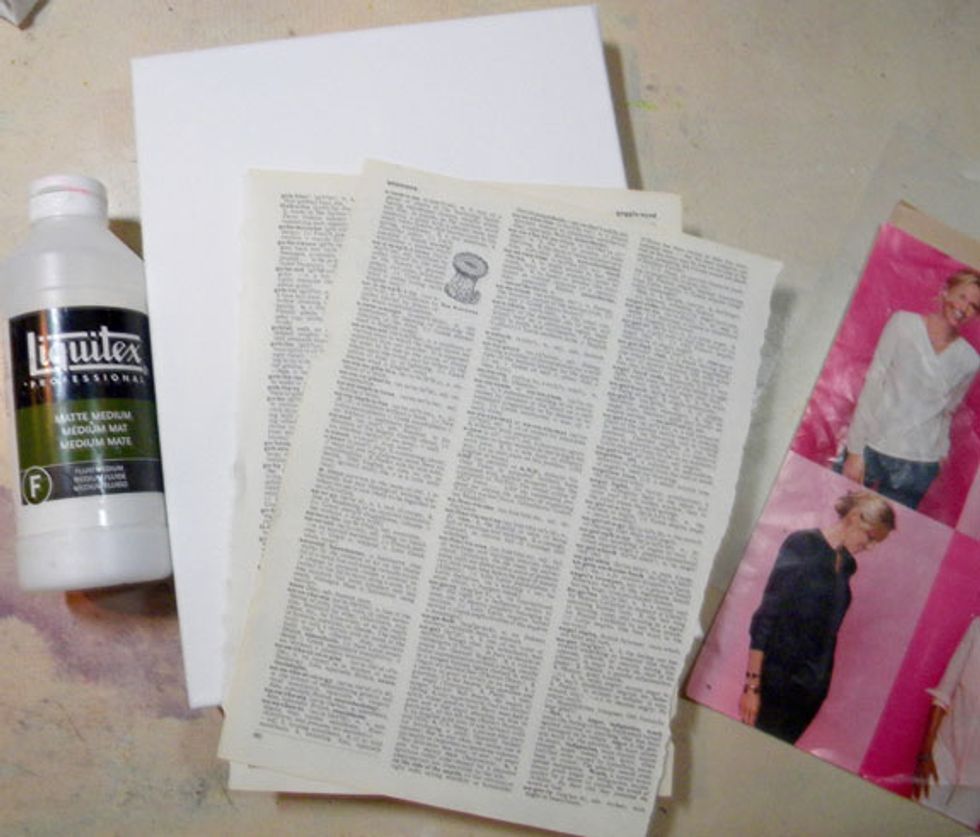
First, lets create the background. Rip book pages and glue to a 9" x 12" deep edge canvas.
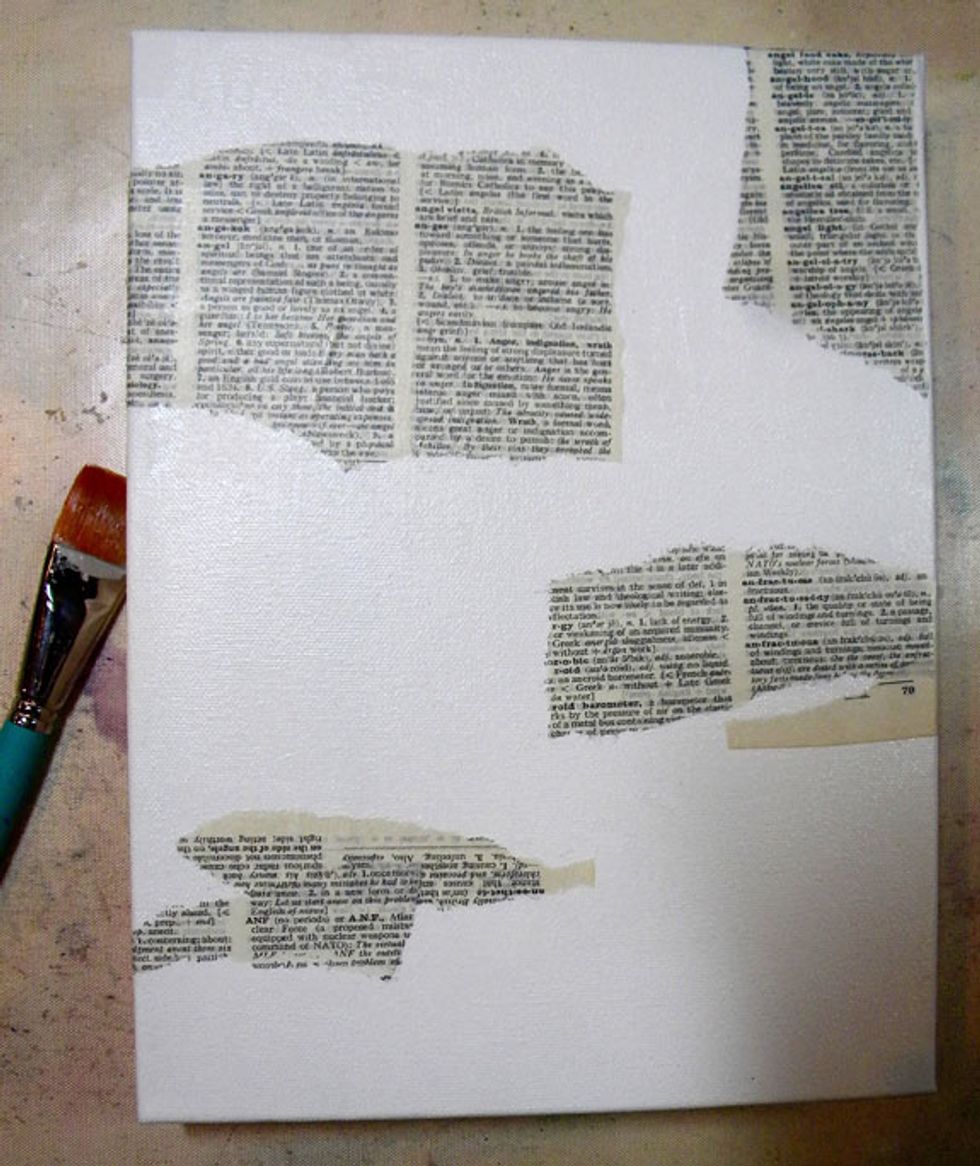
Here is how mine looks. Just be random and don't think to much about it. Very little will show in the end.
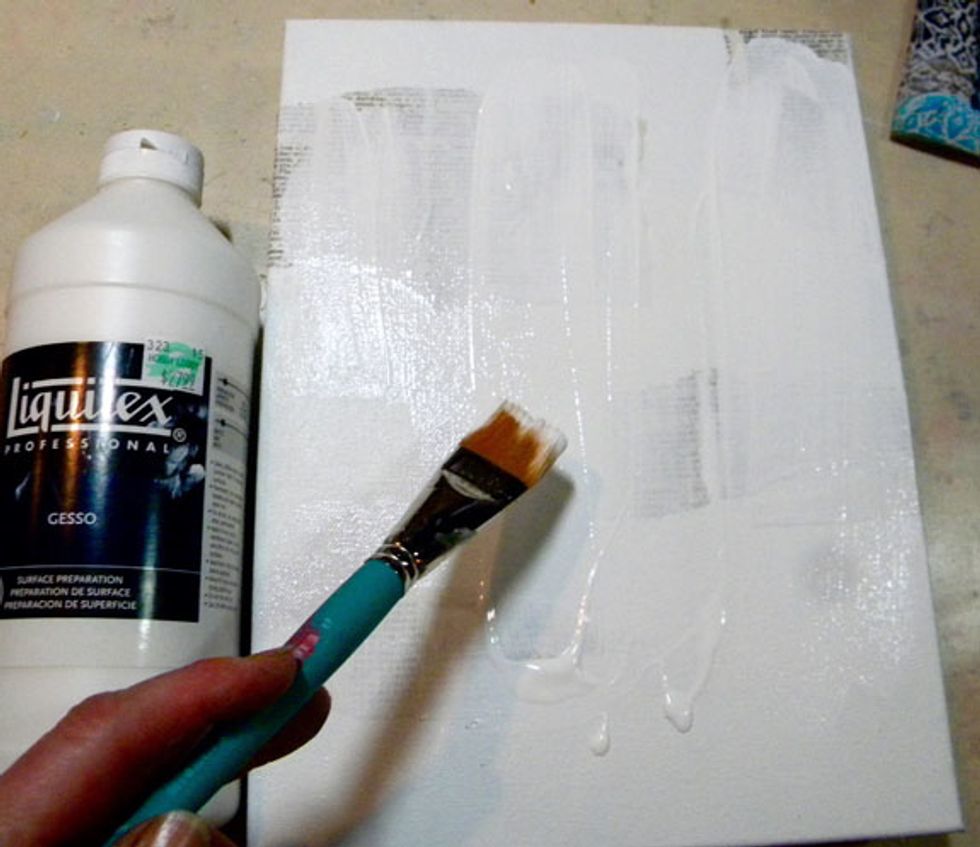
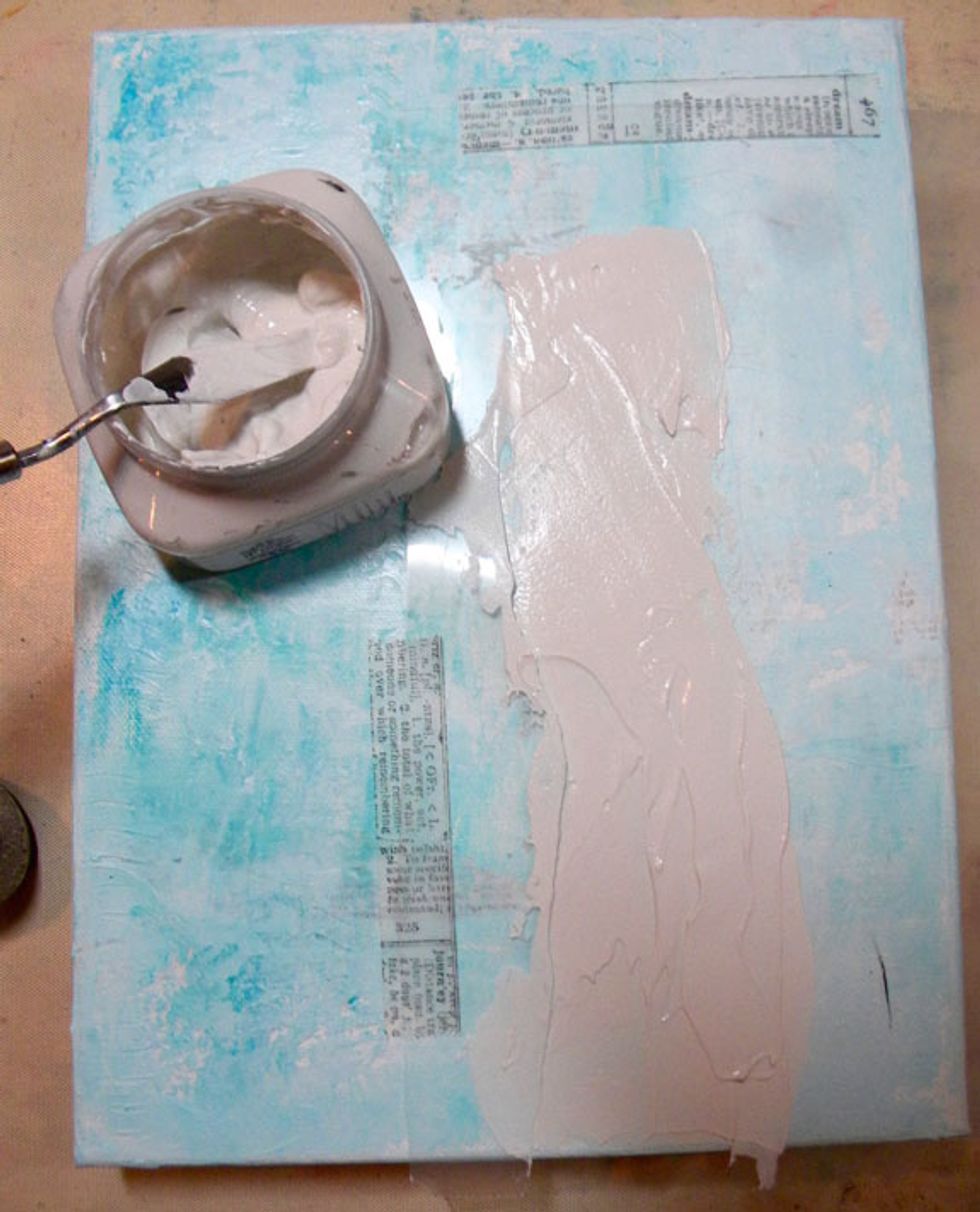
Paint on a thin layer of gesso.
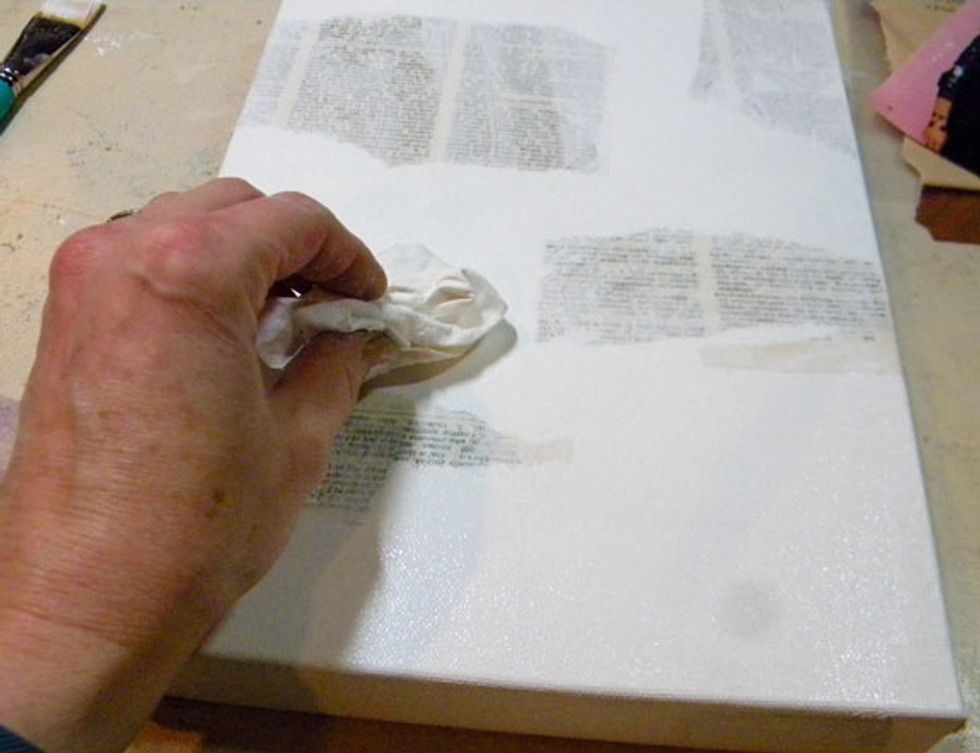
Then dab off randomly with a baby wipe.
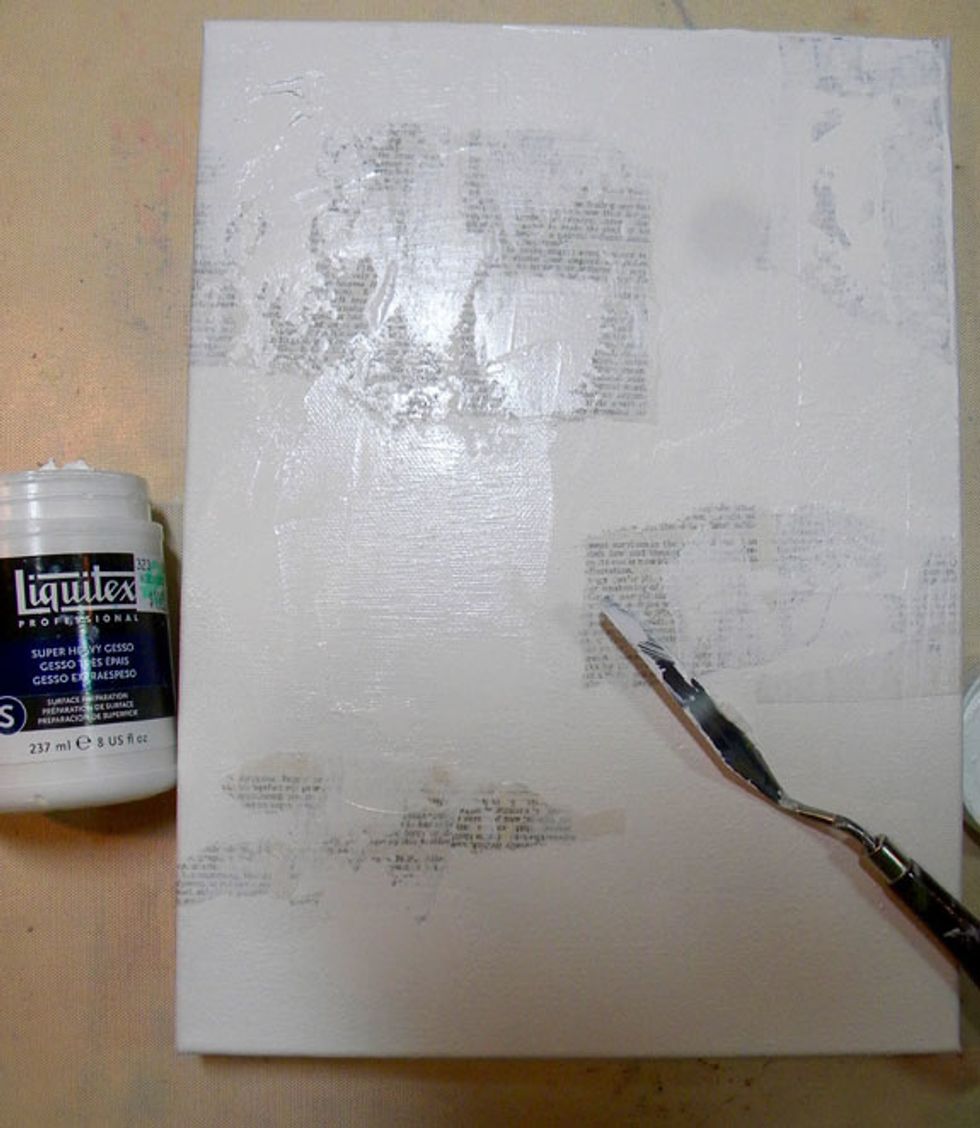
Now add super heavy gesso with a palette knife here and there to add texture to the background.
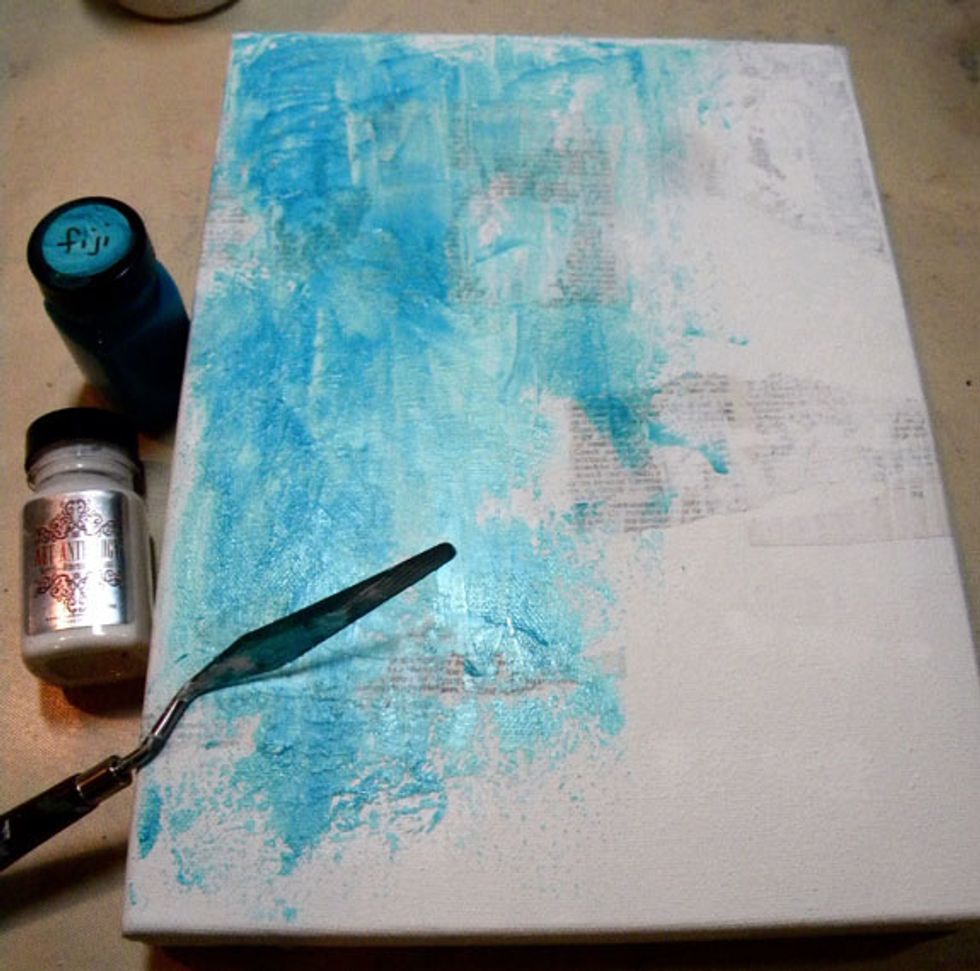
Add Fiji and Cotton Velvets with a palette knife while the layers are wet, covering most of the canvas with color.
Add Art Anthology Mud on top of the Fiji to add more texture, then make marks with a catalyst tool. Make sure you can see some of the book text through all the layers. Use a baby wipe if needed.

If you don't have a catalyst tool, you can use a comb or an old fork. It adds so much texture to the canvas as we add more color on top. Try other mark making objects and have fun with this part!

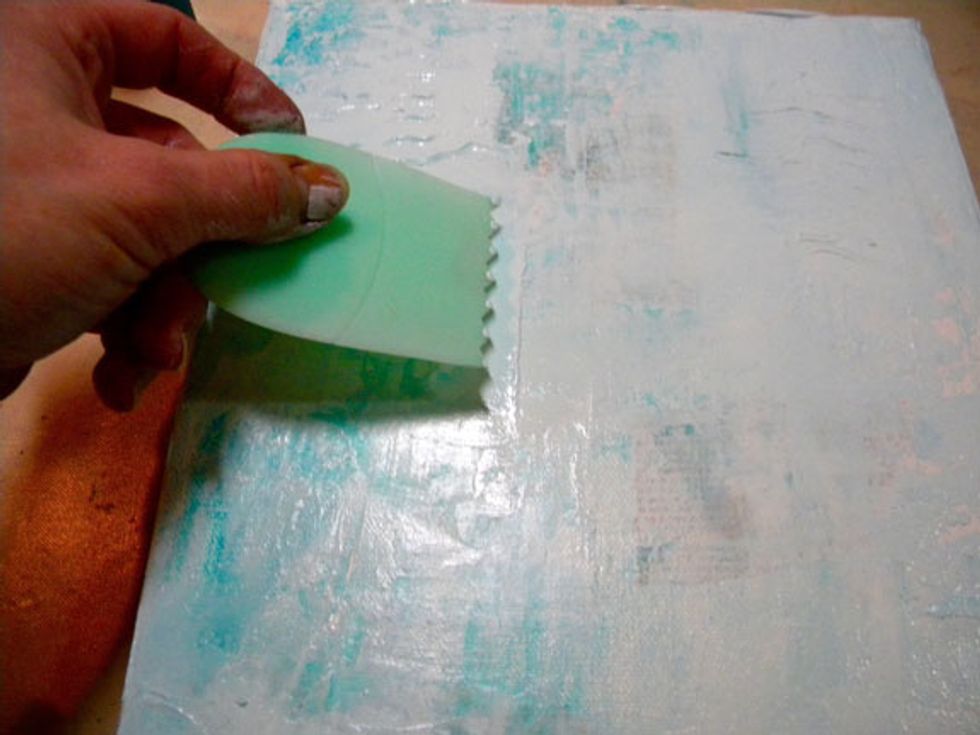
Here is how it looks so far. Let it dry completely before moving on to the next step.
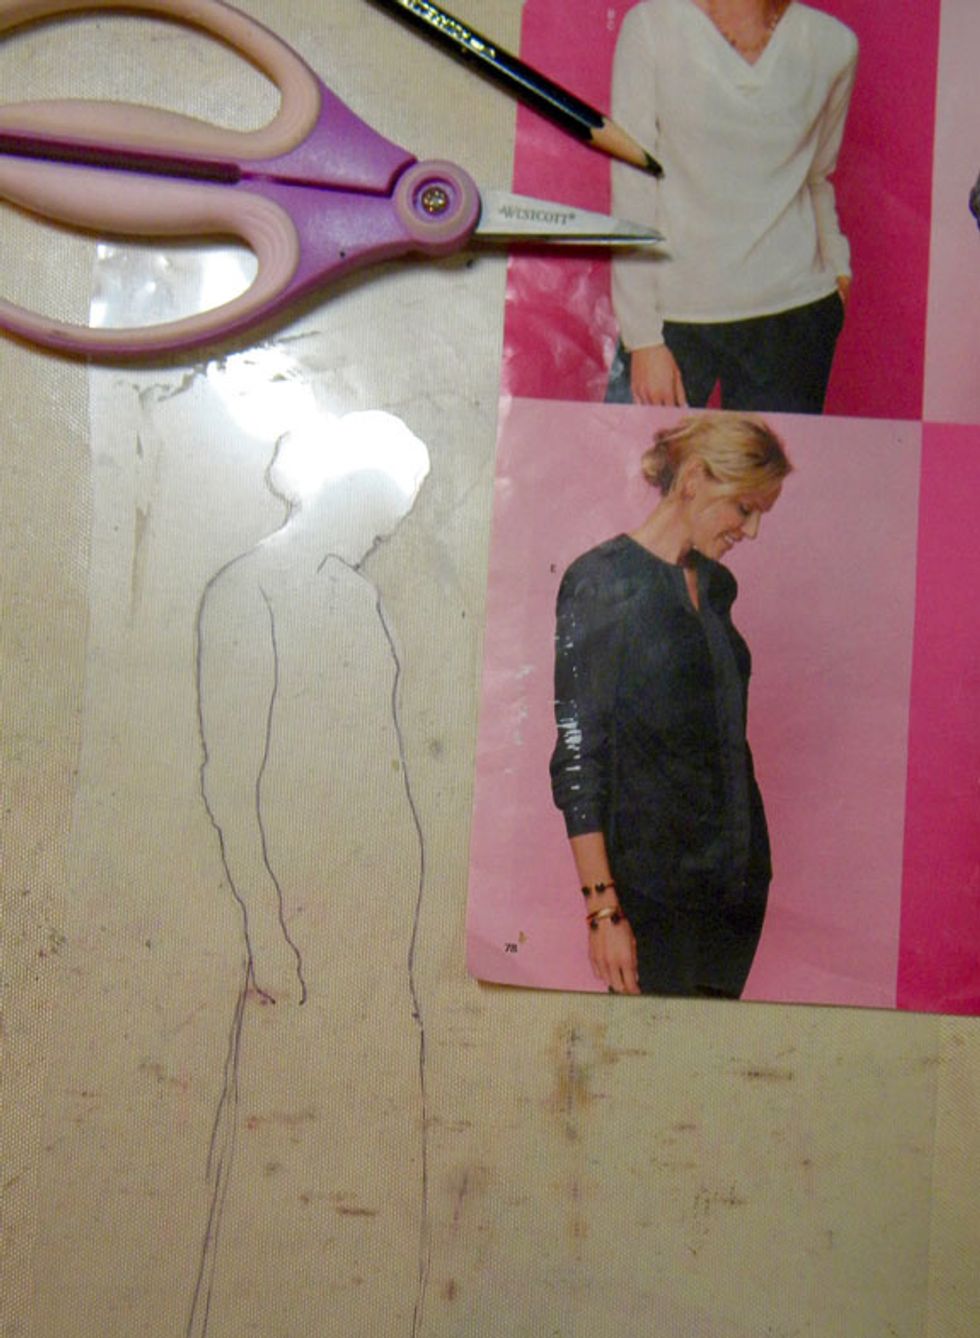
Now to make the silhouette stencil. Find a picture that you want to make the stencil from and lay the transparency on top of it and trace the outline of the figure. Carefully cut it out.
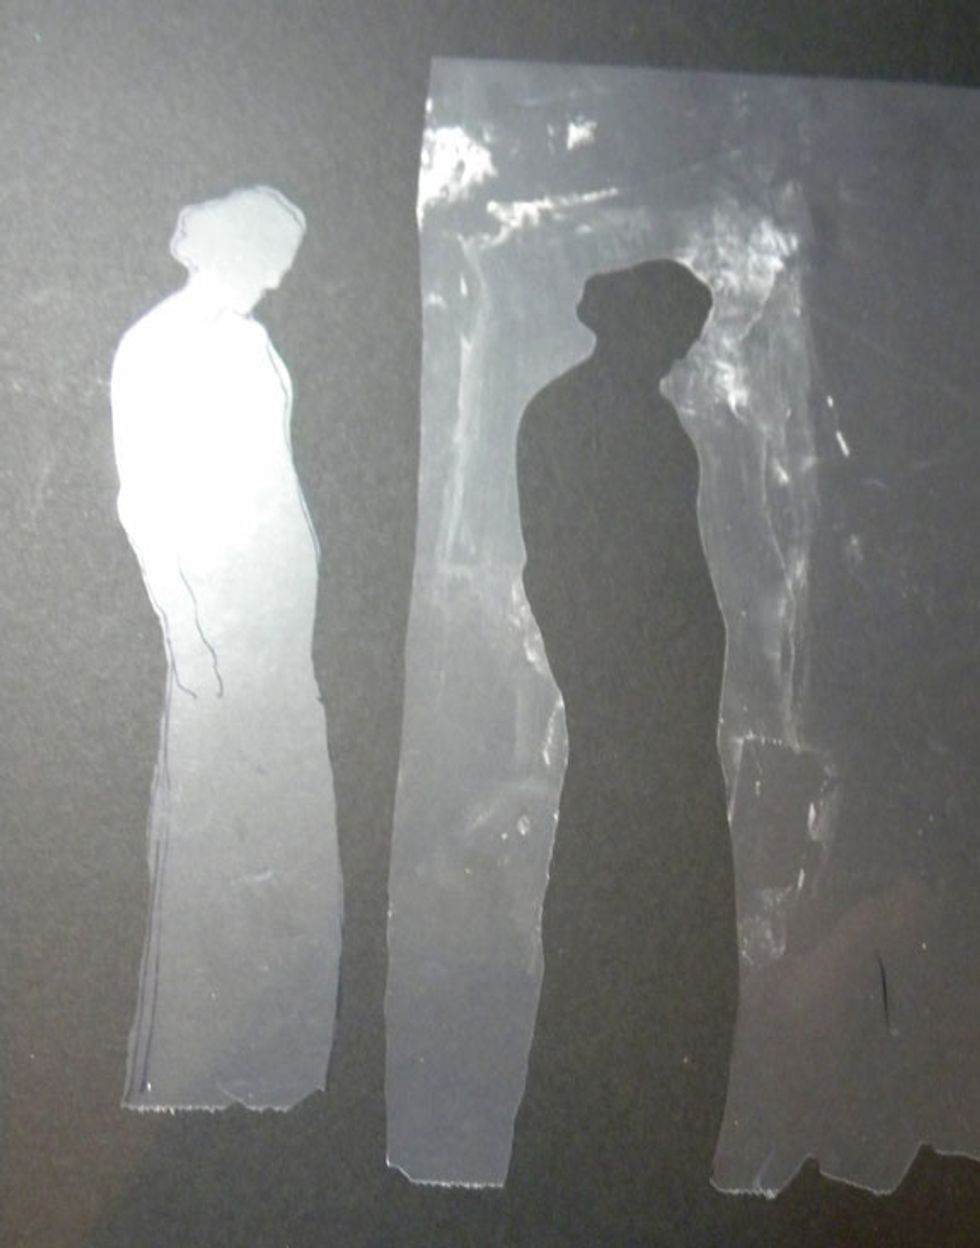
The one on the left is the silhouette mask and the right is the stencil. Keep both pieces. We will use the stencil for this project, but the mask can be used in lots of creative ways too.
Tape the stencil down onto the canvas using low tack tape, like washi. Remember that the focal point is best if it is not smack in the middle of the canvas. So I offset it a bit to the right.
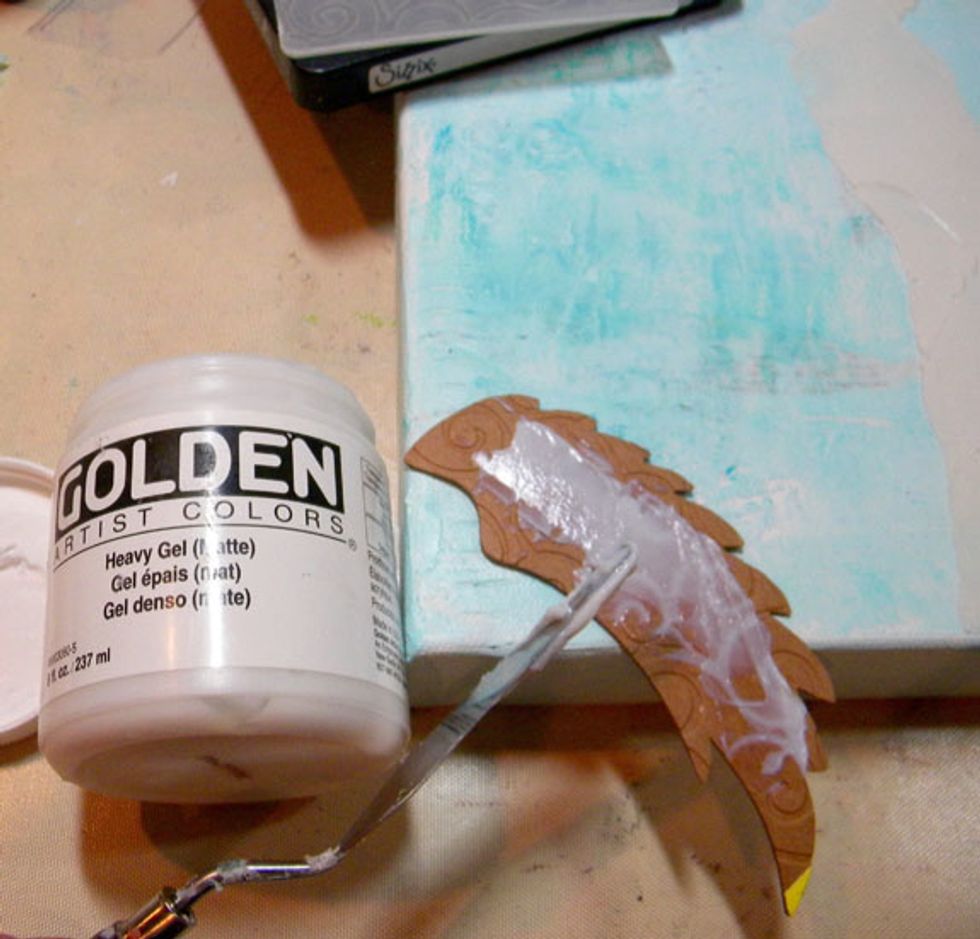
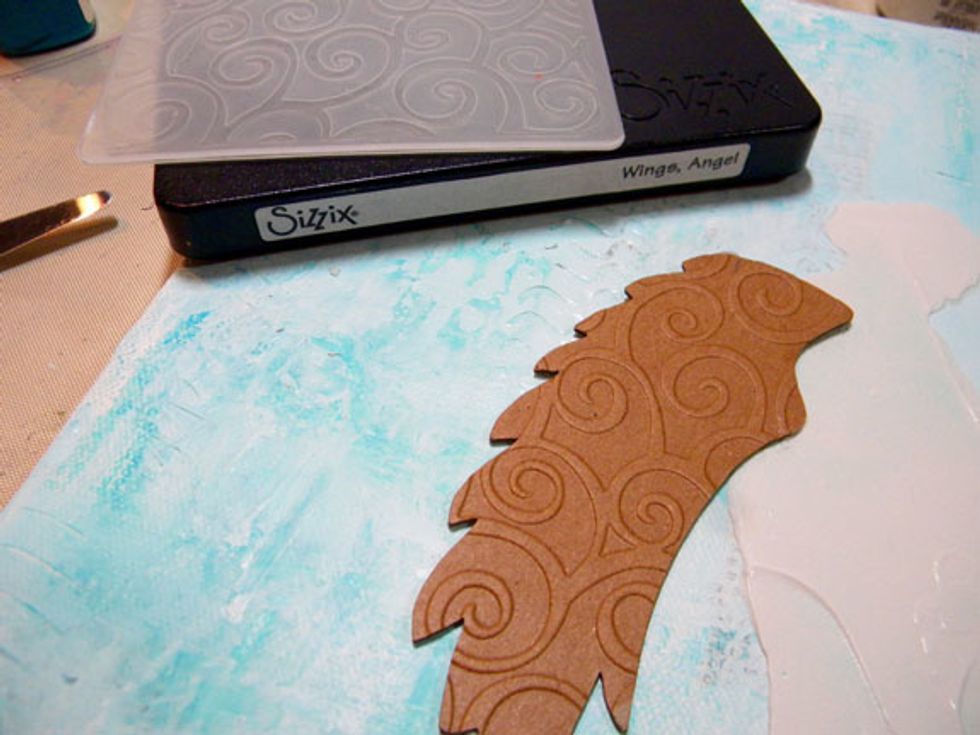
Cut out a wing using a piece of chipboard, the Sizzix Bigz Angel Wing Die, and emboss it with the Cuttlebug D'vine Swirls embossing folder. Glue it down to the canvas using Heavy Gel Medium.
Overlap the wing with the silhouette stenciled onto the canvas, so the wing comes out of the back. Paint a coat of gesso on the wing.
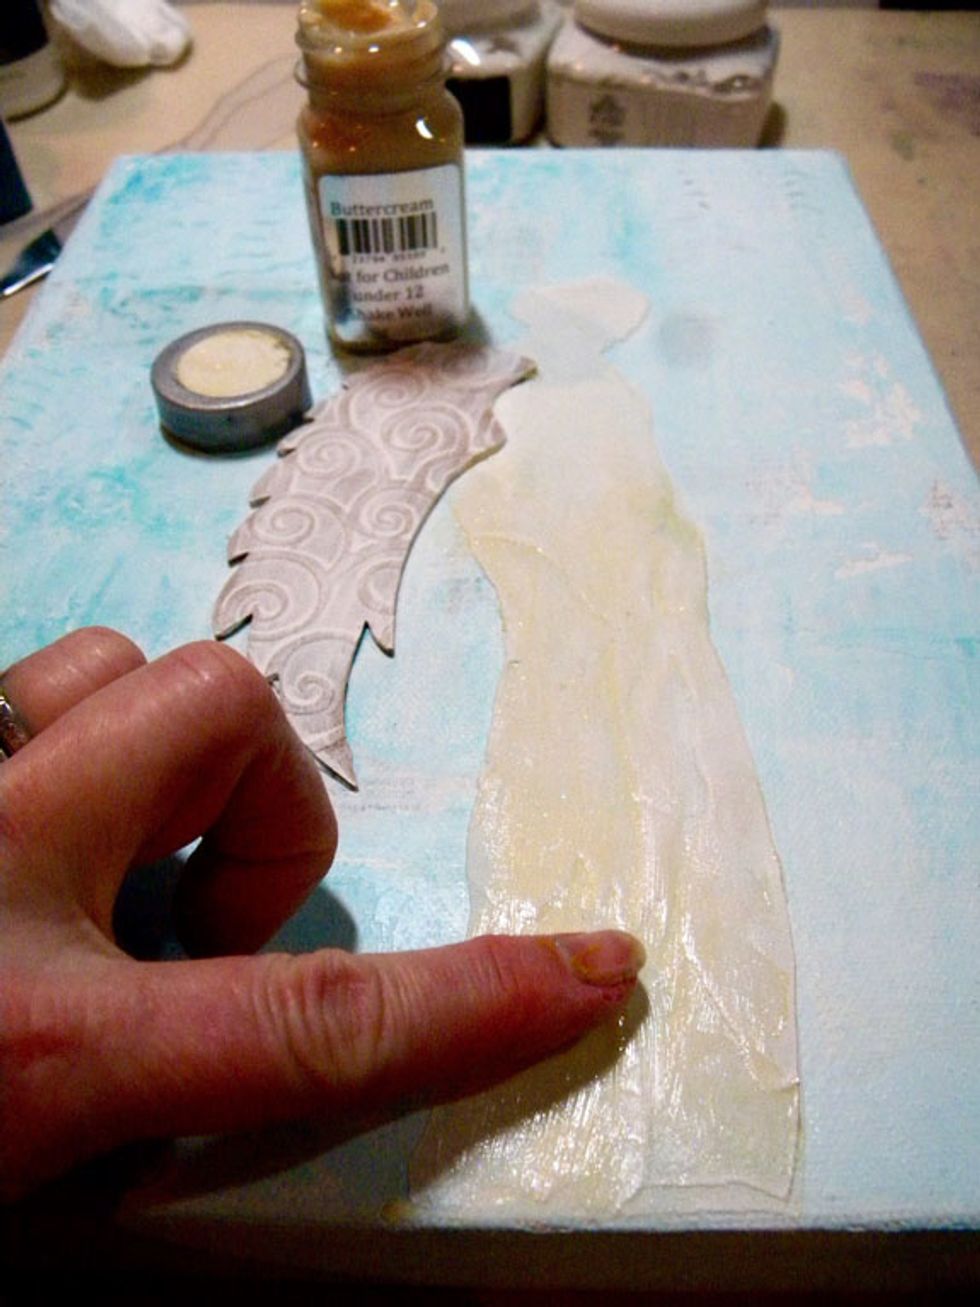
After dry, I decided the silhouette needed more height. I placed the stencil back onto the canvas, lining it up then added a thick layer of Buttercream Sorbet over the existing figure. Let dry.
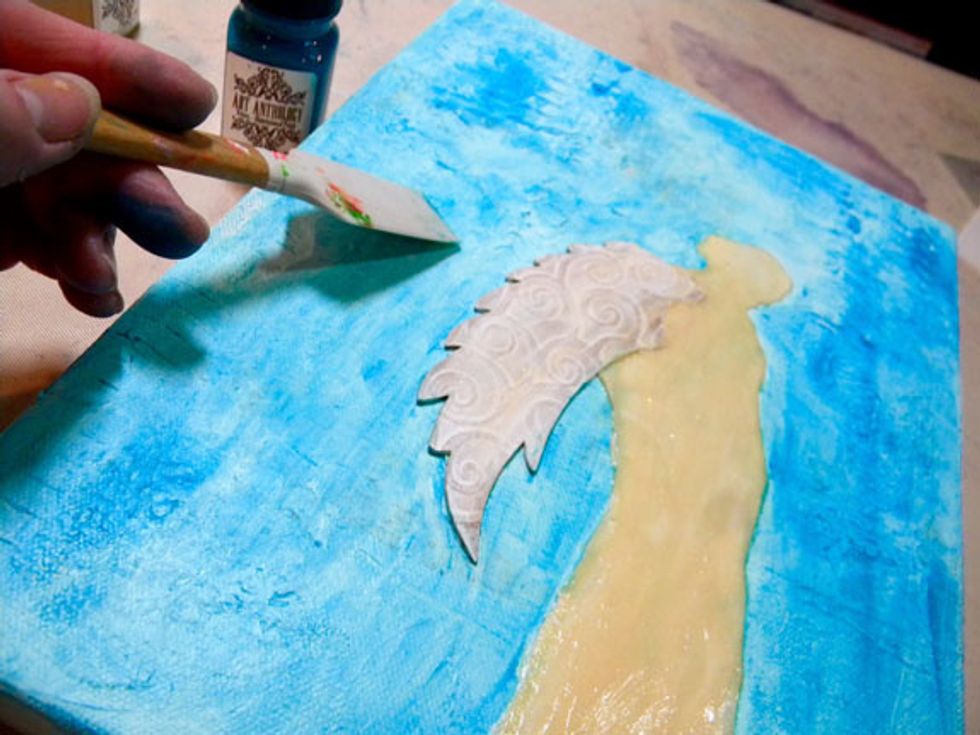
Add more Fiji to the background with the catalyst spatula, mixing in Baby Blue Eyes Sorbet to deepen the layers. I also added Dazzle Sorbet randomly which adds sheen and gold glitter.
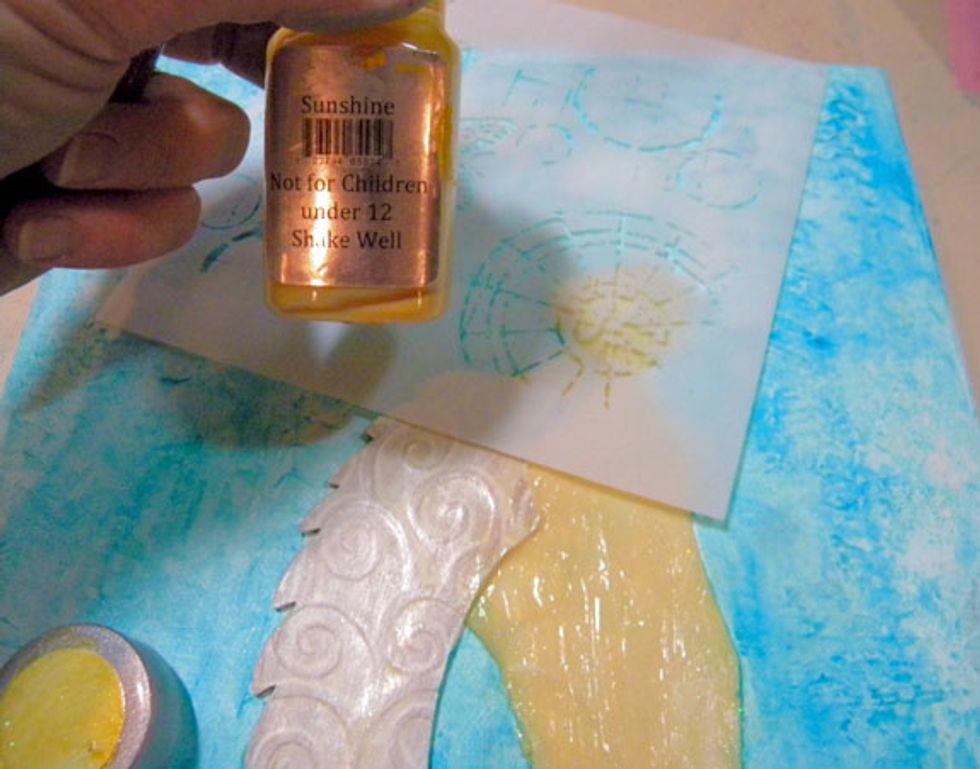
This semi-circle stencil I have makes the perfect halo, so I added Sunshine Sorbet through it. There are lots of ways to add a halo effect. I looked at angel art on Pinterest for ideas.
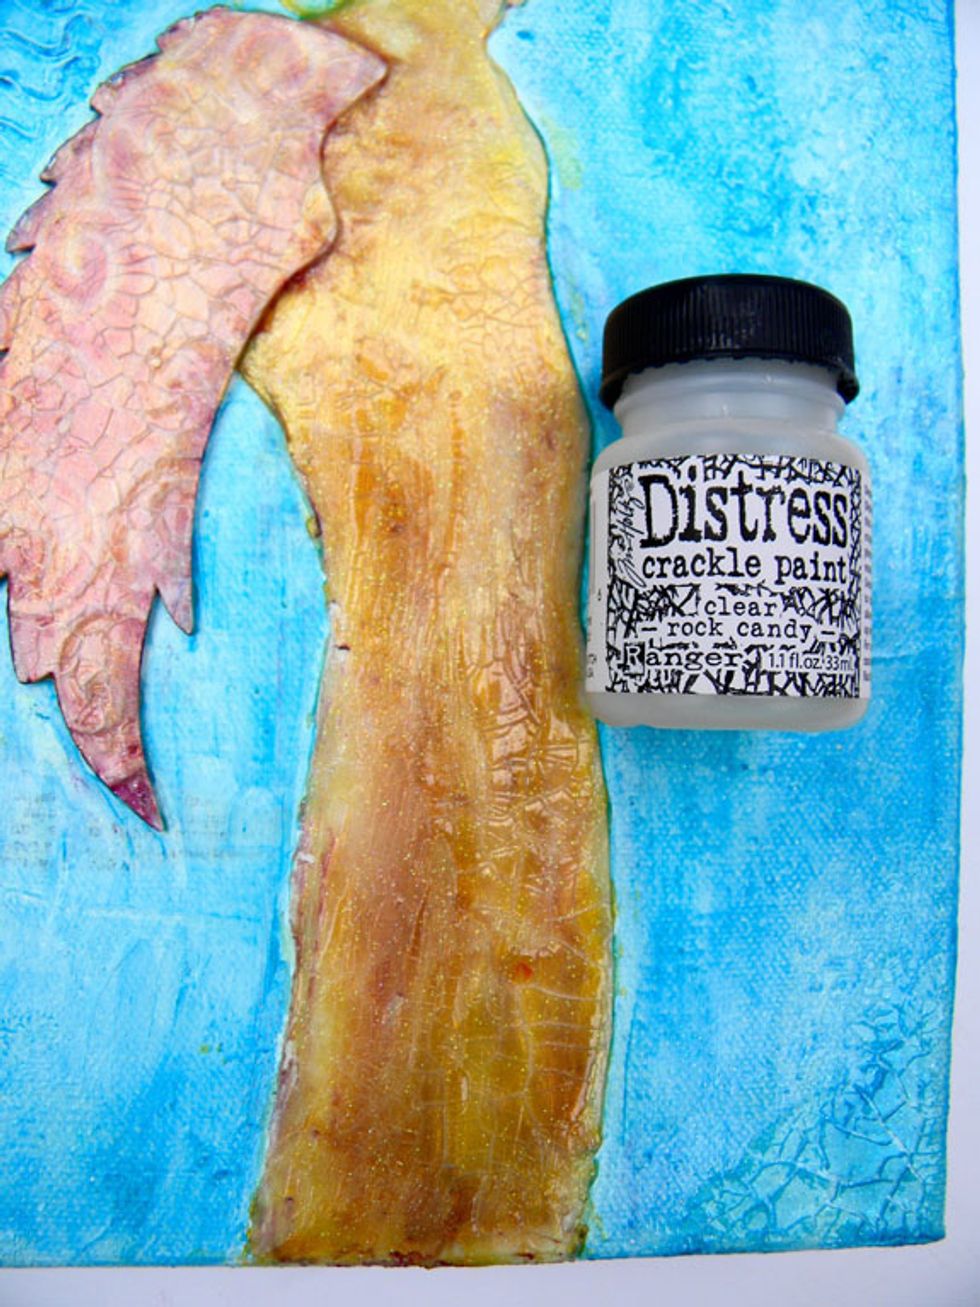
I wanted my canvas to have an "old world" look so I painted thick coats of clear crackle paint around the edges, on the wing and on parts of the angel. Dry completely.
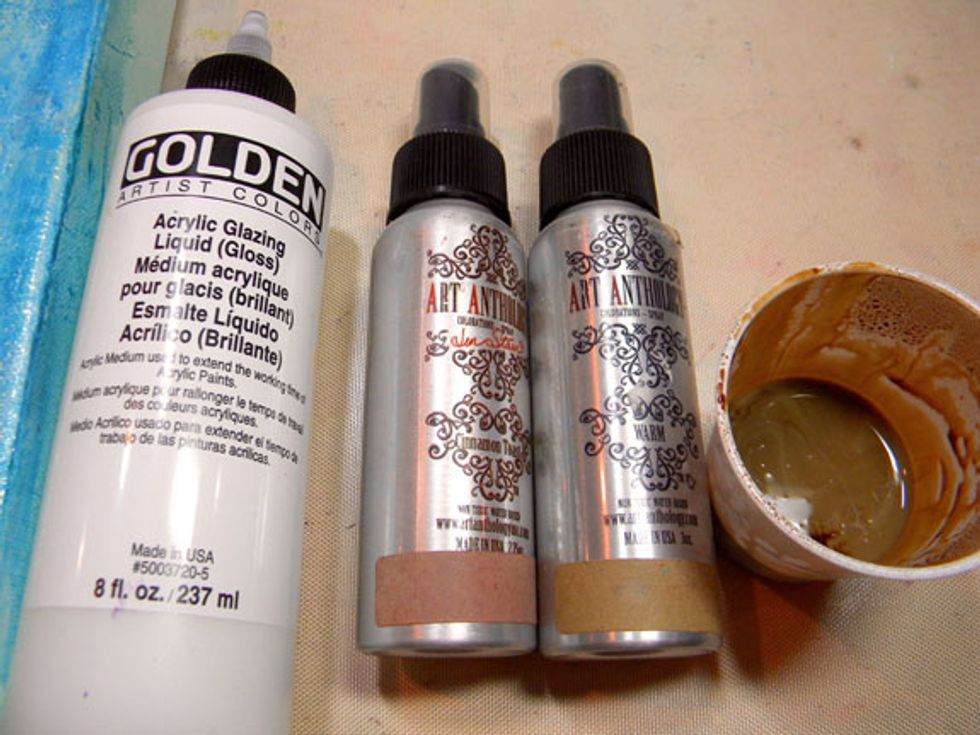
To make the cracks stand out, I made a glaze by mixing Warm and Cinnamon Toast Colorations sprays with Acrylic Glazing Medium in a small cup, about 50% of each.
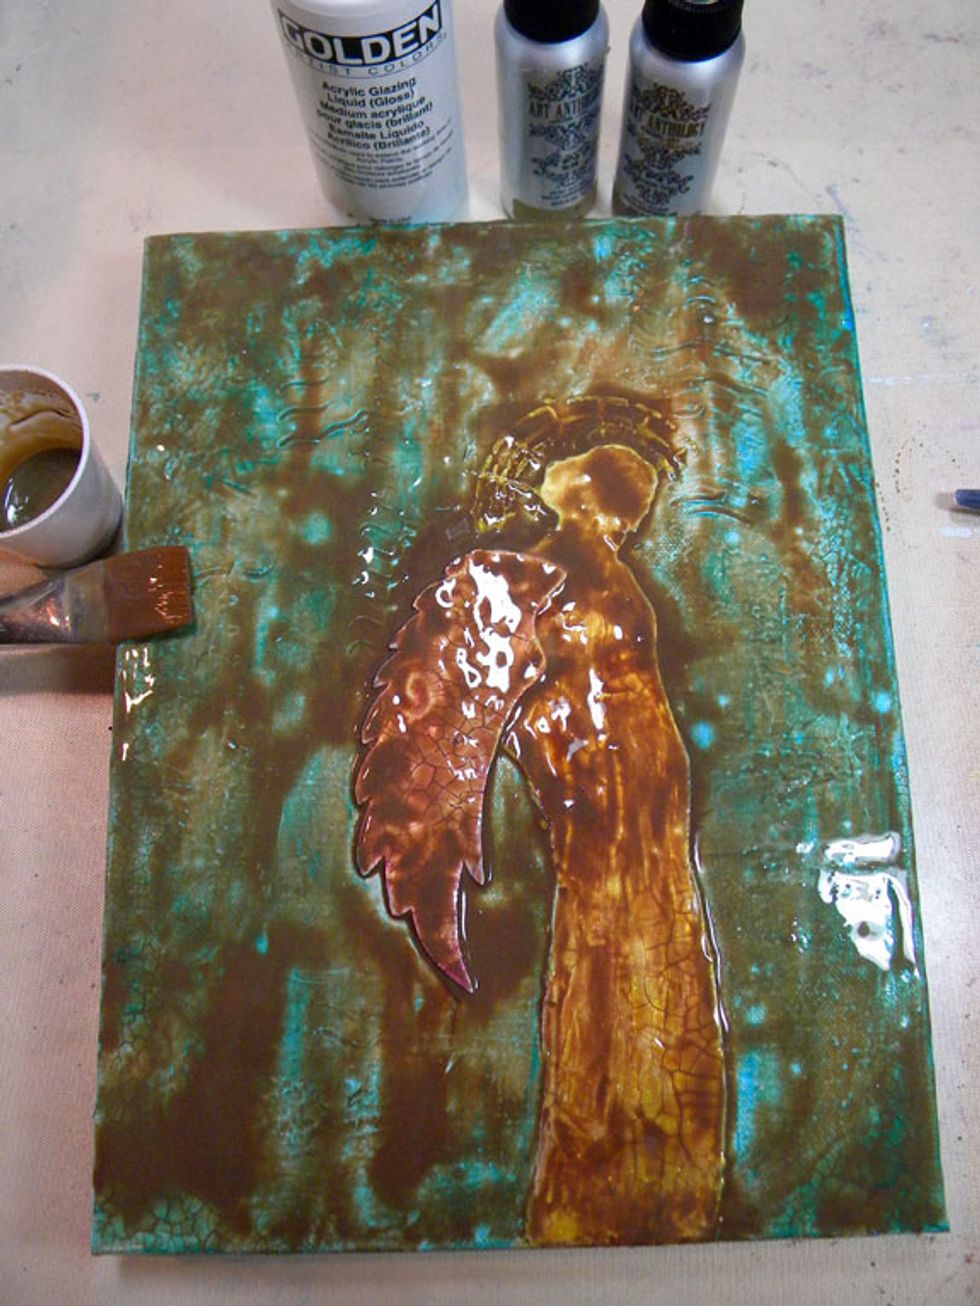
Spread the mixture thickly all over the canvas and let it sit for about 10 minutes. The glaze will seep into all the nooks and crannies and really let those cracks show.

Wipe the glaze off using a baby wipe or soft cloth, leaving some around the angel's edges to create shadows. Repeat this process if needed.
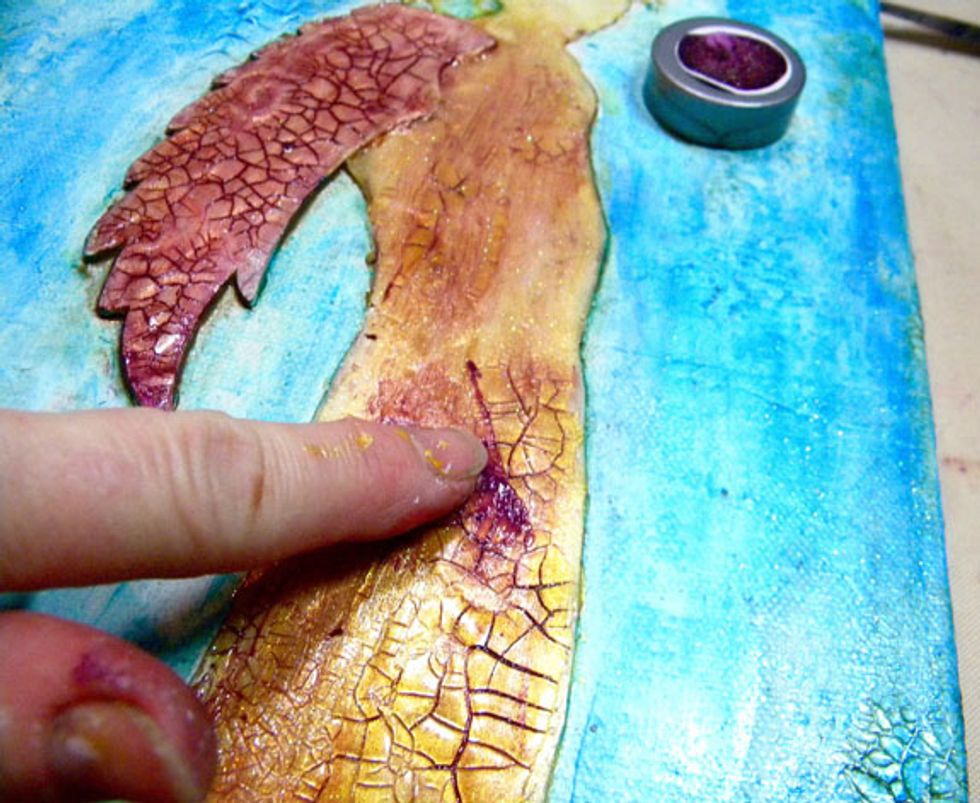
After the glaze is dry, start adding more color to the angel. I chose Imperial Sorbet, applying with my finger, working it into the cracks. Purple is a complimentary color to gold and yellow.
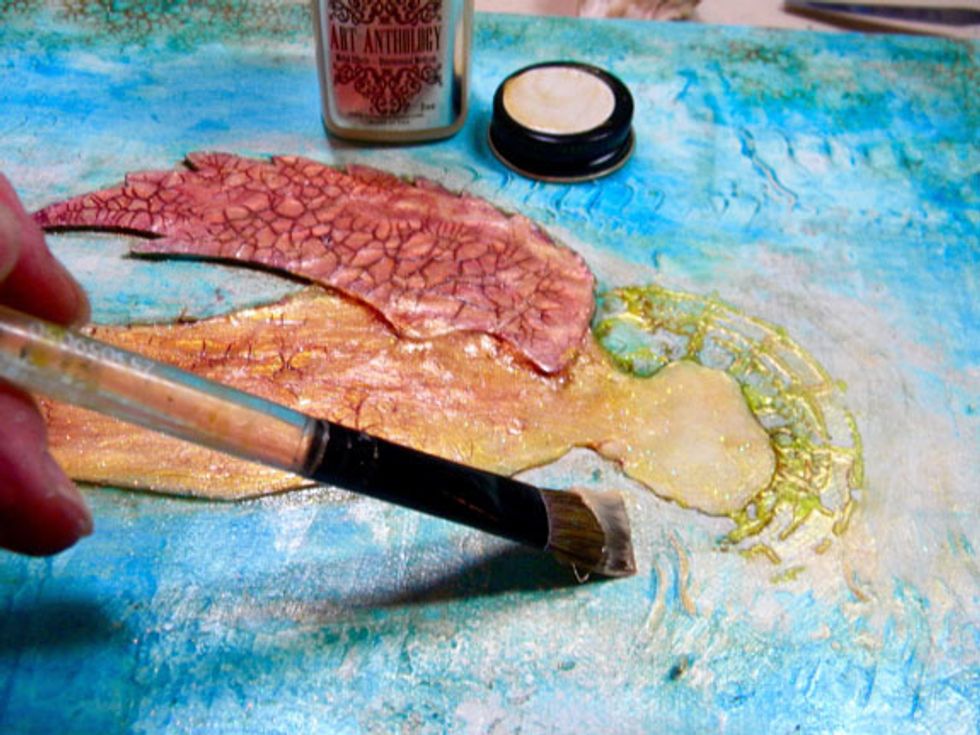
Add Gold Metal Effects to the halo and around the angel silhouette to create a glowing effect. I also added it around the canvas to add highlights here and there.
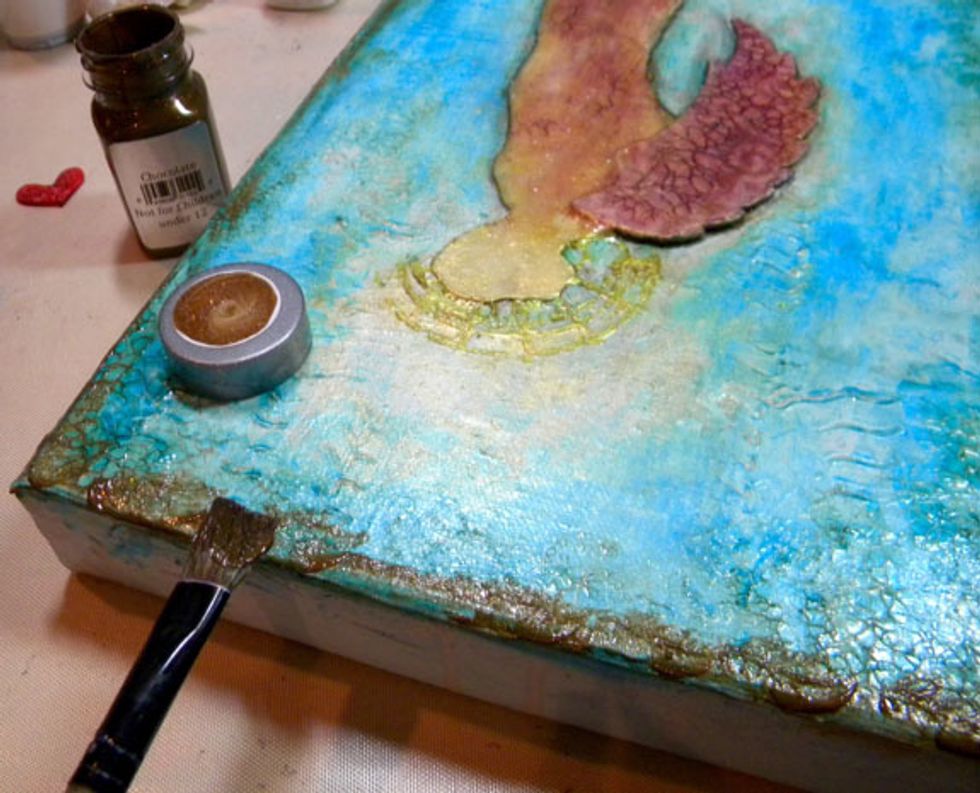
To create a "frame" around the canvas, I added Chocolate Sorbet around the edges and blended it so there was no harsh line. This color really brought out the crackle!
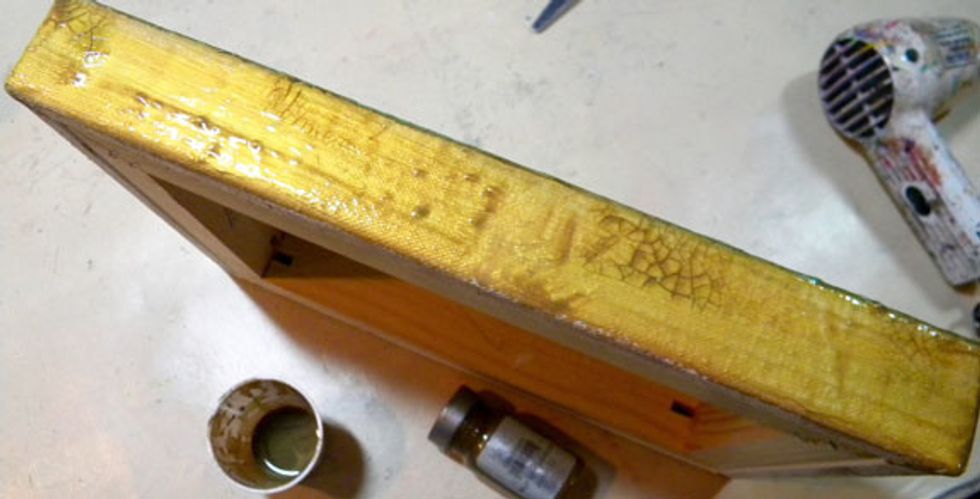
For the sides of the canvas, paint a layer of gesso. When dry, add a few coats of Gold Metal Effects, drying between coats. Add crackle paste, then dry. Lastly, add Chocolate Sorbet and wipe off.
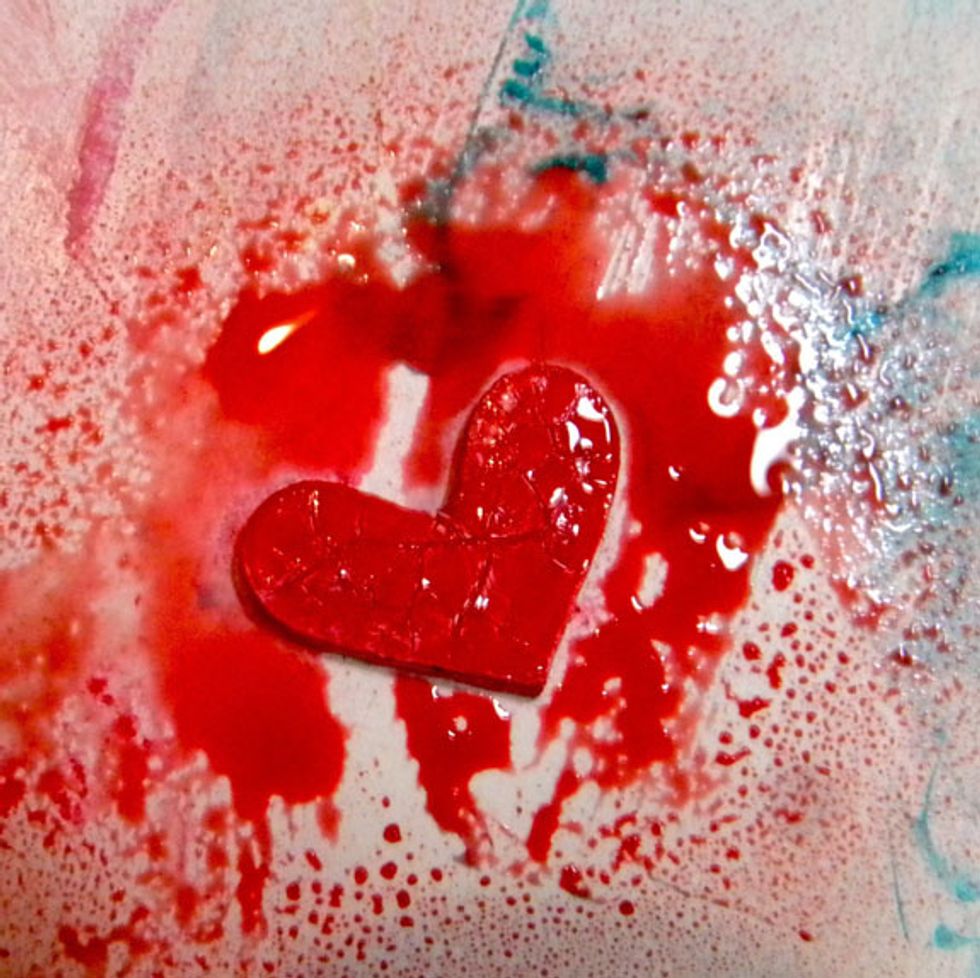
I added a red chipboard heart to the angel, first treating it with gesso, Heart Colorations spray, crackle paste and left over brown glaze. I glued it to the angel with gel medium.
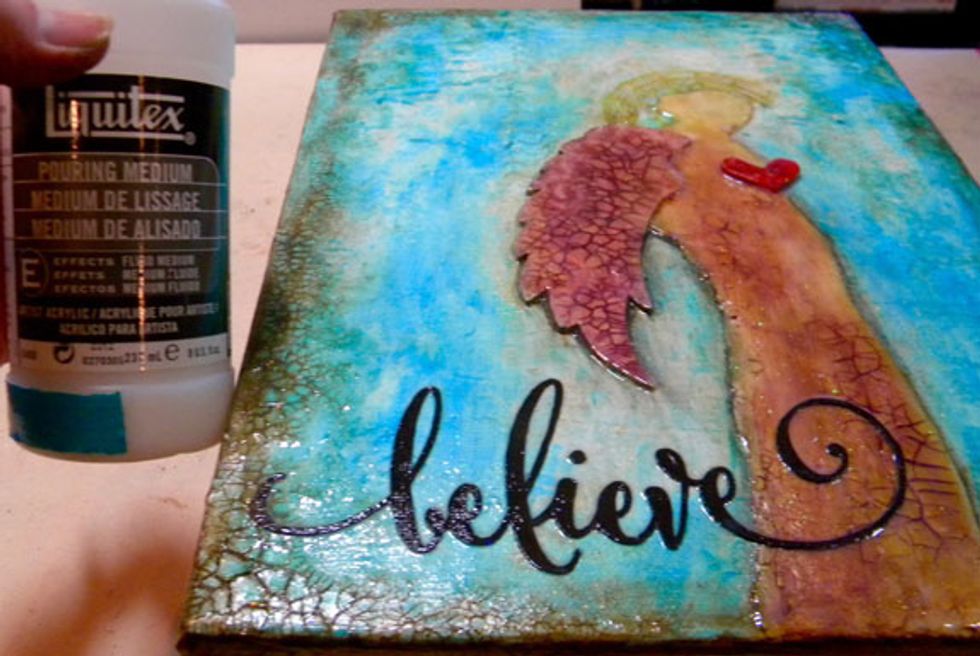
Glue the "believe" die cut to the canvas with gel medium. I wanted the canvas to be shiny, so I painted a thick coat of Liquitex Pouring Medium and let it dry over night.
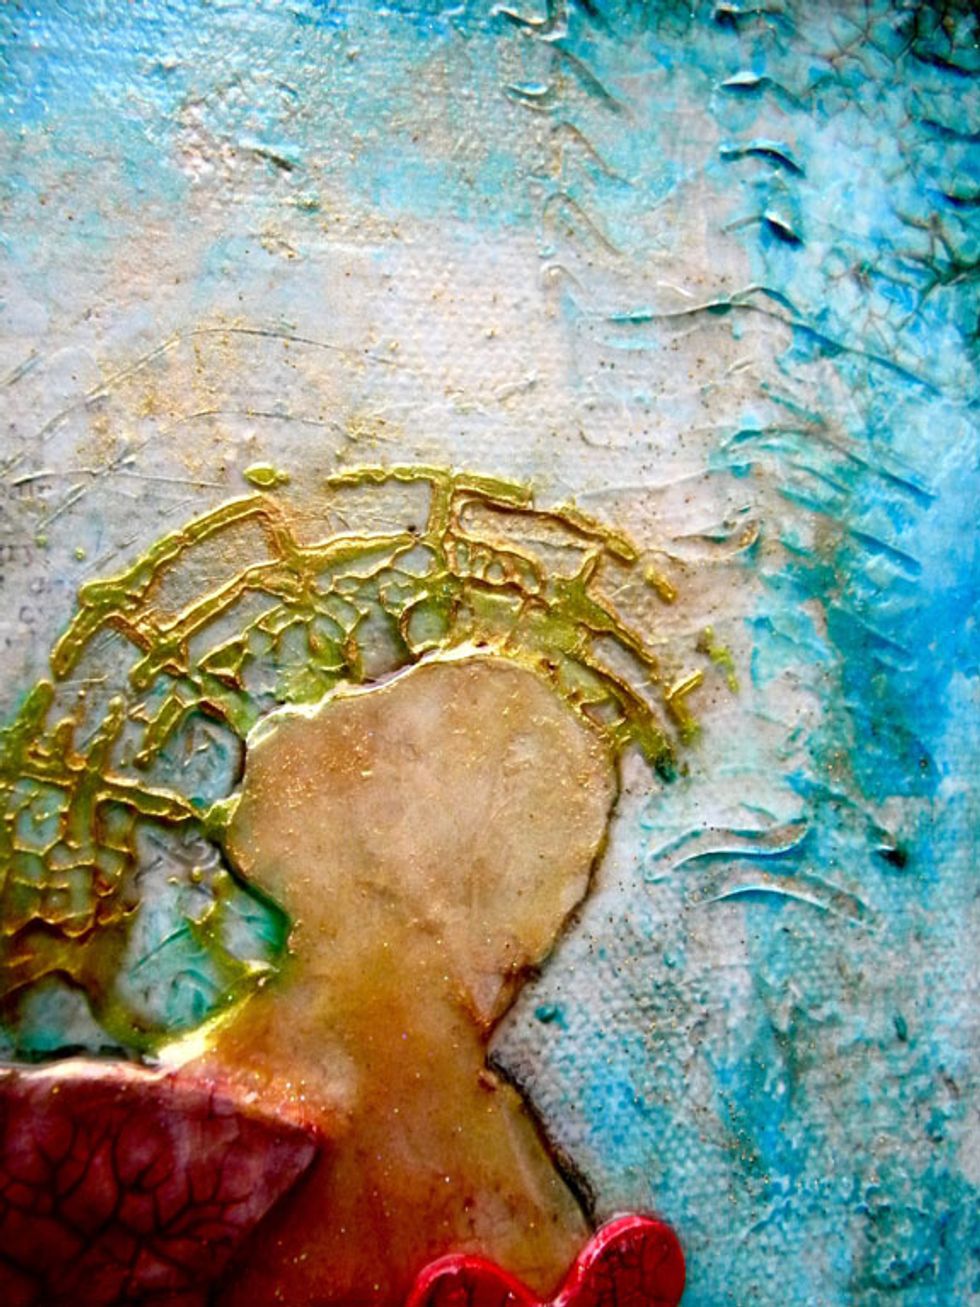
Here is a detail shot to show how the Metal Effects and the Dazzle Sorbet adds a glittery, shimmery glow! You've got to get this stuff if you love bling!!! I wish you could see it in person!
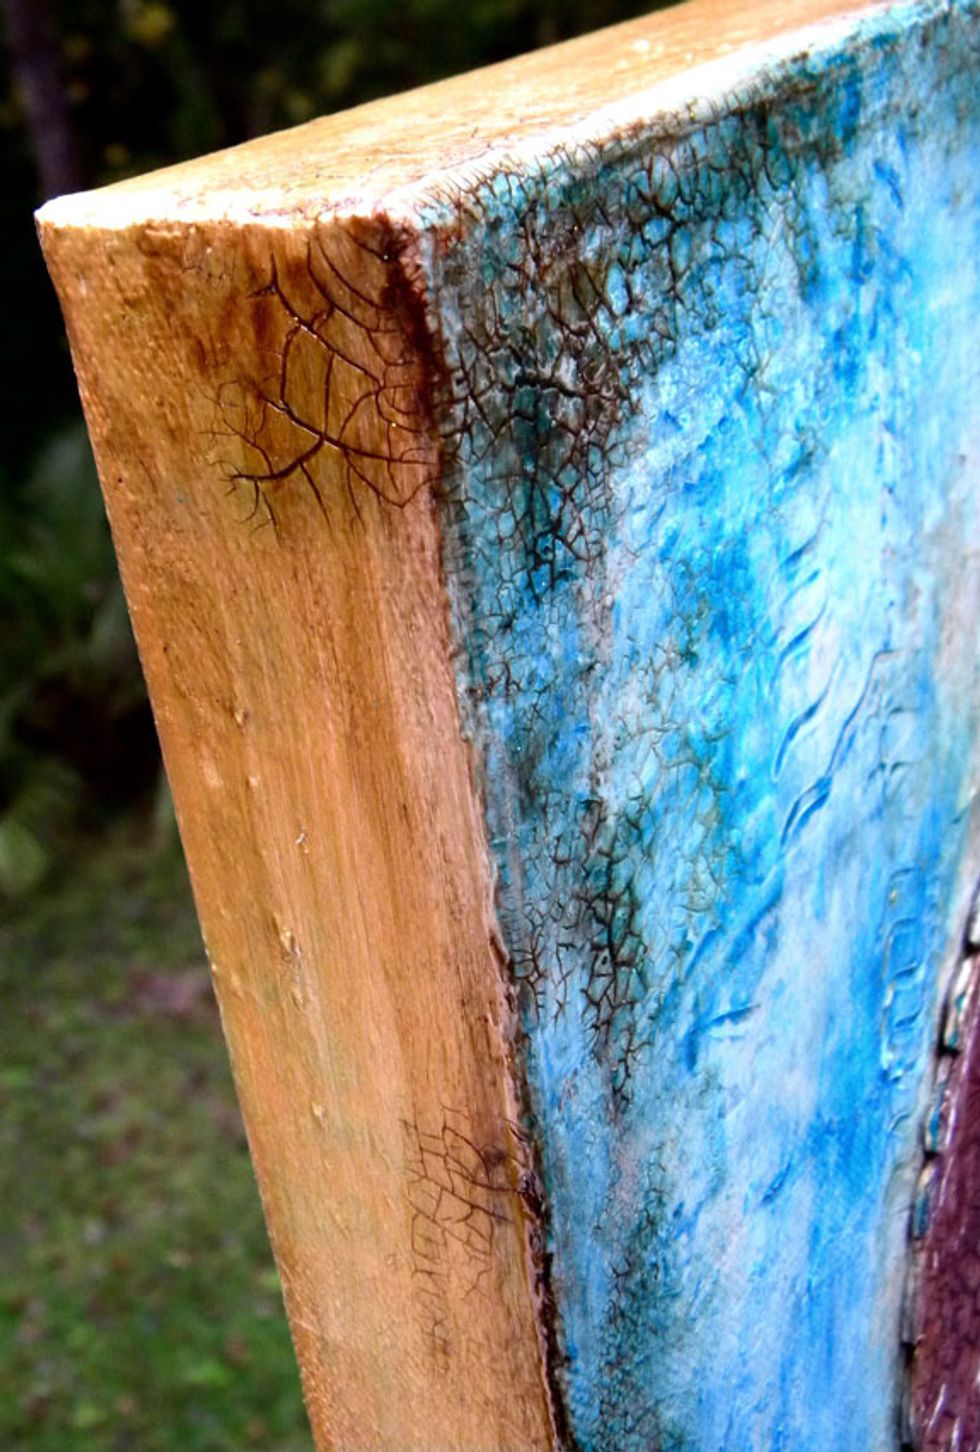
By treating the sides like a frame, I've made this a finished art piece, ready to hang on the wall. And by framing it with darker paint, it draws the eye into the painting and to the focal point.
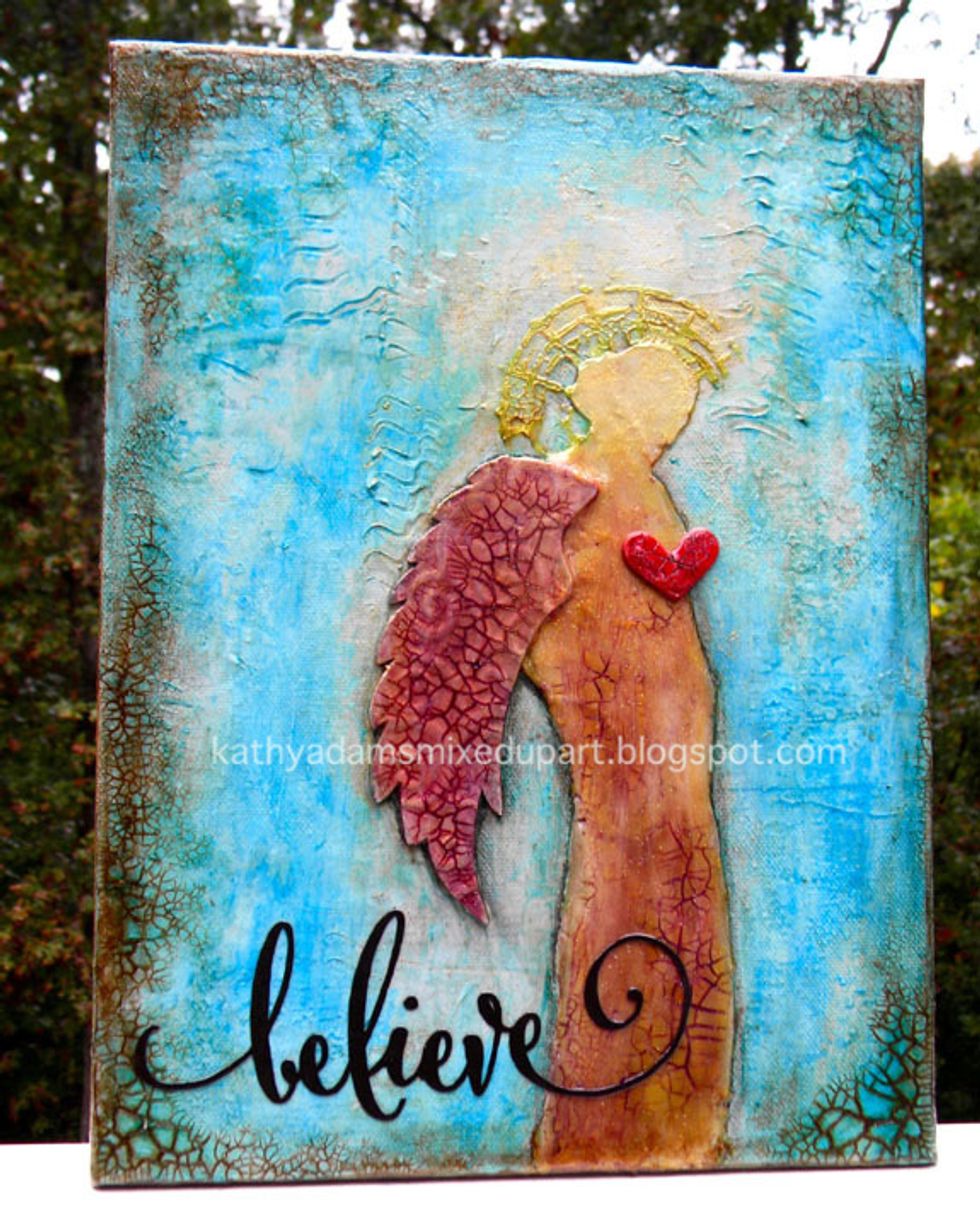
The only way to get this kind of depth and texture is by adding lots of layers. I hope you will try using a hand made silhouette stencil in your art work!