The Conversation (0)
Sign Up
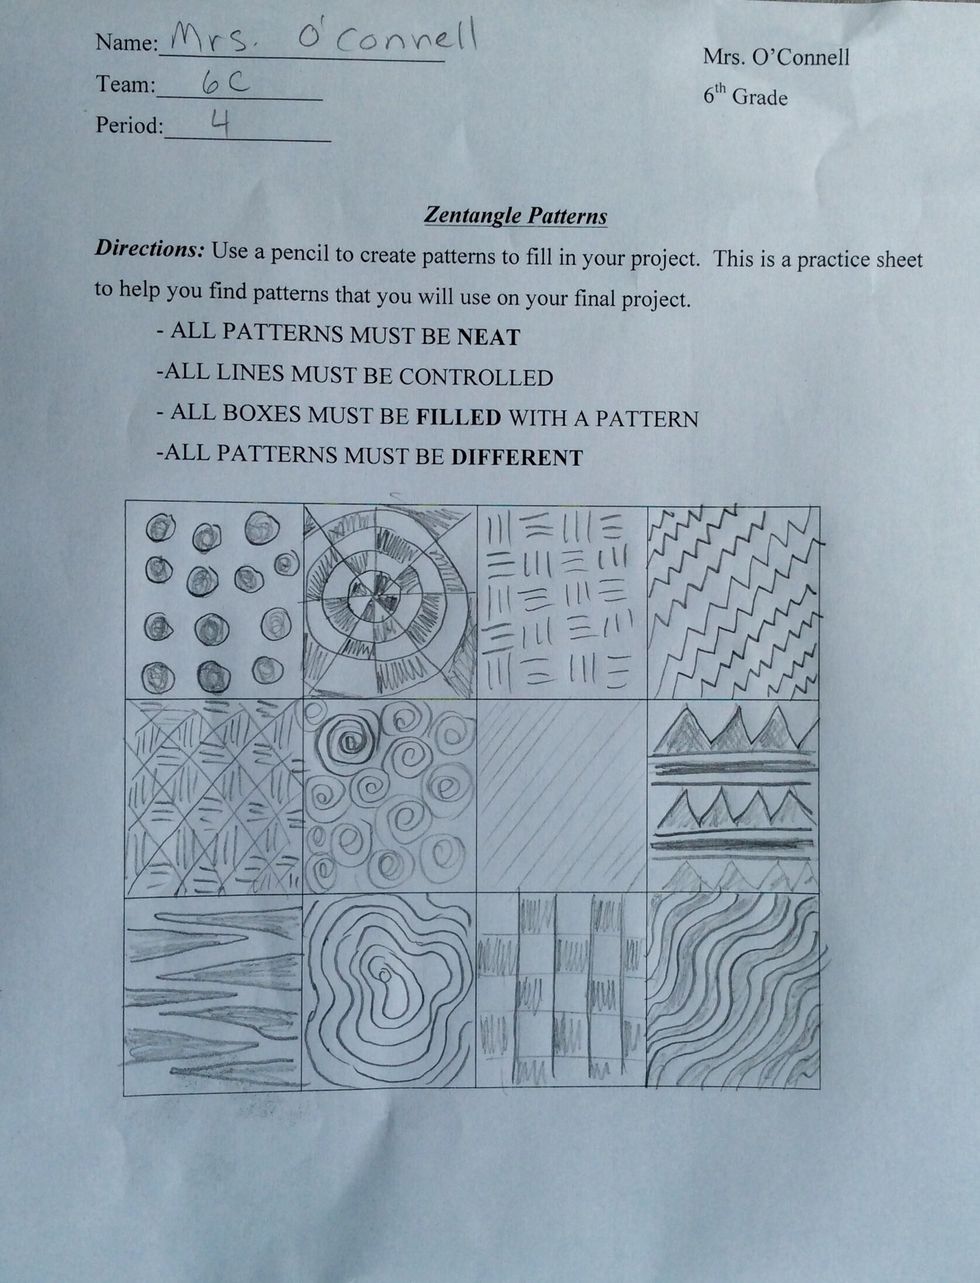
Practice creating patterns on the pre-made handout. Look at examples from the Zentangle binder. Please follow directions!
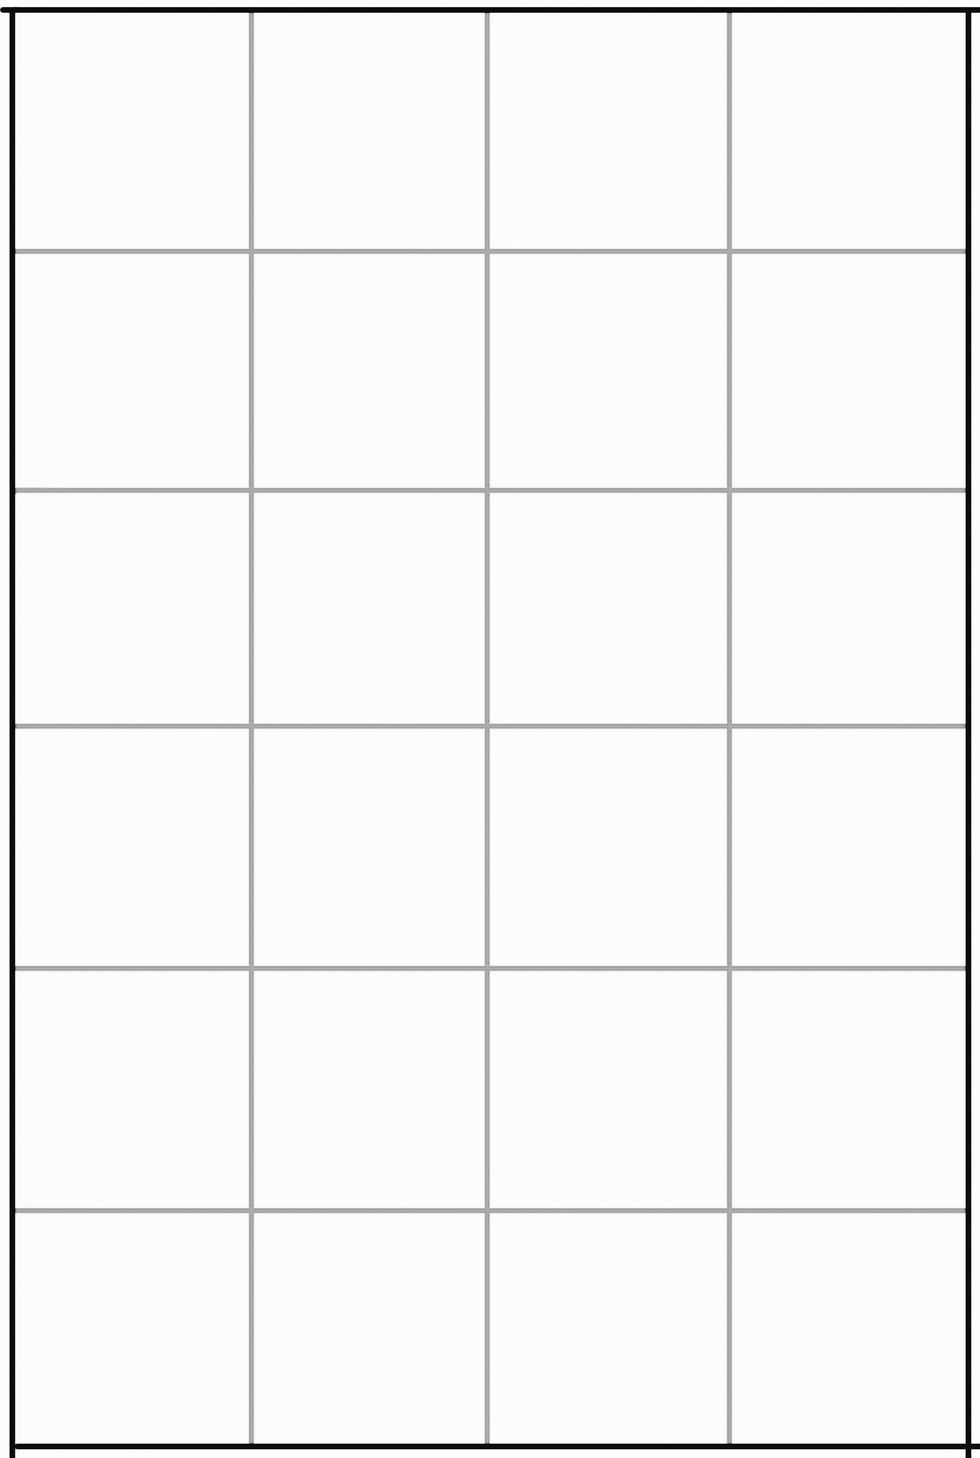
Draw a grid on 12" x 18" paper. Each box must be 3" each. Be sure to draw lightly!
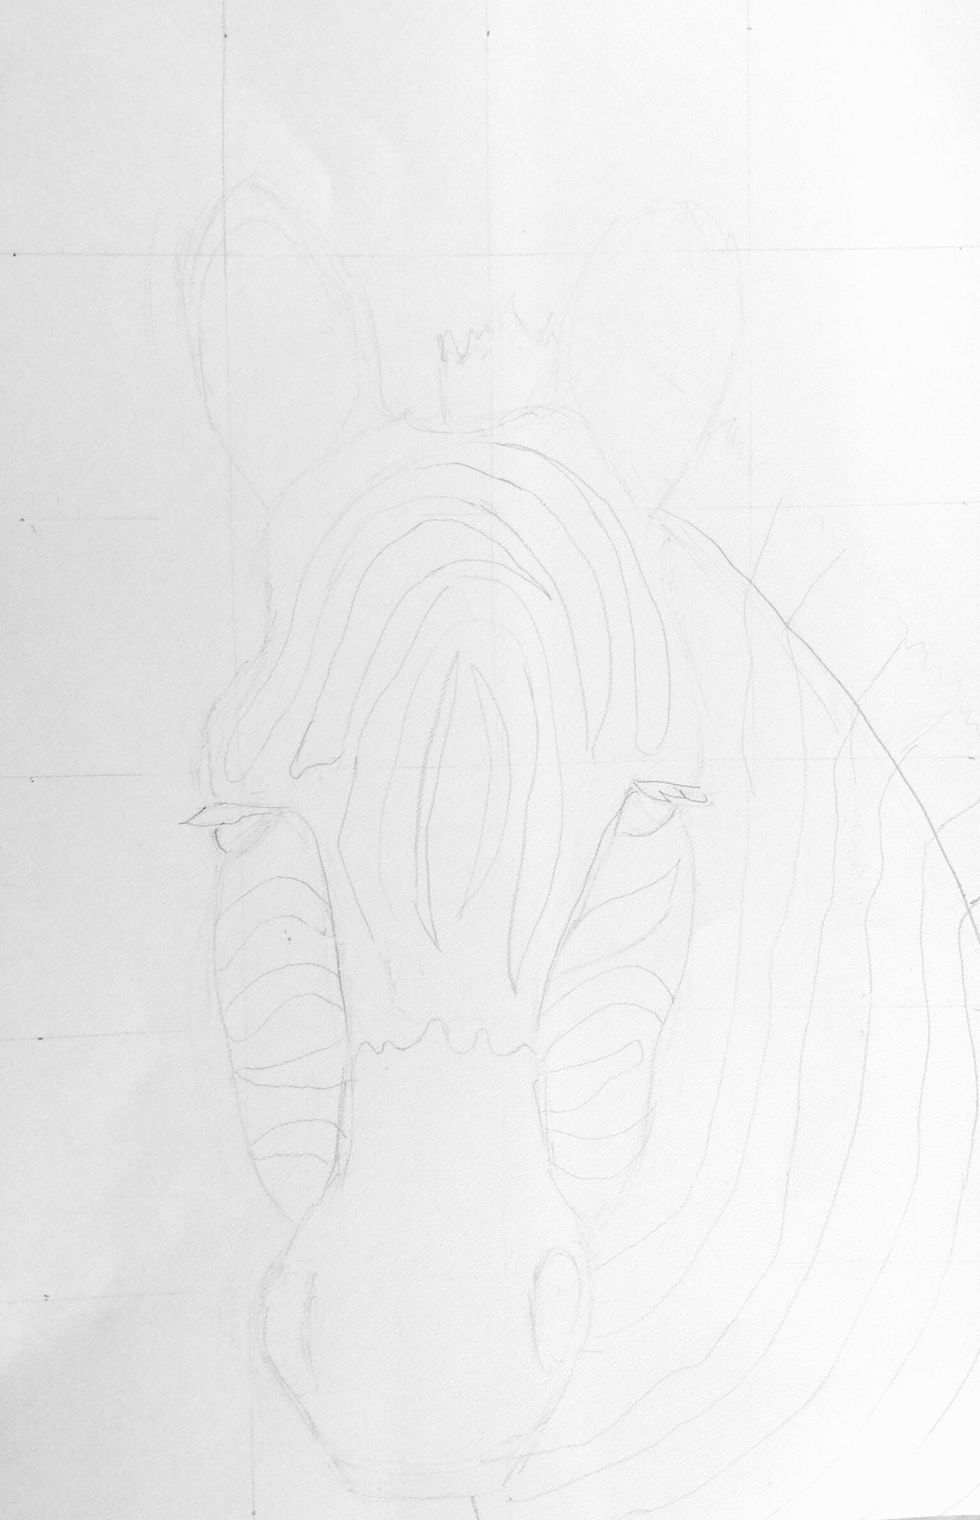
Draw your animal in the boxes to match the animal handout.
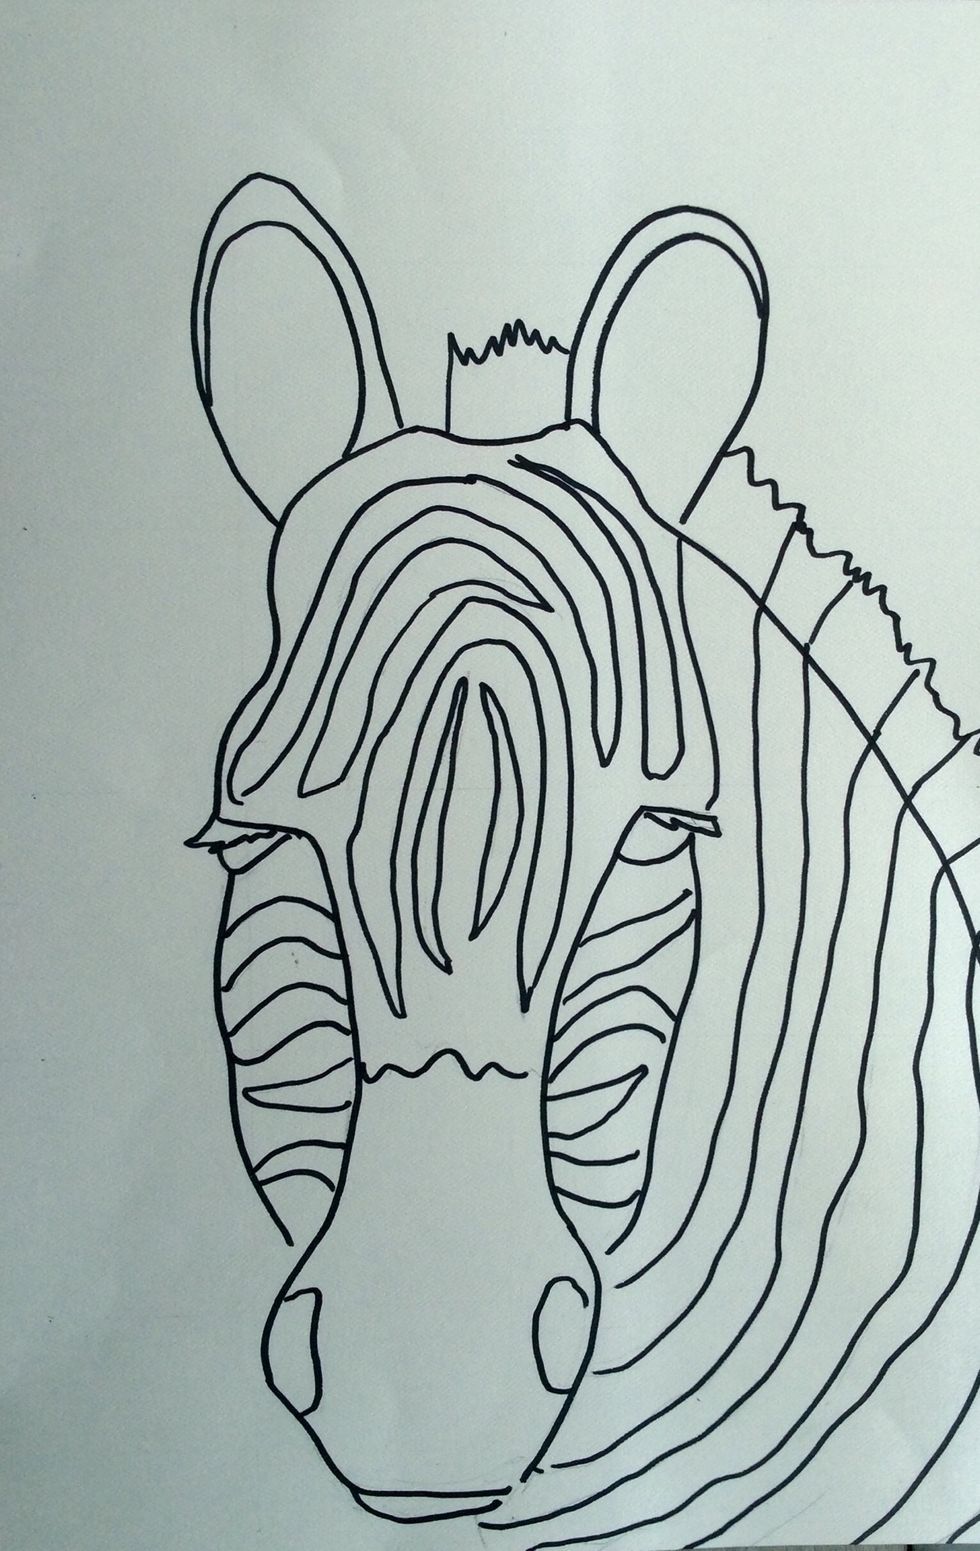
Use black permanent marker to outline your animal. Next, erase all pencil marks and gridlines.
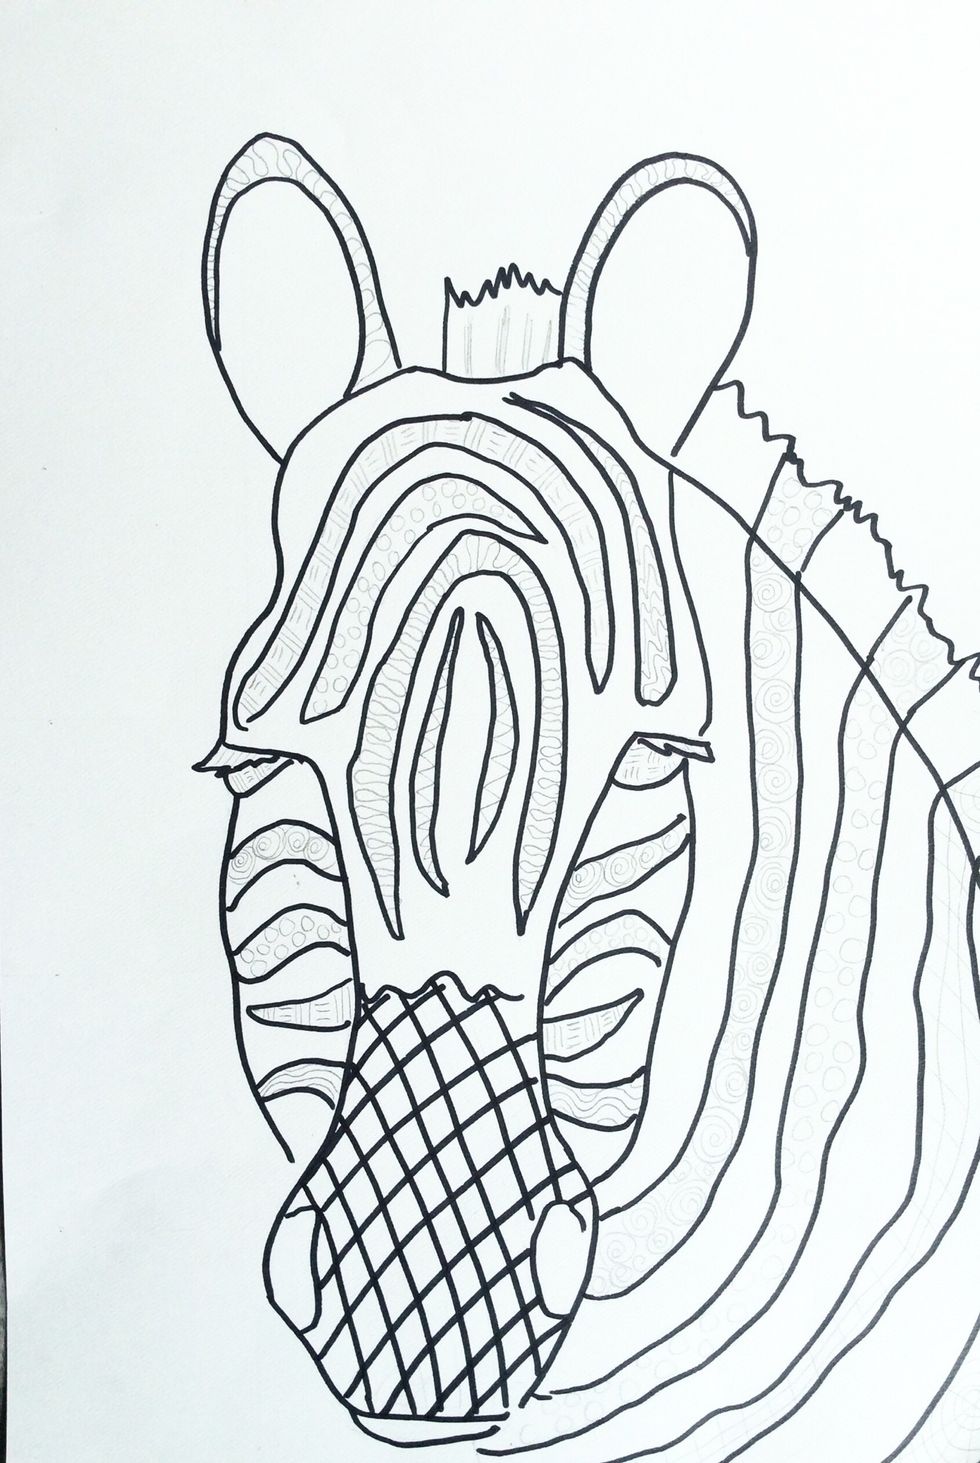
First, Use a pencil to add a variety of patterns to the black areas of your animal. Next, use black permanent marker to fill in your patterns.
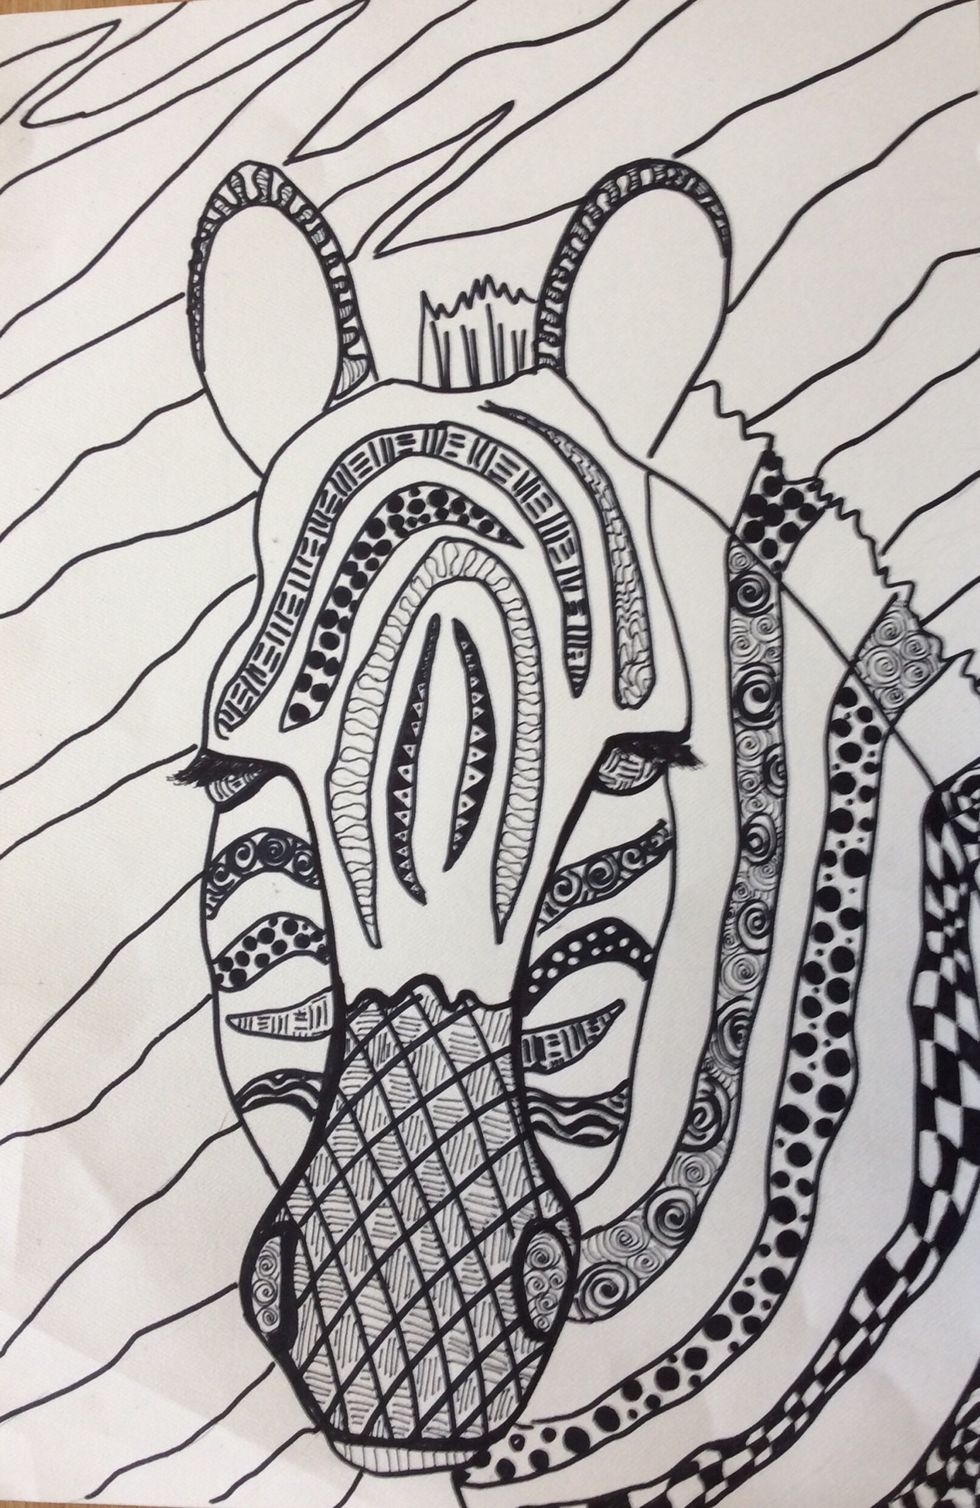
The background should be the pattern of the animal that you selected. In this example, the background is zebra stripes.
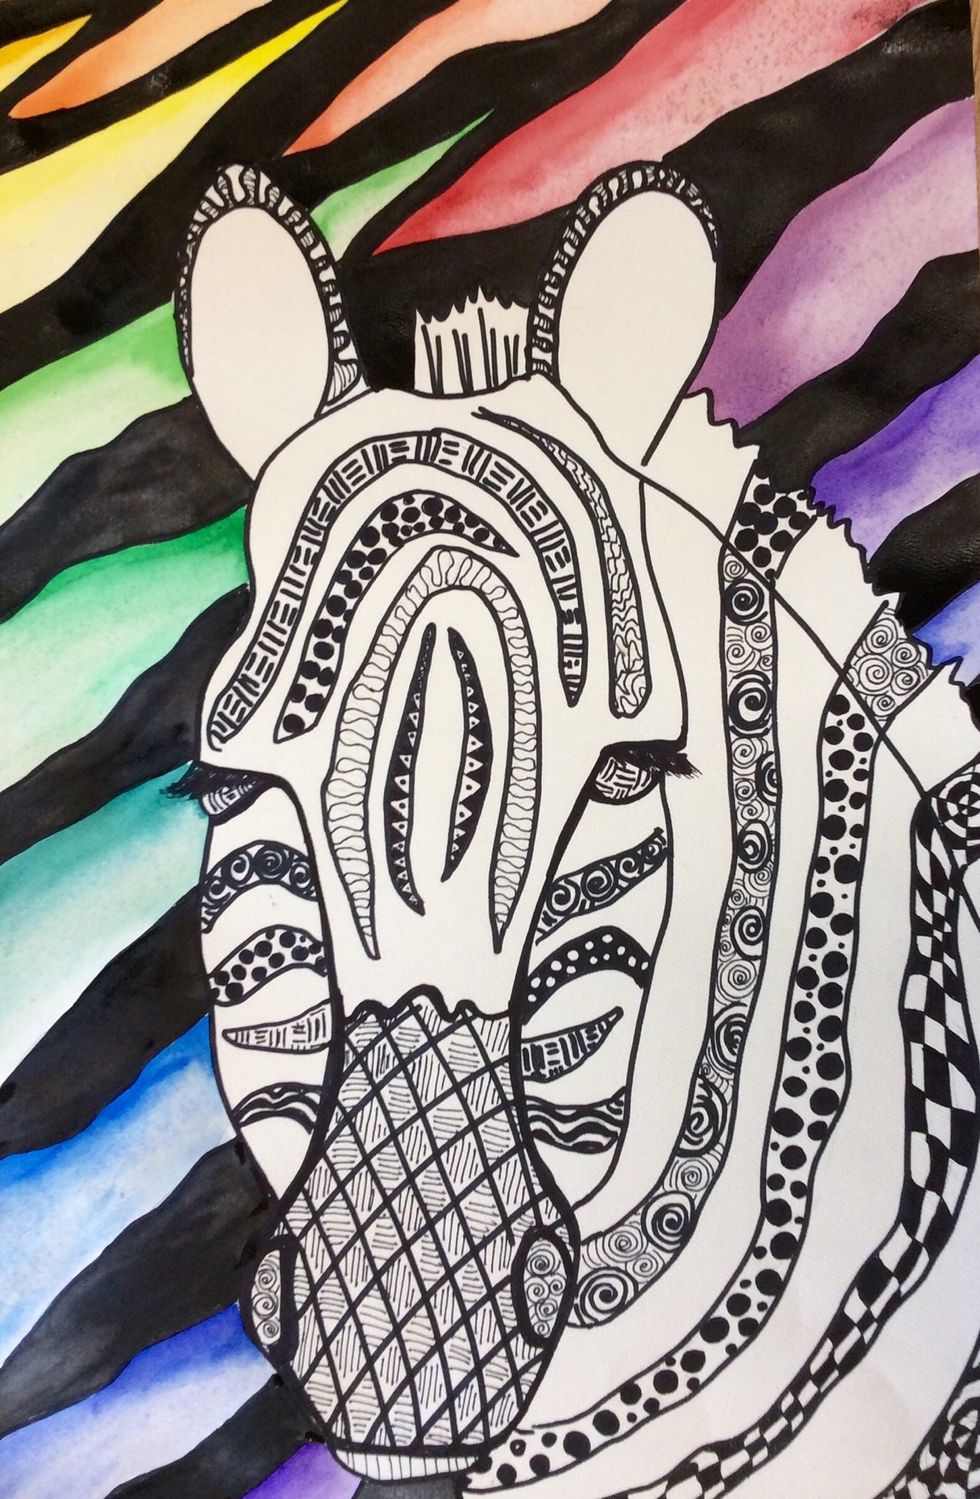
Use watercolor to paint the stripes. In this example, we used the color wheel as inspiration. Use black paint to color around the stripes in the background.