The Conversation (0)
Sign Up
Cut off all zip strips before cutting any paper. You will be using some of them to embellish. A zip strip is the top piece of the paper with the design on it.
The first step is to cover all your cardboard pages first. Trace design on back of your paper. Make sure you pay attention and do not glue the wrong pattern to the wrong side.
Also, pay attention to your pattern paper and make sure you are tracing the design in the right direction. Some of the paper in this packet is a one way design! Tricky Tricky but beautiful when done.
I use bonding memories glue for gluing down the edges. It will not wrinkle your pages. Be sure to put the glue on the edges of your paper especially around the punched holes.
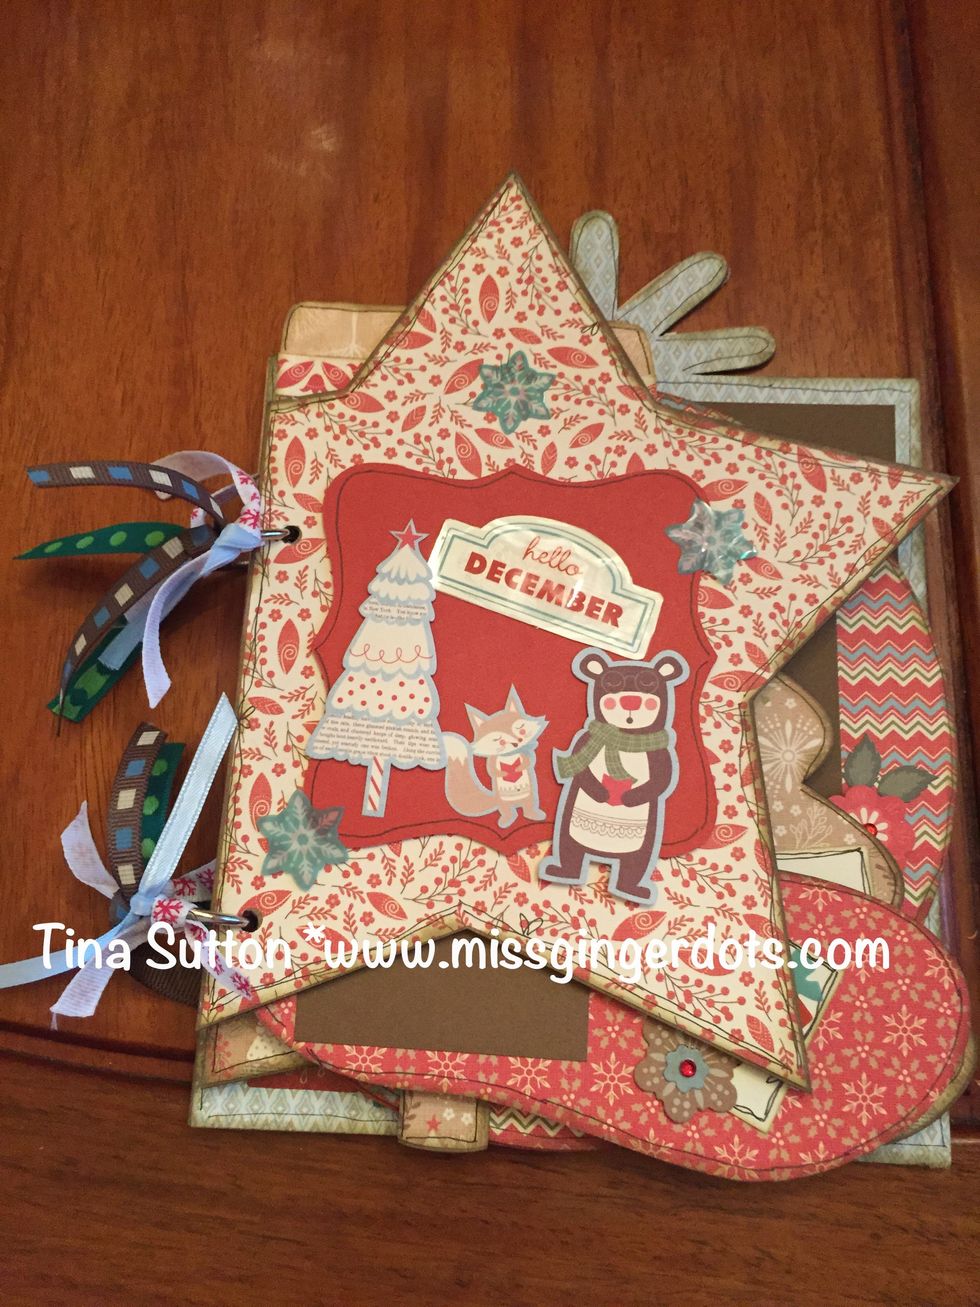
Decorate cover as shown. Red shape is pre-cut for you and in your packet. The bear is raised by using 3 D tape. Add a sparkle to the snowflakes if desired. Back HELLO DECEMBER with white paper.
I used a very thin layer of Bonding Memories glue to adhere the clear HELLO DECEMBER to the white piece of cardstock. You have to cut the cardstock around the Hello December!
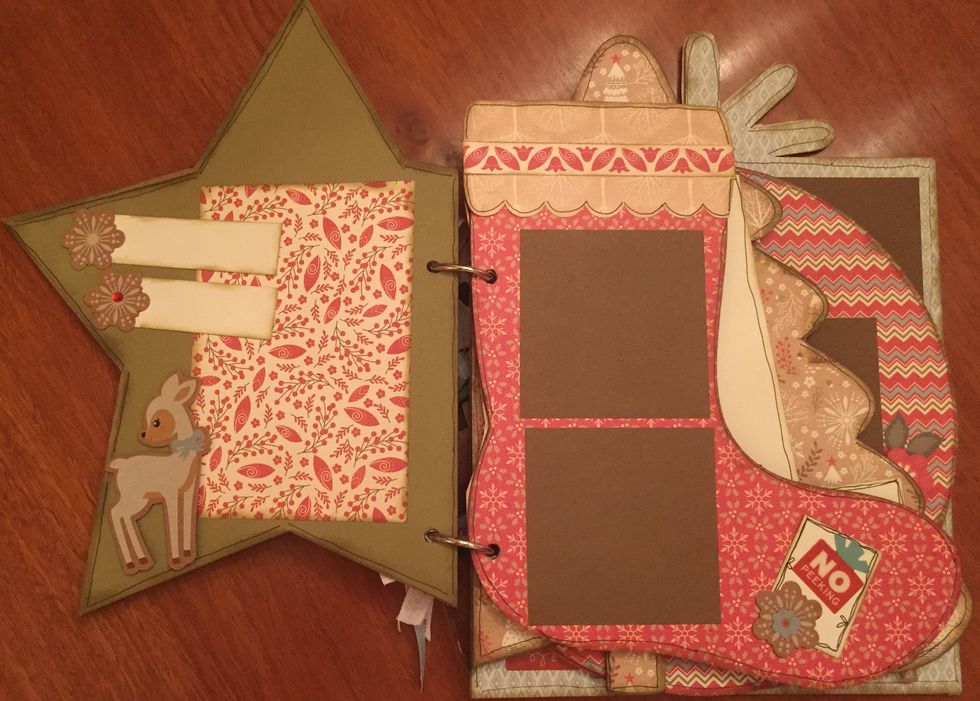
Left Side Printed Mat-3 1/2 x 5 ". 2 Colonial White Journaling Strips- 1 x 3". Deer popped up with 3 D tape. Right Side- 2 Chocolate Mats- 2 1/2 x 2 1/2, White accent piece on toe- 1 1/4 x 1 1/2"
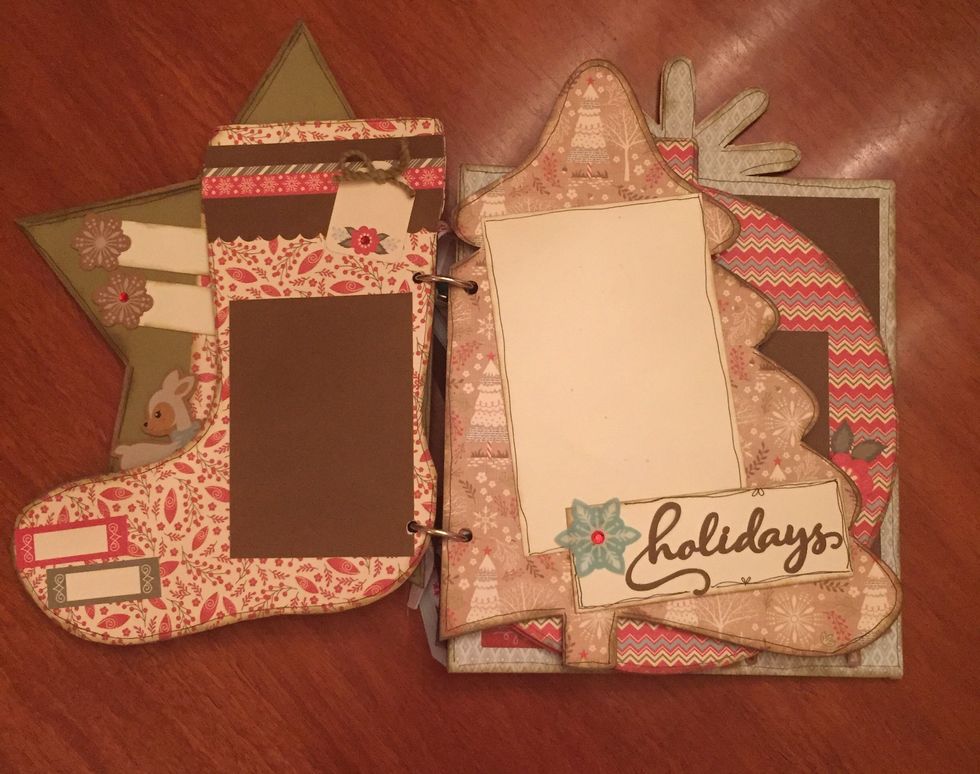
Right Side- Photo Mat- 4 x 6". Mat for word Holiday- 1 1/2 x 4 1/4". Word Holidays is precut for you from our Artistry Cricut Cartridge. Snowflake is from your embellishment packet.
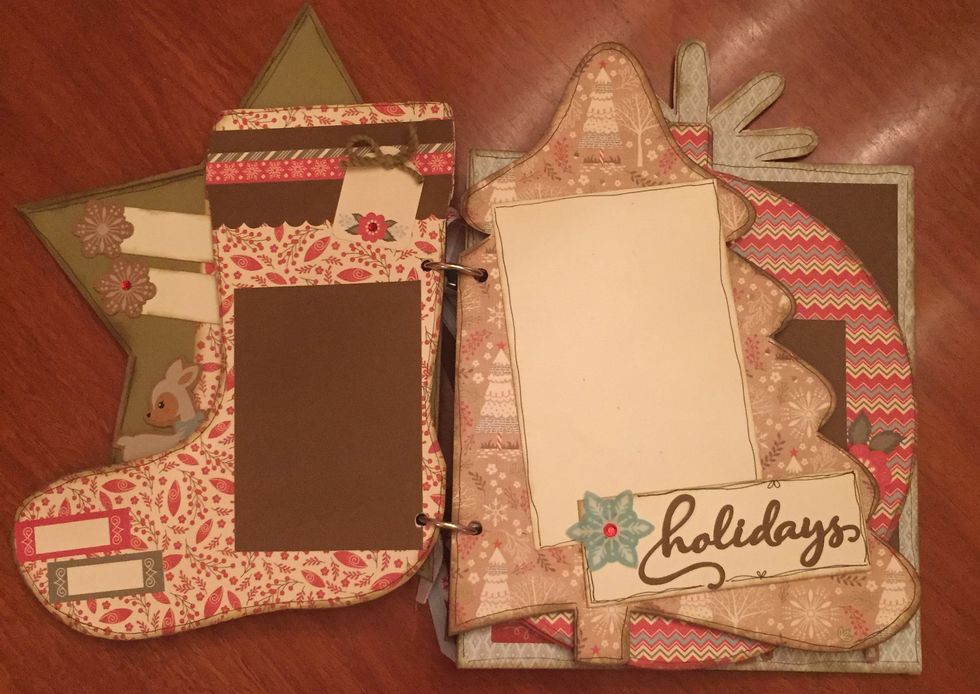
Left Side- Chocolate Mat- 3 x 4" Brown at top- 1 x 4 and edged with ribbon punch. Zip strip from paper and sticker used to embellish brown. Tag is a sticker from packet with a piece of green twine.
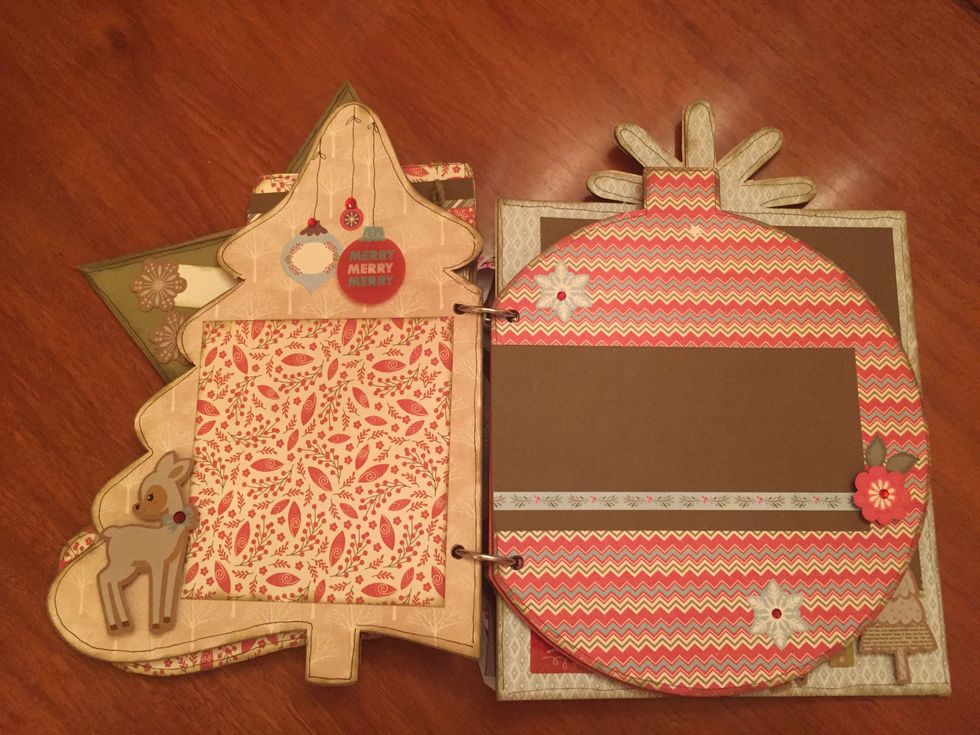
Left page- Square mat- 4 1.2 x 4 1/2. Embellish as shown. Deer and Merry ornament popped. Right side- brown mat-3 x 6". Blue strip is sticker. Embellish as shown. Flower is popped.
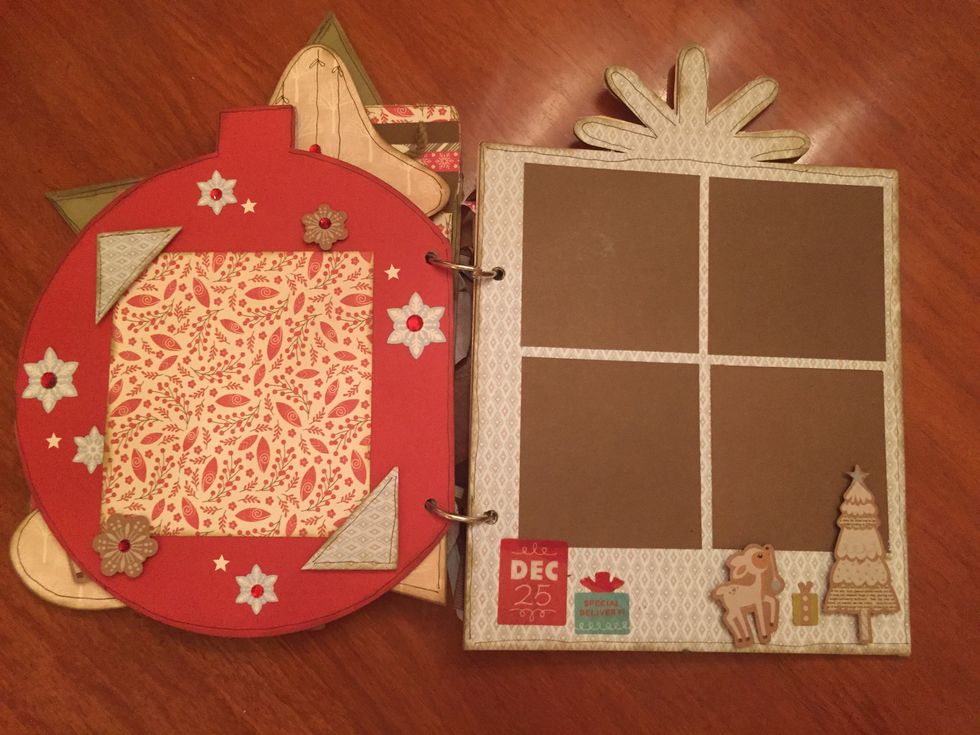
Left Side- Square Mat- 4 1/2 x 4 1/2. Corner accent- cut a 1 1/2" square and cut it diagonally. Pop up. Add snowflakes and stars. Right side- Cut 4 chocolate mats- 3 x 3 ", Tree and deer popped up.
Use any color for back. I left mine just plain- no design, just flowered paper!
After I finished decorating my pages I outlined them using my journaling pen. Just draw a thin line. Do not worry if it is not straight. It will make your design pop.