The Conversation (0)
Sign Up

First, draw the height and length of your cardboard. This is the base of your organizer. Also draw the size of the boxes and denim pocket (there will be instructions to make the denim pocket).
Cut the cardboard to the size that you drew on the planning drawing paper.
Cover the cardboard with black paper. Use your glue stick. This is going to be the base of your galaxy background.
Next, pour your white and blue paint on the paper plate. Take you sponge and start by dabbing a small white circles around the paper.
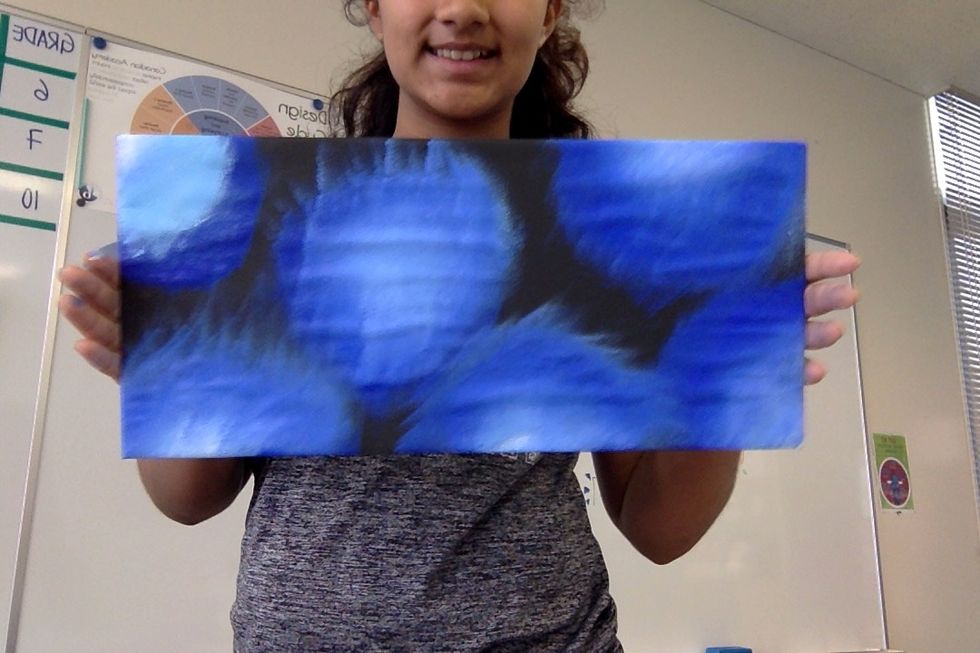
Then, make bigger blue circles around the white ones. Keep on mixing the two colors together until you have a gradient effect.
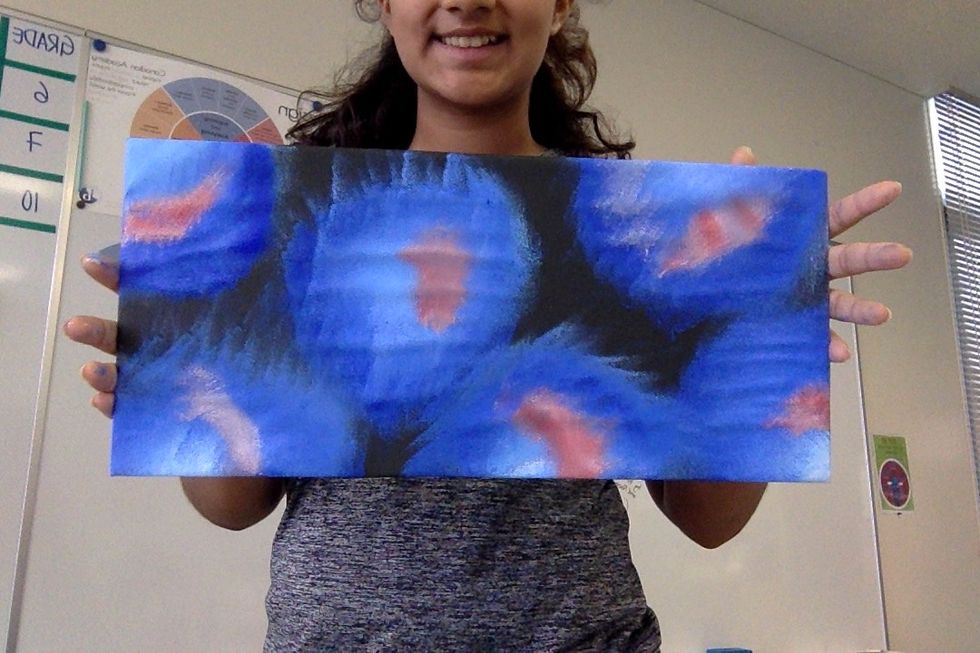
Take your white and red paint and mix them together to make pink on the paper plate. After that, dab a small bit of the pink paint near the center of the blue gradient.
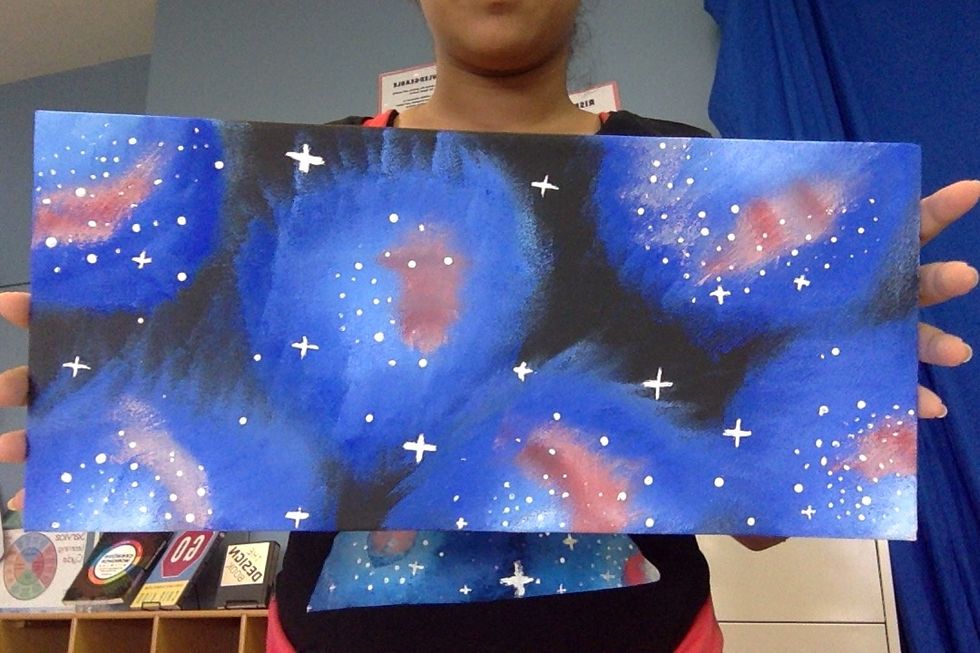
Let the unfinished galaxy dry, and then take some more white paint and make plus signs to represent the big stars and dots to show the small stars. Use the back of your paintbrush for the dots.
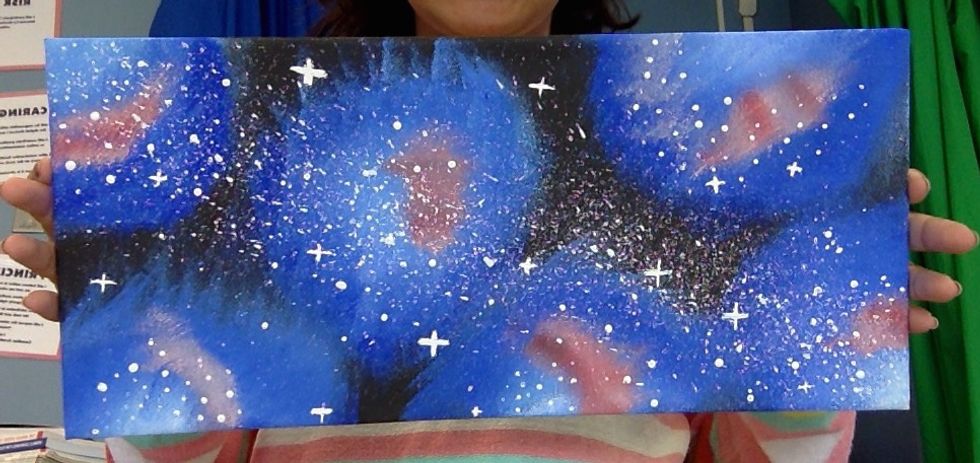
To complete the galaxy, splash some paint from the paint brush on to the paper in one think line. This effect will create the milky way!
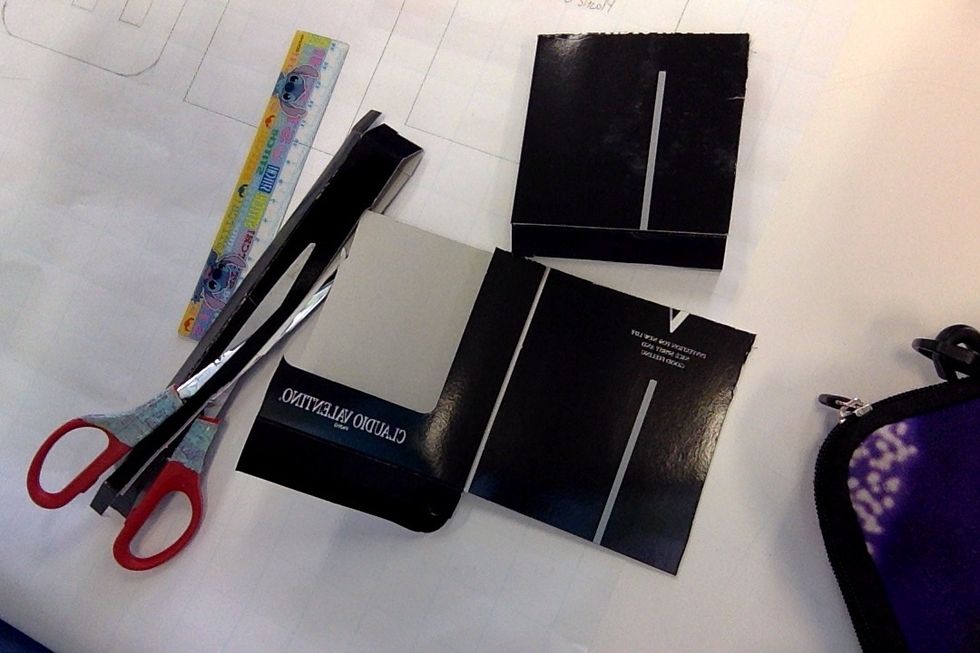
Now take your first box and cut it to your desired size. Use the planning drawing paper and reassemble the box with the glue gun.
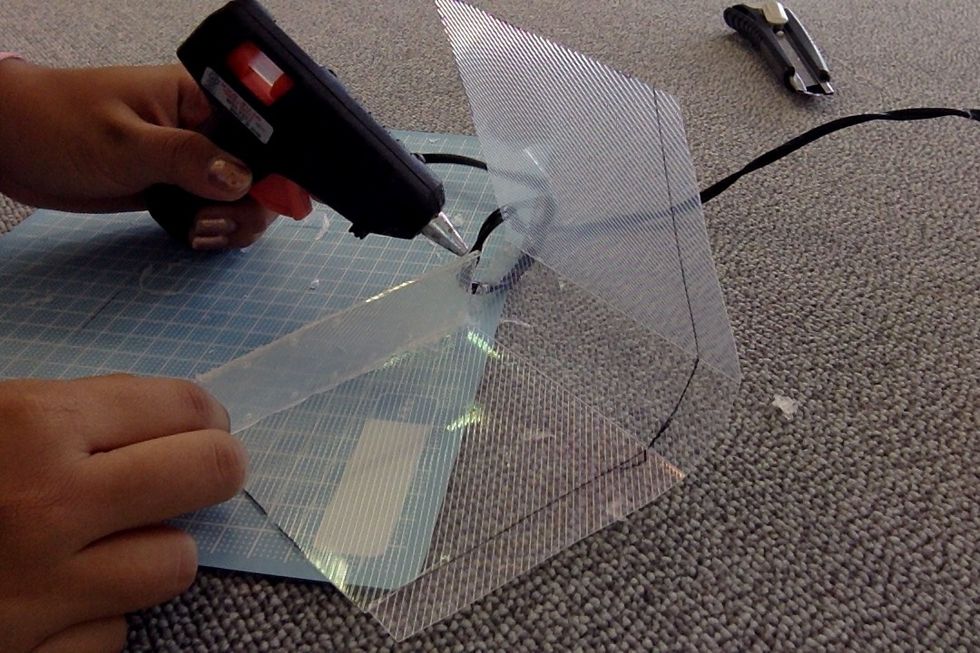
Repeat the same process with your plastic box.
After that, cut the bottom of your denim jeans to about 13 centimeters in height.
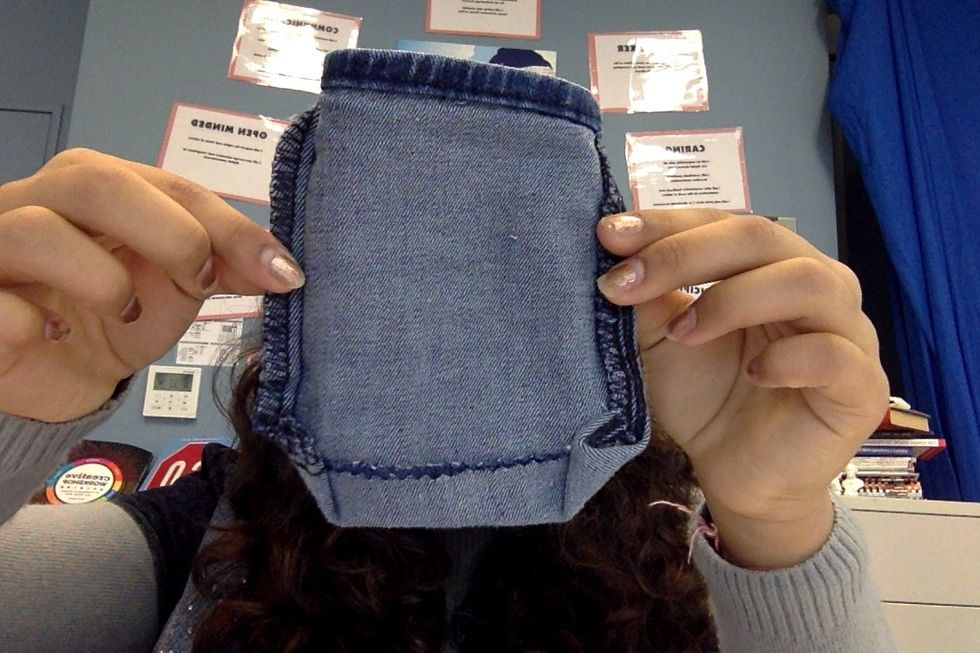
Turn the jeans part the you cut, inside out. Take two centimetres from the bottom and stick it to one side of the pocket. Then, take the two corners and fold them inwards as well. Use the glue gun.
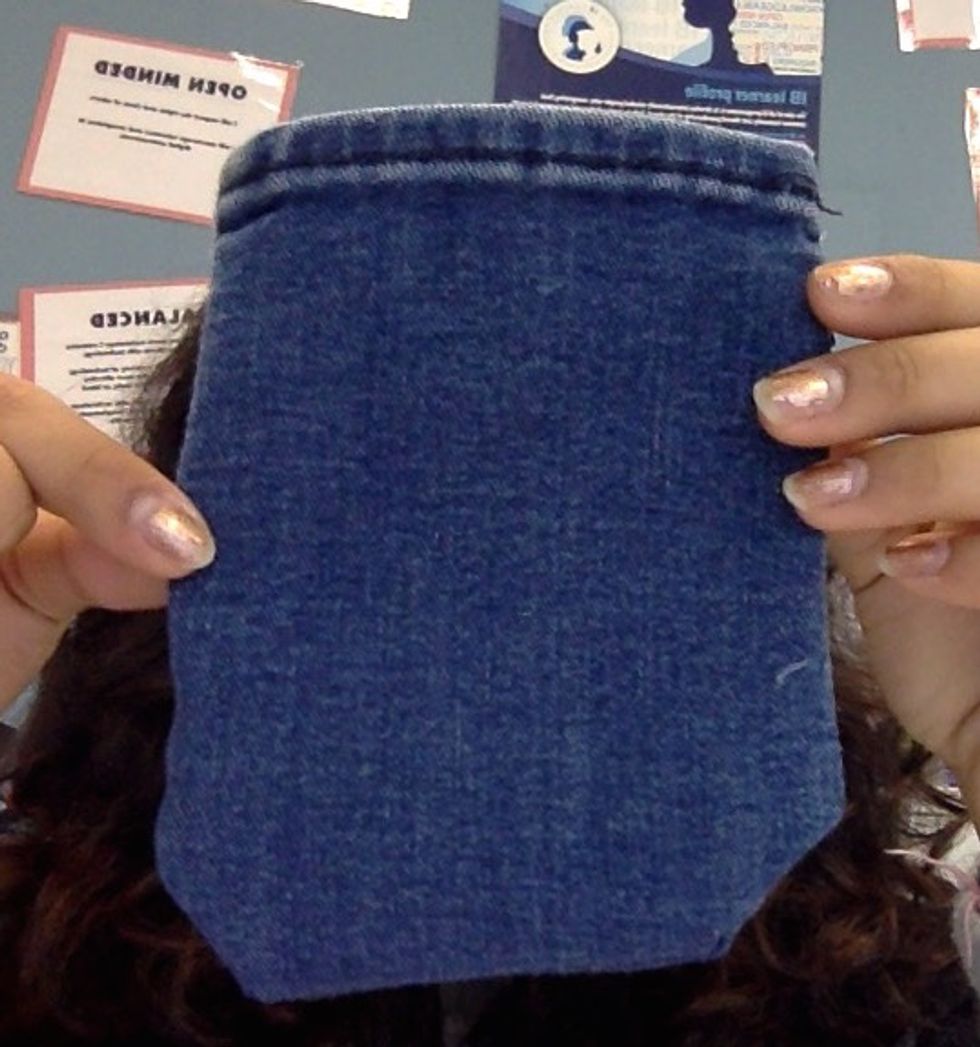
Turn your pocket back to its original side to reveal the finished denim pocket!
Next, fully cover the boxes that were made earlier, with black paper.
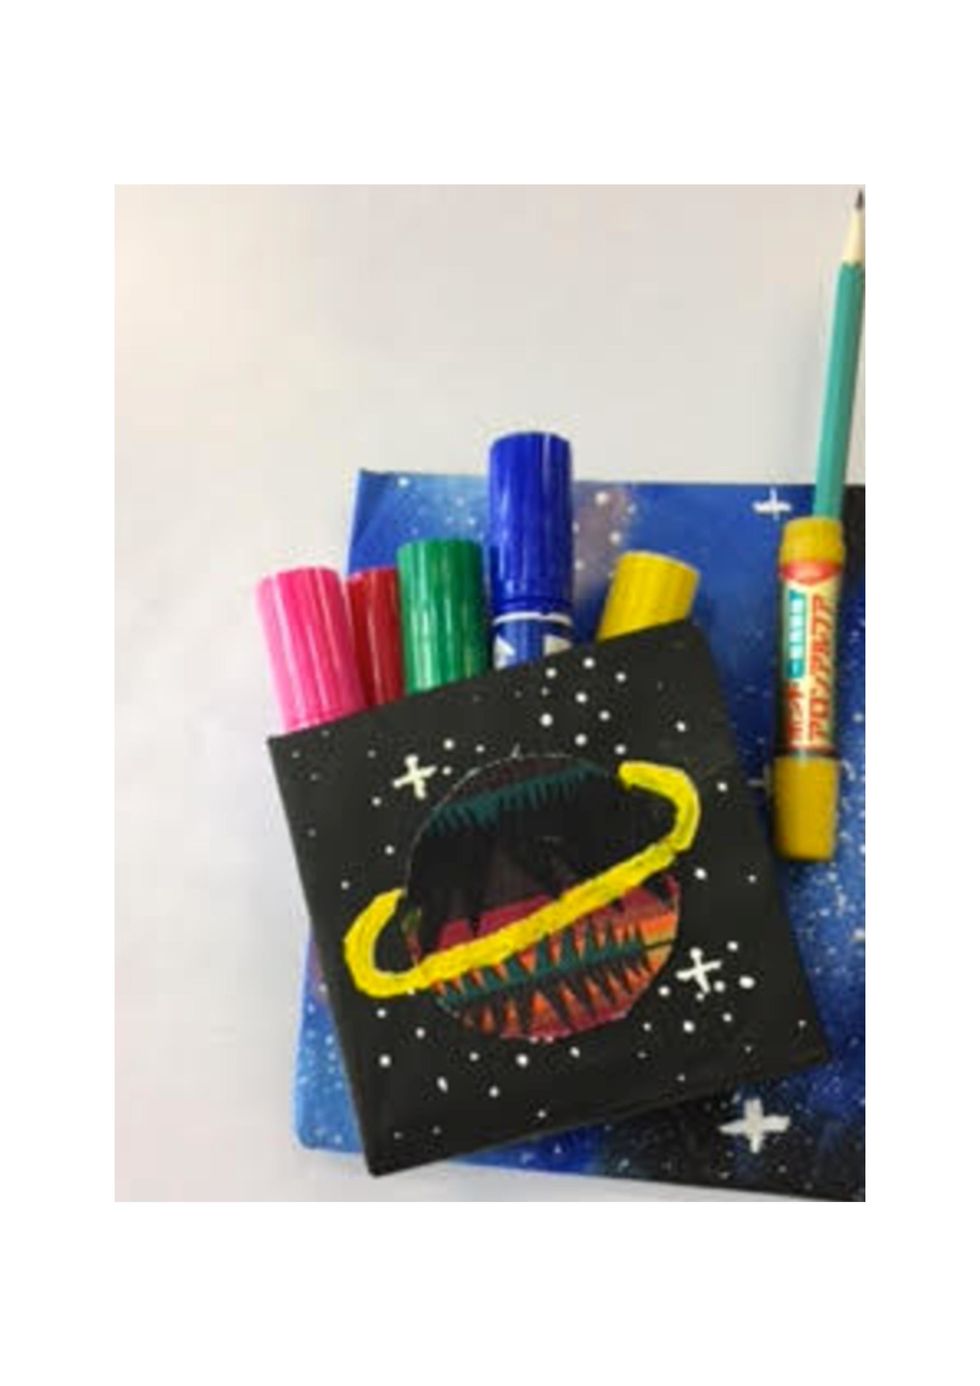
Take your pattern fabric or up cycled purse and cut it into a circle shape. This will be a plant. Adjust the size to fit the center of your box. Stick the fabric on the box using the fabric glue.

Paint a yellow ring around the planet and a few white stars to cover up the empty spaces. However, don't put too many stars!

Then, cut a smaller circle out of the metal phone case. Stick it on the other box using a glue gun.

Stick the excess patterned fabric around your metal planet and paint come additional stars as well.
Let both boxes dry...
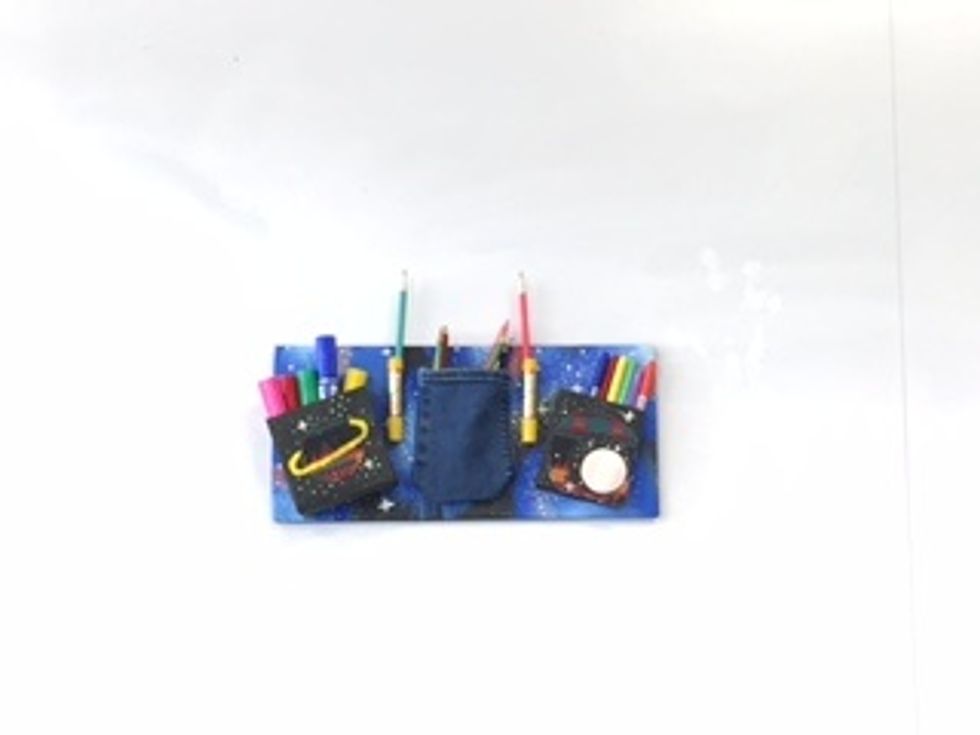
Now stick the boxes and the denim pocket on the cardboard base. As the picture shows- the denim is in the middle and the boxes and angled on the side. Stick the super glue containers beside the denim.

Use the glue gun to stick all of these materials. Now you have completed making your up cycled organizer! Fill it up with stationary, make up or anything you want!