The Conversation (0)
Sign Up

Add a base coat of black acrylic paint to ready to finish wooden shrine base.

Attach G45 Couture Collection ~Accessorize patterned paper to back and backside of doors.

Fussy Cut Balloon image from Time Warp patterned paper and attach using foam spacers for dimension.

Fussy cut woman image from Nouveau Artistry patterned paper and attach using foam spacers.
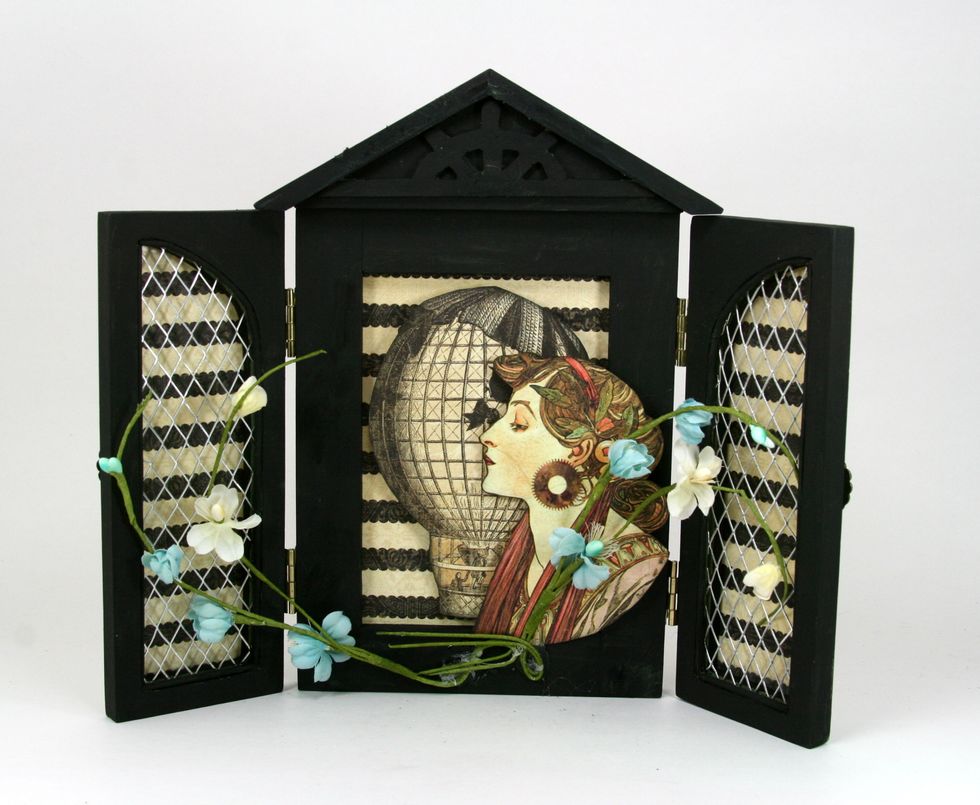
Bend the stems of Prima Flowers to begin shaping arrangement. Add with hot glue.
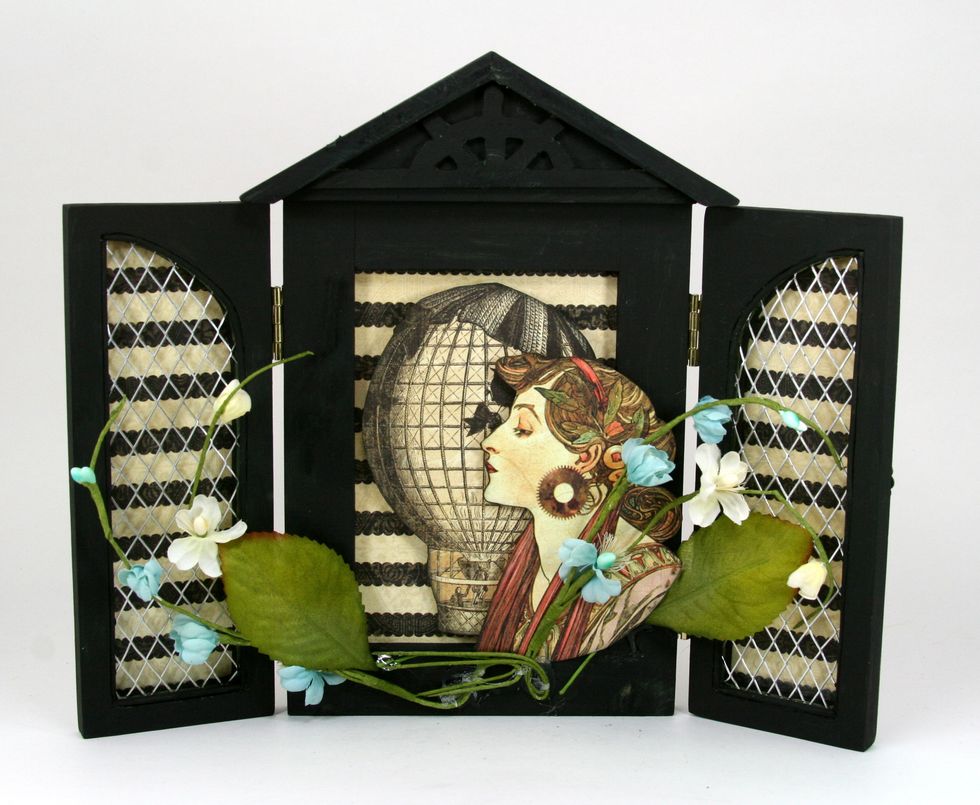
Tuck in some Petaloo leaves to define the base shape and size.
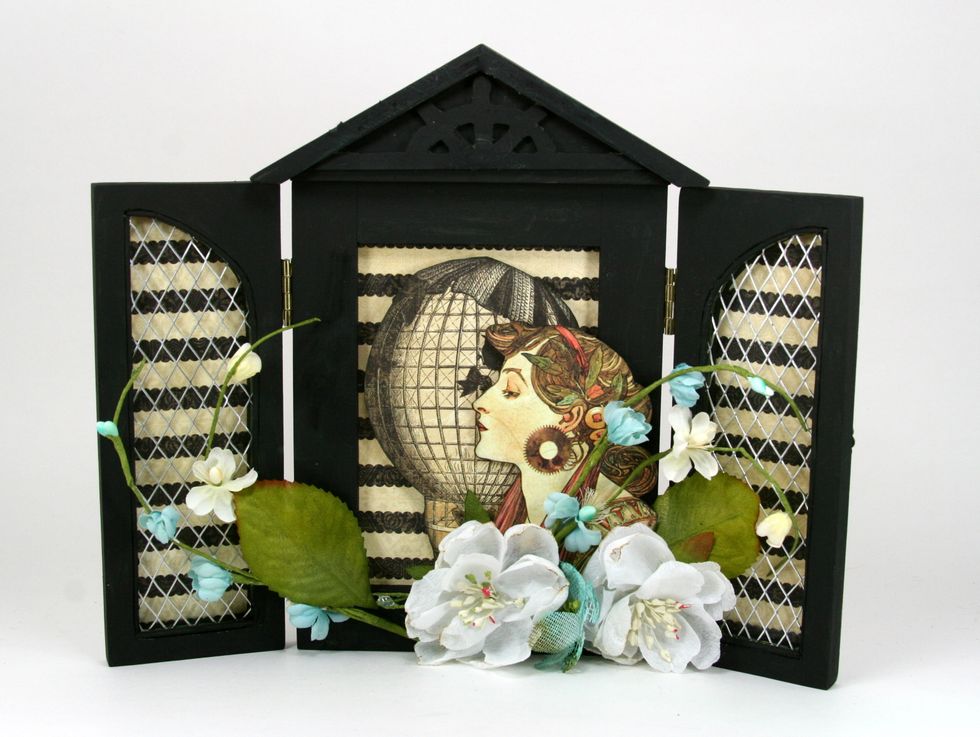
Add larger white Petaloo blooms to anchor the corner and hide cut paper edges.
Next add light turquoise Petaloo flowers.
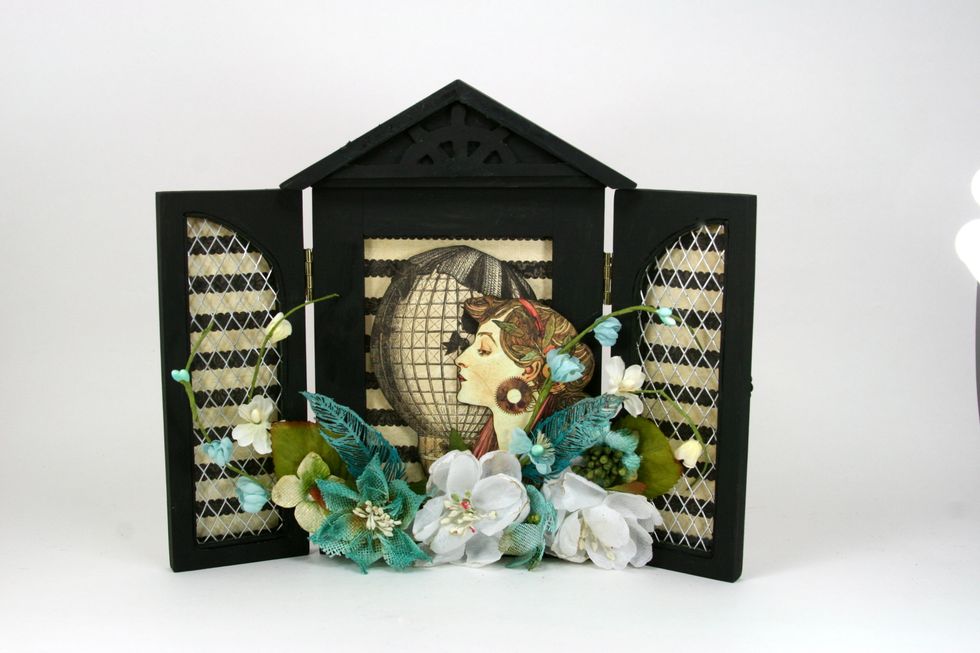
Tuck in some Gypsy Soul Laser Cut Chipboard Feathers. These were finished with light aqua acrylic paint then a layer of Ocean Soul Smooch then accented with Cinnamon Stickles.
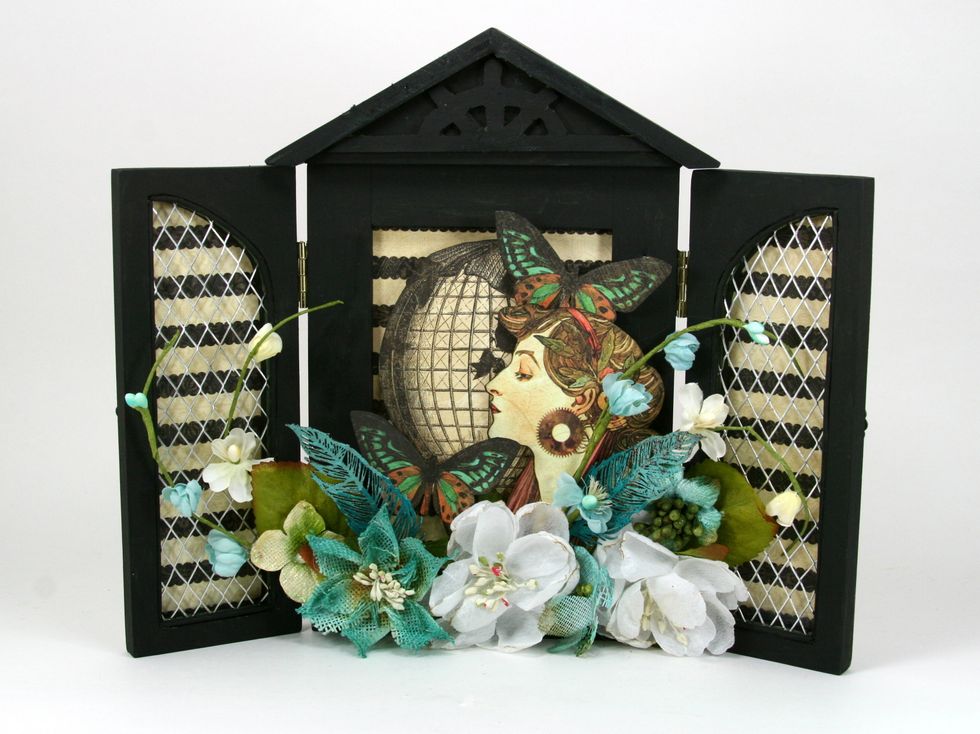
Trim large butterfly images and bend slightly. Adhere them just in the center with a bit of hot glue.
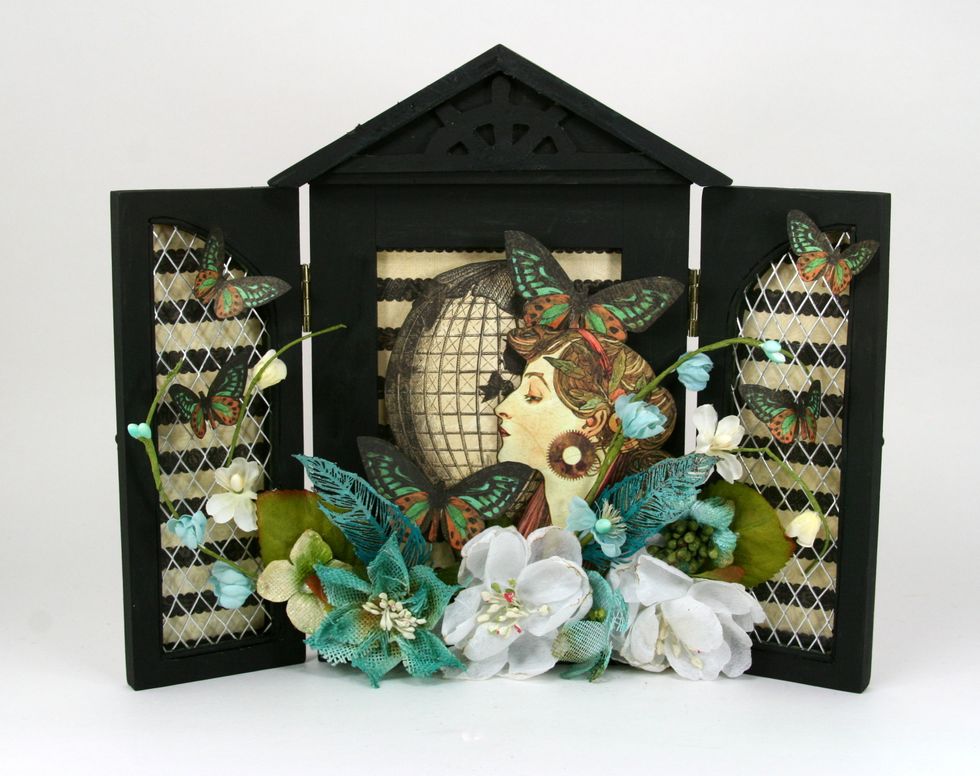
Smaller butterflies are added to the door just as the larger one in the center.
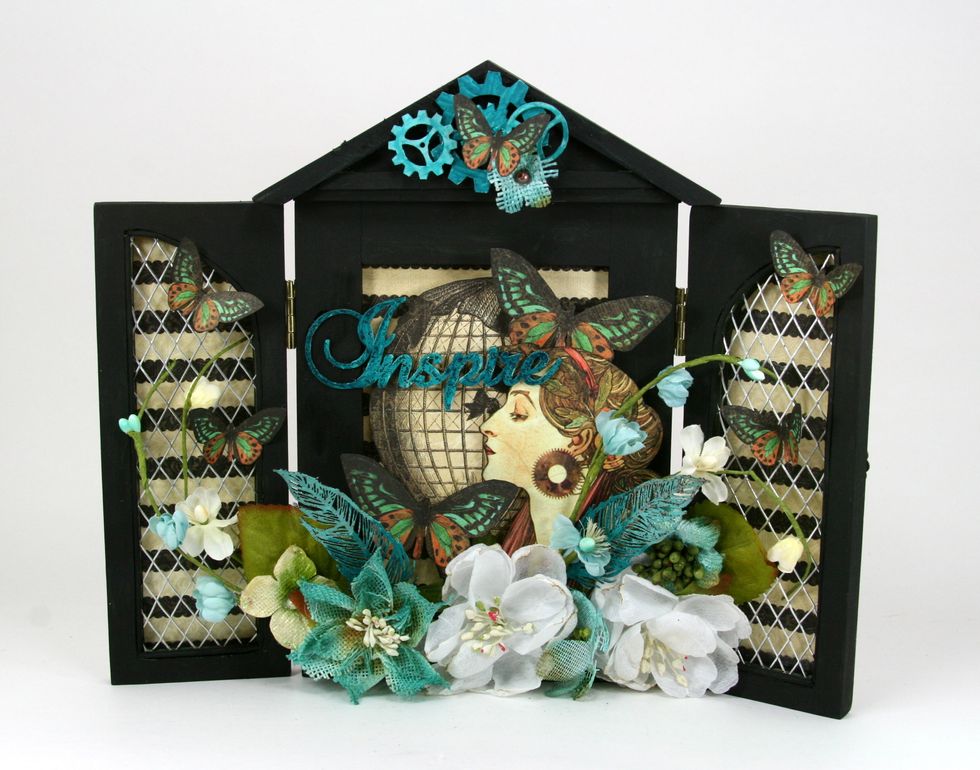
Attach Gypsy Soul Laser Cut Inspire Chipboard sentiment and chipboard gears. These were finished with the same steps as the feathers. Add small fussy cut butterfly and flower to gears.
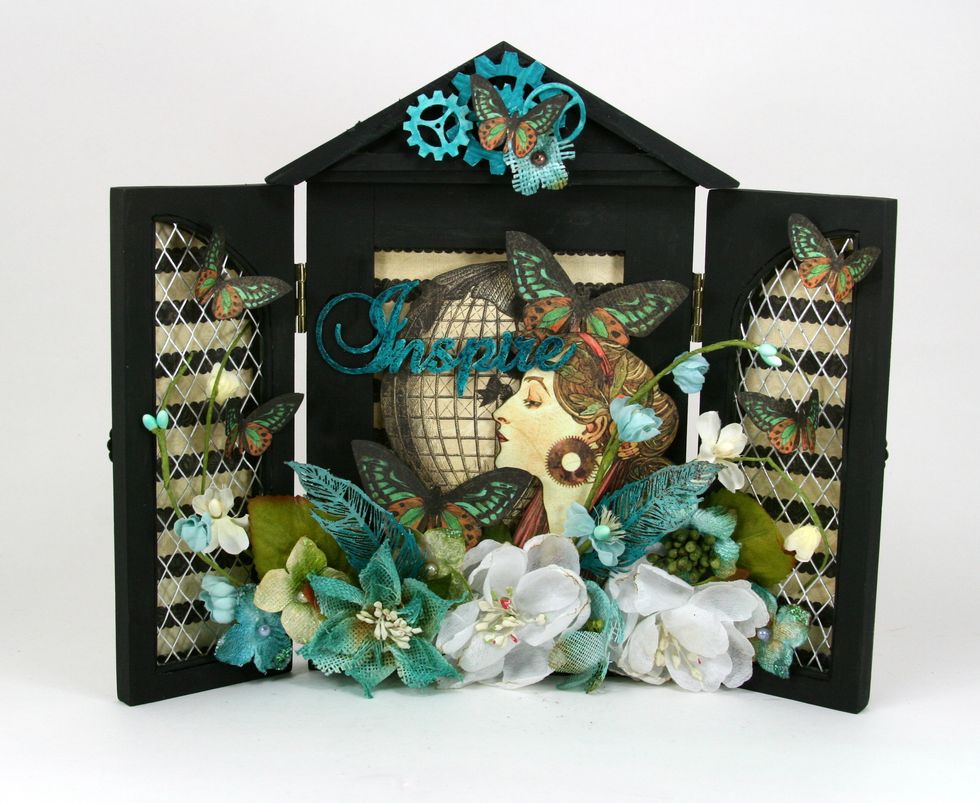
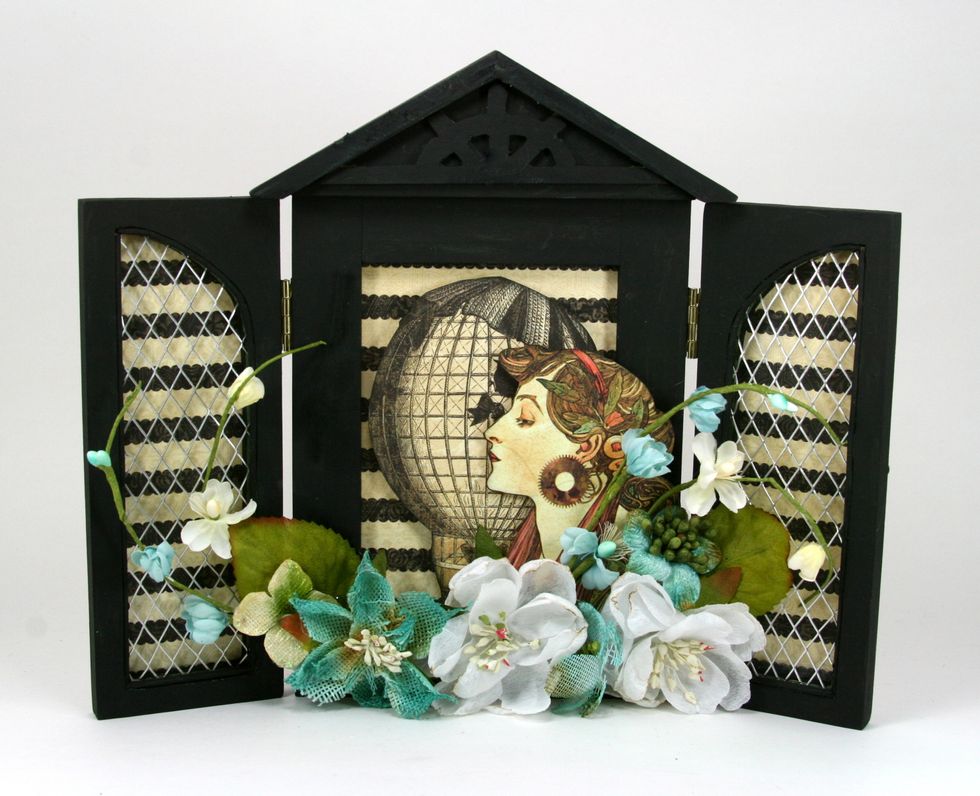
Fill in with additional Petaloo flowers to complete arrangement. This time I added smaller flat blooms in white and light turquoise.