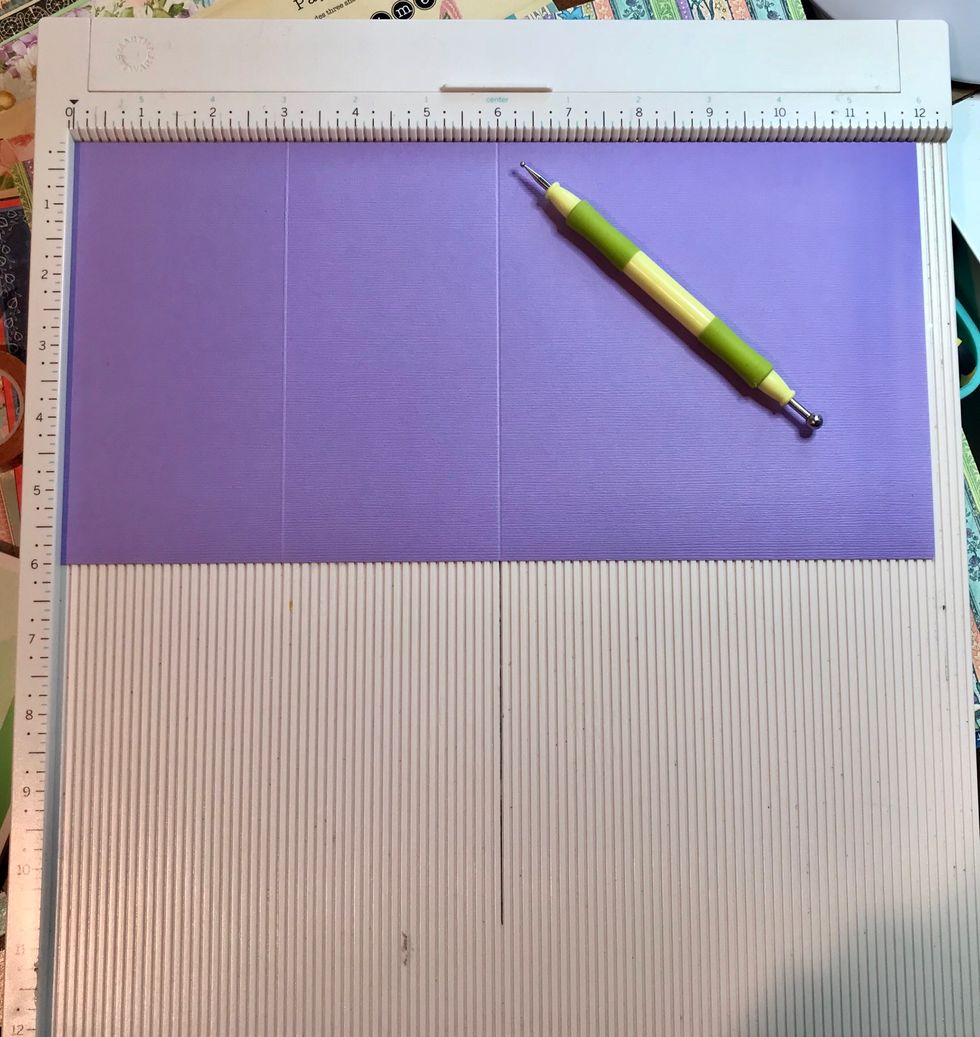
Cut violet cardstock to 6x12”. Score at 3” and 6”.

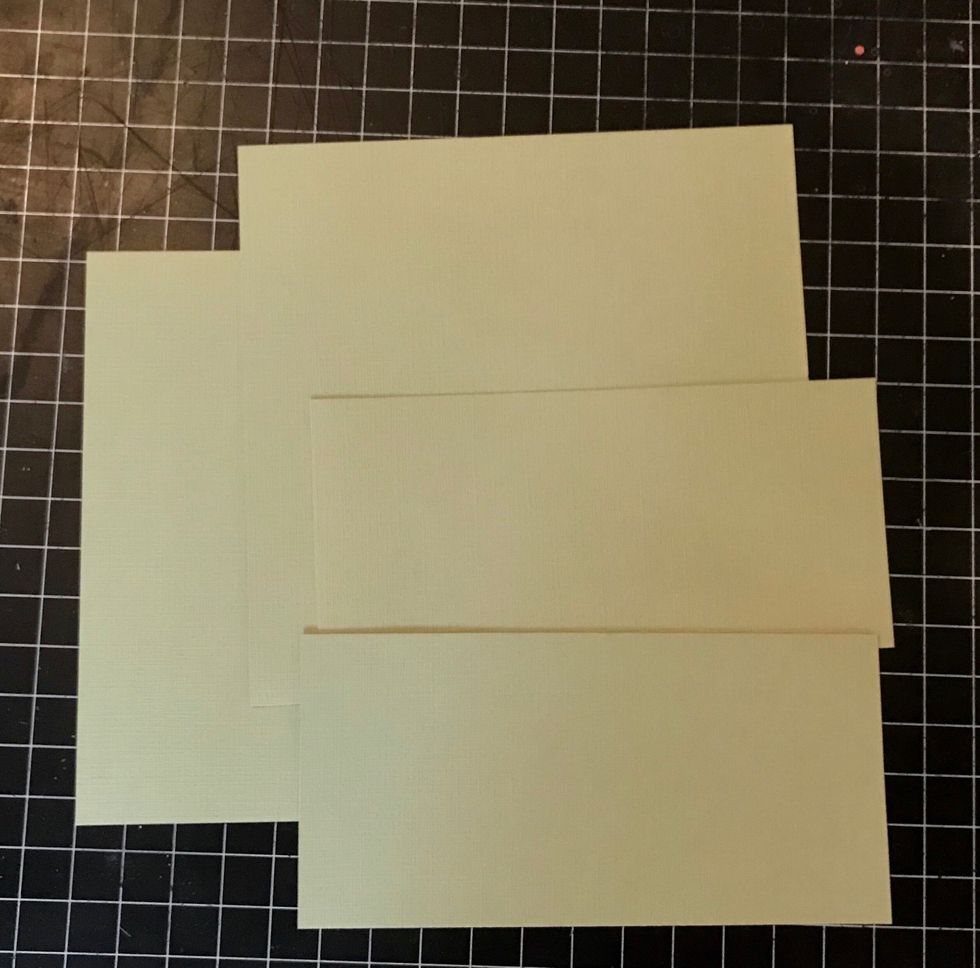
Cut coordinating cardstock 5 7/8” x 5 7/8”. Cut 2. Cut 5 7/8 x 2 7/8”, cut 2.

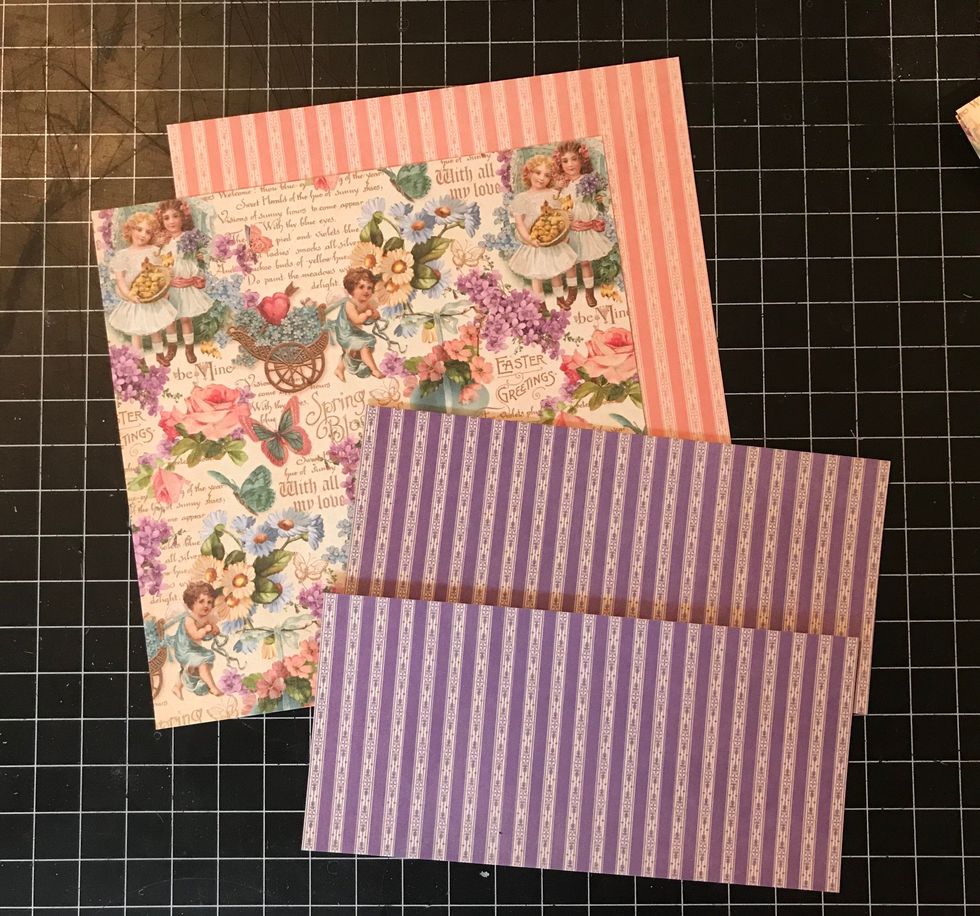
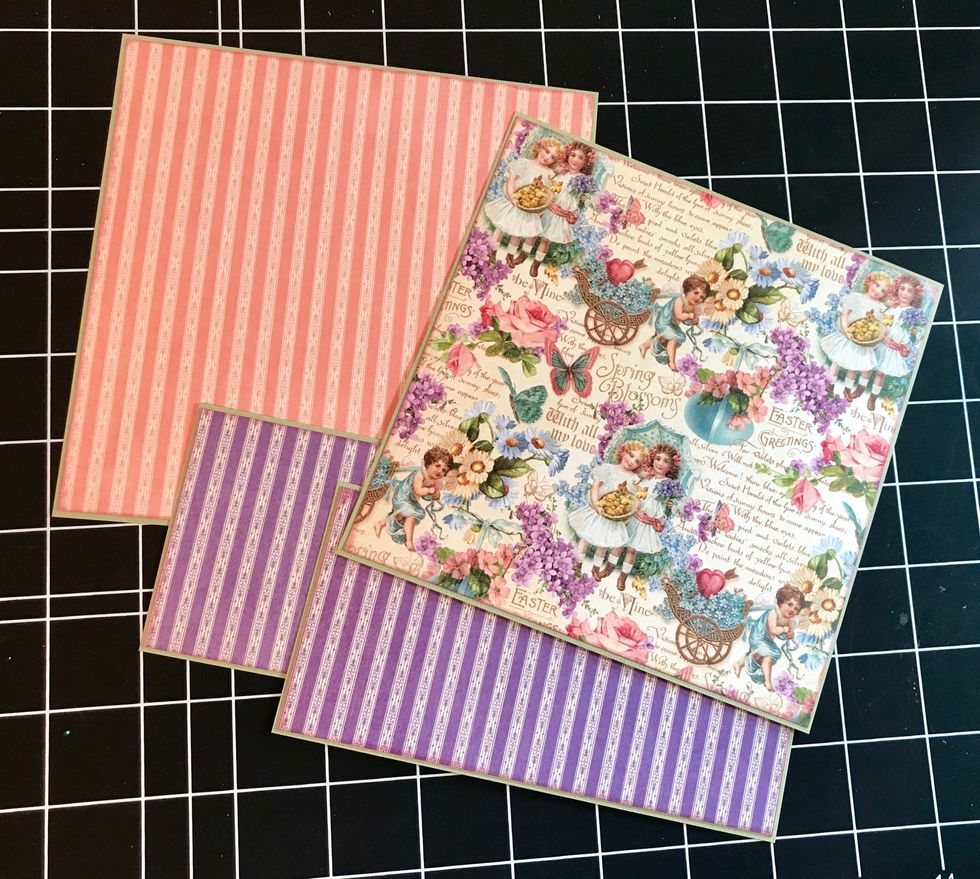
Cut All my Love from 8x8” pad to 5 3/4 x 5 3/4”. Cut Time to Flourish 6x6 pink striped 5 3/4 x 5 3/4”. Cut purple striped 5 3/4 x 2 3/4. Cut 2.

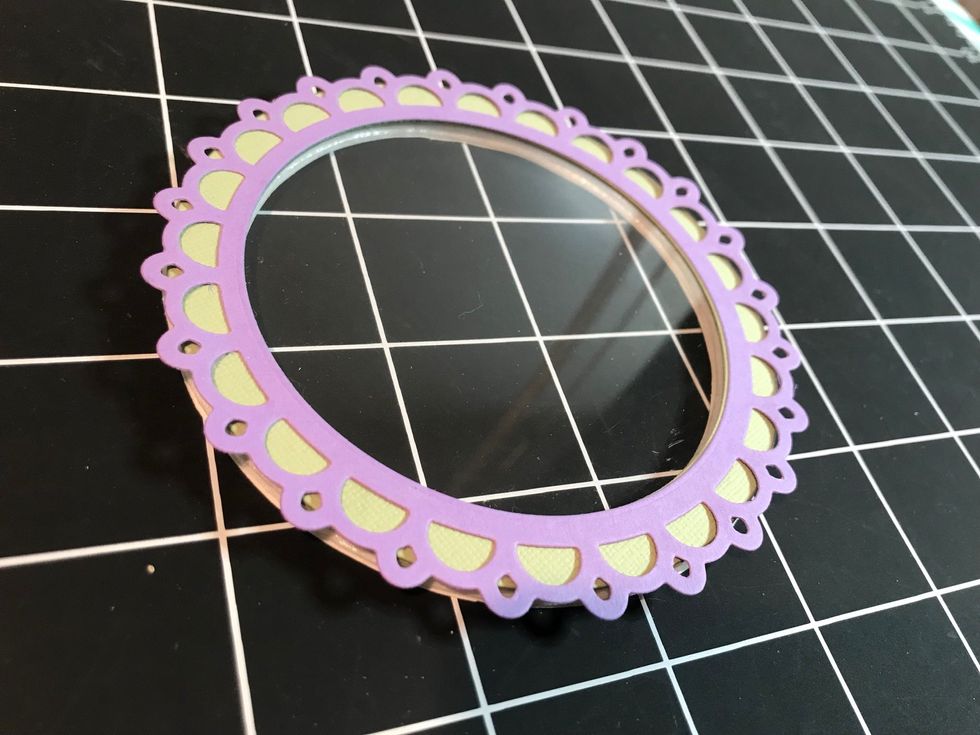
Die cut largest floral oval in coordinating cardstock. Die cut largest picot circle in coordinating cardstock, then using the 3” nesting circle die, die cut the center out.
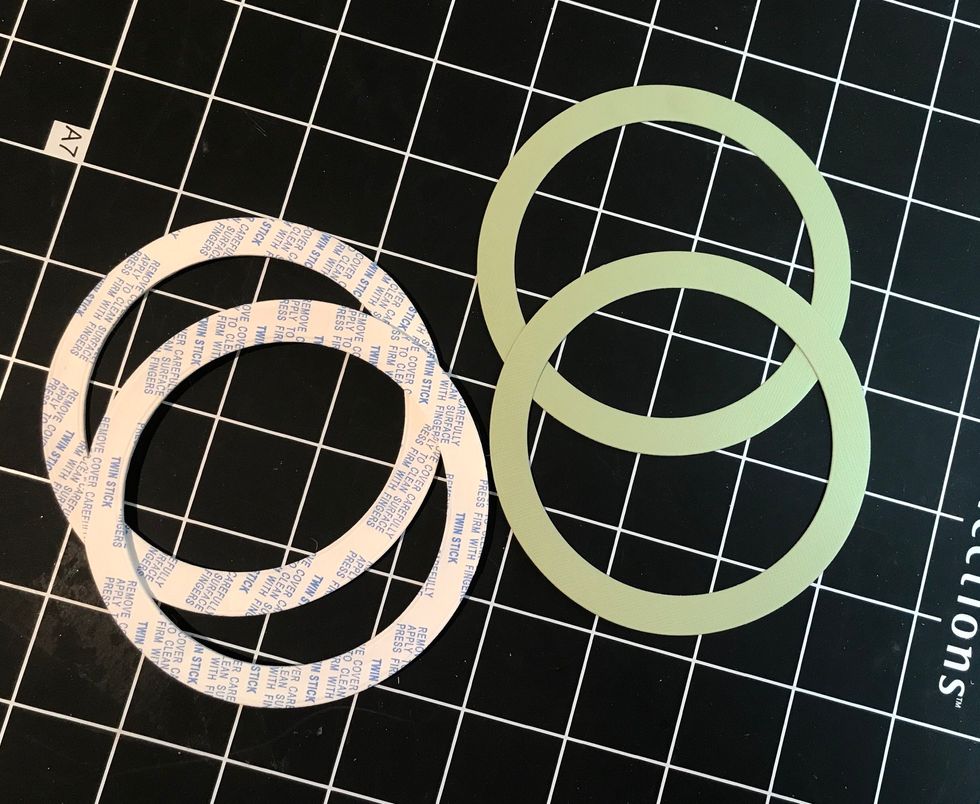
Using the 3” and 3 1/2”circle dies, cut 2 “rings”. These will hold the acrylic piece. Using the same 2 dies, cut 2 pieces of dimensional foam. I used dimensional foam sheets.

Using the 3 1/2” circle die, cut a piece of acrylic or acetate. This will make your shaker window. I used packaging.

Using a good wet adhesive like Art Glitter or Fabri-tac glue, or strong tape adhesive like scor-tape make a “sandwich” of 1 cardstock ring, acrylic circle & the other cardstock ring.

Glue the picot circle on top. Then adhere both foam circles on the bottom circle, one on the other.
Optional: ink all edges of G45 cardstock. Adhere all G45 paper to coordinating plain cardstock.

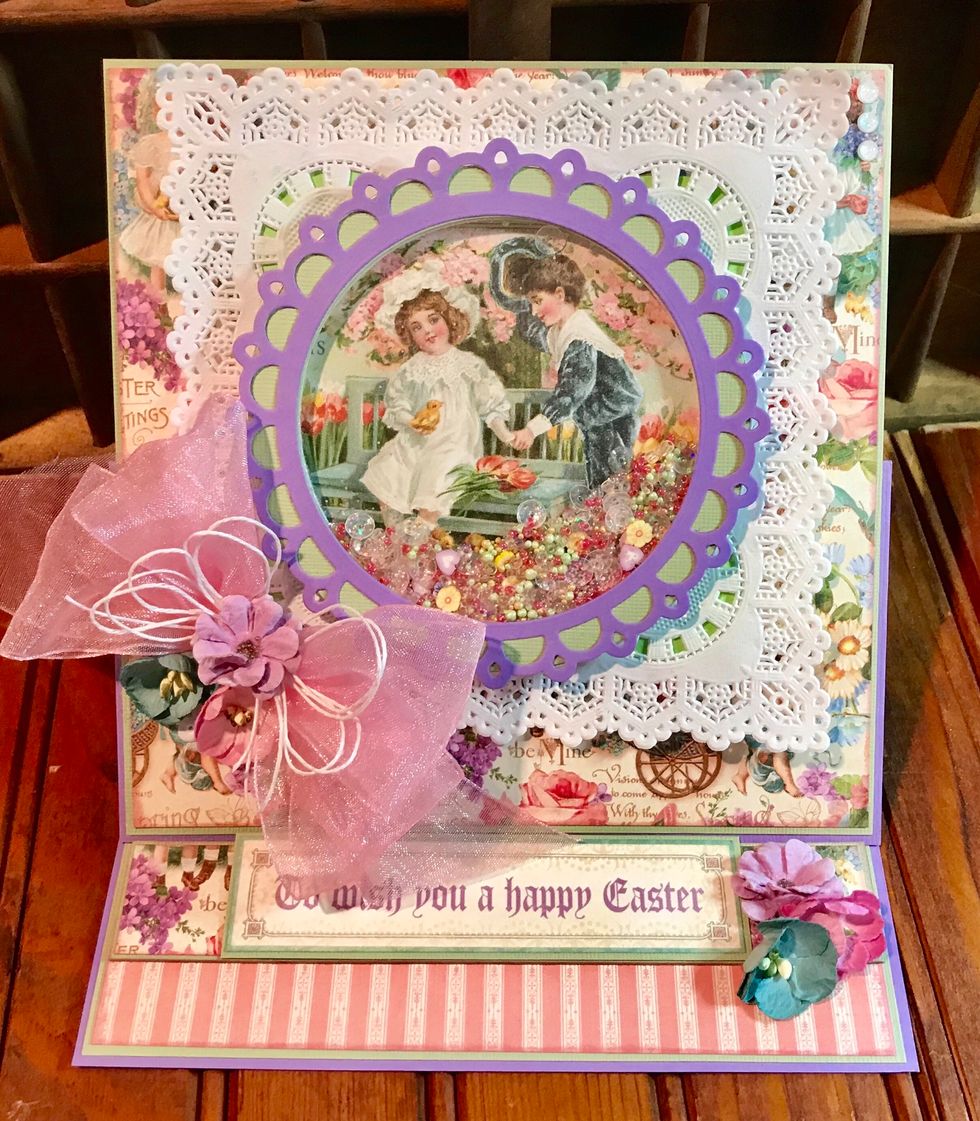
Adhere cutaparts from the 12x12 paper pad to the inside of the card. Add dimensional foam to the bottom strip to act as a fence to hold the front of the card in place.

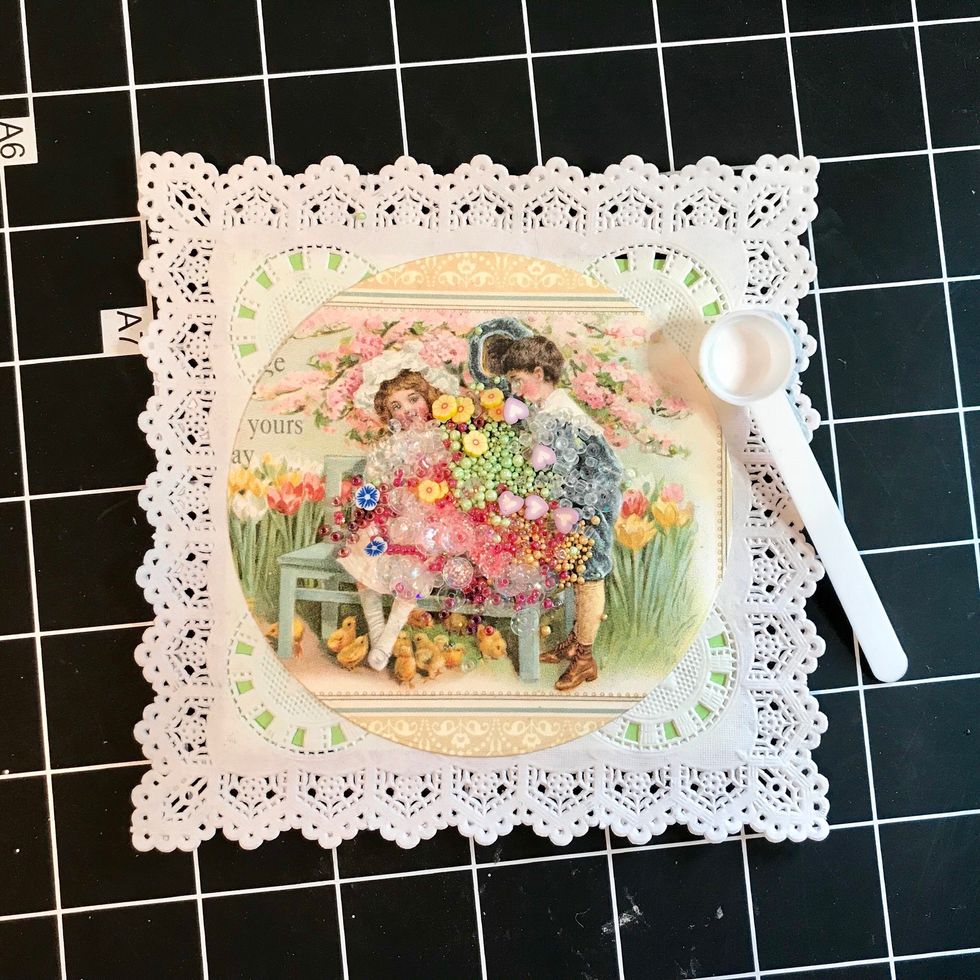
Card front: trim a piece of scrap cardstock and adhere to back side of doily. Adhere trimmed cut apart to center of front of doily. Place shaker elements in the center.

Optional: swipe an anti static pillow over the inside of the window. Peel off the foam circle backing and carefully place over the cut apart. Press firmly to seal.
Attach card front to card base front with wet adhesive or scor-tape. Careful to attach card front only to 6 x 3” section as shown.

Hot glue bow and flowers to card front and next to fence piece. Add rhinestones, sprinkles or sequins to upper right of card front and on middle section of inside card.