The Conversation (0)
Sign Up
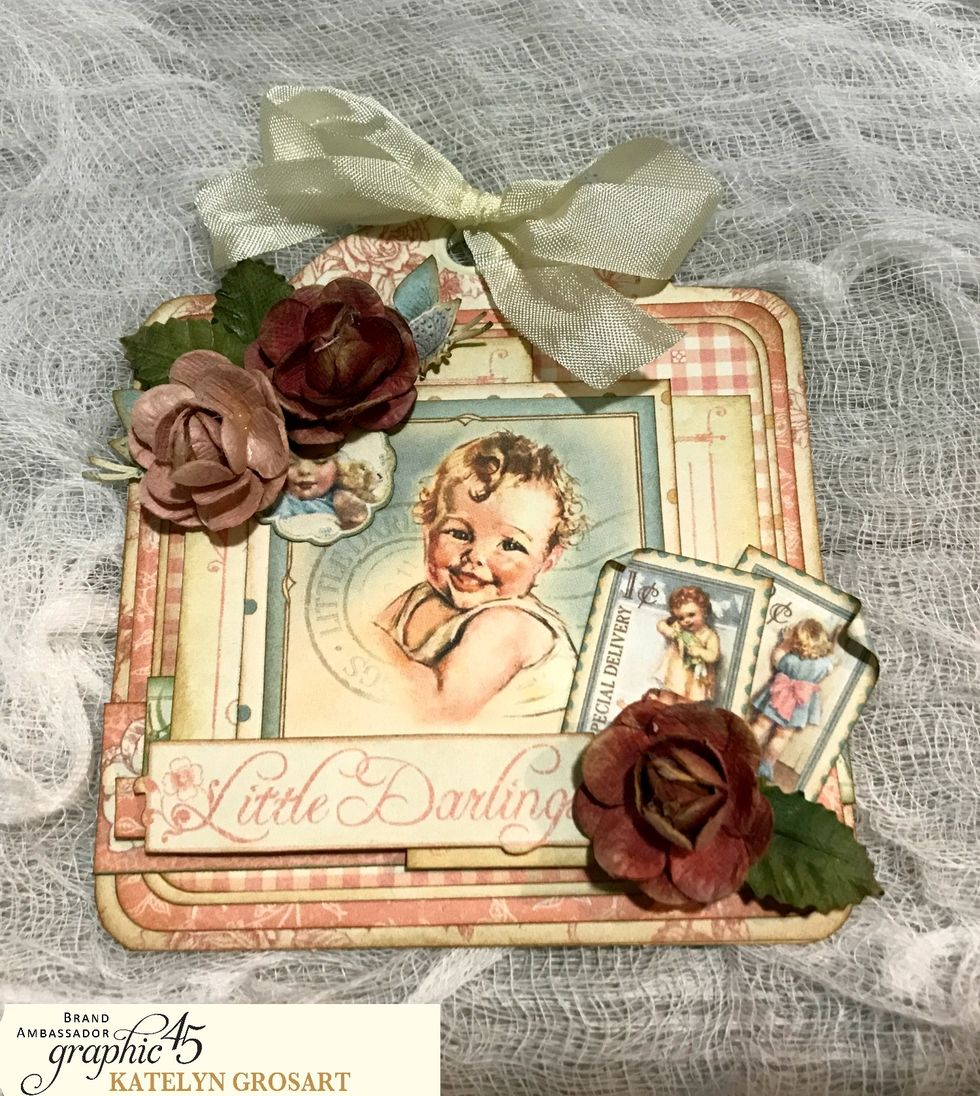
To start, we will create the girls version of the Baby Gift Tags.
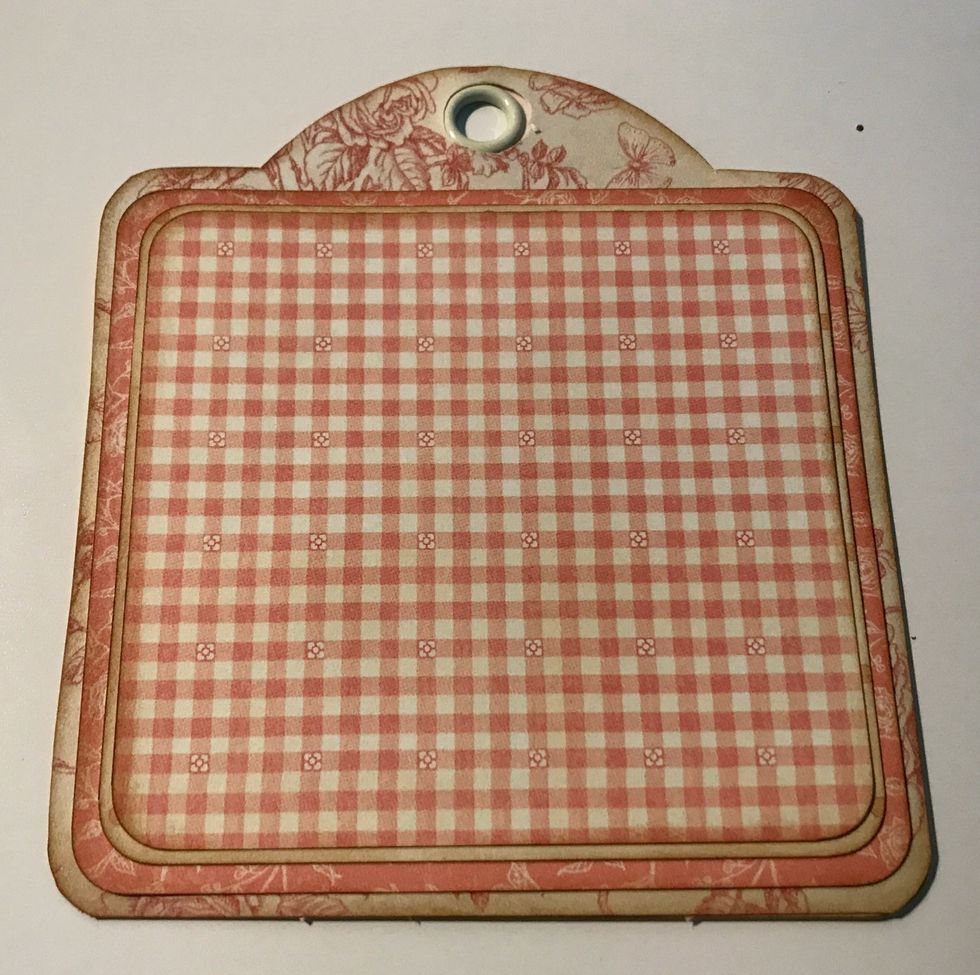
Use an Ivory tag and trace the tag on the pink floral paper. Cut tag out. Punch circle at top of paper using 1/2" circle punch. Ink edges of tag using Vintage Photo Ink & blending tool with foam.

With the Square Ivory Tag out of the package. Ink the edges of the tag using Vintage Photo Distress Ink and a blending tool with foam.
From the pink and cream floral paper, cut a piece that measures 4 1/4" x 4". Round the corners. Ink the edges of the paper using Vintage Photo Distress Ink and a Blending Tool with foam.
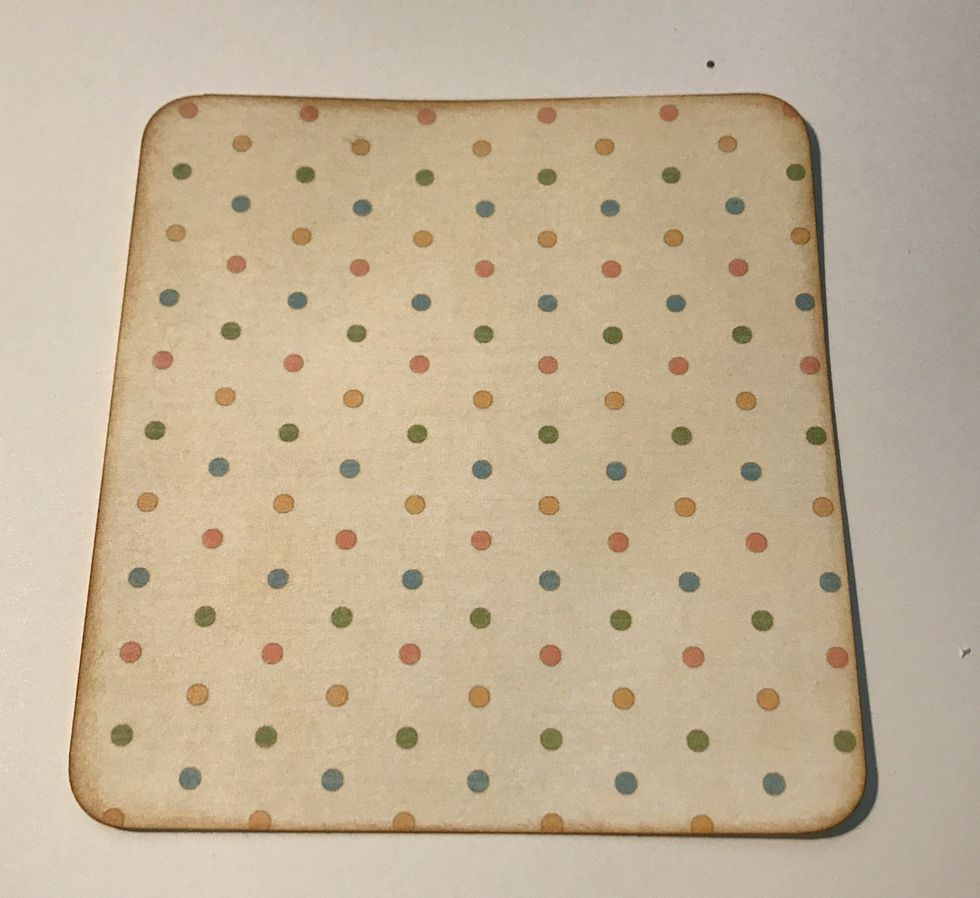
From the polka dot paper, cut a piece that measures 4" x 3 3/4". Round the corners. Ink the edges of the paper using Vintage Photo Distress Ink and a Blending Tool with foam.
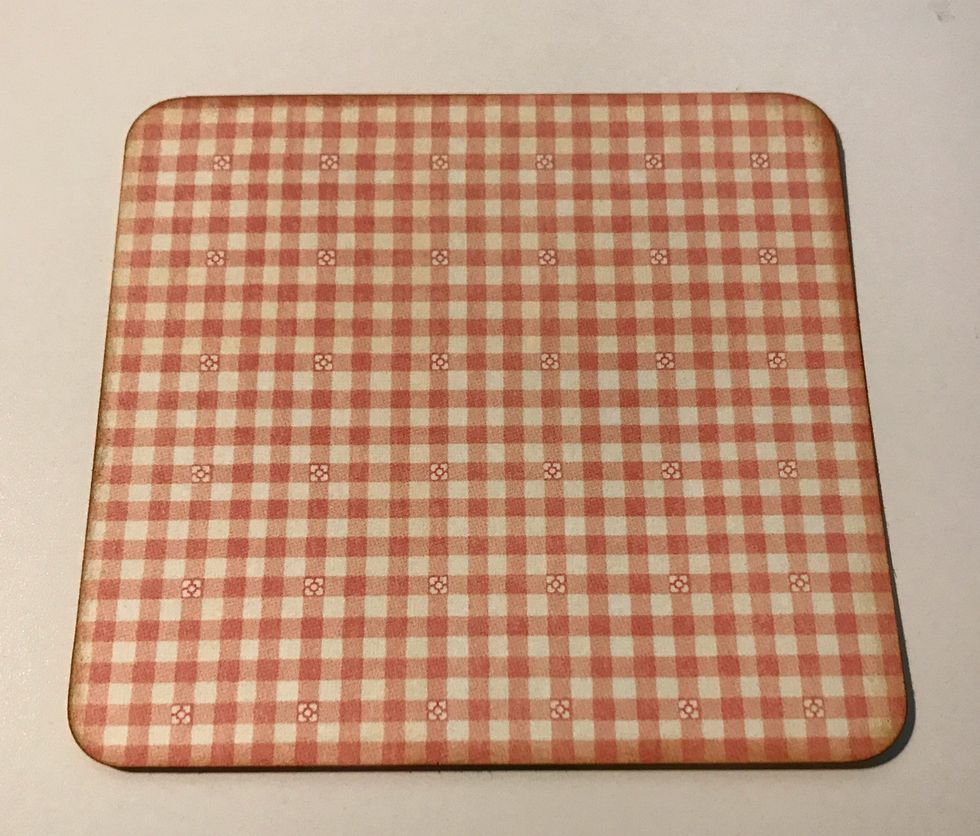
From the pink checkered paper, cut a piece that measures 3 7/8" x 3 5/8". Round the corners. Ink the edges of the paper using Vintage Photo Distress Ink and a Blending Tool with foam.
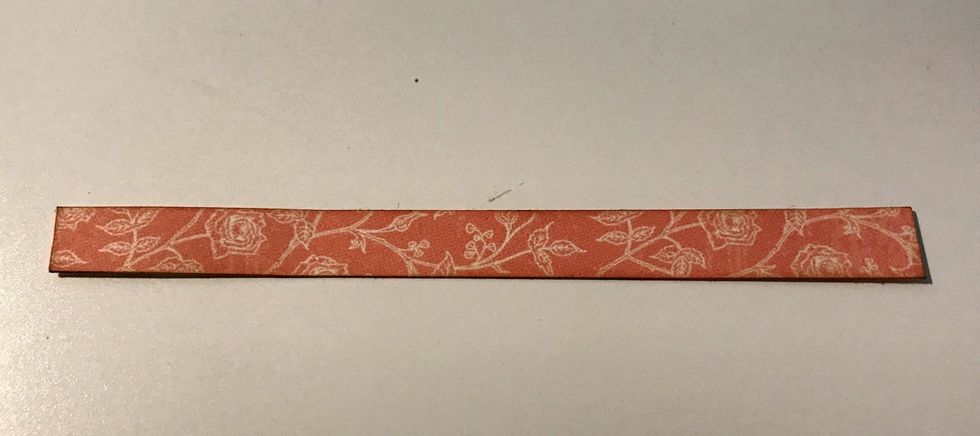
From the pink and cream floral paper, cut a piece that measures 3/8" x 4 1/4". Ink the edges of the paper using Vintage Photo Distress Ink and a Blending Tool with foam.
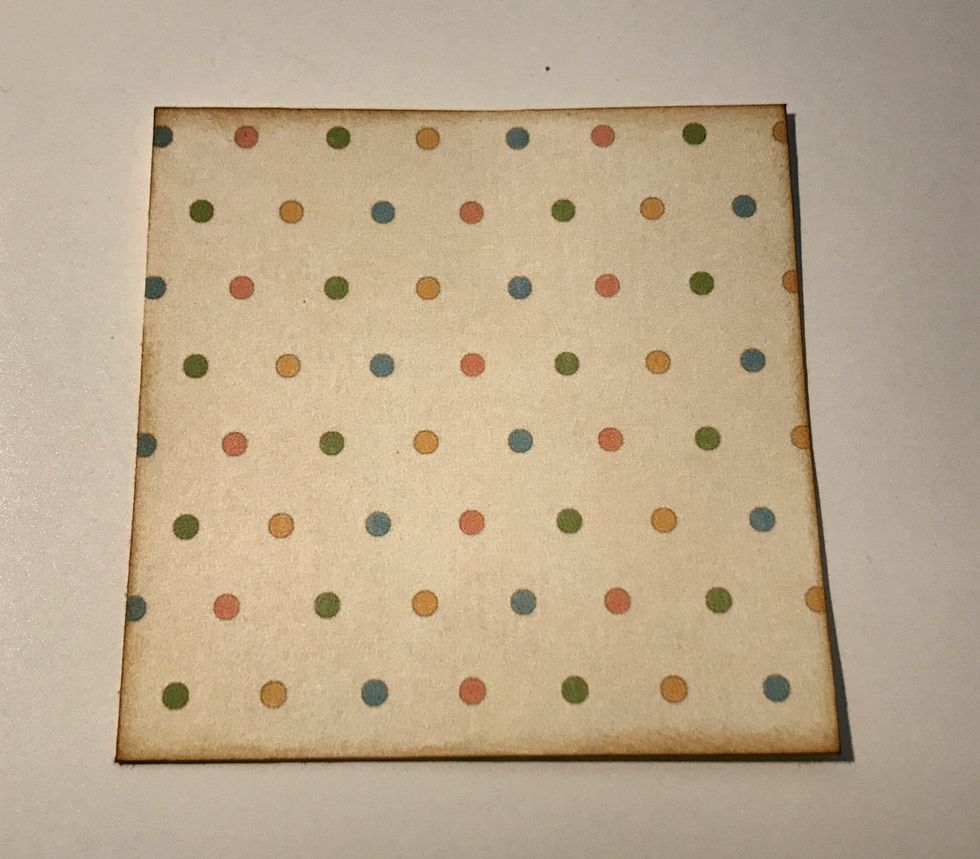
From the polka dot paper, cut a piece that measures 2 3/4" x 2 3/4". Ink the edges of the paper using Vintage Photo Distress Ink and a blending tool with foam.
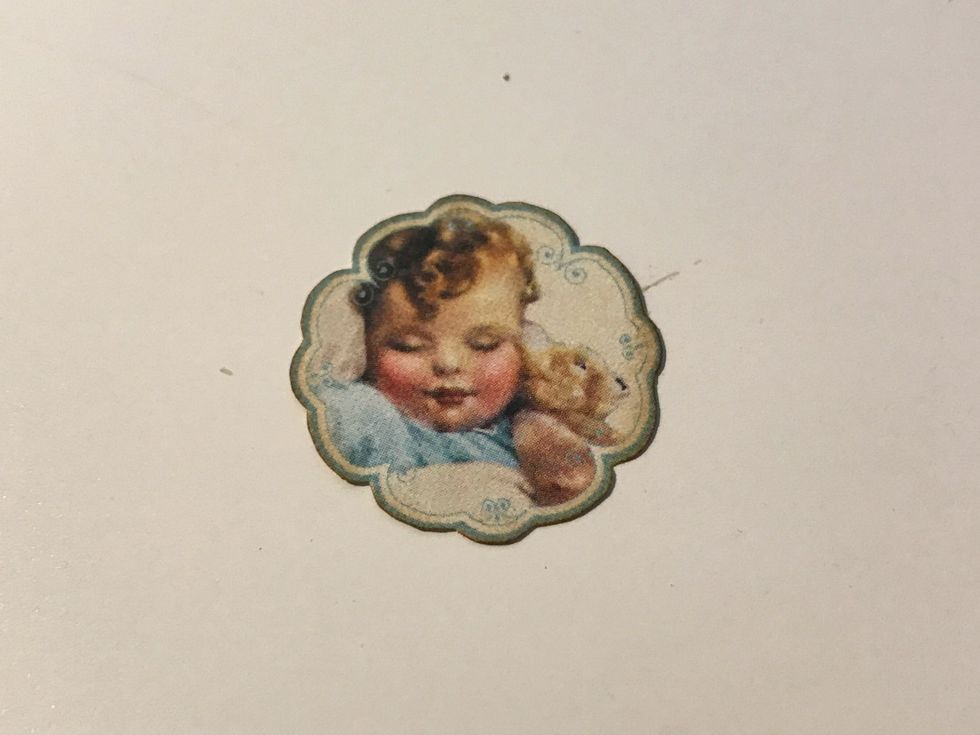
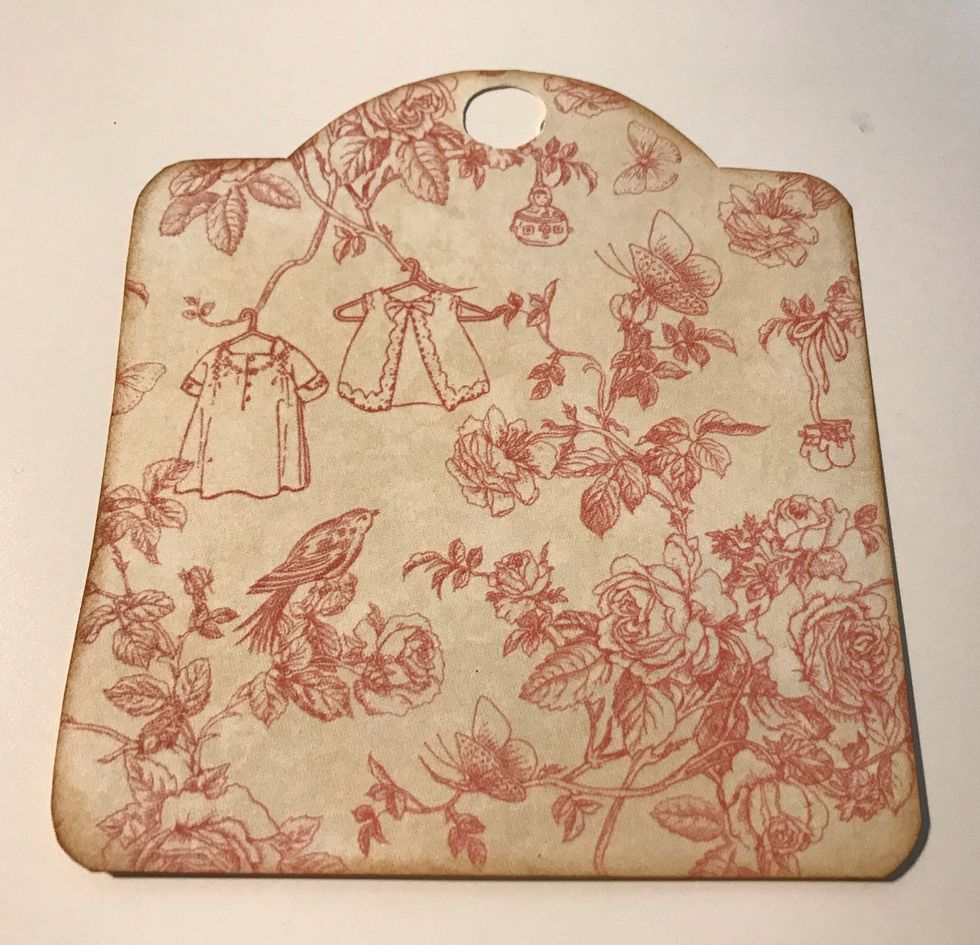
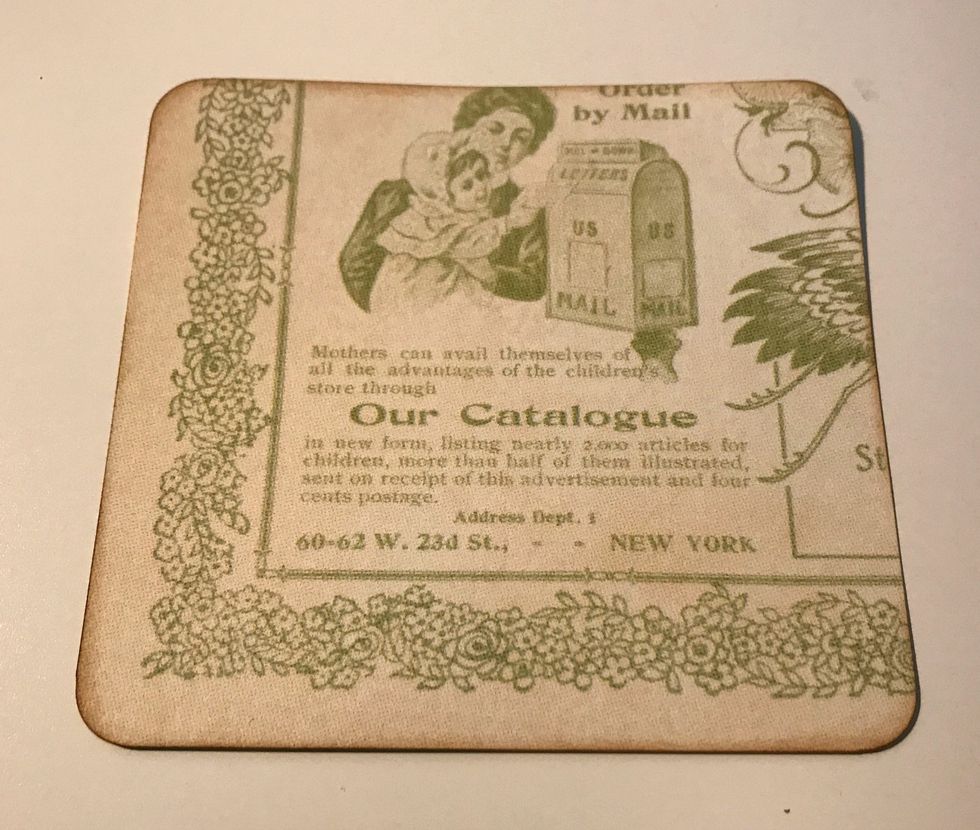
From the border paper, fussy cut the baby with teddy bear out. Ink the edges of the image using Vintage Photo Distress Ink and a blending tool with foam.
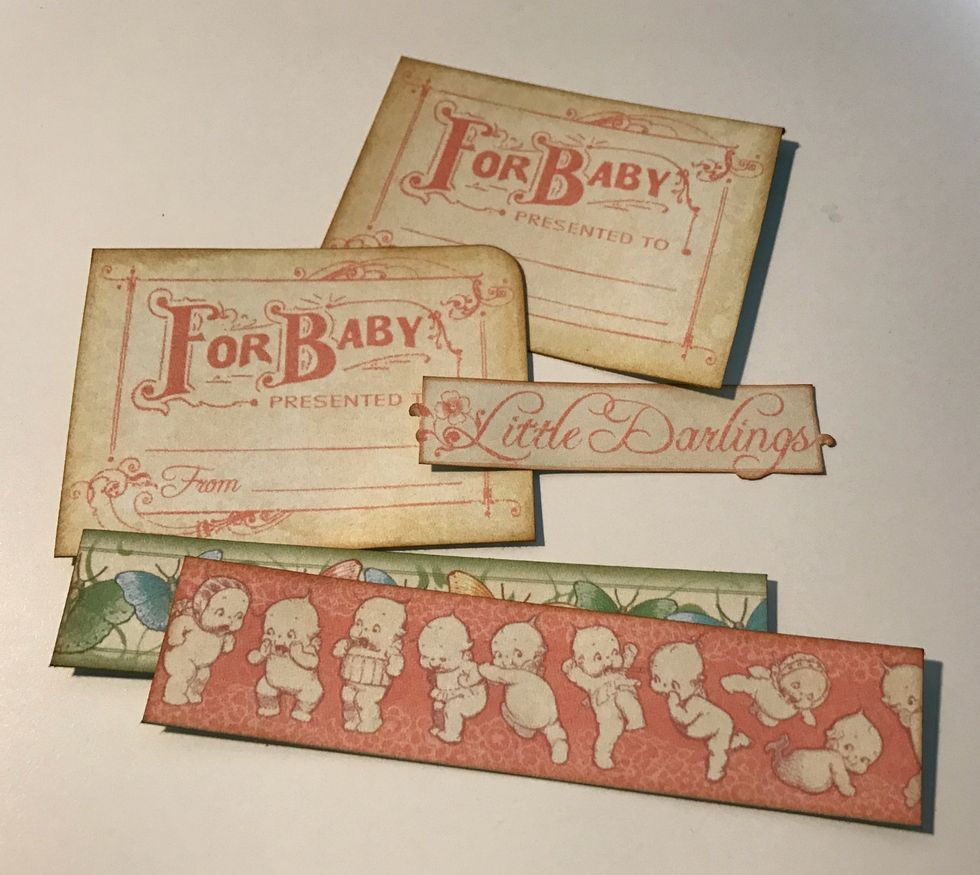
From the border paper, cut out two for baby, little darlings & two borders. Cut one border to 4 1/2" & cut the other to 4 1/4". Ink edges of pieces using Vintage Photo Distress Ink & a Blending Tool.
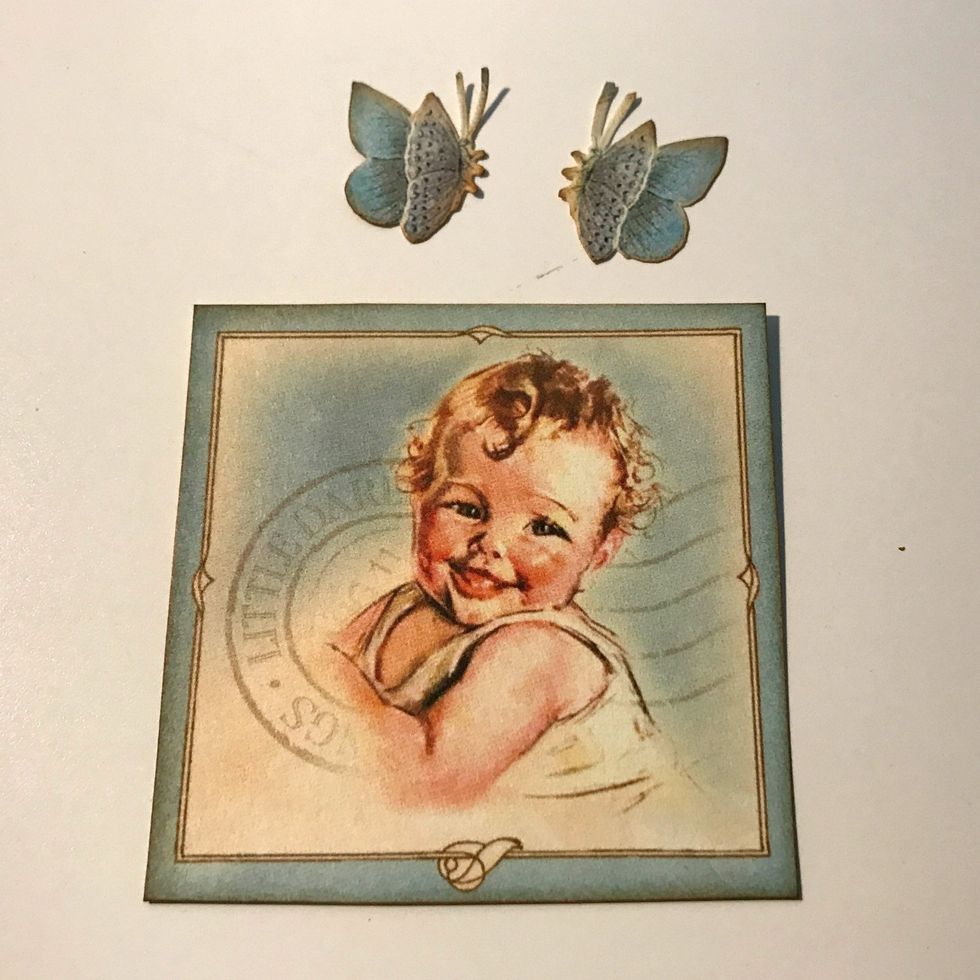
From the image paper, cut a baby square that measures 2 1/2" x 2 1/2". Fussy cut out two butterflies. Ink the edges of the images using Vintage Photo Distress Ink and a blending tool with foam.
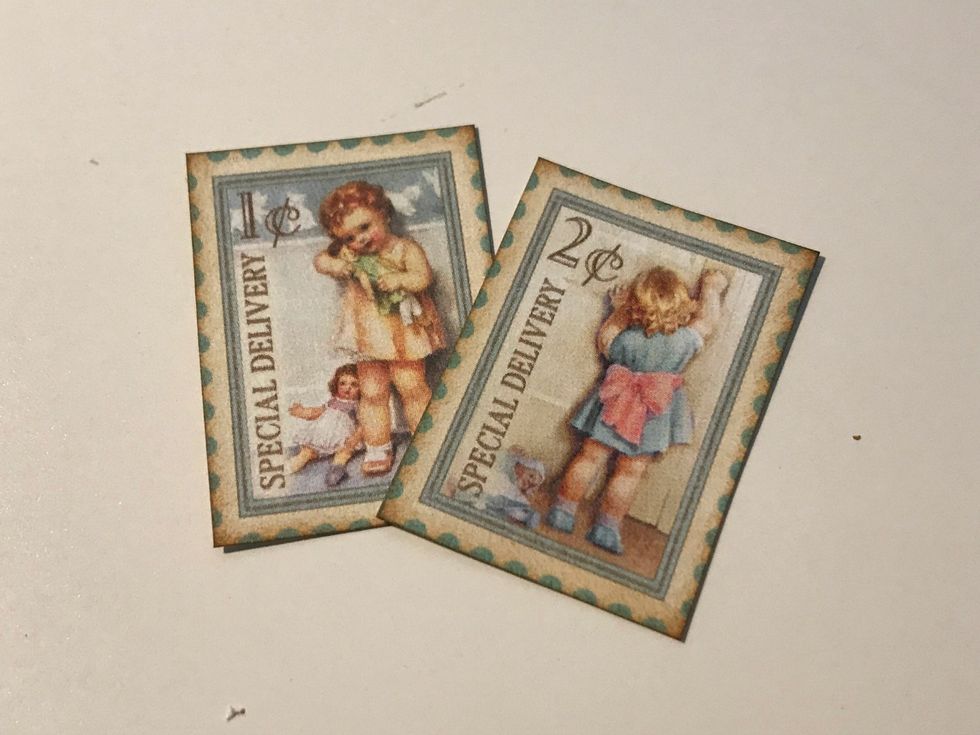
From the postage stamp paper, cut two stamps out. Ink the edges of the paper using Vintage Photo Distress Ink and a blending tool with foam.
Adhere the pink floral paper tag to the ivory tag.
Adhere the pink/cream floral paper to the pink floral tag. Adhere the polka dot paper to the pink/cream floral paper. Adhere the pink checkered paper to the polka dot paper.
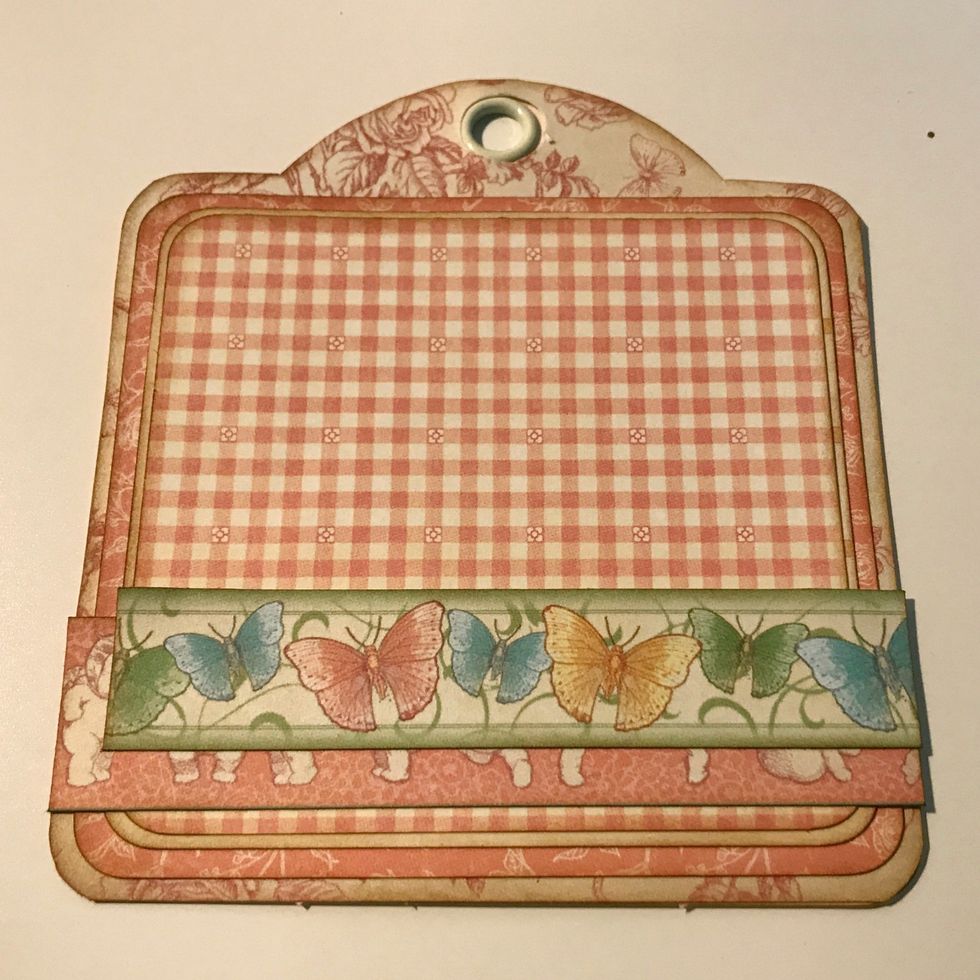
Adhere the 4 1/2" border a 1/2" from the bottom of the tag. Adhere the 4 1/4" border 1" from the bottom of the tag.
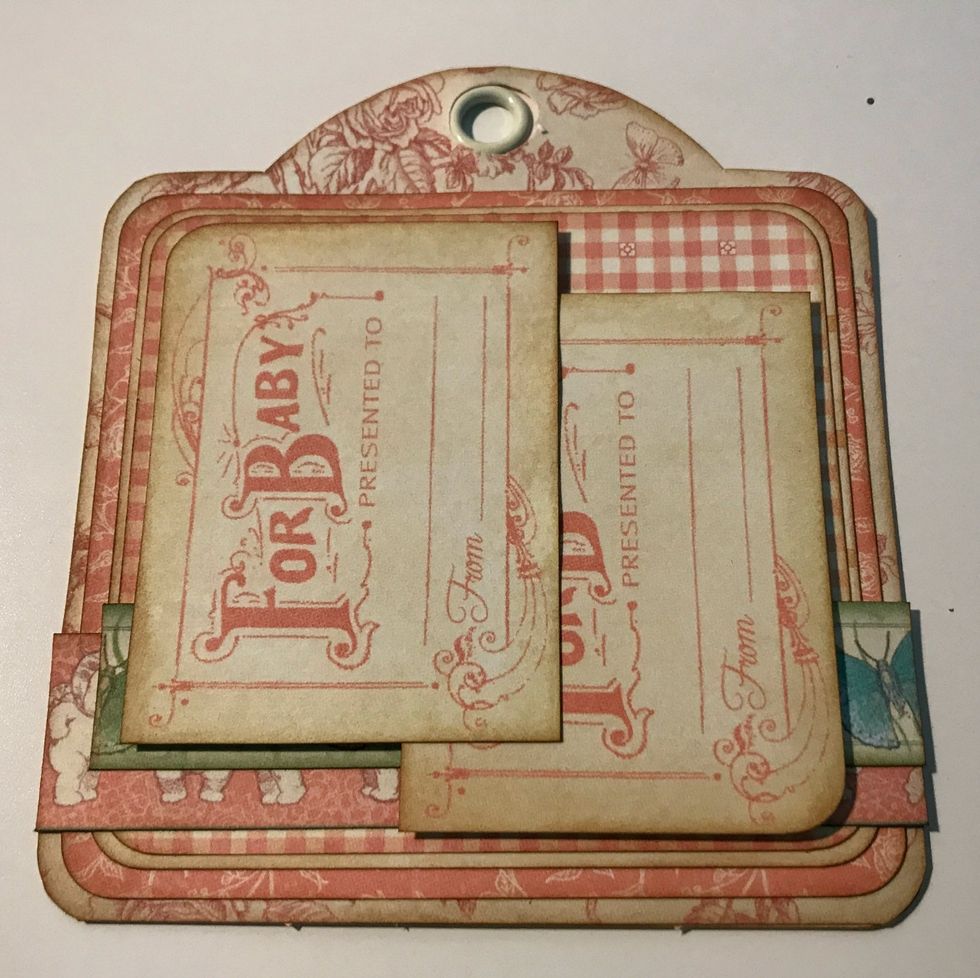
Foam square on of the For Baby tags 3/8" from the bottom & 3/8" from the right of the tag. Foam square the other For Baby tag 7/8" from the bottom & 3/8" from the left of the tag.
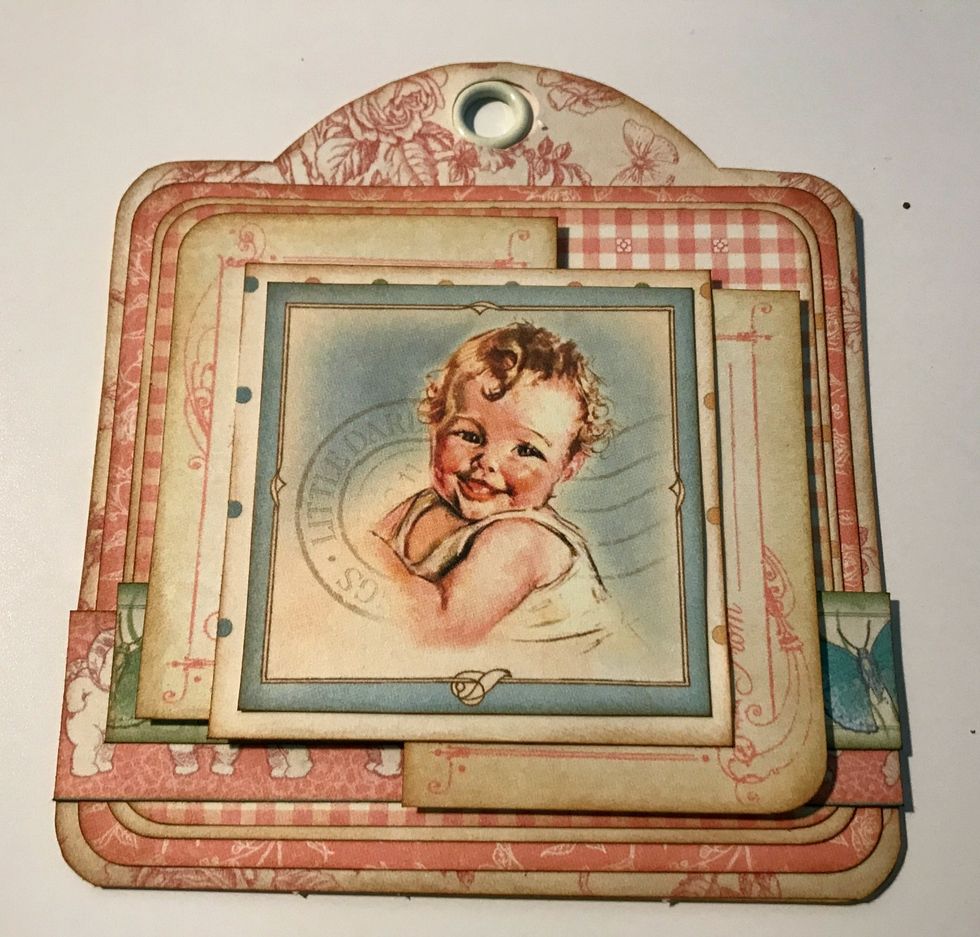
Adhere the baby image to the polka dot square. Adhere the polka dot square in the middle of the For Baby tags.
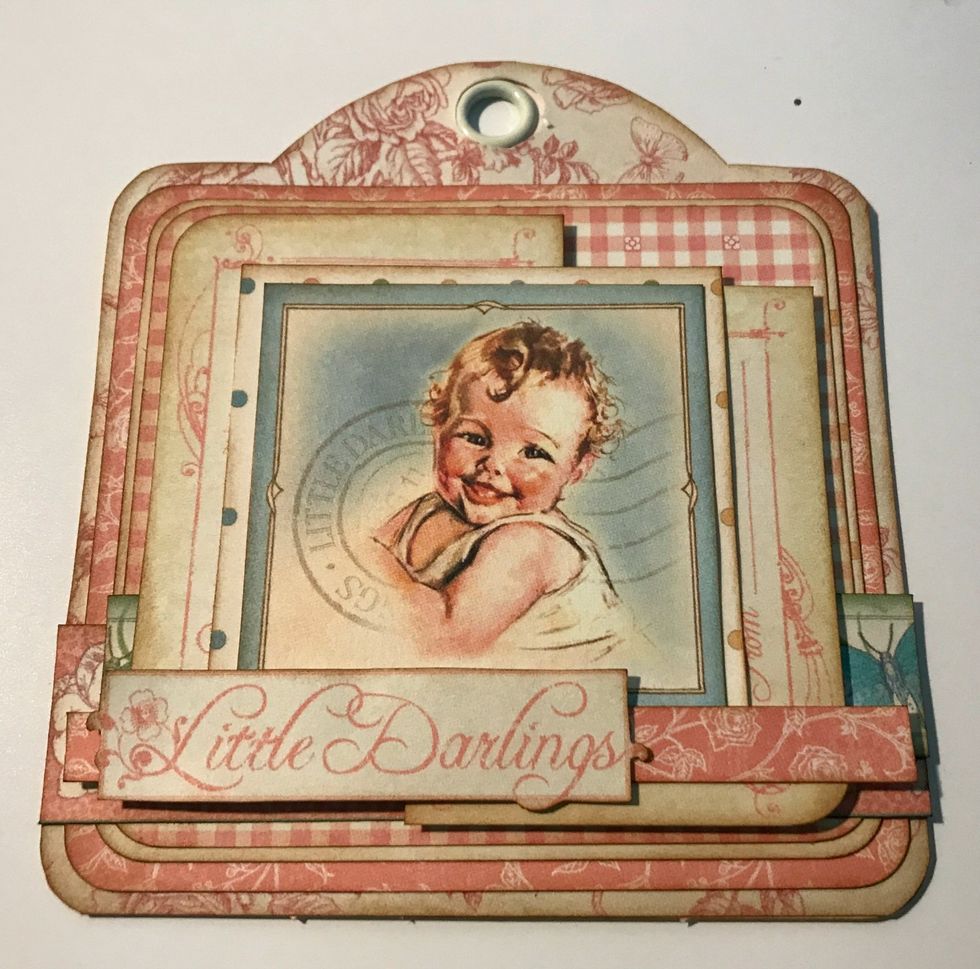
Adhere the skinny pink floral border 5/8" from the bottom of the tag. Foam square the Little Darlings sentiment 3/8" from the left of the tag.
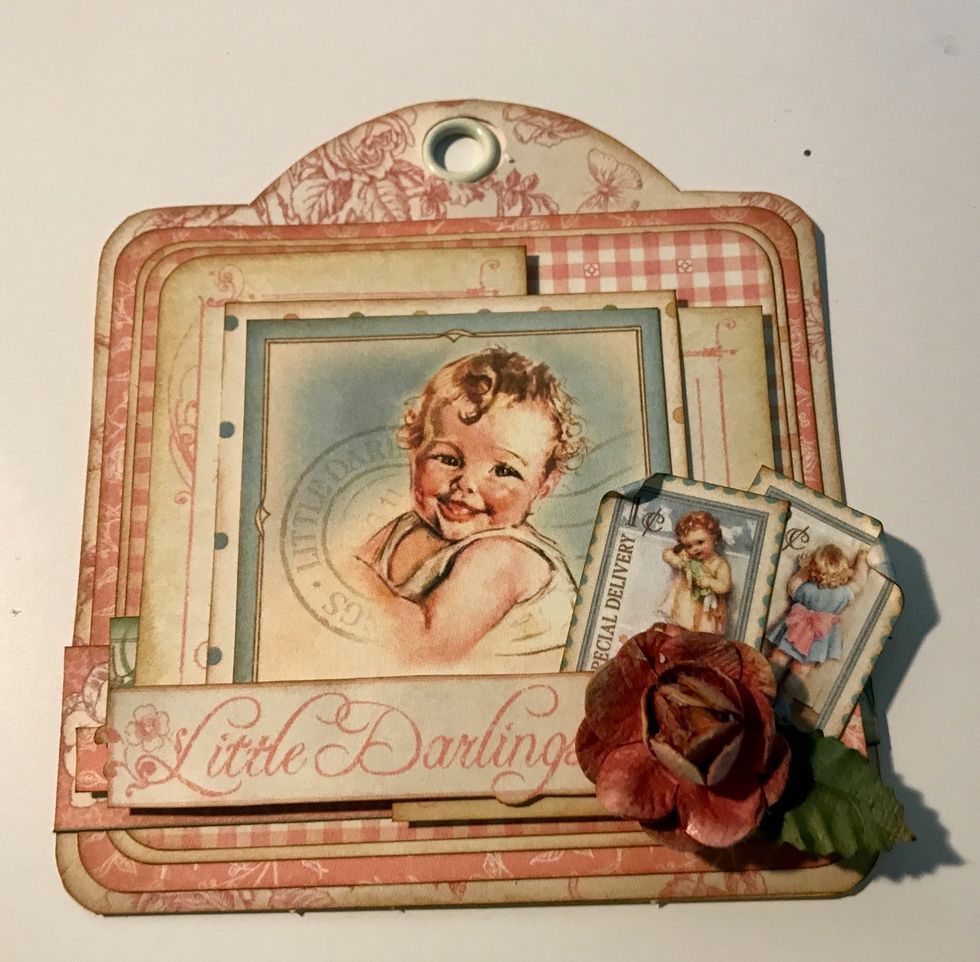
In the bottom right hand corner of the baby image, adhere a flower and two postage stamps. Roll one corner down on each postage stamp.
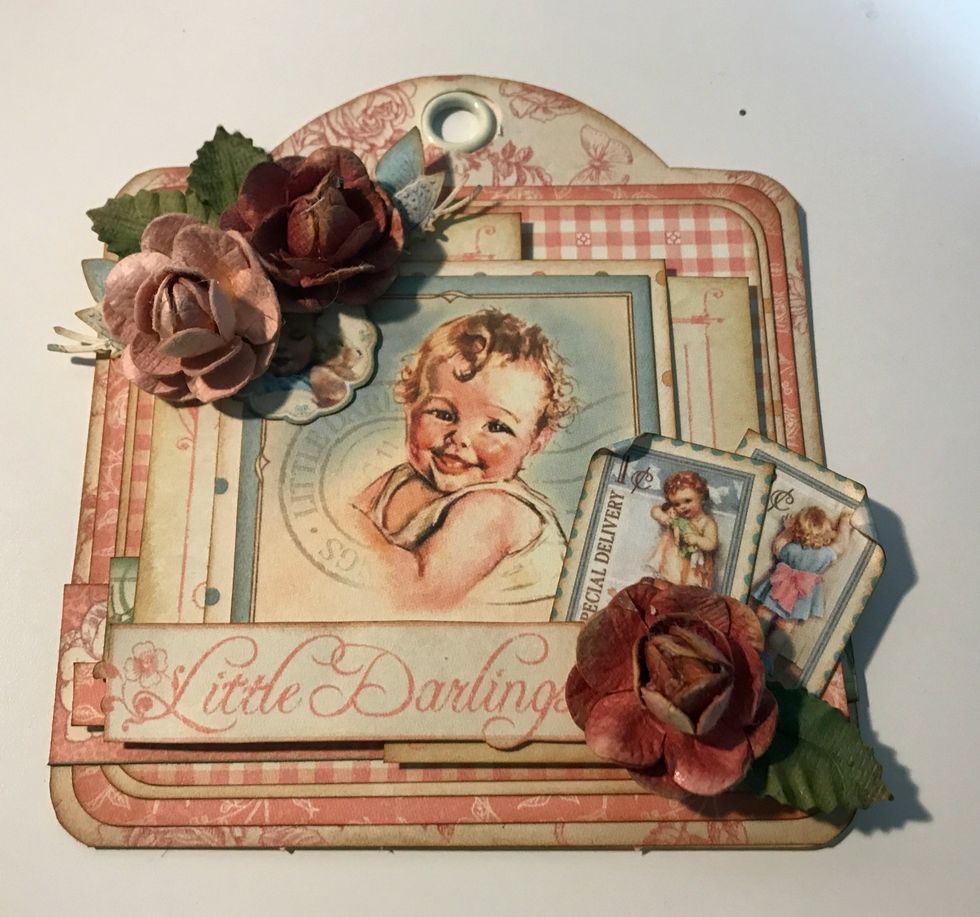
In the top left hand corner of the baby image, adhere two flowers, the two butterflies and the baby holding the teddy bear image.
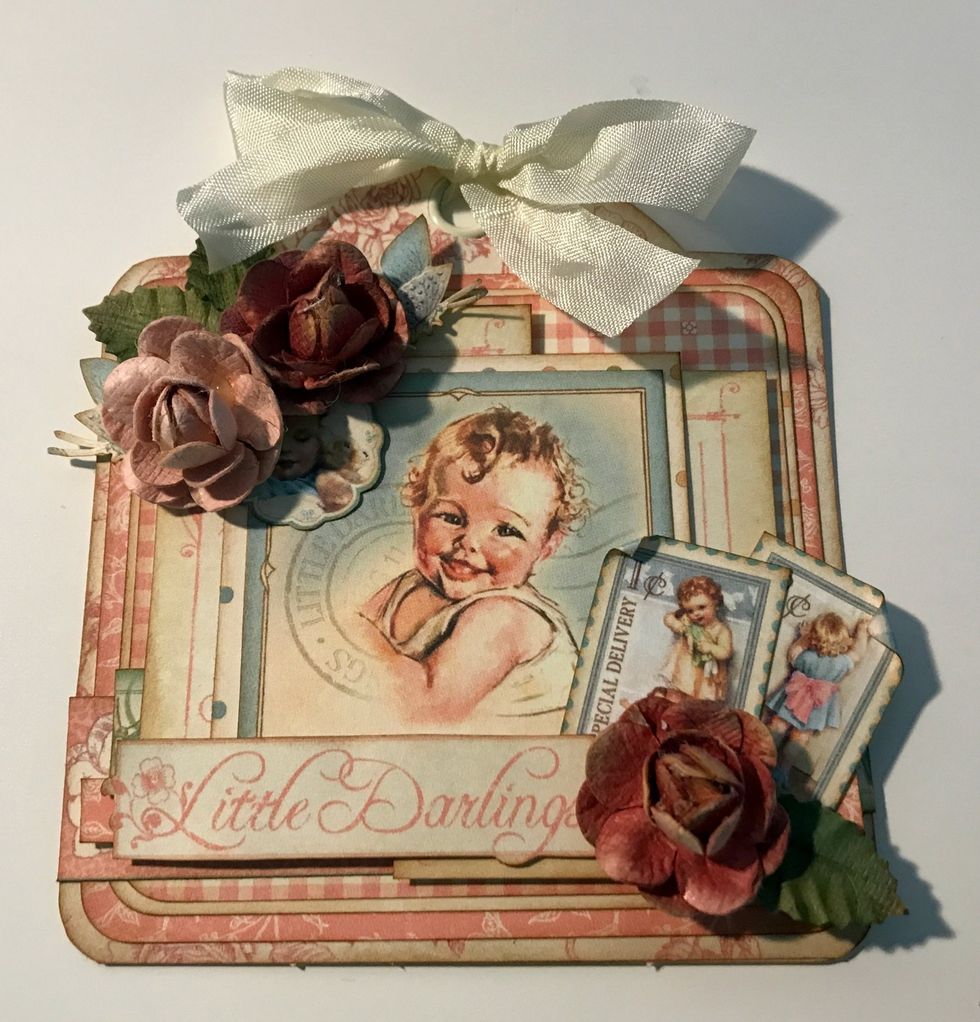
To finish the top of the tag, add a cream bow.

The girl version of the Baby Gift Tag is now complete.

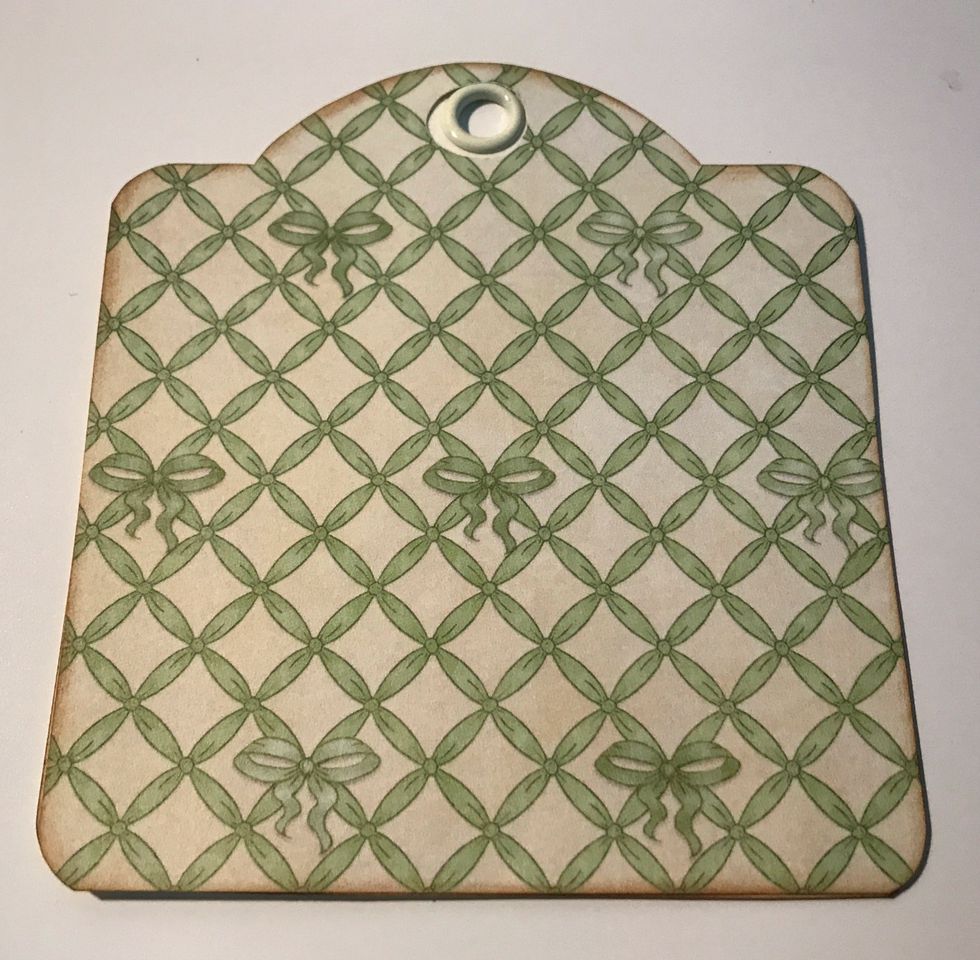
Next, we'll create the boys version of the Baby Gift Tags.
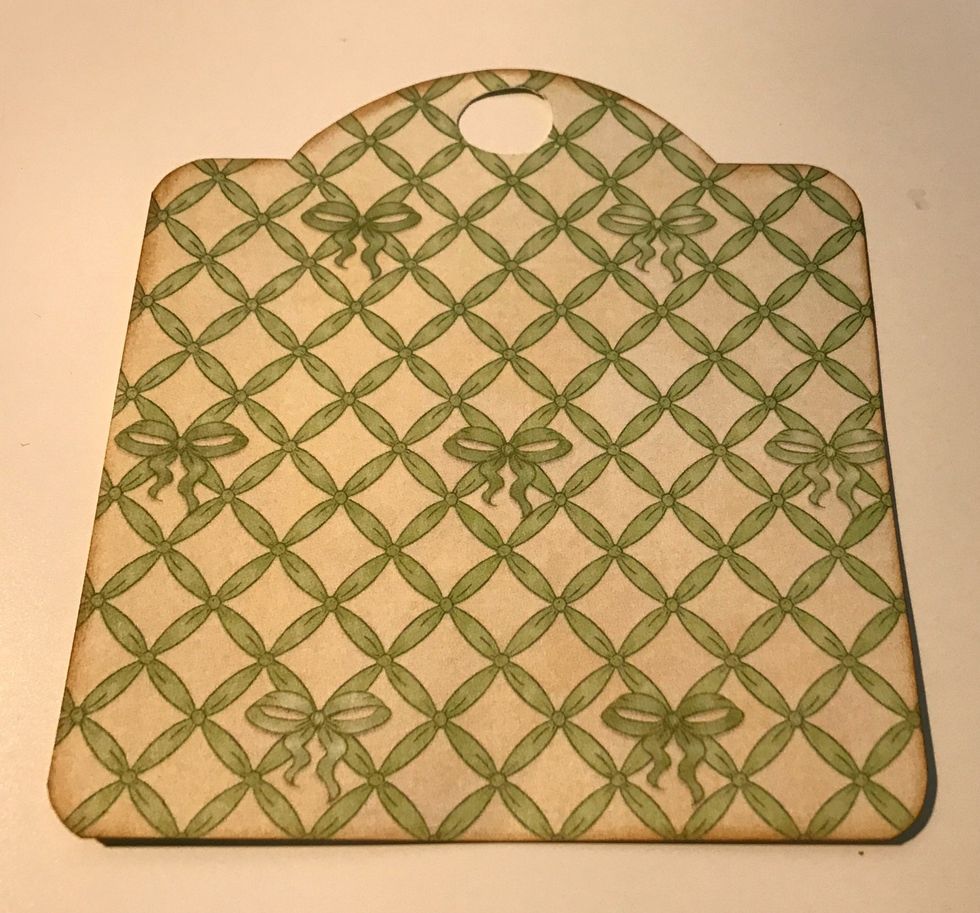
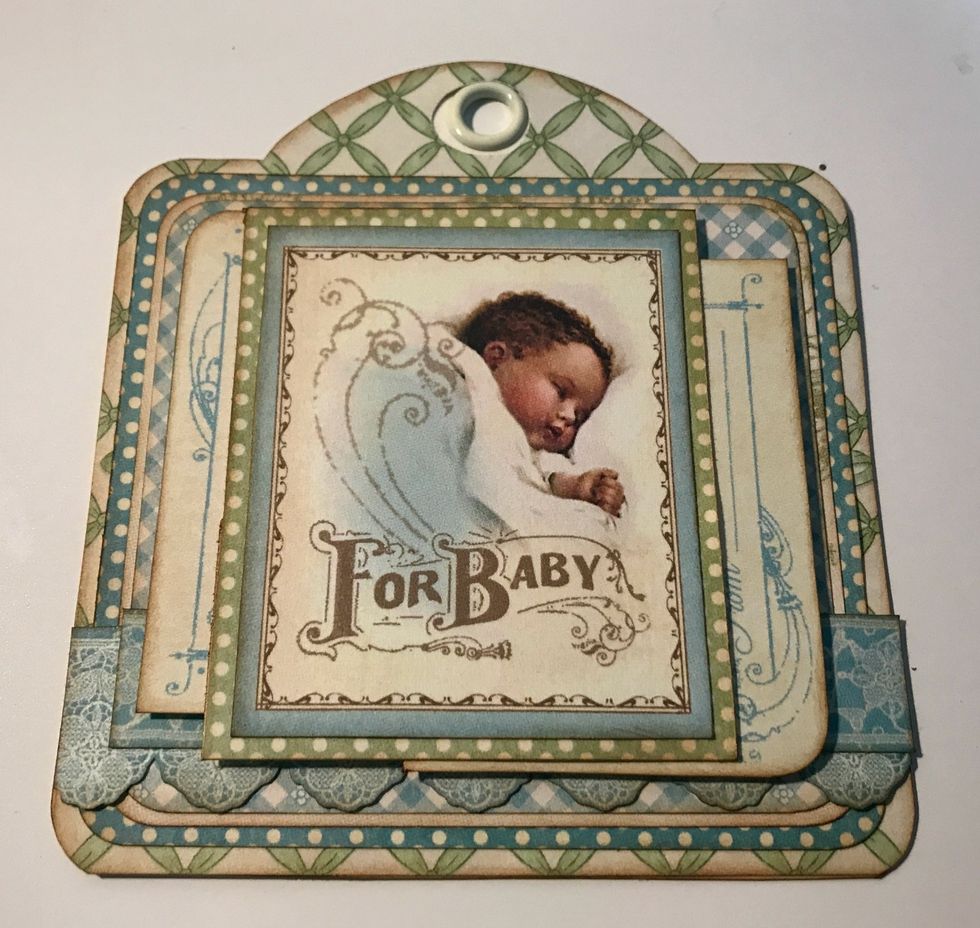
Use an Ivory tag and trace the tag on the green lattice paper. Cut tag out. Punch circle at top of paper using 1/2" circle punch. Ink edges of tag using Vintage Photo Ink & blending tool with foam.

With the Square Ivory Tag out of the package. Ink the edges of the tag using Vintage Photo Distress Ink and a blending tool with foam.

From the blue polka dot paper, cut a piece that measures 4 1/4" x 4". Round the corners. Ink the edges of the paper using Vintage Photo Distress Ink and a Blending Tool with foam.
From the green word paper, cut a piece that measures 4" x 3 3/4". Round the corners. Ink the edges of the paper using Vintage Photo Distress Ink and a Blending Tool with foam.
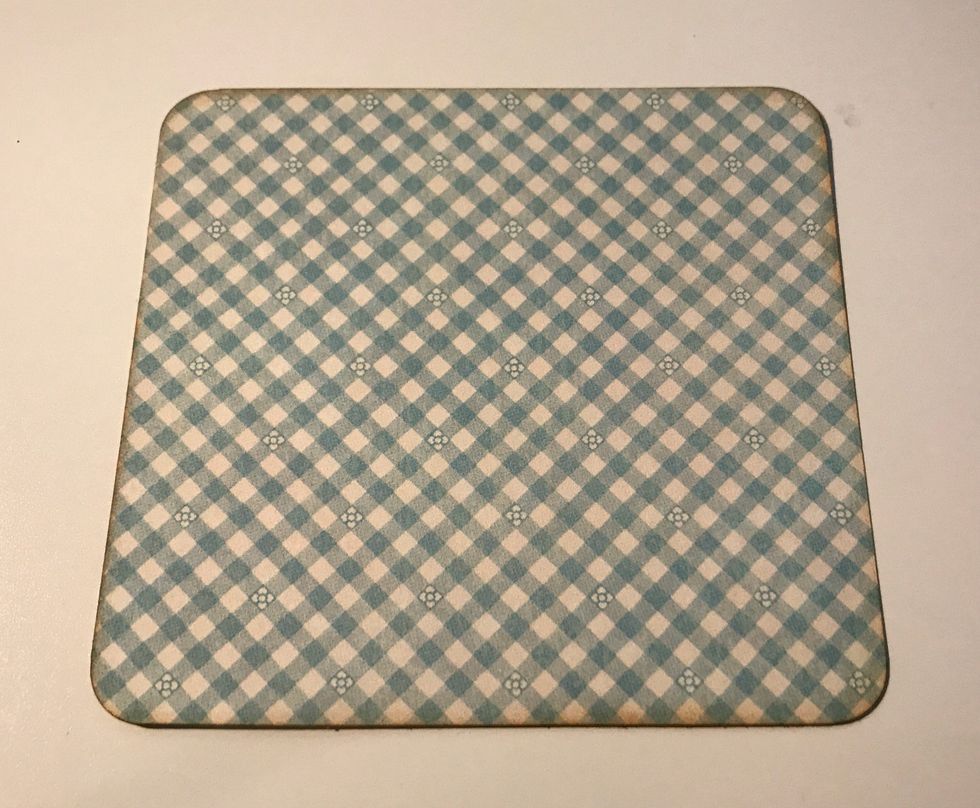
From the blue checkered paper, cut a piece that measures 3 7/8" x 3 5/8". Round the corners. Ink the edges of the paper using Vintage Photo Distress Ink and a Blending Tool with foam.
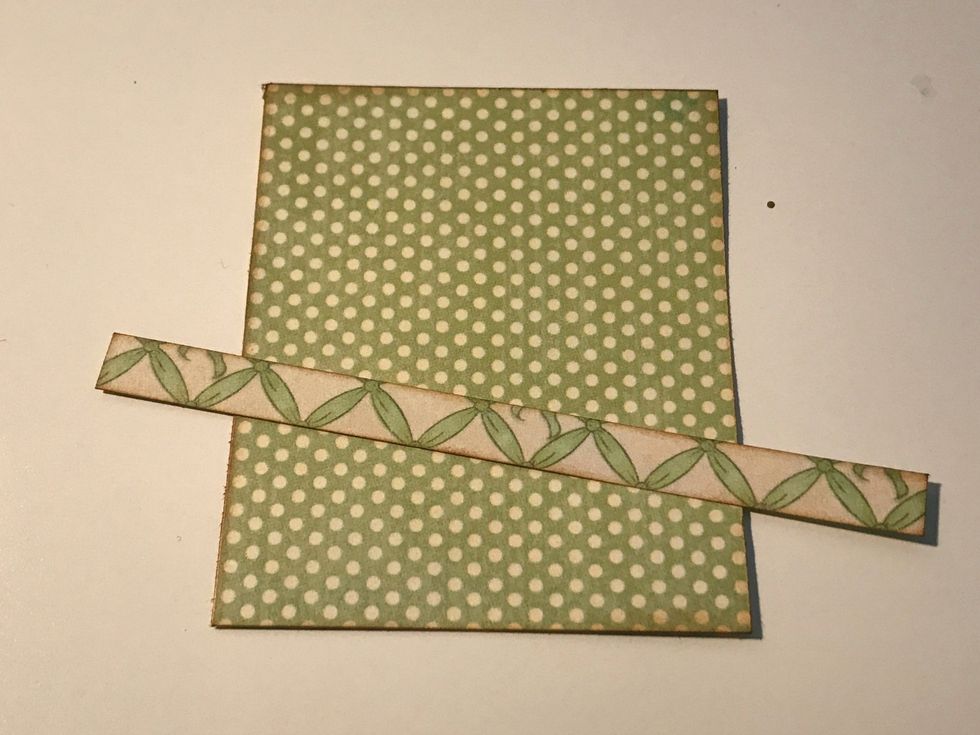
From the green lattice paper, cut a piece that measures 2 3/4" x 3 1/4". Cut a second piece that measures 3/8" x 4 1/2". Ink the edges of each piece using Vintage Photo Distress Ink & a blending tool.
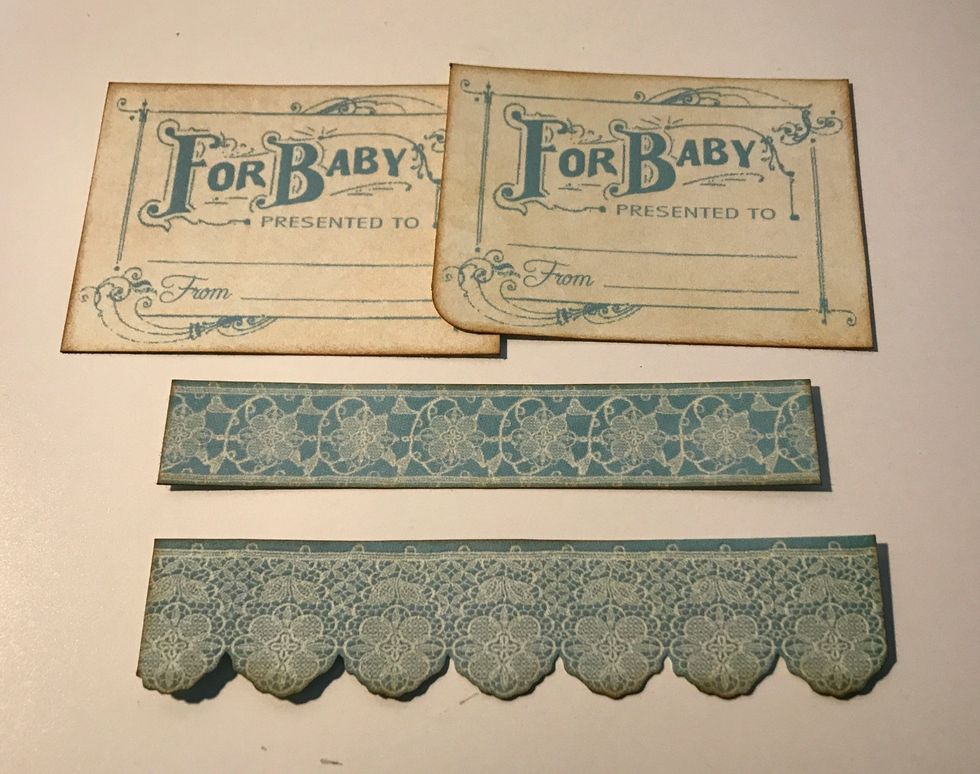
From the border paper, cut out two for baby & two borders. Cut one border to 4 1/2" & cut the other to 4 1/4". Ink edges of pieces using Vintage Photo Distress Ink & a Blending Tool.
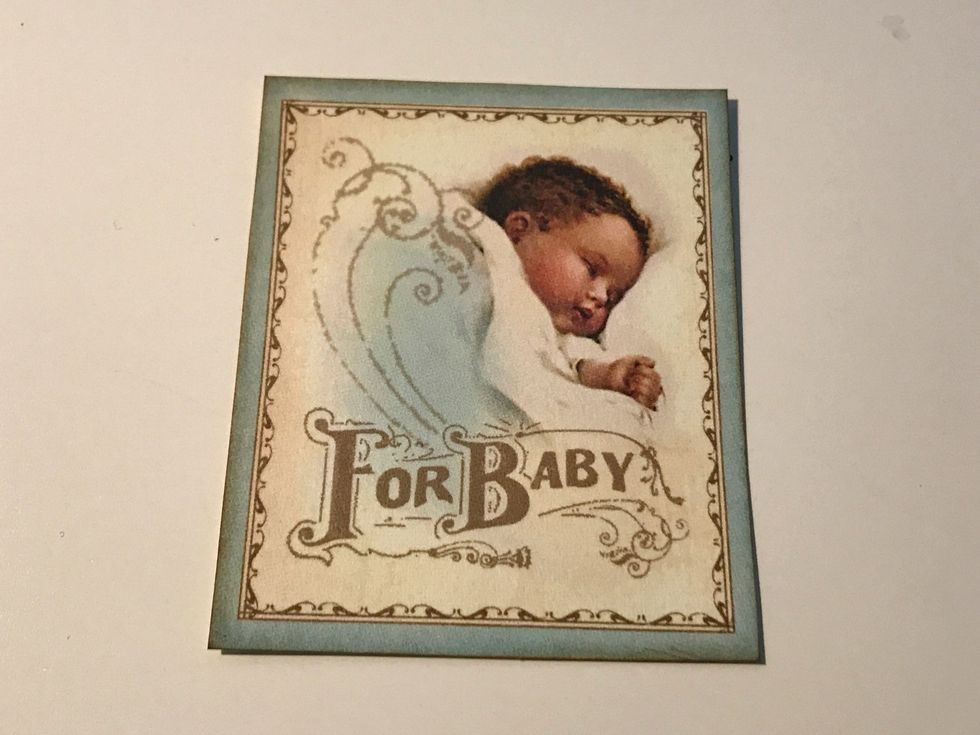
From the image paper, cut a baby square that measures 2 1/2" x 3". Ink the edges of the images using Vintage Photo Distress Ink and a blending tool with foam.
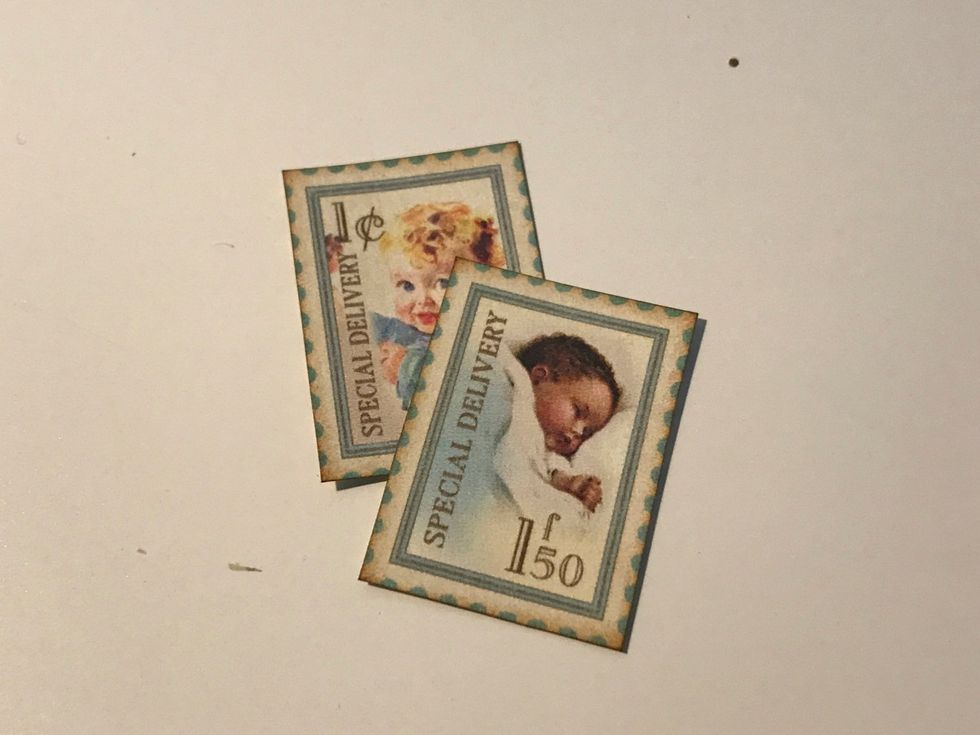
From the postage stamp paper, cut two stamps out. Ink the edges of the paper using Vintage Photo Distress Ink and a blending tool with foam.
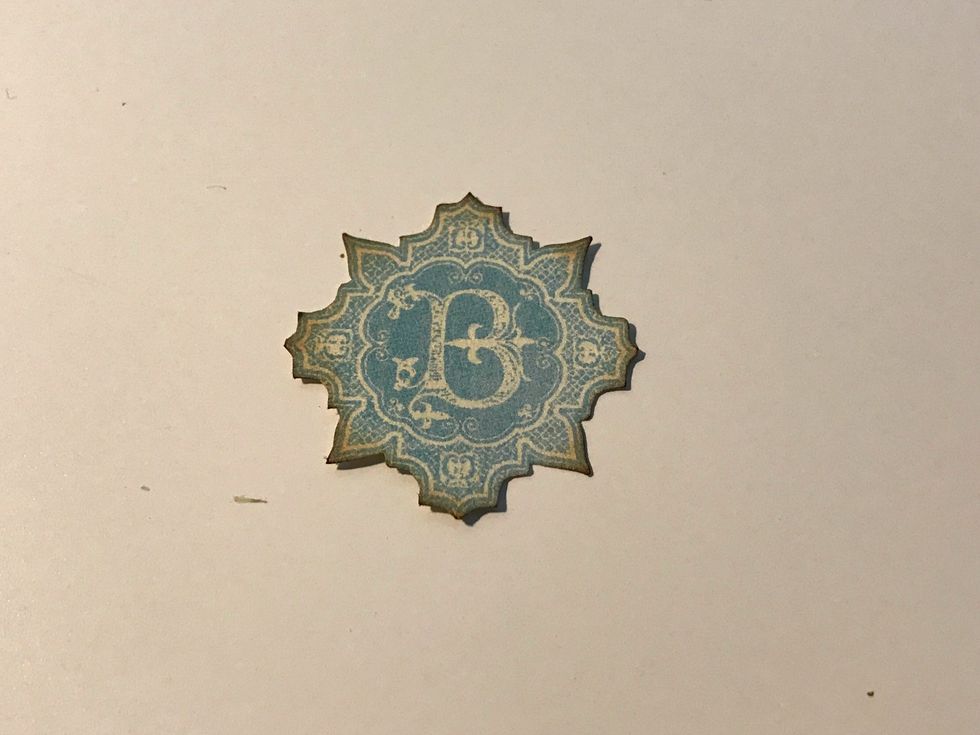
From the blue paper with B's on it, fussy cut one of the B's out. Ink the edges of the image using Vintage Photo Distress Ink and a blending tool with foam.
Adhere the green lattice paper tag to the ivory tag.
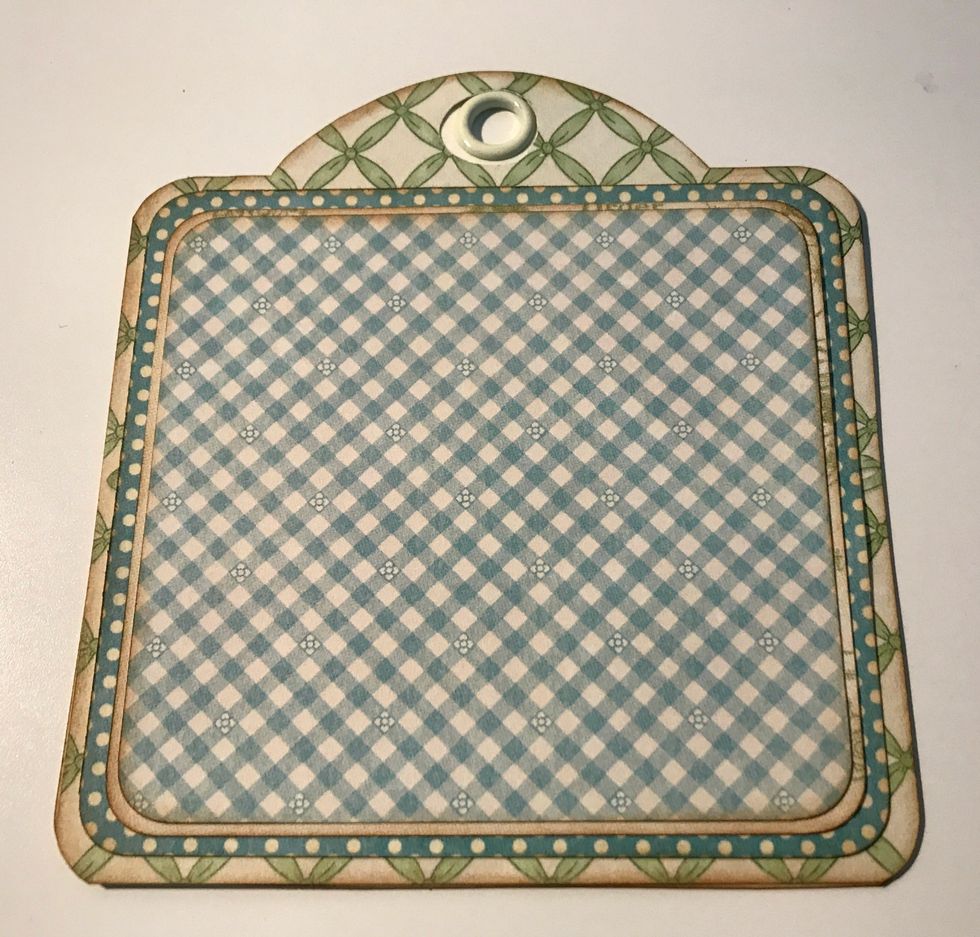
Adhere the blue polka paper to the green lattice tag. Adhere the green word paper to the blue polka dot paper. Adhere the blue checkered paper to the green word paper.
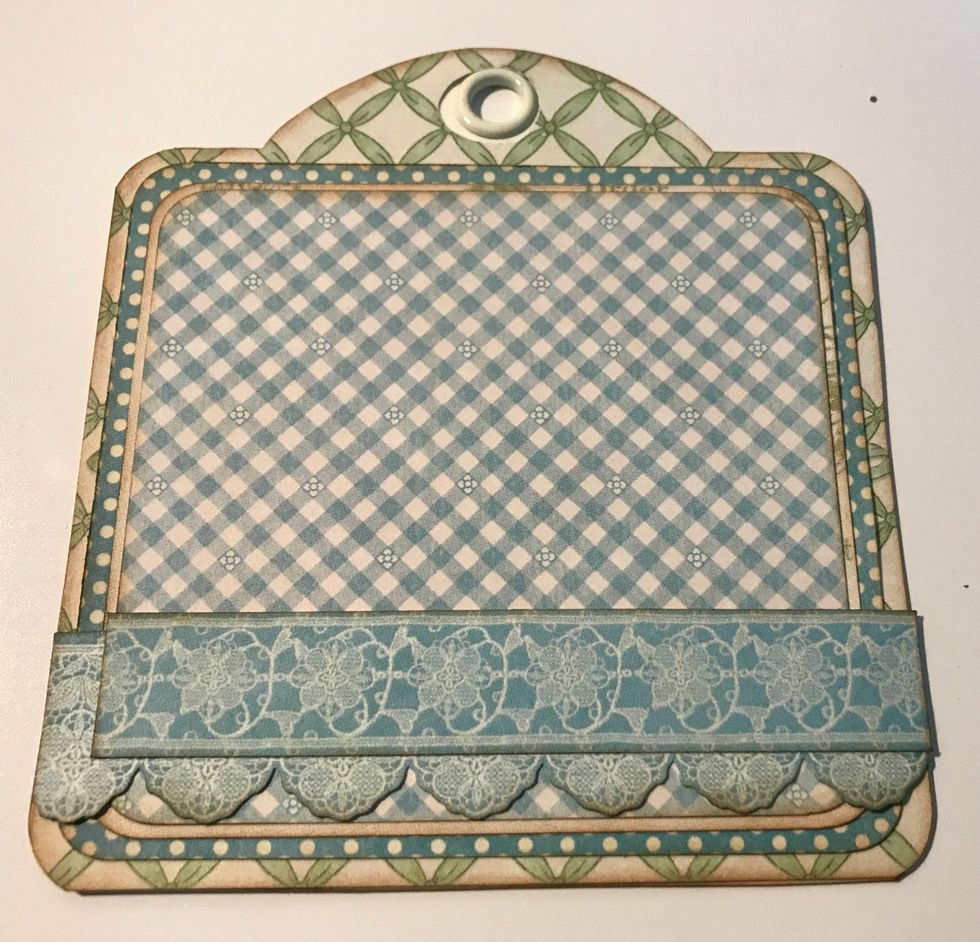
Adhere the 4 1/2" border a 1/4" from the bottom of the tag. Adhere the 4 1/4" border 5/8" from the bottom of the tag.
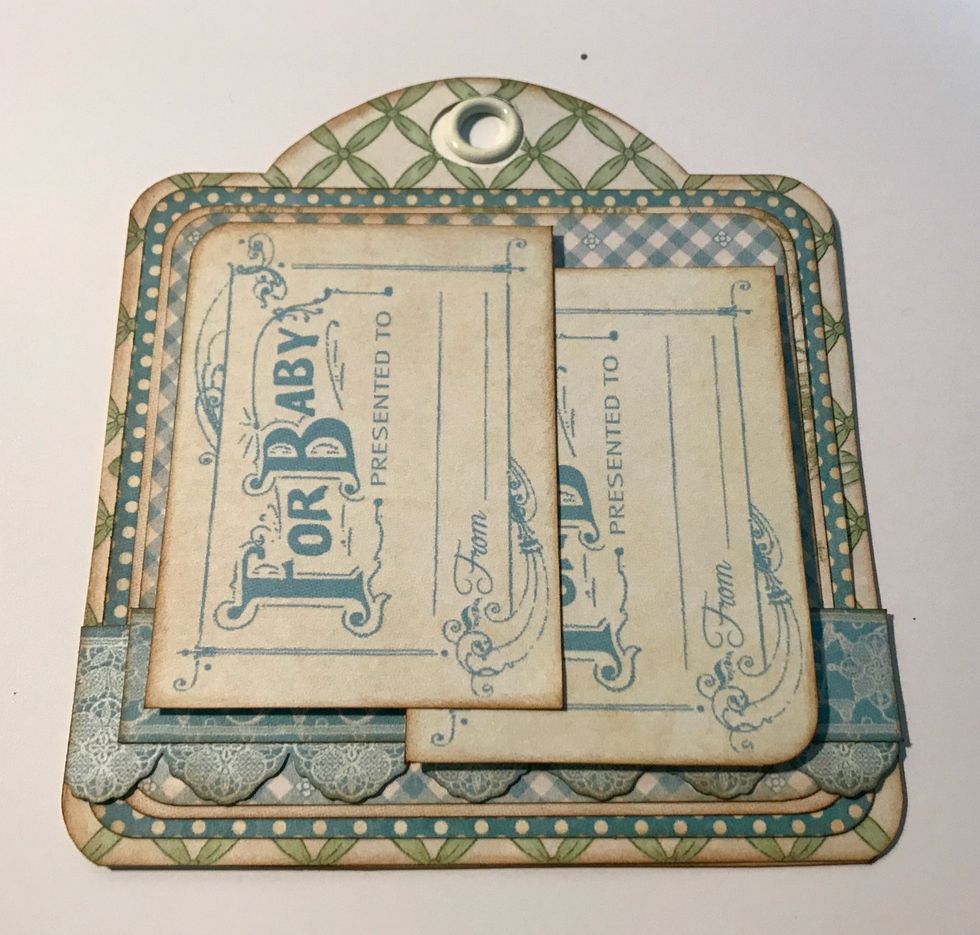
Foam square on of the For Baby tags 1/2" from the bottom & 3/8" from the right of the tag. Foam square the other For Baby tag 3/4" from the bottom & 3/8" from the left of the tag.
Adhere the baby image to the polka dot square. Adhere the polka dot square in the middle of the For Baby tags.
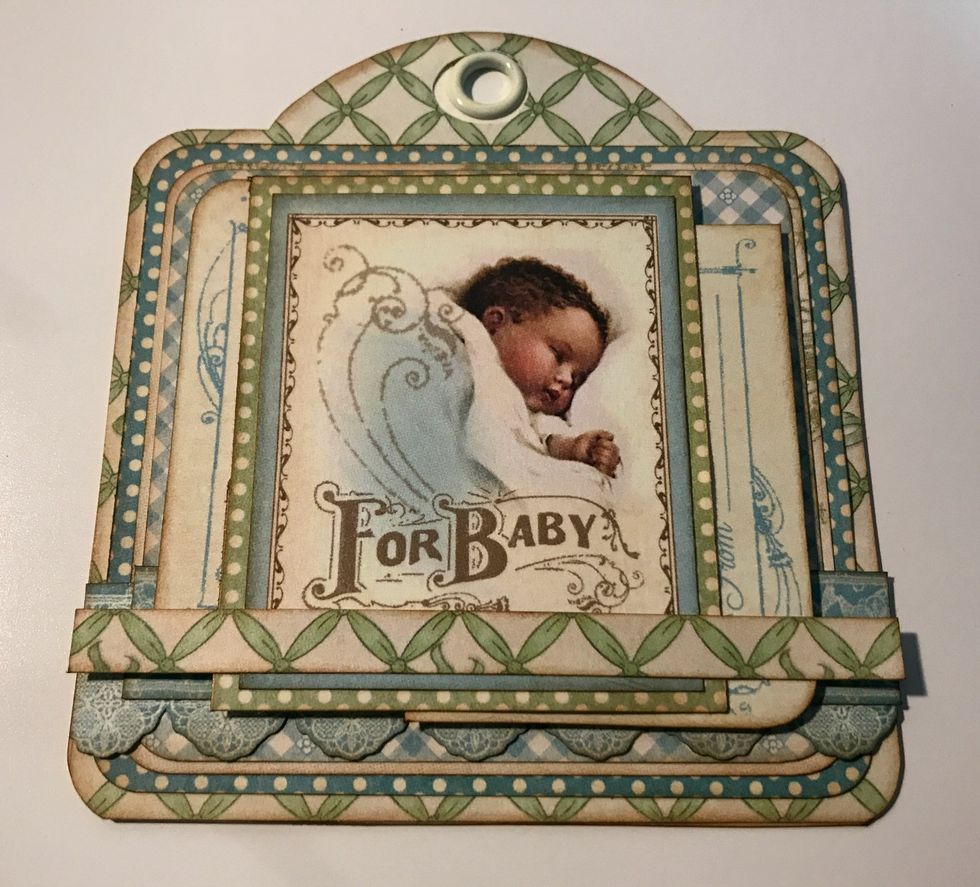
Adhere the skinny green lattice border 3/4" from the bottom of the tag.
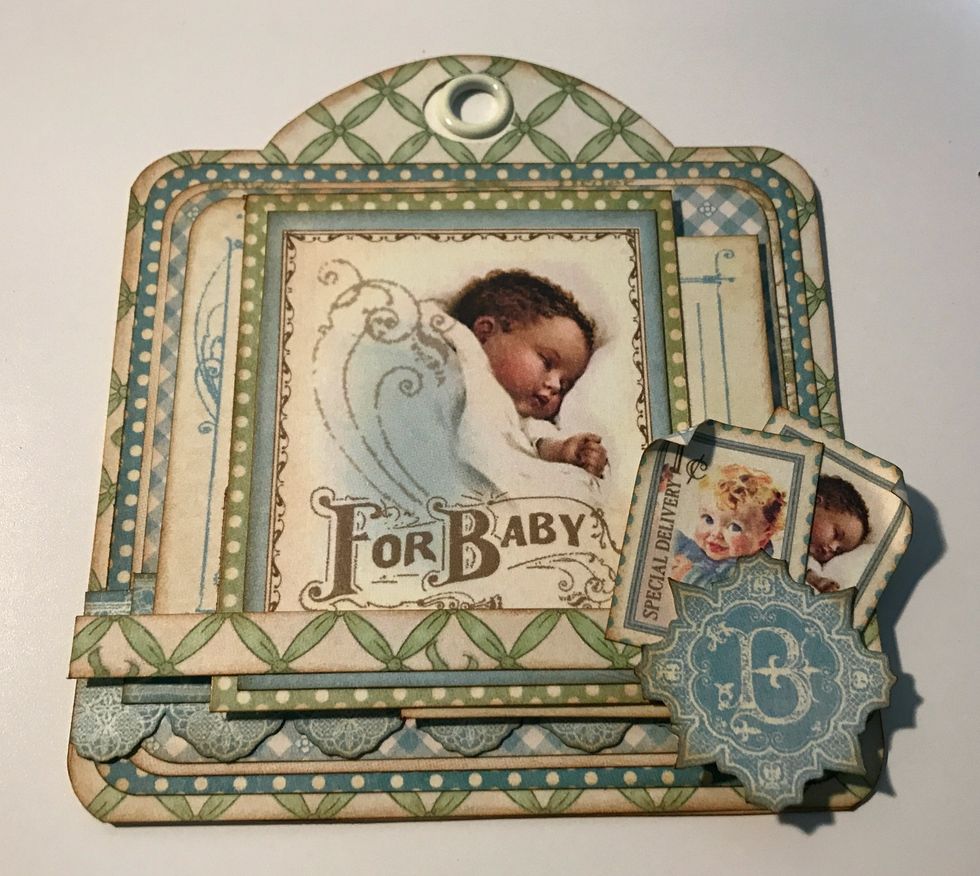
In the bottom right hand corner of the baby image, adhere the B image and two postage stamps. Roll one corner down on each postage stamp.
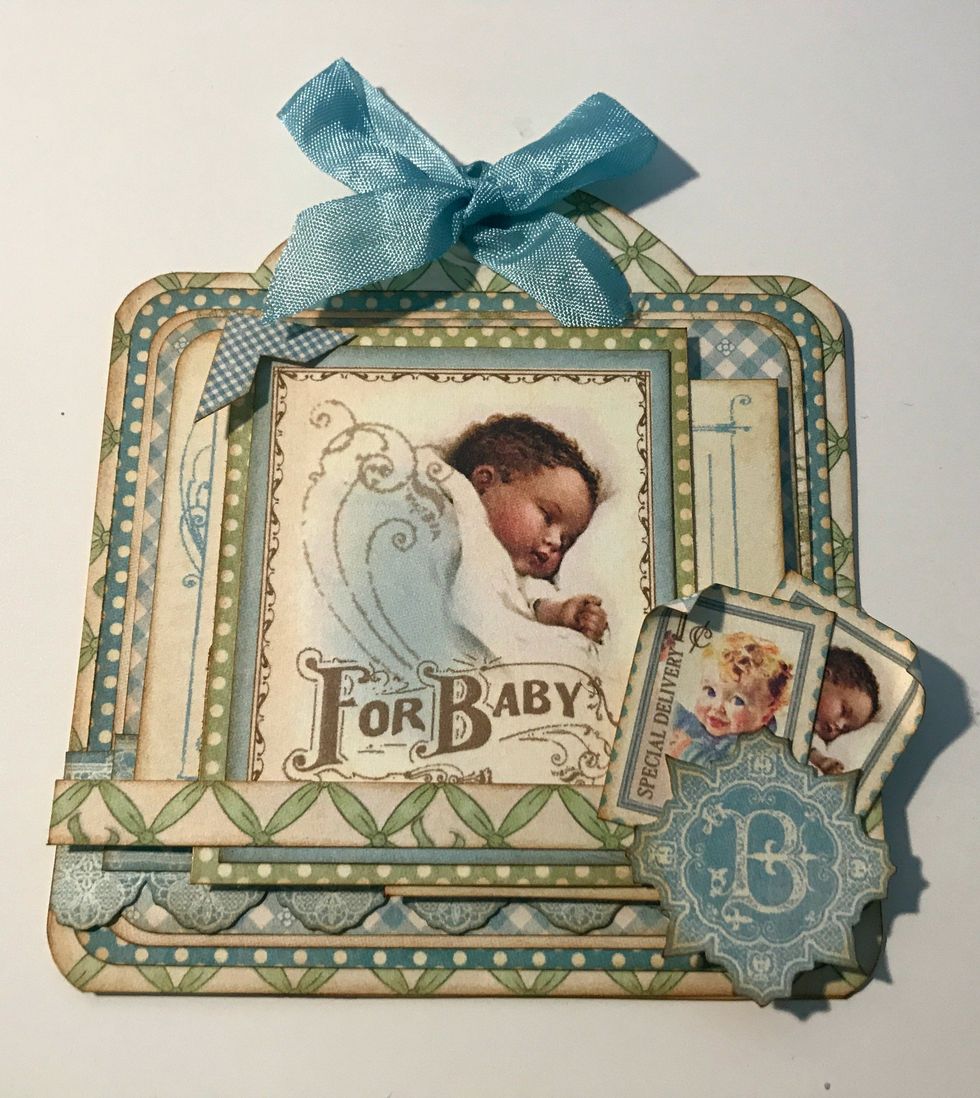
Add a blue checkered photo corner sticker on the top left hand side of the baby image. To finish the top of the tag, add a light blue ribbon bow.
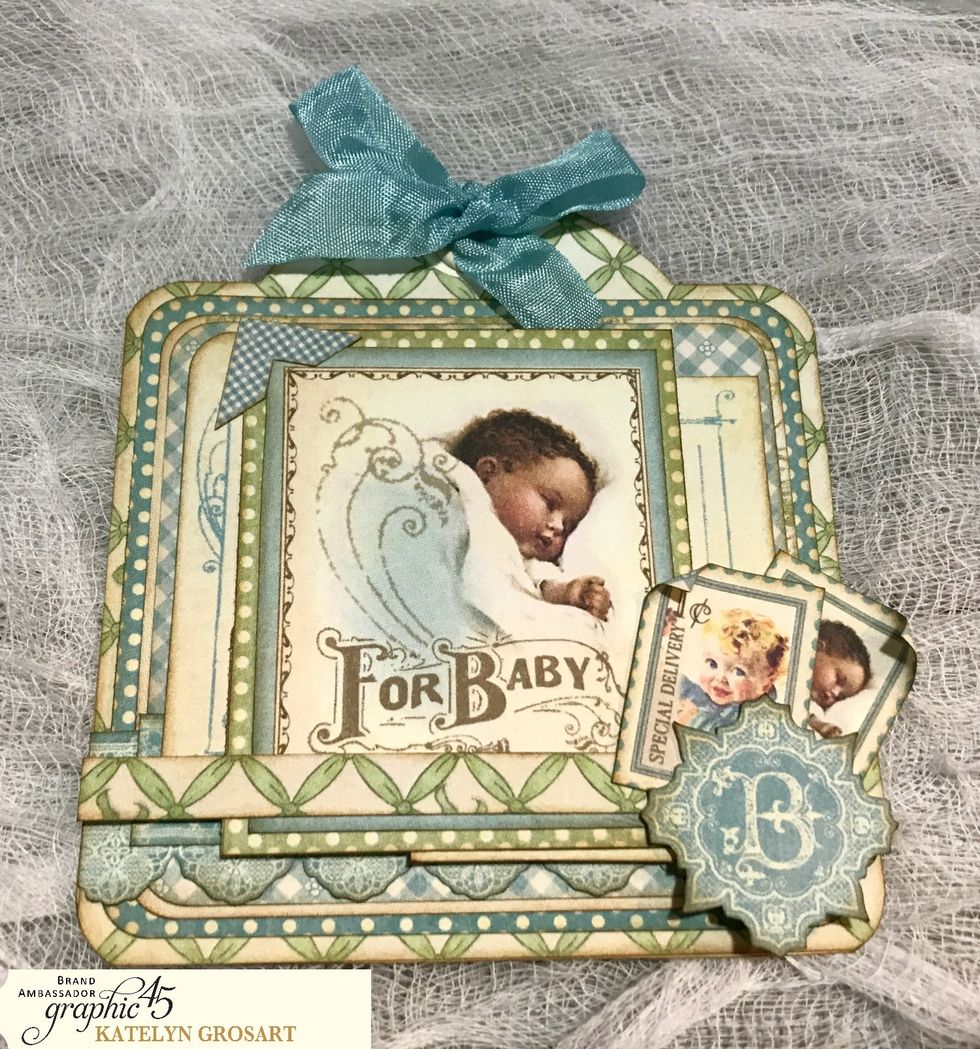
The boy version of the Baby Gift Tag is now complete.
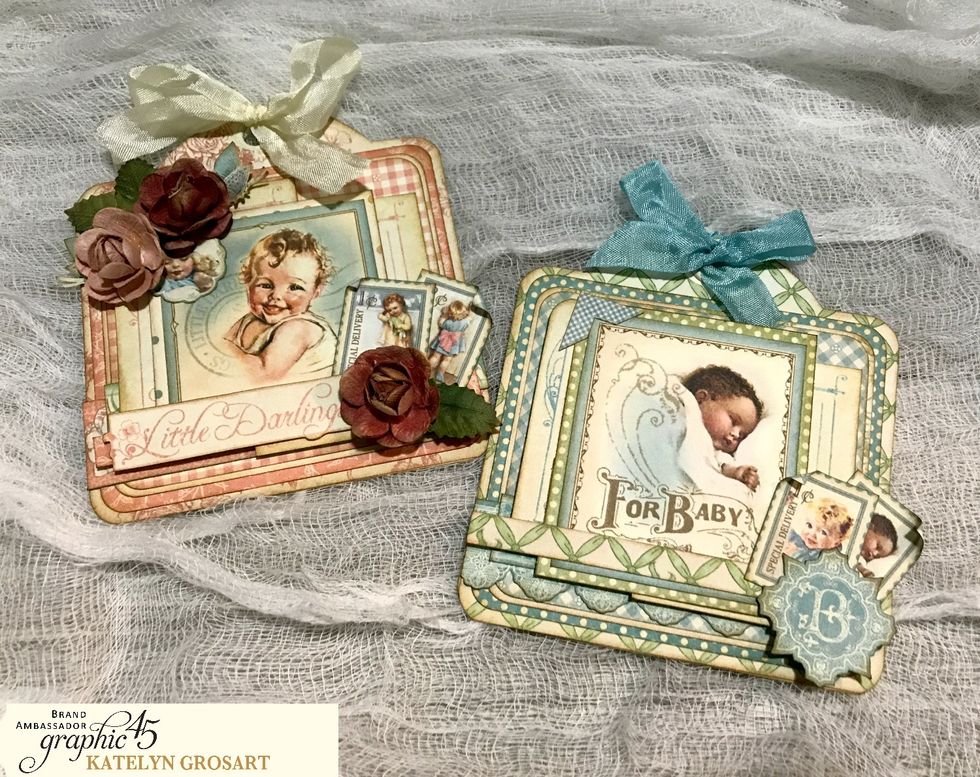
Your set of Baby Gift Tags are now complete.