The Conversation (0)
Sign Up
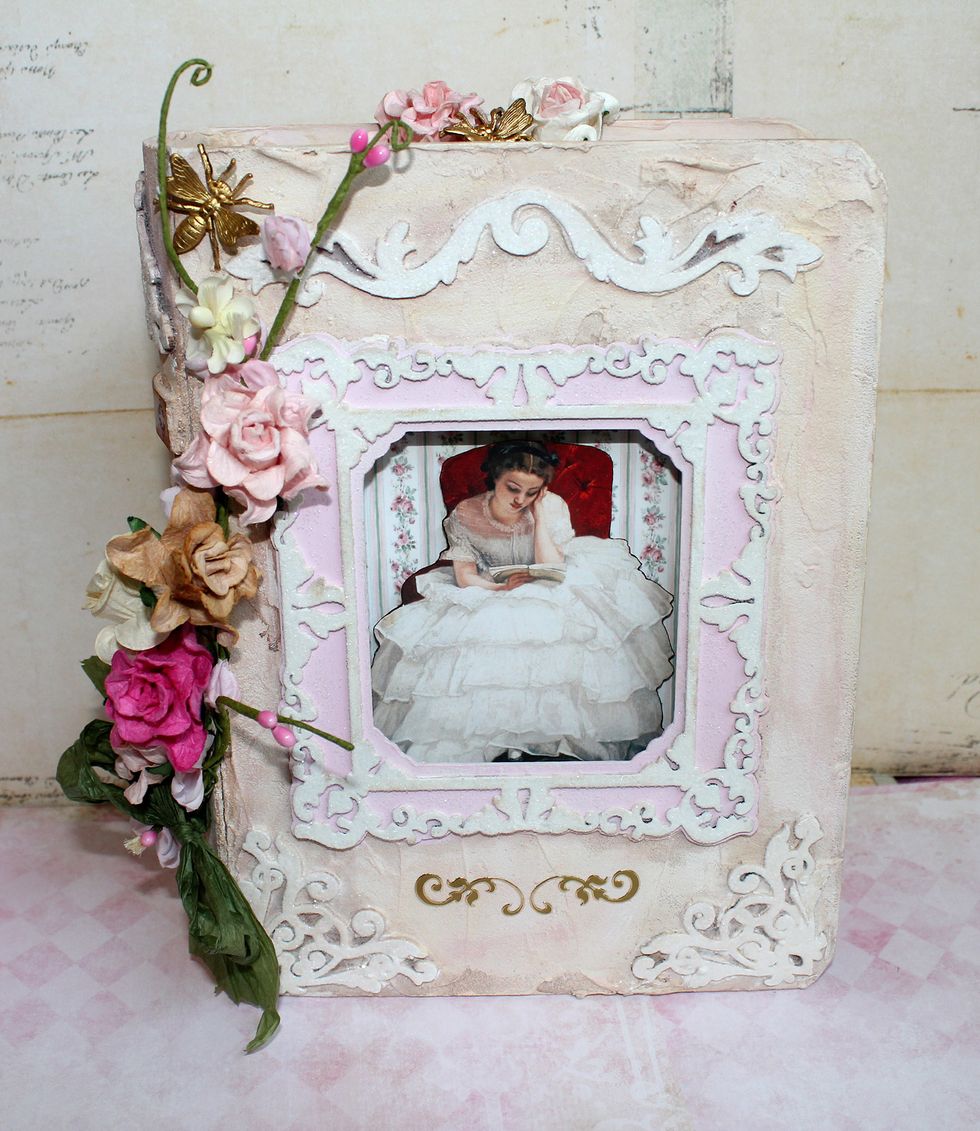
Front view. The young woman is inset into the cover. The book is a frosted confection of cocoa, cream, and strawberry pinks, and sprinkled with sugar. Sounds better than texture paste and paint. :)
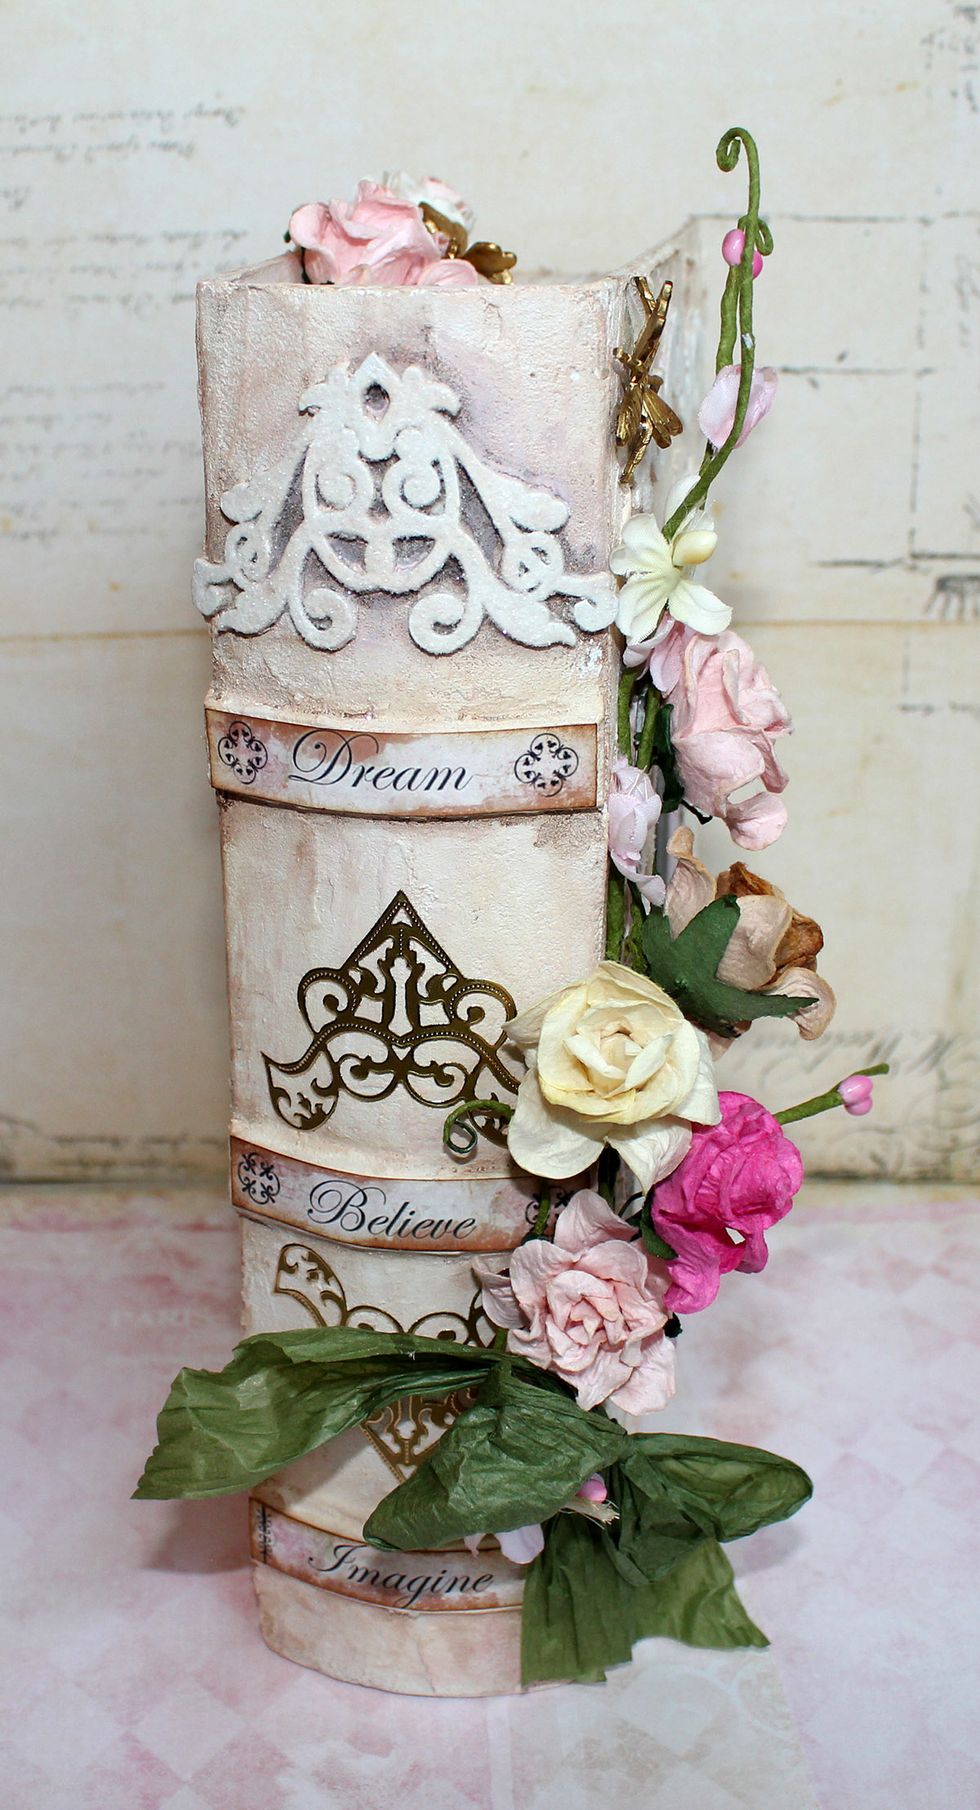
Side view. Flowers in the same sweet colors of cocoa, pink, and cream wrap around the spine. Title bars of inspiration and gold filigree complete a delicious and inviting look.

Back view. A sweet texture and more frosting and delicate chipboard elements grace the back. A key hangs on a gold and pearl chain...a key to unlock the charm and knowledge inside the books we love.

The inside cover features a lovely Victorian lady enjoying her books. She looks so comfortable on her settee, and it looks like she doesn't want to be disturbed.
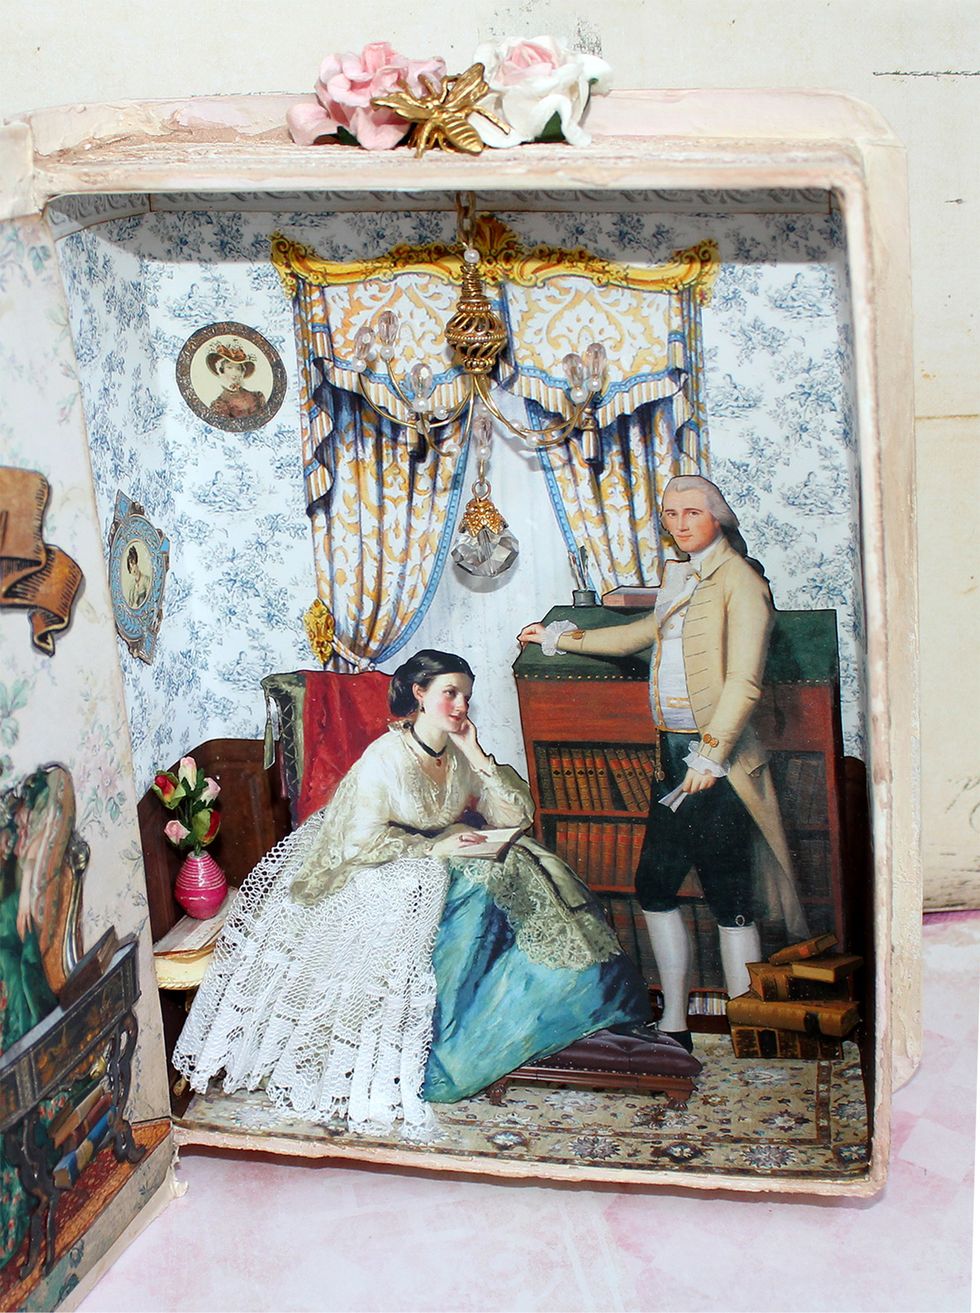
Inside is a diorama of a couple in their sitting room. A chandelier hangs as a lovely compliment to the elegantly appointed furnishings, including a dimensional table and vase of flowers.

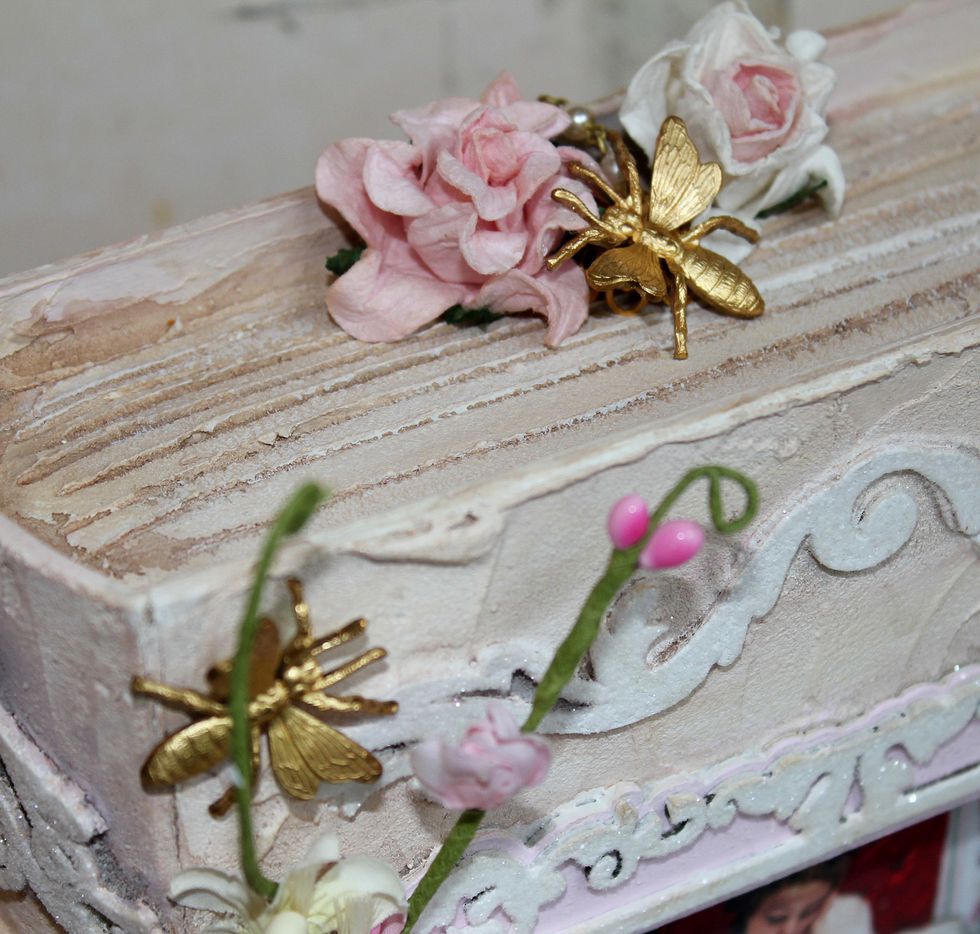
A detail shows the texture, some sweet gold bees on the flowers, and the texturing of the faux pages.
Looks like lots of steps but also lots of photos. I learned some do's and don'ts here so please review the notes before you jump in...I'll tell you how it can be improved upon as we go along.
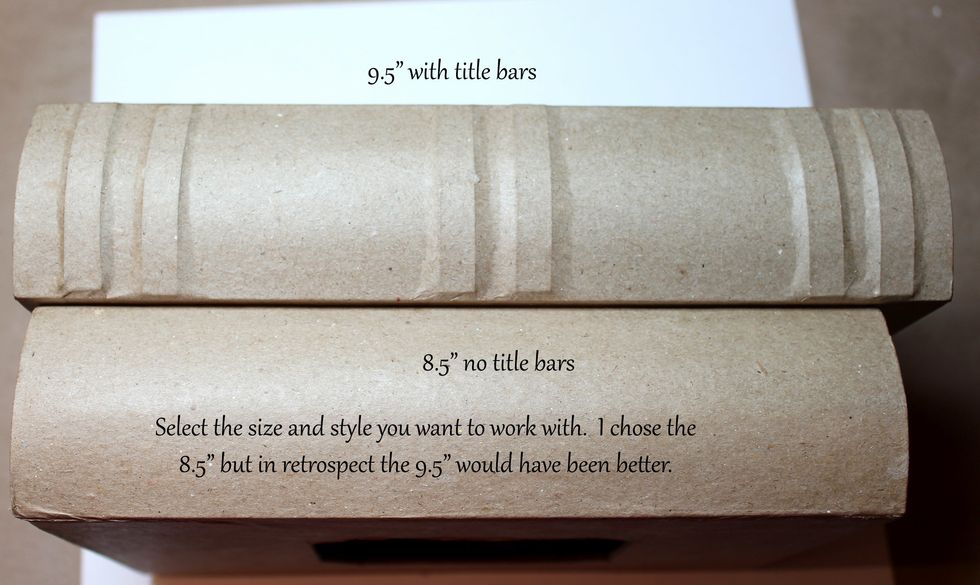
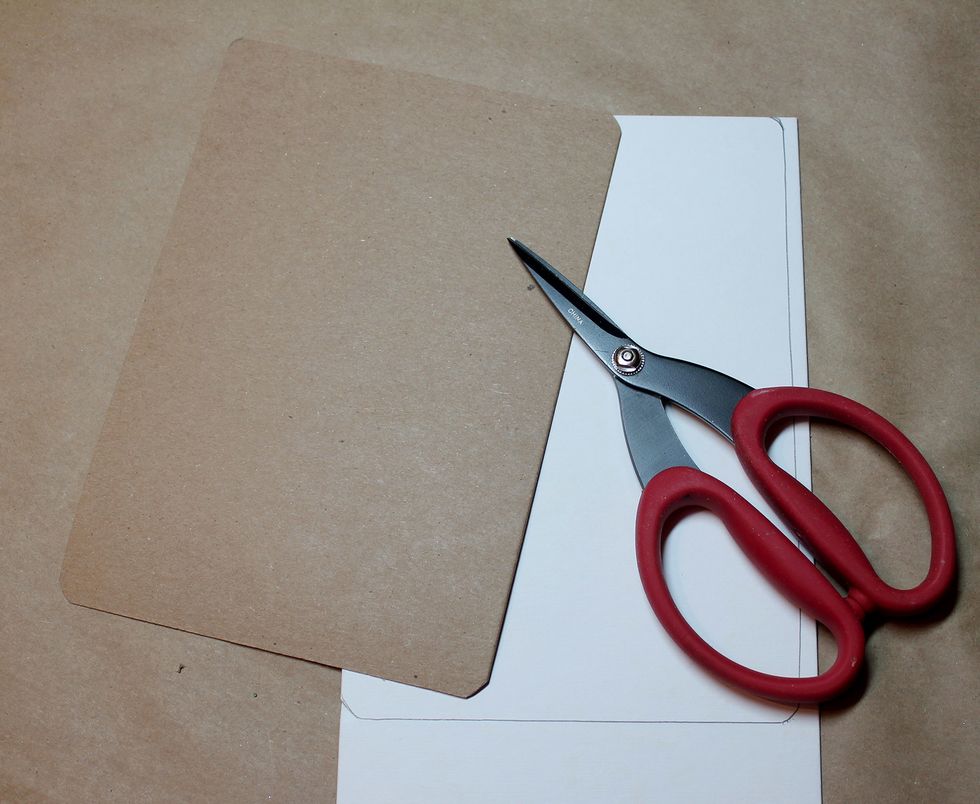
I used the 8.5" book but the 9.5" is better. It already has title bars and is long enough to hang the chandelier if you decide to do one. Depth and width are the same with both books.
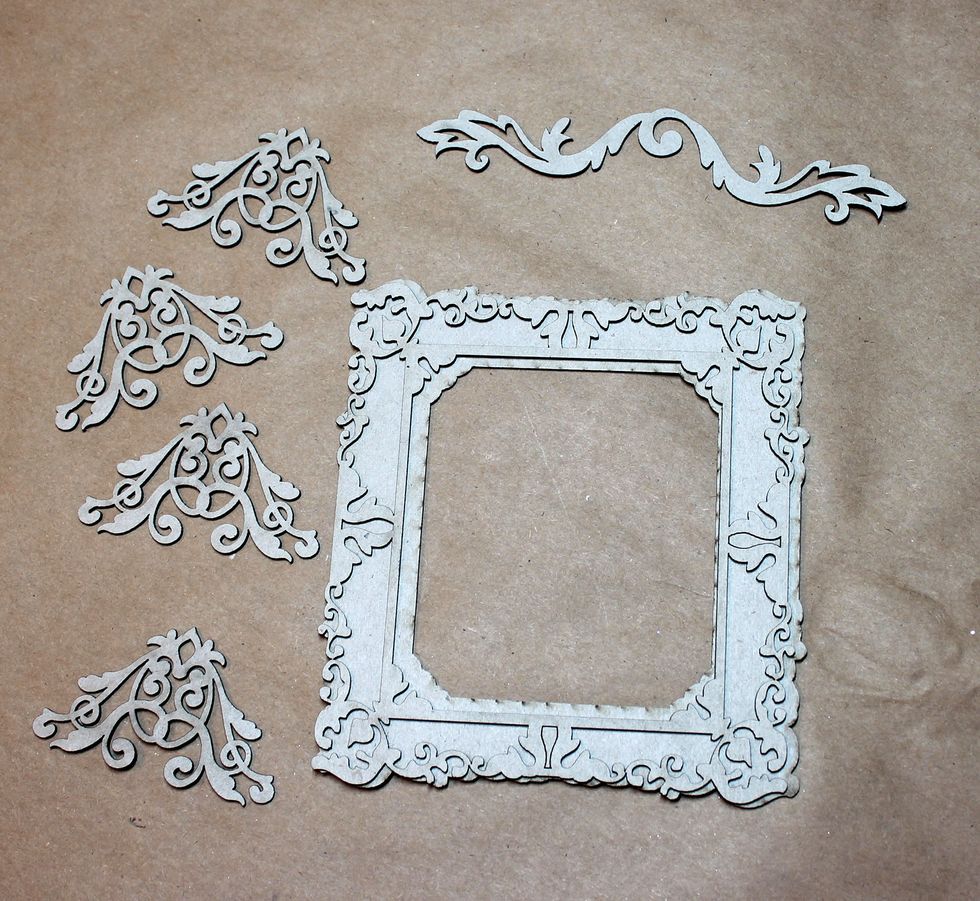
The frame, corners, and decoration I used (added a couple more for the back later). These are all Blue Fern Studios pieces but Dusty Attic has similar delicate pieces.
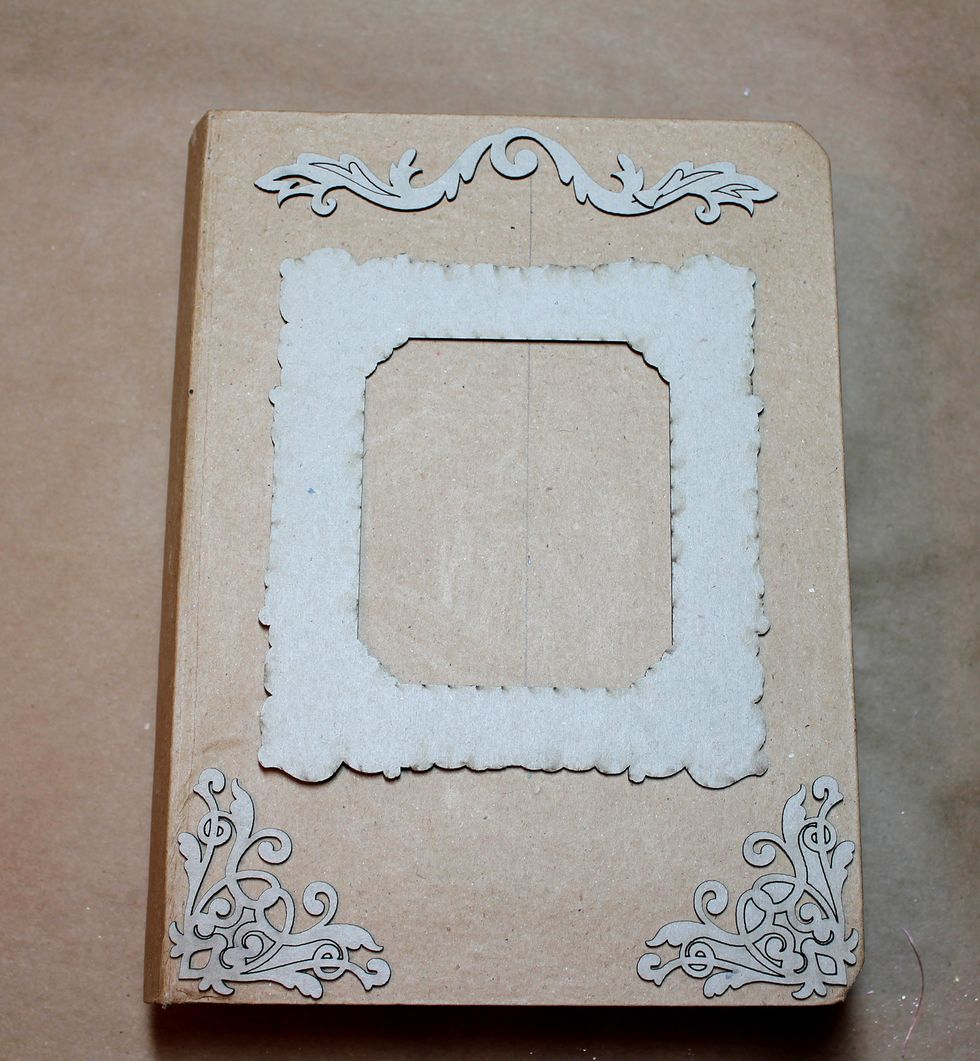
Measure where you want your pieces to be on the box. The 9.5" box would allow more room if you wanted it.
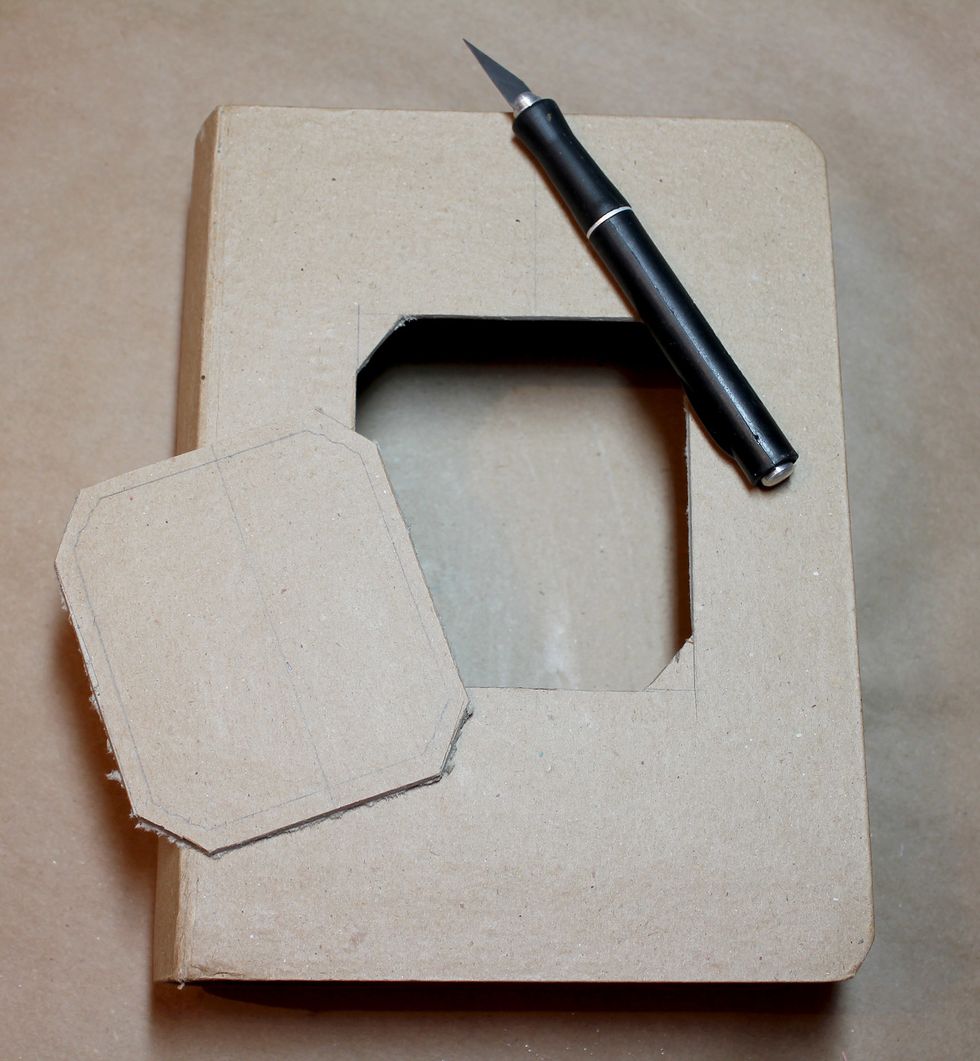
Cut your frame shape out of the front. Be careful, and patient. It takes a number of cuts to get through the cover.
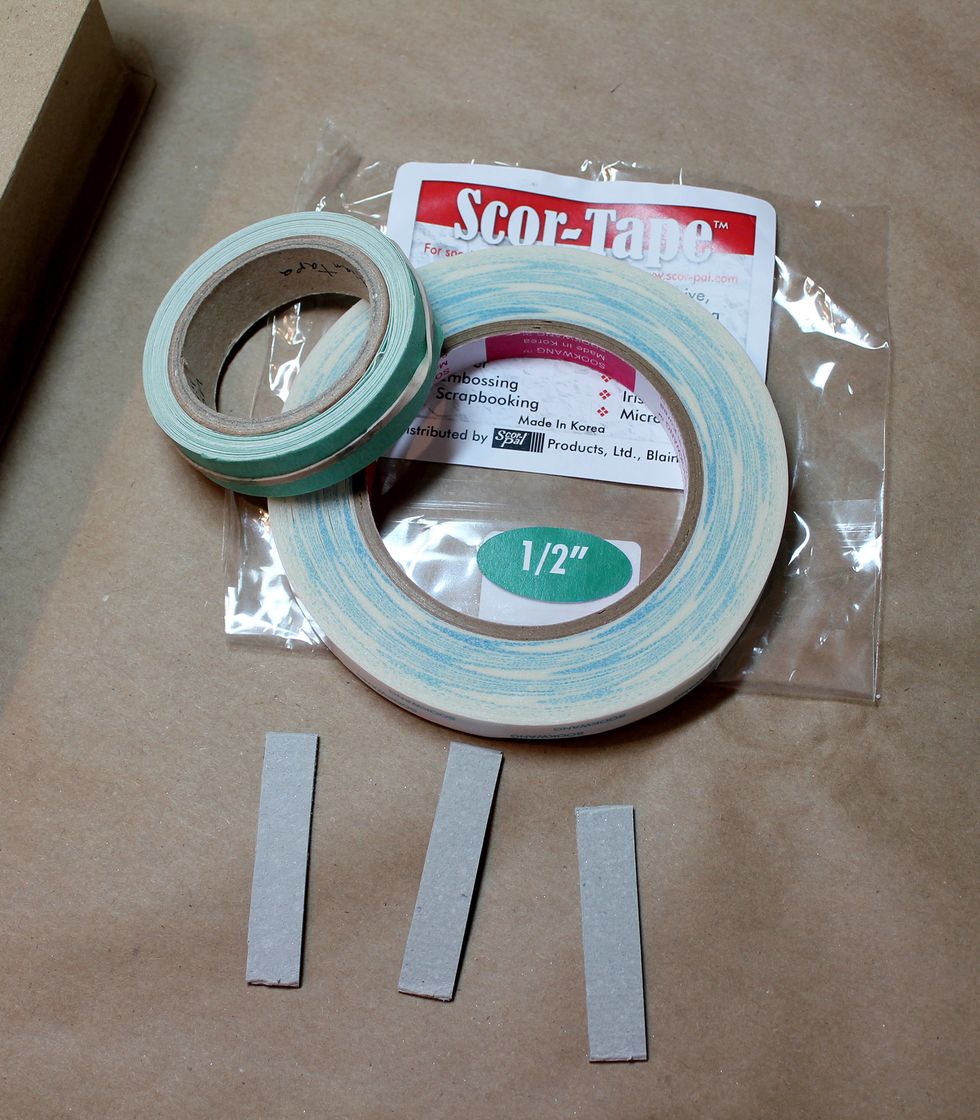
Scor tape or glue. The rubber banded roll is a decorative masking tape. Good for decoration... but not good here. Use regular masking tape if you need it. 1/2" strips of grunge board. (optional)
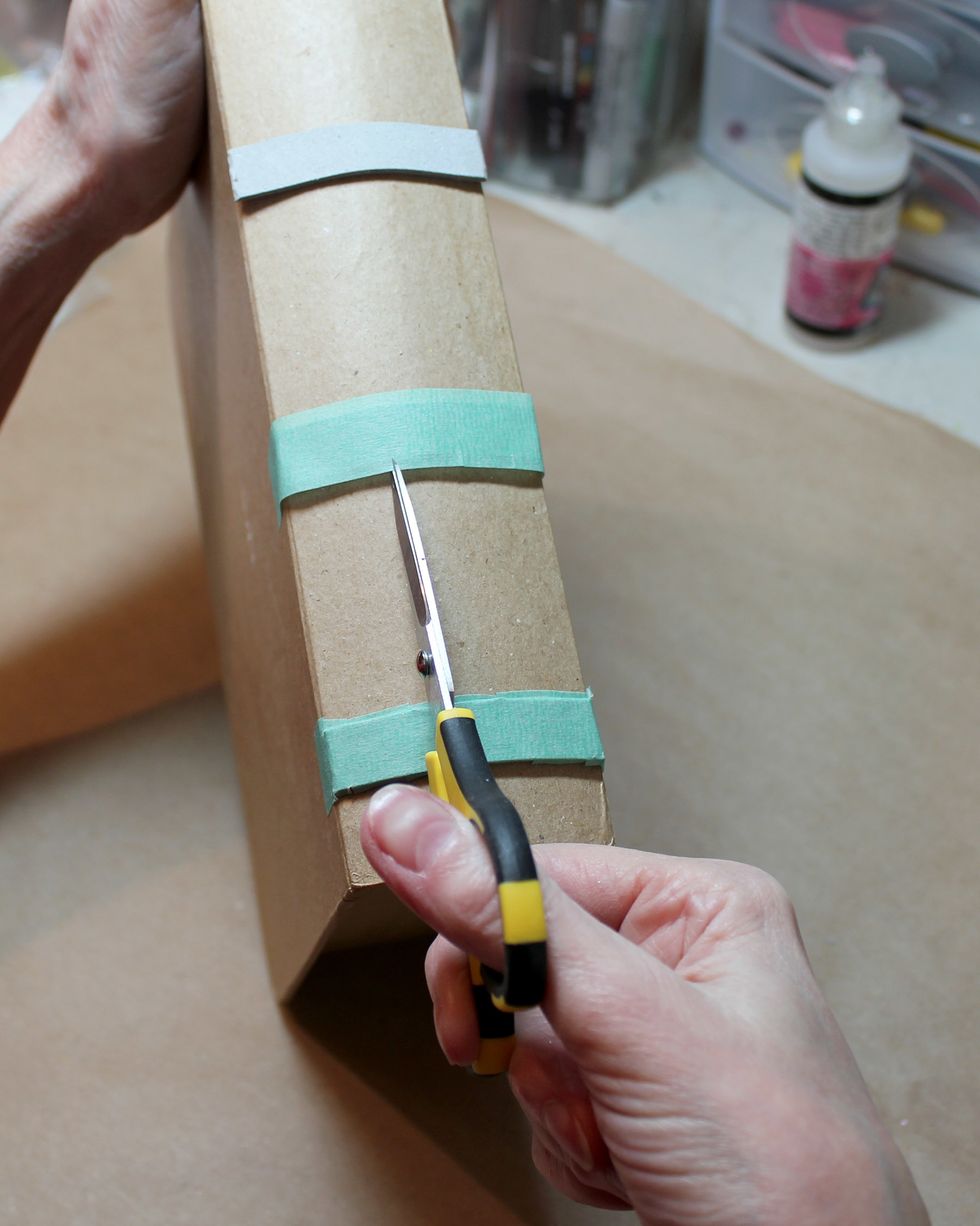
To add title bars I doubled up my grunge board strips and glued down. For a clean line I covered with the masking tape. It wasn't wide enough, didn't stick well, and the green was hard to cover.
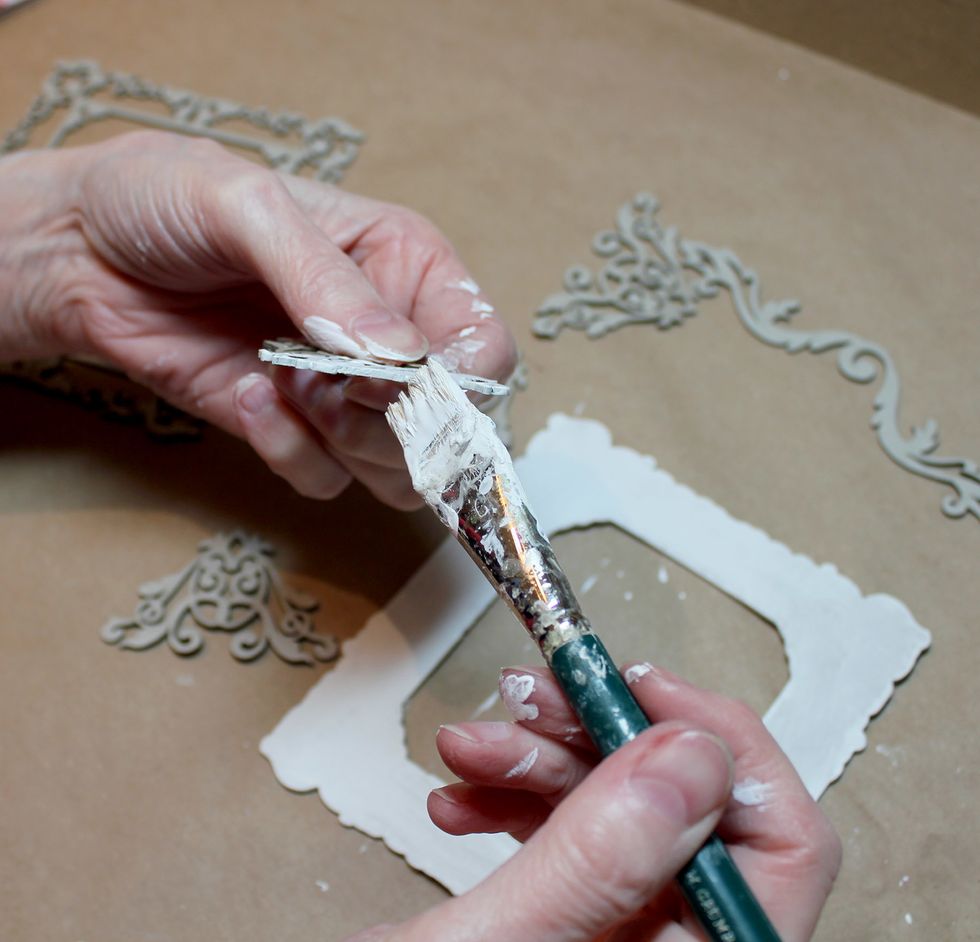
Cover all your pieces, including the box, with gesso.
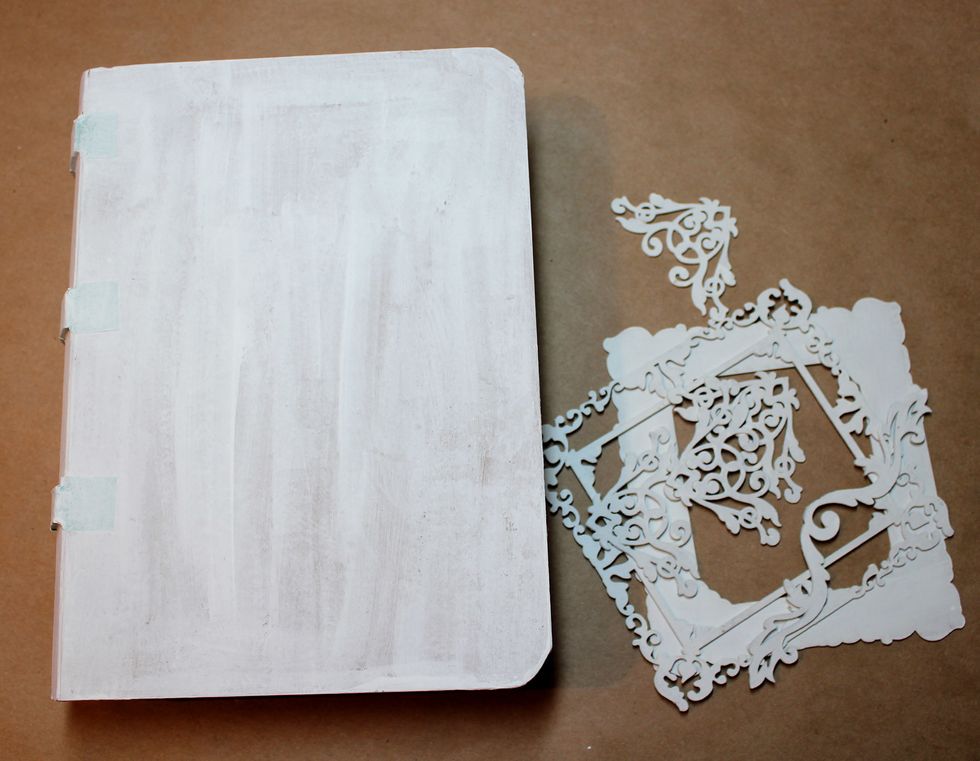
Gesso covered book and chipboard.
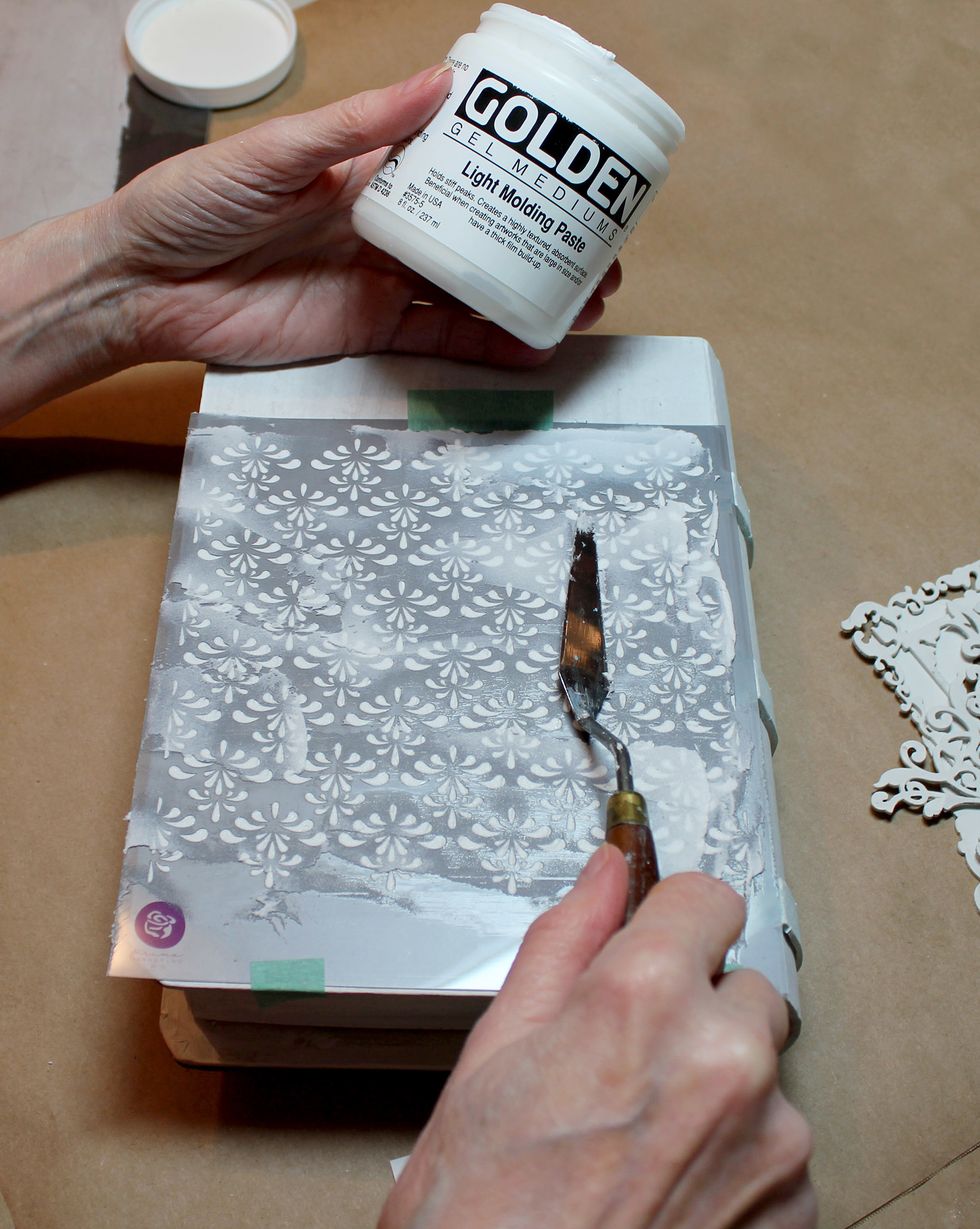
A 6x6 stencil provided a lovely texture on the back (tape to hold). Spread paste like frosting. Lift stencil carefully. **See step 17...just in case** Let dry thoroughly (like overnight).
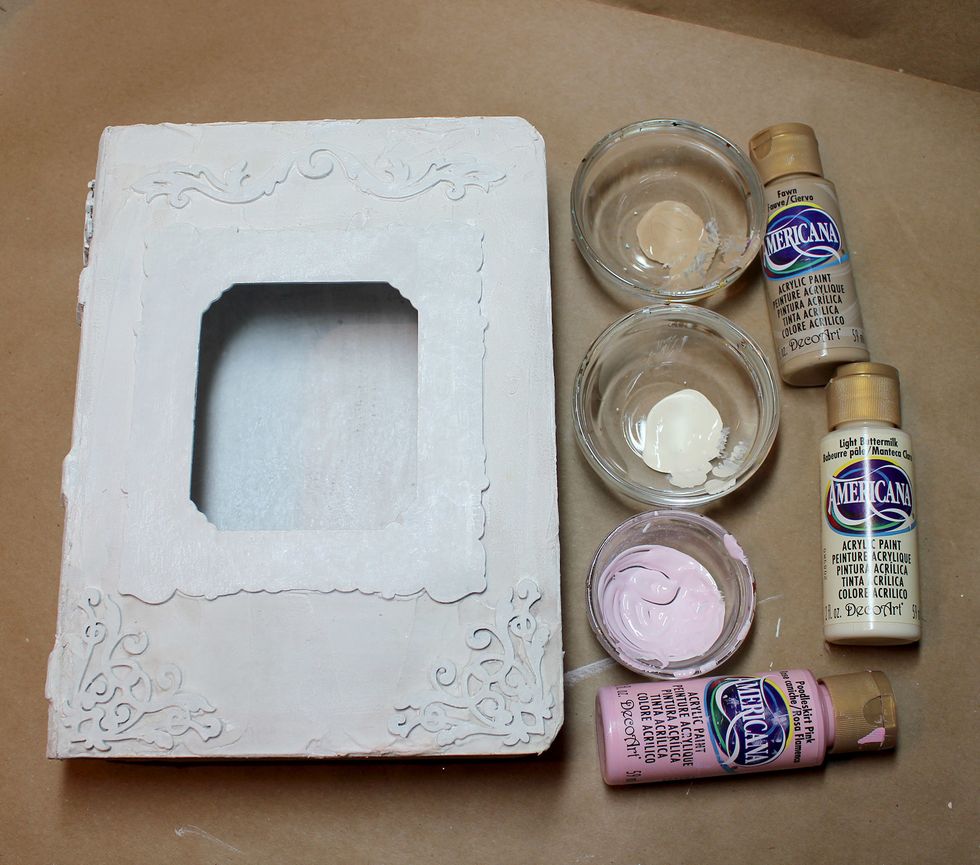
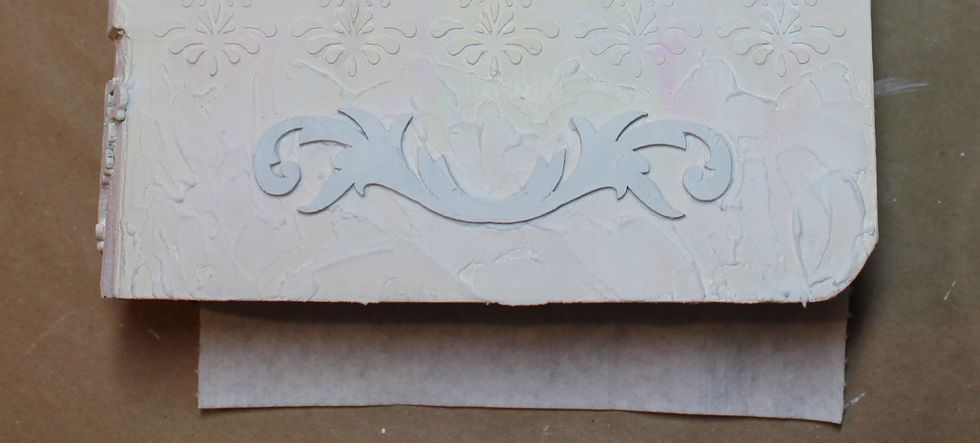
I added a frosting-like texture to the front and spine. I inset my chipboard pieces into the texture. Let dry over night. Yes, again. :) Paint is Poodleskirt Pink, Light Buttermilk, and Fawn.
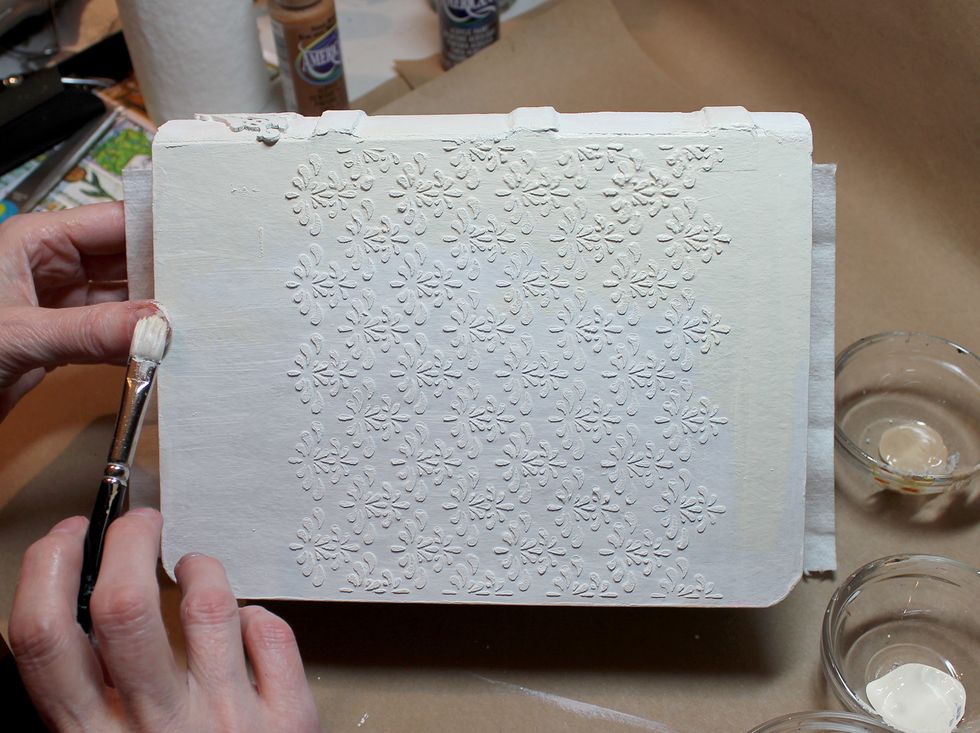
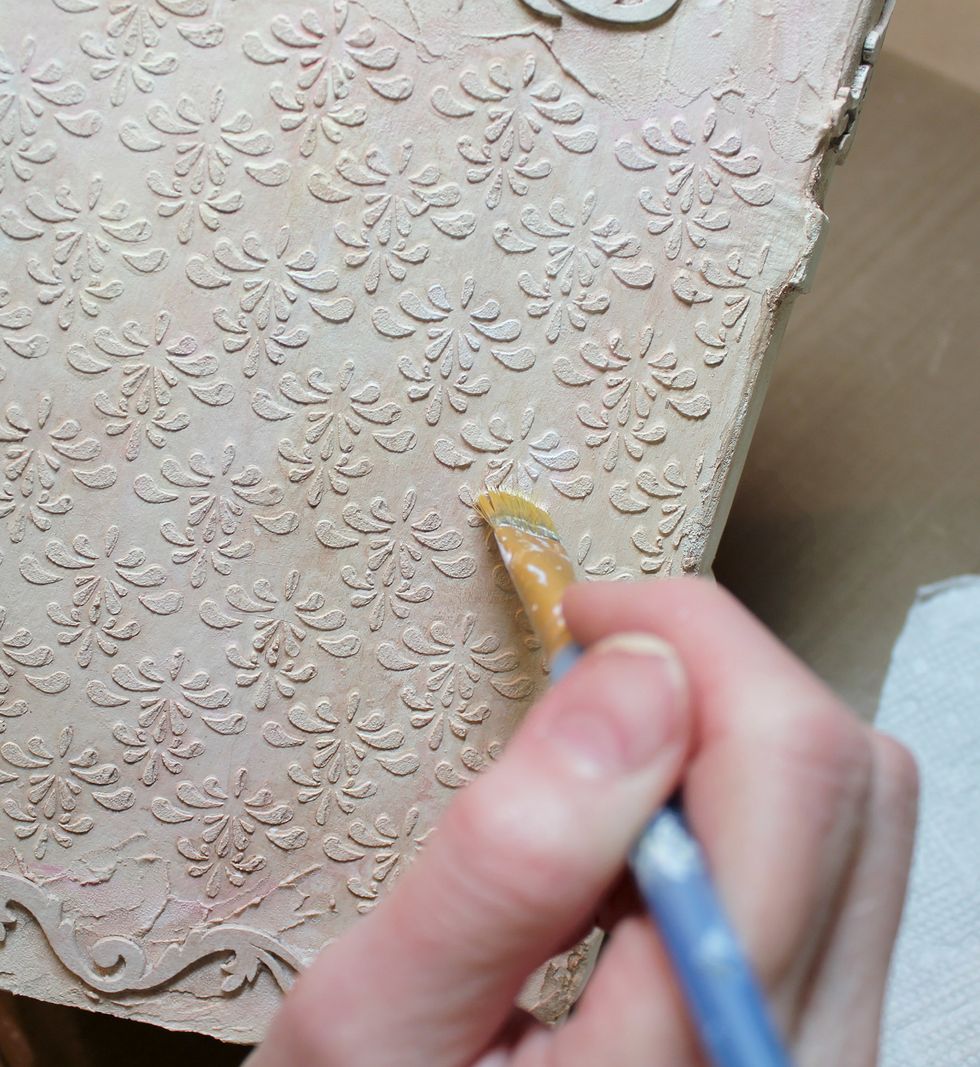
I use the same brush and blend my colors on the book. Start with some Buttermilk...

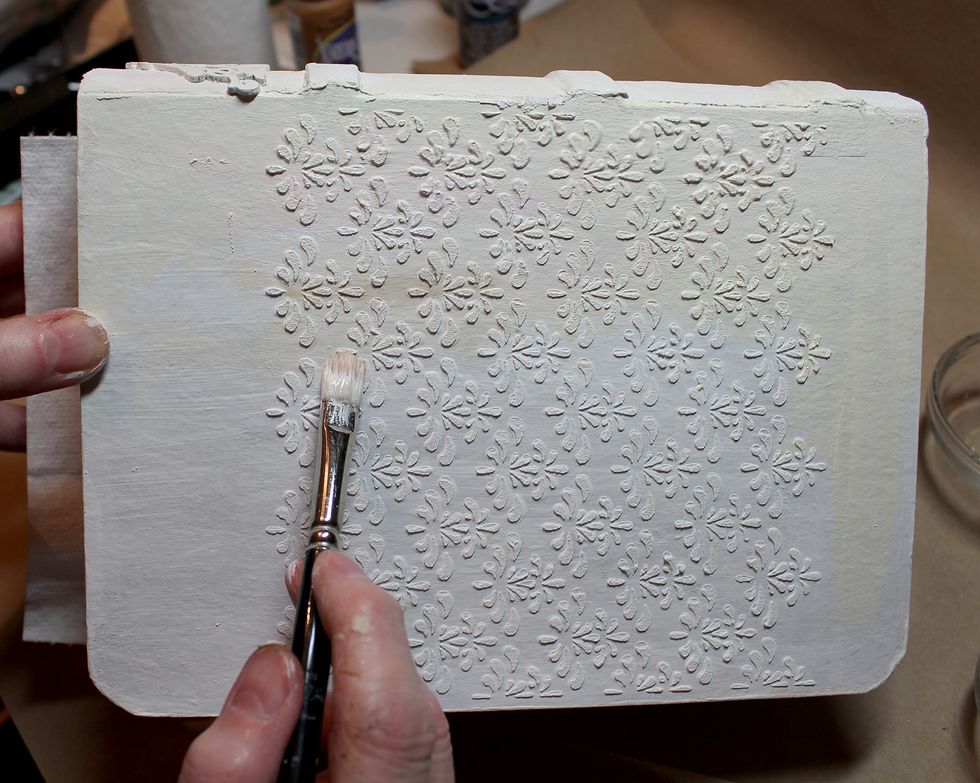
Pick up a little pink on the same brush...
And blend it in here and there. Then more buttermilk, and more pink. Problem arose...the green tape is too obvious. See arrow.
Blend in a little fawn if you like... Add buttermilk to keep it light. Keep missing pink, buttermilk, and fawn to the mix.
To fix where the tape was showing...and AFTER I'd started painting the back...I added more texture paste and chipboard. Let dry thoroughly.
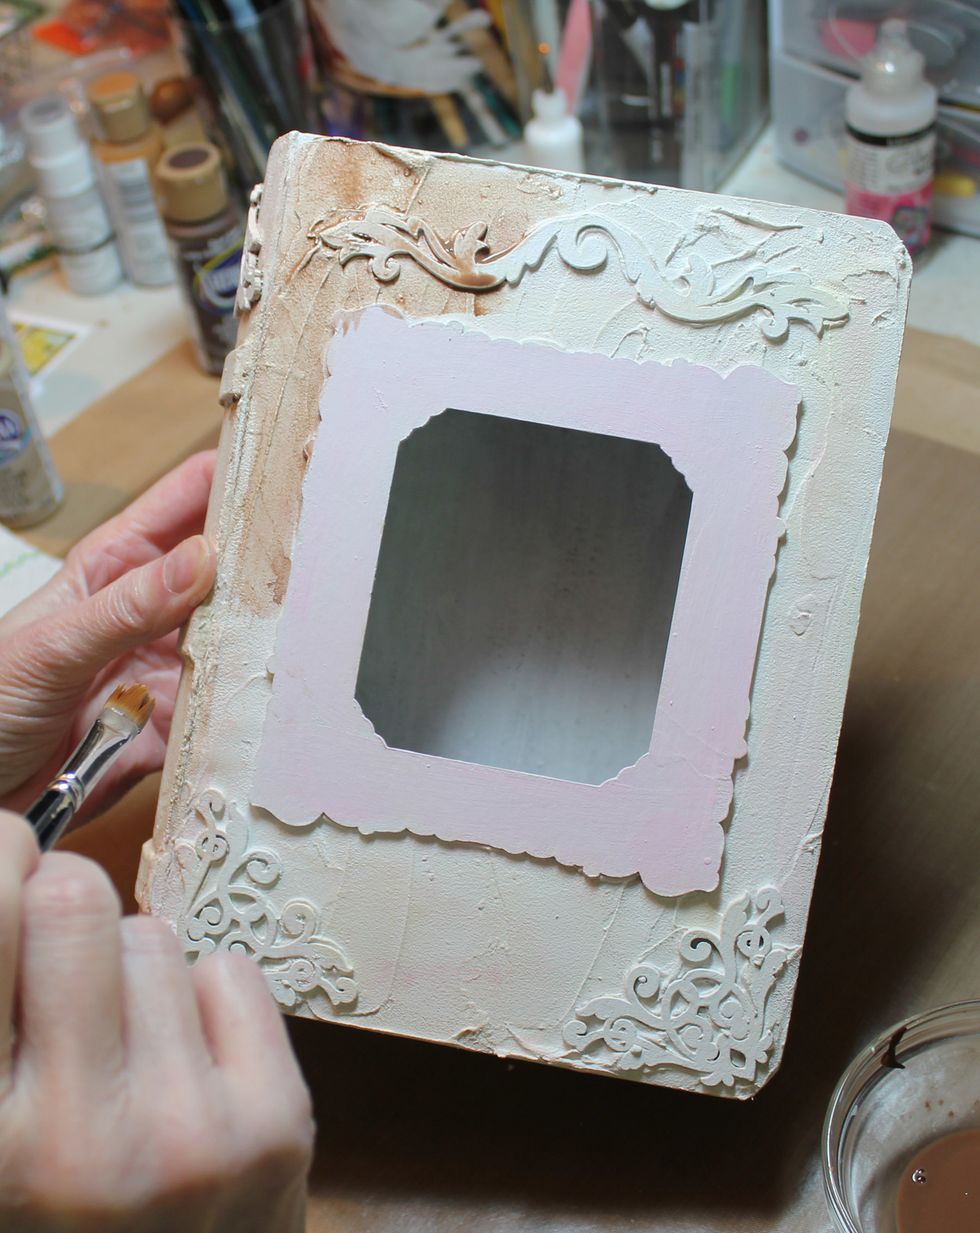
Paint the frame pink. Once texture is painted and dry do a light wash of Burnt Umber. Work one area at a time...

...and wipe back. I was going for a coco color to go with my buttercream and pink berry confection.
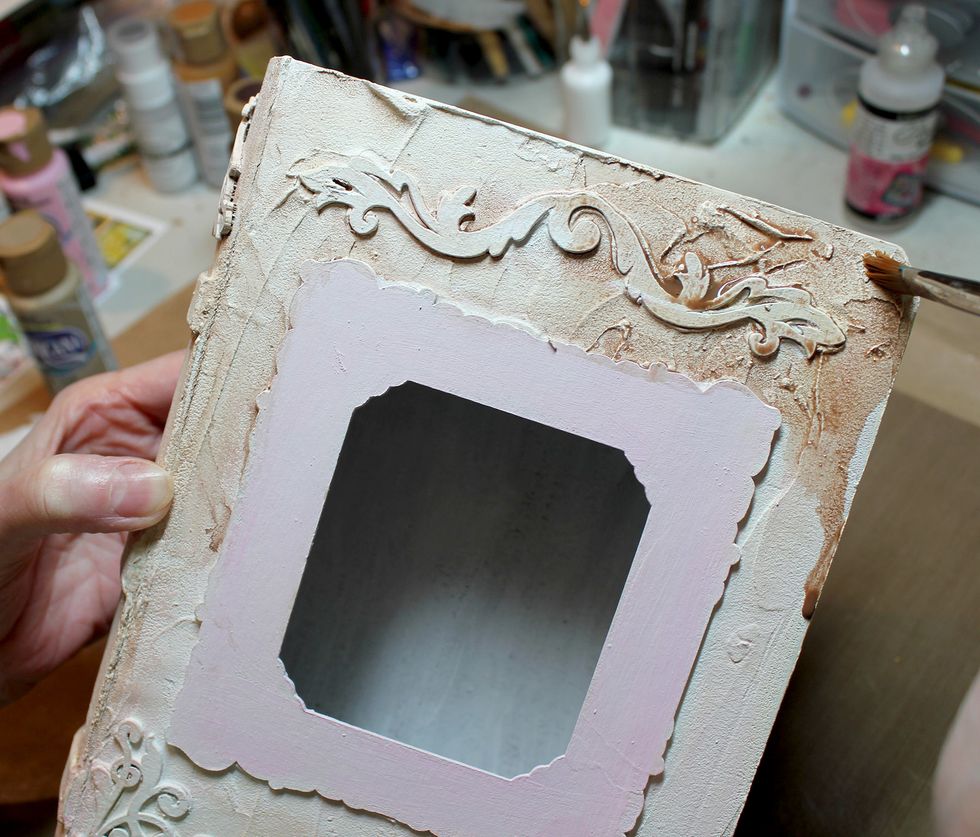
Continue working a section at a time with the wash.
Do a dry brush over some areas (especially back) to bring out some texture highlights.
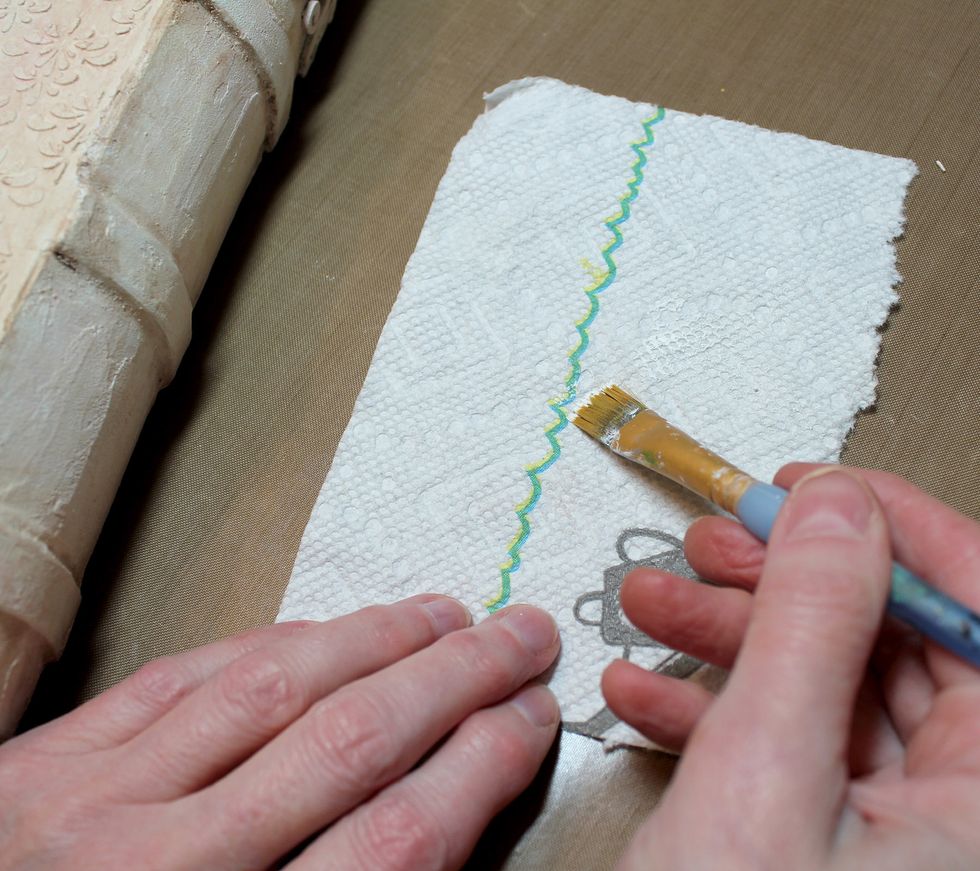
Dry brush over texture. Later I decided I wanted it to show more so carefully drew a flat brush with a bit of white paint over the texture. You can do now if you want more white on the pattern.
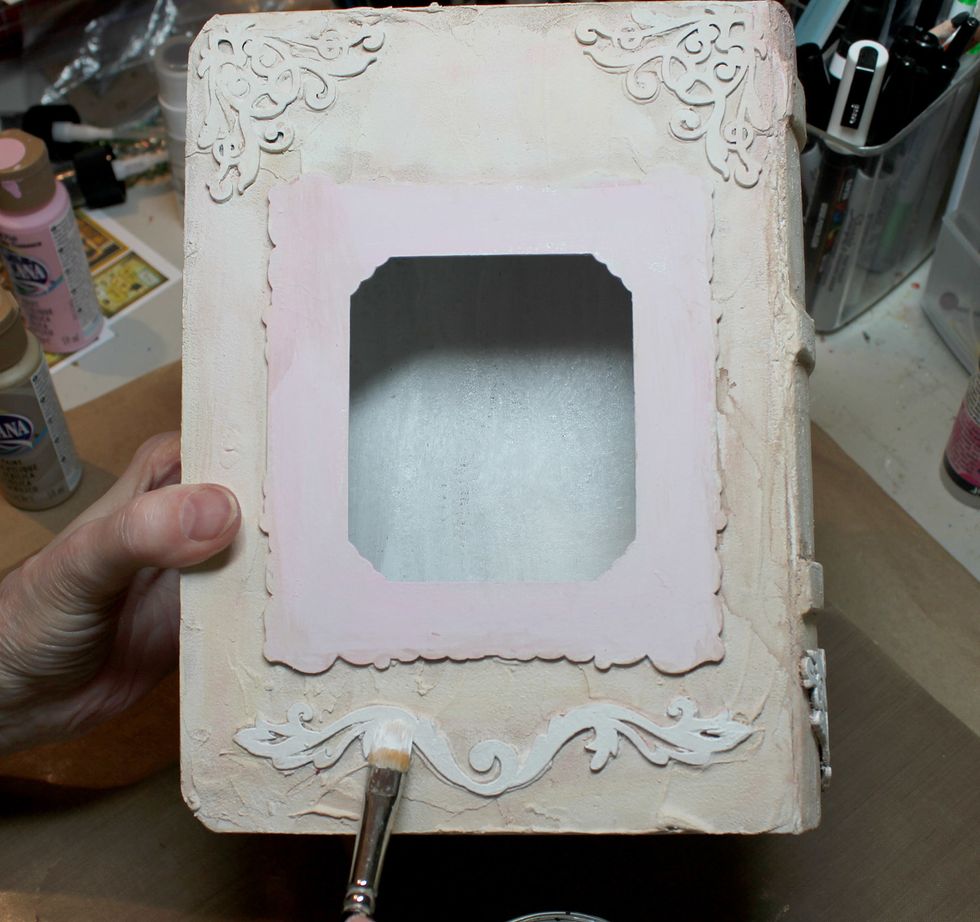
Touch up the pink, and repaint the other chipboard back to white.
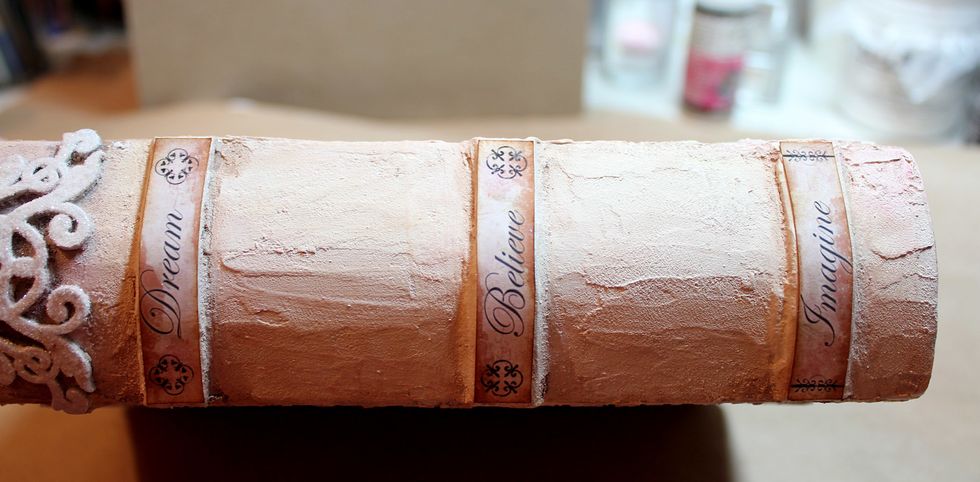
Add your book titles to spine.

I added some Dazzles Stacked Flourish stickers in gold.
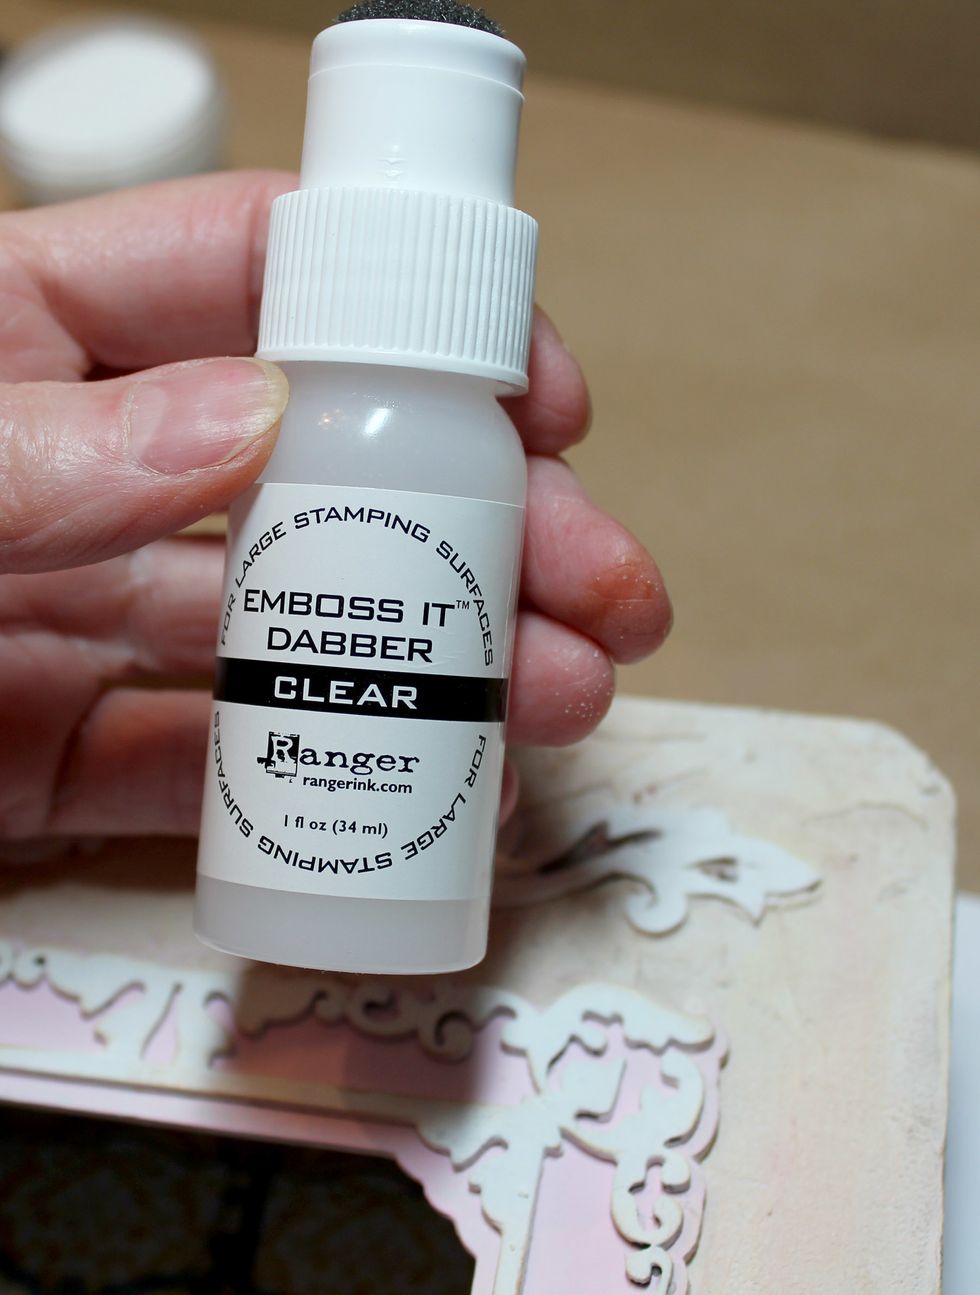
This is NOT the order I did this but it IS the order you should do it. You can use Glossy Accents or other adhesive in place of embossing ink or sticky embossing powder for the distress glitter.

If you choose to do this method then dab on the embossing ink. The dabber makes this really easy.
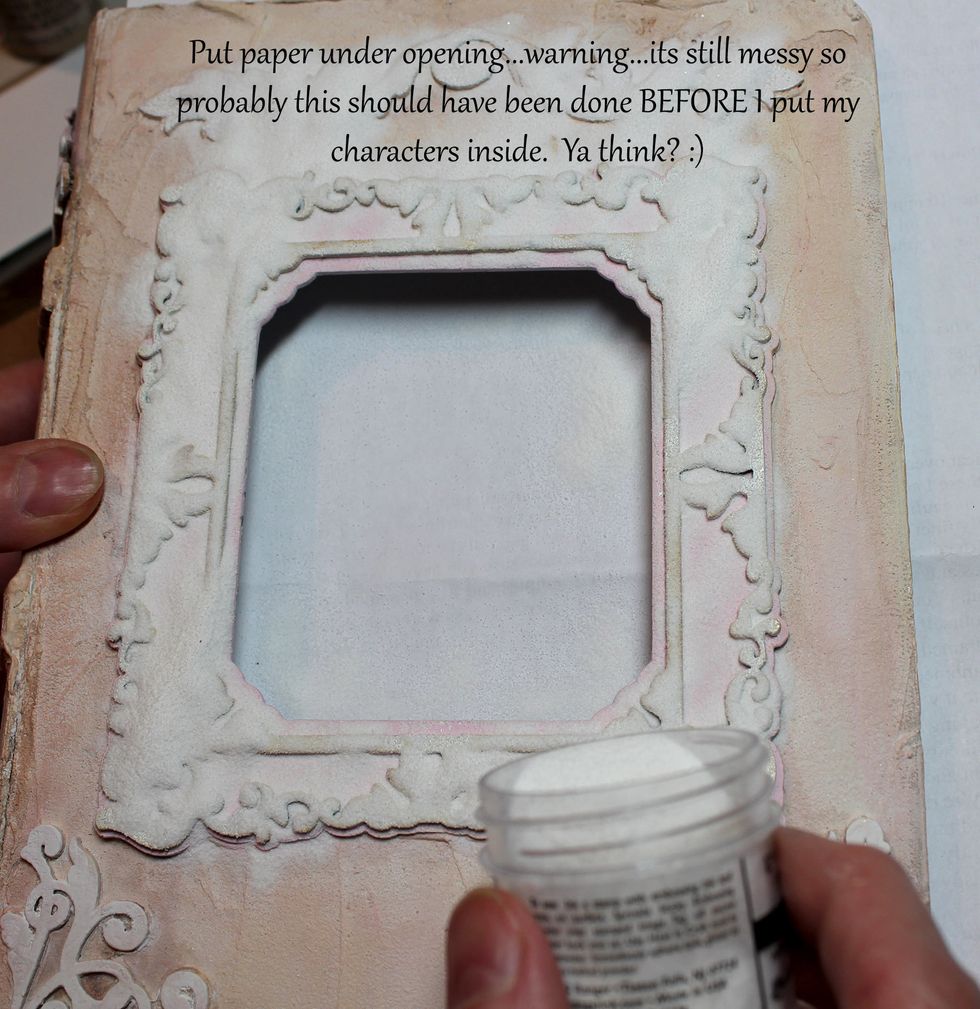
Sprinkle on the sticky embossing powder. Return excess to bottle. Work a section at a time. I'd already added my characters inside (mistake) and an empty book is so much easier to keep clean.
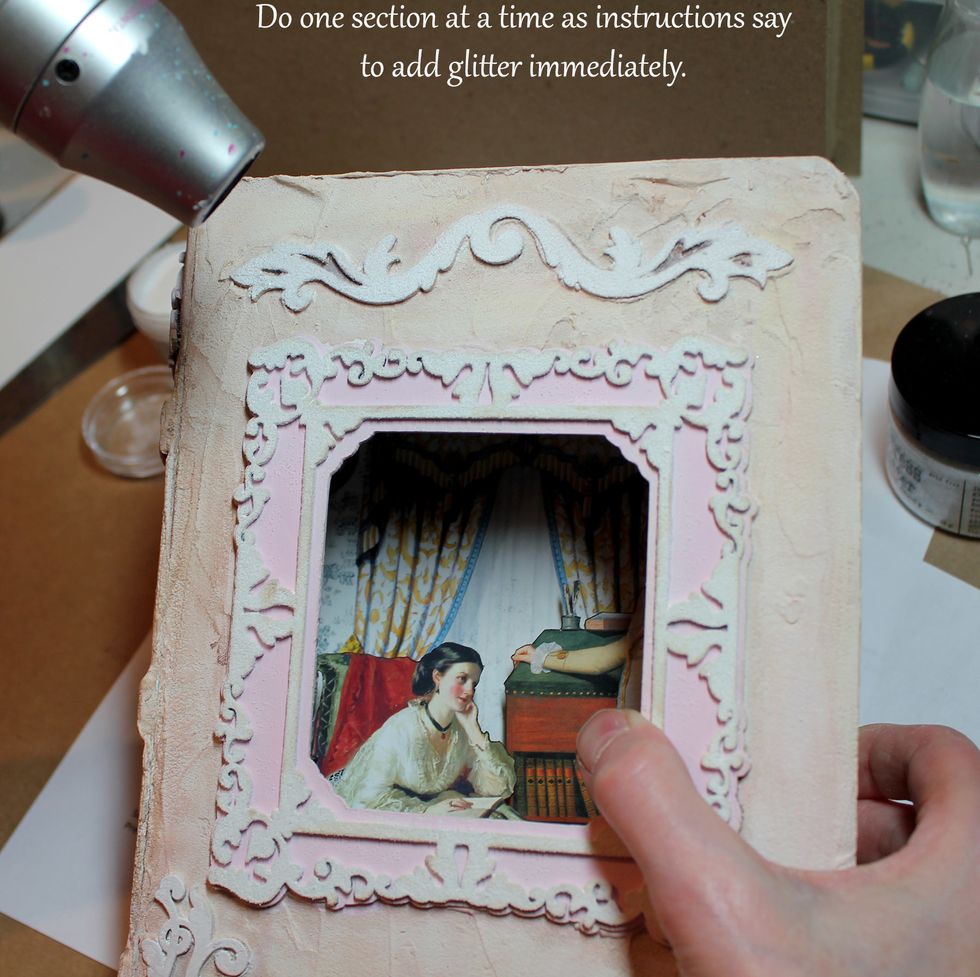
Do a section at a time and heat with heat tool. This turns moist quickly. :)
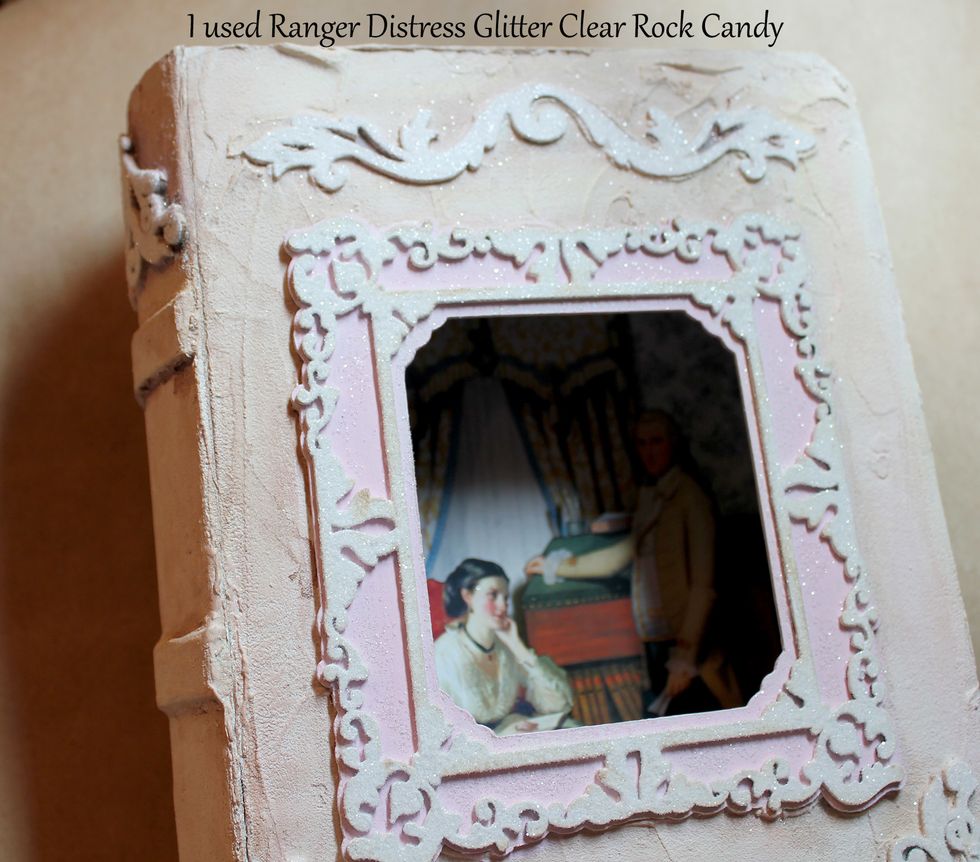
Sprinkle on your glitter. I used Distress Glitter, Clear Rock Candy. Again, work a section at a time and return excess to jar. You can see I added my characters too soon and glittered them!
The glitter tapped off easily enough, but it still would have been easier to be working with an empty book. :)
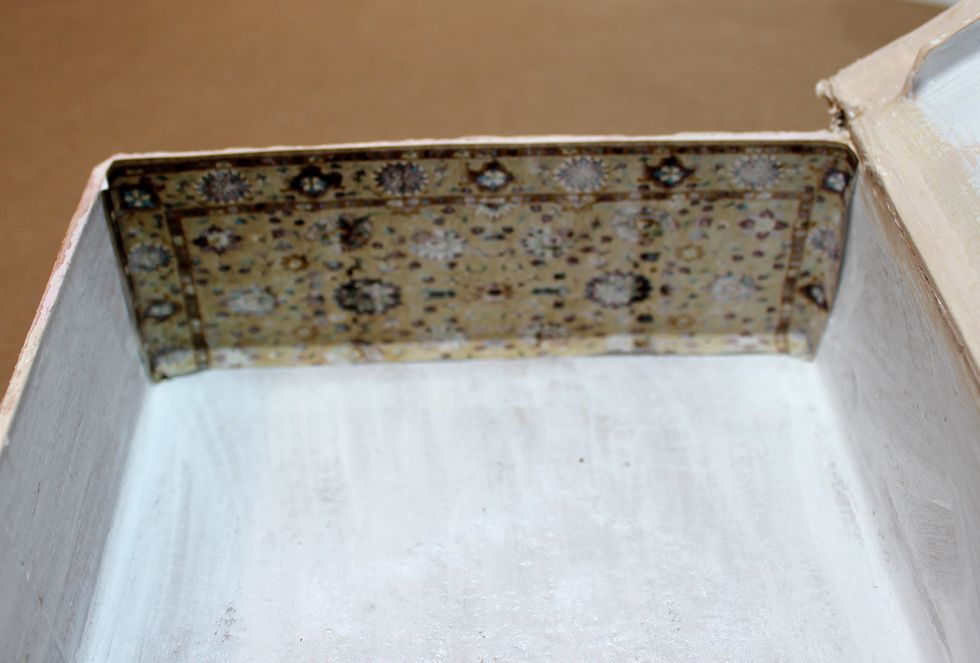
Begin building the interior. Start with the carpet. Cut to fit and turn up 1/4" on back and sides. Boxes are NOT totally square so make adjustments as necessary. Fit carefully before you glue!
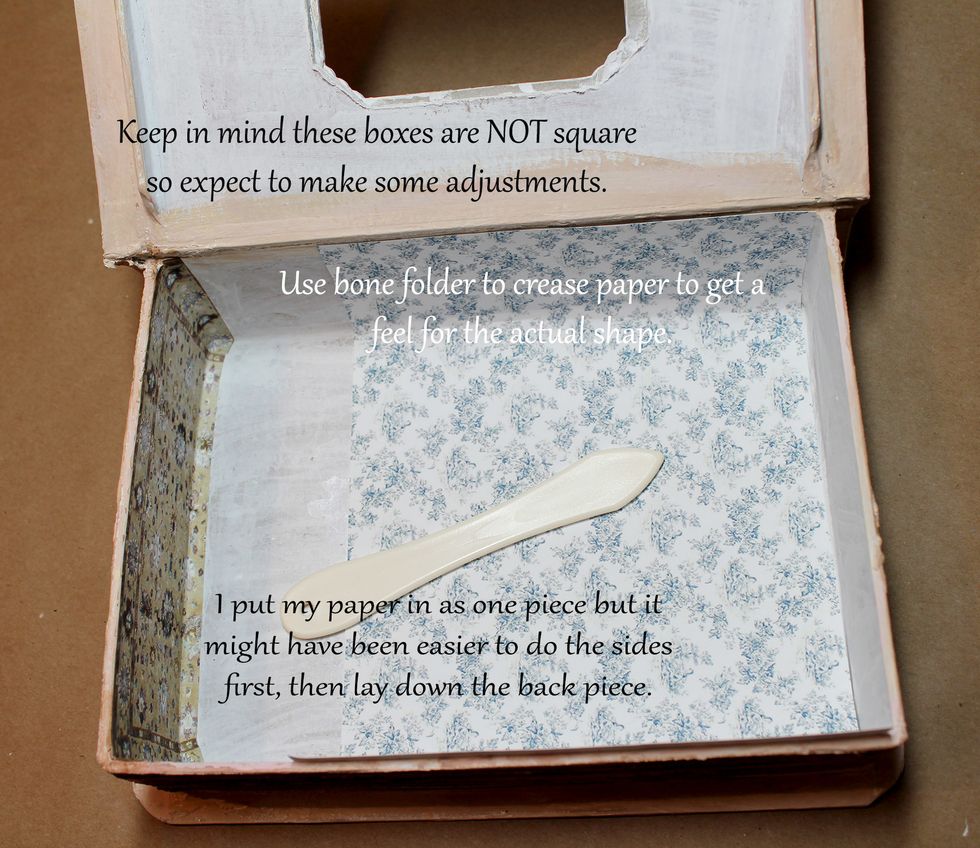
Next the wallpaper. (jennifersprintables.com) I suggest fitting the sides first with 1/4" edge onto back, then add the back piece. Next add the wainscoting, then the ceiling paper.
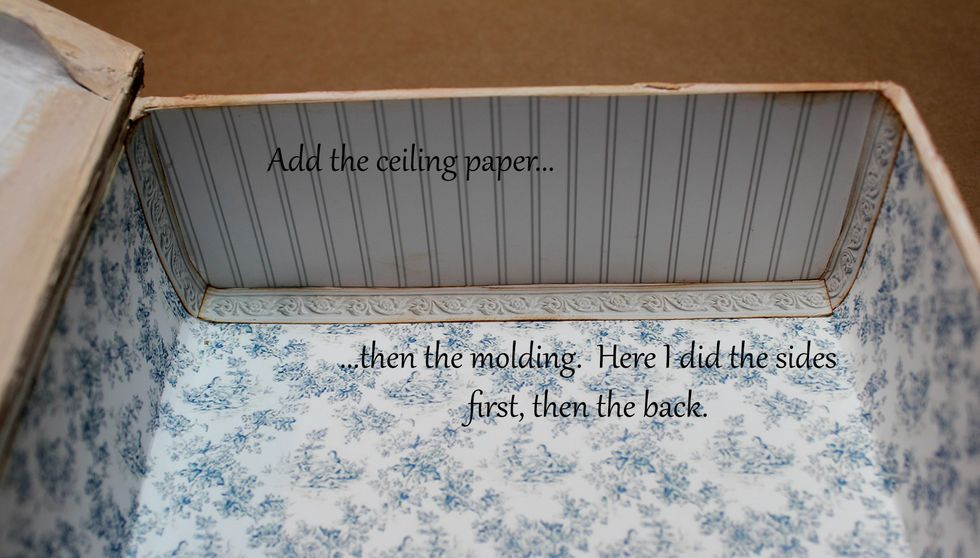
Add the molding, sides first, then the back. Add the draperies, wall photos, etc. **Now we'll jump to the chandelier. I discovered it was better to do that now than after I installed my figures.**
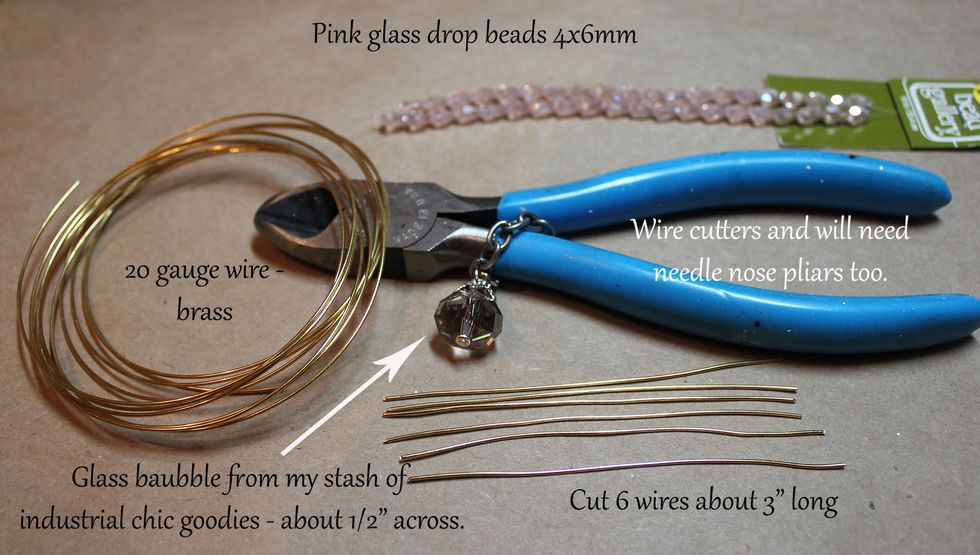
20 gauge wire, brass color, also 26 gauge brass wire. Pink glass drop beads 4x6mm. Glass bauble of some sort (mine is from Industrial Chic). Wire cutters and needle nose pliers. Cut SIX wires 3" long.

If your box is 2" deep you will need two pieces of filigree to attach your chandelier. If deeper you may be able to use the ceiling medallion which I'll show in a few more steps.
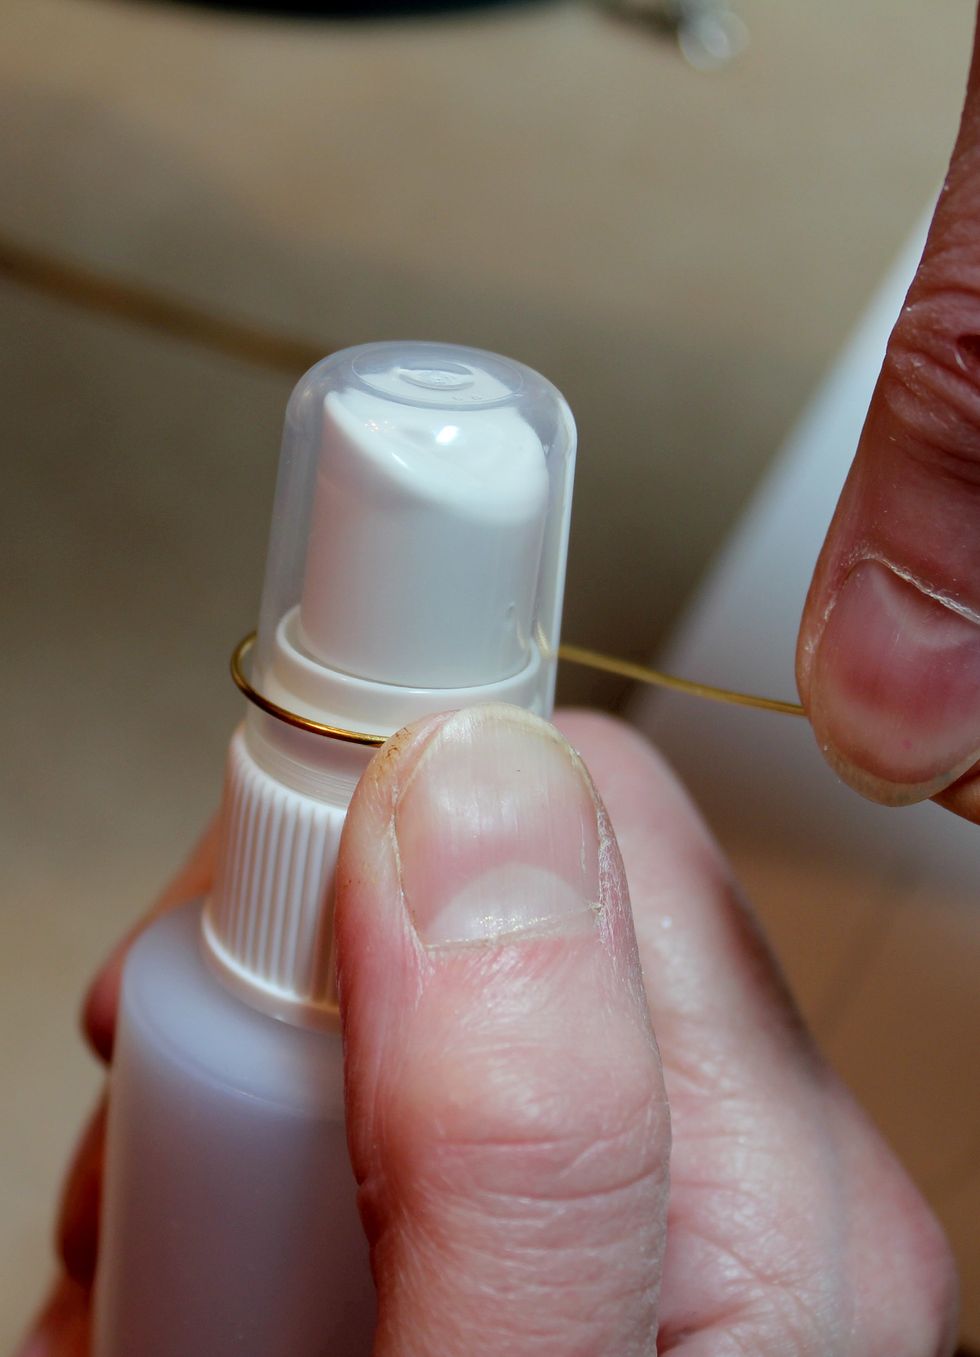
Find an appropriate size object to wind your 3" piece of wire (5 of the 6). This is a cap from a Lindy's ink sprayer, about 3/4" in diameter.
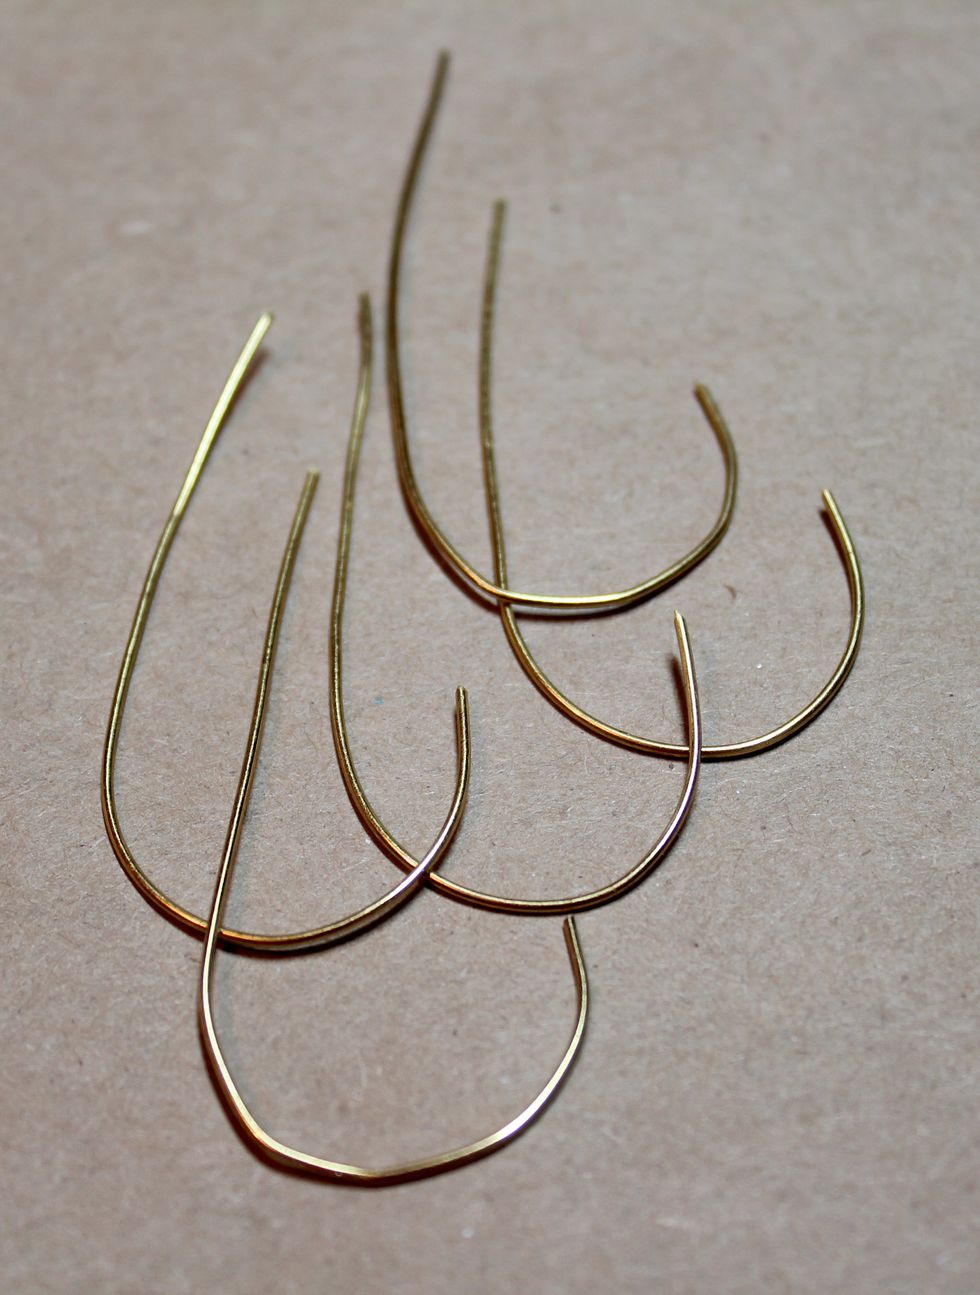
Create 5 hooked wires.
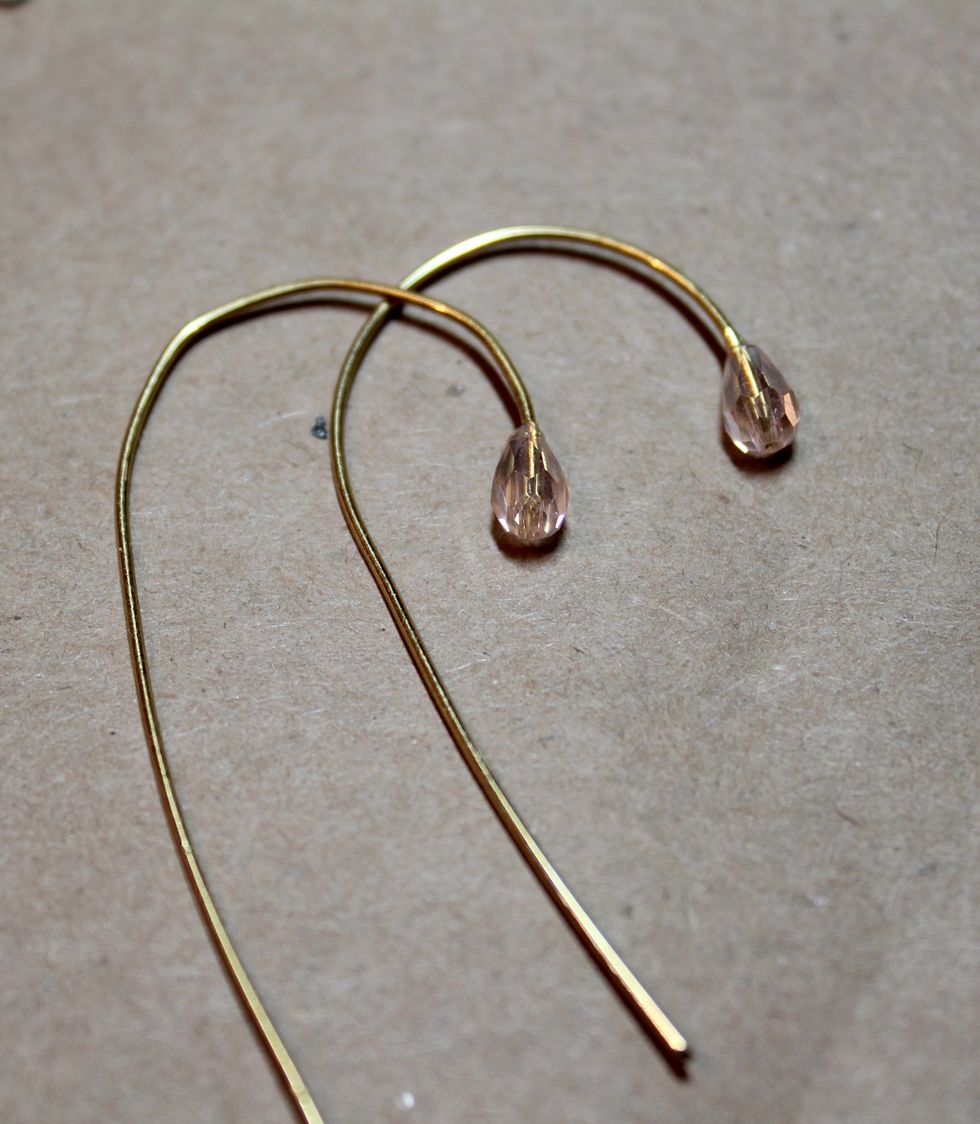
Use glossy accents to adhere a glass drop bead to the short ends, don't expose the wire tip.

When dry, apply a drop of glossy accents and slip on a small pearl bead. Let dry. Loop the end of 6th wire into bauble clasp. Straighten the wire again so the bauble hangs from the center.
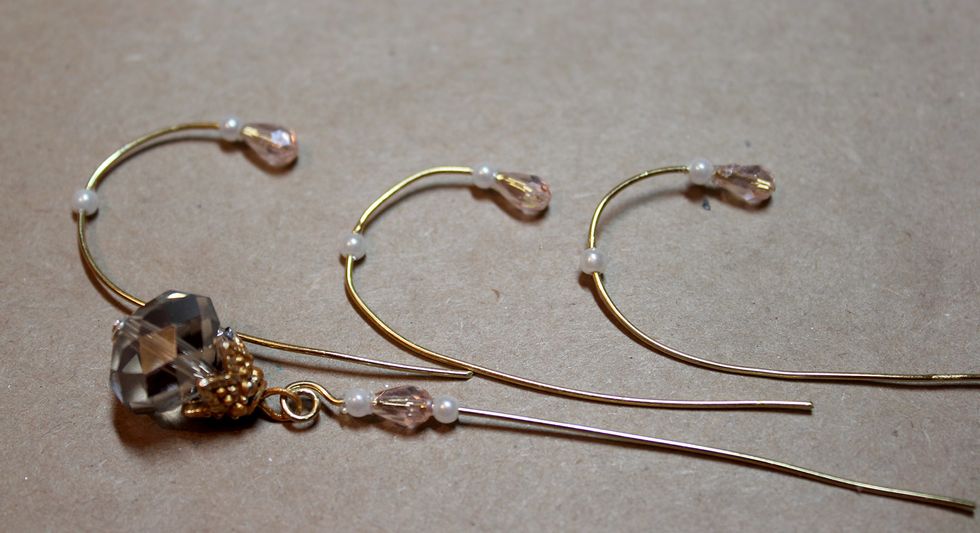
I painted the silver cap on bauble gold. Add a drop of glossy accents to curved wire and add another pearl bead. Do the same with the center (bauble) wire with a pearl, glass bead, and pearl bead.
This might be an unnecessary step. First though, cut your curved wire down to where the arrow is pointing. It's hard to cut it after all 6 wires are glued together. Ask me how I know! :)
I glued the wires with glossy accents held in place with small pieces of wire, but when I added a decorative bead they didn't hold. And discovered I didn't want the 5 wires "in the round" after all.
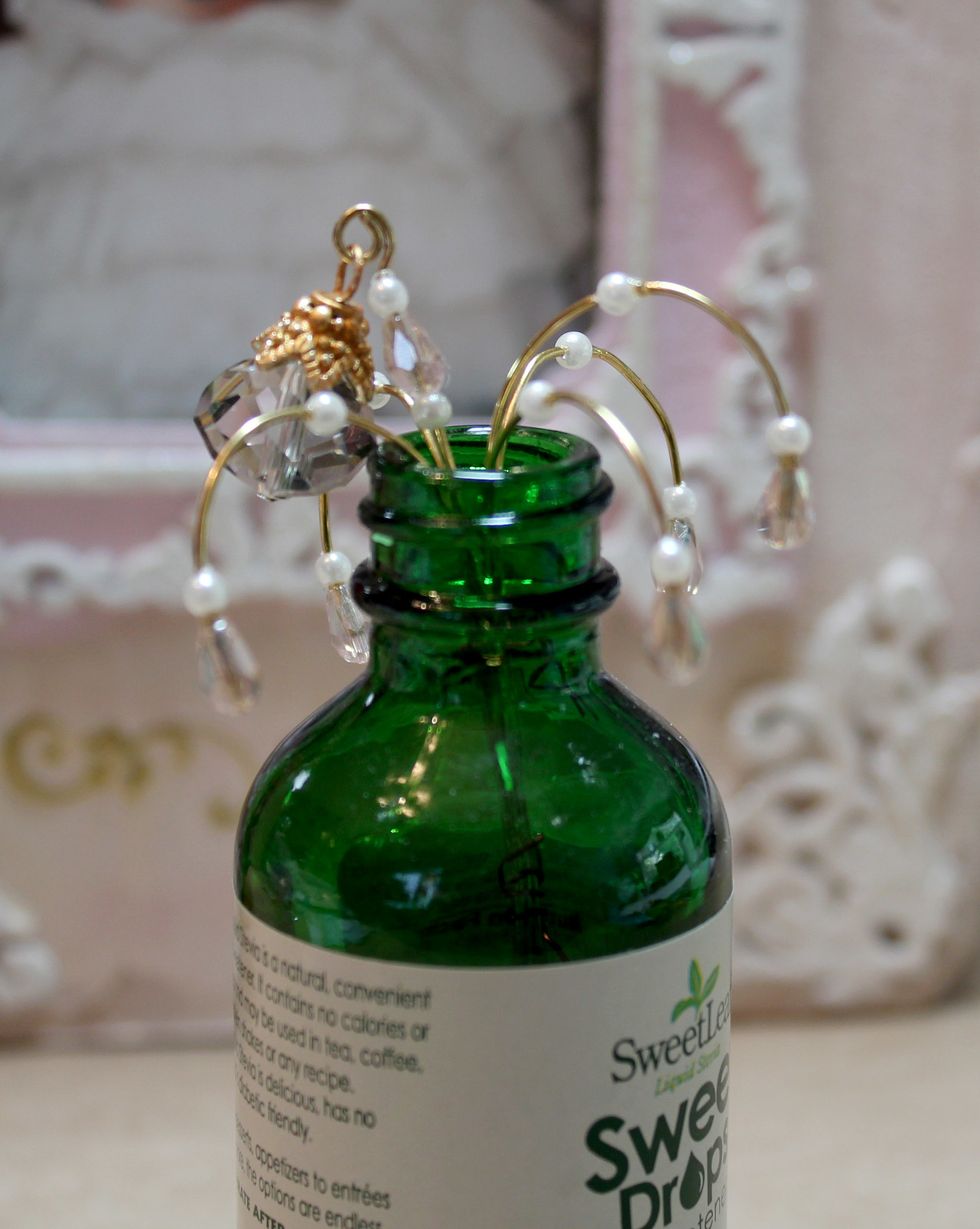
I used a bottle to hold the 6 bound wires while they dried. Here it is in the "round" shape with each of the 5 wires distributed evenly making a pretty chandelier. I didn't end up using it this way.

I painted a silver metal decorative bead gold, as well as a few links of the chain off my bauble. I know, you don't paint chain but I only needed a few links. I sprayed with a fixative.
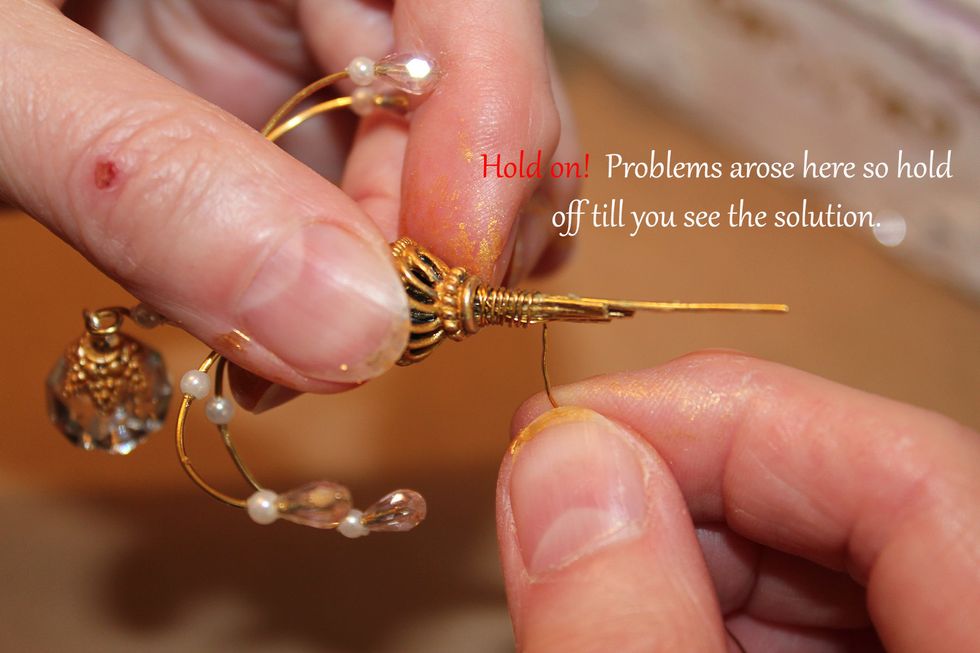
Originally I added my decorative bead, cut back the wires, and then wound with 26 gauge wire. Don't do this if your box is 2" deep.
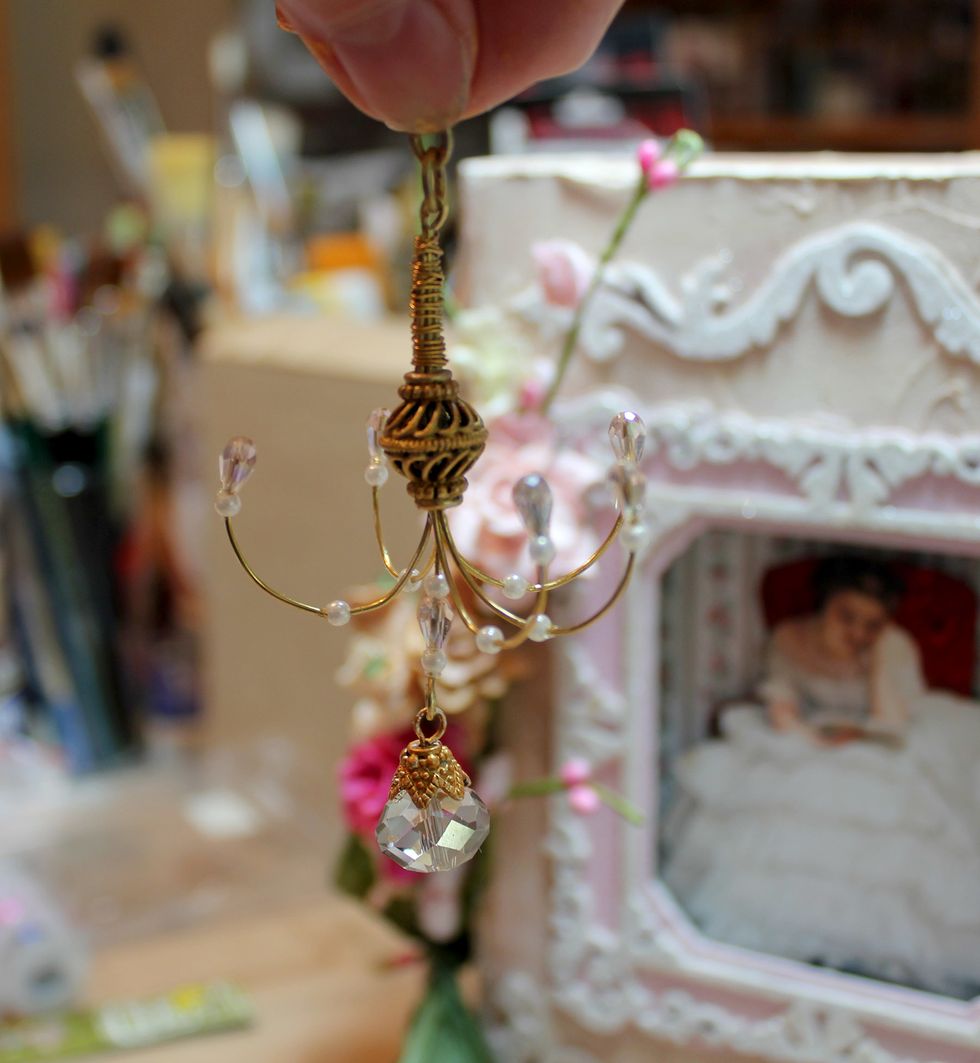
I created a loop in the straight wire and added my gold links to the top. See how my chandelier is still nice and round here? I was able to get the shape back in spite of it giving way earlier.
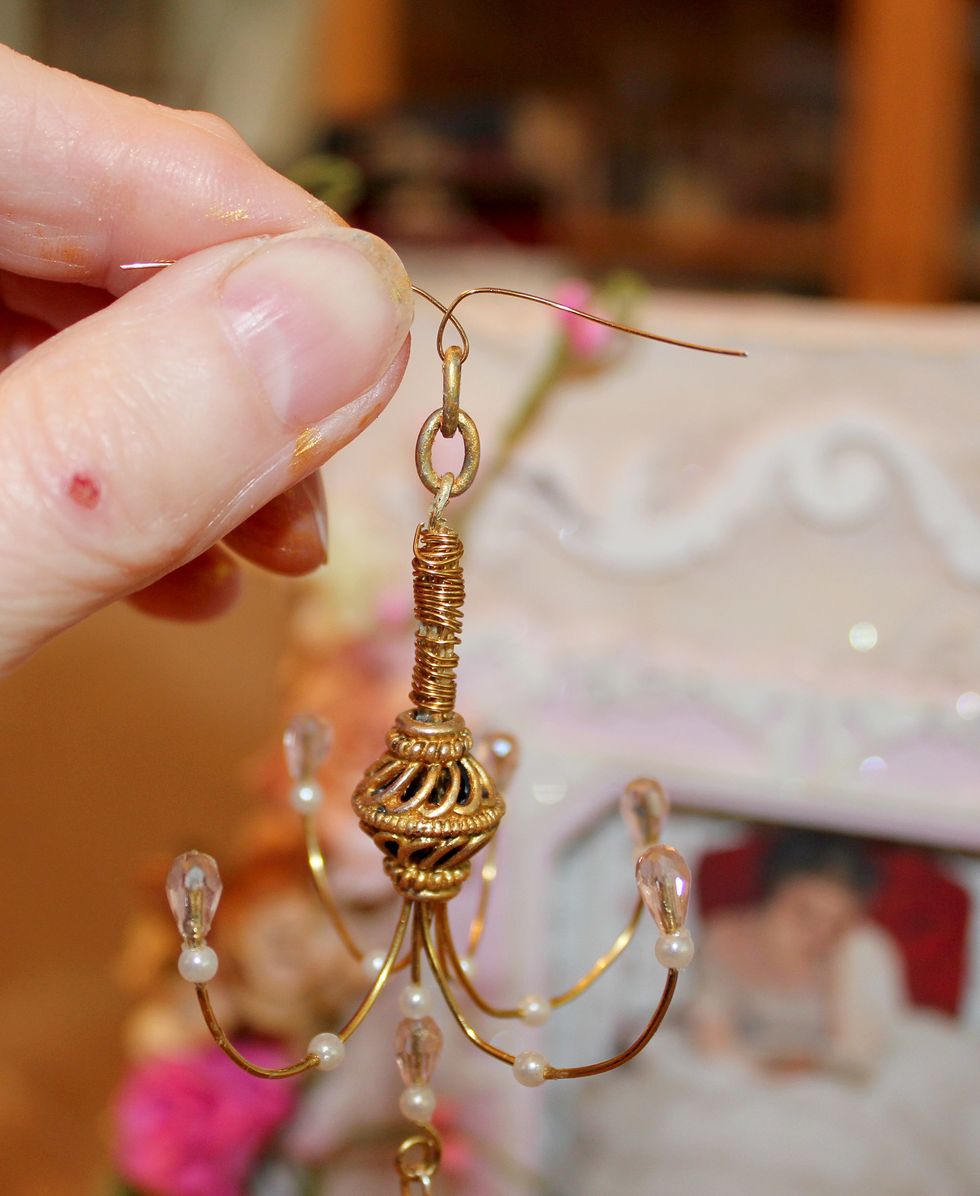
Then I added a 26 gauge wire through the top. I wanted a thin wire that wouldn't interfere with the ceiling medallion.
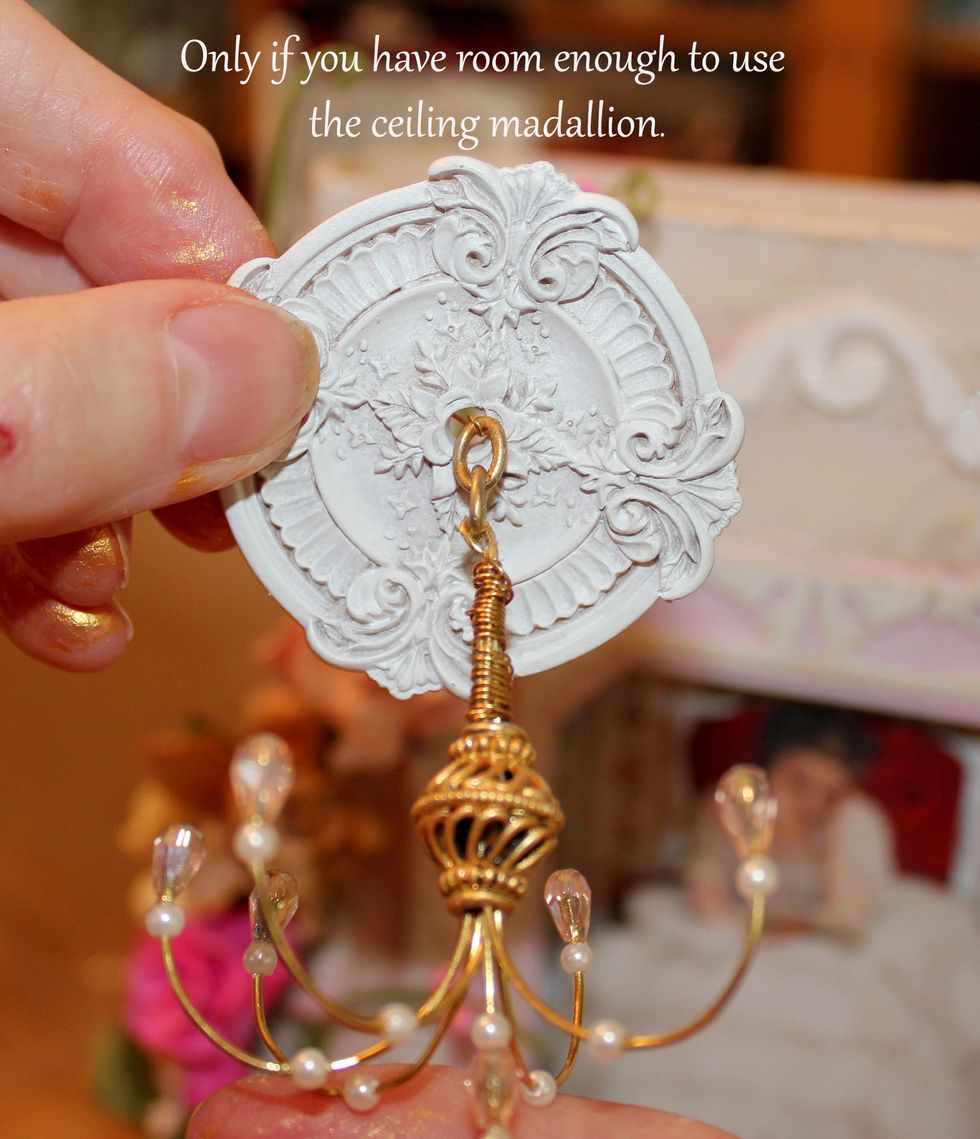
Slipped the wire through the medallion. Isn't that ceiling medallion pretty?
and adhered it to the top side. I then added 1/2" Scor tape to adhere the disc to the ceiling. Don't do this if you have a 2" book box!!

It went in just fine and looked so pretty...but complications arose.

It hung too long. The edge of the disc comes right to the edge of the box. Not an issue if you never want to close it! :) The cover has a 1/4" lip that comes inside, remember? It hits the disc!

So...I unwound most of the 26 ga wire. Cut the 5 hooked wires down more (where I told you to cut earlier), and cut the straight wire with just room for a pearl bead and to form an eyelet, and 1 link.

Knowing the chandelier had to come up through the top of the book I had to think of a disguise and make it look intentional. A key (3" here), some gold pearl chain, and the 2 pieces of filigree.
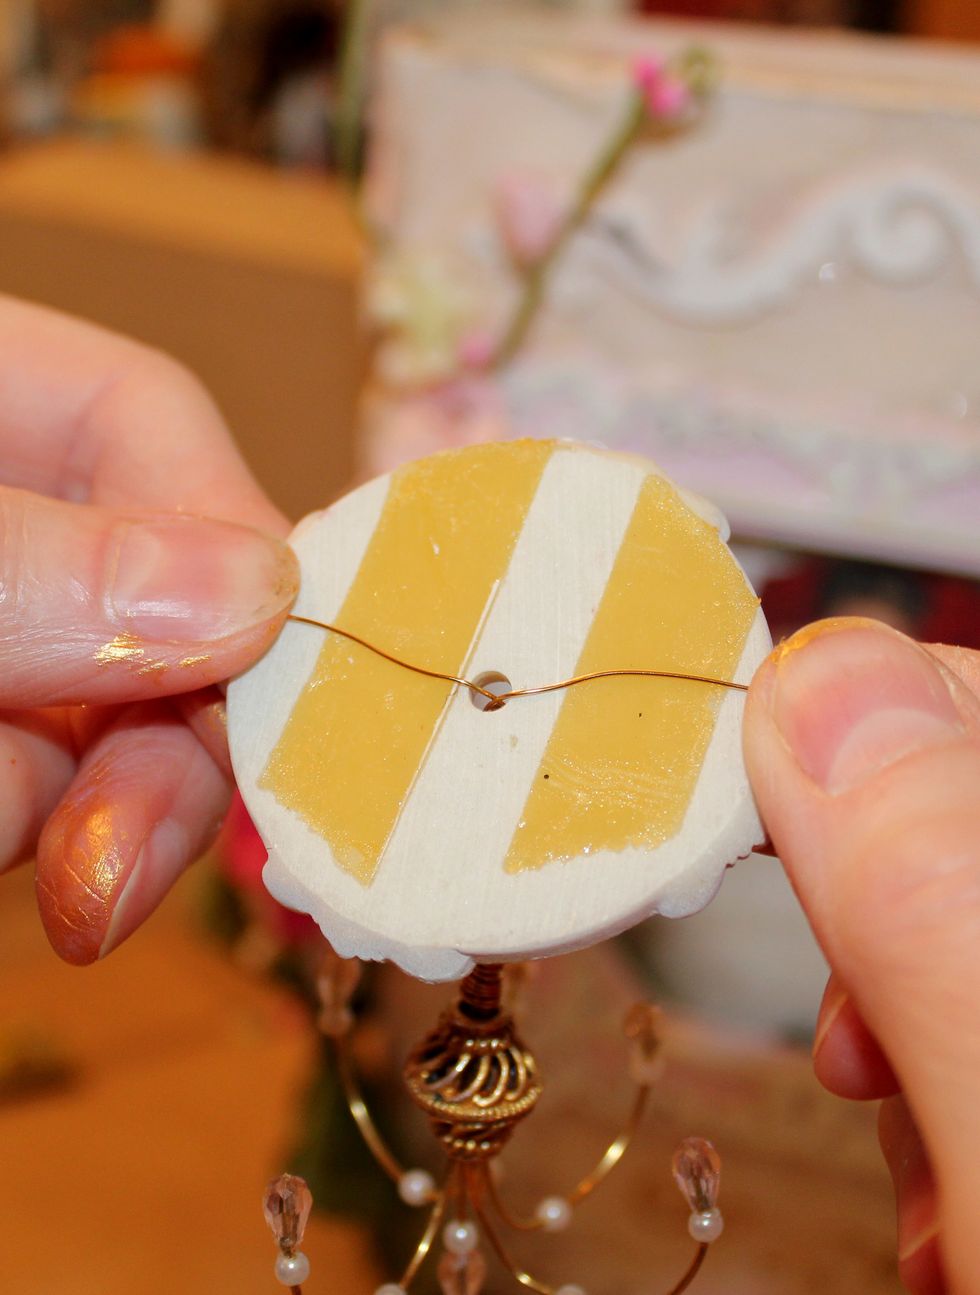
I ran the 26 gauge wire through the 1" filigree which made an excellent ceiling disc...
Slip the wire through the bead cap and through the first link of the pearl chain. Snug it tight...you'll need an extra pair of hands to help most likely. More on completing the disguise later.
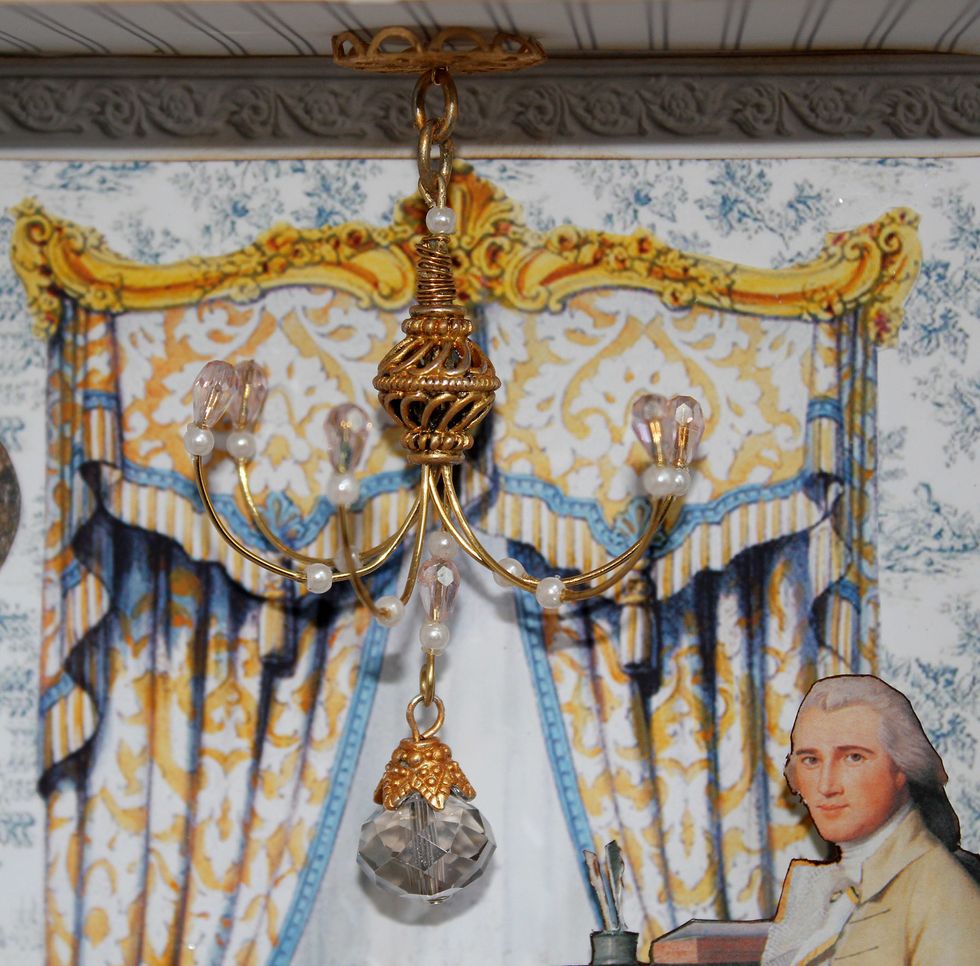
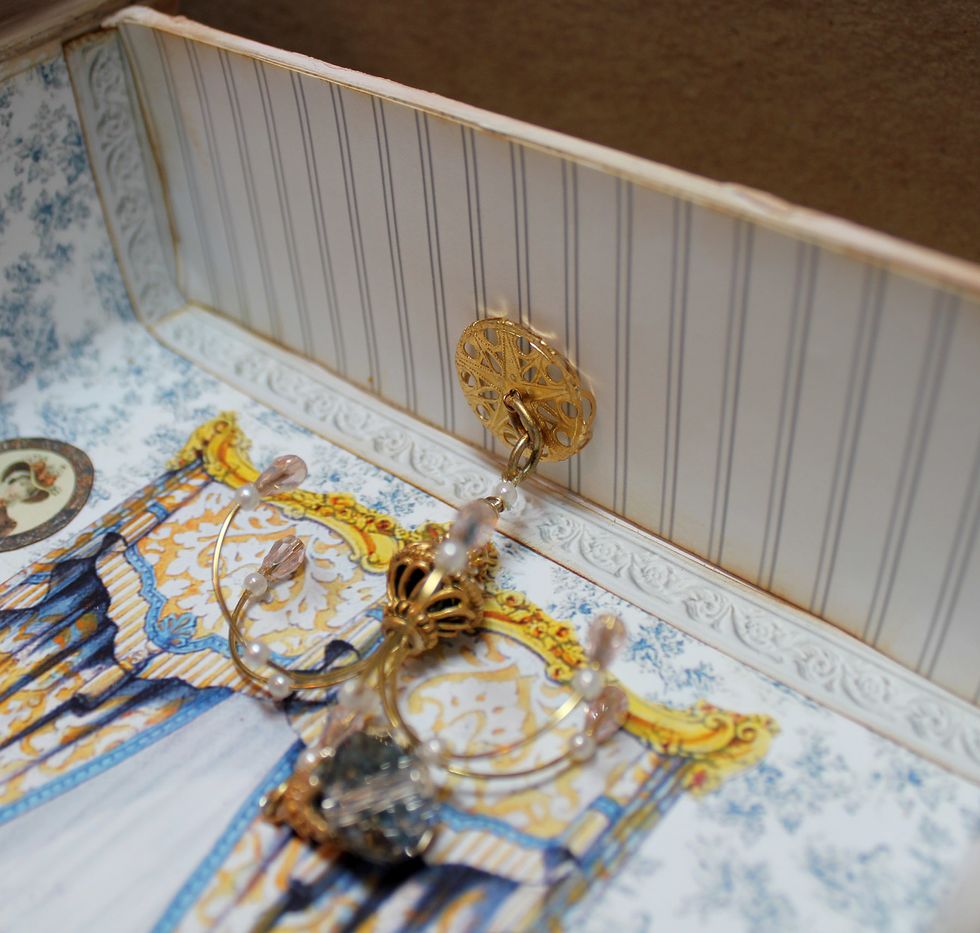
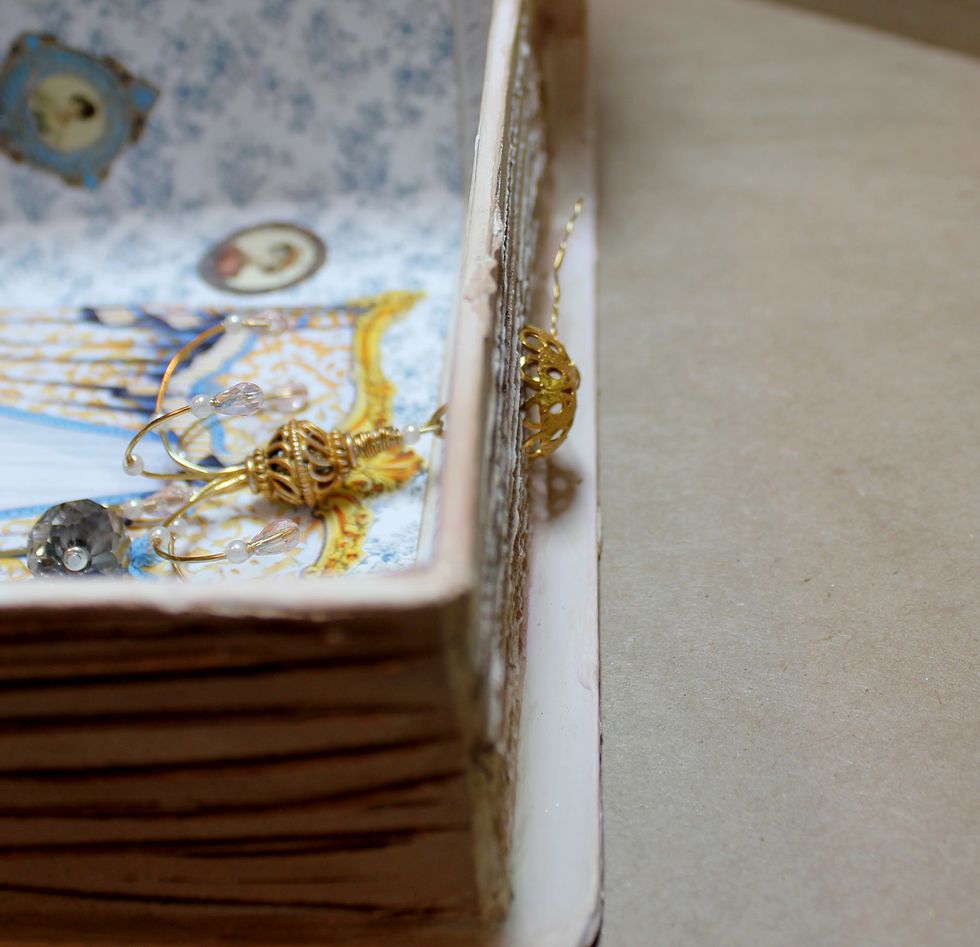
Here is our pretty chandelier installed.
This is the fix (disguise) on the top for where the chandelier had to come through. The key and chain hang down the back but can me moved to the side or front in desired. The gold bees set this off.
Cut all your figures and elements and edge with Vintage Photo Distress pen. I always edge from the back side so if my hand slips it marks the back, not the front.
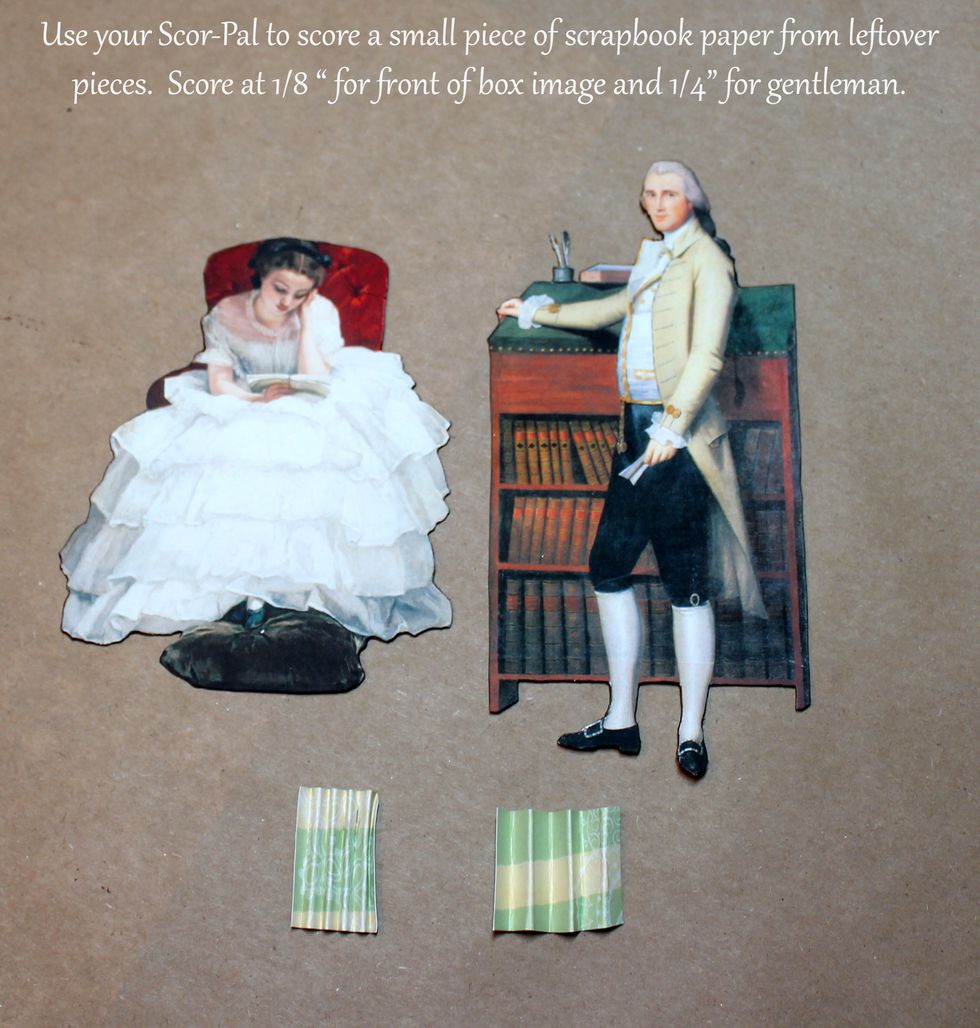
For extra strength, glue (or use Xyron) the interior characters onto cardstock. Cut a scrap of cardstock and score at 1/8" (female) and 1/4" (male). A Scor-Pal is very handy for accurate scoring.
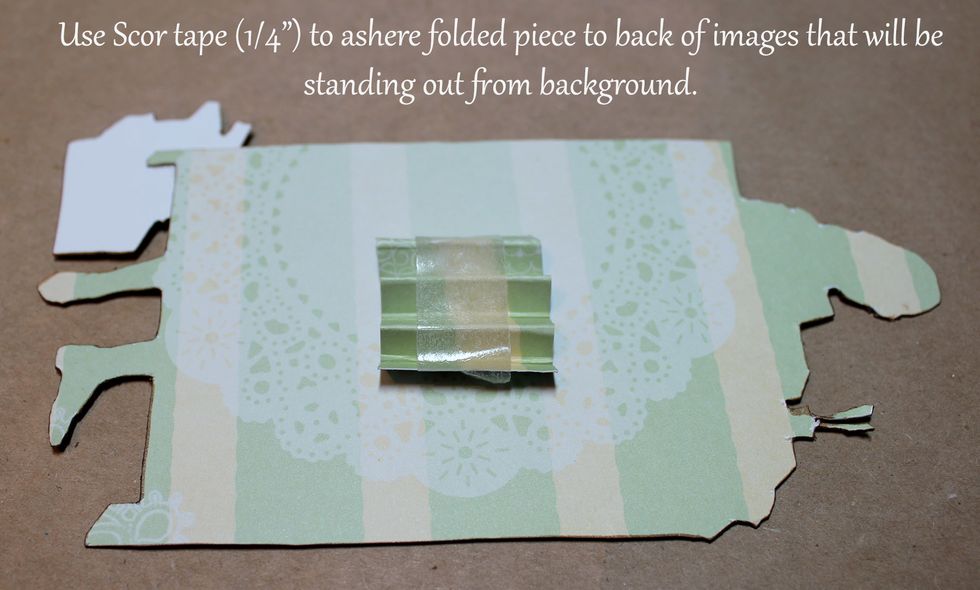
Just do the gent for now. I used 1/2" Scor tape under and over the folded paper. This adheres the paper to the image, and the image to it's background so it will stand out from the wall.
We already added the glitter, background elements, and chandelier so now we can work on the gentleman and his lady.
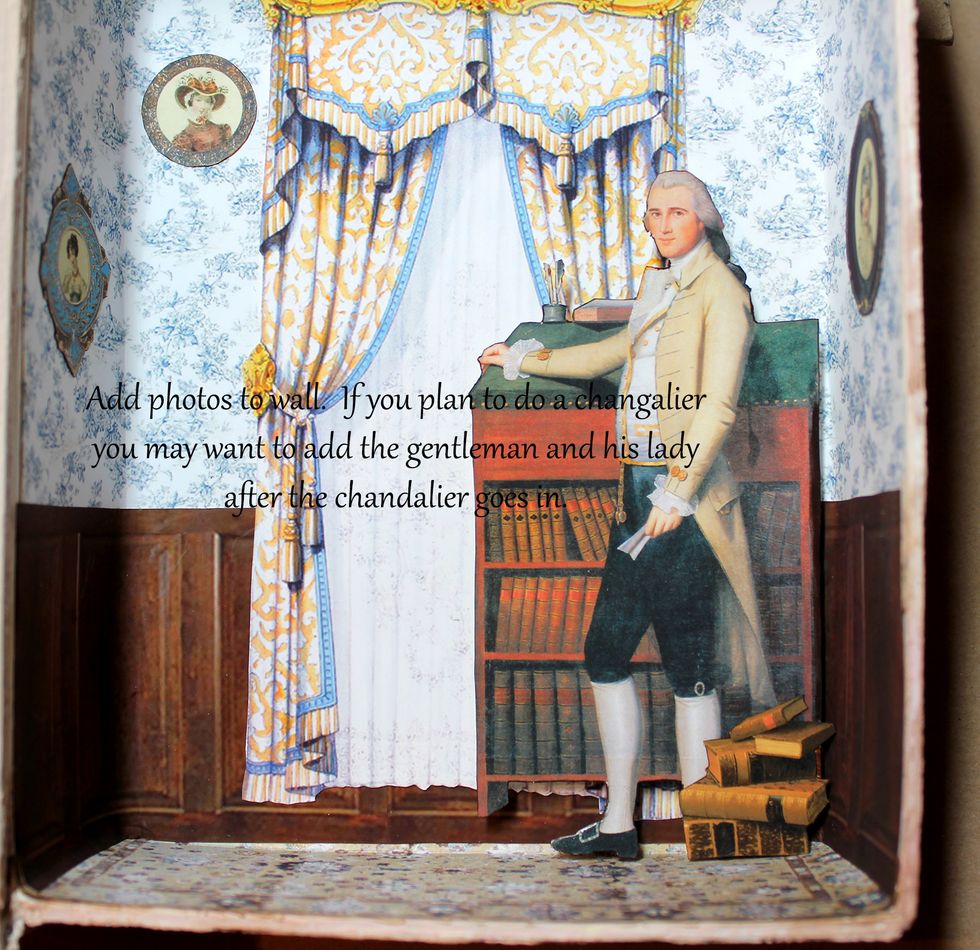
Adhere your gent to the back wall. The folded cardstock will stand him out. His left foot was at a wrong height so I cut it even with the other foot and used books to cover it. Looks natural. :)
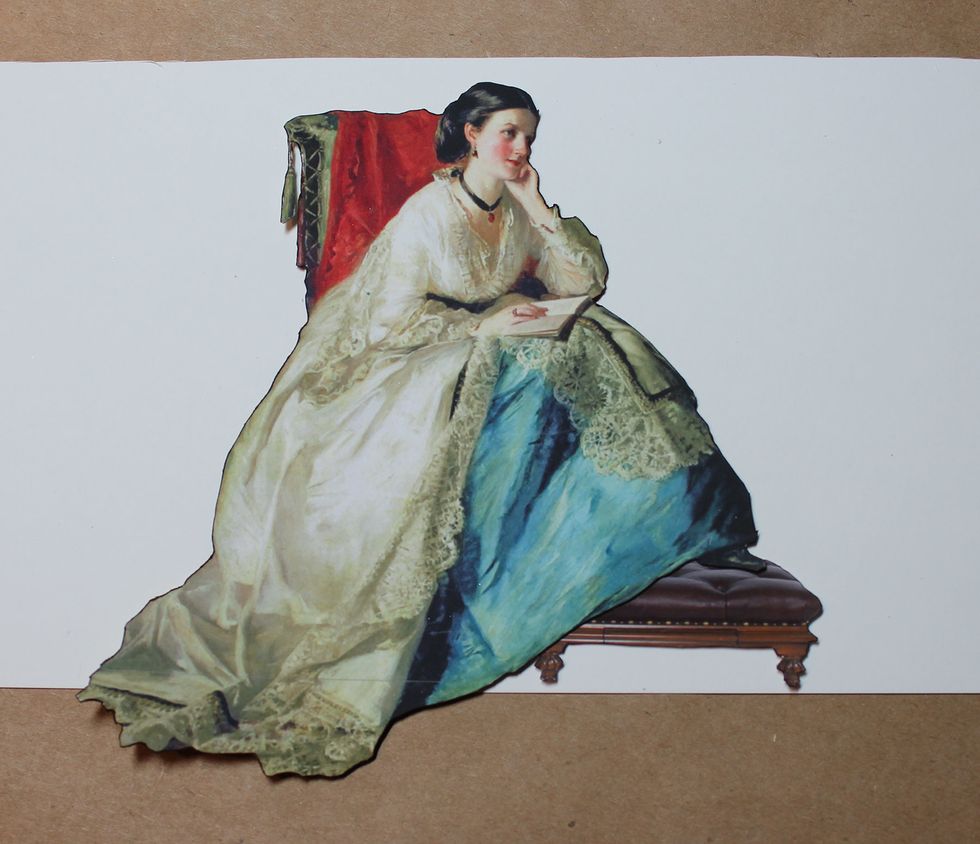
This figure needs something for her foot to rest upon...could even be books. Line her up on a straight edge to see how she will line up to the floor. Ok if her skirt extends below the line for now.

A view of books in front of foot.

Use a ruler to mark where her skirt will hit the floor. Score, and fold to the back to make a tab. You may need to trim it a little bit so it doesn't show from the side.
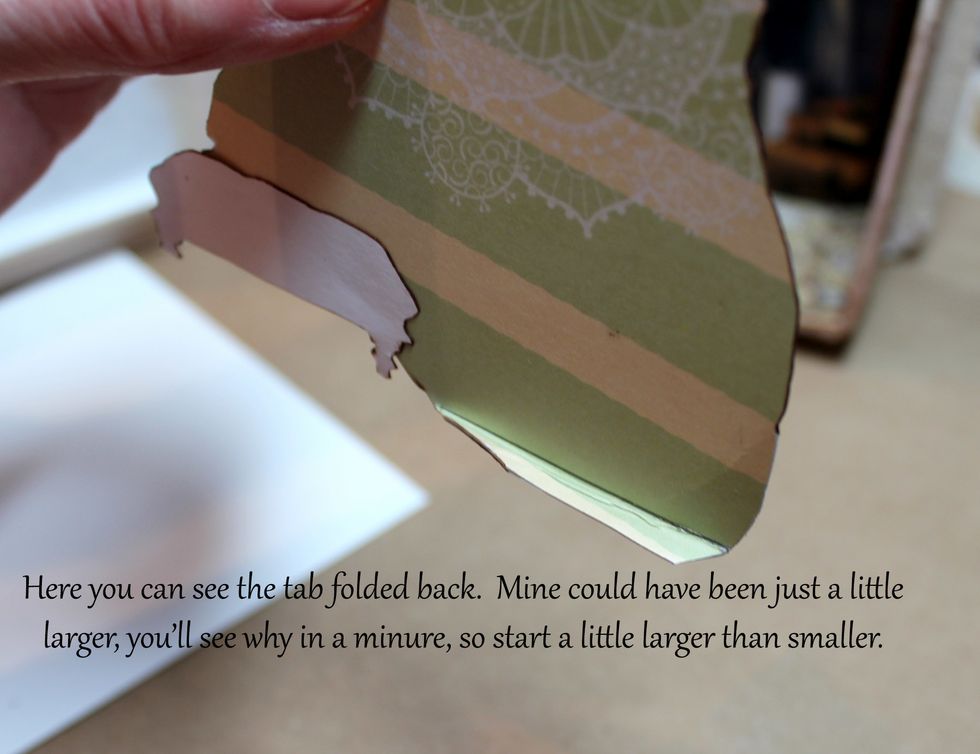
Here is the tab folded back. Mine is about 1/4" and I trimmed some of the edge. Make your tab larger as it will be more secure.
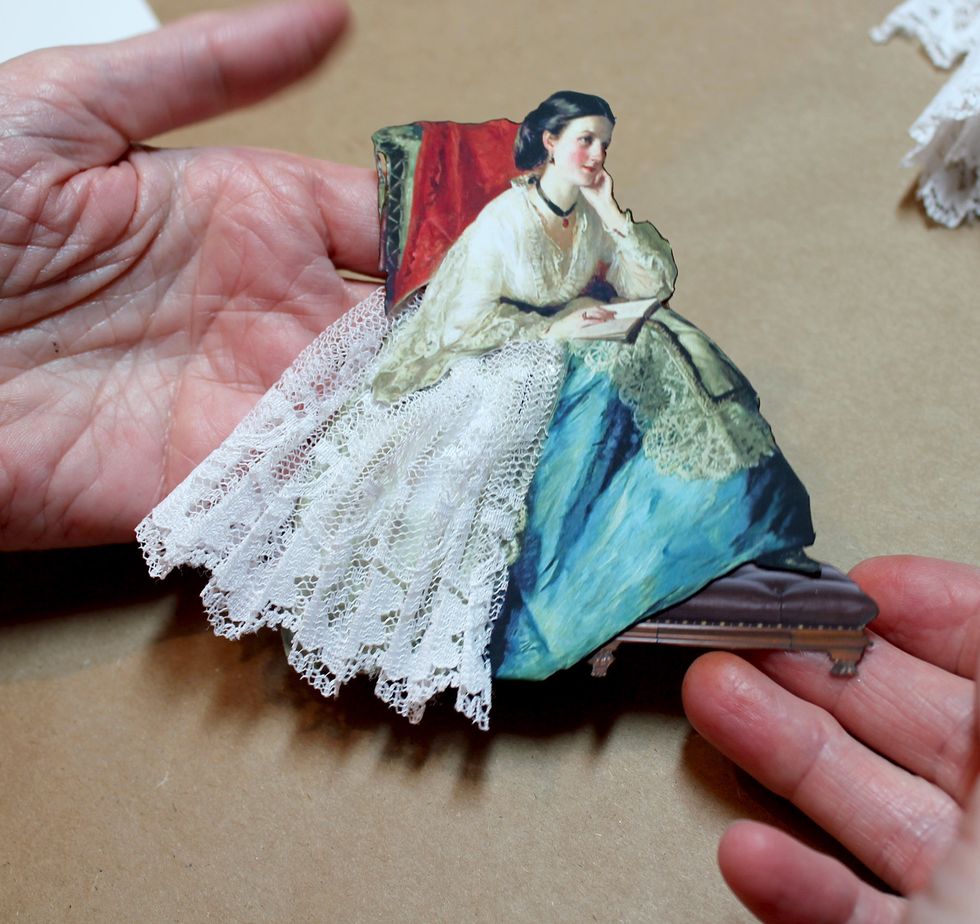
To add a lace skirt (which covers up the folded back tab) cut along the back edge, and under her lacy blouse. I used 1/8" Scor tape to adhere but glue is fine.
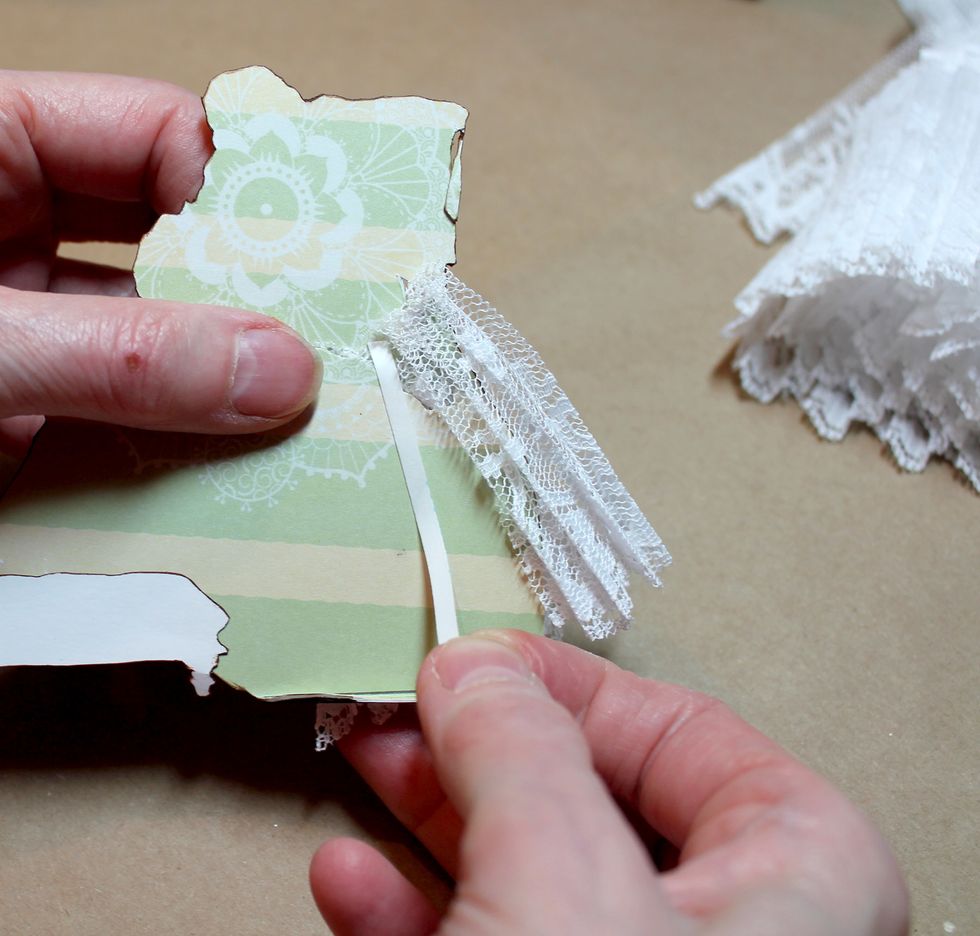
Bring the lace around back and fasten. Use Scor tape or glue on the tab and place her in the scene. Check position first! Add some glue or tape under her lace and pull her forward to adhere in place.

Do you want a dimensional table? This image (and my footstool)came from Paris La Mode digital kit by Pink Lotty. But you can use your own images or other collage sheets to create your own.

So you can have the table standing out from the wall and add a vase of sweet roses? *For the table portion I printed my images larger so you could see the process better.* Your table will be smaller.

Print two same size images of your table. I use 48 lb presentation paper for printing as it's heavy and gives a good reproduction. Print another image at least twice the size, print 2 for luck. :)
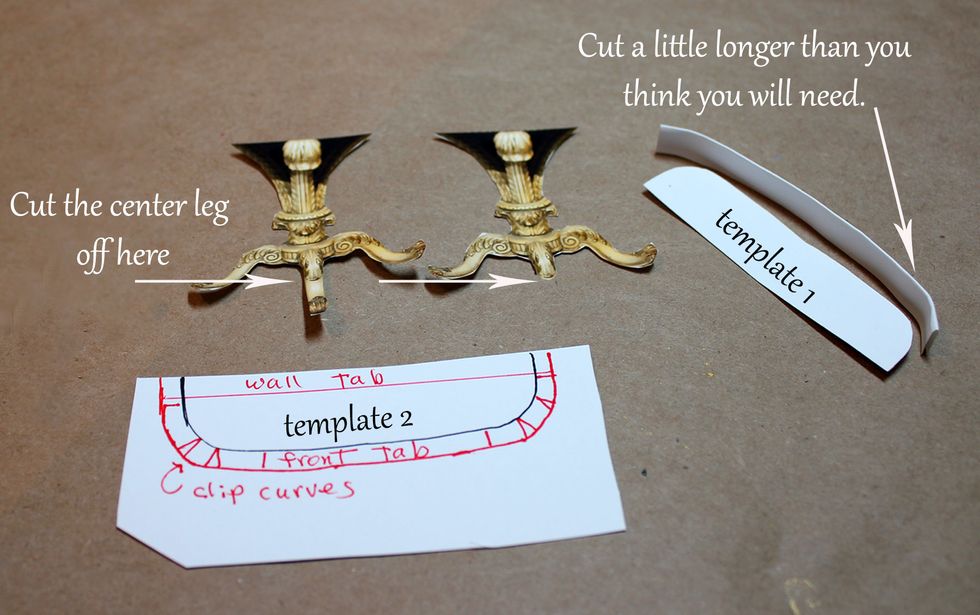
Cut the top off your tables. Cut out. On my image I reduced the length on the center leg. Draw a table top shape and cut out (template 1). Use it to draw your top piece on cardstock (template 2).
Add a tab border across the back and around top (red for reference only). Cut and clip curves. Cut a strip of cardstock a bit longer than needed to go around the table top (not counting the tabs).
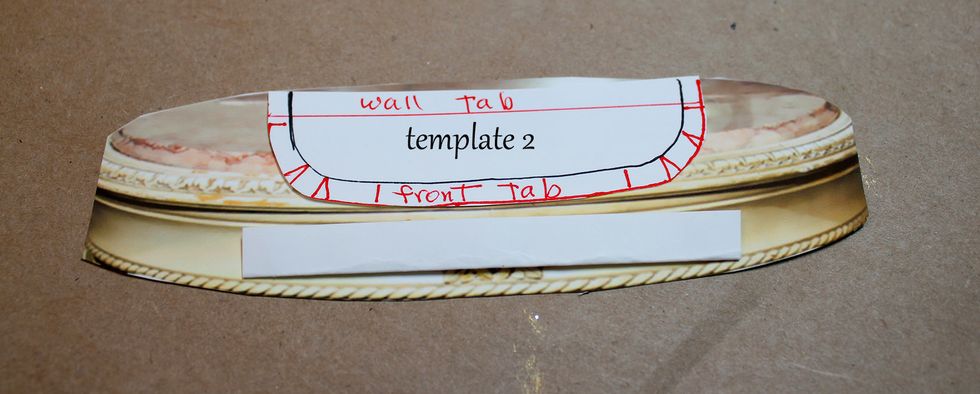
Do as I say, not as I did! Glue template 2 to UNDERSIDE of table top with tab markings visible. You can see now where to cut and clip, and top is already glued on. Do the same with your long strip.

I did it the hard way so skip this step except for making sure your detail (if you have one) is centered better than mine was. But this was just an example table.
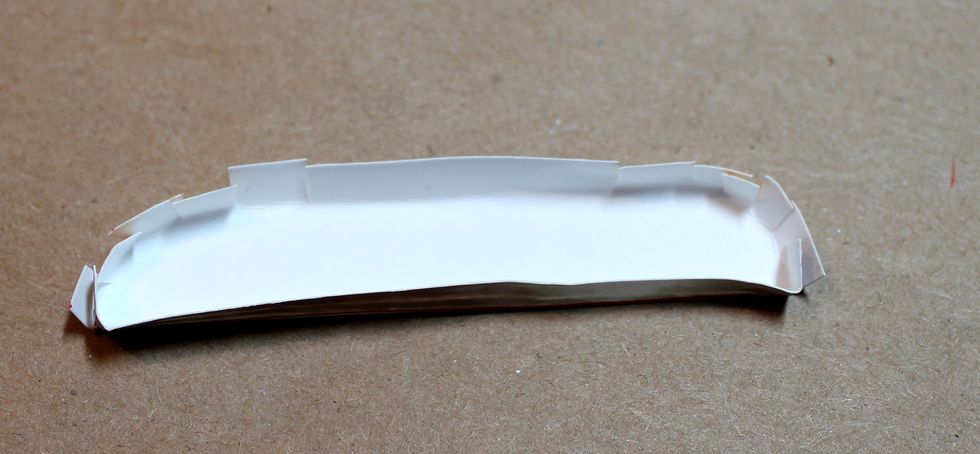
Fold in your tabs. Remember, template 2 would be glued to the underside here.
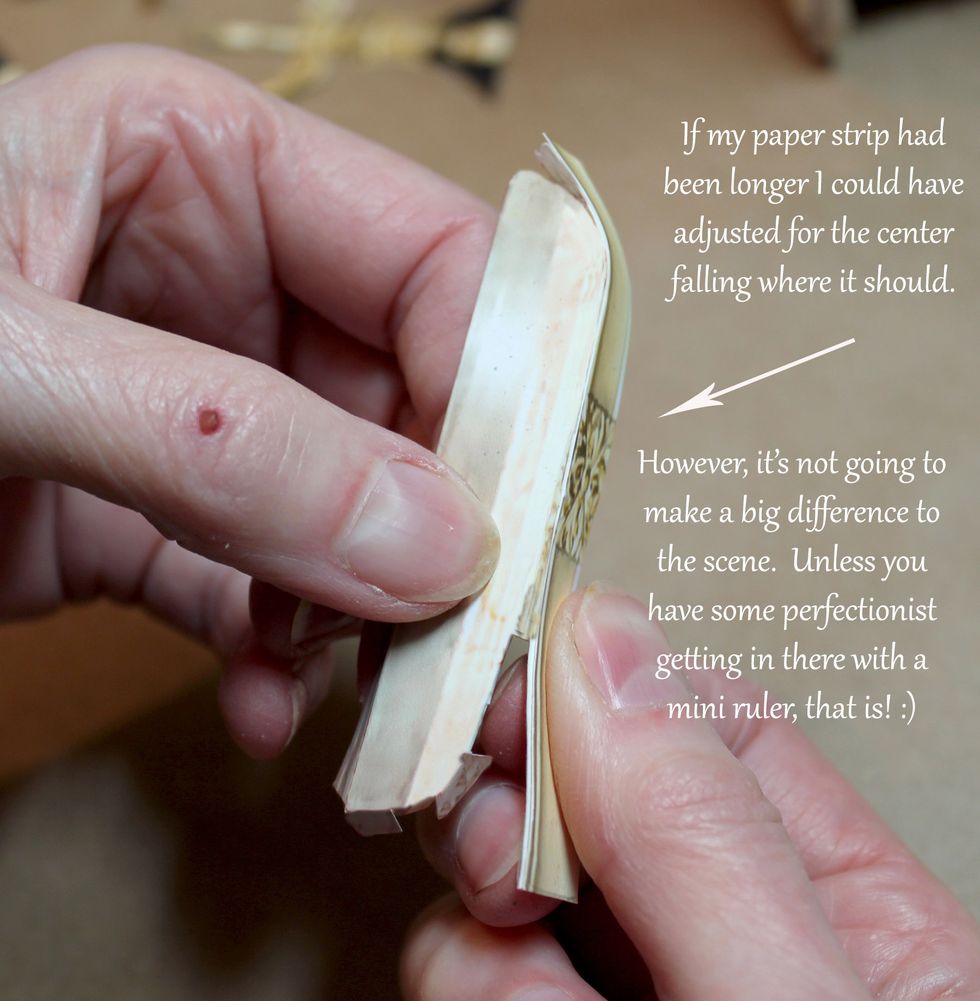
Add 1/8" Scor tape to top edge of long strip and adhere along the table top. Start in the center and work to the edges. If I'd cut a longer strip I could have adjusted for the detail being off.
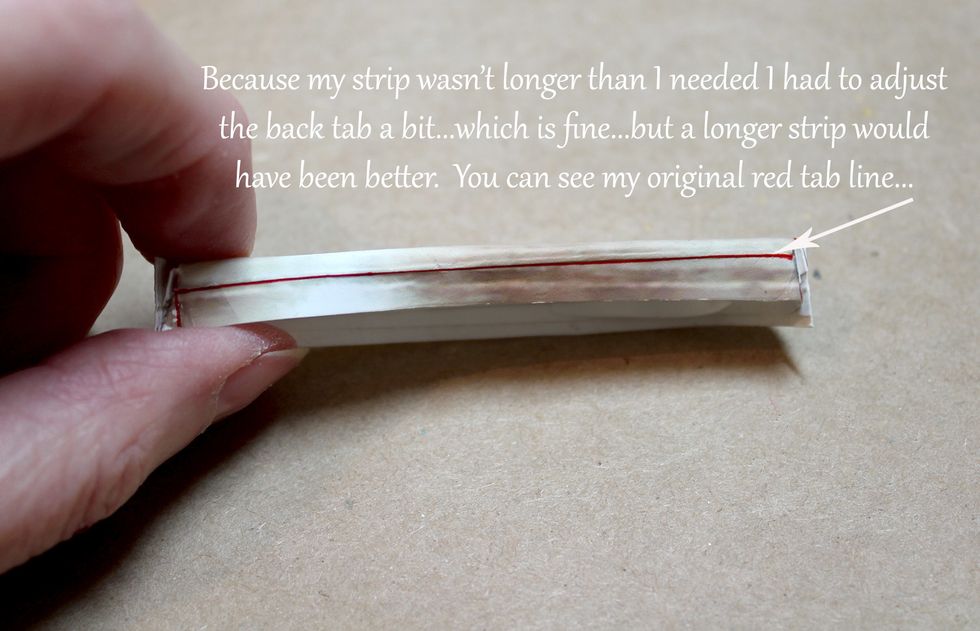
Because my strip wasn't a little longer I had to adjust my back tab (still seen in red) to fit. Which is Ok.

Now you have a table top. Glue any tabs or separations between top and side. Wish Snapguide showed the full pictures!
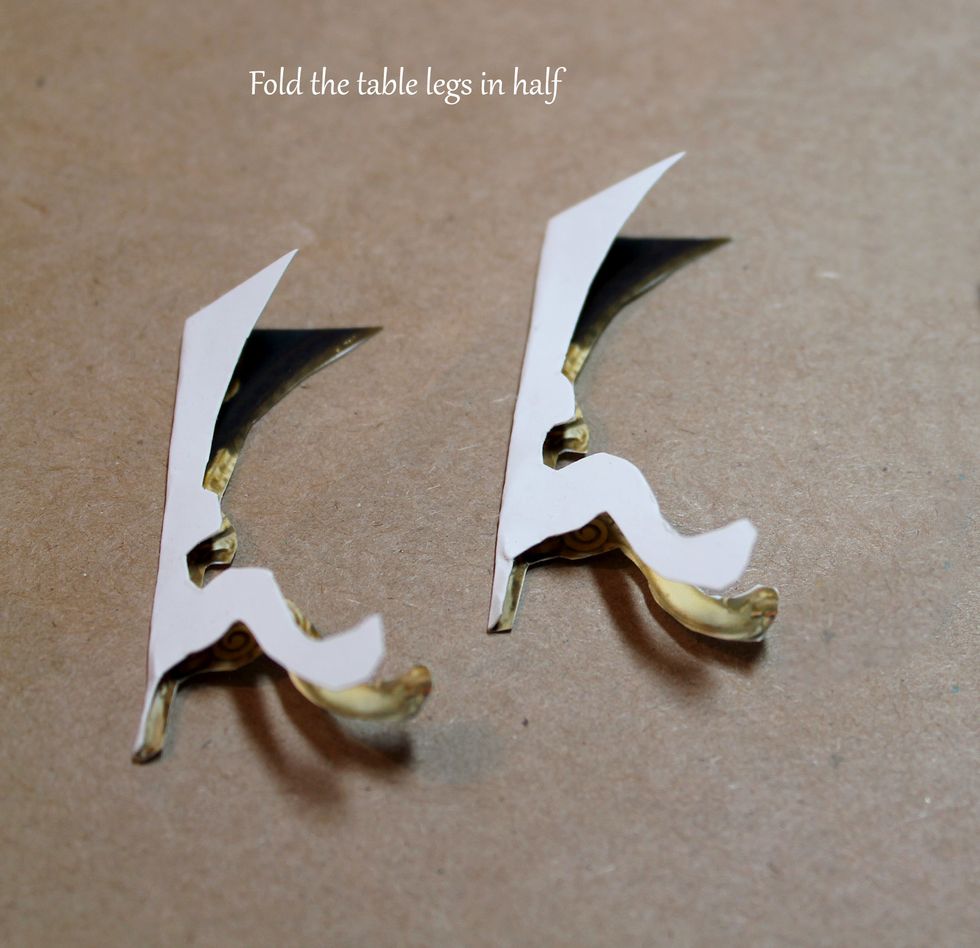
Fold the two legs in half matching legs as much as possible...but they won't be perfect. We'll make corrections.
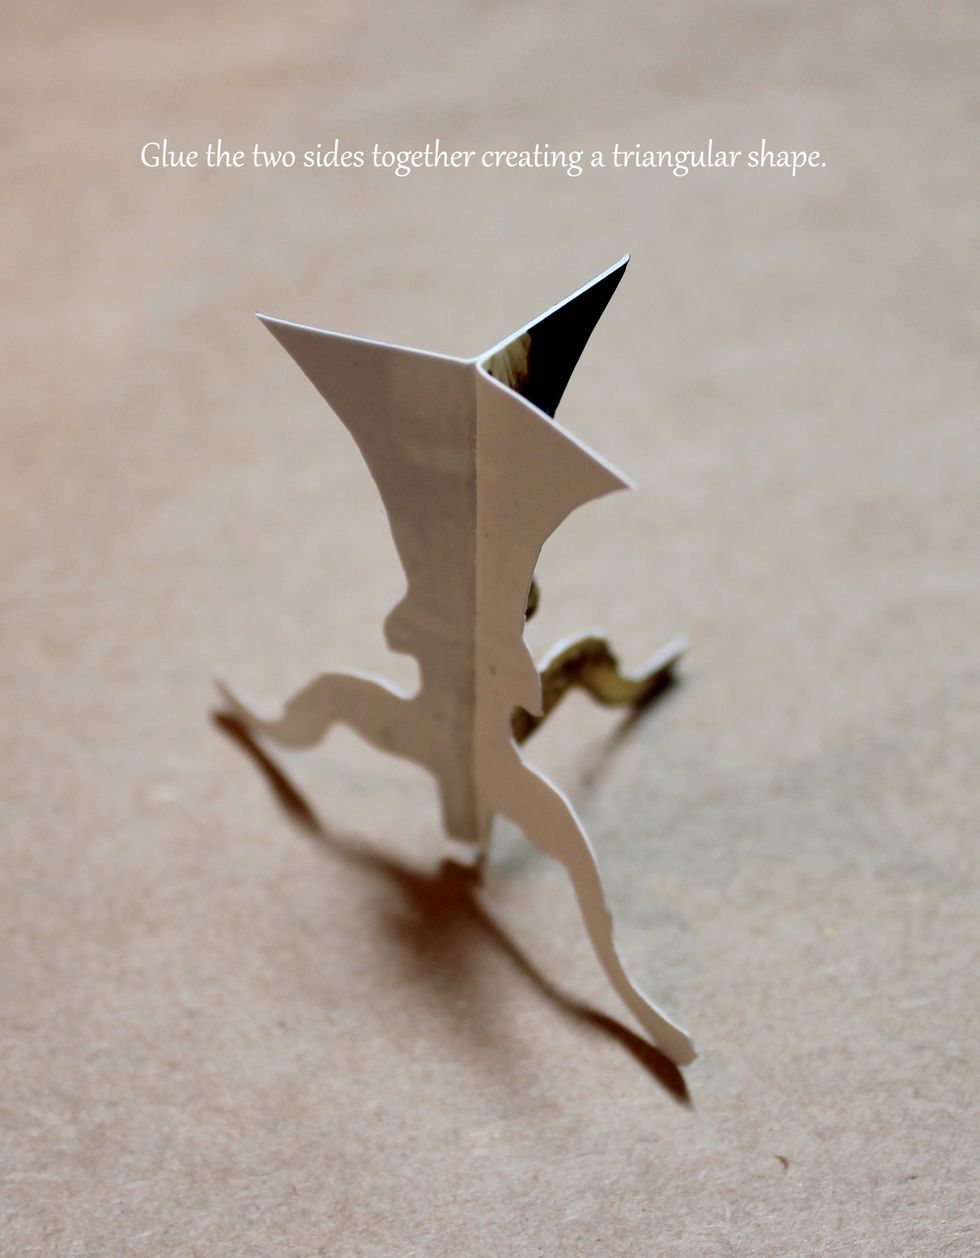
Glue the two halfes together making a triangle shape. The white (back) will go against the wall. Trim the white paper away from the center leg - both sides.
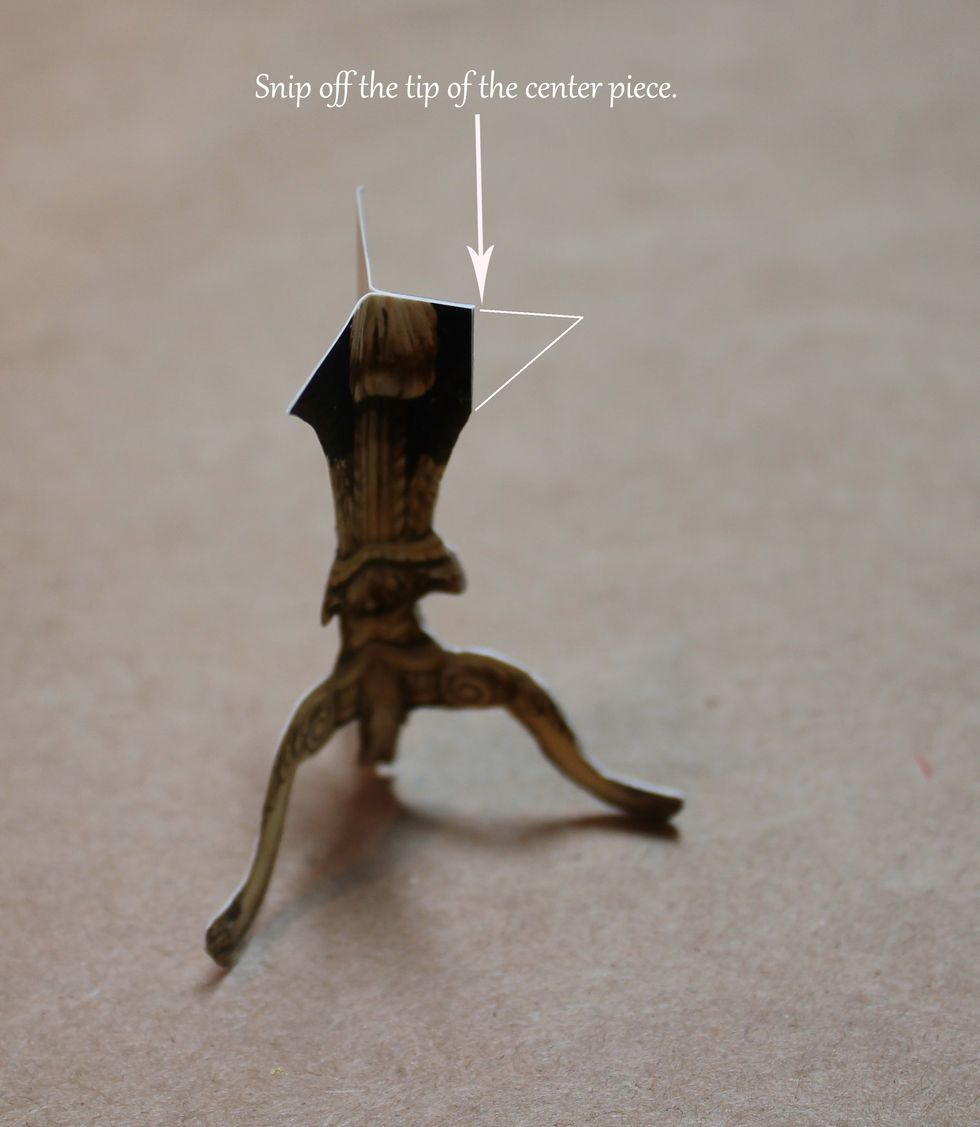
Cut the tip off the center piece so it will fit under the top.
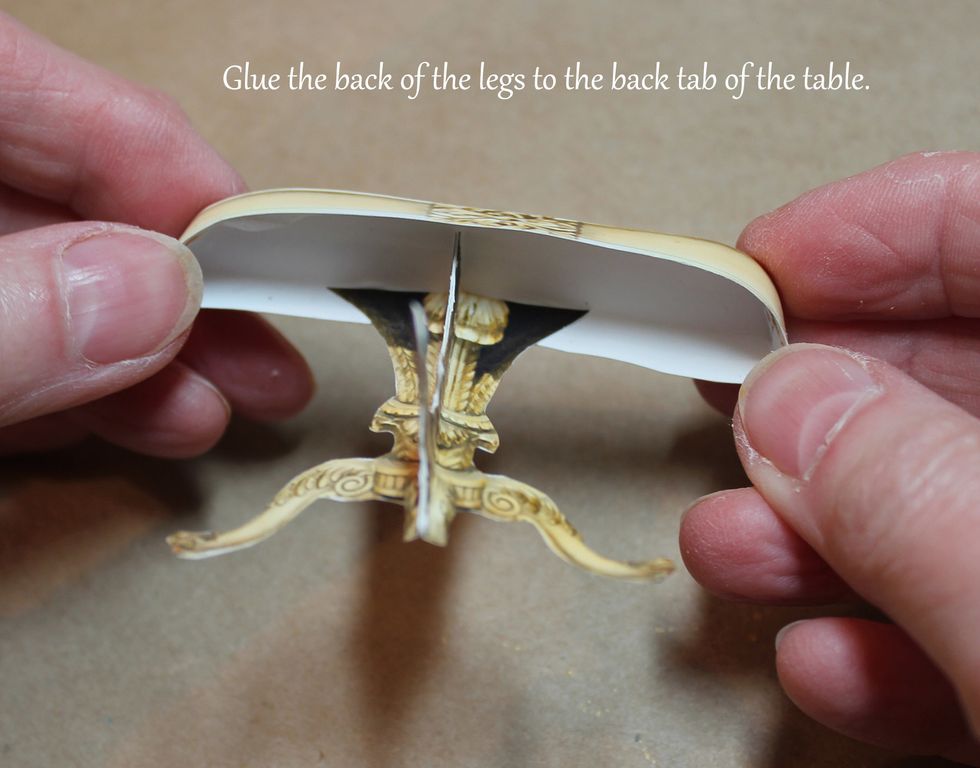
Glue the back of the legs to the back tab of the top.
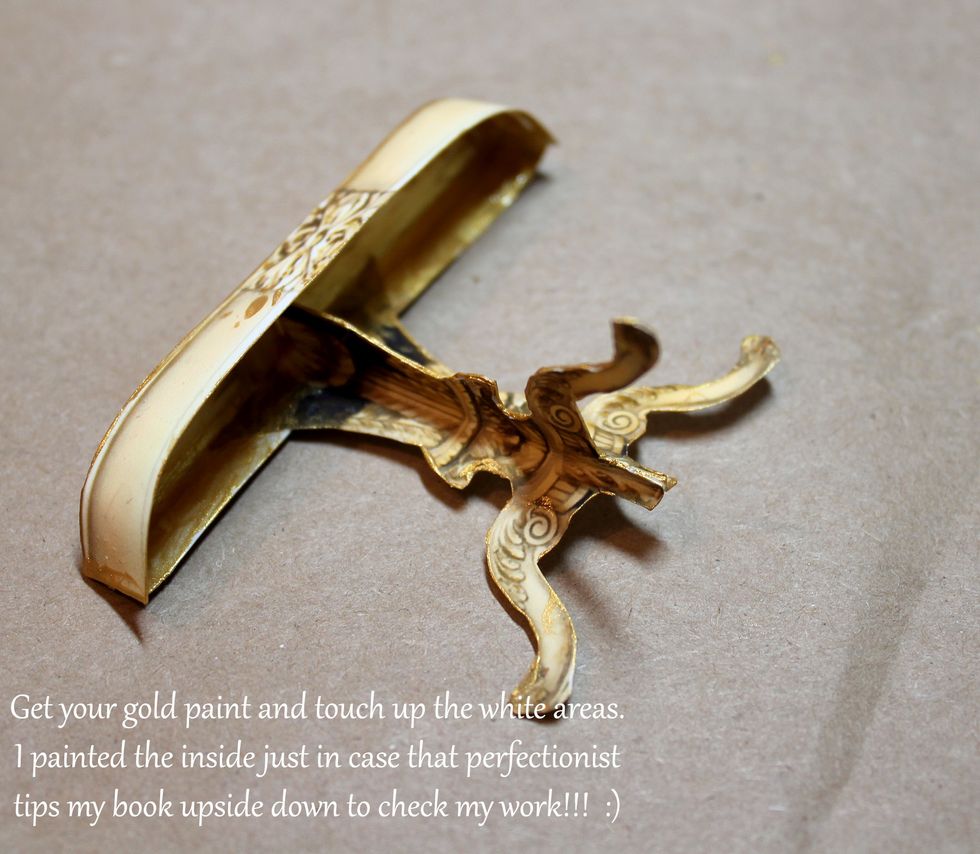
Get out your metallic gold paint and touch up any white edges on the legs and the table top. I painted the inside just in case some perfectionist turns my book upside down to check my work! :)

And here is your free standing dimensional table.
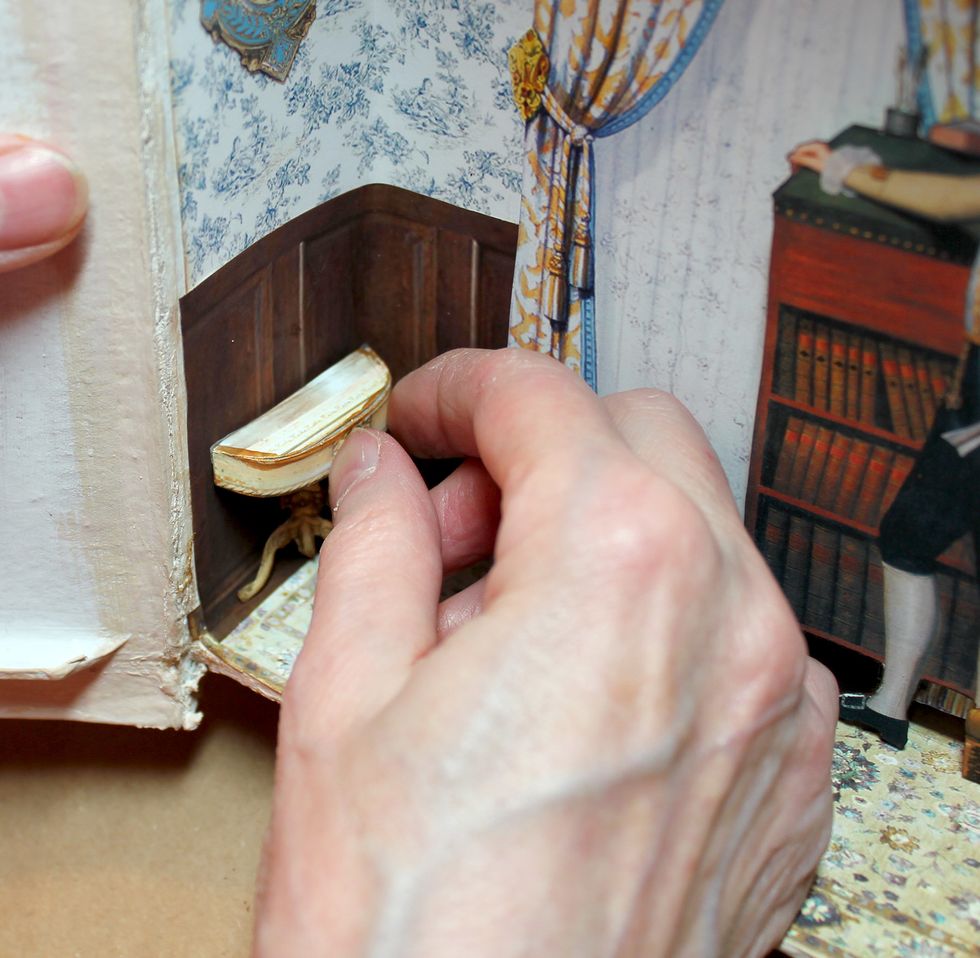
Adhere to side wall.
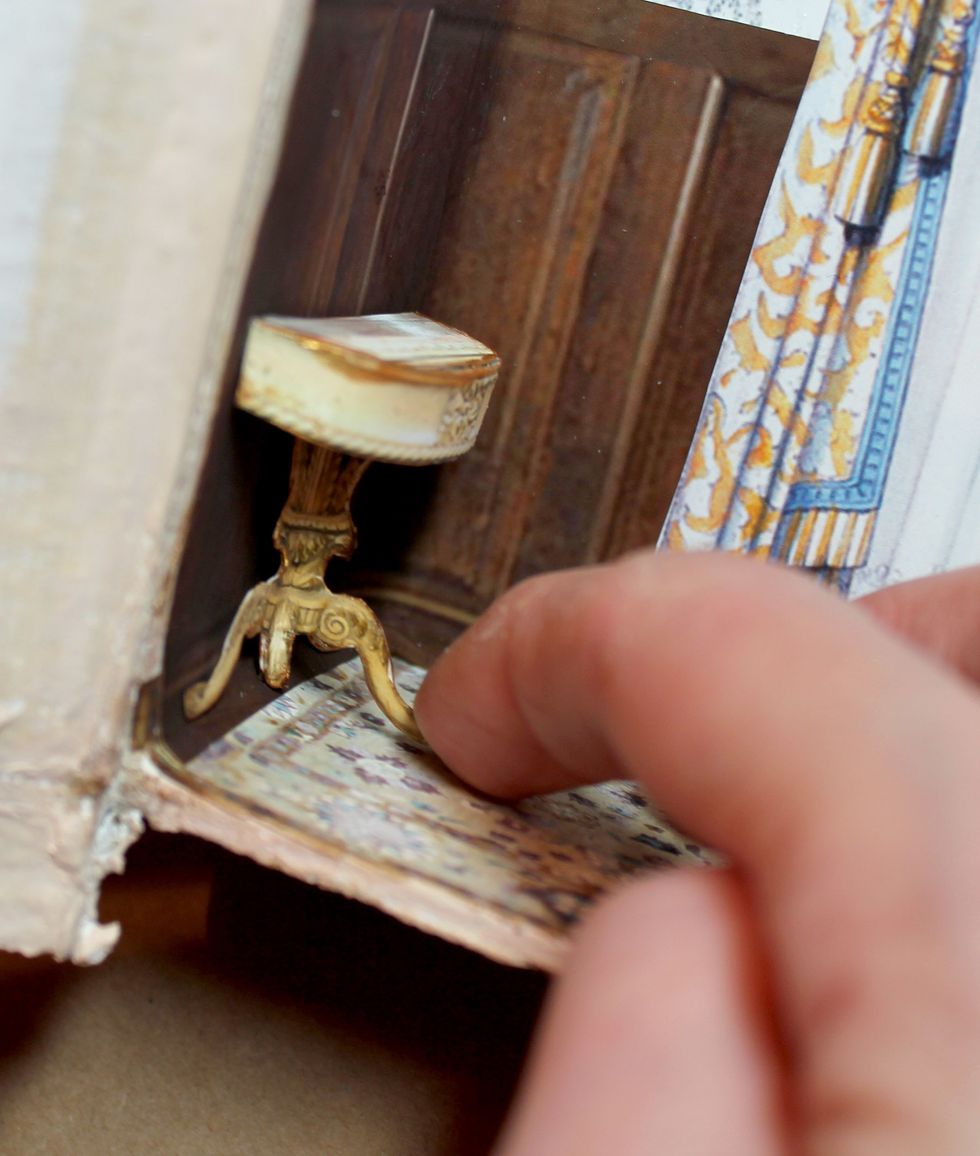
Make sure the center leg comes to the floor. May have to fiddle a fit with the back legs.
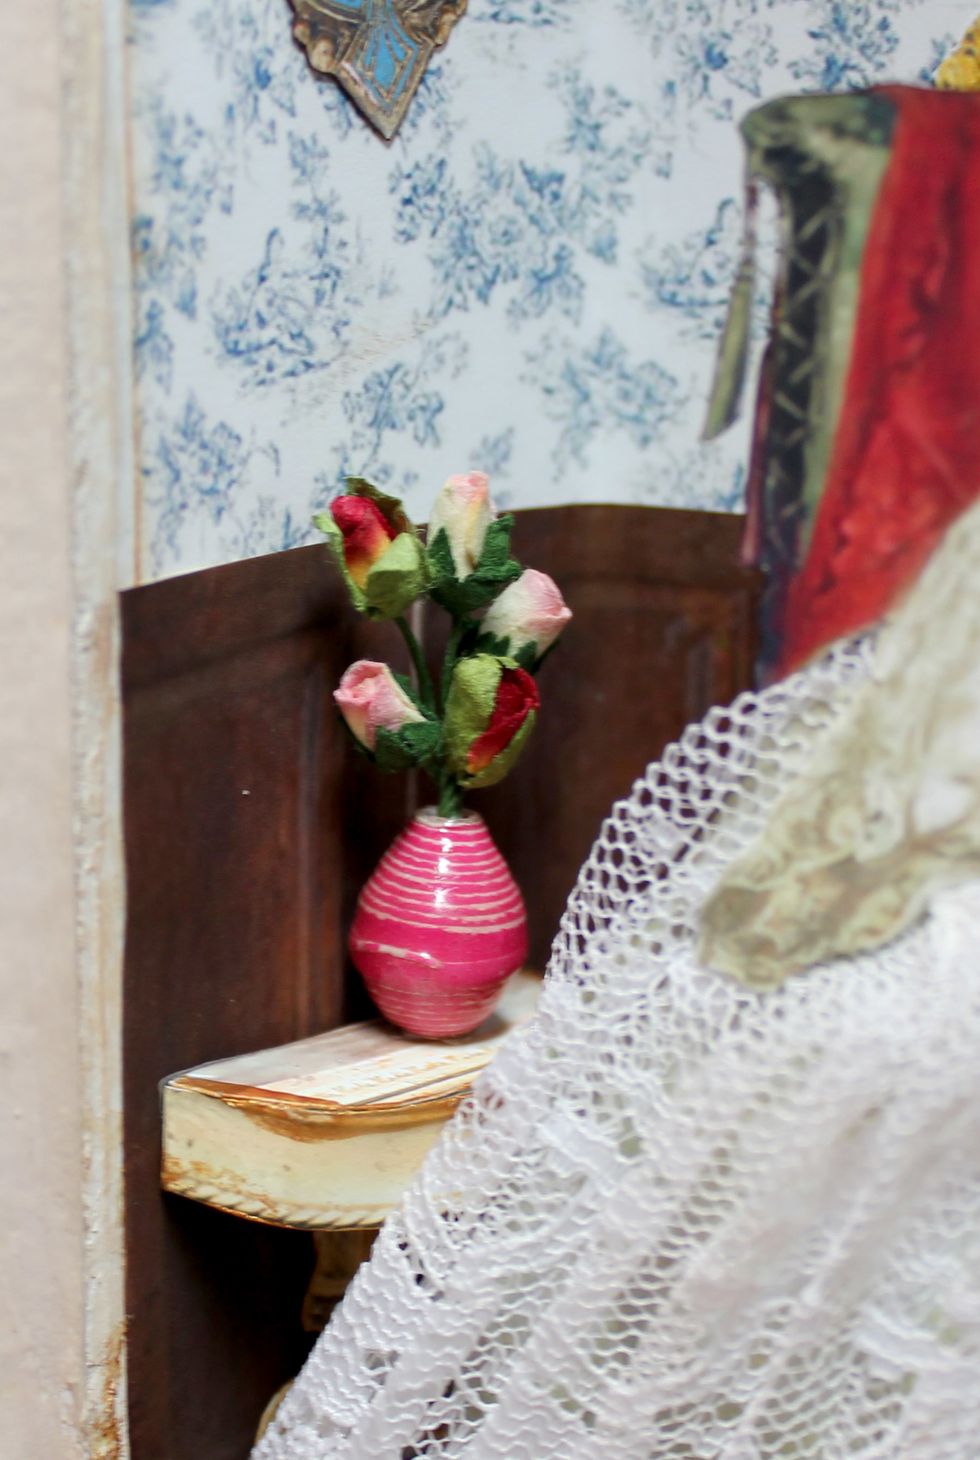
I used a paper bead and some miniature pink and red roses for my bouquet. And where did I find that perfect bead you ask?
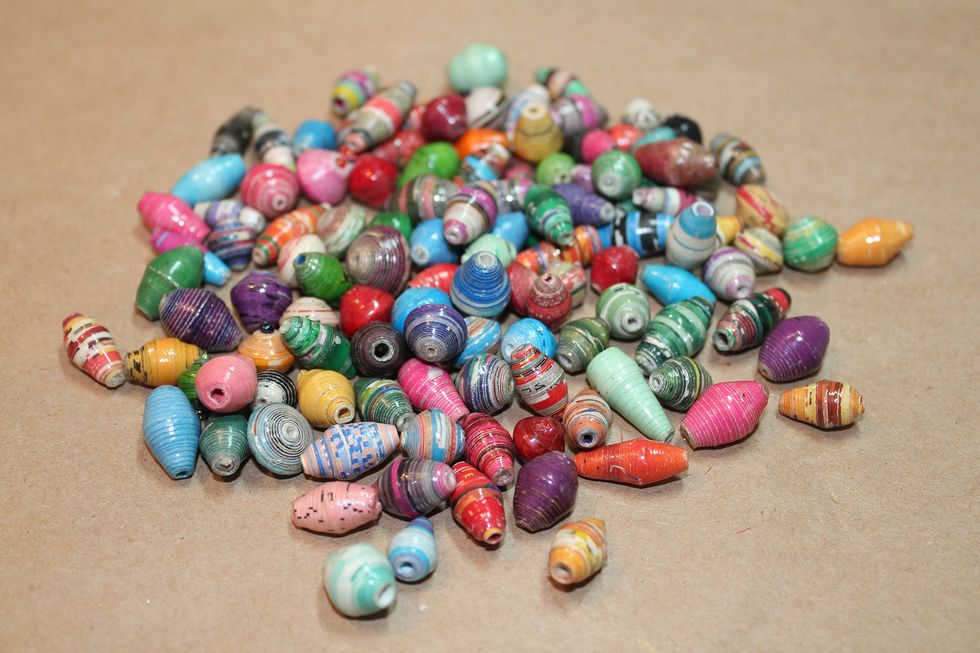
From this awesome set. They come from Outreach Uganda. The ladies make these beads for their livelihood. I have several sets of colors, sizes, and shapes, and mixed ones as well. Love them!

Cover front inset backing with a sweet rose wall paper pattern. This came from a free miniature wallpaper site. comohacerte.com/manualidades/papeles-a-escala-112-casa-de-munecas Adjust for size.
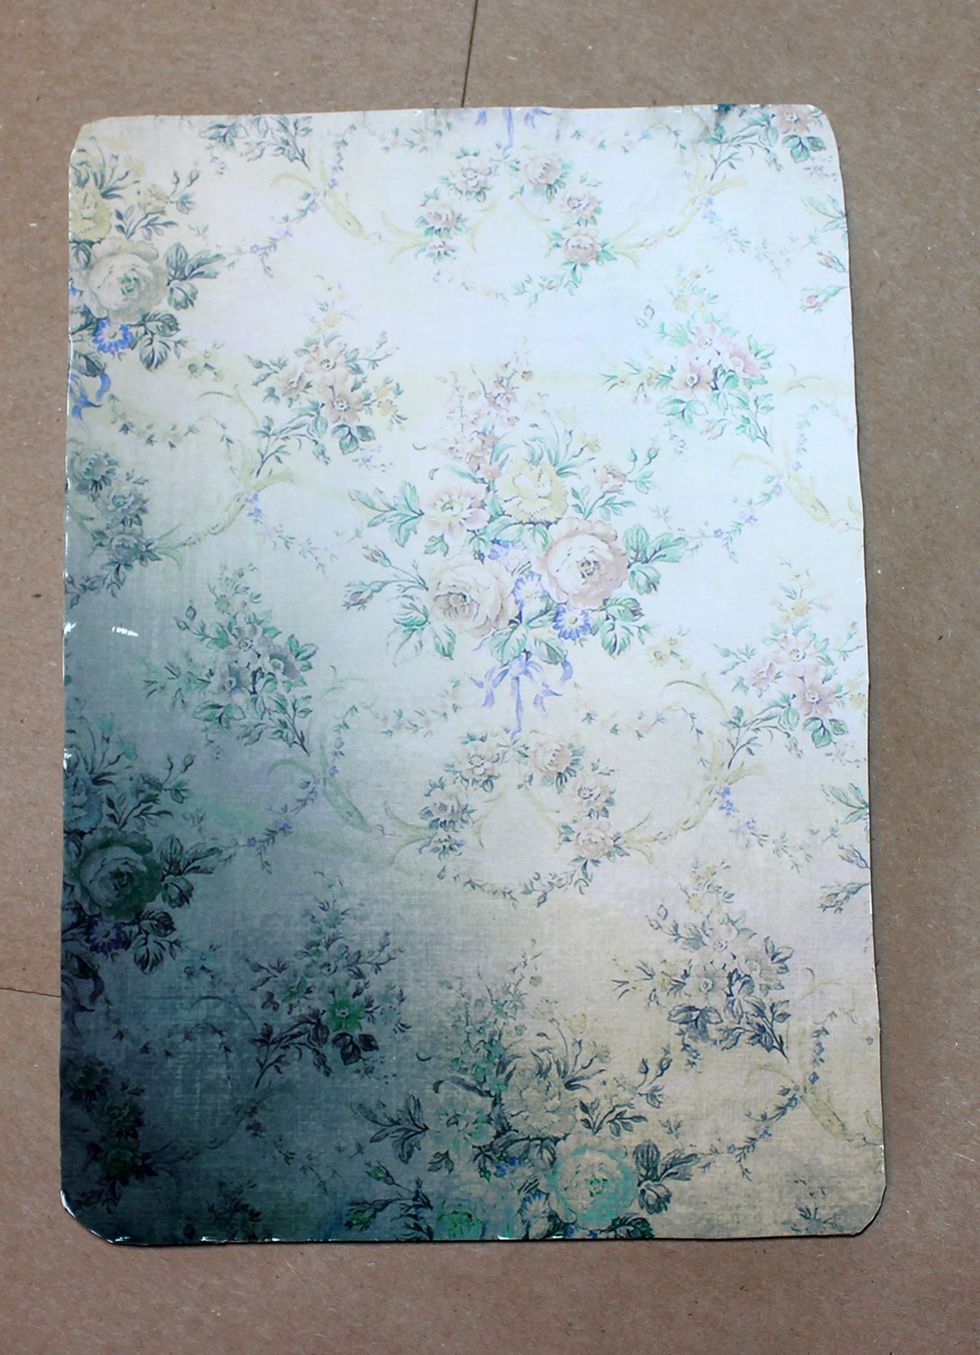
Cover the other side with another wallpaper. This came from a digital kit by Xquizart called Melancholy. I also created some vintage wallpapers in my collage sheets if you prefer to use them.
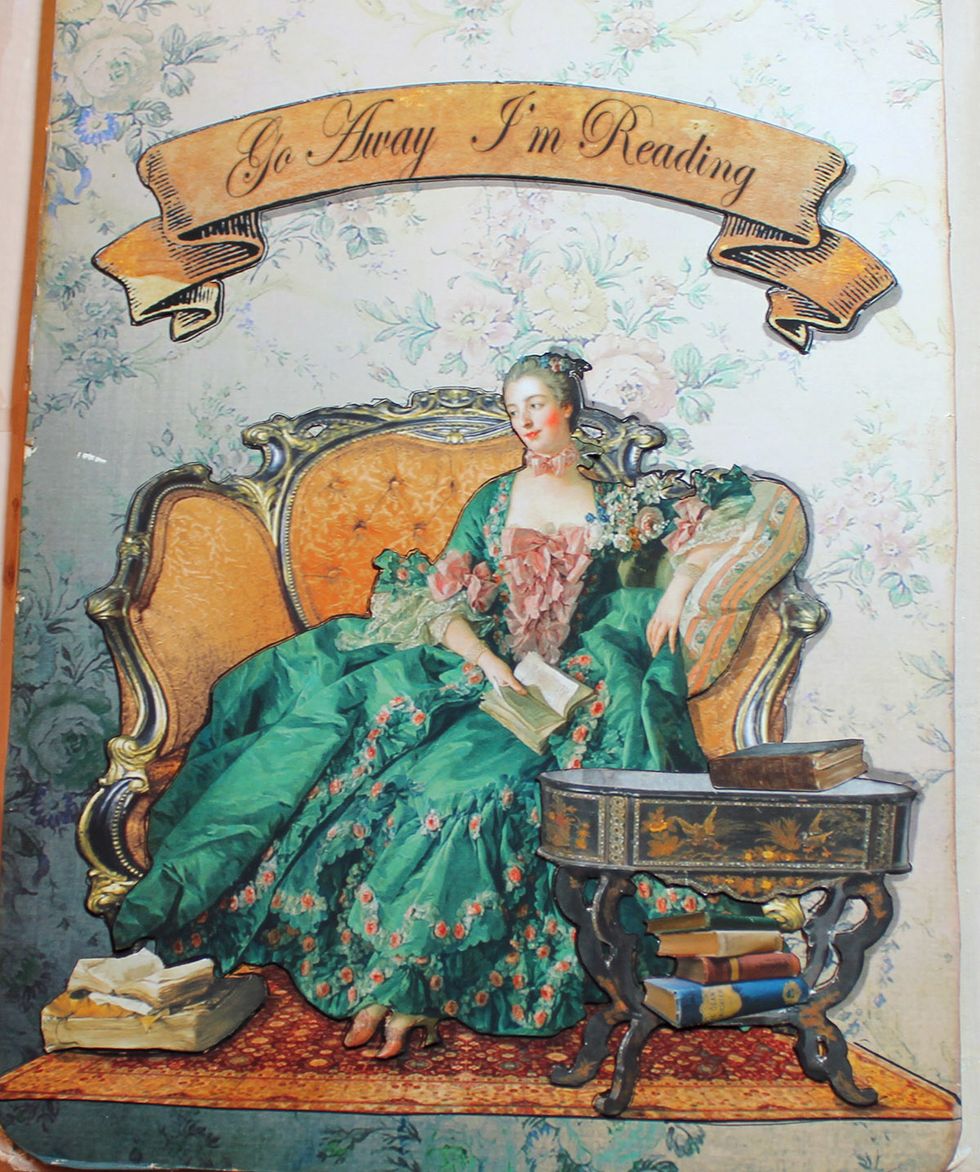
Build your scene. Iused my Go Away I'm Reading collage sheet, plus some furniture from an Xquizart digital kit - Chi Chi. I created two carpet options in my CS if you're not a techie.

Here's an alternate option using the chaise from Have A Seat collage sheet at Alpha Stamps. Also my wallpaper and carpet from my collage sheets Go Away I'm Reading, available at Alpha Stamps.
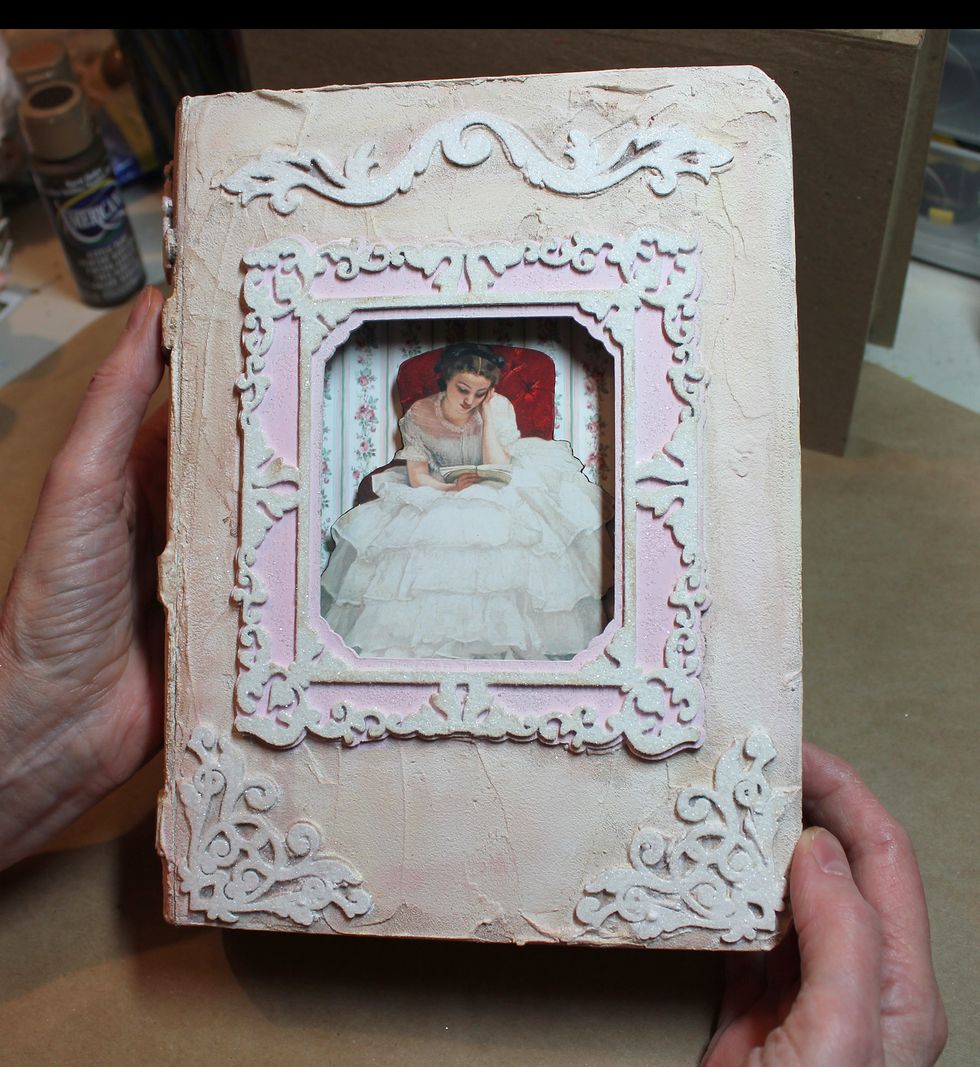
Figure your placement for the young woman on the front. Adhere (using the folded cardstock) to the rose wallpaper background. I used 1/8" Scor tape along the lip edge of cover and adhered carefully.

This will be your inside panel.
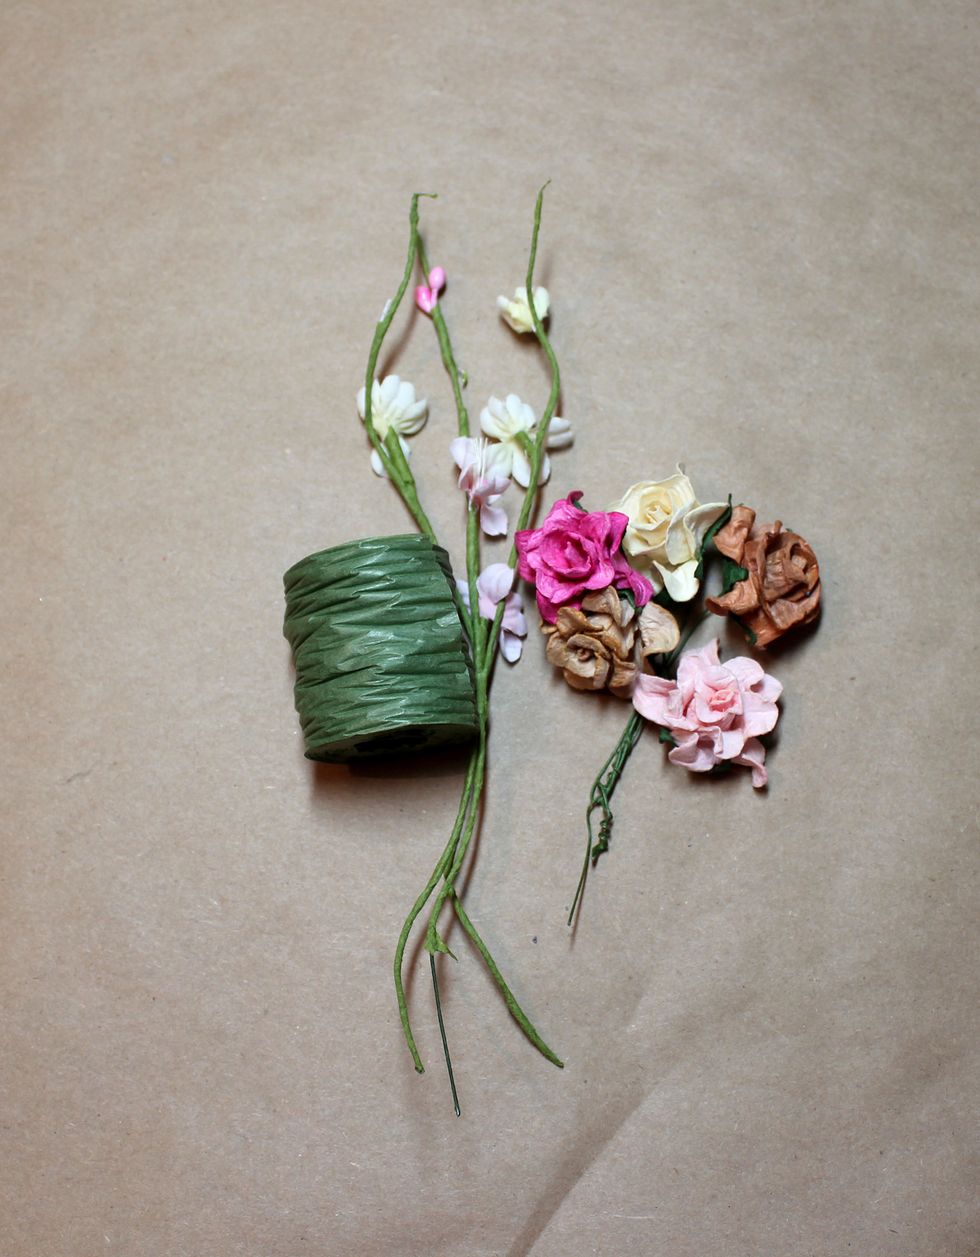
Last but not least... I gathered some coco, cream, and pink roses; a vine with cream and pink blossoms; and some paper tape.
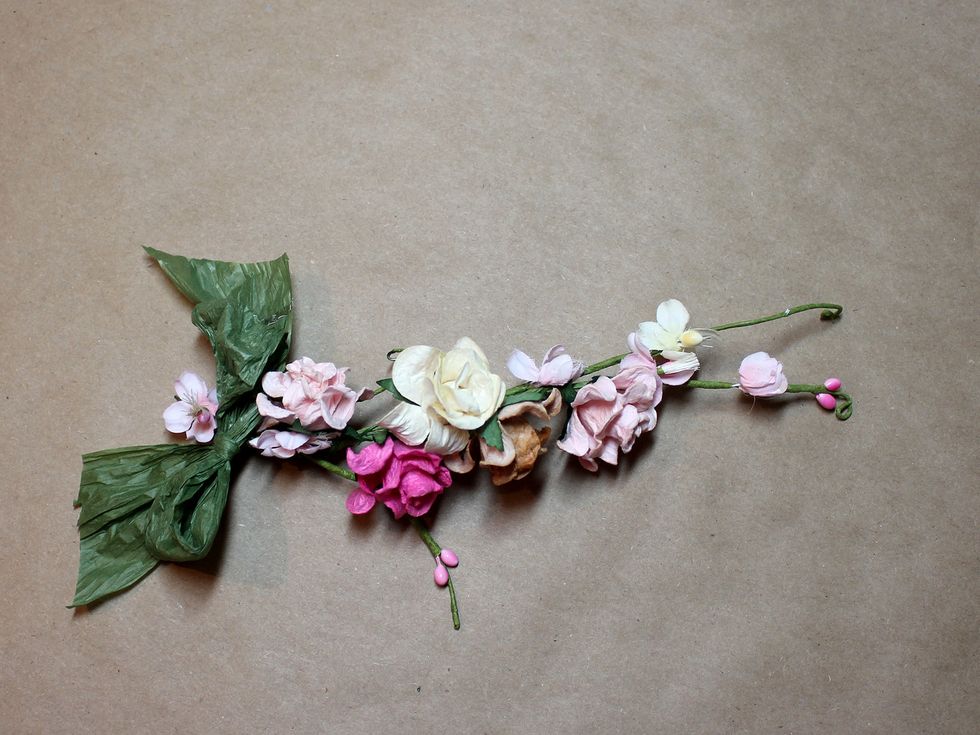
I wove the rose wire around the vine to create a spray of blossoms, and tied off with the paper ribbon.
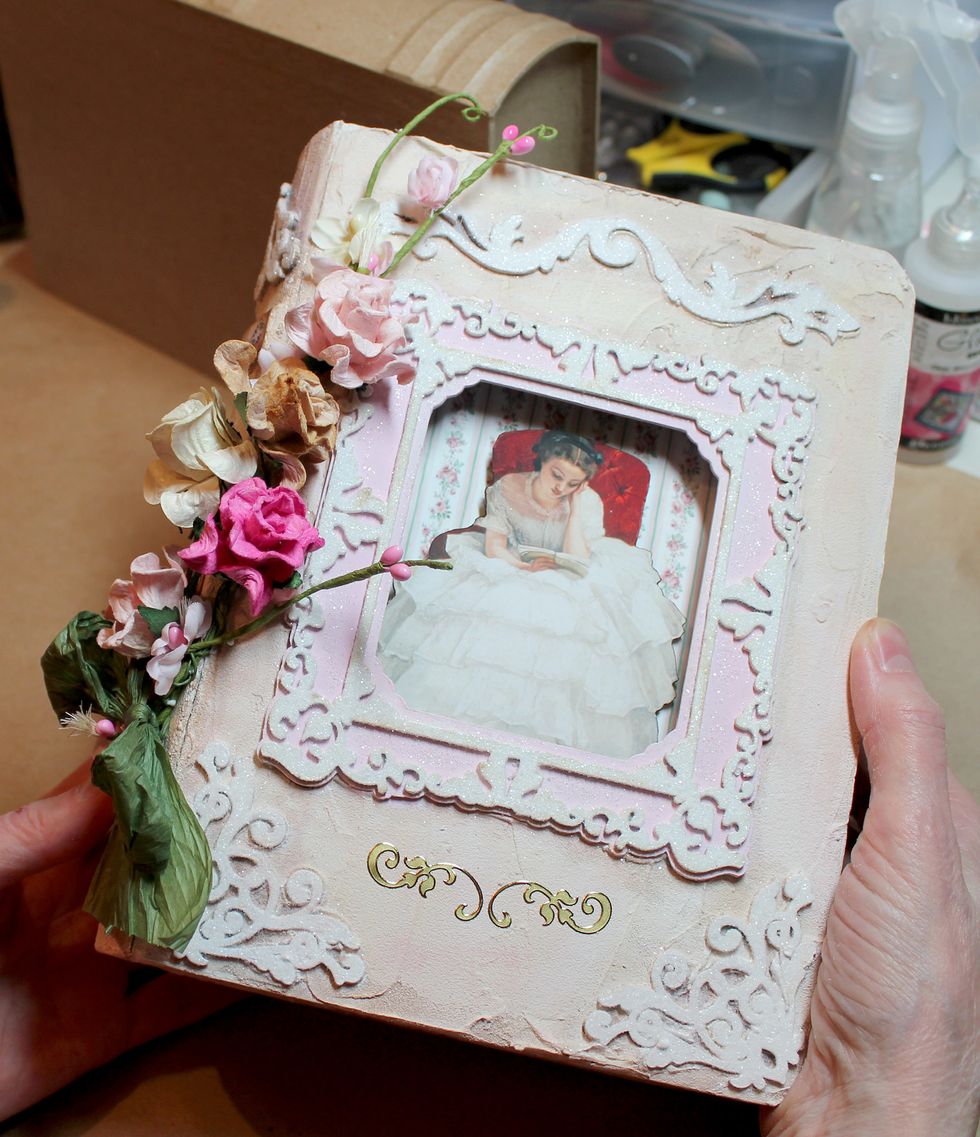
Adhere your spray of flowers along the edge, curving around to the side. I also added some Dazzles stickers to the front of the book.
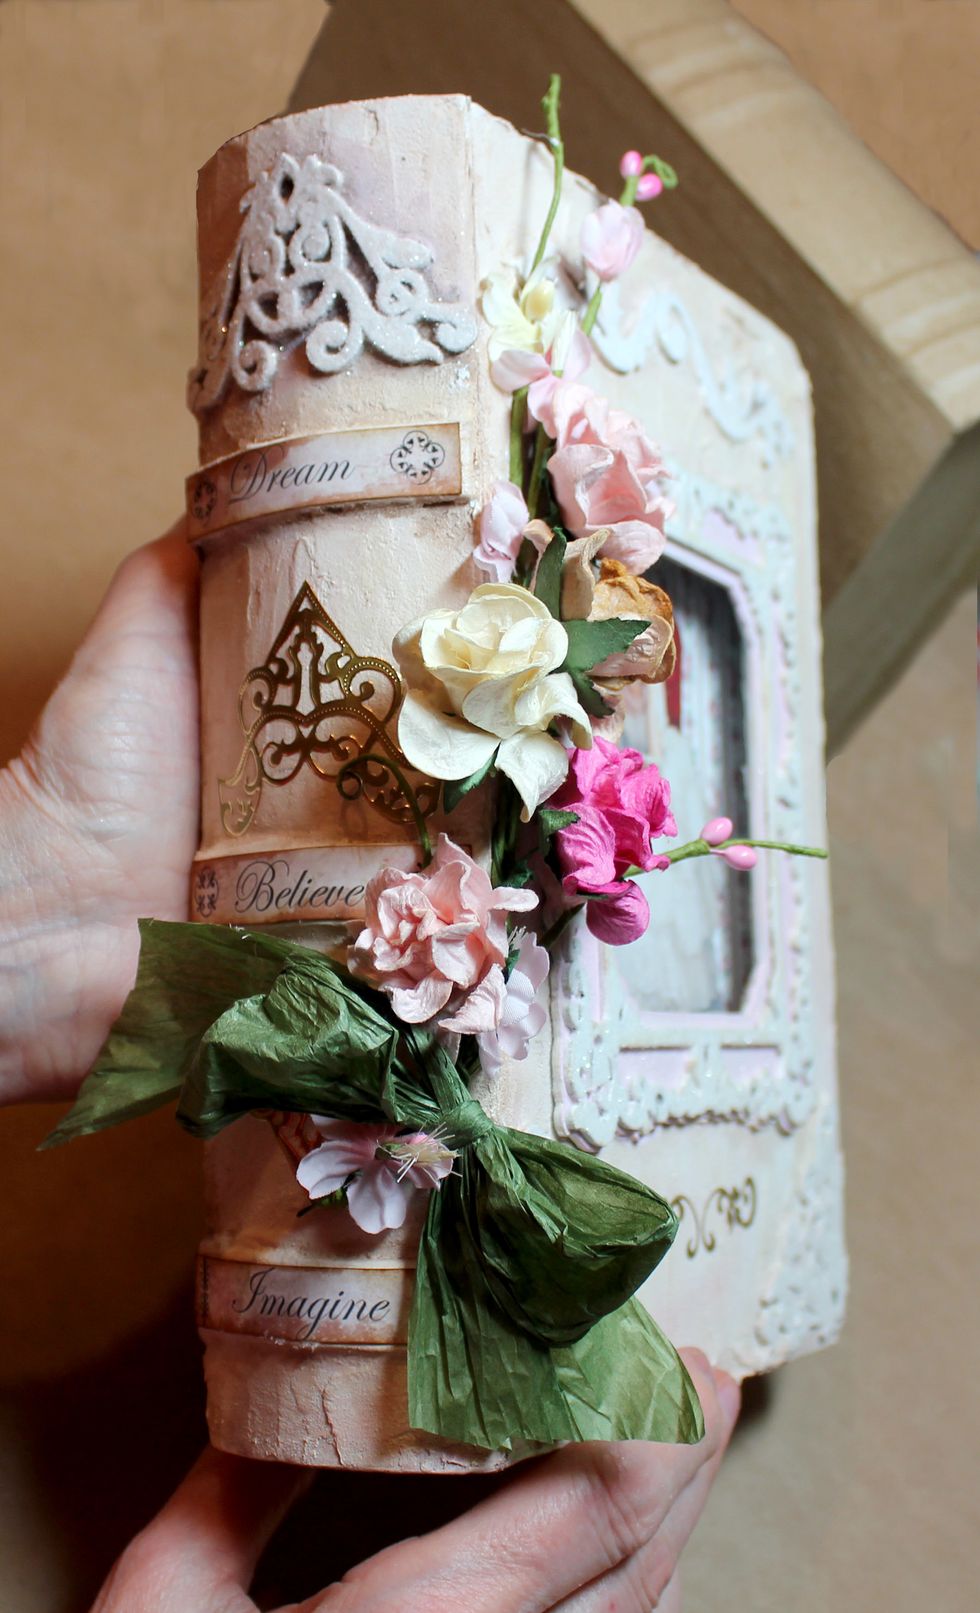
A view from the side.
And there!!! You did it! :)