The Conversation (0)
Sign Up

Cut out a simple shape (circle, square, rectangle, or triangle)from white copy paper. Continue cutting the same shape in various sizes until you have between 30 and 40 shapes.
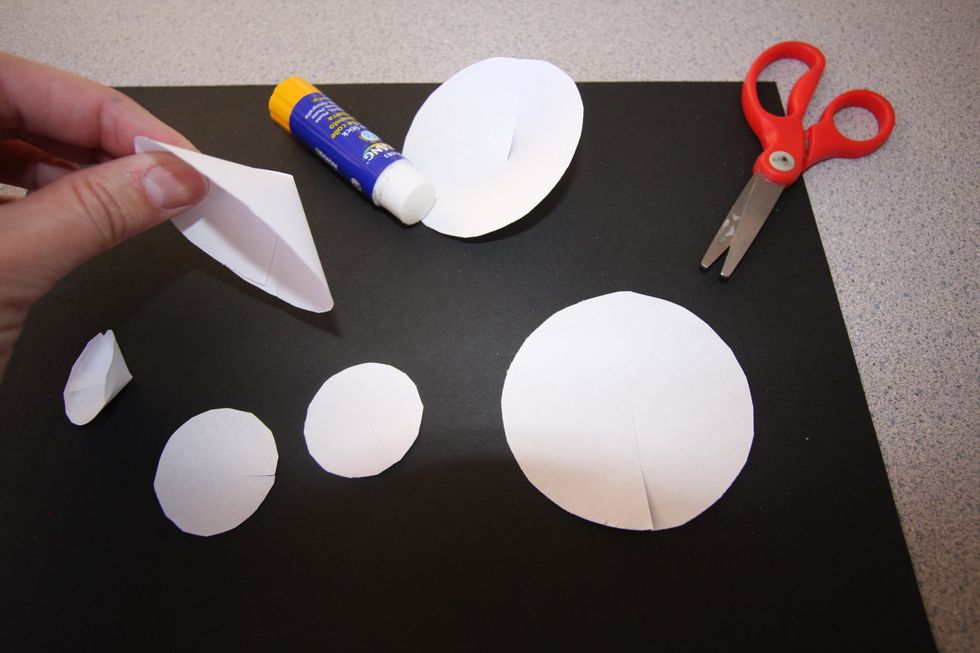
Experiment with rolling, cutting, or folding to alter your shape into a form. Use a glue stick to hold paper form together. Continue to alter all shapes in exactly the same way as the first.
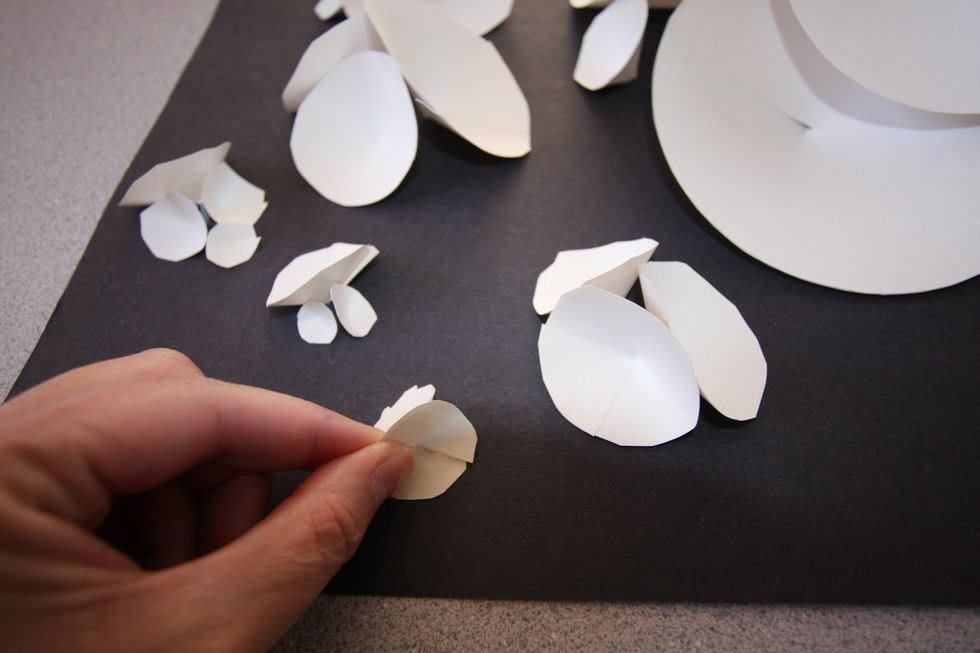
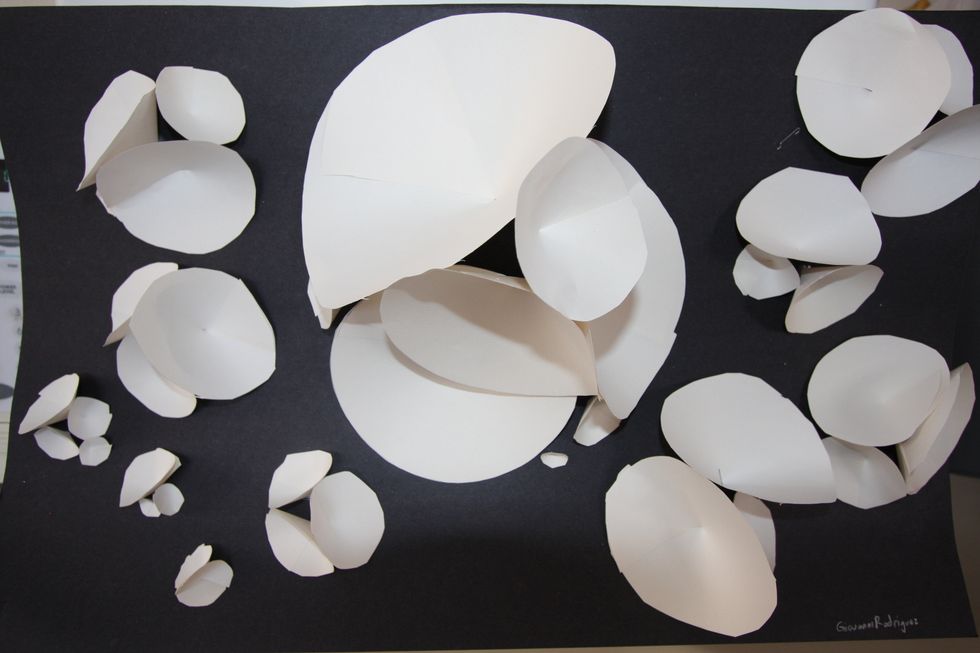
Place all forms on black tag board. At this point, do not glue anything down. Experiment with different arrangements that use all of your created forms.

When you are happy with arrangement, use tacky glue to adhere pieces to each other and to the background. Lay flat to dry completely.
Display under a strong light source that will emphasize the three dimensionality of the work.