The Conversation (0)
Sign Up
Mushroom Materials List - Precious Memories Collection - #4501091 - Precious Memories 6x6 Paper Pad.

This is my basic hand drawn template used to create the house. You should be able to save the image and print the desired size you require.
Once you have traced and cut out the template for the mushroom roof you will need to trace and cut out approximately 24 of these.

Once you have cut them out you will need to fold them evenly in half as shown.

Start gluing the folded spine only and layer on top of each other as shown. Then once all are glued together set aside for glue to dry. PLEASE NOTE - ONLY RUN GLUE ALONG FOLDED SPINE EDGE.

Once glue has dried slowly open out as shown.

Once fully open join and glue the 2 outer pieces together to form the roof.

Top view of joined roof.

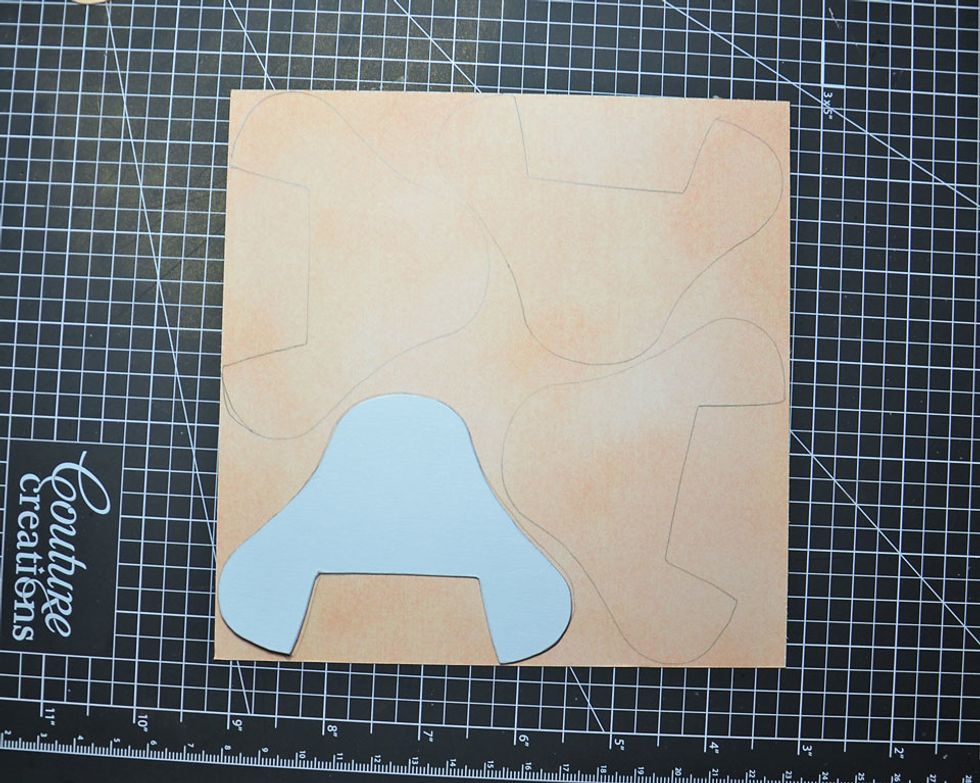
Locate mushroom base template and begin to trace around.

You will need to trace and cut approximately 24 of them.

24 mushroom base pieces :)

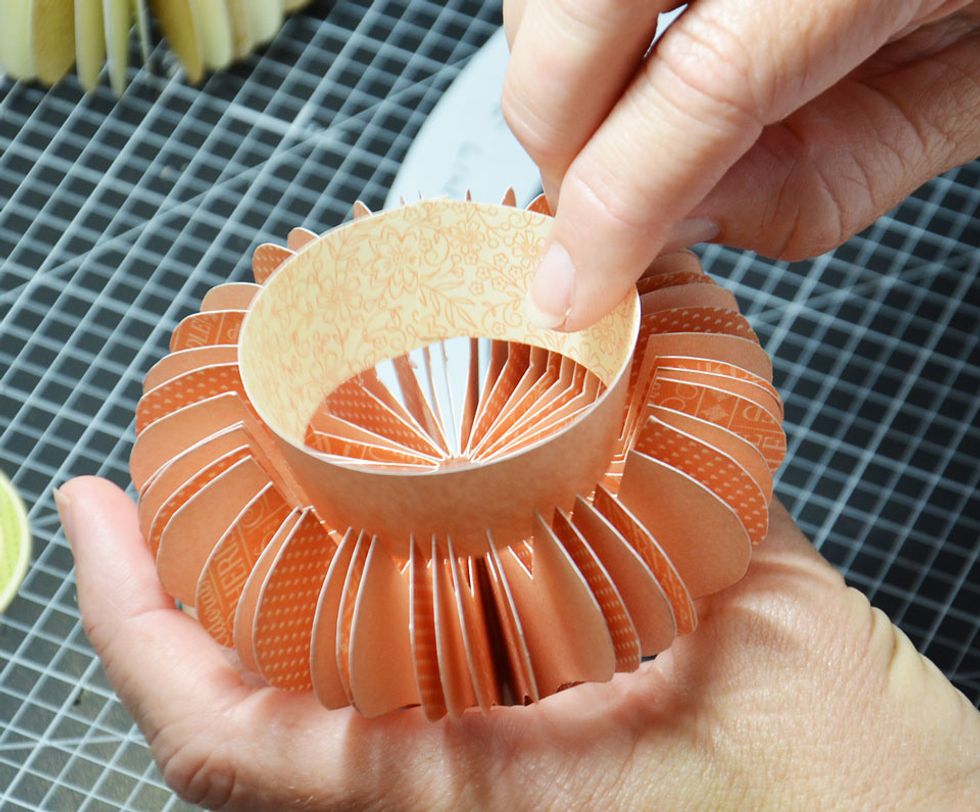
Fold all base pieces evenly in half as shown.

Glue and layer each base piece as shown above and set aside to dry. PLEASE NOTE - ONLY RUN GLUE ALONG FOLDED SPINE EDGE.

Fold out and glue outside pieces together.

Once the base is completely folded out and glued it should look like this.

Using the inside roof template trace and cut 2 circles from the patterned paper. Cut 1 the from the same paper as the roof and cut 1 from the same paper as the base.

Cutting :)

Attach to the top of the mushroom base as shown.

Cut and trace the inside roof lining. You only require 1 of these and it should be cut from the same colour paper as the roof.
Glue the ends of the inside roof lining together to create a circle as shown then attach to the inside of the roof cut out.

Glue the inside roof circle as shown.

The inside roof should look like this once finished.

Sit the roof on top of the base and your Mushroom Fairy house is together.

I created the door from scraps of paper. It is simply a rectangle paper piece which I cut three sides into and left a border this created the door frame and I then I folded it back slightly.

This is creating a chimney for the house. This was created freehand by simply creating a rectangular tube from patterned paper and cutting off the bottom to create the desired angle to suit the roof.

Gluing the chimney shape together.

Attach your chimney as shown.

Now you have completed the basic Mushroom Fairy House. It is now ready to be decorated any way you choose. Please continue on if you would like to follow my steps to further embellish the house.

Fussy Cutting Materials List - #4501099 Once Upon A Springtime Collectors Edition - Papers used - Once Upon A Springtime, Once Upon A Springtime Cut Apart, Enchanted Forest, Primrose Cottage.

For basic embellishing I have chosen to use the Once Upon A Springtime collection. You will need to locate and fussy cut the images shown. This will give you one basic cluster but you can add more.

Locate the fussy cut images and start layering as shown.

Add another layer this time some flowers :)

Now the bunny and some more flowers.

Now the sweet little mouse reading.

Attach finished cluster to the side of mushroom as shown.
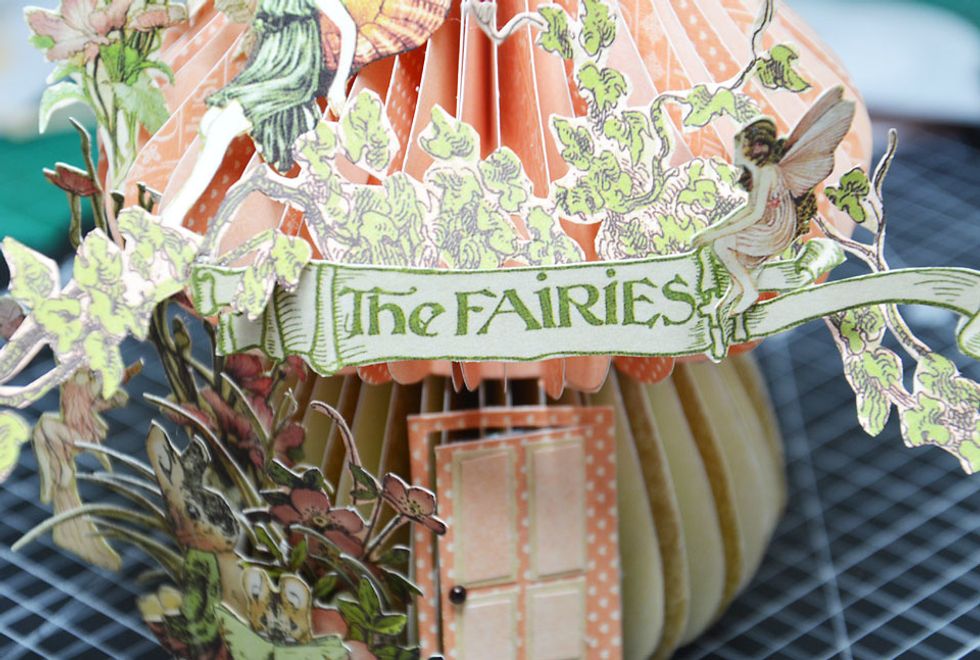
Attach 'The Fairies' title to the front of the roof above the door. PLEASE NOTE - I have added extra fussy cut foliage to the roof area but it is not required.

Attach the green fairy to the side of the roof. NOTE - These are the basic pieces needed to dress the house. I however have chosen to continue fussy cutting more images and attaching.
As you can see in the following images I have continued fussy cutting and making the house full of things to look at. If you wish you may continue on fussy cutting to create a fuller house.

I have added extra fairies and foliage.

A few more flowers, birds and an additional foliage behind the sign.
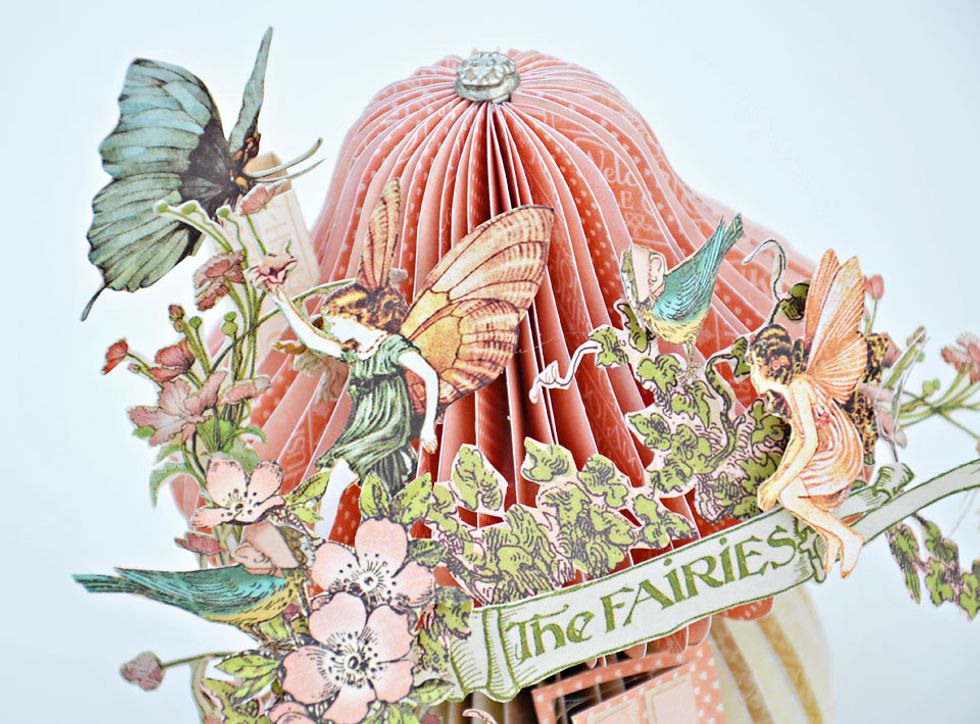
A butterfly to the top of the chimney and I have insert a Graphic 45 Brad to the top of the roof.

Thank you for viewing my tutorial. Joanne Bain - scrappinforme.blogspot.com.au/