The Conversation (0)
Sign Up
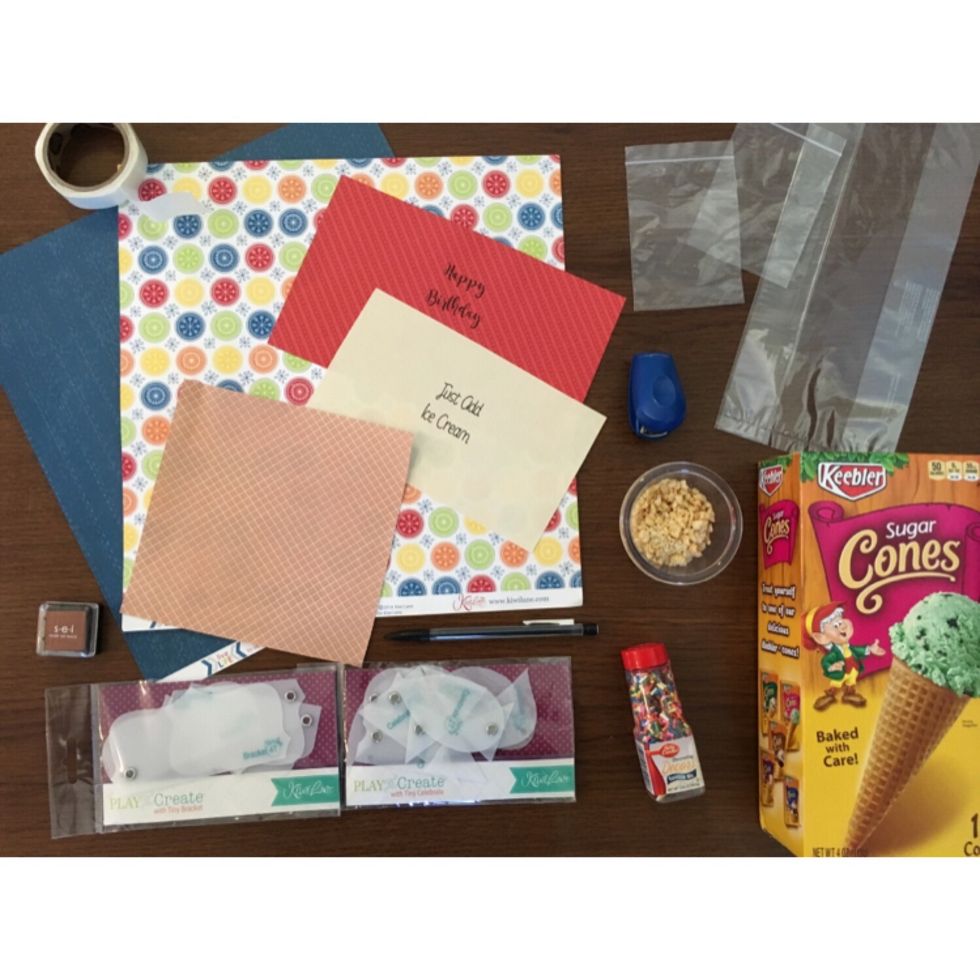
Gather necessary materials
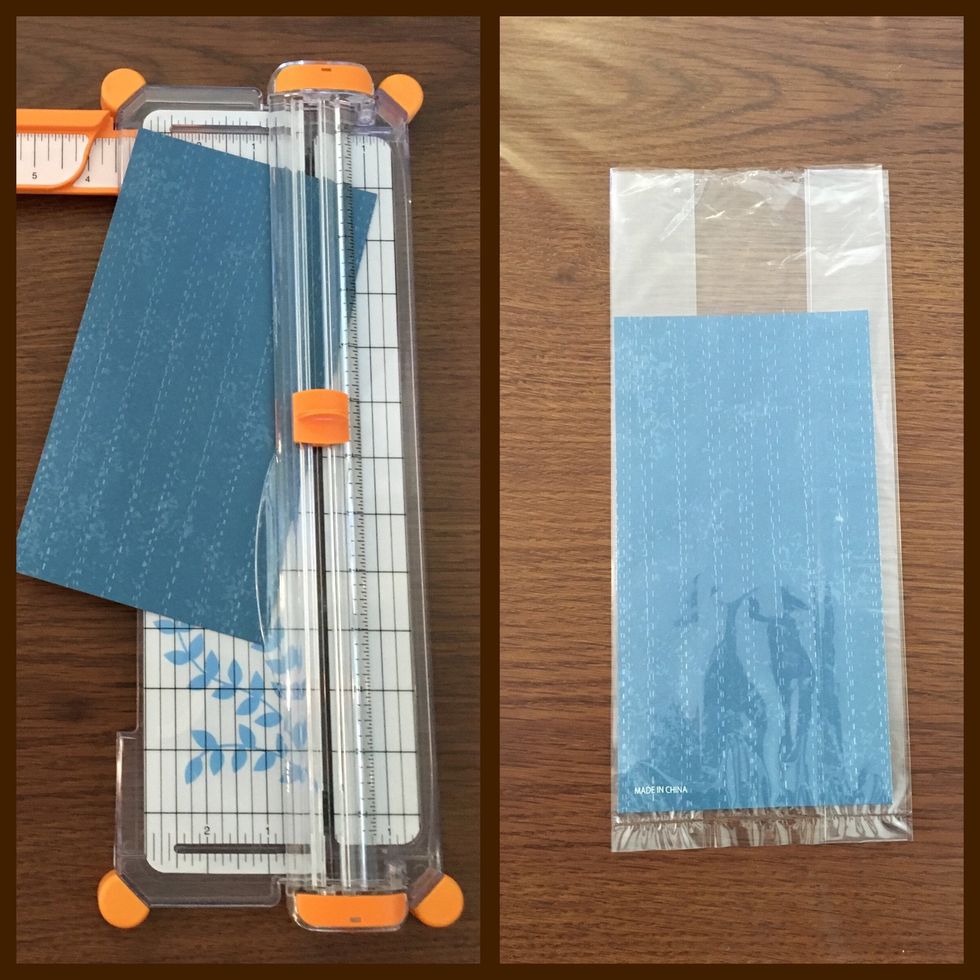
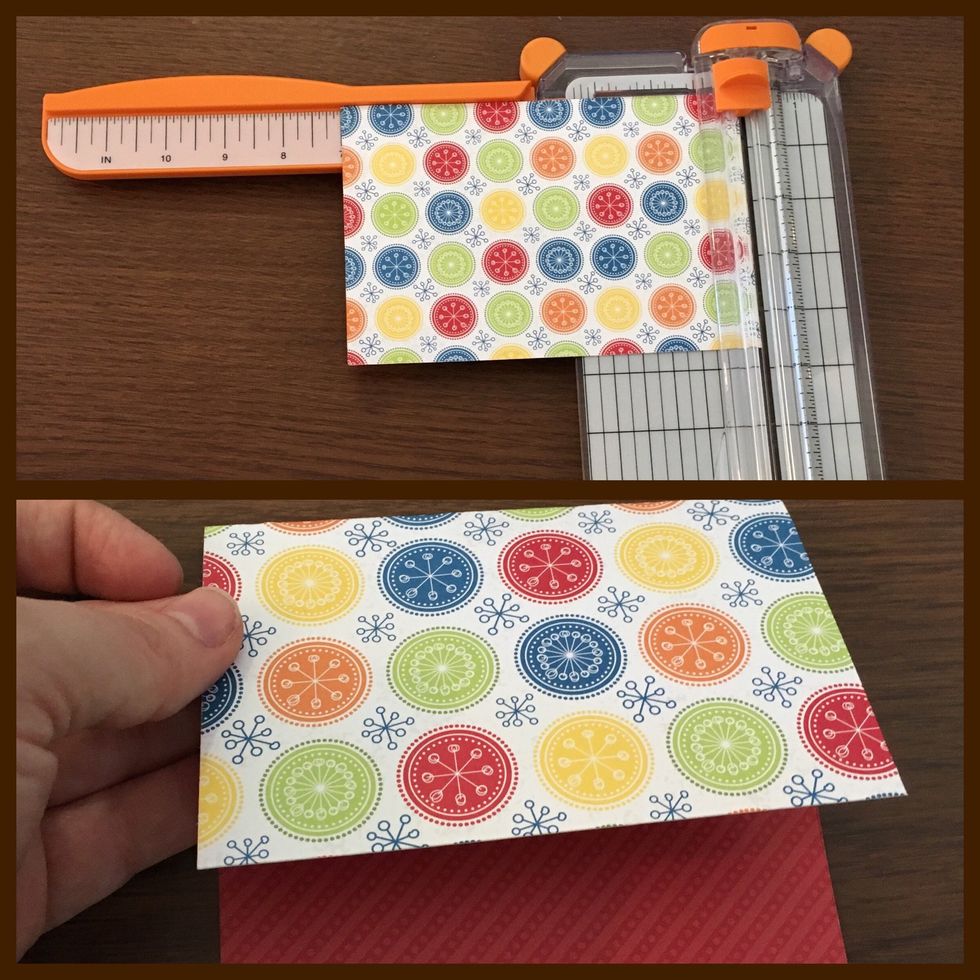
Cut one piece of Kiwi Lane Live Life scrapbook paper to the width of your gift bag and a few inches shorter. https://lindsay.kiwilaneinstructor.com/store/default/live-life-paper-kt.html
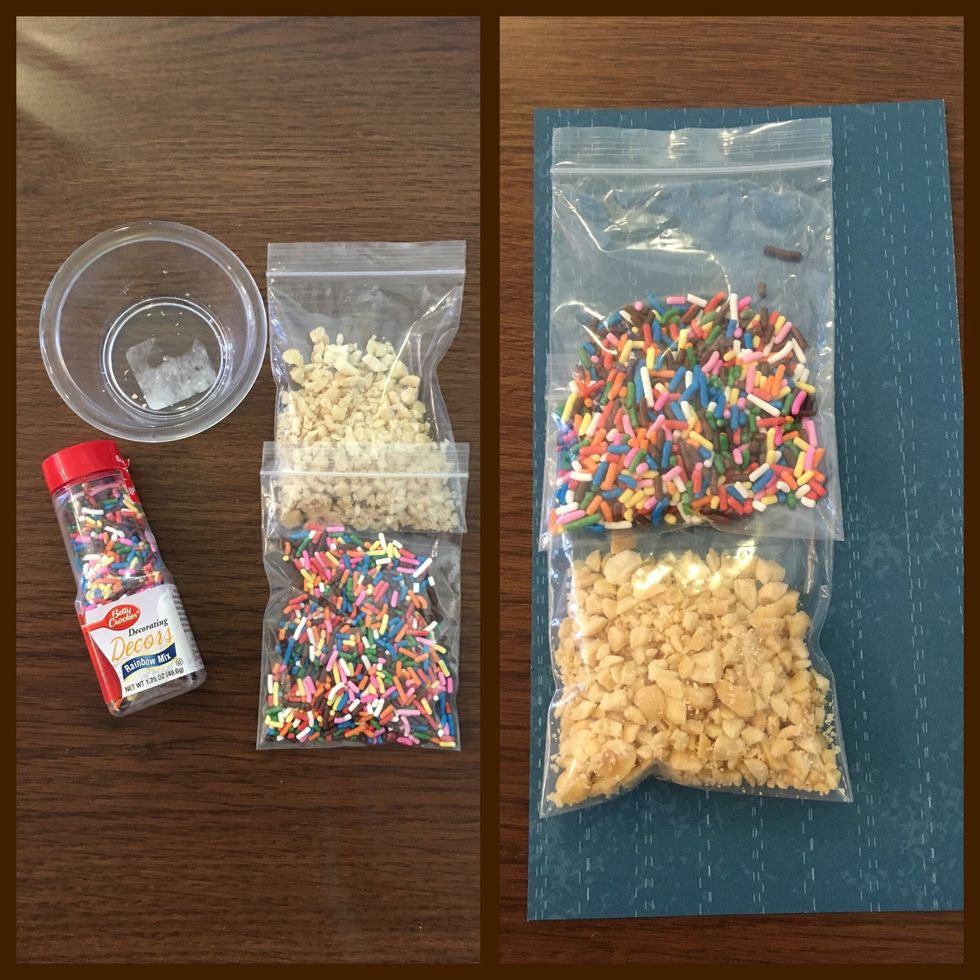
Put sprinkles and crushed peanuts each into a small bag and glue with glue dots onto scrapbook paper
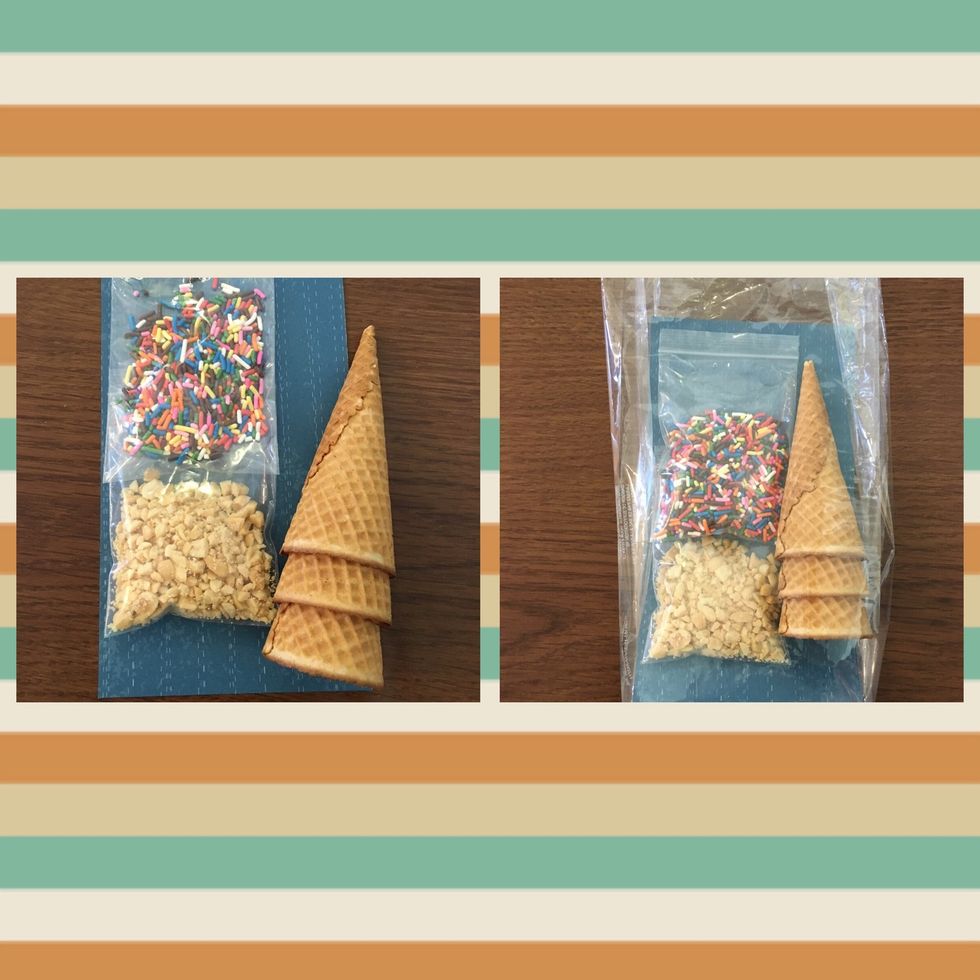
Add 3 ice cream cones and put in gift bag
Cut your Kiwi Lane Live Life scrapbook paper the width of your gift bag and 7 inches long. Fold over with 3 inches on one side and 4 inches on the other.
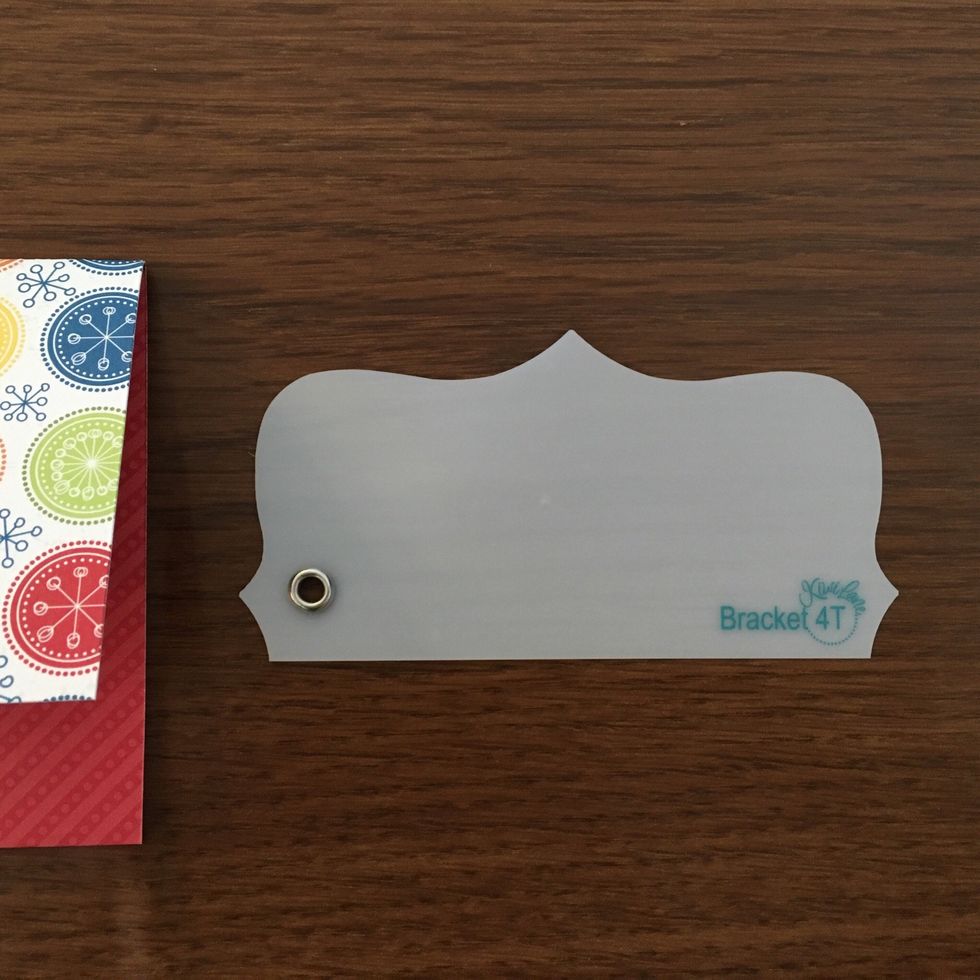
Use Kiwi Lane Designs Tiny Bracket 4T for next step. https://lindsay.kiwilaneinstructor.com/store/default/tiny-brackets.html
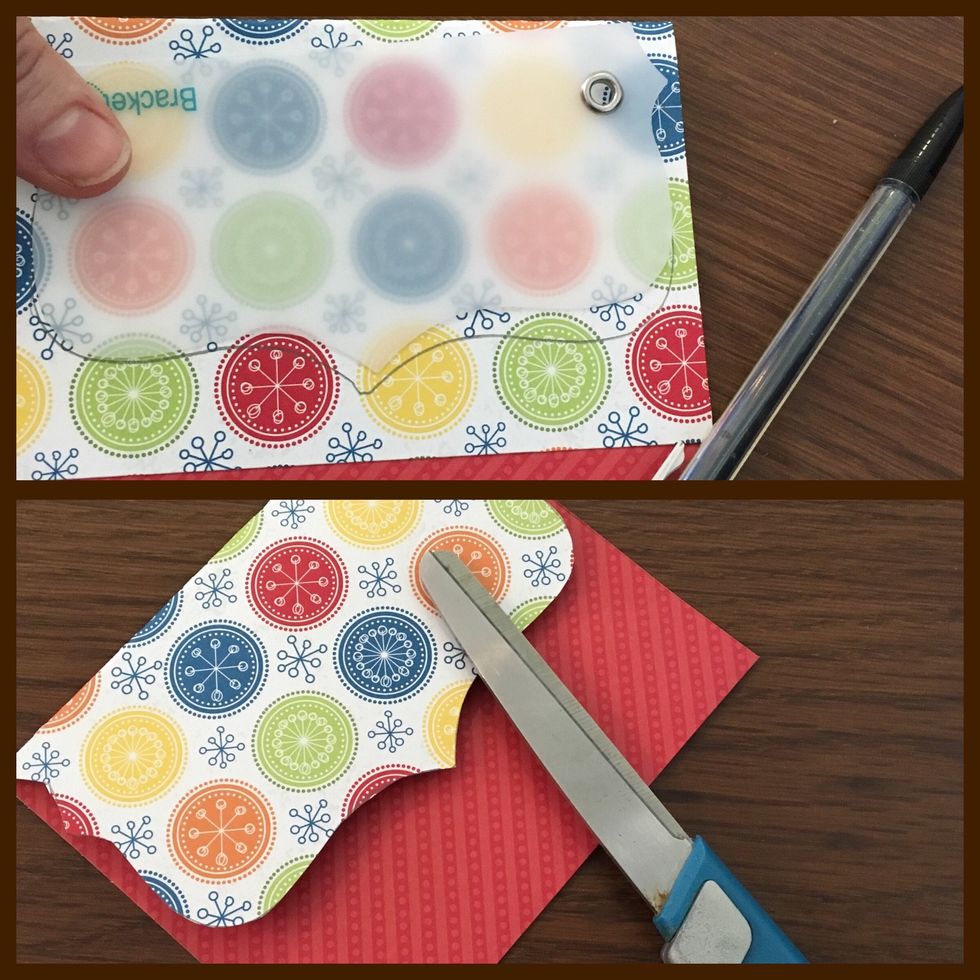
On the 3 inch side trace the template and cut out
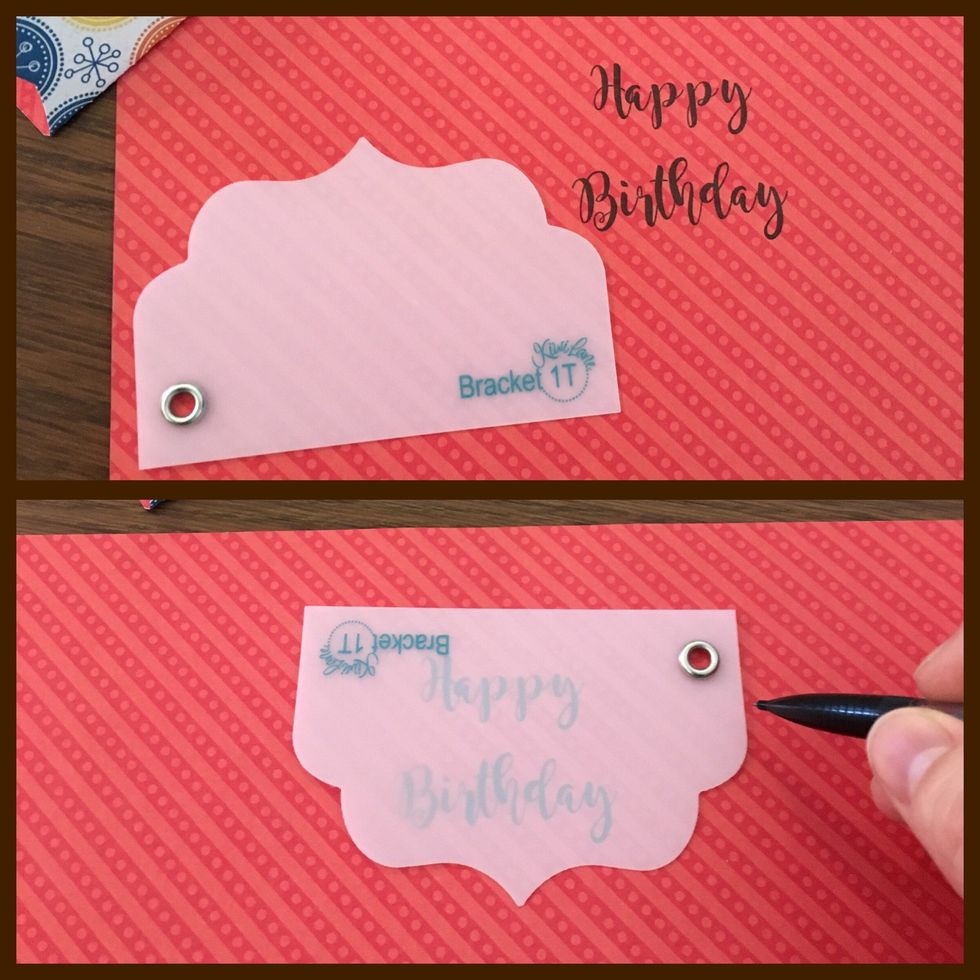
Print "Happy Birthday" on 3rd piece of Kiwi Lane Live Life scrapbook paper. Use Kiwi Lane Tiny Bracket 1T to trace and cut out the Happy Birthday.
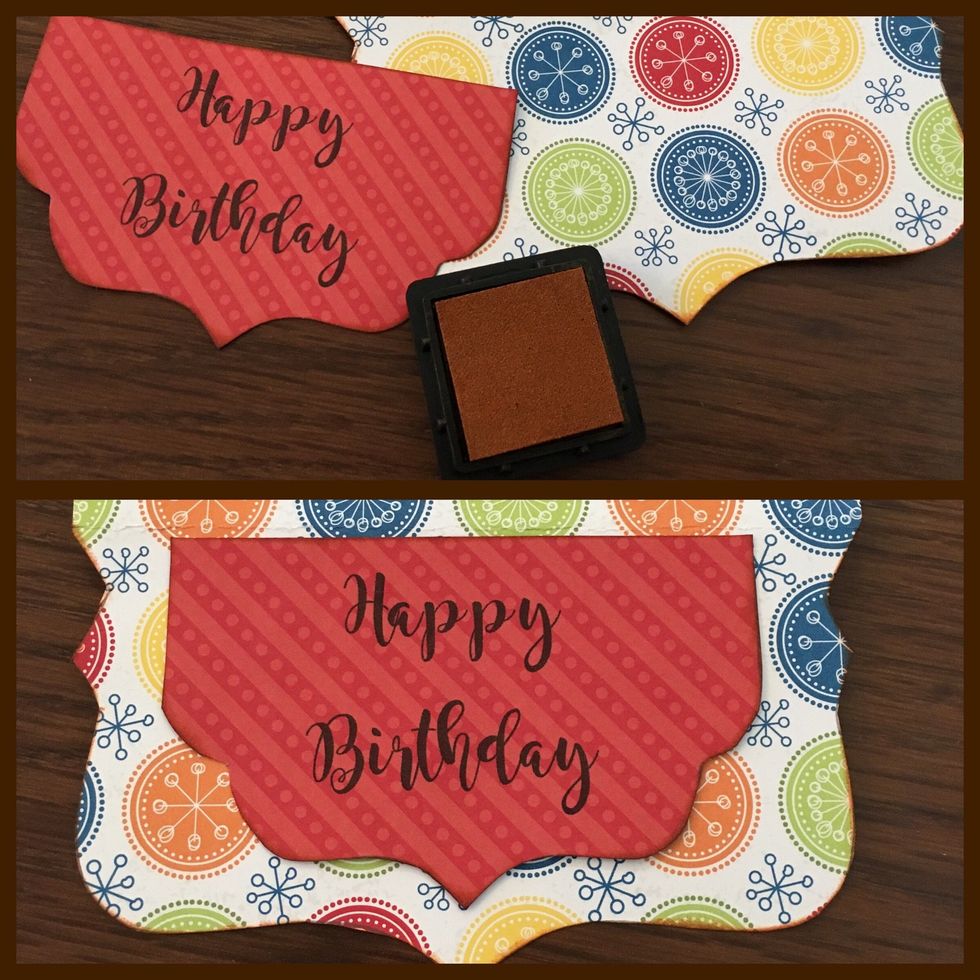
Ink the edges with a light brown ink. I used Tim Holtz Vintage Photo Distress Ink. Glue bracket 1T to bracket 4T. https://lindsay.kiwilaneinstructor.com/store/default/distress-ink.html
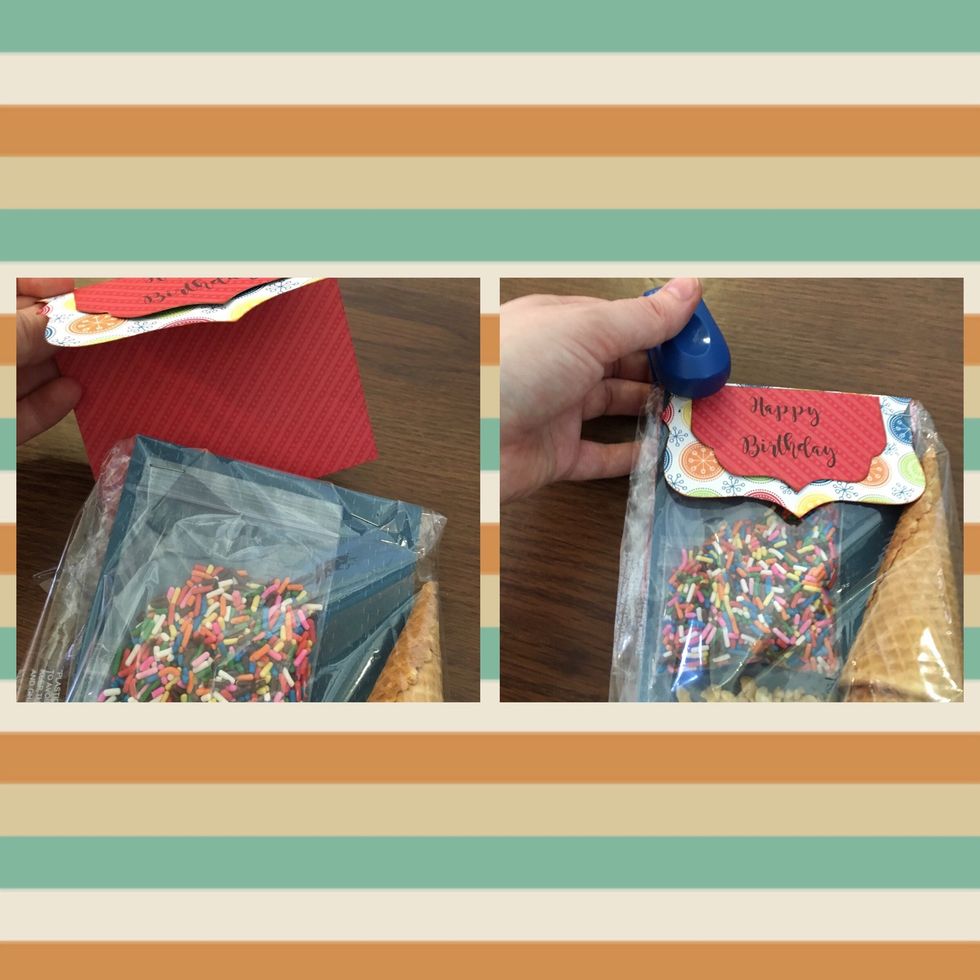
Put folded paper over the top of the bag and staple in place
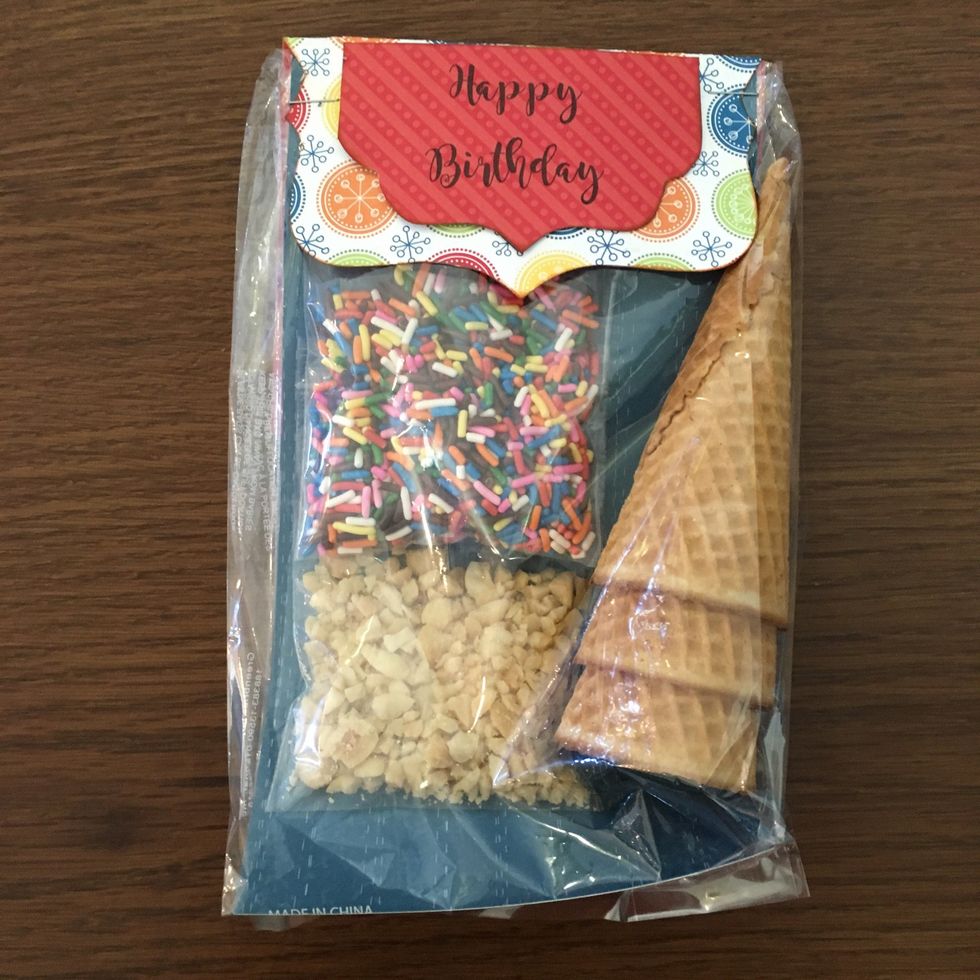
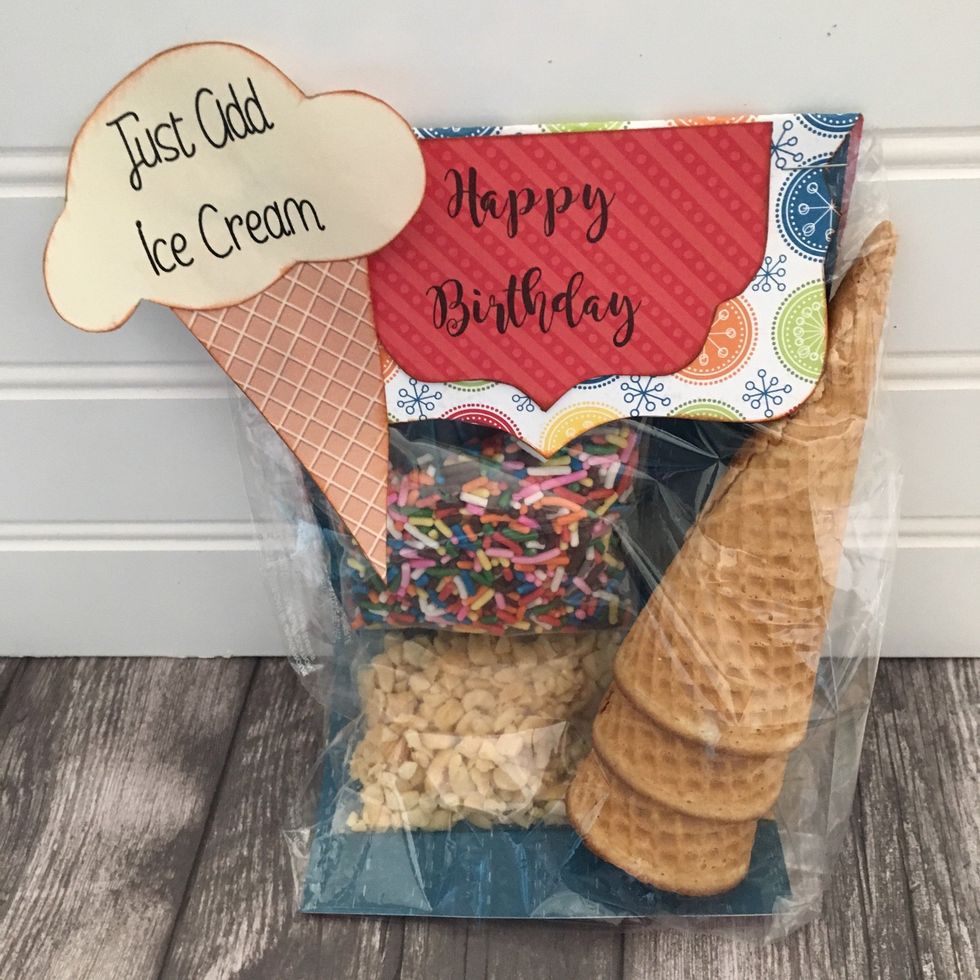
At this point bag should look like this. Now time to make the ice cream cone.
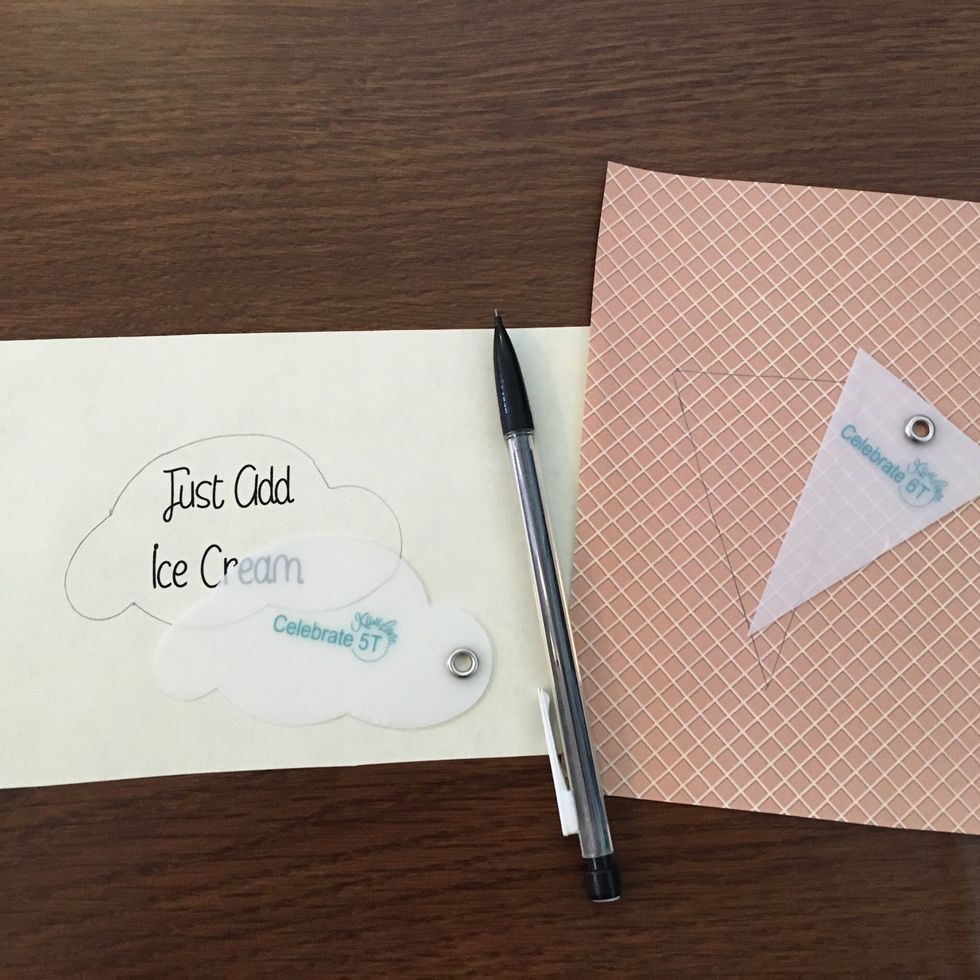
Print "Just add Ice Cream" use Kiwi Lane Templates - Tiny Celebrate 5T and 6T to trace and cut out the ice cream cone. https://lindsay.kiwilaneinstructor.com/store/default/tiny-celebrate.html
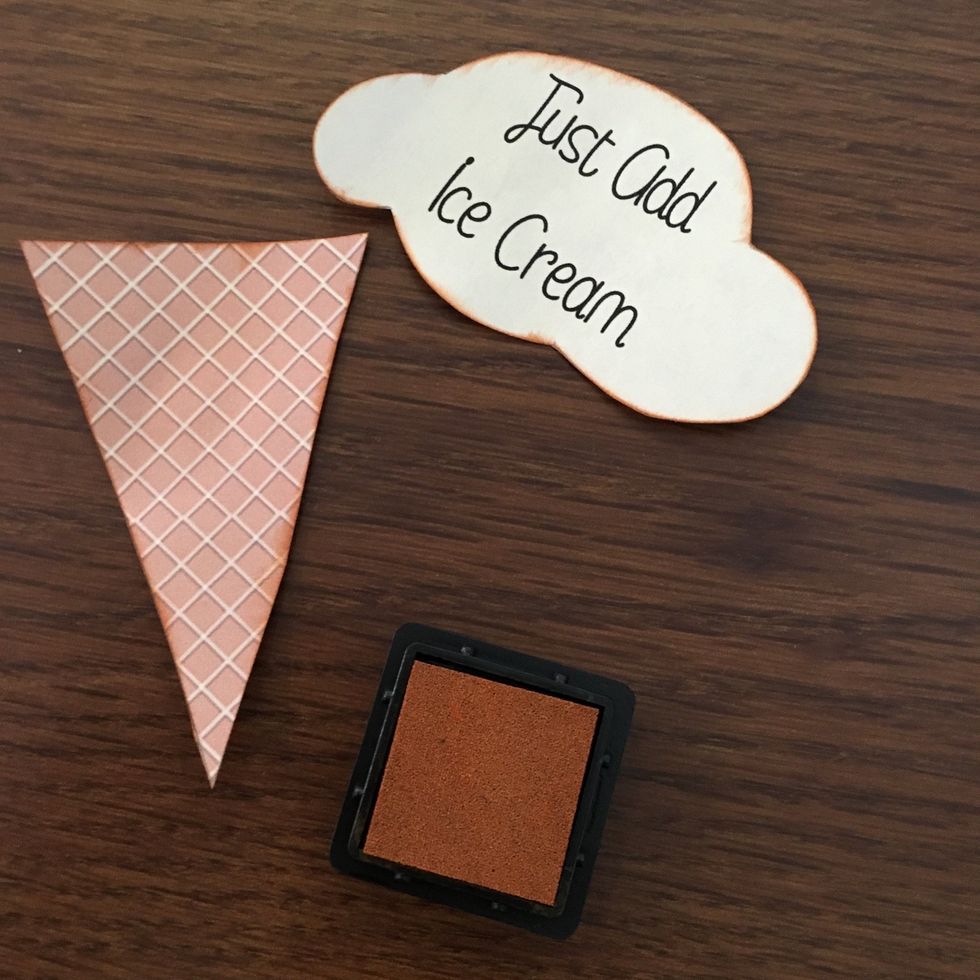
Ink the edges with brown ink. https://lindsay.kiwilaneinstructor.com/store/default/distress-ink.html

Glue together with a glue dot and glue to the bracket on the gift bag.
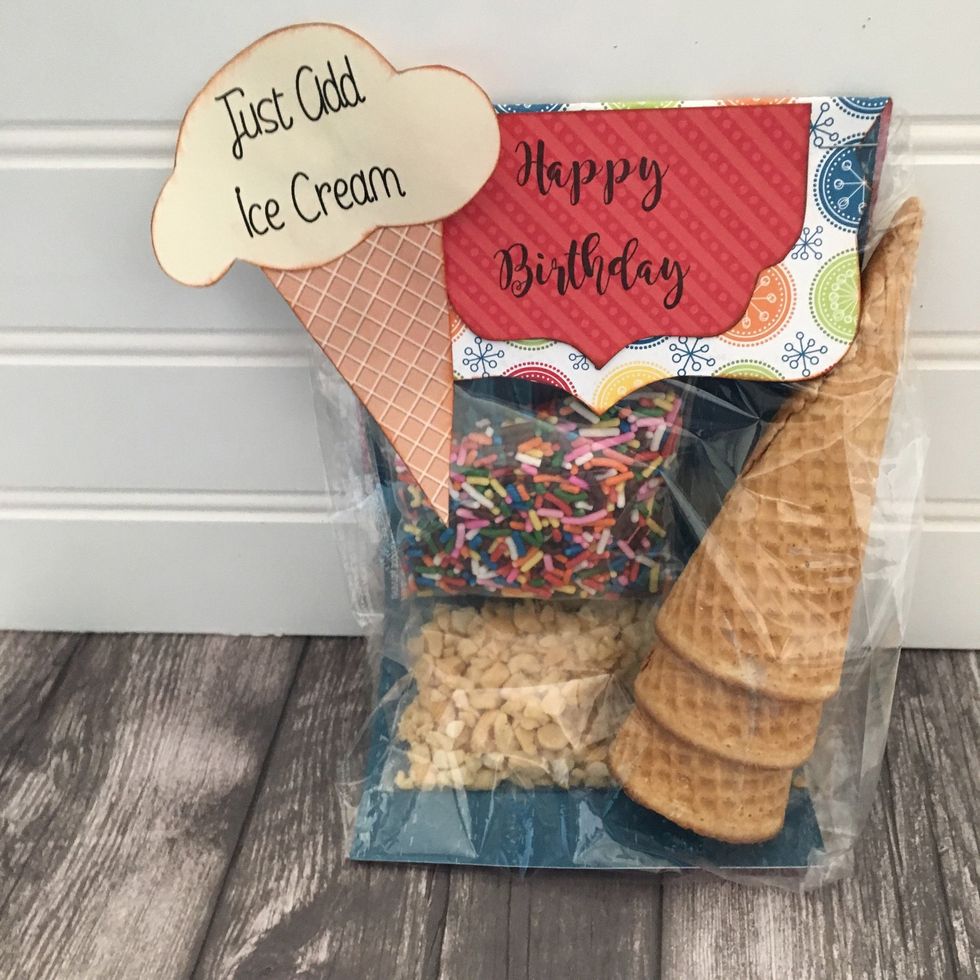
And now you're ready to give the perfect gift!
If you enjoyed this Snapguide please SHARE it! Visit us at https://www.facebook.com/lindsaykiwilaneinstructor/ for more ideas!