STEPS
TOOLS
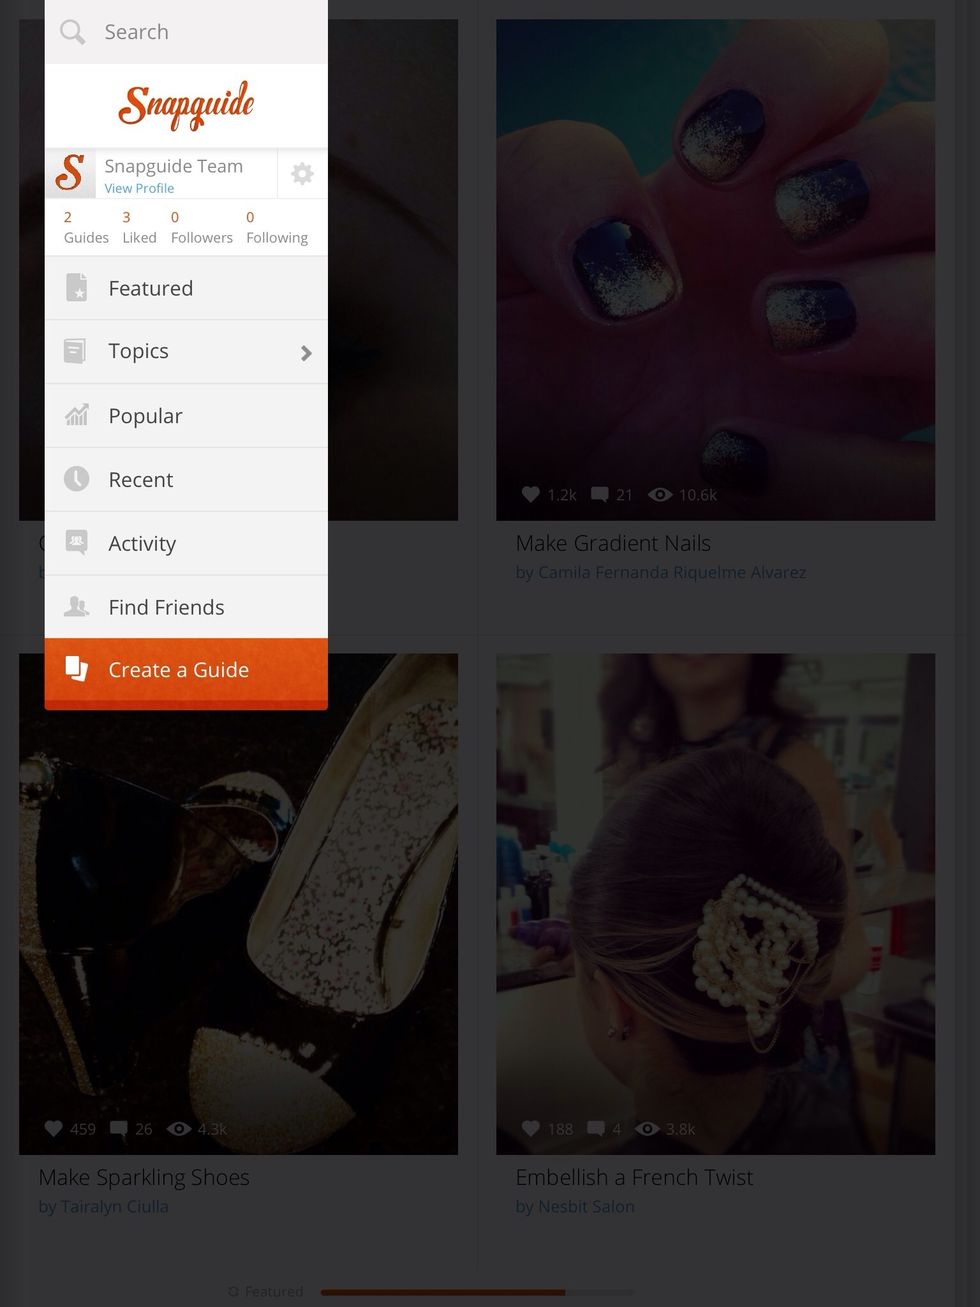
To get started, tap the orange Create a Guide button at the bottom of the navigation bar.
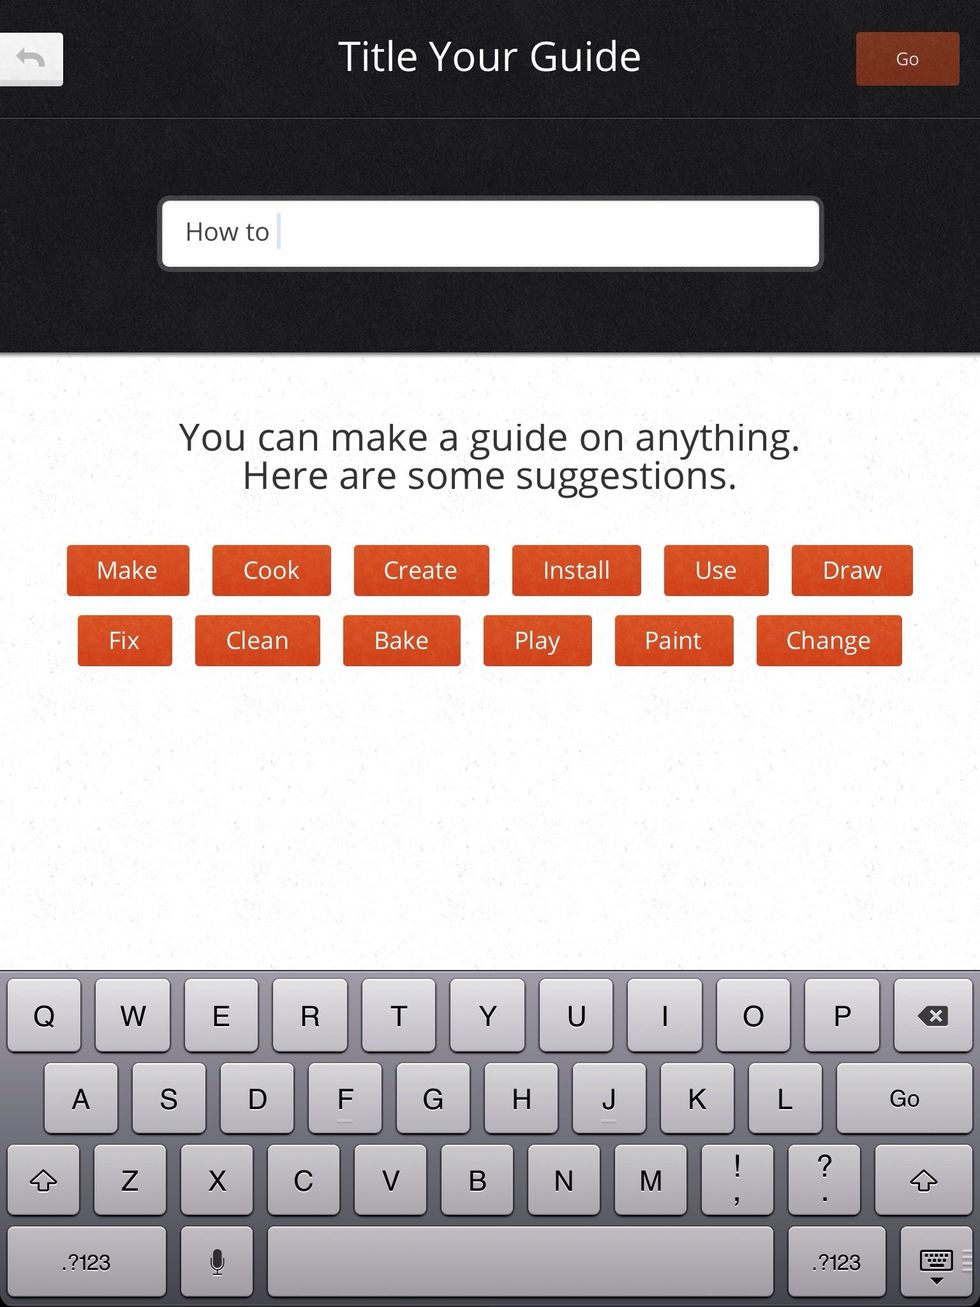
First, add your title. Make sure it clearly explains your guide and begins with an action verb like Make, Cook, or Build.
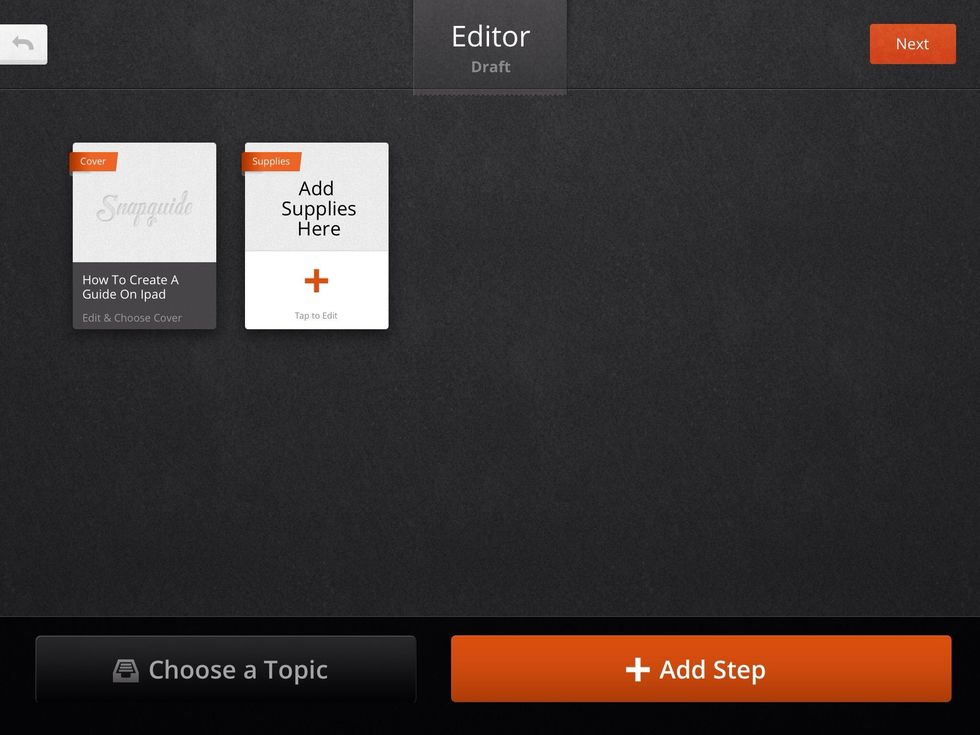
Once you have added your title and tapped next, you will be brought to this screen. This is where the guide making fun happens.
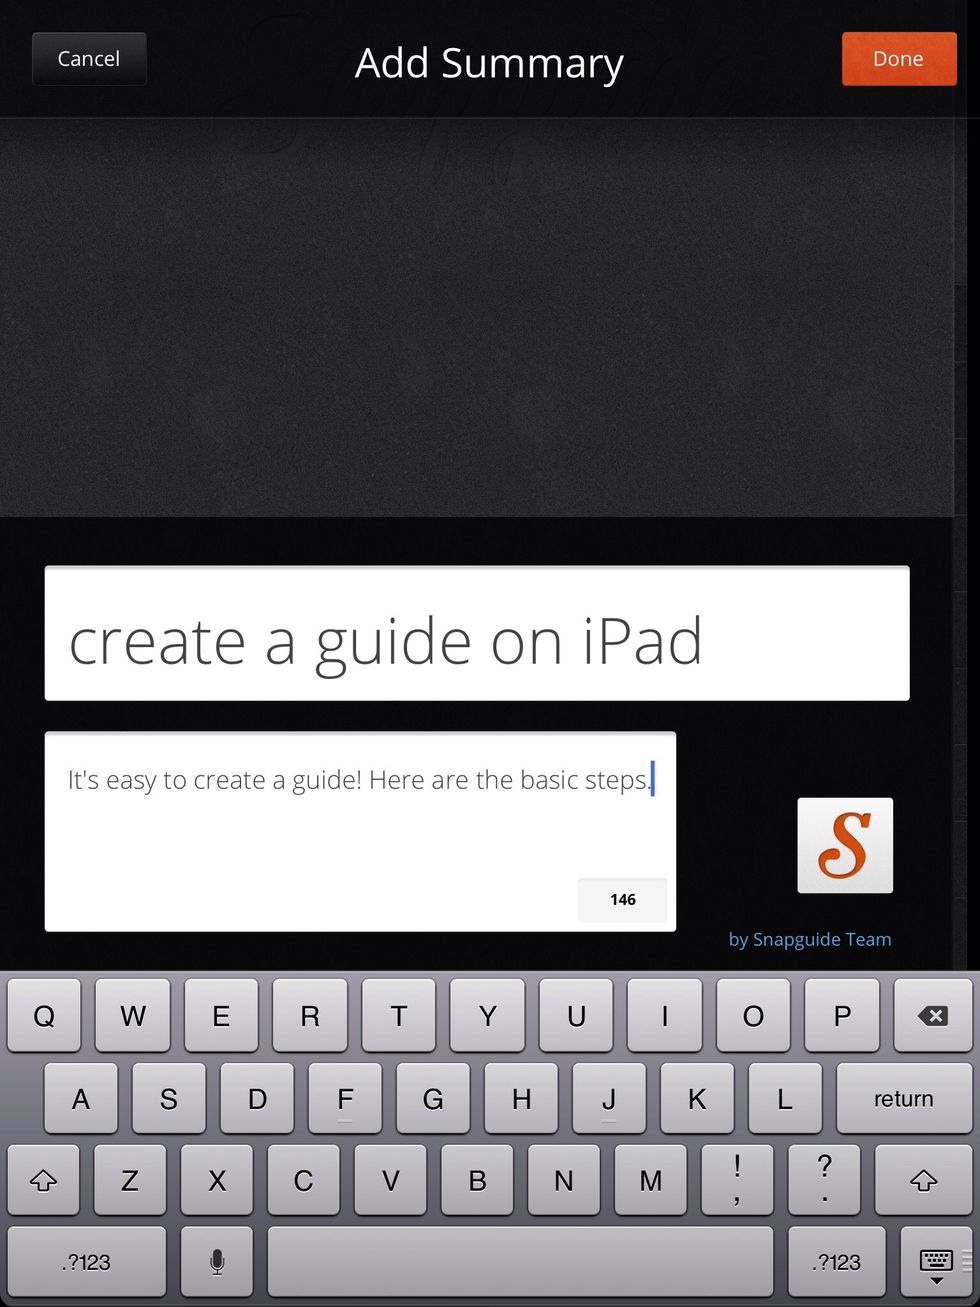
You can tap on the title page to add a summary. This is a great place to credit someone that gave you the idea, or give a backstory to the guide!
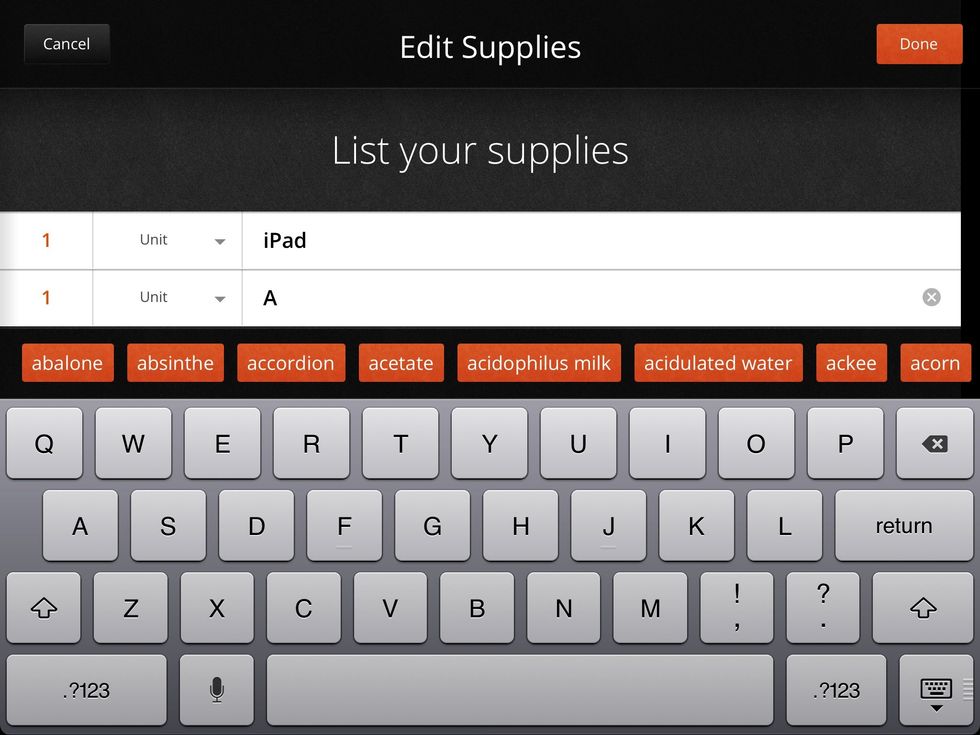
Tap the second card to enter the supplies needed to complete your how-to. To make it easier, select the pre-entered units. Also, we give suggestions for supplies in orange as you type.
Tap the orange "Add + Step" button at the bottom to start adding steps to your guide. Then tap which type of content you would like to add.
If you are adding photos or videos, make sure you allow Snapguide to access them. You can also add permissions by heading to Privacy and then Photos in the Settings on your device.
To get photos or videos from your Camera Roll, tap the "Load" button at the bottom of the screen. Then select as many as you'd like. Tap "Done" to load them into your guide.
The photos or videos you select will be loaded onto the main screen. Tap on the step to type a caption. Try to have a caption for every step, to ensure that your guide is clear.
To rearrange your steps, hold down on a step and drag it to where you want it in the guide. You can also delete a step by tapping the small delete button in the lower left-hand corner.
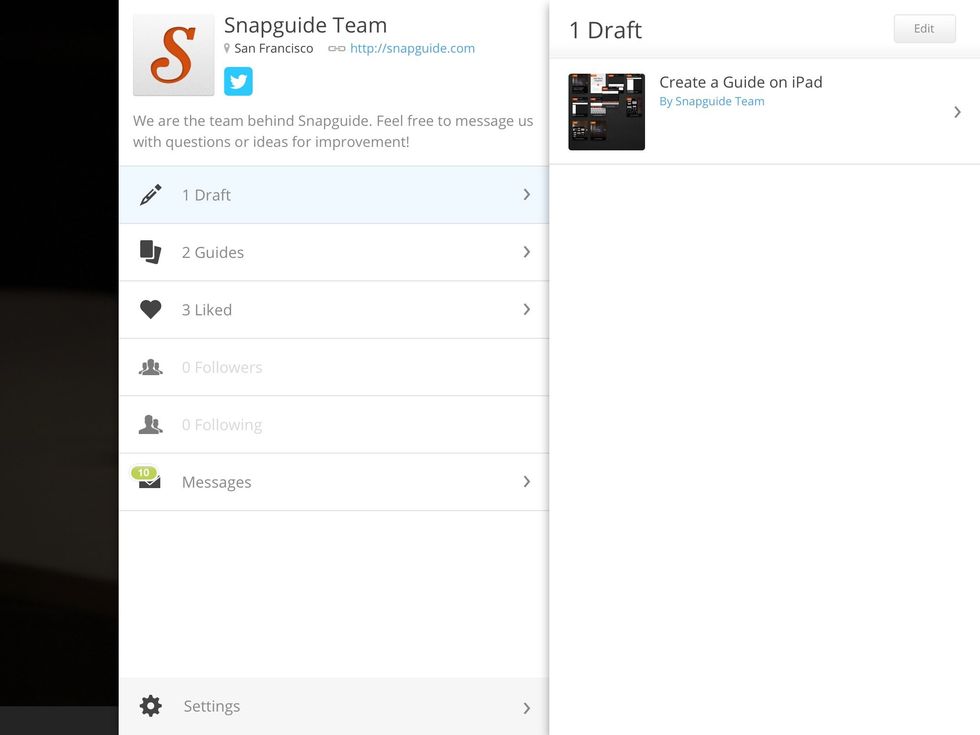
You don't have to finish your guide in one sitting. Your guide will automatically save in the Draft portion of your Profile. Only you can view your draft.
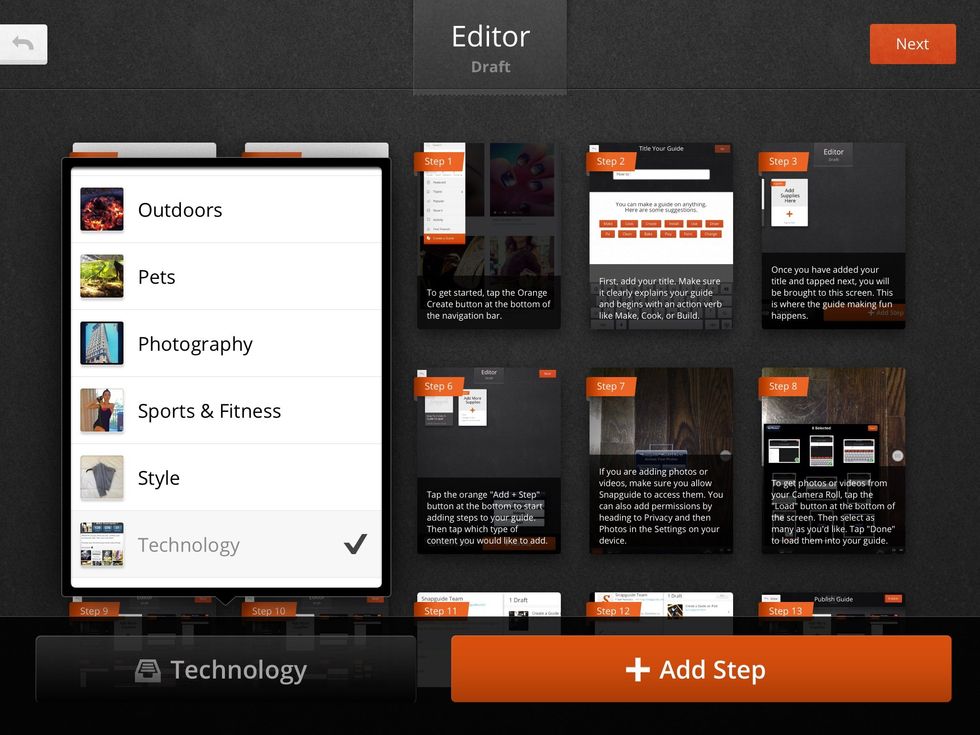
Make your to add a topic to your guide. Choose whichever fits best, take a look at what's already in each topic if you are unsure.
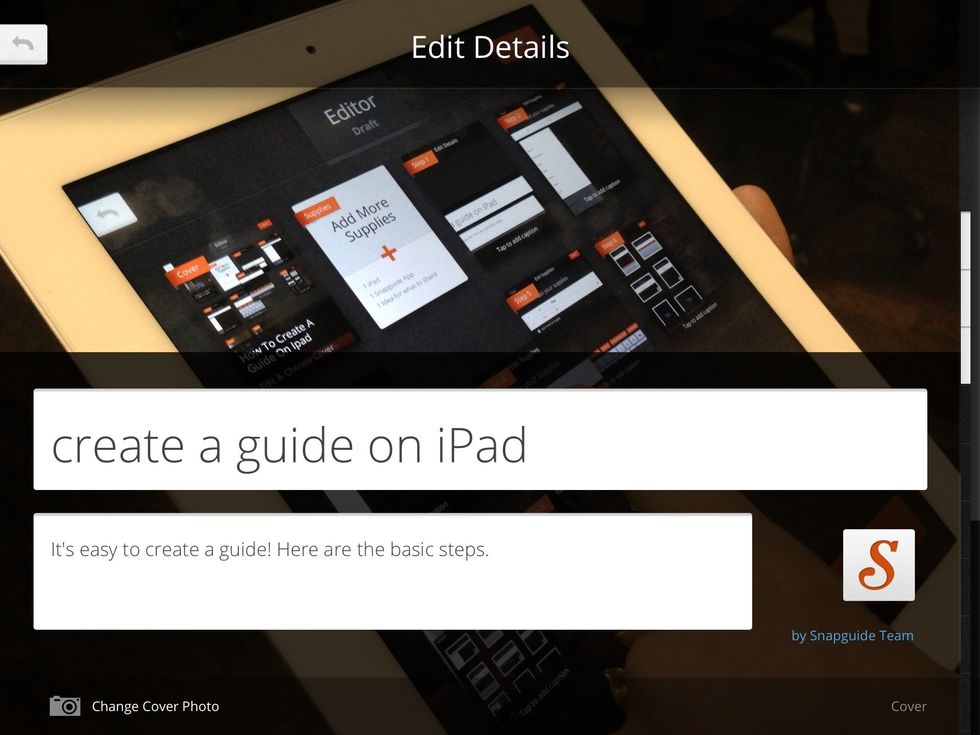
After adding all your steps, tap the orange next button to add a cover photo. A cover photo should depict what the guide is demonstrating. Be creative! Tap publish to share your guide with the world!
After publishing, don't worry if you spot a typo! You can always edit your guide by tapping the blue edit icon next to your guide in your profile. Make sure to tap publish again to share your changes.
- 1.0 iPad
- 1.0 Snapguide App
- 1.0 Idea for what to share
We are the team behind B+C Guides. Feel free to message us if you have any questions or see something that could be improved!
San Francisco
The Conversation (0)
Sign Up