The Conversation (0)
Sign Up
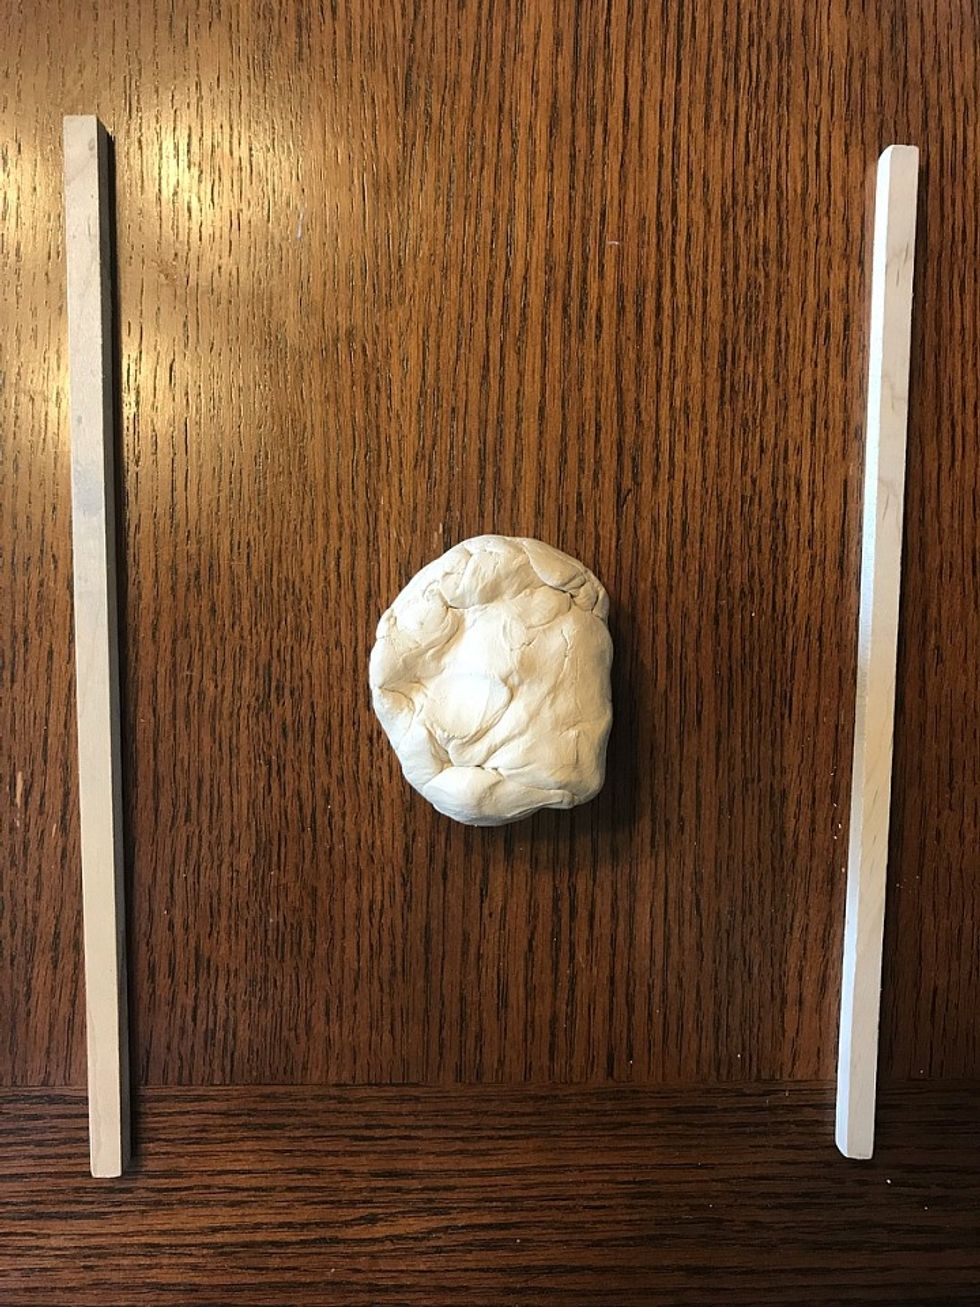
Everyone will be given a baseball size piece of clay. Place your clay ball in between your wooden dowels.
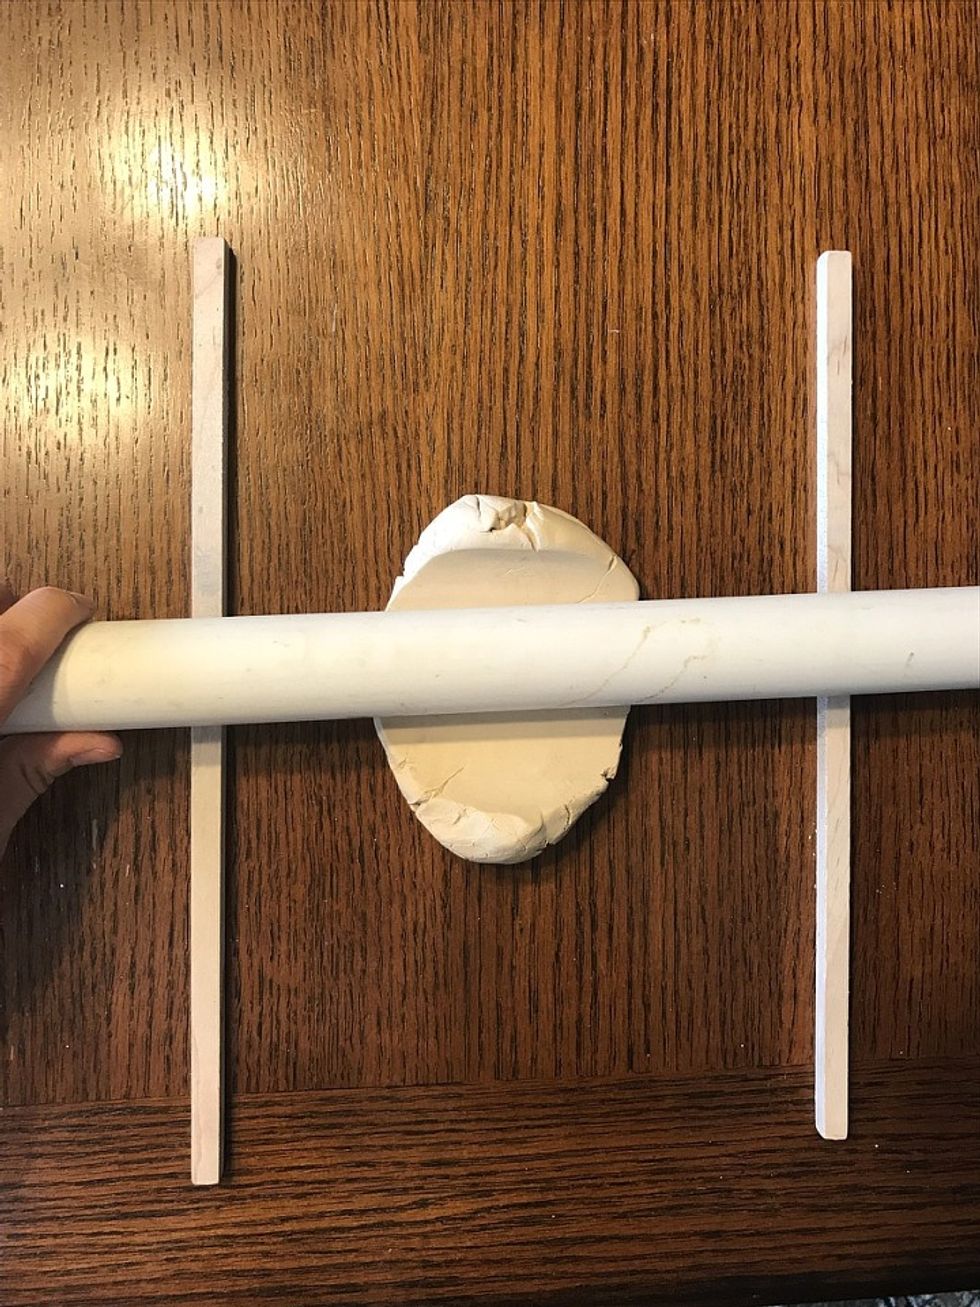
Using your roller you will roll out your clay. Make sure your roller is always on the dowels.
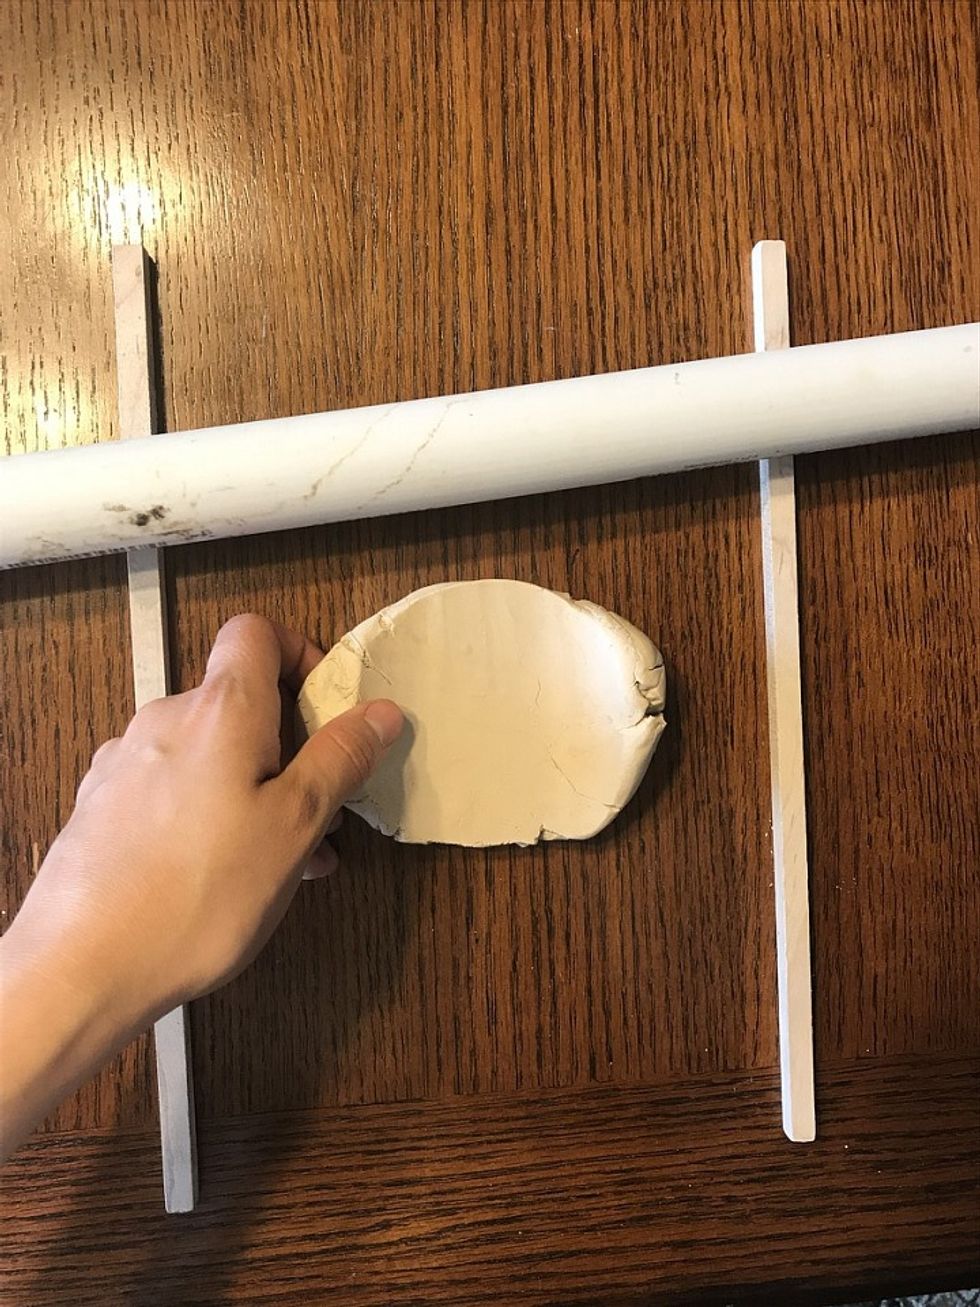
Once you have rolled your clay half way, gently pick it up and flip it the opposite direction.
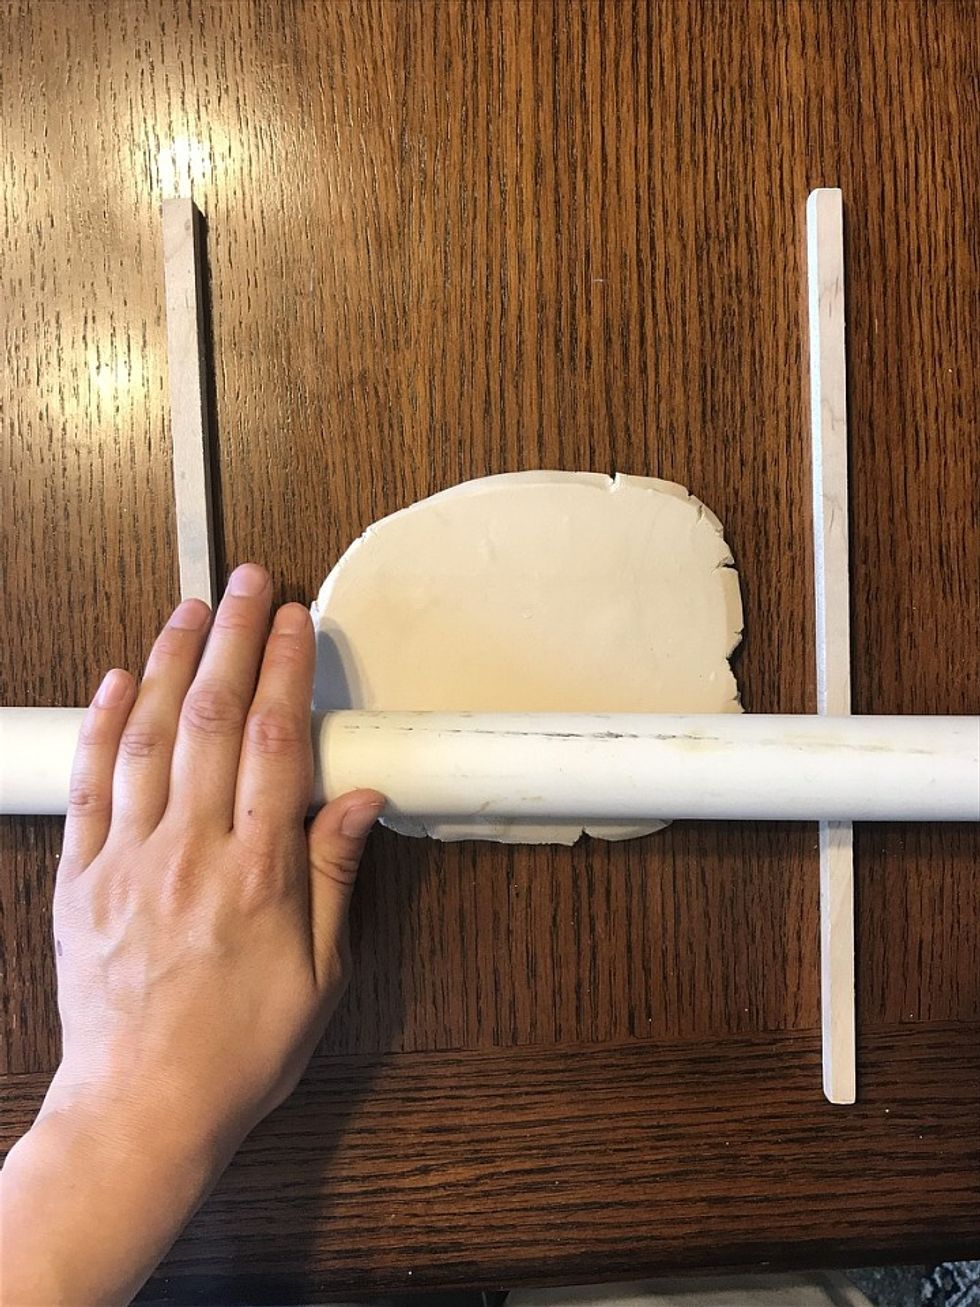
You know it is flat enough when your roller touches the dowels.
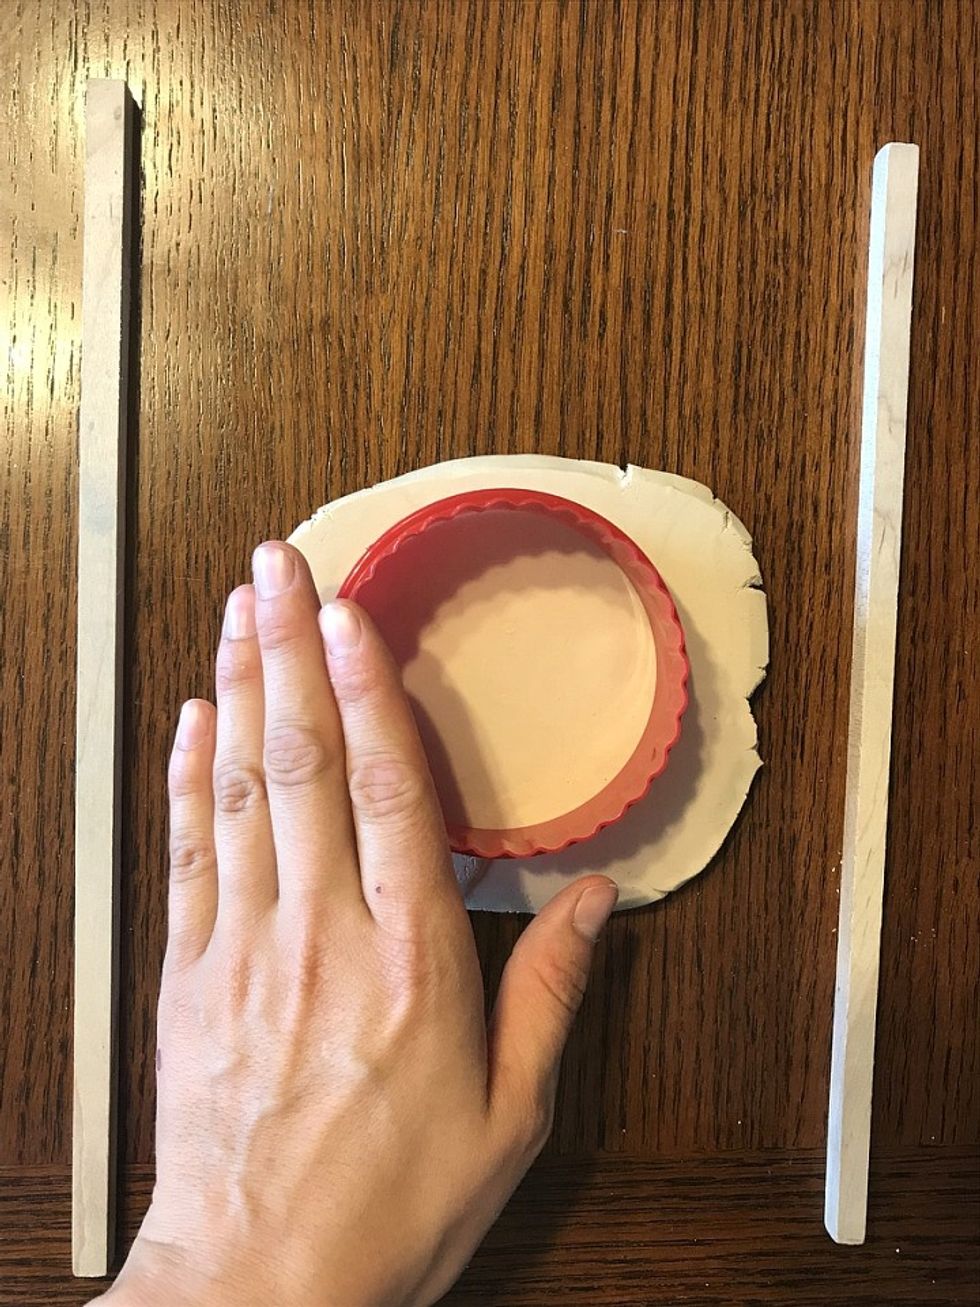
Grab your larger cookie cutter and place it in the middle of your clay. Press firmly down to get a clean circle.
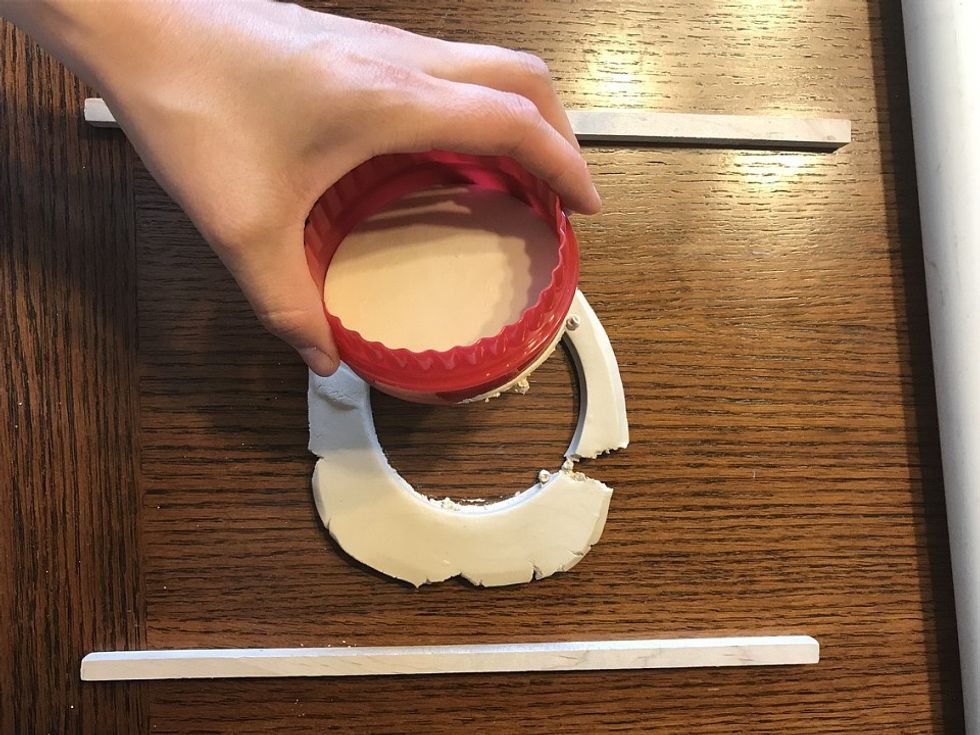
Carefully remove your circle from the clay and place extra clay in the middle of your table.

Now, grab the smaller cookie cutter and press firmly but gently to remove the inner circle.
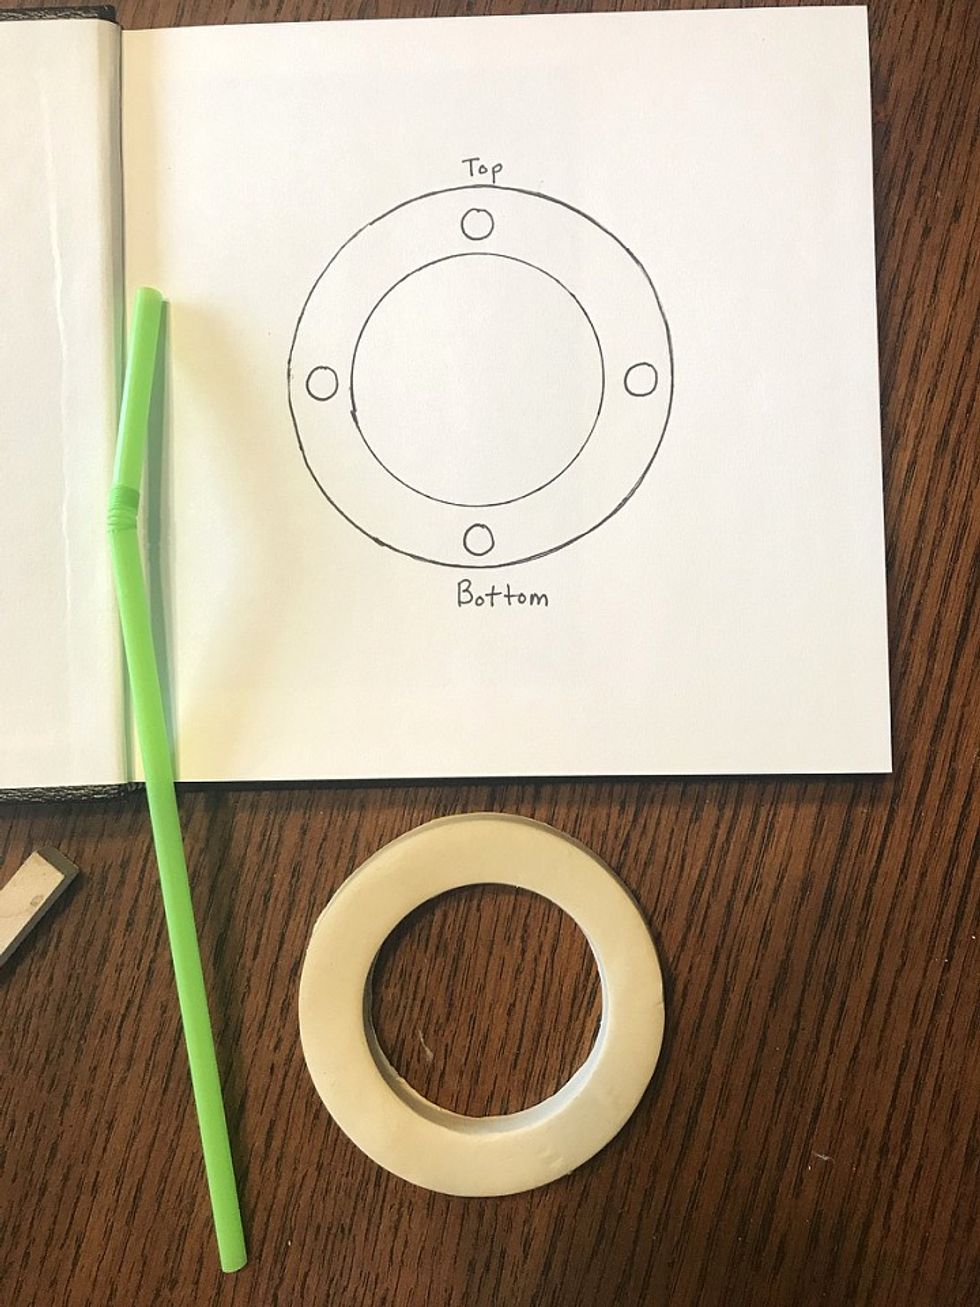
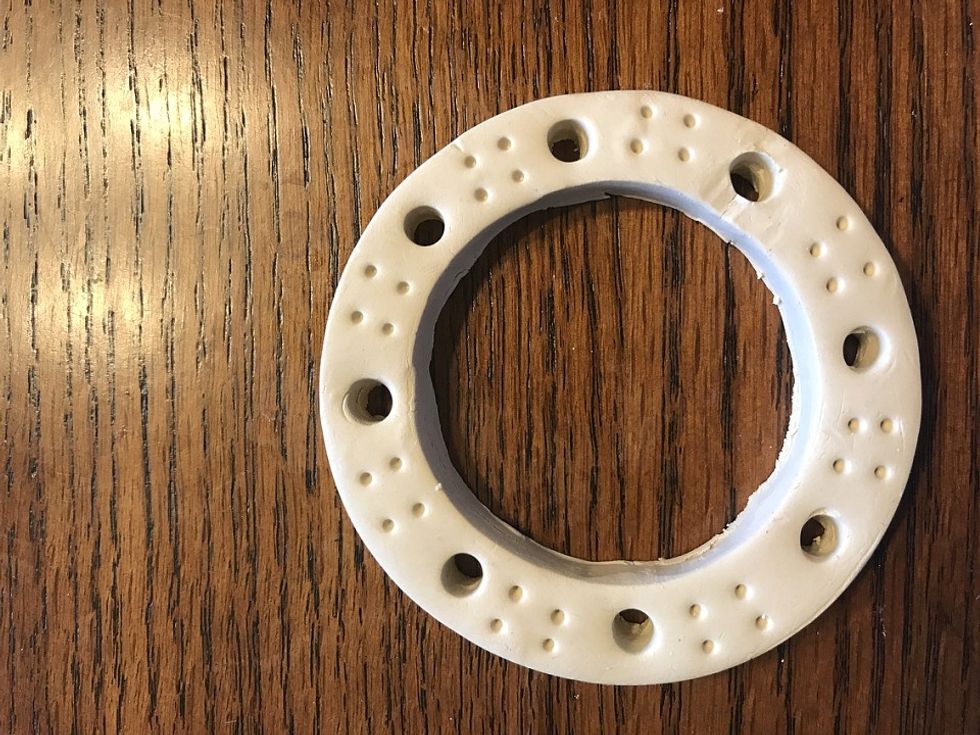
Once your Dream catcher shape is cut out, look at your pre-sketch to see where your holes need to go. Remember top and bottom are even as well as sides.Place holes as close to the middle of the ring.
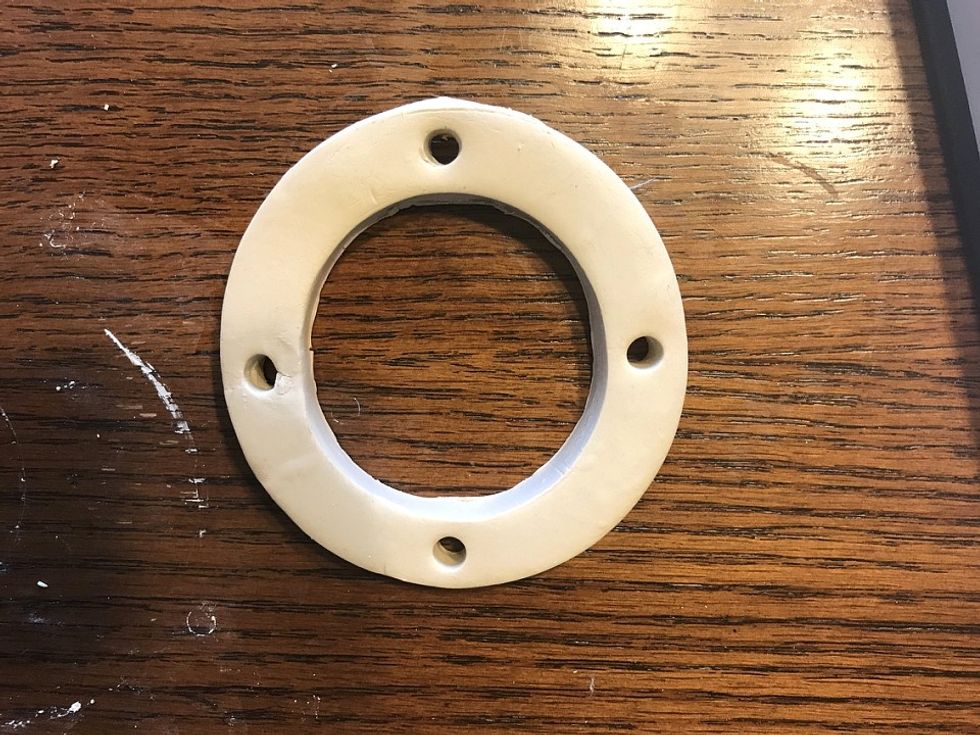
Make sure each hole is punched all the way through.
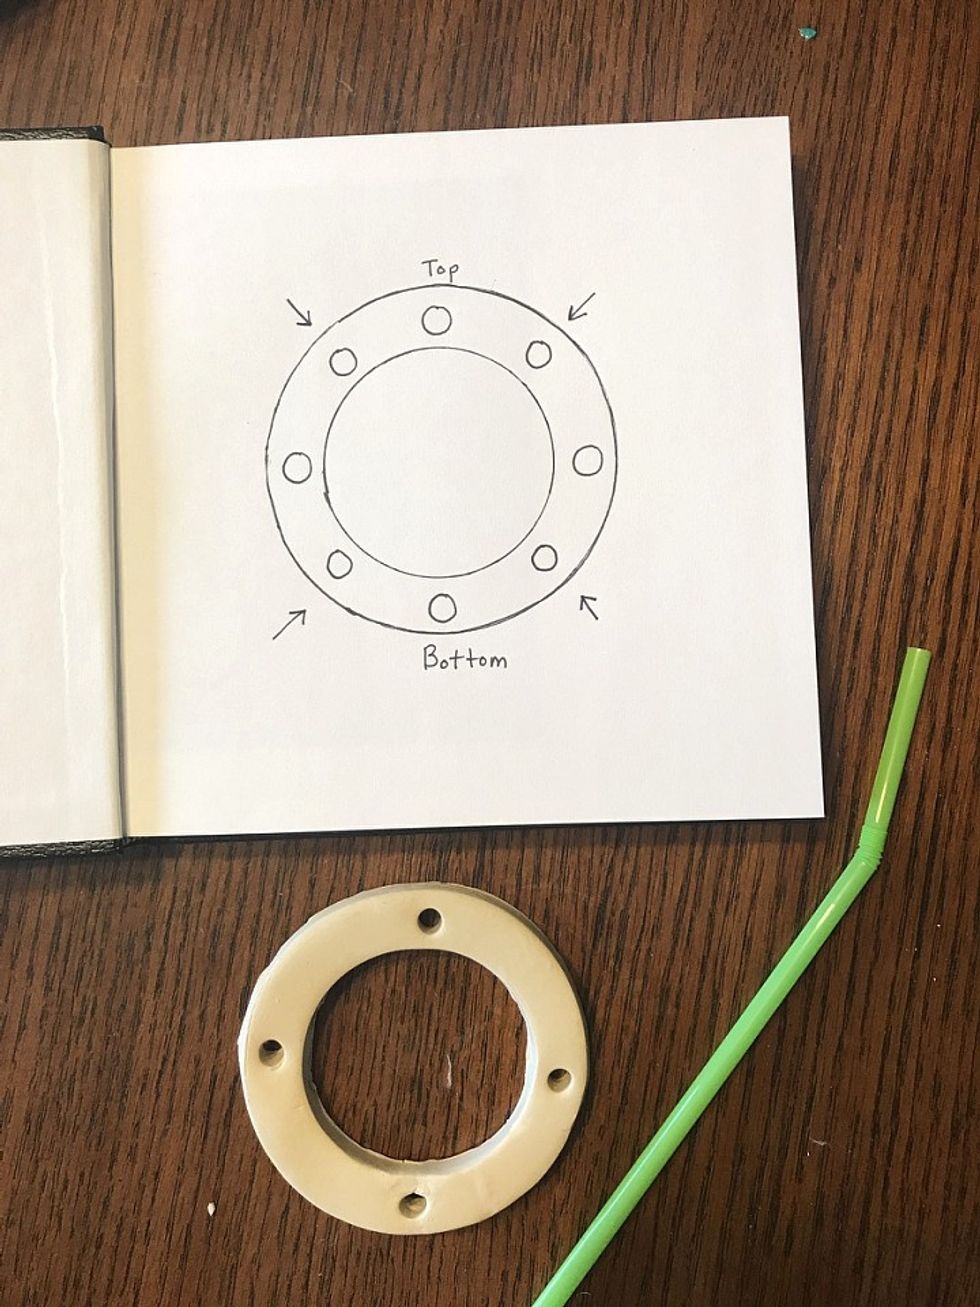
the next holes are just in the in between. Make sure they are spaced evenly.
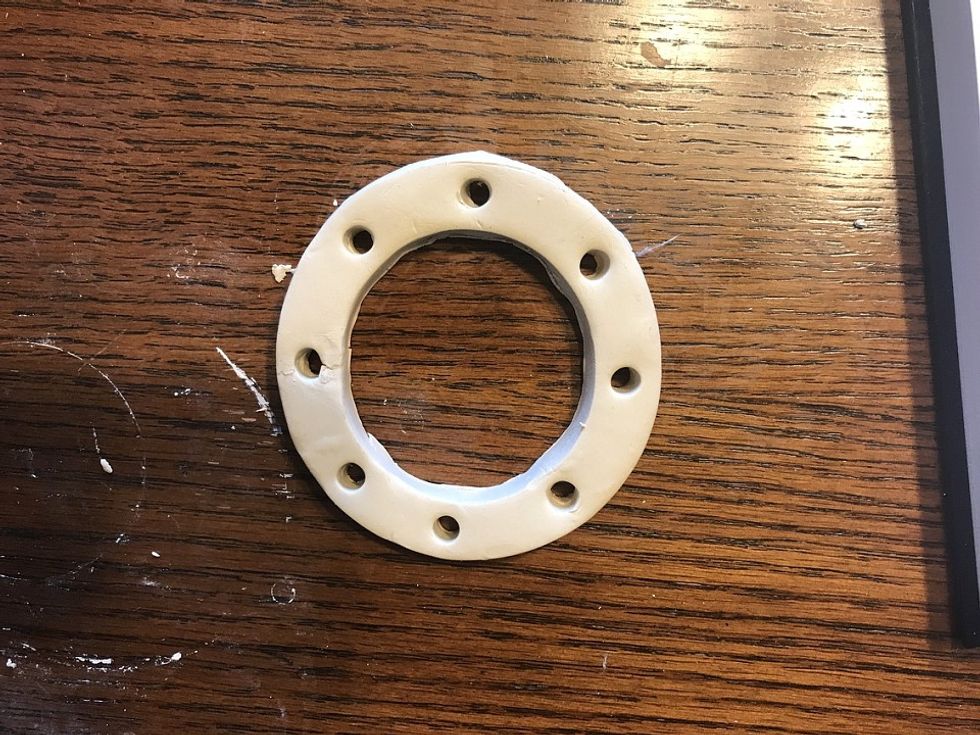
Go over any cracks gently with your finger or tools.
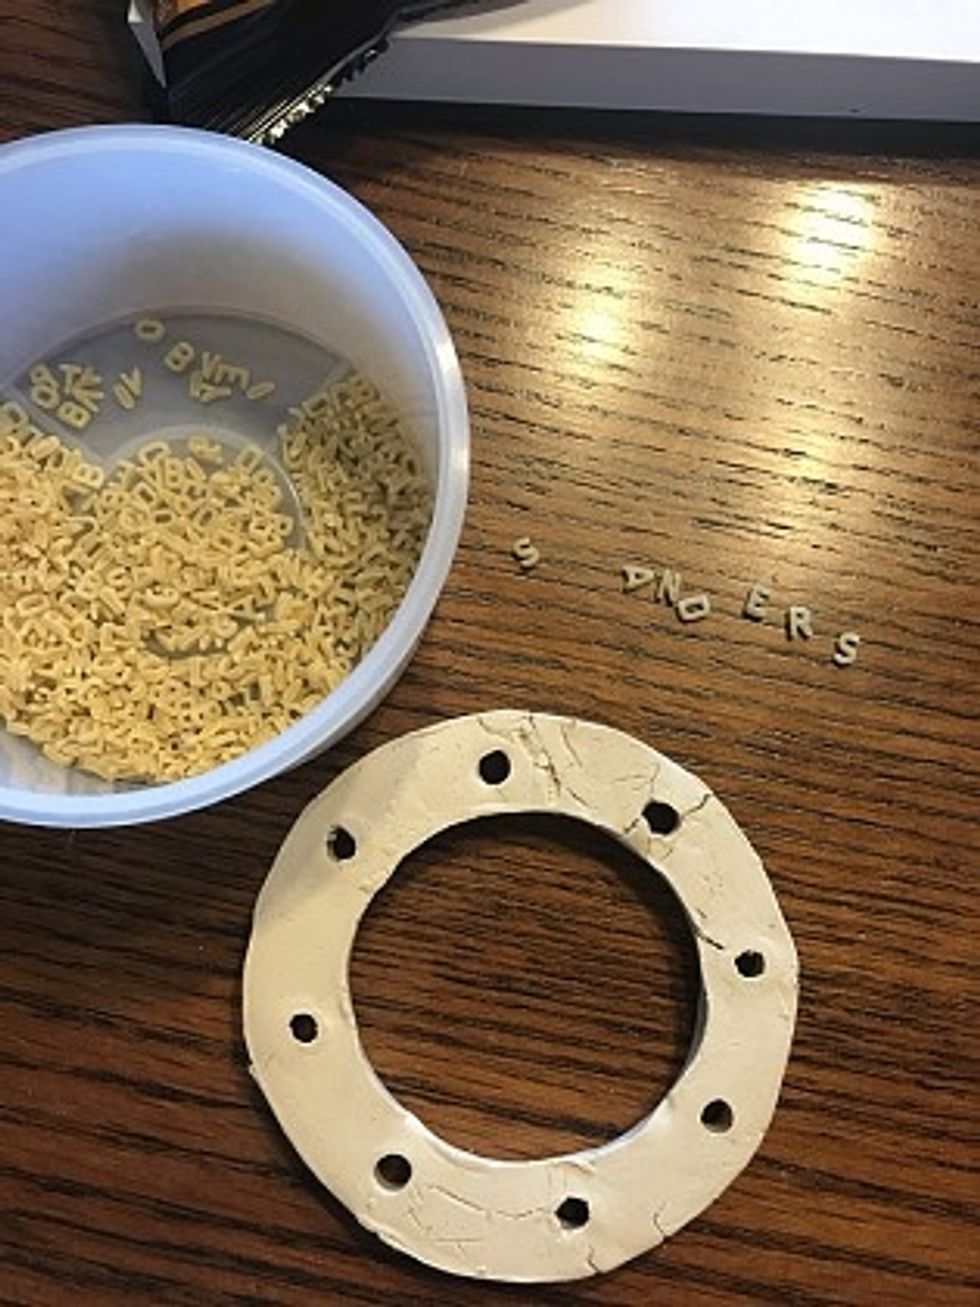
On the back of your Dream catcher you will use alphabet pasta to put your name. Press it firmly into the clay.
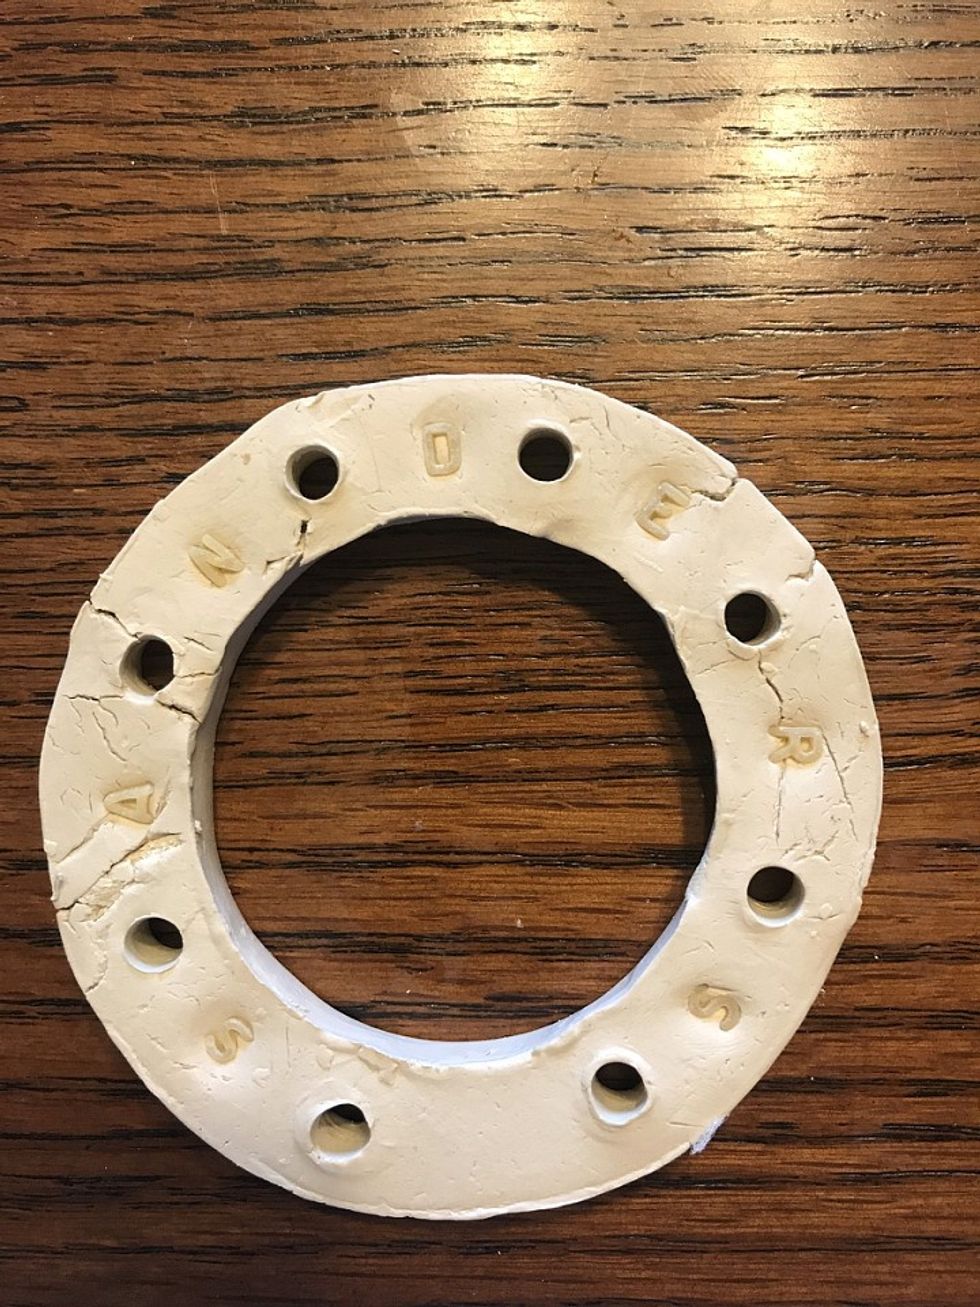
Your pasta noodles will pop out once the clay is dry. Leaving your name perfectly intact.
Lastly, you may want to add small details to give your dream catcher more personality. Do not push too hard into the clay to avoid breaks. Leave out to dry for 24 hours