The Conversation (0)
Sign Up
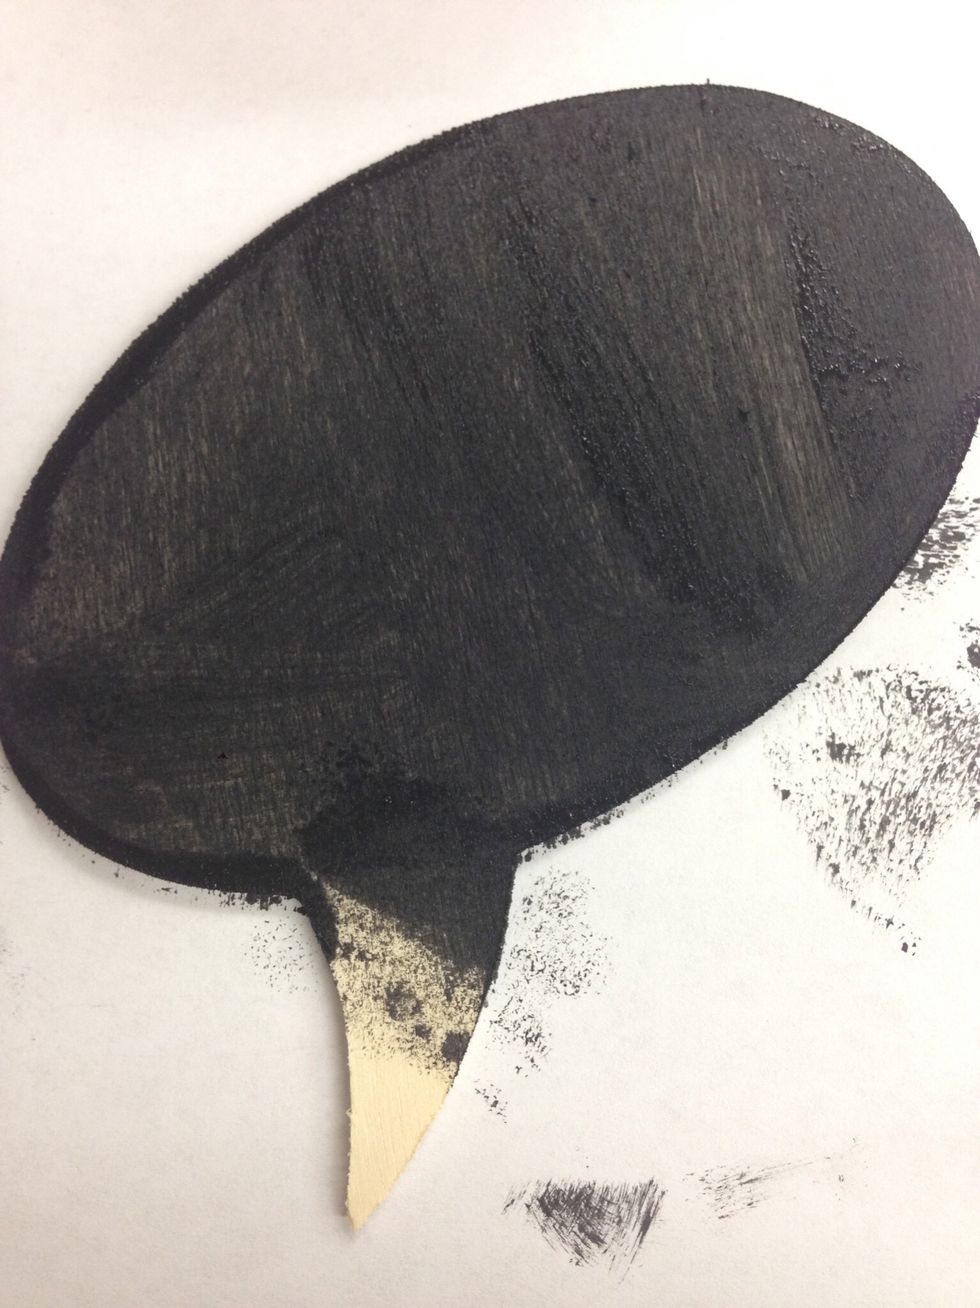
Paint the front side of the quote bubble with chalkboard paint.
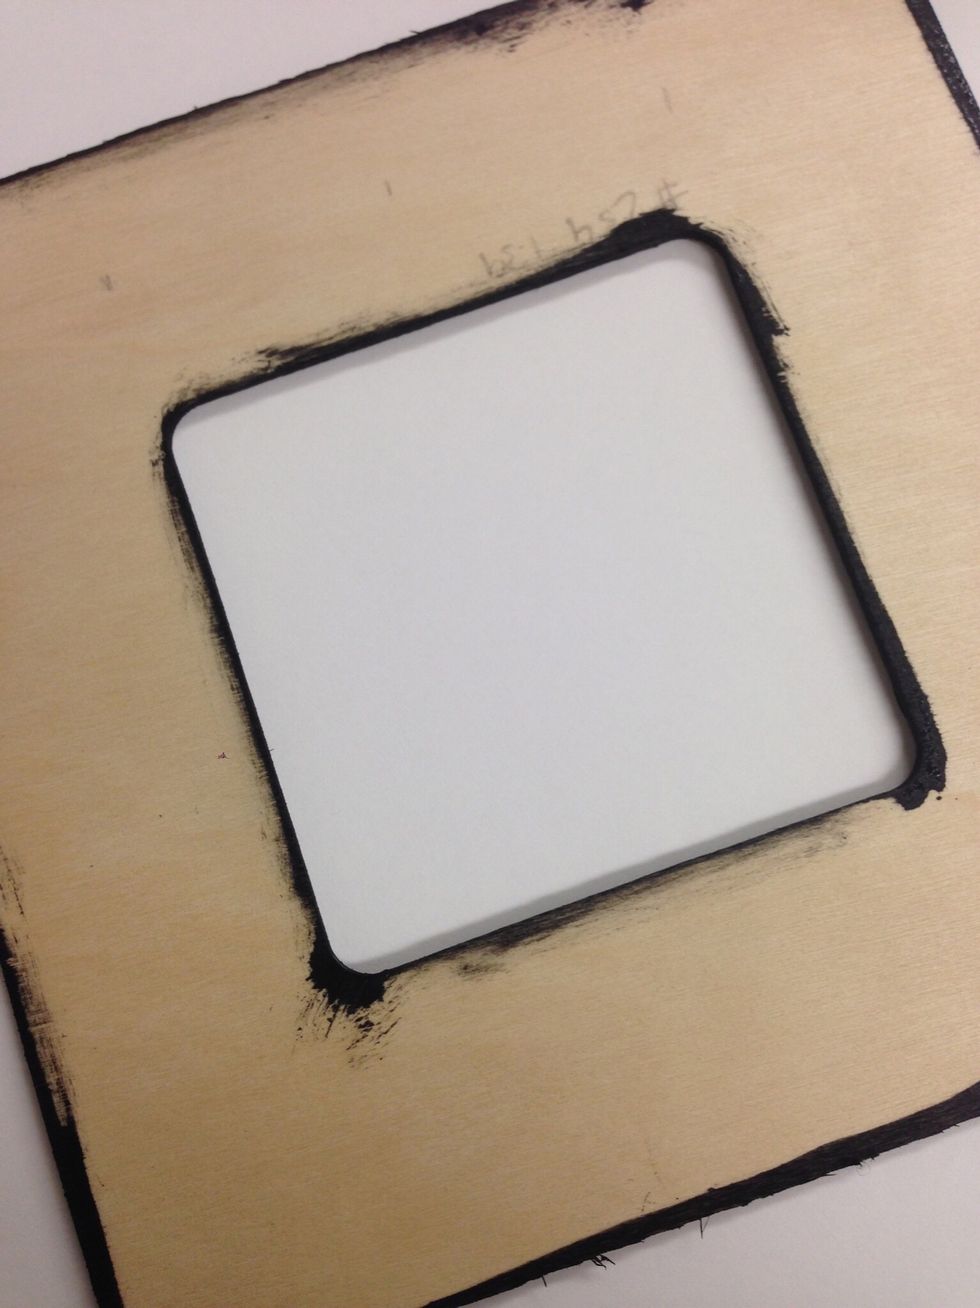
Paint the outside and inside edges of the wooden frame. Leave the rest of the frame on painted.
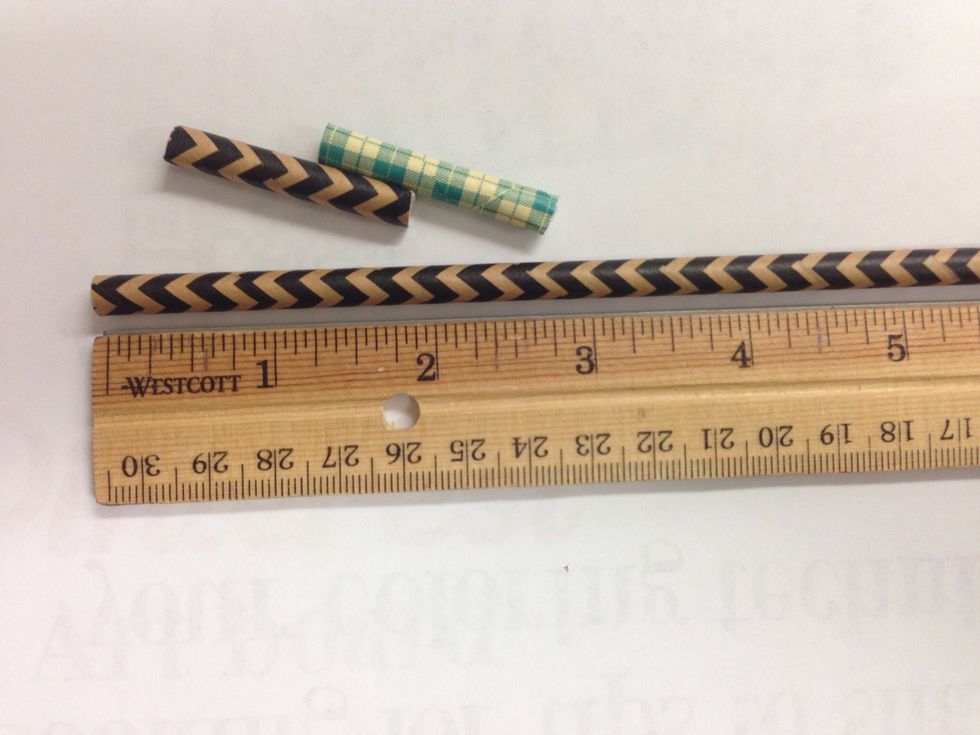
Choose 15 straws. Hold one along a ruler, and use the pencil to mark one and a half inch pieces. Cut SLOWLY to avoid having the pieces fly away from you. Gather all of the pieces in an empty bowl.
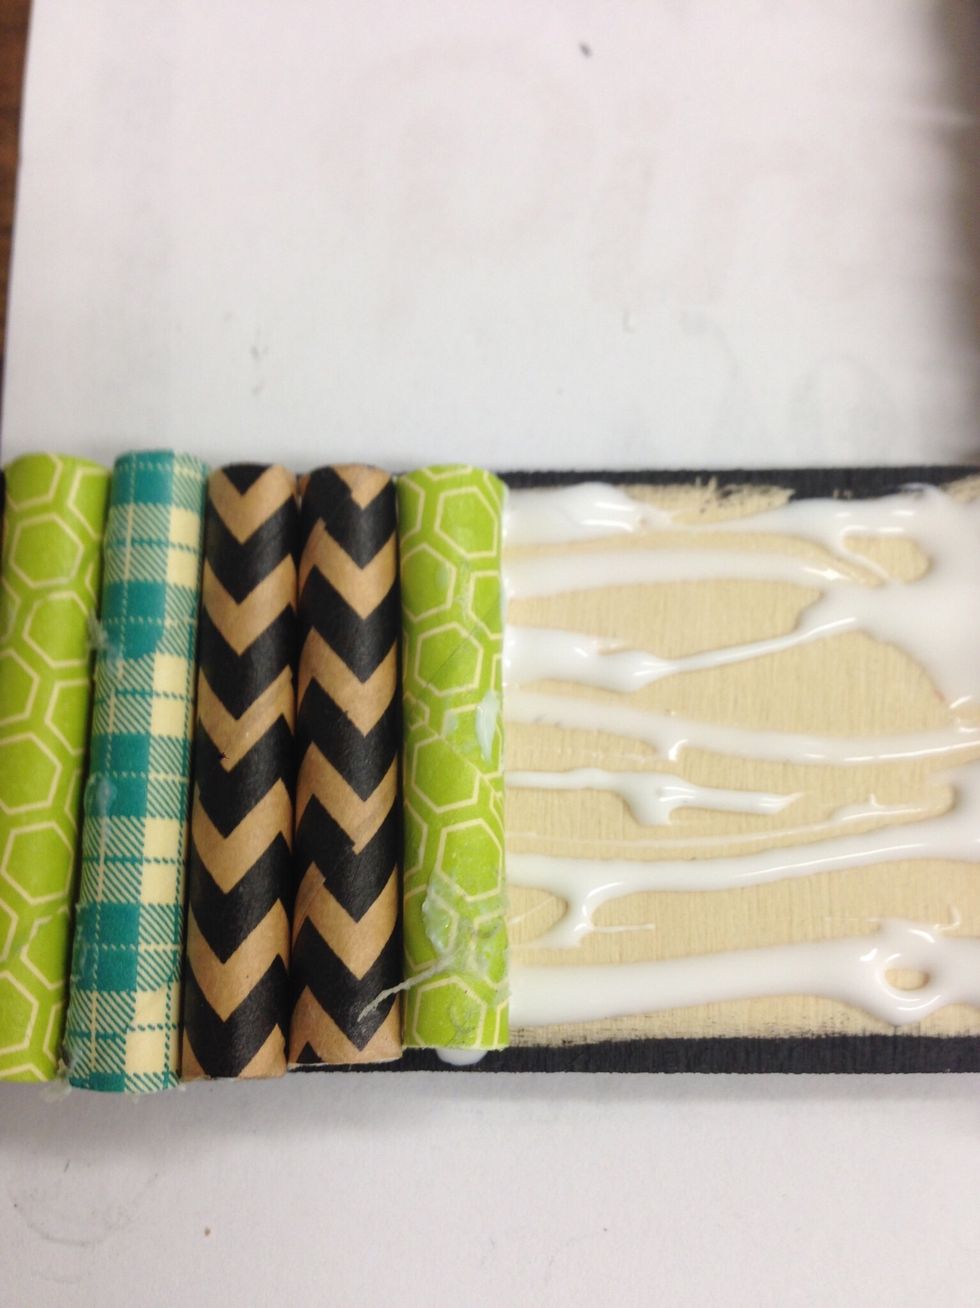
Apply tacky glue and set straws in place. Work in small sections at a time around the frame. You will have room for 24 pieces on both long sides and 12 pieces on both short sides.
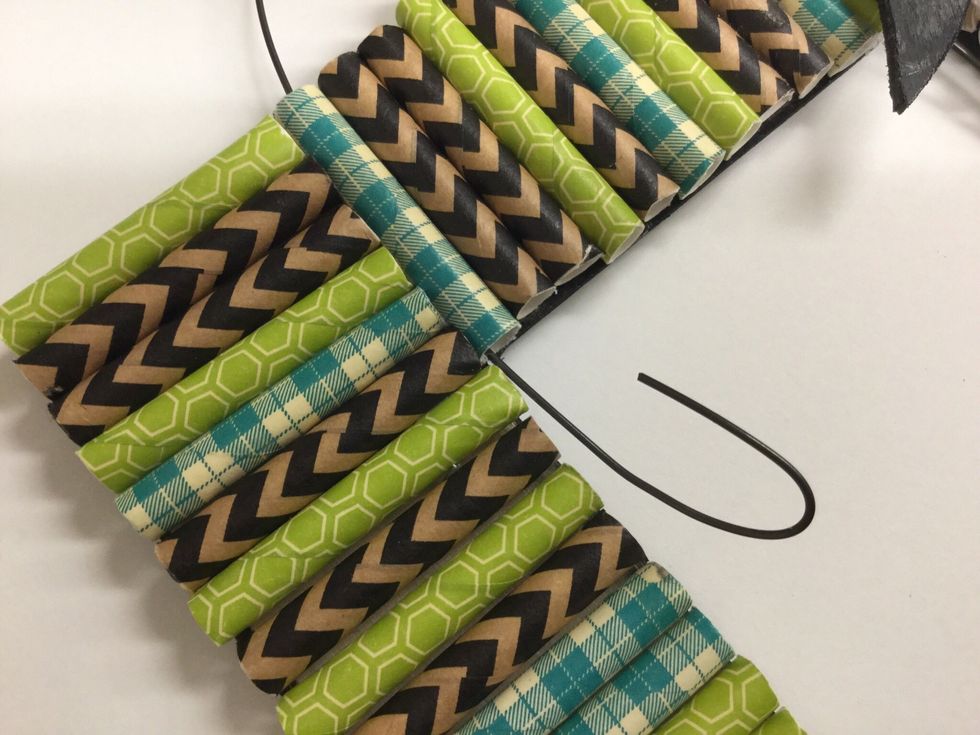
Bend the wire into a U shape. Insert each end of the wire through a straw as shown. Make a loop on each end of the wire.
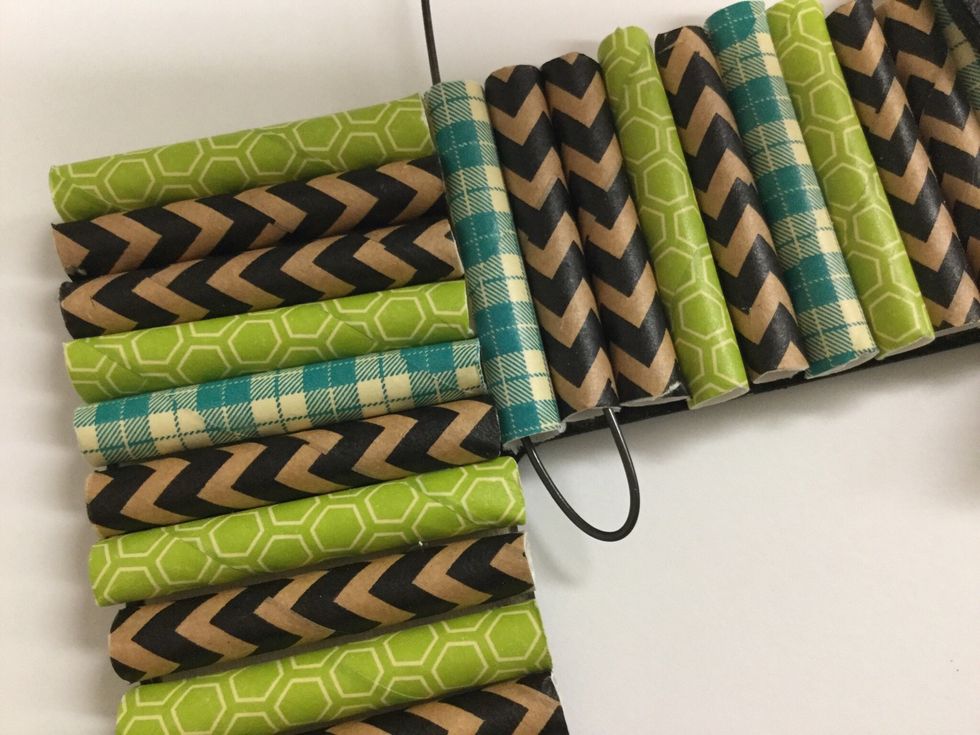
Gently push the wire loop into the neighboring straw as shown. Repeat on the other side.
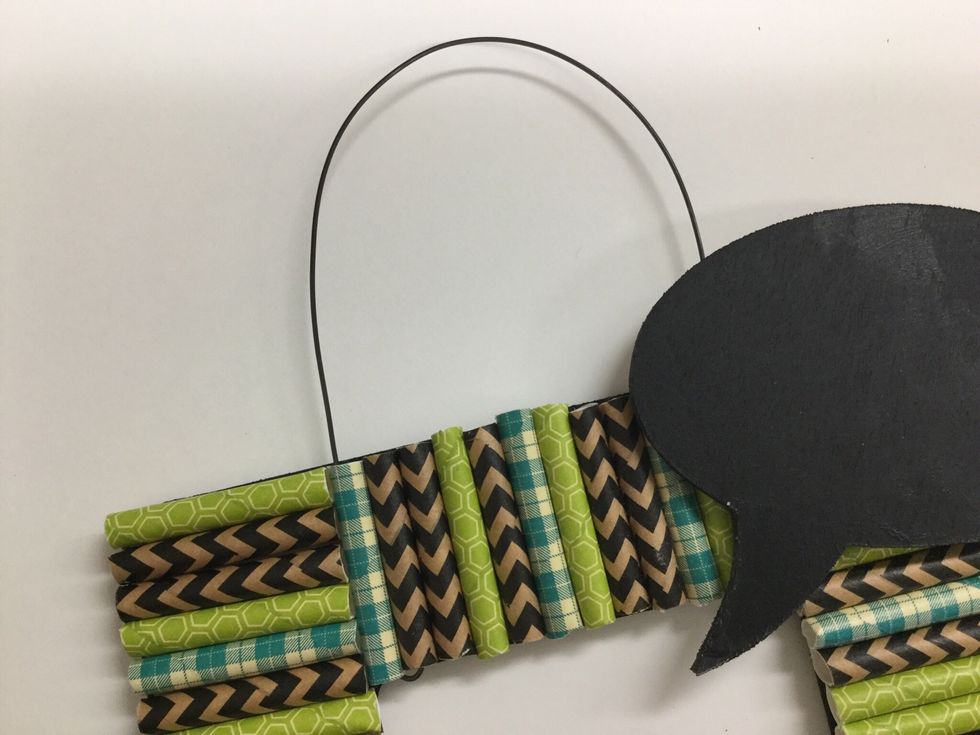
Use hot glue or glue dots to adhere the quote bubble in place.
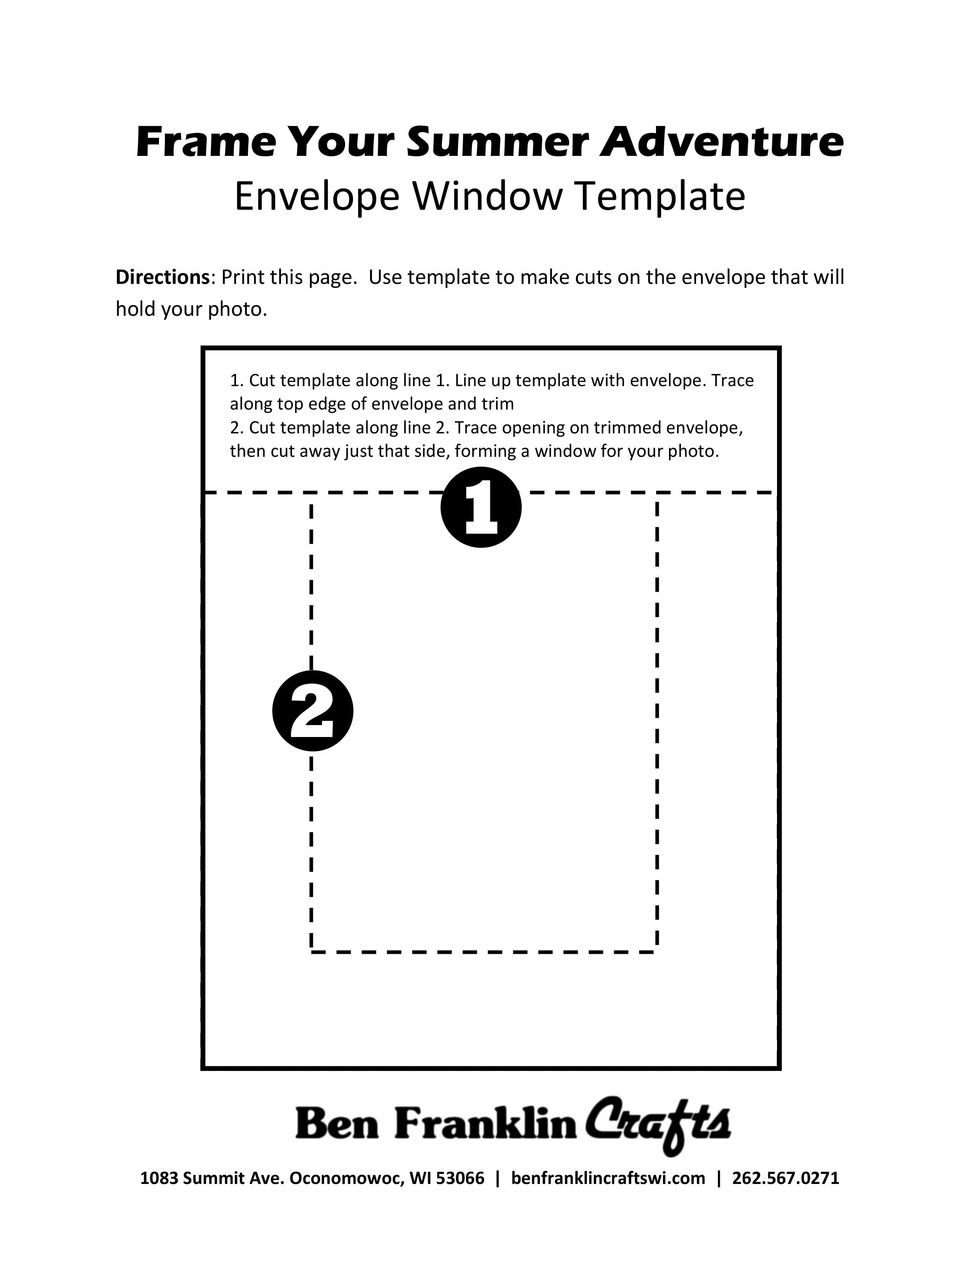
Download and print the FREE envelope window template we've provided for you: http://goo.gl/nTtfDT
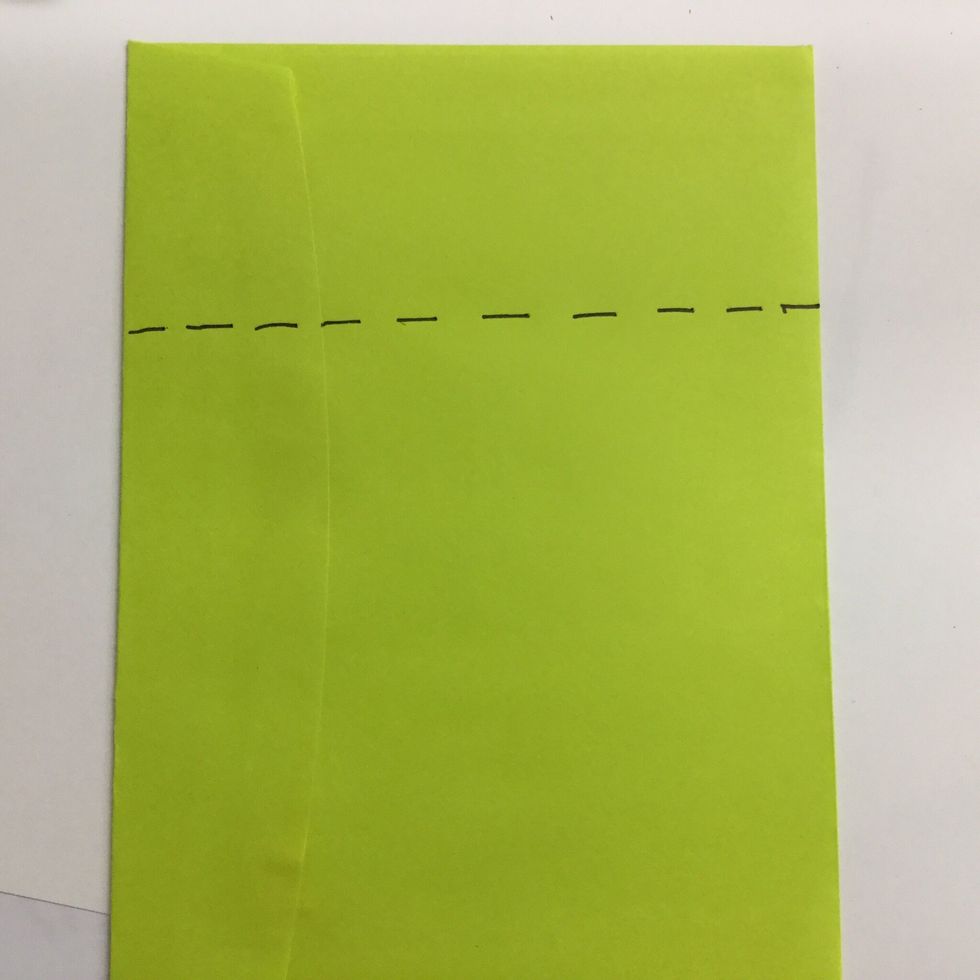
Seal the envelope. You need to cut it into a square. Measure the width, then draw a cutting line that far from one of the short ends of the envelope.
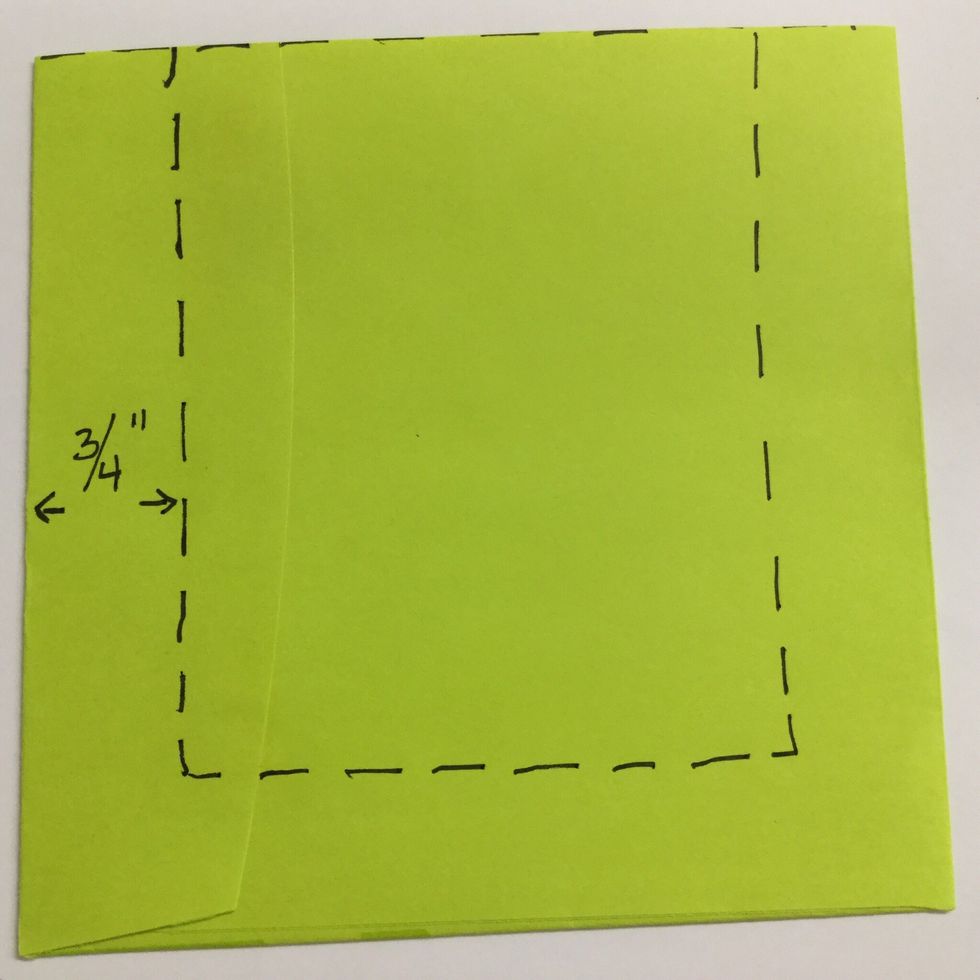
Use the envelope window template to trace a cutting line on the envelope.
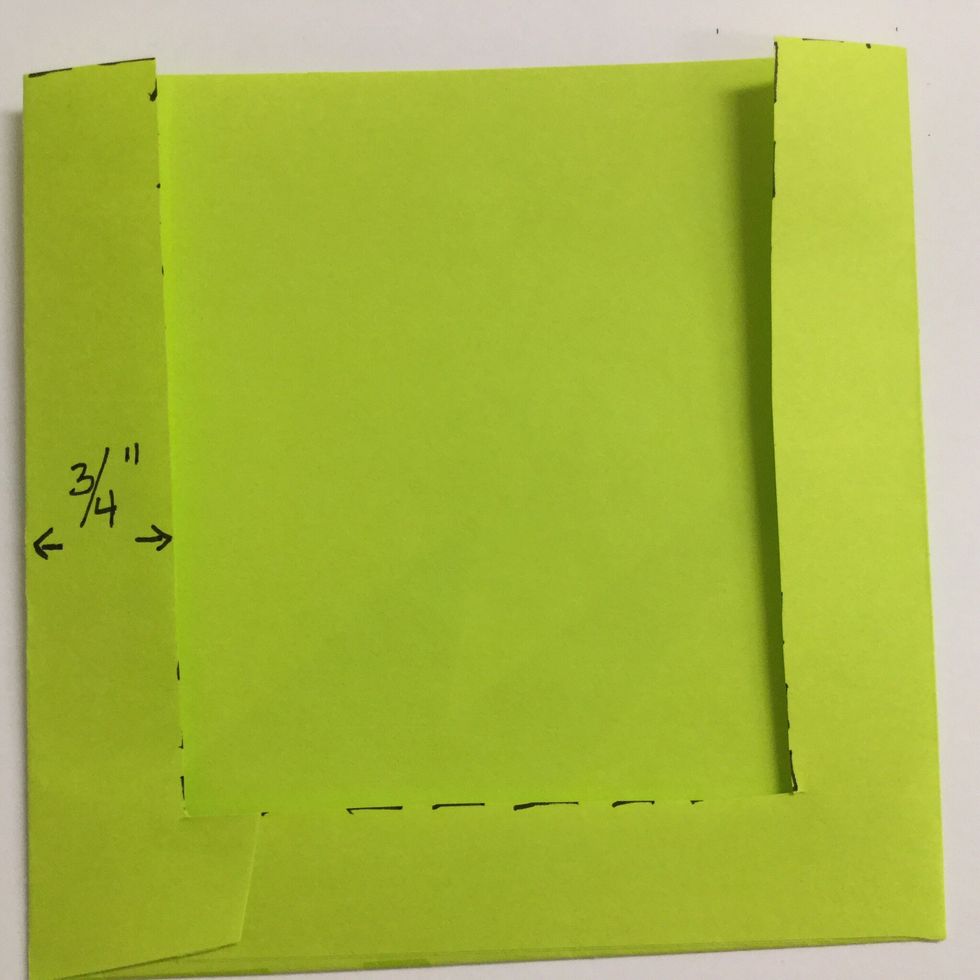
Cut out the window along the cutting line.

Apply glue to the bottom and side borders of the envelope.
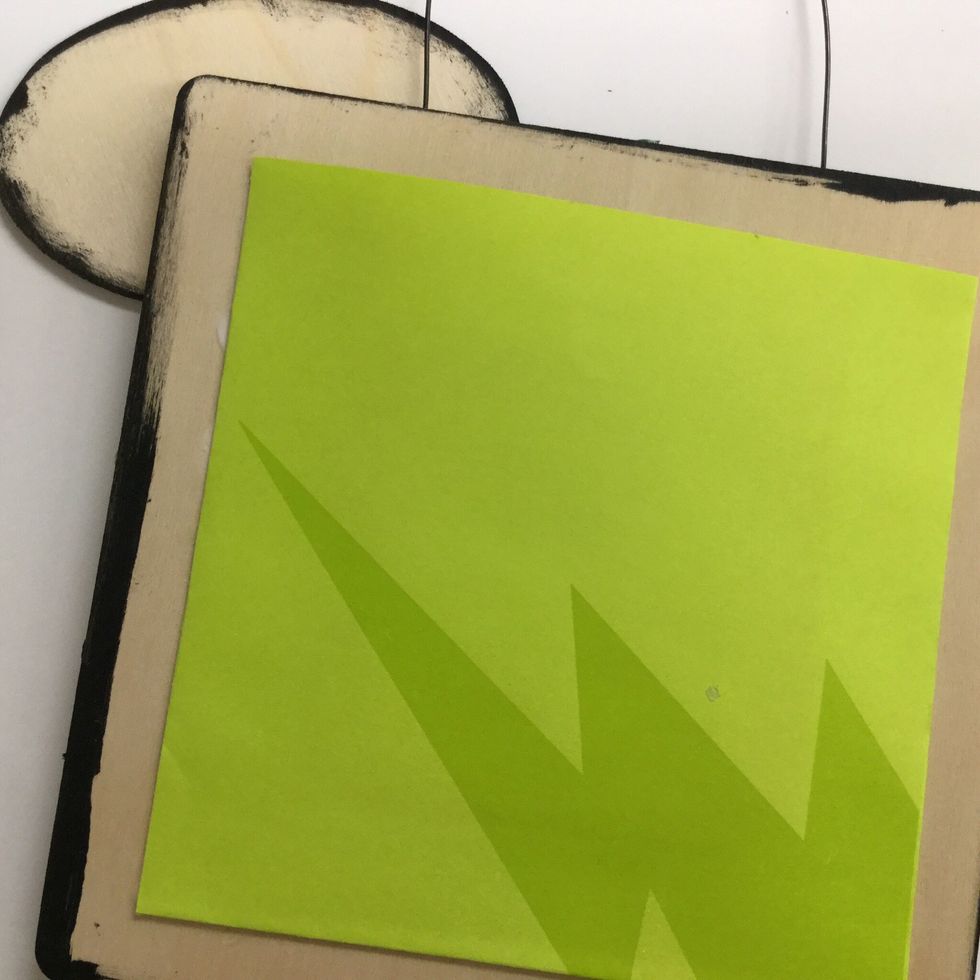
Adhere in place on the back side of the frame, keeping the edge without glue at the top.
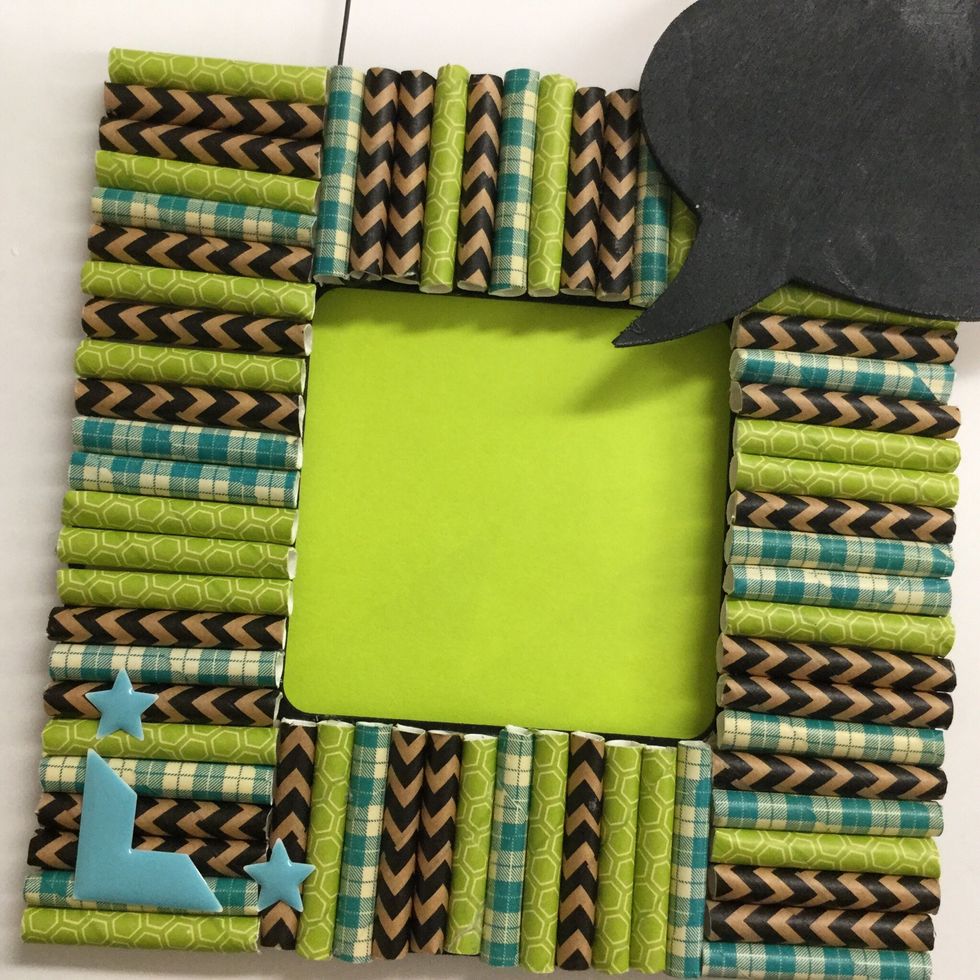
Add stickers to embellish your frame.
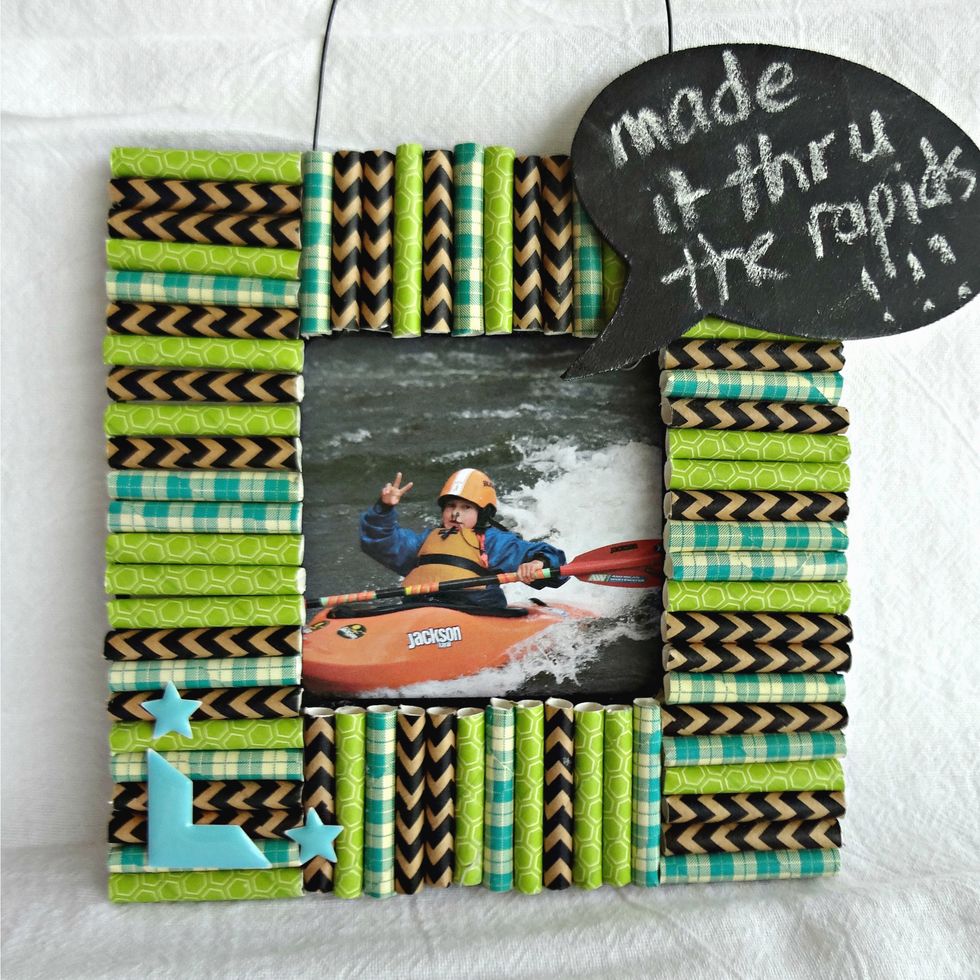
Slide a photo into the envelope pocket. Add a caption with chalk.
We would love to see a photo of your finished frame. Upload it to our Facebook page: goo.gl/br3HgJ