The Conversation (0)
Sign Up
First you want to randomly cover your raw canvas. By this I mean leave some of it raw, cover only parts of it in Gesso...Dry with a heat Gun
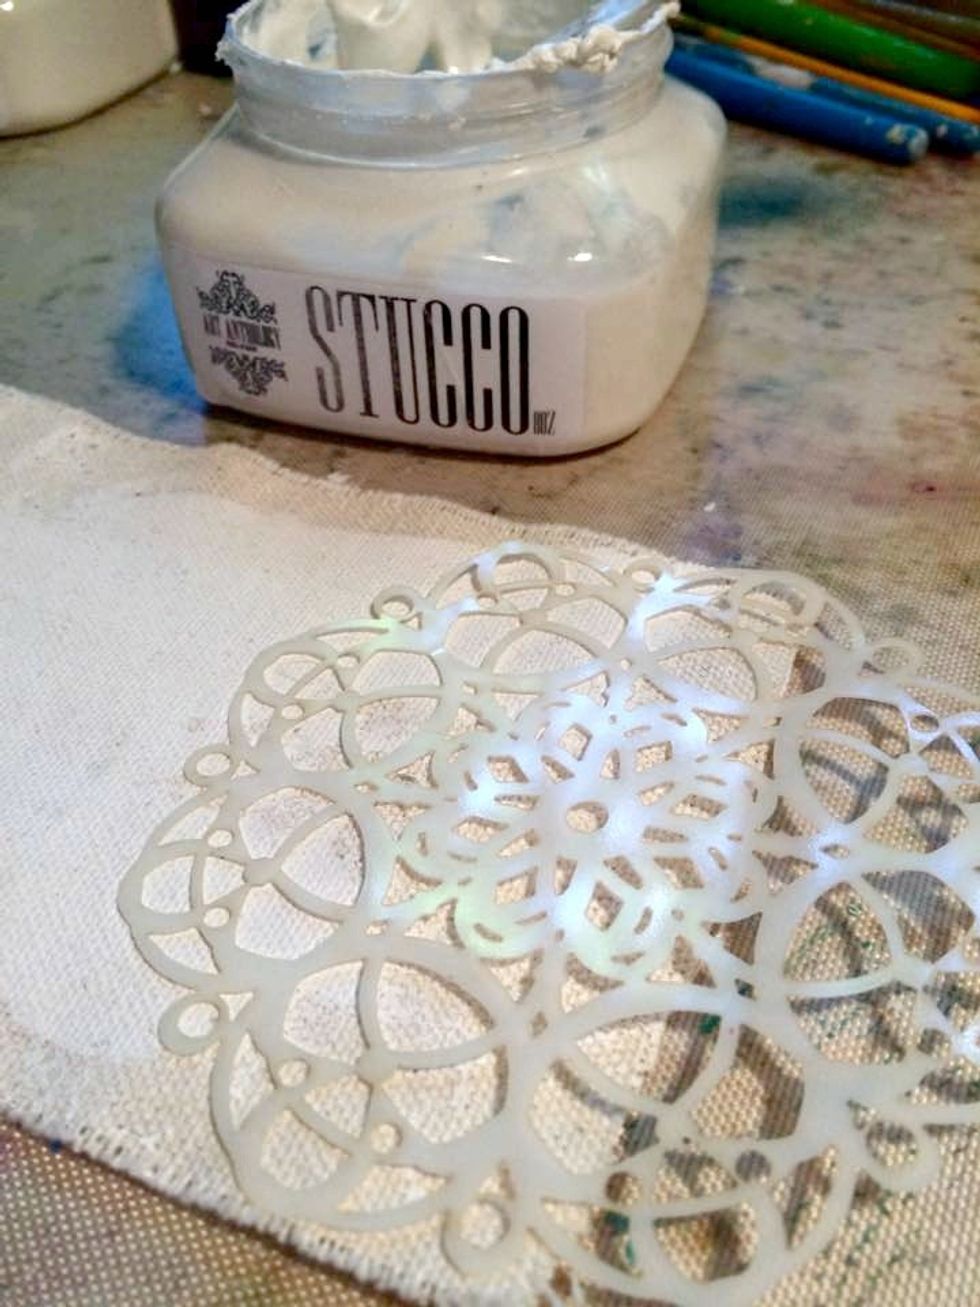
Grab your Art Anthology Stucco, a palette knife, and the Art Anthology small doily stencil. Place it on the bottom of your canvas piece. I used a portion of it, then spread the stucco on the stencil.
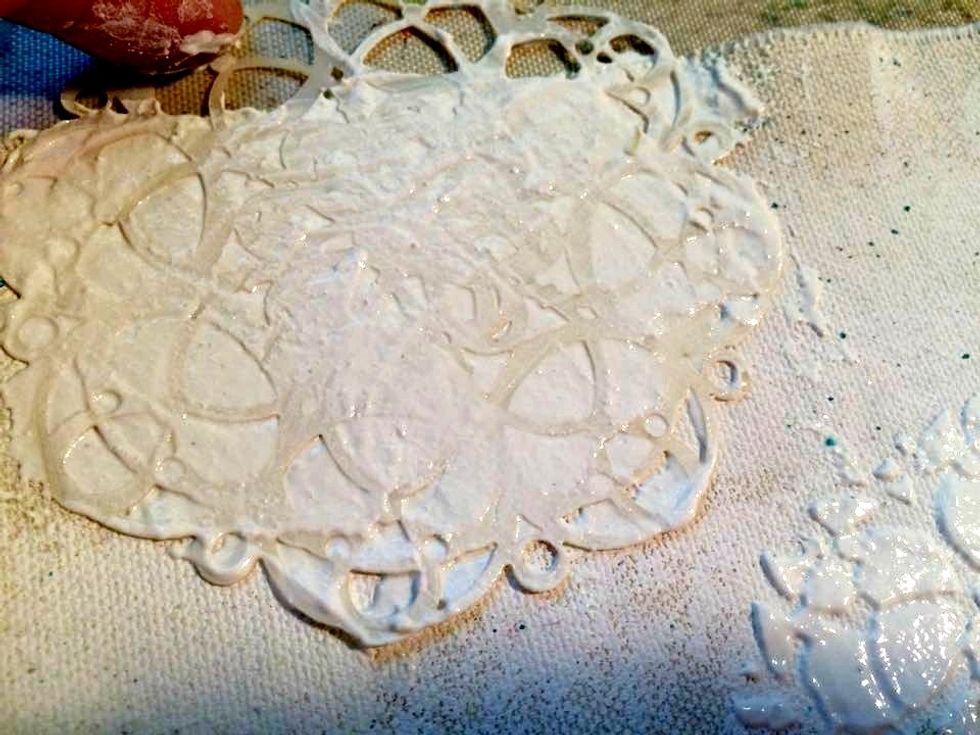
Use your finger to hold the stencil firmly in place, spread the stucco across the stencil with the palette knife. Do this along the edges & top of the stencil. Place it wherever you want the design.
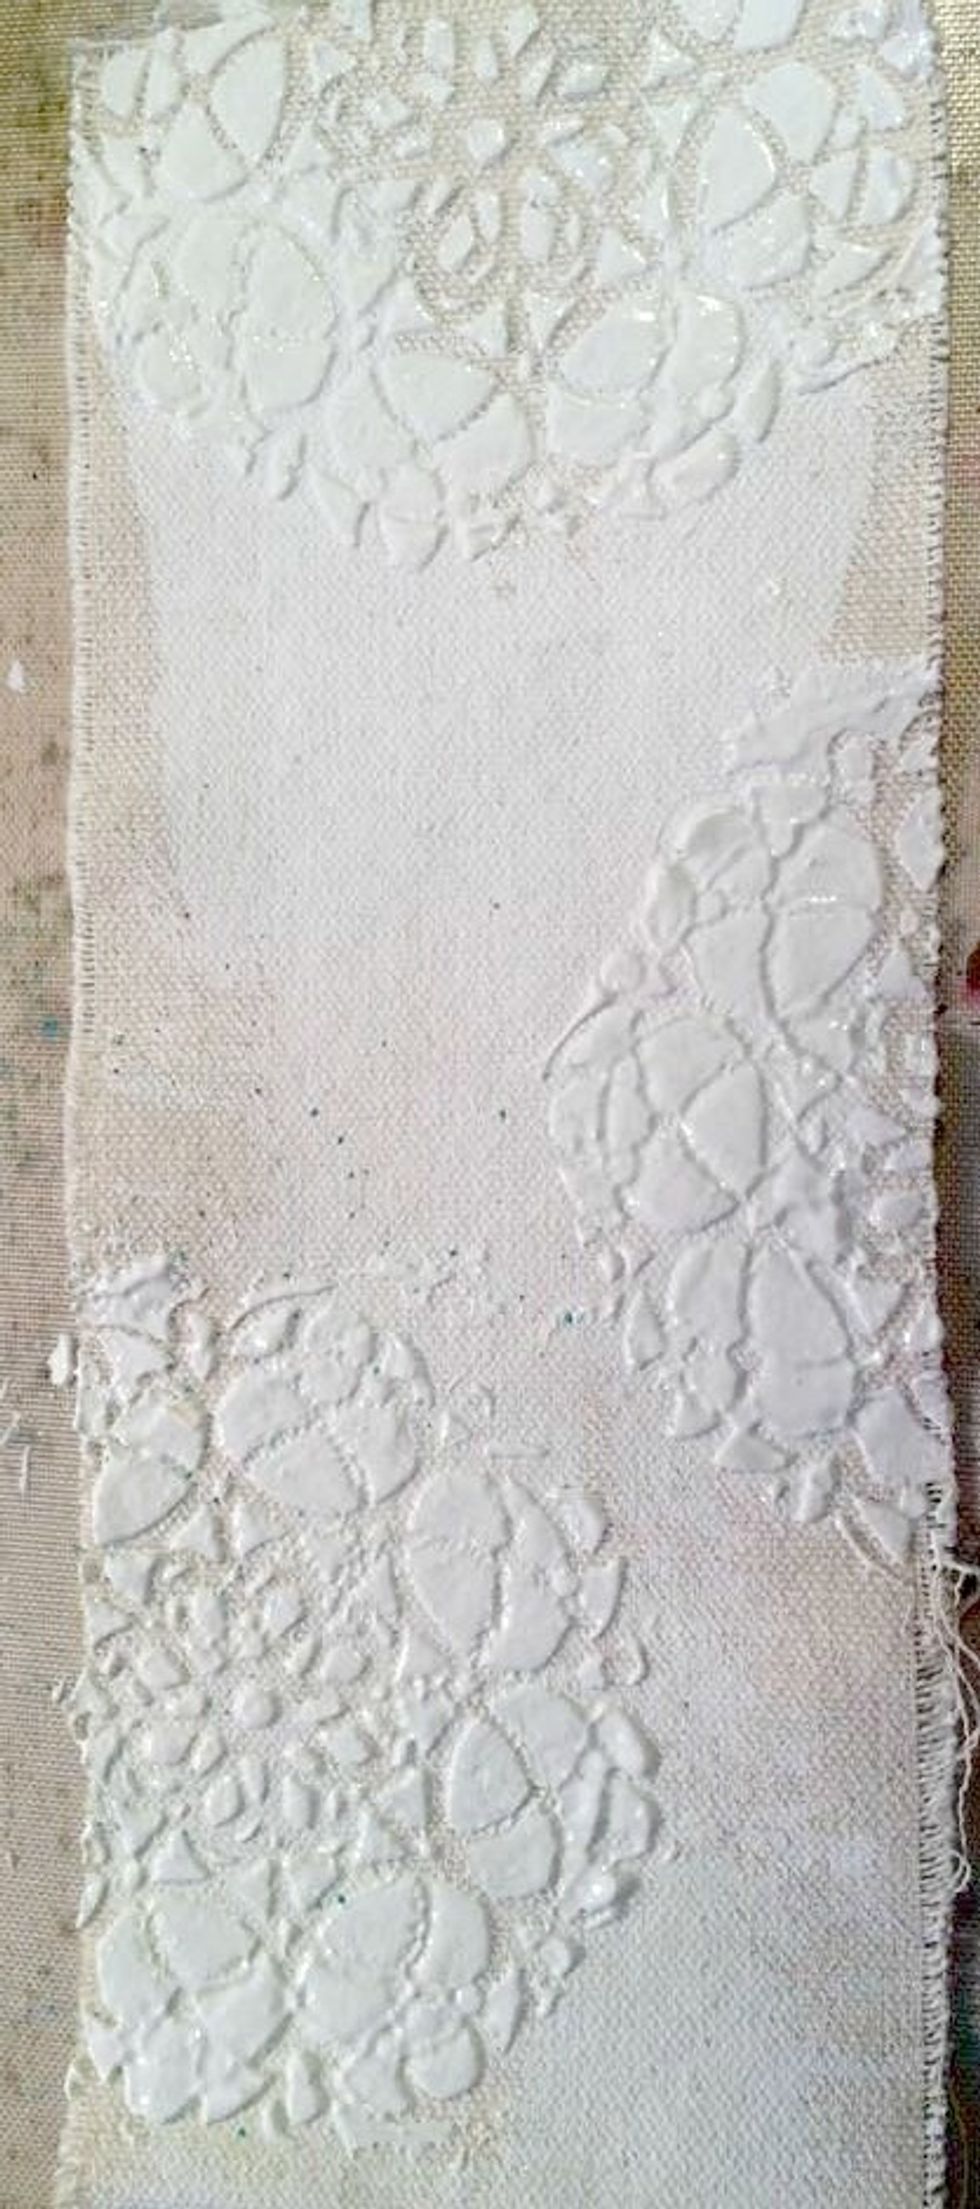
Here you can see the gesso'd and stenciled piece of canvas. I used a heat gun to dry mine because I am inpatient hehe.
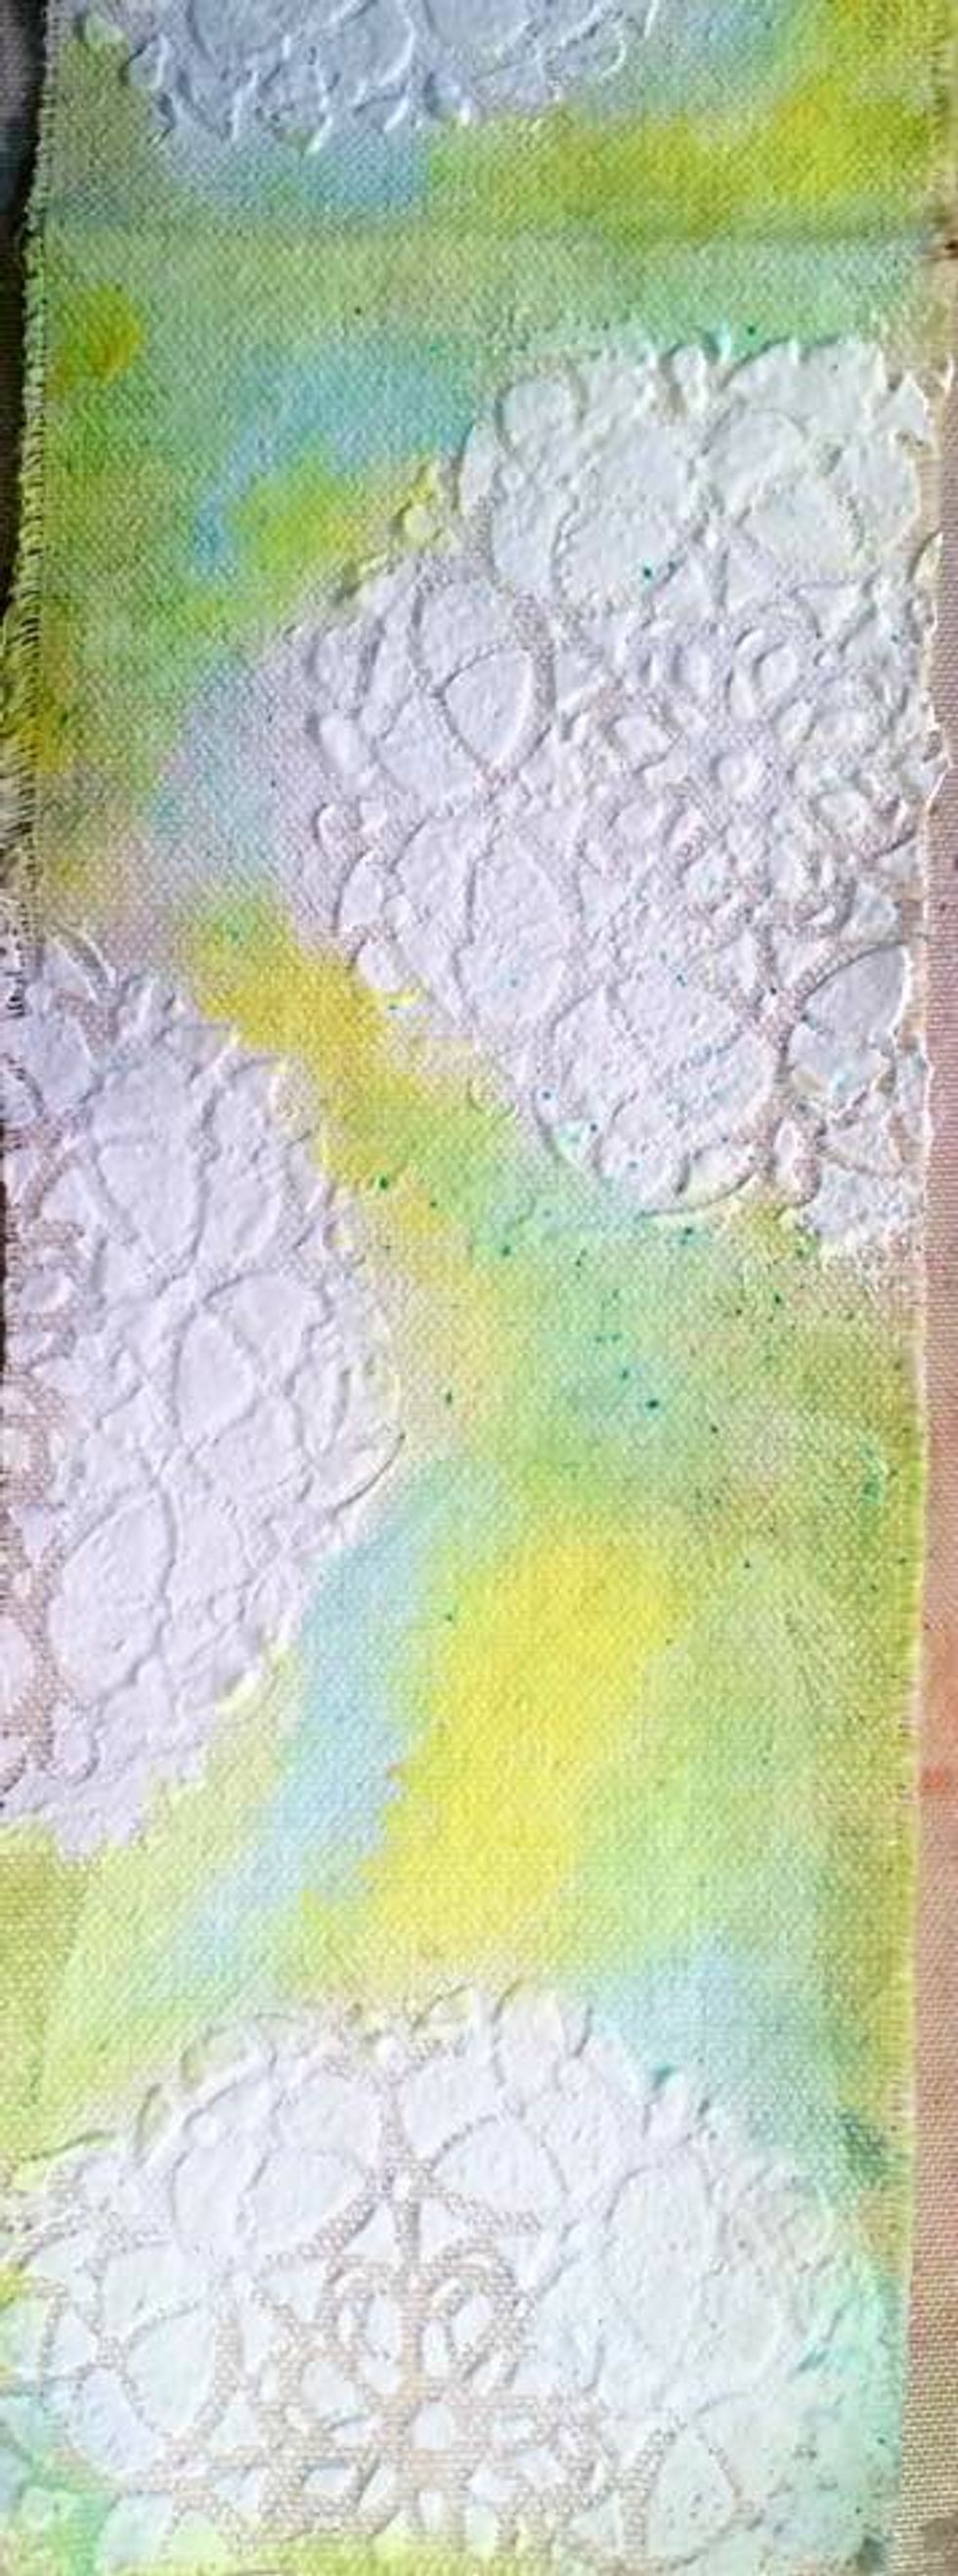
Using my finger, I rubbed Tink, Pixie and a small amount of Lemon Tart on the canvas where I did NOT stencil. I just kept adding color until I was happy with the result. Your fingers make great tools

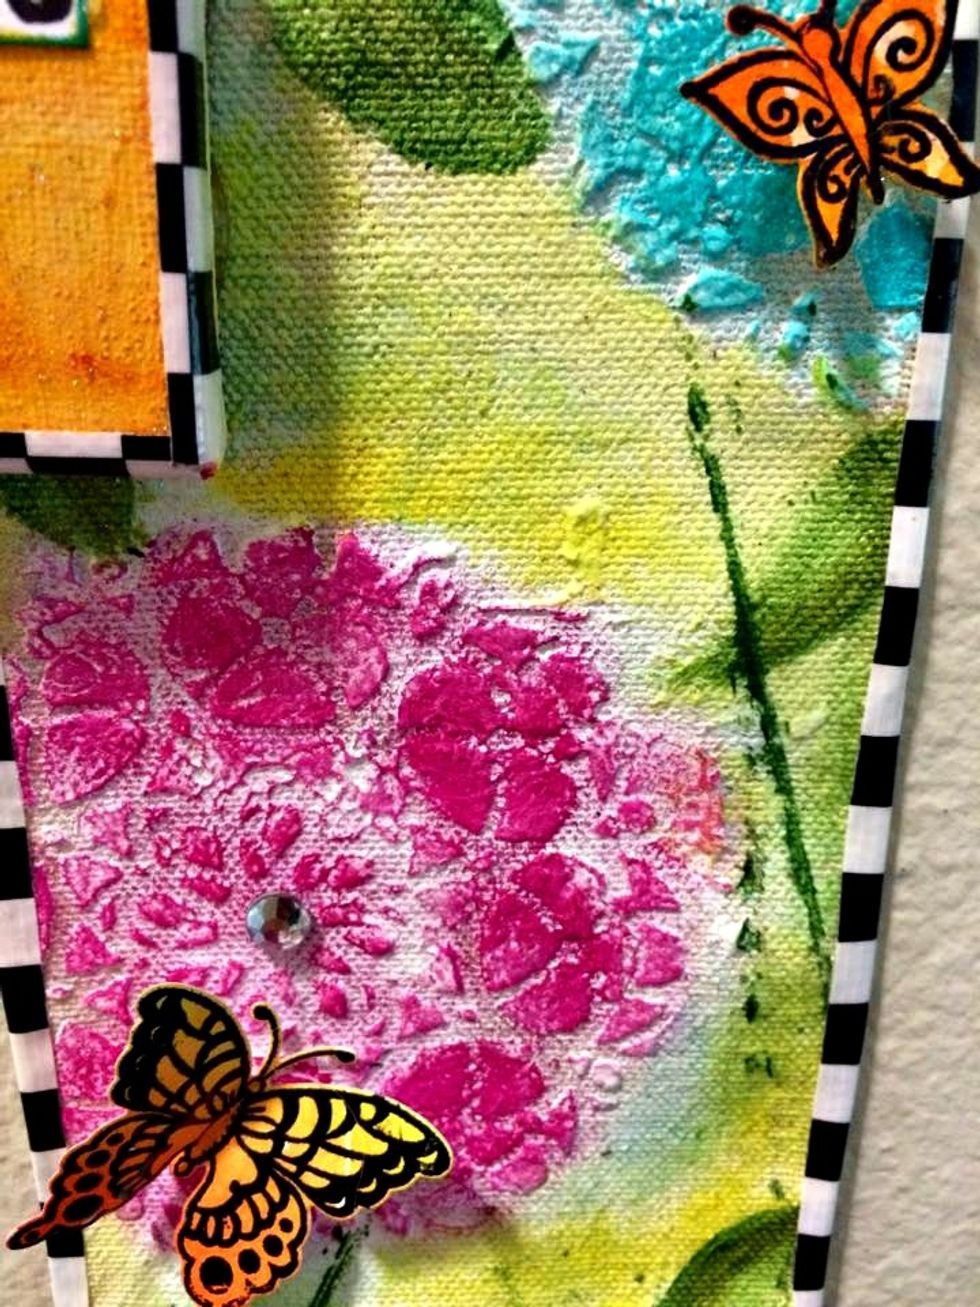
Using a brush, I added leaves. Just place them randomly on the canvas. I used shamrock, then went in with Leaf after the shamrock had dried. I then wanted to add some stems. You can see them here
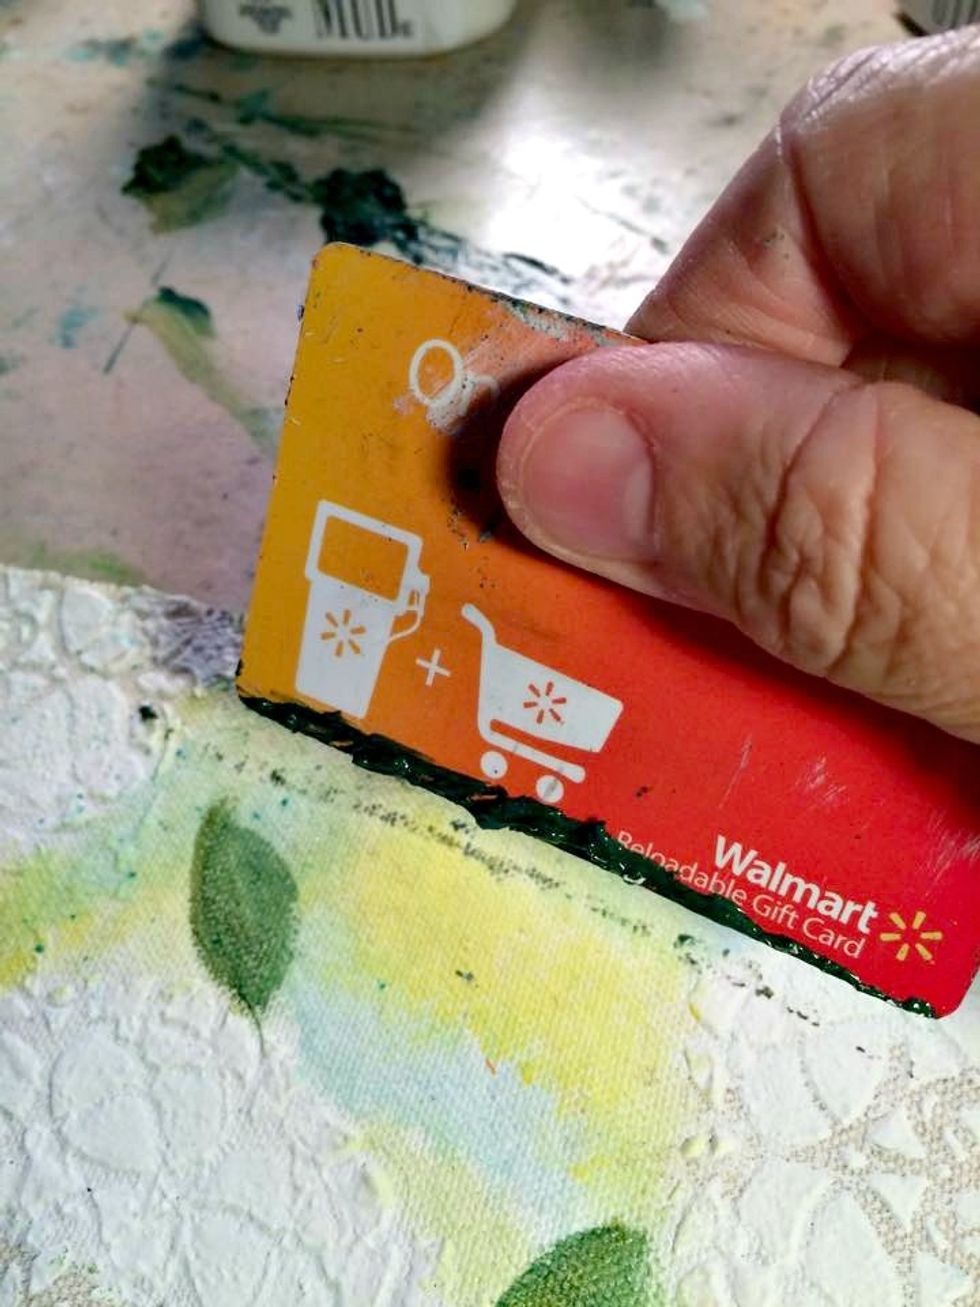
I patted out a bit of Shamrock and Leaf onto my mat then ran the edge of an old gift card through the paint. I then swiped the card on the canvas piece to create the stem.

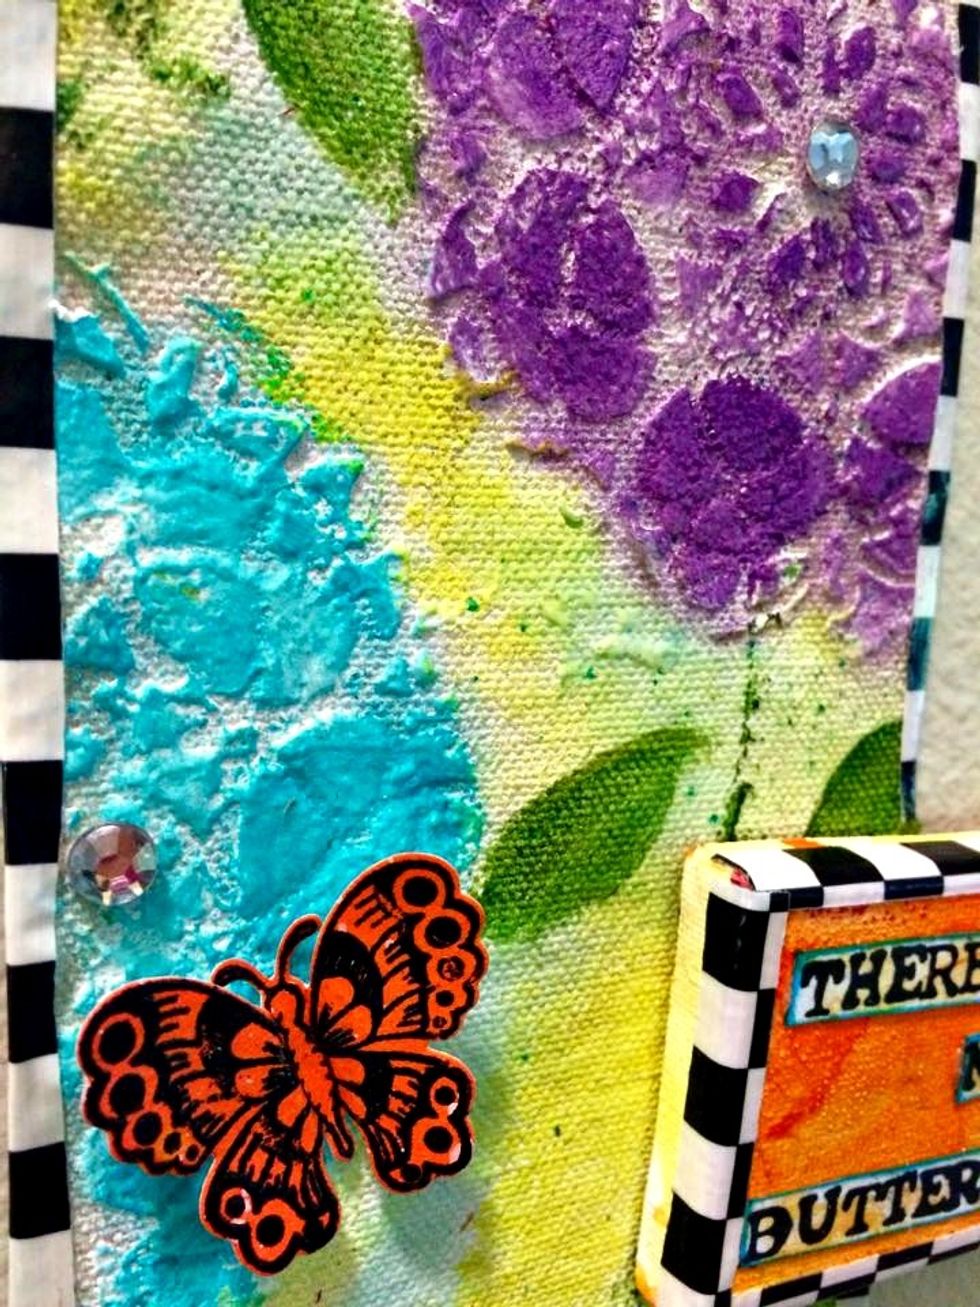
Now for some more color. I used the Flourite, Rhodolite, and Fiji to color the stenciled area. I used a dry brush and not too much paint. Lightly move the brush in a swirling motion.
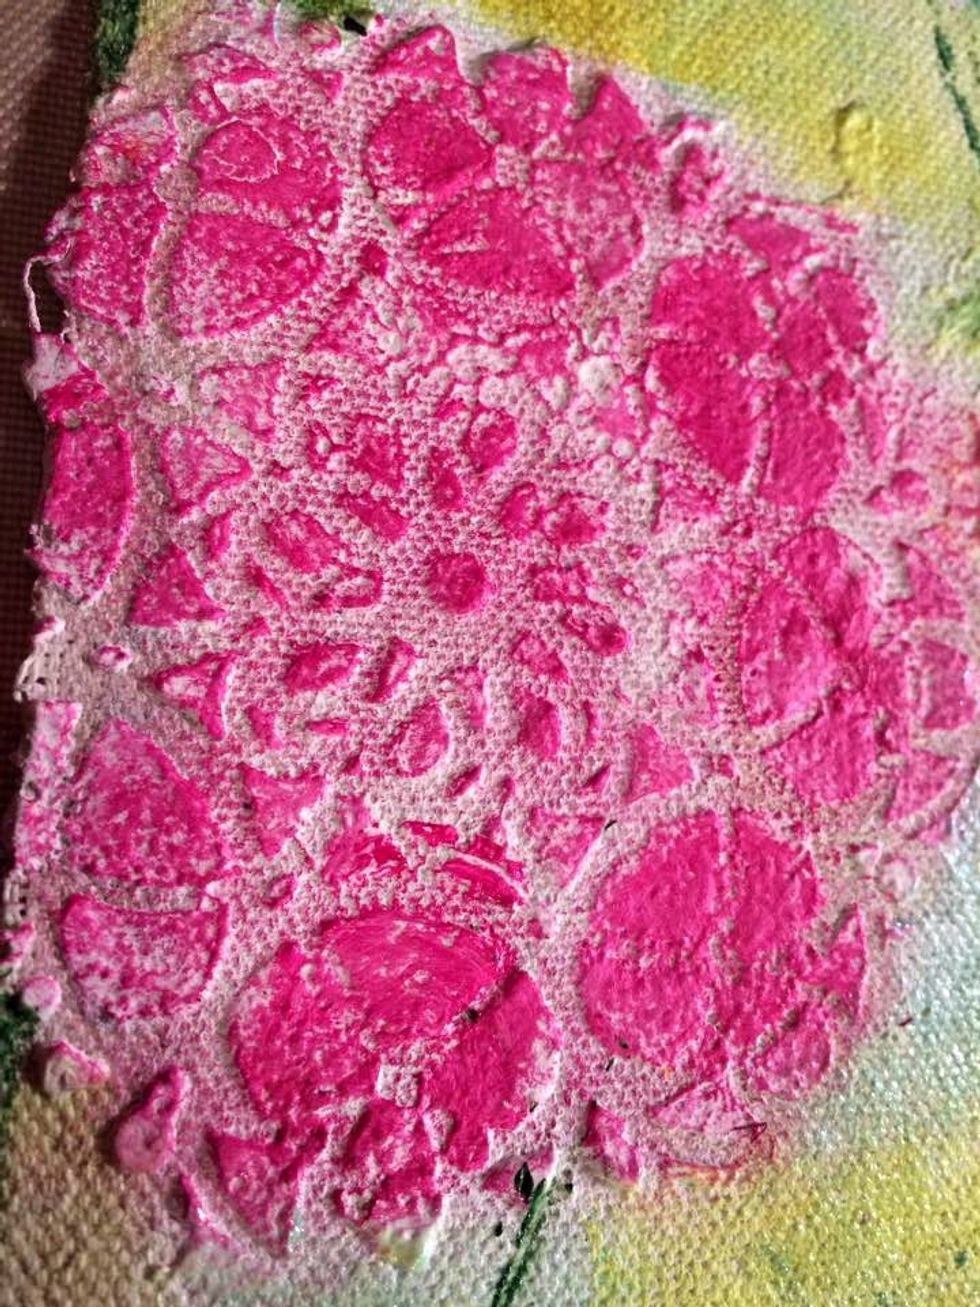
You don't want a lot of paint on the canvas underneath the stenciled area. You want there to be white space to create a look of depth. Just keep going over lightly until you get the look you want
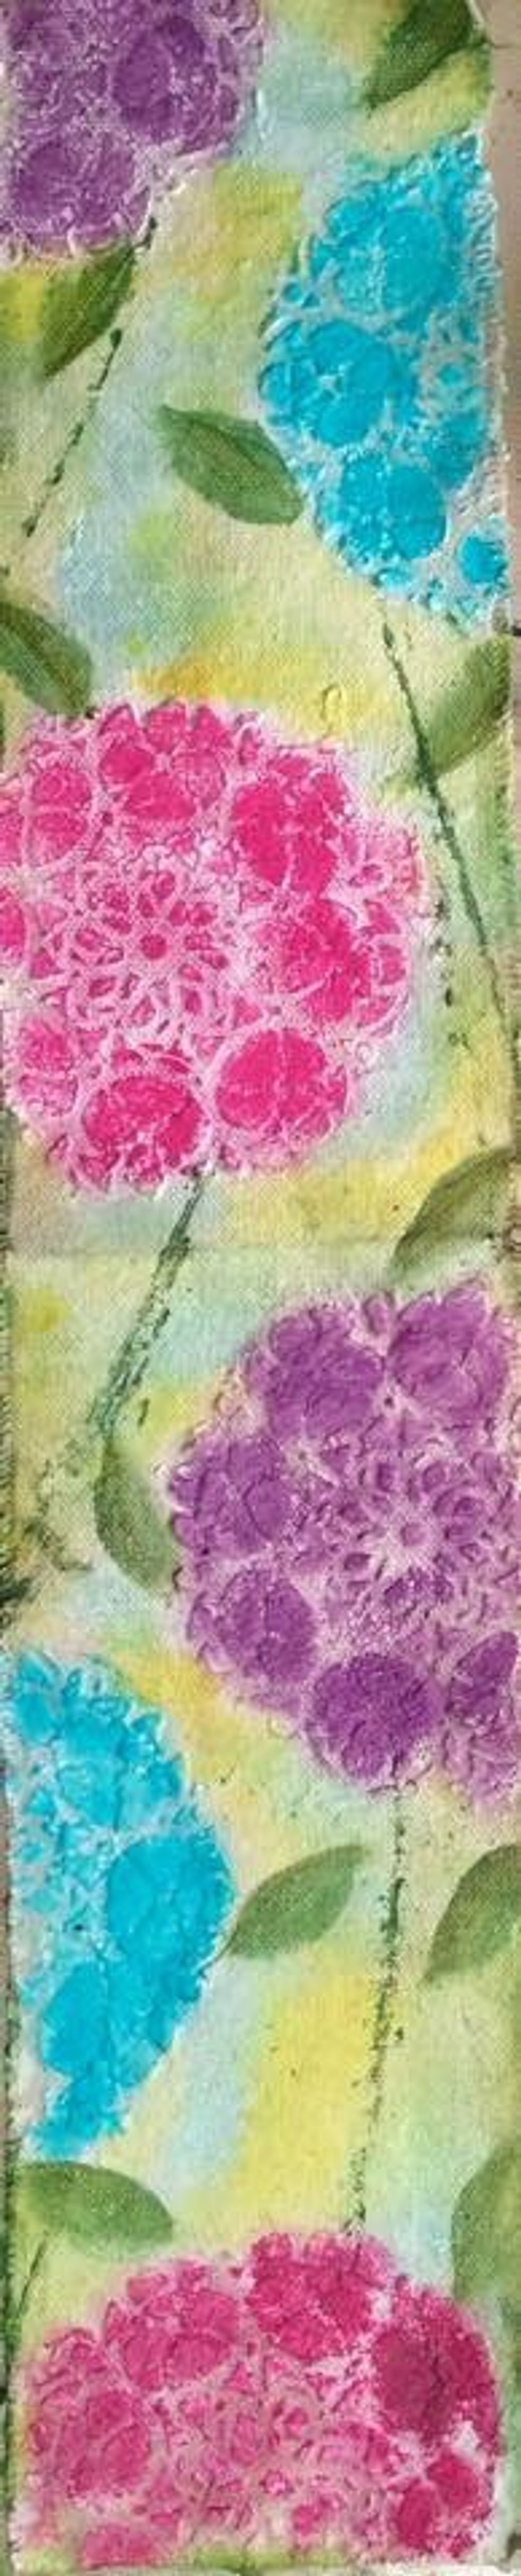
Here is a shot of my flowers. Some areas I did lighter and some darker
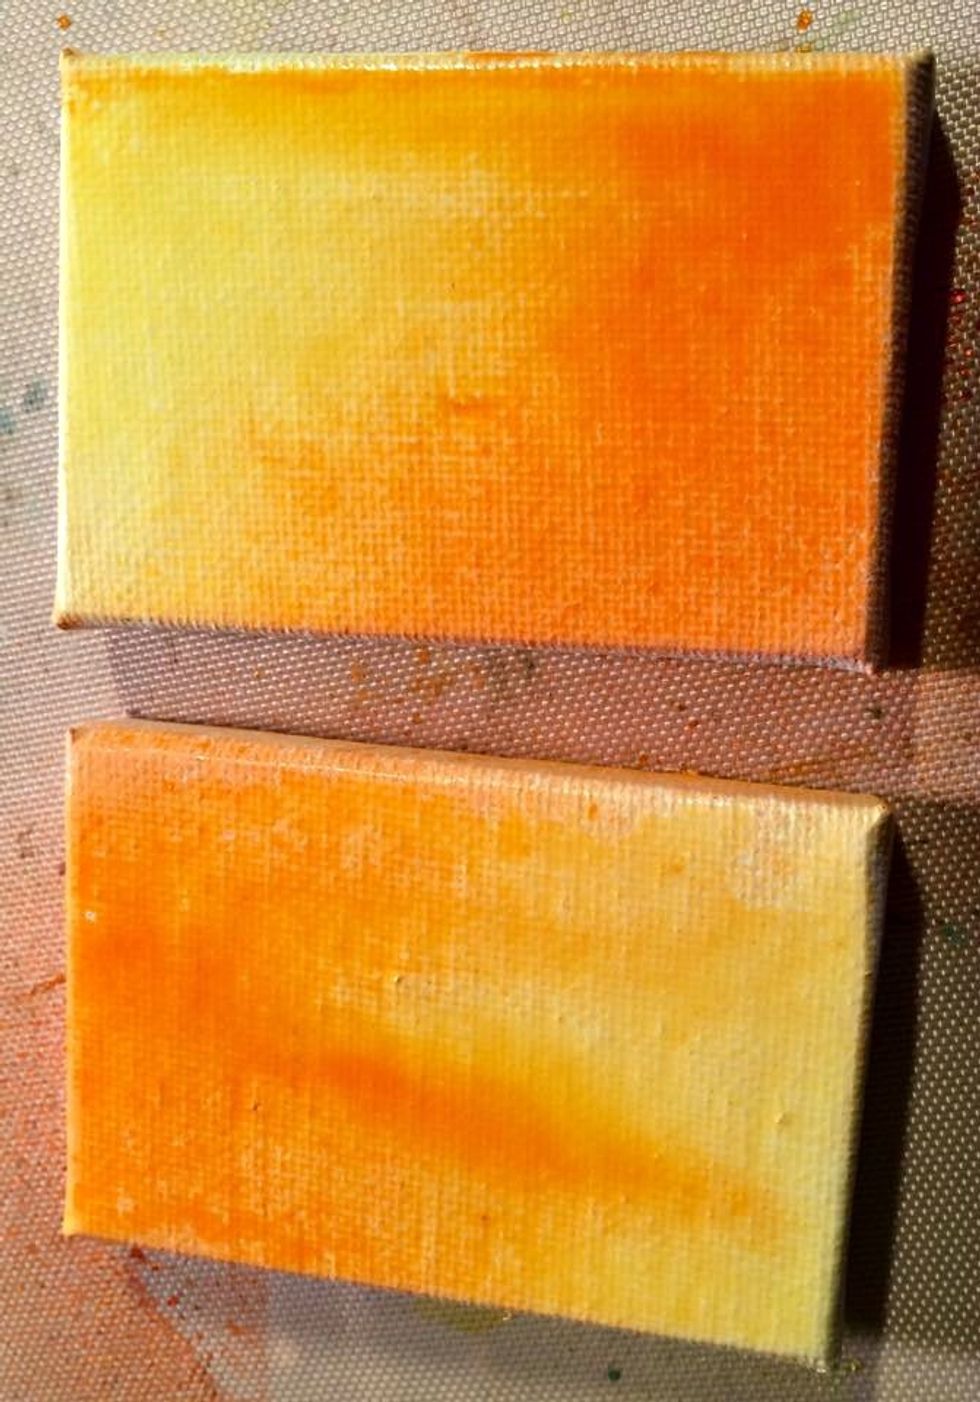
With the Glorious and Juicy, mist your mini canvases. I let the colors pool together and drip a bit then dried with a heat gun. I then stamped my words onto paper and adhered them to the canvases.
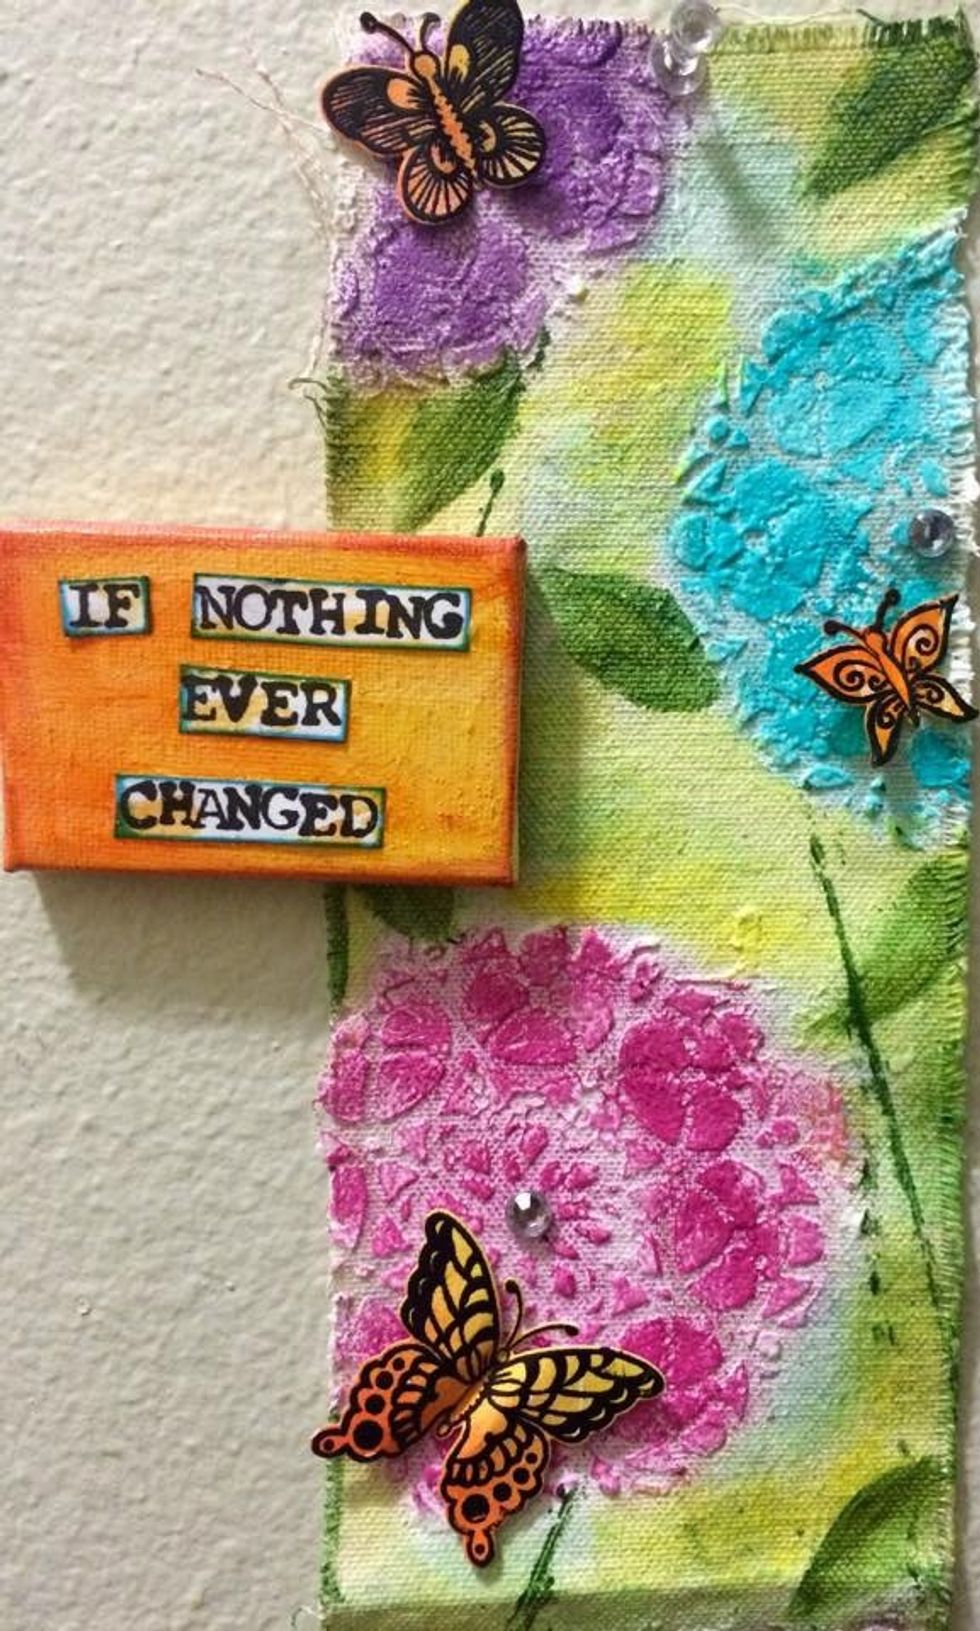
Here you can also see I added some butterflies. I had these left over from my last project that we did with Heartfelt Creations.
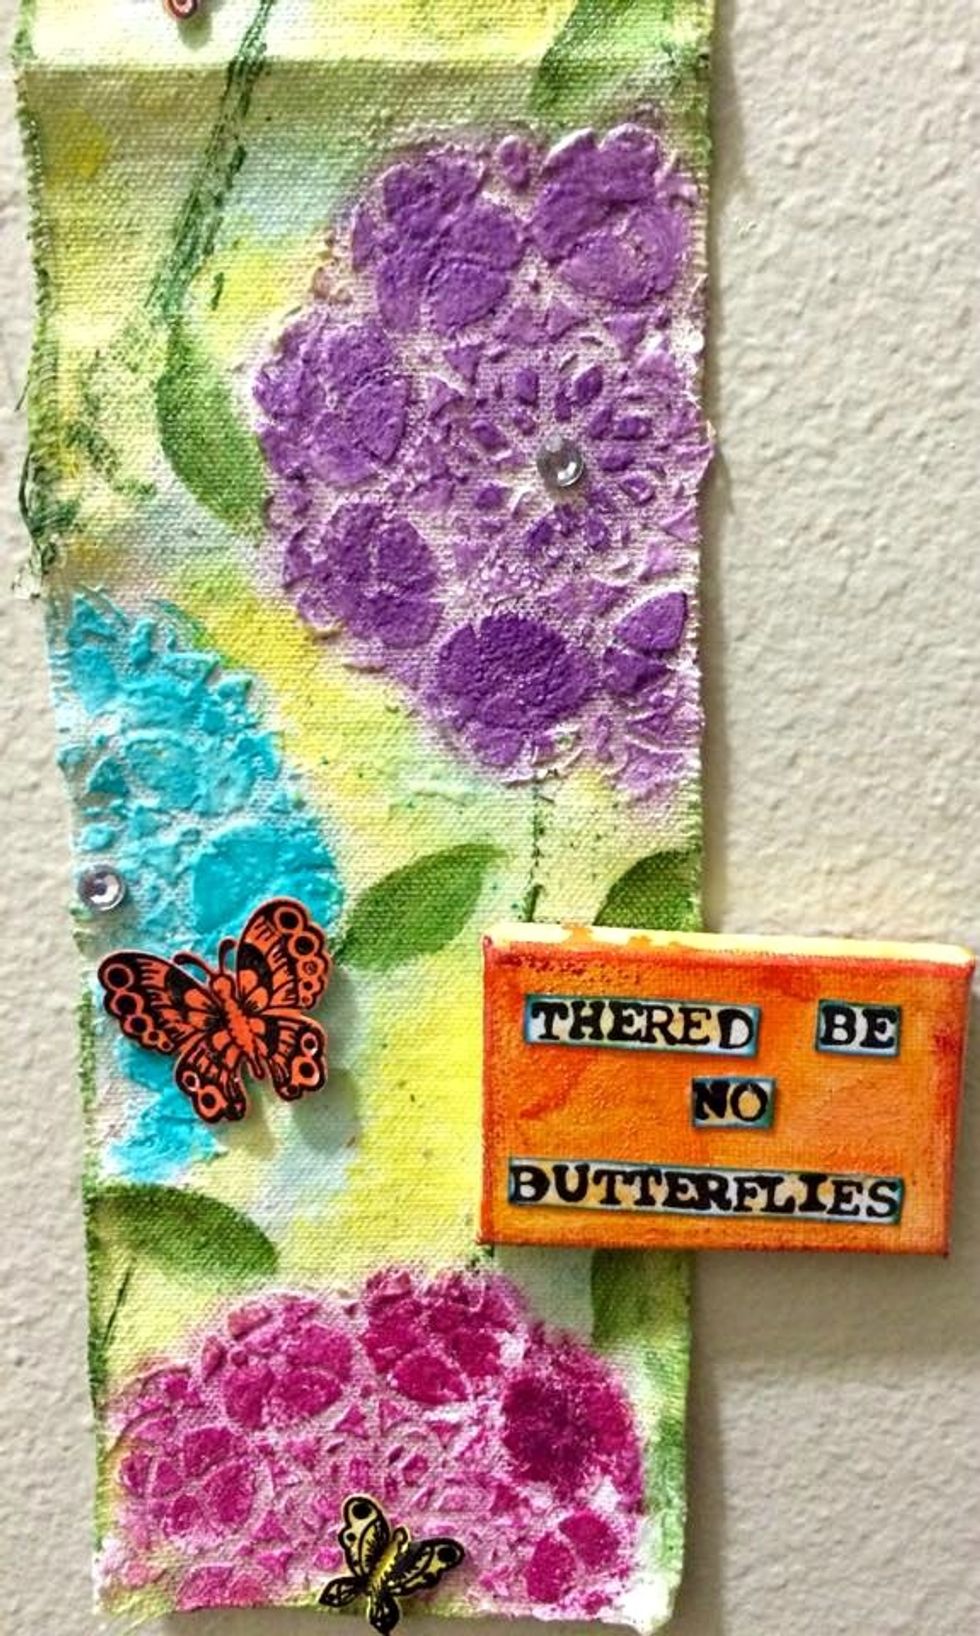
You can check out my snapguide on the Prima Altered Frame to see how I created the butterflies. You could also use printed out butterflies or anything you like. I glued the canvases on with hot glue
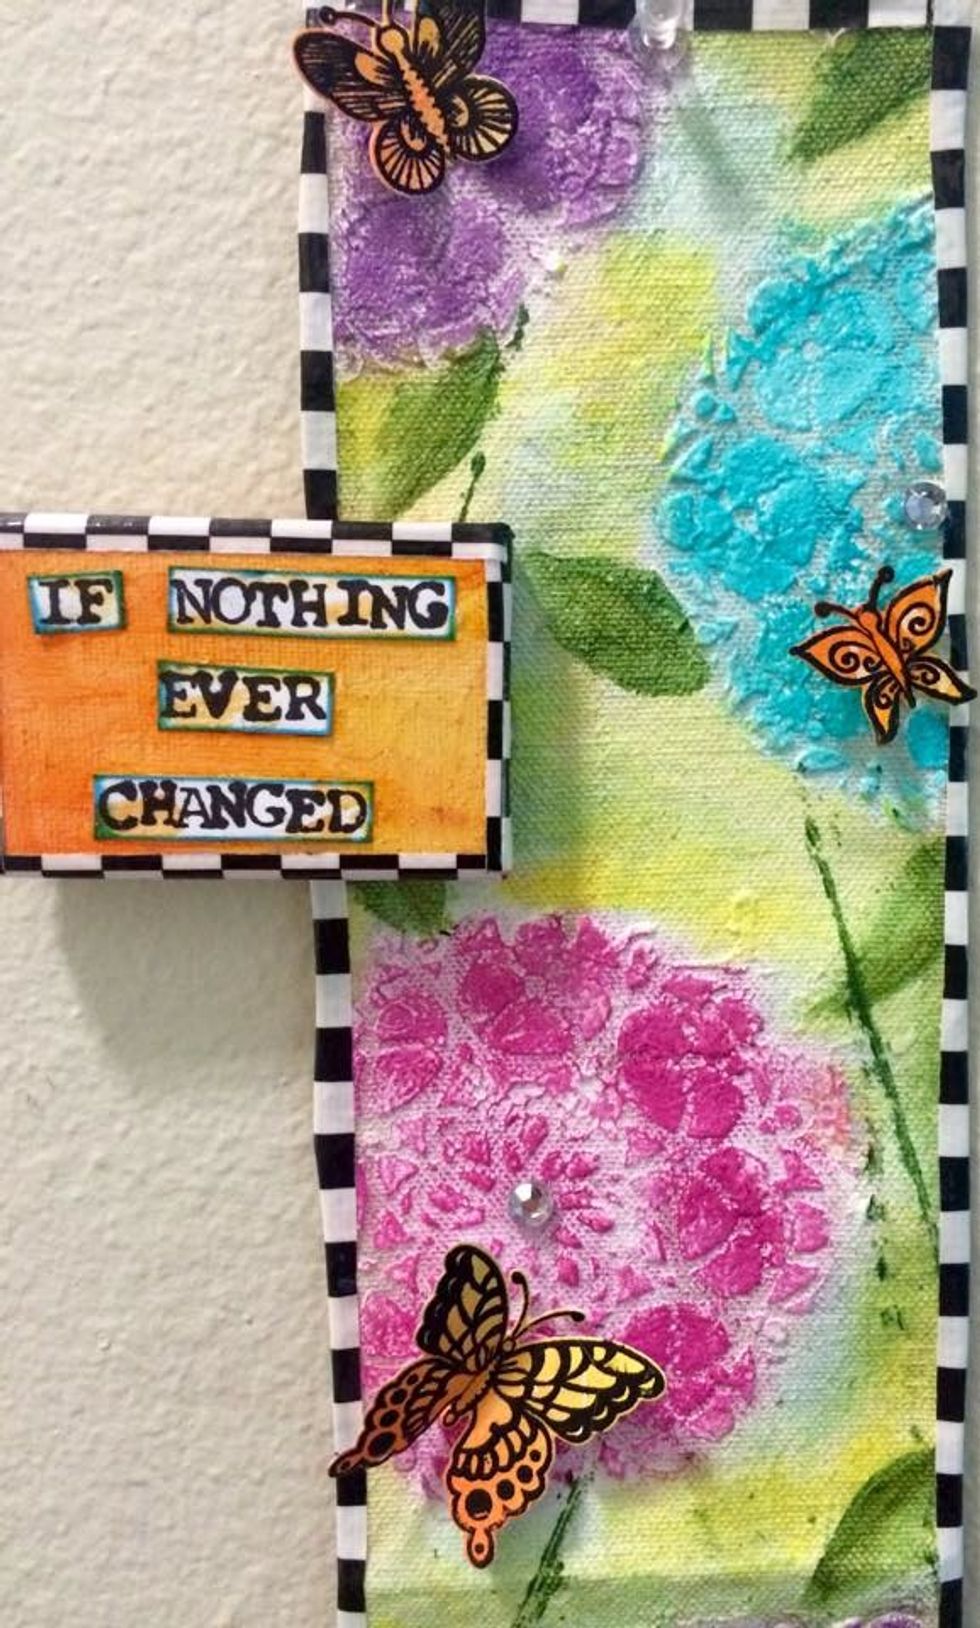
This is where the duct tape comes in. I cut it and use it on the edges of the mini canvases and the entire canvas piece and it creates a contrasting border. Just Fold the tape over the backside.
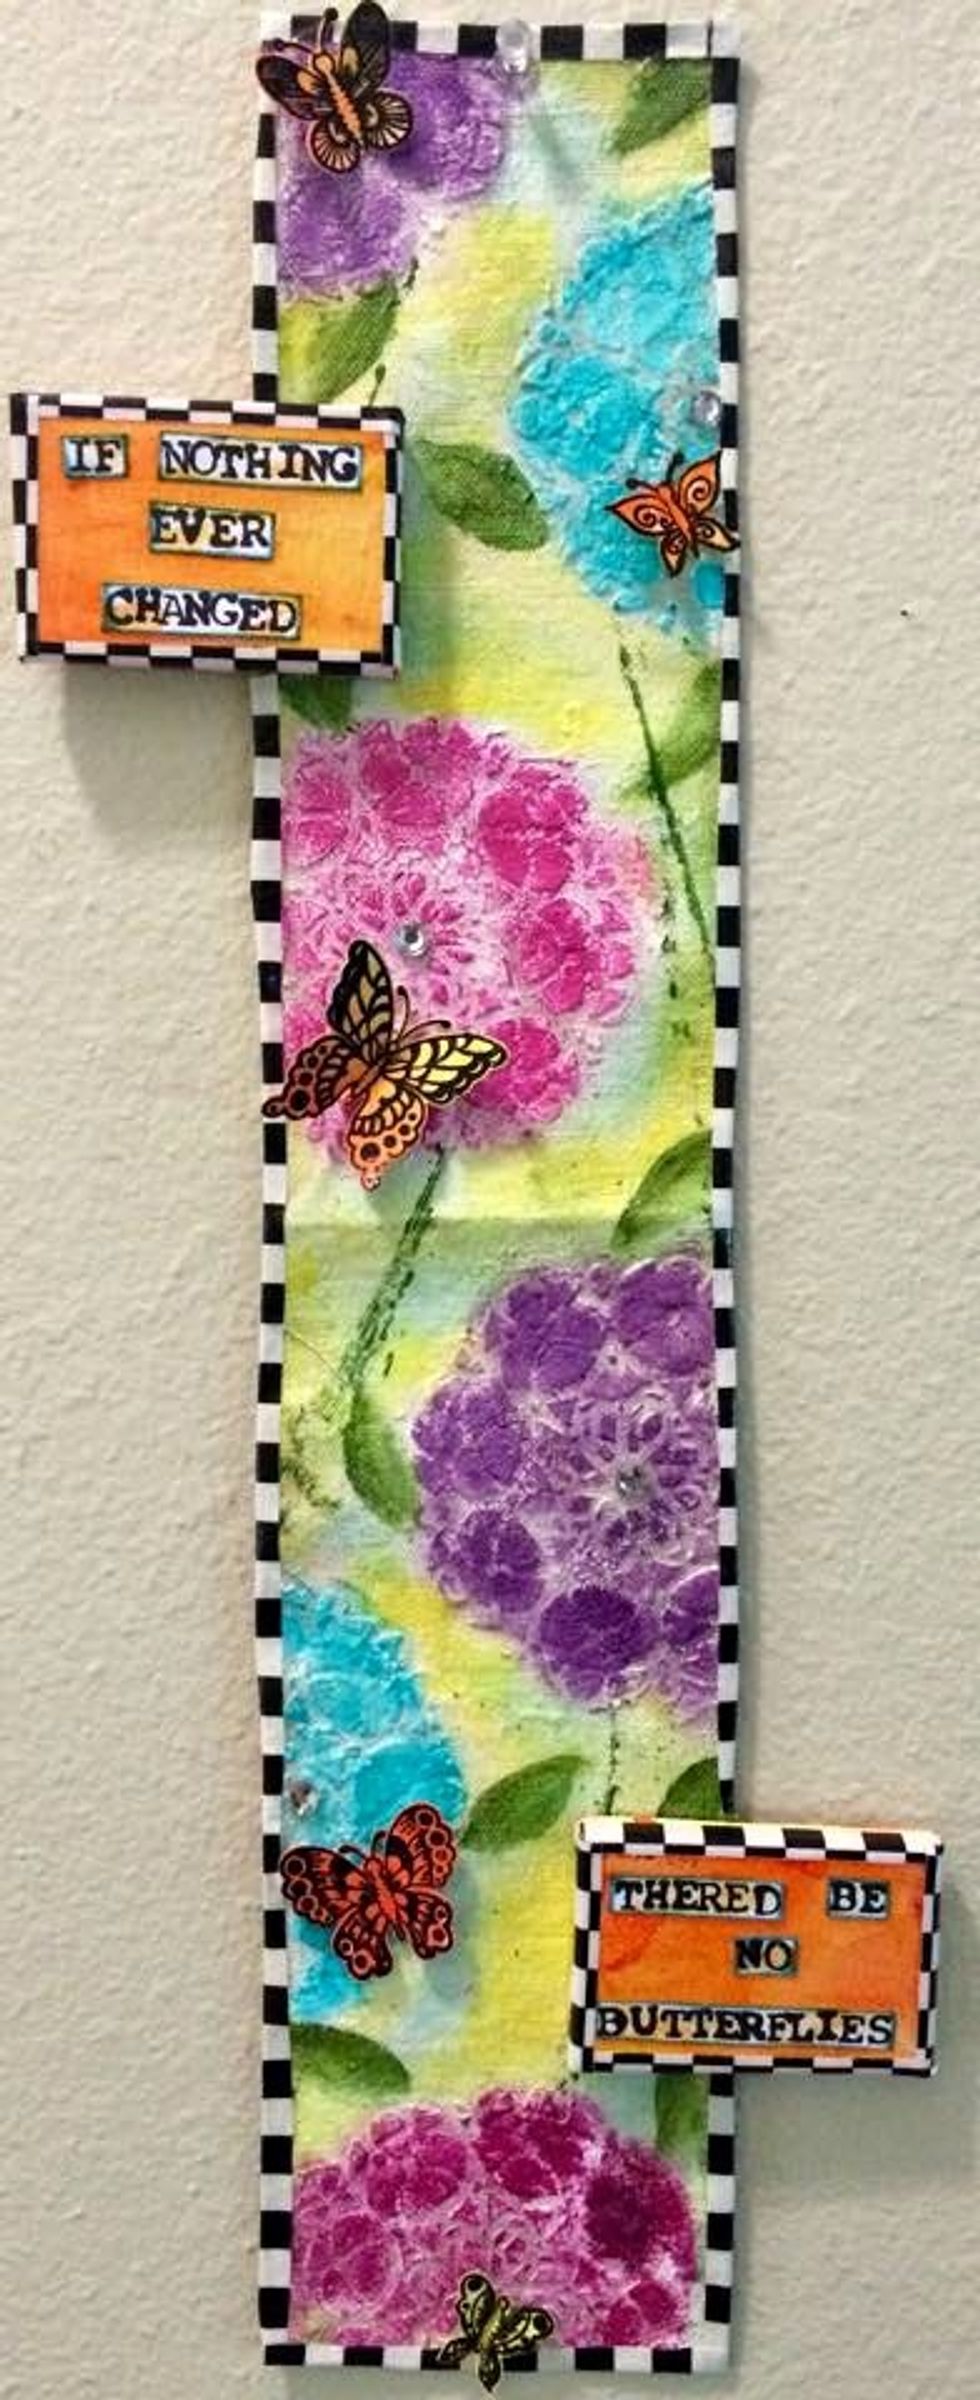
Here is the completed piece...I love how this came out and it is hanging in my entry way. I hope this inspires you to make a color filled wall hanging for your home or as a gift. Thanks. Monica

Be sure and check our blog daily for new posts from other design team members. http://artanthologyinc.com/blog/. Thanks...