The Conversation (0)
Sign Up
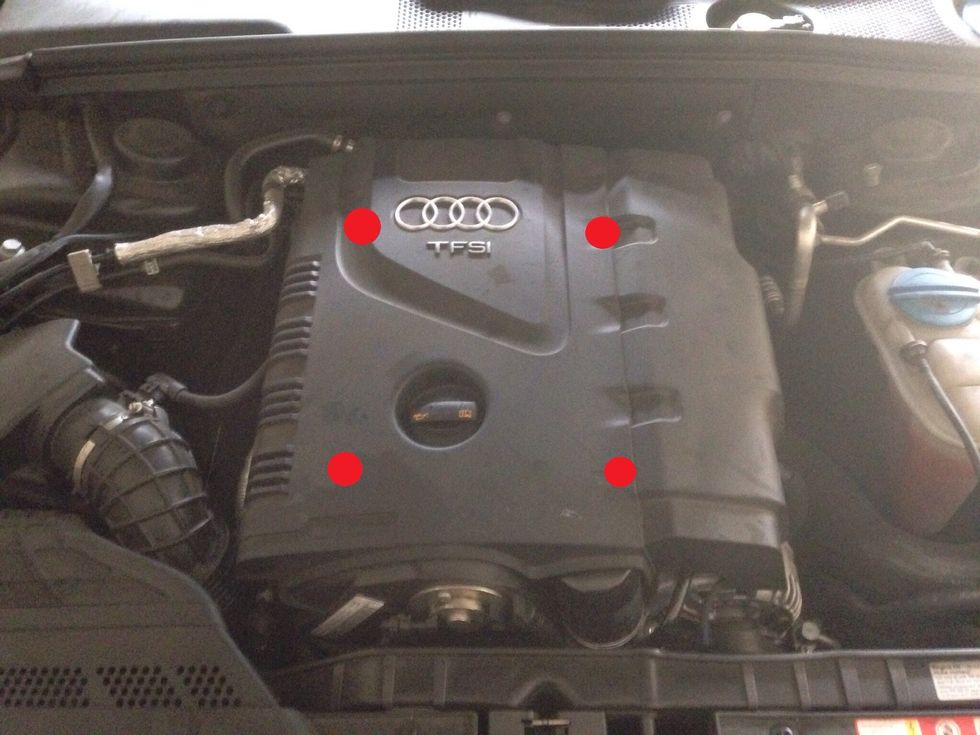
This must be done on a cold engine only! Begin by lifting the engine cover off. It is held in place underneath in 4 places (red dots). Be gentle but firm, and yank up on each corner to remove.
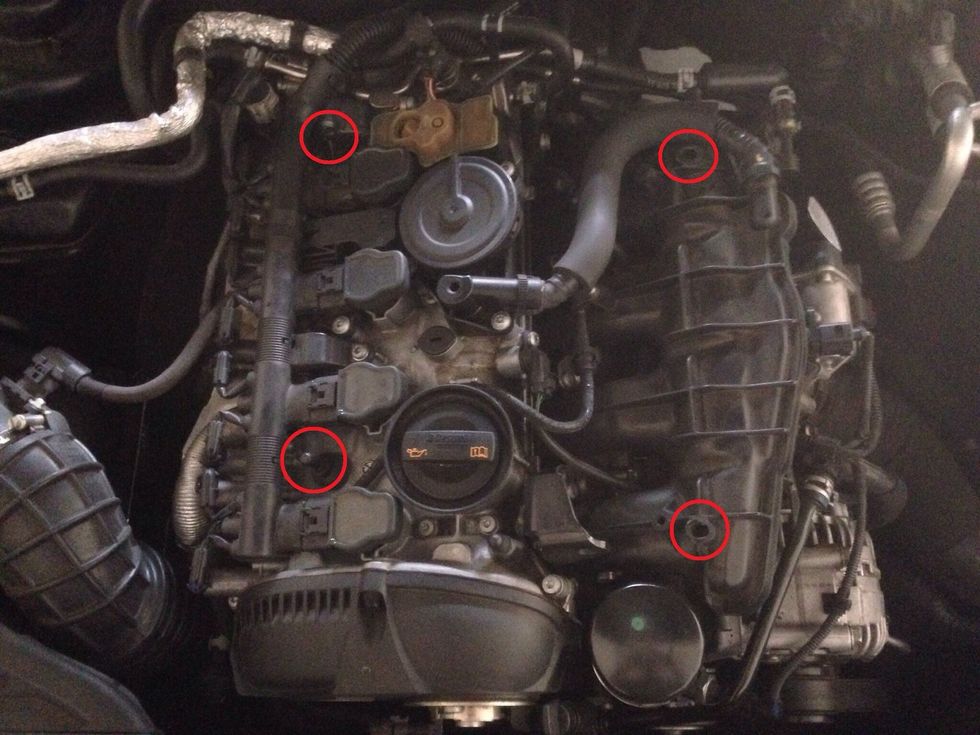
View of the engine with the cover removed. Cover attachment points are circled. Note the 4 coil packs and wiring harness to the left of the oil fill cap.
As seen in the photo for step 6, there are three tasks necessary to remove the coil packs so that you can access the plugs:
1: Remove a Torx screw holding the wiring harness to engine (circled). 2: Unplug 8 connectors on passenger side of wiring harness (below arrows). 3: CAREFULLY unplug each coil pack (arrows).
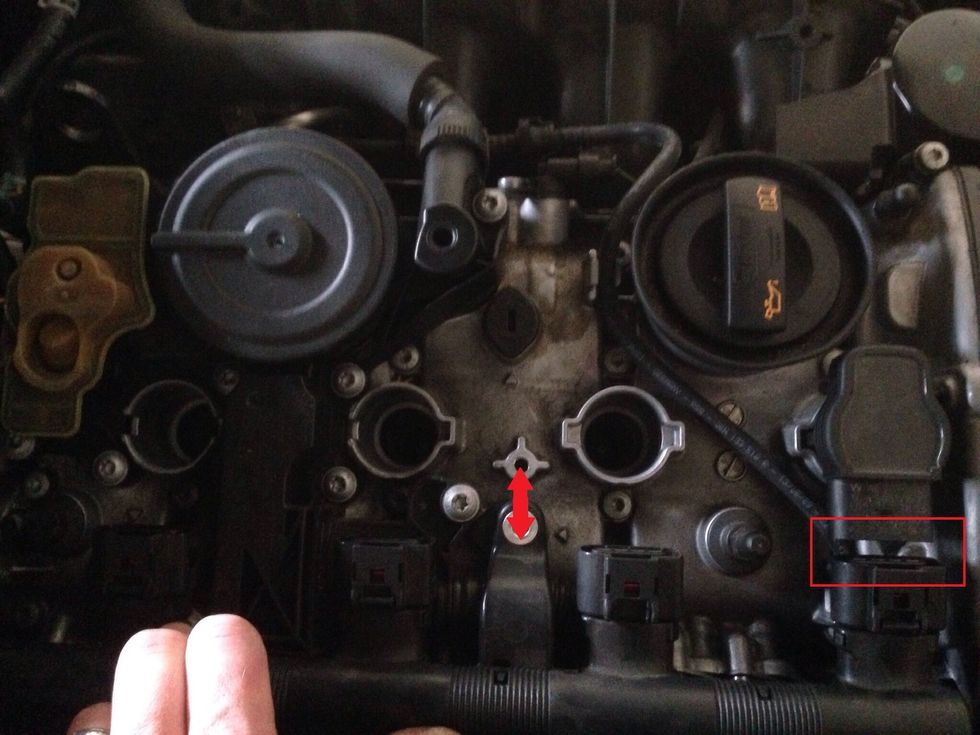
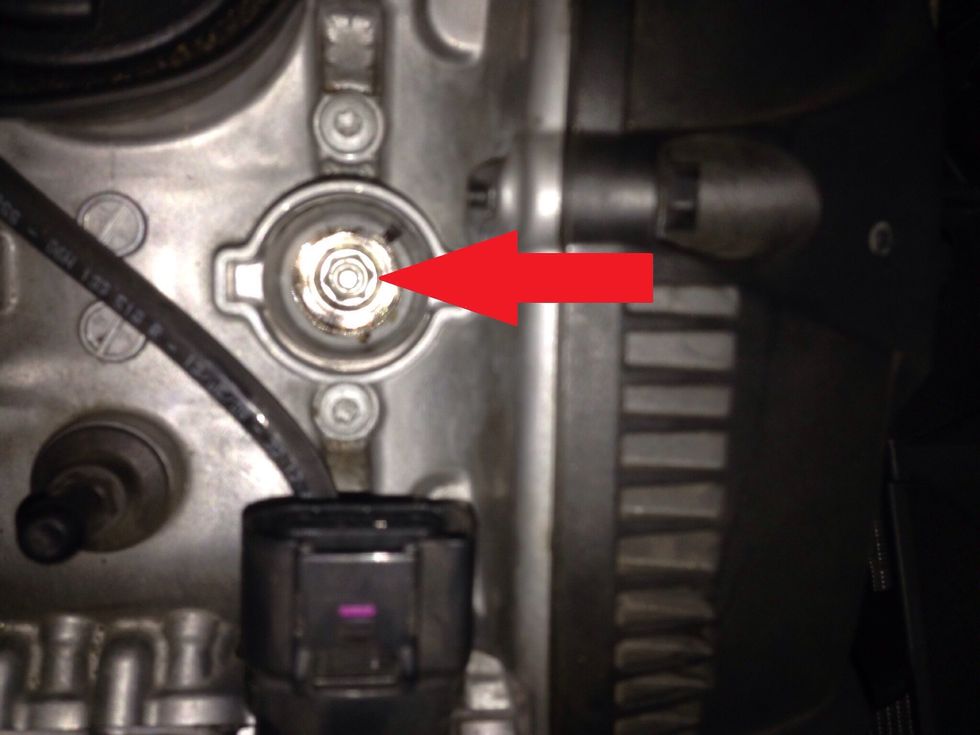
This shows the location (circled in next step) of the Torx screw securing the CP wiring to the engine. Make sure you don't lose this little screw. Also note the correctly separated plug at right.

The arrows point directly to a clip securing a plug to each coil pack (CP 1-4). These are delicate; they break very easily. To remove, push plug and CP together, then depress small tab and pull apart.
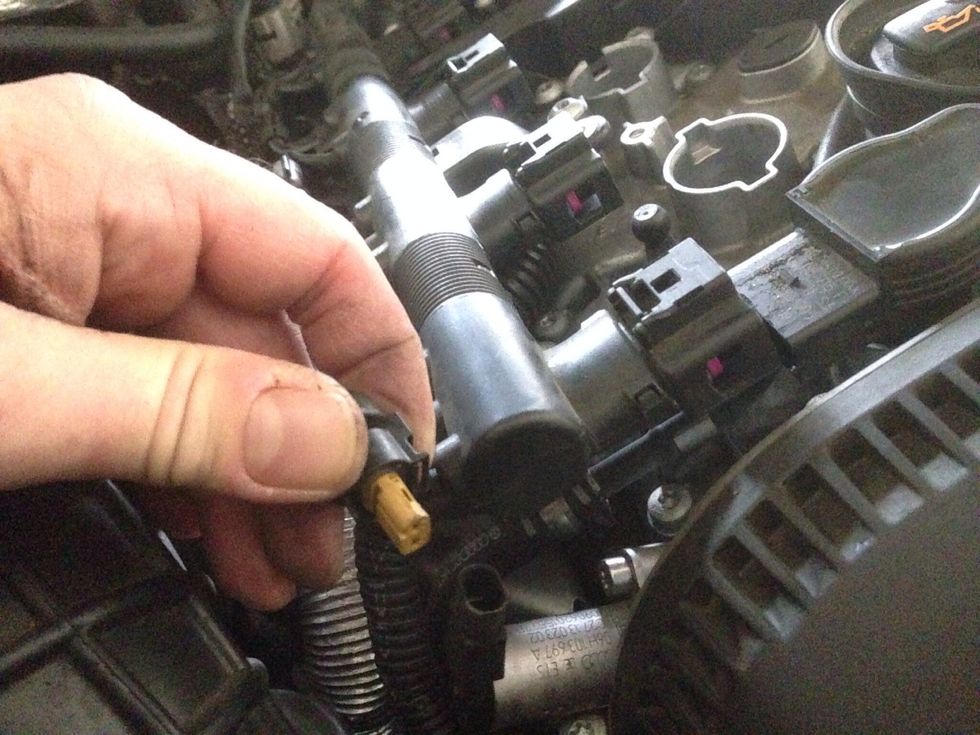
Here's what one of the 8 smaller plugs looks like. These come off easier than the CPs, but still be gentle. Everything should come apart with reasonable force.
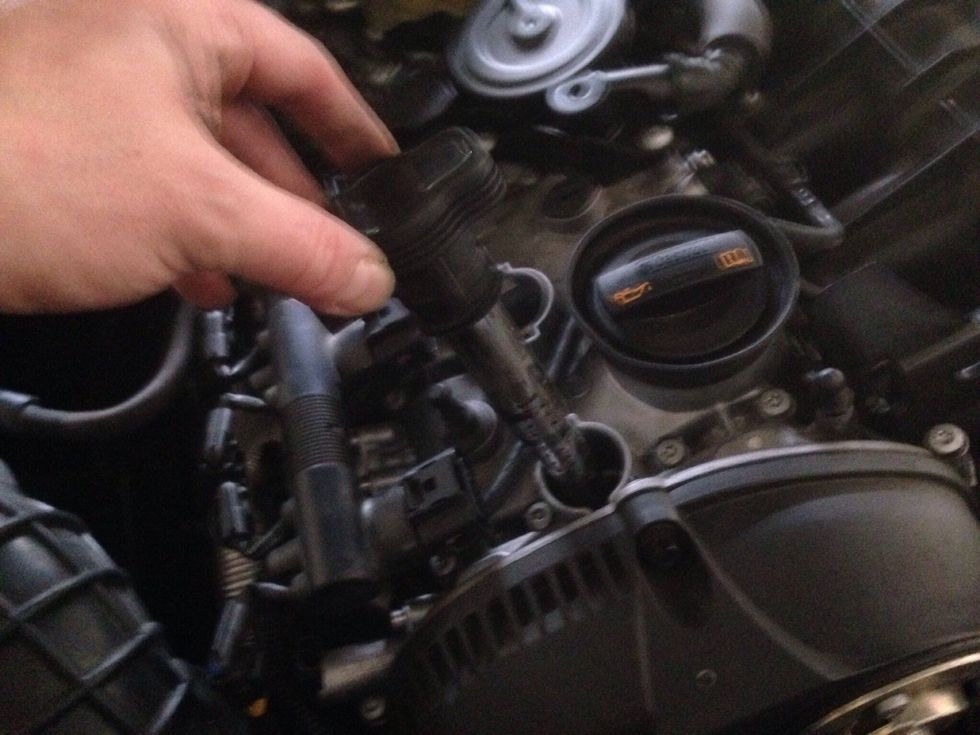
To remove a coil pack, grasp it firmly and pull straight out, wiggling a little if needed. This is the front one. I removed and labeled them so they would go back onto the same cylinder.
A shot down into the CP hole, showing the plug. I had a 6" swivel spark plug socket (get magnetic, not the rubber boot kind) and it barely reached the top, so I suggest at least a 4" extension too.
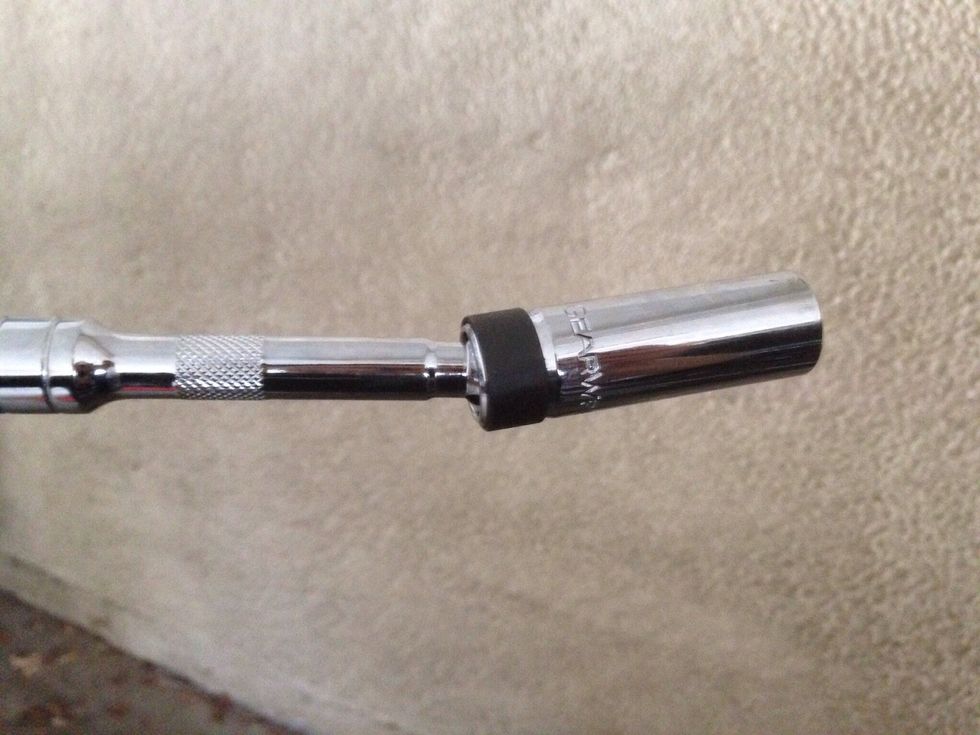
Here's the special swivel spark plug socket with a magnet to hold the plug in during removal/reinstallation. The rubber boot kind do not work well; dropping the plug into the hole is not good.
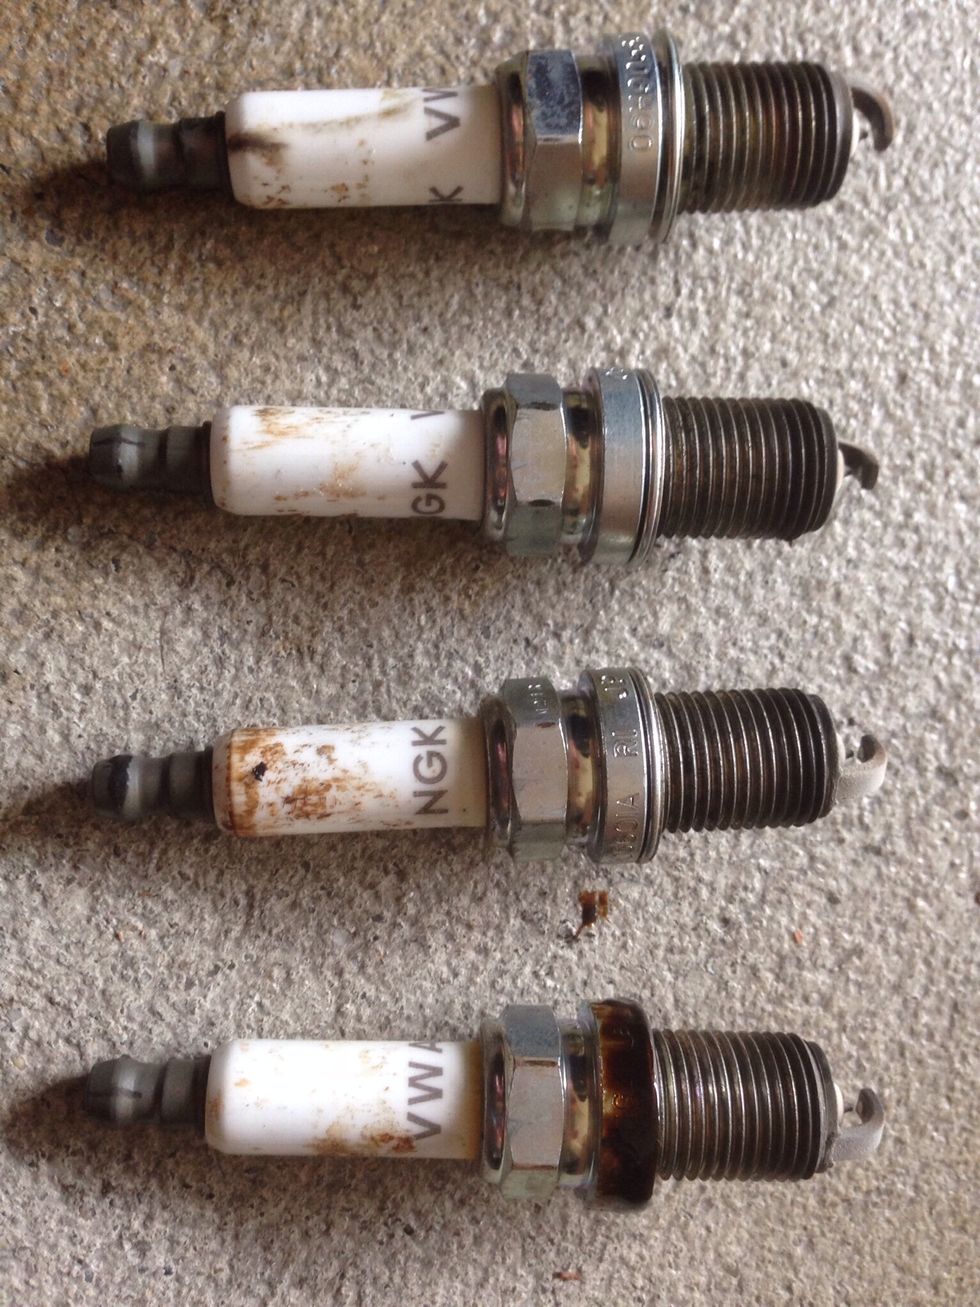
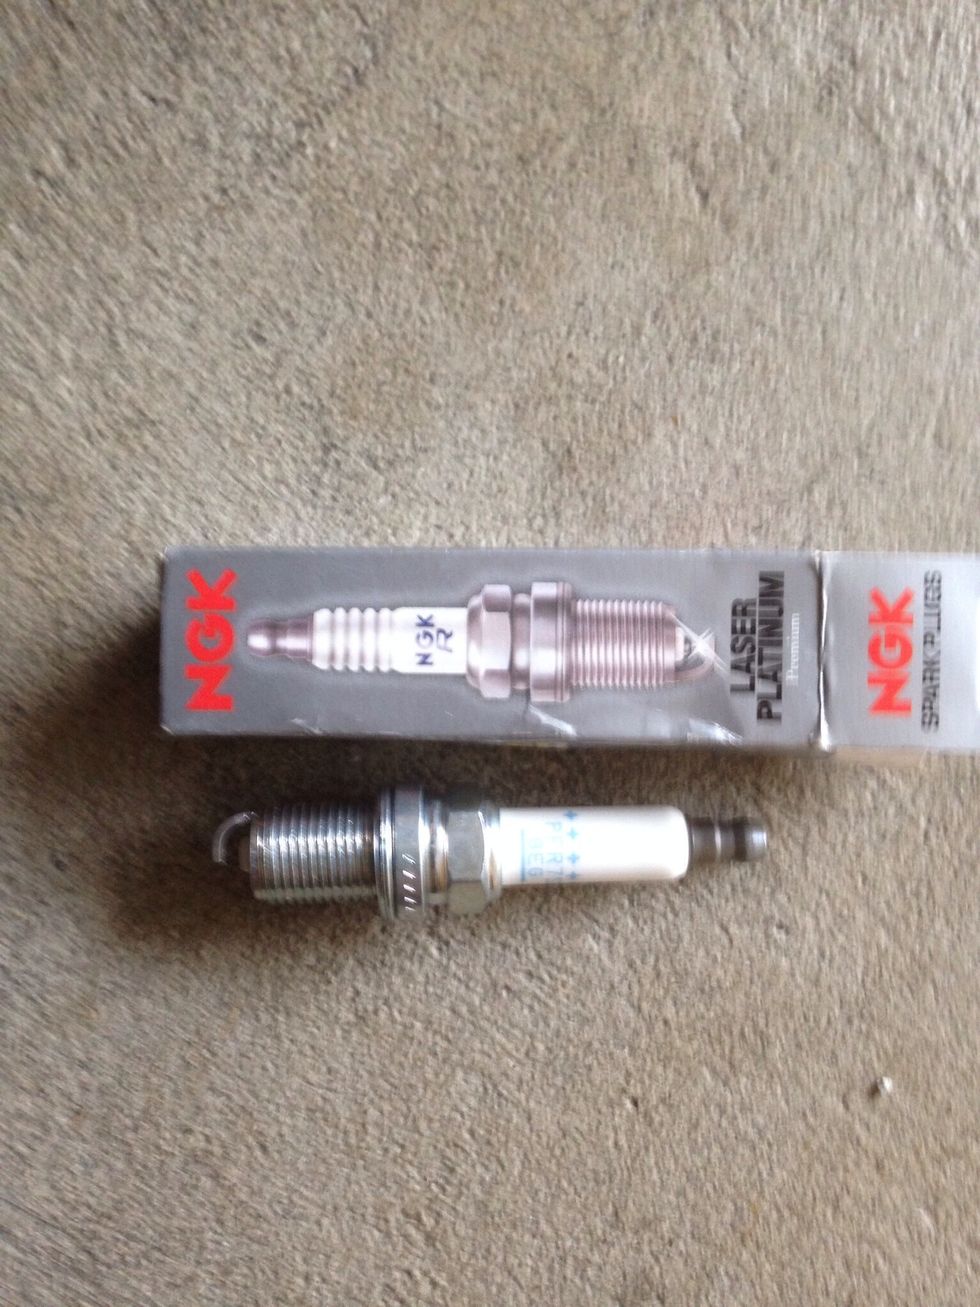
These are the plugs I pulled out, installed by the dealer. The first two I could remove with my fingers, way too loose. More on this problem later.
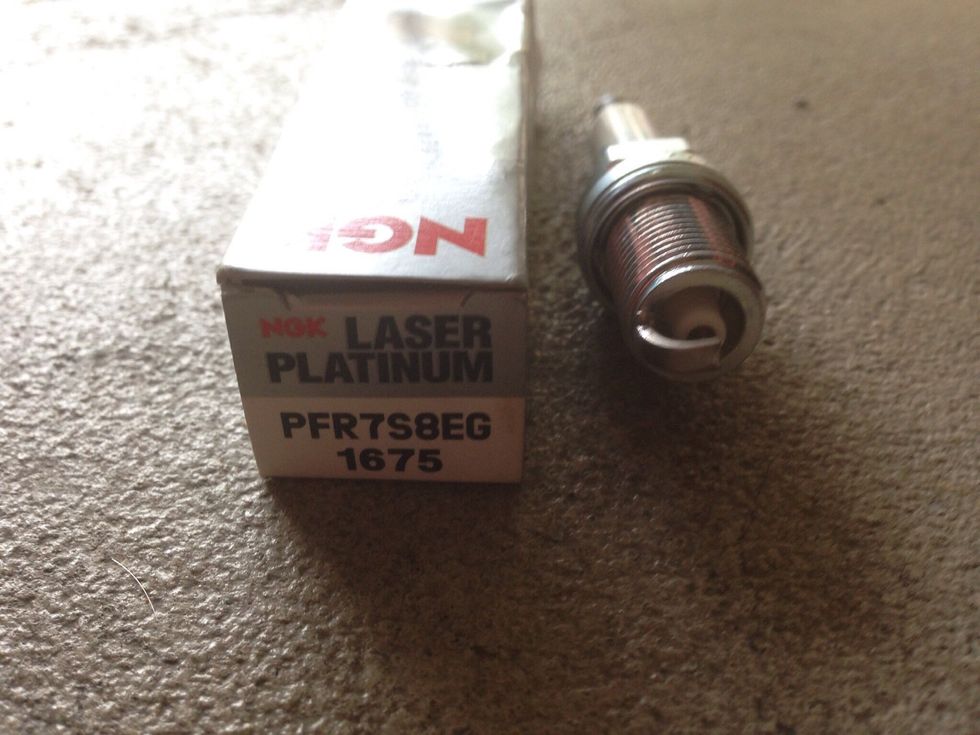
Here are the Audi recommended OEM replacement plugs. I have a Stage I APR ECU tune and these are perfect. Don't go for the hype of colder plugs, it always causes headaches!
A note on spark plug gapping. The factory recommends a 0.032" gap for these plugs. You may also find other sources that state 0.028" is the correct gap (esp. If you have a tuned ECU).
These plug are pre-gapped to 0.032" from NGK. I have a stage I APR ECU tune so I split the difference and set 0.030" as my gap. Always verify gap before installing; don't just install out of the box.
ELSAwin factory manual: 22 ft-lbs of torque on the new plugs. This is correct, but after 3,000 miles you must re-torque any loose plugs again, hence two of my plugs being loose. I applied 24 ft-lbs.
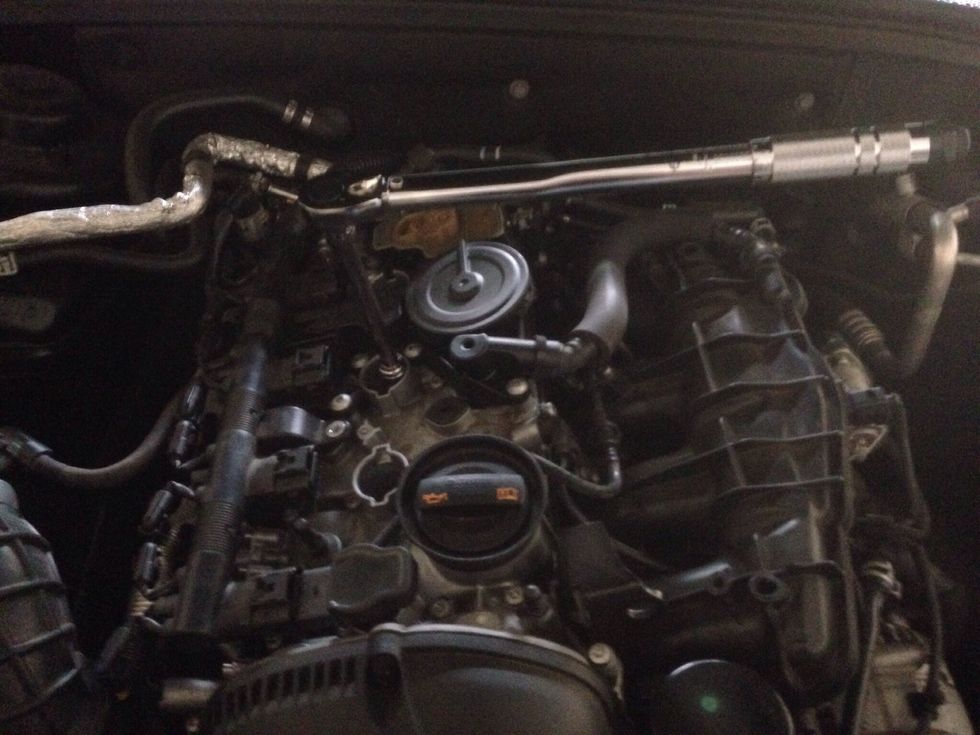
I recommend torquing in 2 steps. Initially set the wrench for 15 ft-lbs, then went back around with it set to 22-24 ft-lbs. Turn the wrench slowly until it clicks.

Don't forget to apply dielectric grease around the inside of the end of each CP. Don't get it everywhere. When the plug goes in, the grease will be shoved up onto the contact, right where it's needed.
After each plug is torqued correctly, reinstall everything in reverse order. Insert coil packs, plug in each CP connector securely. Tighten single Torx screw. Plug in all 8 smaller connectors.
Visually inspect everything you did, and once you are satisfied, gently push engine cover back into place. Recheck torques at 3,000 miles, replace plugs every 30,000 miles.